1
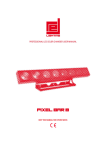
Terbly FS300 Follow Spot
USER MANUAL
KEEP THIS MANUAL FOR FUTURE NEEDS
Contents
1. FEATURES...................................................................................................................................................... 2
2. FIXTURE OVERVIEW ................................................................................................................................. 3
3. GENERAL GUIDELINES ............................................................................................................................. 3
3.1) Important safety warns ....................................................................................................................... 3
3.2) GENERAL GUIDELINES .................................................................................................................. 4
4. INSTALLATION INSTRUCTIONS.............................................................................................................. 5
4.1) Installing or replacing the lamp .......................................................................................................... 5
5. Instructions ...................................................................................................................................................... 7
5.1 Dimming/color temperature adjustment instruction ......................................................................... 7
6. CLEANING AND MAINTENANCE............................................................................................................. 8
7. TECHNICAL SPECIFICATIONS ................................................................................................................ 9
1
Thank you for your patronage. We are confident that our excellent products and service can
satisfy you. For your own safety, please read this user manual carefully before installing the
device.
In order to install , operate, and maintain the lighting safety and correctly. We suggest that the
installation and operation should be done by the verified technician and follow the instruction
strictly.
CAUTION!
Unplug mains lead before opening the housing.
Every person involved with the installation, operation and maintenance of this device has to:
-be qualified
-follow carefully the instructions of this manual
INTRODUCTION:
Thank you for having chosen this professional Followspot Lighting.
You will see you have acquired a powerful and versatile device.
Unpack the device. Inside the box you should find:
1. One power cables
2. Manual
3. One warranty card and certification
Please check carefully that there is no damage caused by transportation. Should there be any,
consult your dealer and don’t install this device.
1. FEATURES
• Lamp: Philips PLATINUM 15R.
• Color Filters: 4pcs manual color filters
• Dimmer intensity from 0%~100%
• Color temperature:linear adjustment from 3200K to 6800K
2
2. Fixture Overview
1: Dimming
2: Color Temperature
3: Iris
4: Frost
5: Framing
6: Adjust beam angle
7: Colored papers
8: Fuse
9: Power supply
10: Power switch
11: Hand
12: Lamp bracketrear metal panel
13: Lens
3. GENERAL GUIDELINES
3.1) Important safety warns
This device has left the factory in perfect condition. In order to maintain this condition and to
ensure a safe operation, it is absolutely necessary for the user to follow the safety instructions and
warning notes written in this user manual.
Important:
Damages caused by the disregard of this user manual are not subject to warranty. The
dealer will not accept liability for any resulting defects or problems.
3
If the device has been exposed to temperature changes due to environmental changes, do not
switch it on immediately. The arising condensation could damage the device. Leave the device
switched off until it has reached room temperature.
This device falls under protection-class I. Therefore it is essential that the device be earthed.
If protection screen,lens or ultraviolet screen in the fixture is apparently damaged or is damaged
to exceed their own effective degree, such as cracked and gashed, it must be replaced.
The electric connection must carry out by qualified person.
Make sure that the available voltage is not higher than stated at the end of this manual.
Make sure the power cord is never crimped or damaged by sharp edges. If this would be the case,
replacement of the cable must be done by an authorized dealer.
Always disconnect from the mains, when the device is not in use or before cleaning it. Only
handle the power cord by the plug. Never pull out the plug by tugging the power cord.
During initial start-up some smoke or smell may arise. This is a normal process and does not
necessarily mean that the device is defective, it should decrease gradually.
Please don't project the beam onto combustible substances.
If the external flexible cable or cord of this luminaire is damaged, it shall be exclusively replaced
by the manufacturer or his service agent or a similar qualified person in order to avoid a hazard.
Please be aware that damages caused by manual modifications to the device are not subject
to warranty. Keep away from children and non-professionals.
3.2) GENERAL GUIDELINES
This device is a lighting effect for professional use on stages, in discotheques, theatres, etc., the
device was designed for indoor use only.
This fixture is only allowed to be operated with the max alternating current which stated in the
technical specifications in the last page of this manual.
Lighting effects are not designed for permanent operation. Consistent operation breaks may
ensure that the device will serve you for a long time without defects.
4
Do not shake the device.Avoid brute force when installing or operating the device.
While choosing the installation-spot, please make sure that the device is not exposed to extreme
heat, moisture or dust. Please don't project the beam onto combustible substances.The minimum
distance between light-output from the projector and the illuminated surface must be more than 3
meter.
If you use the quick lock cam in hanging up the fixture, please make sure the quick lock fasteners
turned in the quick lock holes correctly.
Operate the device only after having familiarized with its functions. Do not permit operation by
persons not qualified for operating the device. Most damages are the result of unprofessional
operation.
Please use the original packaging if the device is to be transported.
For safety reasons, please be aware that all modifications on the device are forbidden.
If this device will be operated in any way different to the one described in this manual, the
product may suffer damages and the guarantee becomes void. Furthermore, any other operation
may lead to short-circuit, burns, electric shock, lamp explosion, crash, etc.
4. INSTALLATION INSTRUCTIONS
4.1) Installing or replacing the lamp
Only install the lamp with the device unplugged from the mains.
The lamp has to be replaced when it is damaged or deformed.
Because of the nature of the extreme heat associated with the Platinum 15R lamp and
the tight nature of the internal optical system it is imperative that the lamp be
replaced every 2000 hours. This is done to protect the internal optical system as well
as prevent accidental lamp explosion, which could lead to hot glass particles falling
from the fixture. Failure to change the lamp within 300 hours of operation will result
in automatic shut down of the fixture’s electronics.
5
Before replacing the lamp let the lamp cool down, because during operation, the lamp can
reach very high temperature.
During the installation of halogen lamps do not touch the glass bulbs bare handed. Always use a
cloth to handle the lamps during insertion and removal.
Do not install lamps with a higher wattage. They generate higher temperatures than which the
device was designed for.
For the installation, you need one: PLATINUM 15R
Procedures:
1) Unscrew the 3 screws (A, B, C) on the bottom of the housing, holding the plate where the
lamp is underneath. Carefully remove the metal plate.
2) Insert the lamp counter-clockwise 35 degree into the lampholder, then turn clockwise 35
degree to put it into the right position. Attention: please wrap the lamp with the soft cloth that
comes with the packing, avoid naked hand contact to the lamp directly.
3) Put the lampholder back position after install the lamp, tighten the screw and complete the
installation.
Please remember the lamp is not a hot-restrike type, you must wait for approximately 10
minutes after having turned off the lamp before you can turn it back on again.
Do not operate this device with open cover
6
Layout Drawings:
5. Instructions
5.1 Dimming/color temperature adjustment instruction
1)Dimming: linear dimming-Intensity 0% to 100%.
Instruction: dimming according to silkscreen instruction by slider.
2)Color temperature:linear adjustment from 3200K to 6800K.
Instruction: adjust color temperature according to silkscreen instruction by slider.
3)Iris: adjust Min. to Max linearly.
Instruction: adjust iris according to silkscreen instruction by slider.
4)Frost:soften the edge of spot
Instruction: push the adjusting lever, please adjust the frost effect according to the fixed
position of the silk-screen.
5)Framing: profile from up to down.
Instruction: profile according to silkscreen instruction.
7
5.2 Beam angel adjustment instruction
adjust beam angle: linearly adjusting beam angel from small to big
Instruction: move sliders on both sides to focus and zoom.
(Attn: must keep both sides move to same value )
6. CLEANING AND MAINTENANCE
The following points have to be considered during the inspection:
1) All screws for installing the devices or parts of the device have to be tightly connected and
must not be corroded.
2) There must not be any deformations on the housing, color lenses, fixations and installation
spots (ceiling, suspension, trussing).
3)The electric power supply cables must not show any damage, material fatigue or sediments.
Further instructions depending on the installation spot and usage have to be adhered by a skilled
8
installer and any safety problems have to be removed.
In order to make the lights in good condition and extend the life time, we suggest a regular
cleaning to the lights.
1) Clean the inside and outside lens each week to avoid the weakness of the lights due to
accumulation of dust.
2) Clean the fan each week.
3) A detailed electric check by approved electrical engineer each three month, make sure that
the circuit contacts are in good condition, prevent the poor contact of circuit from
overheating.
We recommend a frequent cleaning of the device. Please use a moist, lint- free cloth. Never use
alcohol or solvents.
There are no serviceable parts inside the device except for the lamp. Please refer to the
instructions under “Installation instructions”.
Should you need any spare parts, please order genuine parts from your local dealer.
7. TECHNICAL SPECIFICATIONS
Power supply: AC 100-240V~,50/60Hz
Power consumption: 380W
Lamp: PLATINUM 15R
Lamp power: 300W
Packing carton dimensions: 101x44x53cm
Flight case dimensions: 117.5x69x50cm
Net weight: 23.5 KGS
Gross weight: 29 KGS(carton packing)
82.5KGS (Package in flightcase: including tripod and lens,
lens circle weight)
Remark: errors and omissions for every information given in this manual excepted. All
information is subject to change without prior notice.
9