1
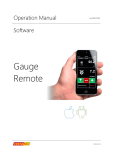
Operation Manual
rev-2013-12-02
Software
Virtual
Gauge
Retrotec Inc.
Table of Contents
1. Overview of the Virtual Gauge ............................................................. 3
2. Install the Virtual Gauge Software ....................................................... 4
3. Start the Virtual Gauge Software ......................................................... 8
4. Find gauges connected to the computer to control .......................... 9
4.1
Find Retrotec DM32s ................................................................................................................................. 9
5. Control a real connected gauge ......................................................... 12
6. Start and Stop simulating a gauge .................................................... 13
7. Uninstall the Retrotec Virtual Gauge ................................................. 15
Page 2 of 15
©Retrotec Inc. 2013
1. Overview of the Virtual Gauge
Virtual Gauge software can run on any computer, laptop or tablet running a full desktop enabled version
of Windows, (version XP SP2 or higher).
The Virtual Gauge provides two separate but related functions – simulation of a Retrotec DM32 series
touchscreen gauge, and remote control and reflection of a real DM32 connected to the computer
running the Virtual Gauge software.
The remote control function lets the user enter parameters on the Virtual Gauge and see them sent to
the real gauge.
The reflection function reflects the values that are showing on the real gauge on to the Virtual Gauge.
Thus using the Virtual Gauge software in conjunction with a real gauge lets users control the real gauge
directly by tapping on its touchscreen or by clicking on the Virtual Gauge screen and all user input is
reflected on both the real and Virtual Gauge screens.
Simulating a touchscreen gauge lets the user practice with the gauge and enter simulated values for
pressure on channel A and channel B. The Virtual Gauge software is meant to be used for training
purposes.
Page 3 of 15
©Retrotec Inc. 2013
2. Install the Virtual Gauge Software
The Virtual Gauge is part of the DM32 Software Suite along with the Retrotec Data Logger and the
Gauge Configurator. If you want all three applications, when your computer is connected to the
internet, you can use the following link to download an installer for the software suite, or to install the
software directly on your computer:
http://www.retrotec.com/Downloads/DM32SoftwareSuite.html.
Once installed, you uninstall each application individually, using the procedure outlined in section 7,
from your computer Control Panel. Once installed, every time you launch the Virtual Gauge and are
connected to the internet, the software will check for updates and offer to download them and update
itself.
Figure 1: Install the DM32 Software Suite including Virtual Gauge, Data Logger and Configurator
Click on the “Install” button in the window that opens, as shown in Figure 1. Follow all the steps in the
figures that follow in order to install each of the software packages in turn on your computer. You will
end up with three desktop icons, including one for the Virtual Gauge.
If you only want the Virtual Gauge application on its own, the latest version of the software is always
available on the internet. When your computer is connected to the internet, you can use the following
link to download an installer for the software, or to install the software directly on your computer. Once
installed, you can uninstall using the procedure outlined in section 7, from your computer Control Panel.
Once installed, every time you launch the program and are connected to the internet, it will check for
updates and offer to download them and update your Virtual Gauge software.
http://www.retrotec.com/software/vdm32/publish.html
Click on the “Install” button in the window that opens, as shown in Figure 2. Follow all the steps in the
figures that follow in order to install the software on your computer.
Page 4 of 15
©Retrotec Inc. 2013
Figure 2: Install the Virtual Gauge software from the internet
Figure 3: Security settings on some computers generate a warning and you must click [Run] to start the installation
Figure 4: If your computer cannot verify the publisher as Retrotec, you will see this warning. OK to click [Run]
Page 5 of 15
©Retrotec Inc. 2013
Figure 5: Once the installer is downloaded it checks that your computer has all the pre-requisites to run the Virtual Gauge
Figure 6: The installer will put up this warning before starting, click on [Install]
Figure 7: Once all security checks are made, the installer runs, installs, and creates a shortcut on your desktop
Page 6 of 15
©Retrotec Inc. 2013
Once installed, the Retrotec Virtual Gauge shortcut will appear on your desktop as shown in Figure 8,
and the software will open, showing the window as in Figure 9. Every time you run the software and are
connected to the internet, the software will check that the version is the latest, and download updates
as necessary. If you are not connected to the internet, the update process is skipped and the software
just starts.
Page 7 of 15
©Retrotec Inc. 2013
3. Start the Virtual Gauge Software
To start the Virtual Gauge software, click on the desktop shortcut that was created by the installer,
shown in Figure 8. The window in Figure 9 will open.
Figure 8: Click the desktop icon to start the Virtual Gauge
Figure 9: Main Virtual Gauge window opens with no connected gauges
The next step is to connect to a real gauge or choose to simulate a gauge.
Page 8 of 15
©Retrotec Inc. 2013
4. Find gauges connected to the computer to control
The Virtual Gauge software can find all powered up Retrotec gauges connected to the computer via
either Ethernet network or USB.
4.1
Find Retrotec DM32s
All powered up gauges in the Retrotec DM32 family connected to the computer will be found and added
to the list when [Find Gauges] is clicked in the “Gauge Connection” section as shown in Figure 10. Any
gauges that are powered down but connected to mains power will also be found.
Figure 10: Connect to Retrotec DM32 family gauges by clicking [Find Gauges]
The Virtual Gauge can find gauges in the Retrotec DM32 family that are connected to the computer.
Since these gauge models can be connected to the computer multiple ways, the user must specify how
the Virtual Gauge looks for real gauges. Normally the Virtual Gauge will find gauges connected in any
way to the computer, but the “Advanced” drop down shown in Figure 11 lets the user specify which
connection types to check. The user can specify to look on a “Network” port, on “USB” ports or “Both”.
Page 9 of 15
©Retrotec Inc. 2013
Figure 11: Specify gauge connection type using the "Advanced" drop down
It is recommended that DM32s be connected to a computer using the “Network” connector since it is
the most reliable control connection.
When “Network” is chosen, the user has the option of letting the computer manage the finding of all
gauges on the network or they can enter a particular IP address to connect to, as shown in Figure 12.
Figure 12: Connect to a particular gauge by typing in the IP Address and clicking Go
If no gauges are found using any of the specified connection methods, the user is notified of the failure
with a pop up box as shown in Figure 13. It is recommended that gauges be connected to a computer
using the “Network” connector since it is the most reliable control connection.
One thing to check if the Virtual Gauge cannot find a connected gauge is that the gauge is still powered
on (DM32s can power themselves down after a user set time period or can run out of battery charge).
Reasons why the Virtual Gauge cannot find a Network connected DM32 include: [Network] settings set
to “Disabled”, [Network] settings on the gauge not set to IP Address for the same network that the
computer is connected to, Ethernet cable not plugged in to computer, Ethernet cable not plugged into
“Network” port on gauge, faulty Ethernet cable, faulty Ethernet hub/switch/router, USB hub not
plugged into mains power, computer network not functioning.
Page 10 of 15
©Retrotec Inc. 2013
Reasons that the Virtual Gauge cannot find a USB connected DM32 include: USB cable not plugged in to
computer, USB cable not plugged into gauge, faulty USB cable, faulty USB hub, USB hub not plugged into
mains power.
Figure 13: User warned if no DM32s found using specified connection method
Figure 14: Gauges show up in "Gauge Connection" list once they are found - blue means selected
Once gauges are found, they show up in the “Connected Gauges” list in the main window as shown in
Figure 14.
The next step is to tell the Virtual Gauge to either control the real connected gauge, or to simulate a
gauge.
Page 11 of 15
©Retrotec Inc. 2013
5. Control a real connected gauge
Select a gauge in the list and click [Connect] to start controlling a real gauge, as shown in Figure 15.
When connected, the green check mark shows up next to the gauge name in the list.
Figure 15: Select a gauge in the list and click [Connect] to start controlling a real gauge
Page 12 of 15
©Retrotec Inc. 2013
6. Start and Stop simulating a gauge
To practice with the touchscreen gauge, click [Start Gauge Simulator] as shown in Figure 16. A
simulated gauge will open as shown in Figure 17
Figure 16: Click on [Start Gauge Simulator] to start a simulated gauge
Page 13 of 15
©Retrotec Inc. 2013
Figure 17: A simulated gauge is started and connected and is shown outlined in red on the virtual gauge screen
Two simulation options appear in the “Simulation Settings” section, the Virtual PrA and Virtual PrB.
Enter numeric values in these data entry boxes to have the values appear on the Simulated Gauge.
To stop the Virtual Gauge simulation, click on [Stop Gauge Simulator] and the ”Simulator” gauge is
removed from the list, and the screen goes back to being ready to connect to a real gauge.
Page 14 of 15
©Retrotec Inc. 2013
7. Uninstall the Retrotec Virtual Gauge
Page 15 of 15
©Retrotec Inc. 2013