1
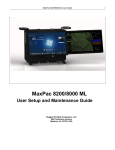
MaxPac 8250 XLRA User Operations and Maintenance Guide ii MaxPac 8250 XLRA-Series User Operation and Maintenance Guide MaxPac 8250 XLRA User Operation and Maintenance Guide Operating and Maintaining Your MaxPac 8250 XLRA Transportable Workstation MaxVision Corporation 495 Production Avenue Madison, AL 35758, USA Part Number: 209-0072-0 MaxPac 8250 XLRA -Series User Operation and Maintenance Guide iii iv MaxPac 8250 XLRA-Series User Operation and Maintenance Guide Warranties and Liabilities MaxVision, Rugged Portable Computers, LLC (henceforth called “MaxVision”) warrants that the Product, in the course of its normal use, will conform to MaxVision's specifications and be free from defects in material and workmanship for a period of twelve (12) months from the date of the original sale. Such warranty commences on the purchase date appearing on the invoice. The original end user is entitled to customer support through telecommunication during normal MaxVision business hours and email support to be responded to as support staff are available. Such support shall be limited to hardware operations and the software required operating such hardware. Upon written request and subject to the availability of MaxVision personnel, additional support may be provided by MaxVision in its sole discretion on a time and materials basis. Limited Warranty for Software. MaxVision warrants to the original end user only that the Software as delivered at the time of purchase will perform in MaxVision hardware, and that the original diskettes or compact disks are free from defects in material and workmanship under normal use, for a period of thirty (30) days from the date of original sale, provided the Software is used with a MaxVision unit. MaxVision makes no warranty that the Software will work in combination with any hardware or software products provided by third parties, that the operation of the Software will be uninterrupted or error-free, or that all defects in the Software will be corrected. This limited warranty is void if failure of the Software has resulted from accident, abuse, or misapplication. MaxVision's entire liability and your sole and exclusive remedy shall be, at MaxVision's option, either to (a) correct or help you work around or avoid a reproducible Error or (b) replace defective diskettes or compact disks. Any replacement Software will be warranted for the remainder of the original Limited Software Warranty Period. Limited Warranty for the Product. MaxVision warrants to the original end user only that all Products sold by MaxVision will be free from defects in material and workmanship and conform substantially to the applicable standards set forth in the Documentation, under normal use, for a period of 365 days from the date of original sale. This limited warranty is void if failure of the Product has resulted from accident, abuse, or misapplication. If MaxVision confirms a Product is defective after you have obtained a Return Materials Allowance Number for such Product and, at your expense, have returned the Product to MaxVision for inspection, MaxVision will, at its election, repair or replace such Product at no charge to you. Replacement Product may be either new or remanufactured. In the event that the Product returned is not defective, you will be responsible for freight costs for return shipment to you. The foregoing warranty shall not apply to Product that has been (a) damaged by accident, Acts of God, shipment, improper installation, abnormal physical or electrical stress, misuse or misapplication, as determined by MaxVision in its sole reasonable discretion, or (b) modified without MaxVision's express written acceptance of such modification for warranty purposes. MaxVision reserves the right to charge additional fees for repairs or replacements performed outside the Warranty Period. Any replaced or repaired components, subassemblies or units as well as spare parts are warranted for thirty (30) days or the remainder of the original warranty period, whichever is longer. MaxVision shall not be responsible for any software, firmware, information or memory data of yours contained in, stored on, or integrated with any Products returned to MaxVision pursuant to any warranty under this Agreement. Disclaimer of Warranties. EXCEPT AS SPECIFICALLY PROVIDED ABOVE, NEITHER MAXVISION NOR ITS LICENSORS OR SUPPLIERS PROVIDES ANY WARRANTY OF ANY KIND FOR THE SOFTWARE OR THE PRODUCT, WHETHER EXPRESS, IMPLIED, STATUTORY OR OTHERWISE, INCLUDING BUT NOT LIMITED TO WARRANTIES OF MERCHANTABILITY, FITNESS FOR A PARTICULAR PURPOSE, AND NON-INFRINGEMENT OF THIRD PARTY RIGHTS. EXCEPT AS SET FORTH IN THIS AGREEMENT, THE ENTIRE RISK AS TO THE QUALITY AND PERFORMANCE OF THE SOFTWARE AND THE PRODUCT IS WITH YOU. If a disclaimer of implied warranties is not permitted by law, the duration of any such implied warranty is limited to ninety (90) days from the date of purchase by the original end user. Some jurisdictions do not allow the exclusion of implied warranties or limitations on how long an implied warranty may last, so such limitations or exclusions may not apply to you. This limited warranty gives you specific legal rights, and you may also have other rights which vary from jurisdiction to jurisdiction. Liability Exclusions and Limitations. IN NO EVENT SHALL MAXVISION OR ITS LICENSORS OR SUPPLIERS BE LIABLE FOR ANY INDIRECT, SPECIAL, INCIDENTAL, EXEMPLARY OR CONSEQUENTIAL DAMAGES OF ANY KIND (INCLUDING LOST PROFITS, LOSS OF USE OR INTERRUPTION OF BUSINESS), OR FOR LEGAL FEES, ARISING OUT OF THE USE OF THE SOFTWARE OR THE PRODUCT, REGARDLESS OF THE FORM OF ACTION, WHETHER IN CONTRACT, TORT (INCLUDING NEGLIGENCE), STRICT PRODUCT LIABILITY OR OTHERWISE, EVEN IF MAXVISION OR ITS LICENSORS OR SUPPLIERS HAVE BEEN ADVISED OF THE POSSIBILITY OF SUCH DAMAGES. IN NO EVENT WILL COMPANY'S AGGREGATE LIABILITY HEREUNDER EXCEED THE PURCHASE PRICE PAID BY YOU. This limitation shall apply notwithstanding any failure or inability to provide the limited remedies set MaxPac 8250 XLRA -Series User Operation and Maintenance Guide v forth above. Some jurisdictions do not allow the exclusion or limitation of incidental or consequential damages, so the above limitation(s) or exclusion(s) may not apply to you. Proprietary Rights-Contracts with Certain U.S. Government Agencies. If the Software is acquired under the terms of a Department of Defense or civilian agency contract, the Software is "commercial item" as that term is defined at 48 C.F.R. 2.101 (Oct. 1995), consisting of "commercial computer software" and "commercial computer software documentation" as such terms are used in 48 C.F.R. 12.212 of the Federal Acquisition Regulations and its successors and 48 C.F.R. 227.7202-1 through 227.7202-4 (June 1995) of the DoD FAR Supplement and its successors. All U.S. Government end users acquire the Software with only those rights set forth in this Agreement. Export Restrictions. You acknowledge that the laws and regulations of the United States restrict the export and re-export of certain commodities and technical data of United States origin, including the Product and the Software, in any medium. You agree that you will not knowingly, without prior authorization if required, export or re-export the Software or the Product in any medium without the appropriate United States and foreign government licenses. Severability. You acknowledge and agree that each provision of this Agreement that provides for a disclaimer of warranties or an exclusion or limitation of damages represents an express allocation of risk, and is part of the consideration of this Agreement. Invalidity of any provision of this Agreement shall not affect the validity of the remaining provisions of this Agreement. General. This Agreement is the entire agreement between you and MaxVision relative to the Product and the Software, and supersedes all prior written statements, proposals or agreements relative to its subject matter. It may be modified only by a writing executed by an authorized representative of MaxVision. No MaxVision reseller or sales representative is authorized to make any modifications, extensions or additions to this Agreement. This Agreement is governed by the laws of the State of Alabama without application of the principles of conflicts or choice of laws. The application of the United Nations Convention on Contracts for the International Sale of Goods to this Agreement is expressly excluded. Copyright The materials in this document are the copyrighted works of MaxVision, Rugged Portable Computers, LLC, copyright © 2005-2006. All rights reserved. Email [email protected] for permission to duplicate and otherwise re-use. Trademarks MaxVision, and MaxPac are registered trademarks, and MaxPro and TeraPac are trademarks, of MaxVision, Rugged Portable Computers, LLC. Microsoft and Windows are registered trademarks of Microsoft Corporation. Intel and Pentium are registered trademarks and Xeon is a registered trademark of Intel Corporation. Other trademarks and registered trademarks are the property of their respective owners. Regulatory Approvals FCC / EN60950-1:2006 / A11:2009 / A1:2010 / A12:2011 / EN55022:2006 + A1:2007 / EN55024:1998 +A1:2001 & A2:2003 / EN61000-3-2:2006 and EN61000-3-3:2008. Warnings Changes or modifications to this device that are not approved by the party responsible for compliance could void the user’s authority to operate the equipment. To reduce the risk of electrical shock, do not attempt to open the device unless instructed to do so. Do not use any tool for purposes other than instructed. A Lithium Ion battery is included with the system motherboard. This battery is used for the Real Time Clock (RTC) circuit. The expected lifetime of the battery is approximately 5 years. There is a danger of explosion if this battery is incorrectly replaced. Replace only with the same or equivalent type recommended by the motherboard manufacturer. Dispose of used batteries according to the manufacturer’s instructions. vi MaxPac 8250 XLRA-Series User Operation and Maintenance Guide Contents Legal and Related Information Copyright .............................................................................................................................................................. v Trademarks .......................................................................................................................................................... v Regulatory Approvals ........................................................................................................................................... v Warnings .............................................................................................................................................................. v Chapter 1: Quick Start Setup.................................................................................................................................. 1 Inspecting the Shipment...................................................................................................................................... 2 Unpacking the System ........................................................................................................................................ 2 Setting-Up Your MaxPac..................................................................................................................................... 3 Removable Devices ............................................................................................................................................ 8 Chapter 2: Module Replacement/Upgrade Procedures ..................................................................................... 10 Introduction ....................................................................................................................................................... 11 Required Tools and Techniques ....................................................................................................................... 11 Names and Types of Screws ............................................................................................................................ 11 Removing the Display Assembly ...................................................................................................................... 12 Removing a Single Display ............................................................................................................................... 12 Accessing the Inside of the Chassis ................................................................................................................. 13 Removing the UPS (Uninterruptable Power Supply) ........................................................................................ 14 Removing/Replacing PCI-E Cards .................................................................................................................... 15 Accessing the Motherboard .............................................................................................................................. 16 Motherboard Quick Reference .......................................................................................................................... 17 Memory ............................................................................................................................................................. 18 Chapter 3: Motherboard BIOS Settings .............................................................................................................. 19 Appendix A: Creating and Using Backup Images (Including Restoring Your OS)(Windows Only) ............. 20 Introduction ....................................................................................................................................................... 20 Appendix B: Regular System Maintenance ........................................................................................................ 30 Cleaning Interior Dust ....................................................................................................................................... 30 Maintaining (Cleaning) the "Baghdad Filter" ..................................................................................................... 30 Replacing the Lithium Battery ........................................................................................................................... 32 Appendix C: Screws and Required Tools ........................................................................................................... 33 Screws............................................................................................................................................................... 33 Required Tools .................................................................................................................................................. 34 Appendix D: Contacting MaxVision Support (RMA and Serial Numbers) ....................................................... 35 Repairing/Replacing Products/Accessories ...................................................................................................... 35 Contacting Technical Support and RMA Numbers ........................................................................................... 35 MaxPac 8250 XLRA-Series User Operation and Maintenance Guide Chapter 1: Quick Start Setup 1 2 MaxPac 8250 XLRA-Series User Operation and Maintenance Guide Inspecting the Shipment MaxPac systems are packaged to withstand the roughest of treatment during shipping. Any boxes, foam core padding, and anti-static bags should be stored safely away in case you need to ship the system for any reason in the future. Inspect the box the system arrived in. If there is any unusual damage to the box, make note of the damage on the delivery form and contact MaxVision support (see Appendix D for more details). Unpacking the System MaxPac XL systems are usually shipped in an associated Pelican case. Depending on the configuration of your system the MaxPac can weigh approximately 65 pounds. (105 pounds including the transit case) If you are unable to lift this weight safely, you should obtain assistance in unpacking and moving the system. 1) Place the Pelican case and MaxPac system on the floor. Remove the packing slip from the outside of the case and save it for later use as discussed below. 2) Clear an area on a desk or table on which to place the MaxPac system. Note: In order to raise or lower the handle on the Pelican case, use your thumb to slide the release catch to the right. Use the release catch to operate the handle on the Pelican case 3) Place the Pelican case flat on its back on the floor and open it. Then tilt the case so that the lid is on the floor, and slide the unit out of the case onto the lid. If a second person is available, still tilt the case and slide the unit on the lid, use the two handles (one per person) to lift the unit. MaxPac 8250 XLRA-Series User Operation and Maintenance Guide 3 4) Observe that the keyboard, mouse, power cord, other accessories and documentation package are located in the Pelican case. 5) Keeping your back straight, bending at the knees, and using your legs as much as possible, lift the MaxPac system and place it on the cleared table or bench. 6) Check the packing slip to ensure that everything is as you expect with regard to the main system. Pay particular attention to any special options you may have requested, such as number of disk drives, memory upgrades, and custom graphics subsystems. 7) Check the contents of the envelope containing the documentation associated with your system. In addition to this manual – and also any user guides and manuals associated with special upgrade options you may have ordered (such as graphics cards) – a basic MacPac XL documentation pack will include: Device Documentation (Graphics Cards, Add-On Cards, etc.) Motherboard CD and/or manual. This document. Recovery DVD (see also Appendix A). Setting-Up Your MaxPac Location Your MaxPac XL system needs to be positioned in a location with the capacity to safely support at least 65 lbs depending on its configuration. The unit should be unobstructed so as to permit the free flow of cooling air in through the intake filter and out via the exhaust vents. The environment should be no more than 50° C and under 98% relative humidity, non-condensing. Power Requirements MaxPac XL power supplies are auto-sensing 100 to 240 VAC, 50 to 60 Hz units. Ensure that the supplied power is sufficient, stable, and without spikes or surges for operation of your MaxPac and other required equipment. Maximum power is 100-240, 50/60Hz 6A. Tilting the Display 1) Place one hand on top of the system to stabilize. Press up on the tab located under the display assembly and tilt the screen to desired angle. 4 MaxPac 8250 XLRA-Series User Operation and Maintenance Guide Connecting the Keyboard, Mouse, etc. 1) Connect the keyboard and/or mouse to the appropriate ports on the left side of the system, which are labeled below. Some configurations have an E-SATA port between the graphics card and the power port for the displays 5 MaxPac 8250 XLRA-Series User Operation and Maintenance Guide 2) The AC power port is also located on the left side of the system, circled in red. Right above the power port, circled in blue, is the soft power switch, which will power the unit on and off. Opening the Displays and Adjusting the Settings 1) Pull down on the retaining tab (Red Arrow) holding the screens in place and open the outermost screen (1). Then open the middle screen while still holding down the retaining tab (2). 2 1 6 MaxPac 8250 XLRA-Series User Operation and Maintenance Guide 2) Located on the top of each display, a row of buttons can be used to adjust display settings or bring up the displays OSD menu. Adjust the brightness Navigate Menu Options Open the OSD (On Screen) Menu Power On/Off Display Adjust Highlighted Menu Options 3) The following table explains the OSD (On Screen) Menu functions: (Continued on Next Page) MaxPac 8250 XLRA-Series User Operation and Maintenance Guide 7 8 MaxPac 8250 XLRA-Series User Operation and Maintenance Guide Removable Devices Note: If you are removing drives for any reason (safe storage, for example), it is important to replace the drives in their original slots. 1) Unscrew the thumb screw (circled in red) holding the hard drive retainer bar as illustrated below. The retainer bar can then be removed and the hard drive array can gently slide out of its bay. Note that the sleeve is also removed with the hard drive array. 2) Once the 4-drive array has been removed, then remove the “binder bar” circled in red by unscrewing the four thumb screws. A single hard drive can then be removed by sliding it out of the sleeve. MaxPac 8250 XLRA-Series User Operation and Maintenance Guide 3) Use the following illustrations for replacing the slide rails and faceplate of a single drive: 4) Removing the system drives and optical drive are similar. Unscrew the thumb screws (circled in red) and then gently slide out the drive as illustrated below. Note that the drive assemblies are keyed and can only be installed in one direction. 9 10 MaxPac 8250 XLRA-Series User Operation and Maintenance Guide Chapter 2: Module Replacement/Upgrade Procedures MaxPac 8250 XLRA-Series User Operation and Maintenance Guide 11 Introduction The instructions in this chapter describe how to replace and upgrade various modules in your MaxPac system. Note: Generally speaking, you should only access the MaxPac internals under the direction of MaxVision support. In some cases, performing unauthorized procedures or using components that have not been tested and approved by MaxVision may invalidate your warranty. Note: Power-down your MaxPac system and then remove the power cable before performing any of the procedures discussed in this chapter. Also please be aware of static discharge when working on your MaxPac. In general, touch the metal part of the chassis to discharge any static prior to handling any delicate electronic parts. Note: When accessing the system internals and/or performing module upgrade procedures, you are quickly going to end up with a lot of screws and other small items. In order to keep track of things and to prevent misplacing any parts, it is strongly recommended to have a plastic container divided into small compartments and to label these compartments as you work. Required Tools and Techniques Most of the module replacement and upgrade procedures discussed in this chapter can be performed using only a pair of #1 (small tip) and #2 (regular tip) Phillips screwdrivers. However, some procedures will require additional tools as discussed in Appendix C. Note: It is extremely important that you use only high-quality tools so as to avoid any slippage and stripping of screw heads and threads. Furthermore, in order to avoid any slippage, it is VERY important to apply adequate force in the form of firm and steady pressure. See Appendix C for details on the tools required to service the system. Note: It is highly recommended that you use magnetized screwdrivers so as to prevent screws from dropping inside the case and/or aiding in retrieving them if they do drop inside the case. (If your screwdriver isn’t already magnetized, you can make it so by repeatedly “stroking” the blade with a permanent magnet. Note: For additional immunity to vibration, all screws in a MaxPac XL system are secured with removable blue LOCTITE. If you remove any screws, then you should reapply LOCTITE prior to replacing those screws. Names and Types of Screws MaxPac XL systems use a variety of different screw types. In order to help you follow the instructions in this chapter, details on these screws are provided in Appendix C. 12 MaxPac 8250 XLRA-Series User Operation and Maintenance Guide Removing the Display Assembly 1) On both the left and right side of the system, behind the screen assembly, spring loaded bolts hold the screen assembly to the main chassis of the system. Pull on both of these spring loaded bolts and lift up to release the screen assembly. Ensure all cables connected to the displays are disconnected before removing the assembly. NOTE: The unit should be laying flat when removing the display assembly. Disconnect Video Cables (May be DVI, Display Port, or HDMI) Disconnect Video Power Cable Pull Pin on BOTH sides of display assembly, then lift up to disconnect. Removing a Single Display 1) Remove the display assembly as discussed previously. 2) Remove the top and bottom four screws with a #2 Phillips screw driver as illustrated below. Once the screen is detached, disconnect the power and video cable (circled in red). MaxPac 8250 XLRA-Series User Operation and Maintenance Guide 13 Accessing the Inside of the Chassis 1) Accessing the chassis is easier than ever, simply unscrew the two thumb screws holding the rear lid to the chassis (circled in red). Then slide the rear cover to remove it as illustrated below: NOTE: The thumb screws will stay attached to the lid. 14 MaxPac 8250 XLRA-Series User Operation and Maintenance Guide Removing the UPS (Uninterruptable Power Supply) 1) Remove the rear cover to access the inner chassis as discussed earlier in this chapter. 2) Unscrew the thumb screw holding the UPS retaining bracket circled in red below. The retainer should slide out. Lift the UPS gently and disconnect the USB and Power Cables connecting the UPS to the system. USB and Power Connections illustrated below. Disconnecting the USB and Power Connections: Note that if the UPS is removed, a jumper will have to replace the UPS on the 4-pin power connector in order for the system to power on: MaxPac 8250 XLRA-Series User Operation and Maintenance Guide 15 Removing/Replacing PCI-E Cards 1) Remove the rear cover to access the inner chassis as discussed earlier in this chapter. 2) Unscrew the thumb screw holding the PCI Card retainer circled in red below. Once loose, the retainer should slide out easily. 3) Remove the screws holding the PCI cards in place, their location is circled in red below even though the illustration does not show a screw. Note that some PCI-E slots have a retaining clip on the motherboard and will need to be pressed in order to fully remove the card. PCI-E Slot Retaining Clips NOTE: Some PCI-E cards require auxiliary power (such as graphics) and may have a power cable coming from the power supply to the card. Reinstall such cables when replacing/reinstalling cards. 16 MaxPac 8250 XLRA-Series User Operation and Maintenance Guide Accessing the Motherboard 1) Remove the rear cover to access the inner chassis as discussed earlier in this chapter. 2) Remove the UPS as discussed earlier in this chapter. 3) If needed, remove any PCI-E cards as discussed earlier in this chapter. 4) Remove the middle support bar by removing the four screws holding the bar in place. These screws are circled below. The support bar may have to be twisted to be fully removed. 5) Depending on what action needs to be taken, do not proceed without the support of MaxVision Support. Especially if considering changing jumper settings, replacing components or replacing the motherboard. It is assumed if you attempting to access the motherboard, you are a trained technical professional with knowledge of a variety of computer systems. MaxPac 8250 XLRA-Series User Operation and Maintenance Guide Motherboard Quick Reference 17 18 MaxPac 8250 XLRA-Series User Operation and Maintenance Guide Memory Note: Due to the fact that high-end computer systems can experience a host of memory compatibility issues and problems, you should only use replacement and/or additional memory sticks supplied by MaxVision. Note: In the event that you begin to experience problems with the memory that is already resident in your MaxPac, you must first determine which stick has failed under the direction of MaxVision support. Adding/Replacing Memory Sticks 6) Remove the rear cover to access the inner chassis as discussed earlier in this chapter. Also, remove the UPS and other hardware as discussed earlier in this chapter. 7) In order to remove and replace a memory stick, gently press down-and-out on the two plastic “Release Tabs” at either side of the stick which will cause it to pop out, and then remove the stick from the system. (Illustrated below) 8) Take the memory provided by MaxVision support and incorporate it into the system by performing the steps described above in reverse order. MaxPac 8250 XLRA-Series User Operation and Maintenance Guide Chapter 3: Motherboard BIOS Settings For detailed description and specifications for the motherboard BIOS settings, follow this link: http://www.supermicro.com/manuals/motherboard/C606_602/MNL-1275.pdf Or see the motherboard manual that was delivered with the system. 19 20 MaxPac 8250 XLRA-Series User Operation and Maintenance Guide Appendix A: Creating and Using Backup Images (Including Restoring Your OS)(Windows Only) Introduction Every MaxVision system comes equipped with a MaxVision Recovery DVD. In addition to an image of your operating system, this disc also contains a copy of the Acronis True Image™ application from Acronis (www.acronis.com). Acronis True Image is a superb tool for operating system (OS) deployment, software distribution, back-up, and disaster recovery. In particular, this utility allows you to make reliable backups of your system drives, including applications and critical data. There are two primary scenarios that need be considered as follows: Restoring the MaxVision-supplied Image This is the worst-case scenario. It assumes that your system has undergone some catastrophic failure such that – under the direction of MaxVision support – you are going to replace your primary hard drive(s) and/or restore the original MaxVision-supplied image. In this case, you will lose any applications and data that you have installed, loaded, or created on your main “C:” drive/partition. Note: If you do re-load the original MaxVision-supplied image, you will also have to re-run the initialization procedures – including re-activating/re-registering your OS license – as described earlier in this manual. 1) Power-down the system. 2) Ensure that the bootable recovery DVD supplied in the accessory pack is in the system's CD/DVD drive. 3) Power-up the system. This will automatically launch the Acronis application as shown in Figure A-1. Figure A-1 Figure A-2 4) Select Yes in the dialog shown in Figure A-2 to allow Acronis to completely restore your disk. MaxPac 8250 XLRA-Series User Operation and Maintenance Guide 21 5) Figures A-3 and A-4 show the completing steps for restoring you image back to the MaxVision configuration as originally shipped. Figure A-3 Figure A-4 Creating Your Own Image This scenario assumes that you have added new applications, loaded or created new datasets, and generally configured and customized your MaxVision system the way you like it. At this stage, before you deploy the system, it is strongly recommended that you use the Acronis True Image application to create an image of the system. Similarly, as you add additional applications or generate additional datasets, it is strongly recommended that you create periodic backup images. This greatly facilitates your ability to return the system to a “known good state” should any problems arise (such as a virus attack or a hard drive failure) at some stage in the future. For the purposes of this example, we will assume that you are writing your image to CD media (as opposed to DVD), and that the image will occupy two CDs. 1) Power-down the system. 2) In this case you will need to create your own Acronis Recovery bootable DVD media from the Acronis Windows application. 3) Ensure that the bootable recovery DVD supplied in the accessory pack is in the system's CD/DVD drive. In the case of a multiple DVD image, ensure Disk #1 is in the drive. 4) Power-up the system. This will automatically launch the Acronis application as shown in Figure A5. Use the mouse to select the Acronis item as shown in Figure A-5. 22 MaxPac 8250 XLRA-Series User Operation and Maintenance Guide Figure A-5 Figure A-6 5) Following the splash screen (Figure A-6), under the Pick a Task heading, select the Backup option (the top item) as illustrated in Figure A-7. Figure A-7 Figure A-8 6) Follow the actions depicted by the screenshots shown in Figures A-8 through A-22. Figure A-9 Figure A-10 MaxPac 8250 XLRA-Series User Operation and Maintenance Guide Figure A-11 Figure A-12 Figure A-13 Figure A-14 Figure A-15 Figure A-16 23 24 MaxPac 8250 XLRA-Series User Operation and Maintenance Guide Figure A-17 Figure A-18 Figure A-19 Figure A-20 Figure A-21 Figure A-22 MaxPac 8250 XLRA-Series User Operation and Maintenance Guide 25 Restoring Your Own Image Note: If you do re-load an image (containing the OS) that you have created yourself following your original activation and registration of the OS, you will NOT be required to re-activate and re-register the OS so long as you are restoring the image to the original machine. However, you will be required to re-activate and re-register the OS if you re-load the image onto a different machine. Prior to shipment from MaxVision the Microsoft SYSPREP utility is used to clear out the license number and other settings following system test. If you create your own image, and if SYSPREP is not run, and you subsequently load your image onto another MaxPac system, then Microsoft will require activation before use (no 30 day grace period). At this time, you will need to supply the correct OS license number for the MaxPac and activate prior to use (this procedure may vary depending on the version and license type of Windows used). For the purposes of this example, we will assume that you are restoring your image from CD media (as opposed to DVD), and that the image occupies two CDs. 1) Power-down the system. 2) Ensure that the bootable recovery DVD supplied in the accessory pack is in the system's CD/DVD drive. In the case of a multiple DVD image, ensure Disk #1 is in the drive. 3) Power-up the system. This will automatically launch the Acronis application as shown in Figure A-23. Use the mouse to select the Acronis item as shown in Figure A-23. Figure A-23 Figure A-24 4) Following the splash screen (Figure A-24), under the Pick a Task heading, select the Restore option (the top item) as illustrated in Figure A-25. 5) Follow the actions depicted by the screenshots shown in Figures A-25 through A-43. 26 MaxPac 8250 XLRA-Series User Operation and Maintenance Guide Figure A-25 Figure A-26 Figure A-27 Figure A-28 Figure A-29 Figure A-30 MaxPac 8250 XLRA-Series User Operation and Maintenance Guide Figure A-31 Figure A-32 Figure A-33 Figure A-34 Figure A-35 Figure A-36 27 28 MaxPac 8250 XLRA-Series User Operation and Maintenance Guide Figure A-37 Figure A-38 Figure A-39 Figure A-40 Figure A-41 Figure A-42 MaxPac 8250 XLRA-Series User Operation and Maintenance Guide Figure A-43 Figure A-44 29 30 MaxPac 8250 XLRA-Series User Operation and Maintenance Guide Appendix B: Regular System Maintenance Cleaning Interior Dust You should periodically check your system for the presence of interior dust and clean the enclosure as required. The frequency of such checks will be strongly dependent on your situation. Perhaps not surprisingly, systems deployed in a desert environment, for example, will typically require such cleaning more often than systems located in less rigorous settings. Having said this, even in harsh environments, it should not be necessary to clean the system interior of dust very often so long as you maintain your "Baghdad Filter" as discussed below. In order to clean the interior you should perform the following steps: • Shut down the system and unplug the power cord. • Remove the main display assembly and then access the inner chassis as discussed in Chapter 3. • Using a commercially available compressed air PC cleaning product, blow the accumulated dust out of the unit. Pay special attention to air passages, grills, and heat sinks. • Close up the system. Maintaining (Cleaning) the "Baghdad Filter" 1) Observe the filter on the rear of the main chassis. This filter is located over the air intake vents (any uncovered fans act as exhausts). 2) The filter is attached to the main chassis using four knurled knobs. Unscrew these knobs (circled in red above) and gently pull the filter away from the system. MaxPac 8250 XLRA-Series User Operation and Maintenance Guide 31 3) The filter should be cleaned as mandated by local conditions (a good rule of thumb is to clean the filter when it looks physically dirty). 4) Separate the filter element from its frame, and then place the filter element on a working surface that is protected by some form of absorbent, disposable material (Figure B-3). Note: As illustrated in Figure B-3, The filter recharge kit (MaxVision Part Number 228-0002-0) comprises a pump spray cleaner and an aerosol spray containing replacement oil. MaxVision Part Number 228-0003-0 comprises a pump spray cleaner and an pump spray containing replacement oil. Figure B-3 Figure B-4 5) It is recommended that you first tap the filter element on the work surface to dislodge any large embedded dirt particles, and then gently brush it with a soft bristle brush. Next, spray the cleaner onto both sides of the filter element (Figure B-4), leave for ten minutes, and then rinse the element using a low-pressure water source (tap water is OK). Note: Always apply the water from the "clean" side of the filter element. Note: The use of other cleaning materials (including high-pressure air) may damage and/or reduce the effectiveness of the filter element. 6) Shake off any excess water and then let the filter element dry naturally. 7) Spray replacement oil on the "dirty" side of the filter element (Figure B-5). Keep the nozzle about three inches from the filter. Note that the cotton in the filter element will absorb and distribute the oil into an even film; thus, it is important to use only a single pass for each area of the filter and to not over-spray the filter. Note: The filter oil is a compound of mineral and animal oil blended with special polymers to form a very efficient barrier. Red dye is added to show just where you have applied the oil (this red color will eventually fade, but the oil will remain and filter the air). 8) Let the filter stand for 20 minutes and then touch-up any spots that do not visibly show the red dye contained in the oil. 32 MaxPac 8250 XLRA-Series User Operation and Maintenance Guide Figure B-5 Figure B-6 9) Bring together the elements forming the filter assembly (Figure B6). 10) Reattach the filter assembly to the main chassis using the four knurled knobs. Replacing the Lithium Battery A Lithium Ion battery is included with the system motherboard. This battery is used for the Real Time Clock circuit. The expected lifetime of the battery is approximately 5 years. There is a danger of explosion if this battery is incorrectly replaced. Replace only with the same or equivalent type recommended by the motherboard manufacturer. Dispose of used batteries according to the manufacturer's instructions. In order to replace the lithium battery you should perform the following steps: 1) 2) 3) 4) Shut down the system and unplug the power cord. Access the inside of the system as discussed earlier in this manual. Remove and replace the lithium battery according to the manufacturer's instructions. Close up the system. MaxPac 8250 XLRA-Series User Operation and Maintenance Guide Appendix C: Screws and Required Tools Screws The various screws used in a MaxPac XL system are illustrated approximately full size as shown in Figure C-1 Figure C-1. Screws used in MaxPac XL systems 33 34 MaxPac 8250 XLRA-Series User Operation and Maintenance Guide Required Tools Note: It is extremely important that you use only high-quality tools so as to avoid any slippage and stripping of screw heads and threads. Note: It is highly recommended that you use magnetized screwdrivers so as to prevent screws from dropping inside the case and/or aiding in retrieving them if they do drop inside the case. (If your screwdriver isn’t already magnetized, you can make it so by repeatedly “stroking” the blade with a permanent magnet. Using a high quality universal screwdriver with replaceable Phillips #1 and #2 bits is a good idea to ensure that your bits are always in excellent condition. Most of the module replacement and upgrade procedures discussed in this chapter can be performed using only a pair of #1 (small tip) and #2 (regular tip) Phillips screwdrivers. For some procedures, however, needle-nose pliers will be of use, and you may have to cut cable ties on occasion. MaxPac 8250 XLRA-Series User Operation and Maintenance Guide 35 Appendix D: Contacting MaxVision Support (RMA and Serial Numbers) Repairing/Replacing Products/Accessories MaxVision will repair or replace products/accessories due to defects in material or workmanship, or any failure of the hardware system to conform to written specifications. Warranty repairs will be performed at MaxVision’s service center. Any replacement parts/products shall be new or refurbished. Any repaired or replaced product will not extend the original warranty term of the product. Additionally, this warranty period will not be extended as a result of the purchase of any additional parts/products from MaxVision Corporation. Contacting Technical Support and RMA Numbers During the warranty period, MaxVision will provide technical support for hardware diagnosis via email ([email protected] or [email protected] ) or the technical support and customer service hotline (800-533-5805). If MaxVision’s technical support determines that the product is defective, MaxVision will issue a Return Material Authorization (RMA) number to the customer. The customer is required to ship the product referencing the RMA number on the outside of the original (or equivalent) packaging with a copy of MaxVision’s RMA form if provided. The return shipment must be sent insured and prepaid to: MaxVision Corporation 495 Production Avenue Madison, AL 35758 USA Attn: Support MaxVision will ship the repaired or replaced product to the customer with freight prepaid if the customer’s address is within United Stated of America (excluding Alaska, Hawaii, Puerto Rico and U.S. possessions). Shipments to other locations will be shipped at the customers expense. MaxVision must receive notice of all events before the warranty period expires. NOTE: MaxVision will not be responsible for data on the hard-disk drive. Before you ship the product(s) to MaxVision, please back up your data from the hard-disk drive(s)or any other storage device(s) in the product(s).