1
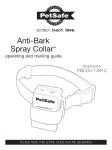
Elite Remote Spray Trainer
operating and training guide
Model Number
PDT00-11234
Please read this entire guide before beginning
Important Safety Information
Explanation of Attention Words and Symbols used in this guide
This is the safety alert symbol. It is used to alert you to potential personal injury hazards.
Obey all safety messages that follow this symbol to avoid possible injury or death.
WARNING indicates a hazardous situation which, if not avoided, could
result in death or serious injury.
CAUTION, used with the safety alert symbol, indicates a hazardous
situation which, if not avoided, could result in minor or moderate injury.
CAUTION, used without the safety alert symbol, indicates a hazardous
situation which, if not avoided, could result in harm to your pet.
Risk of explosion. Do not short circuit, mix old and new batteries, dispose
of in fire, or expose to water. When batteries are stored or disposed, they
must be protected from shorting. Dispose of used batteries properly.
Not for use with aggressive dogs. Do not use this Product if your dog is
aggressive, or if your dog is prone to aggressive behavior. Aggressive dogs
can cause severe injury and even death to their owner and others. If you are unsure whether
this product is appropriate for your dog, please consult your veterinarian or certified trainer.
Safety during on-leash training. It is vitally important that you and your
dog remain safe while learning during on-leash training. Your dog should be
on a strong leash, long enough for him to attempt to chase an object, but short enough for him
not to reach a road or other unsafe area. You must also be physically strong enough to restrain
your dog when he tries to chase.
Do not expose the device to freezing temperatures -32°F or 0°C or to
conditions warmer than 113°F or 45°C. Do not leave the unit in direct sunlight.
Never leave the unit in a car where the device can heat up to high temperatures 113°F or 45°C.
AEROSOLS:
:: Keep out of reach of children.
:: Contents of the refill can and the spray collar are under pressure.
:: Use only in a well ventilated area. Use only as directed.
:: May explode if heated, do not heat. Do not expose to temperatures over 113°F or 45°C.
:: Do not burn. Do not dispose of in fire, even when empty.
:: Keep out of direct sunlight.
:: Do not leave the aerosol can in a vehicle where temperature could exceed 113°F or 45°C.
:: Store in a cool location.
:: Keep away from sparks or flame. Do not smoke while refilling.
:: Do not puncture. Contact of liquid propellant with skin may cause frostbite.
:: Do not ingest. In case of accident, seek medical care. If swallowed, call a poison control
center immediately.
The PetSafe Elite Remote Spray Trainer is not a toy. Keep it away from the reach of children.
Use it only for its pet training purpose.
®
2
Customer Care Center 1-800-732-2677
Risk of skin damage. Please read and follow the instructions in this manual.
Proper fit of the collar is important. A collar worn for too long or made too tight
on the pet’s neck may cause skin damage. Ranging from redness to pressure ulcers; this
condition is commonly known as bed sores.
:: Avoid leaving the collar on the dog for more than 12 hours per day.
:: When possible reposition the collar on the pet’s neck every 1 to 2 hours.
:: Check the fit to prevent excessive pressure; follow the instructions in this manual.
:: Never connect a lead to the electronic collar.
:: When using a separate collar for a lead, don’t put pressure on the electronic collar.
:: Wash the dog’s neck area weekly with a damp cloth.
:: Examine the neck area daily for signs of a rash or a sore.
:: If a rash or sore is found, discontinue use of the collar until the skin has healed.
:: If the condition persists beyond 48 hours, see your veterinarian.
:: For additional information on bed sores and pressure necrosis, please visit our website.
These steps will help keep your pet safe and comfortable. You may find after some time that
your pet is very tolerant of the collar. If so, you may relax some of these precautions. It is
important to continue daily checks of the neck area. If redness or sores are found, discontinue
use until the skin has fully healed.
The PetSafe Elite Remote Spray Trainer must be used only on healthy dogs. We recommend
that you take your dog to a veterinarian before using the collar if he is not in good health.
®
www.petsafe.net3
Thank you for choosing the PetSafe brand. You and your pet deserve a
companionship that includes memorable moments and a shared understanding
together. Our products and training tools enhance the relationship between pets
and their owners. If you have any questions about our products or training your pet,
please visit our website at www.petsafe.net or contact our Customer Care Center at
1-800-732-2677.
®
To get the most protection out of your warranty, please register your product within
30 days at www.petsafe.net. By registering and keeping your receipt, you will enjoy
the product’s full warranty and should you ever need to call the Customer Care
Center, we will be able to help you faster. Most importantly, PetSafe will never
give or sell your valuable information to anyone. Complete warranty information is
available online at www.petsafe.net.
®
Table of Contents
Components.................................................................................................................. 5
Features......................................................................................................................... 5
Other Items You May Need........................................................................................... 5
How the System Works................................................................................................. 5
Key Definitions.............................................................................................................. 6
Operating Guide ......................................................................................................... 8
Prepare the Handheld Remote.................................................................................. 8
Prepare the Receiver Collar....................................................................................... 9
Fit the Receiver Collar............................................................................................. 11
Ensure a Proper Spray Pattern ............................................................................... 12
To Fill and Refill the Spray....................................................................................... 12
Find the Best Spray Level for Your Pet.................................................................... 13
Two Dog System...................................................................................................... 13
To Pair Dog 1 Receiver Collar and the Handheld Remote....................................... 14
Training Guide............................................................................................................ 15
General Tips............................................................................................................. 15
Training Your Pet with Tone..................................................................................... 15
To Train using Spray Stimulation............................................................................. 15
Teaching Basic Obedience...................................................................................... 15
Eliminating Unwanted Behavior............................................................................... 18
Frequently Asked Questions.................................................................................... 20
Troubleshooting ........................................................................................................ 20
To Pair the Handheld Remote and Receiver Collar..................................................... 21
Customer Care International....................................................................................... 21
Terms of Use and Limitation of Liability...................................................................... 21
Battery Disposal.......................................................................................................... 22
Perchlorate Battery...................................................................................................... 22
Compliance................................................................................................................. 22
Warranty...................................................................................................................... 22
4
Customer Care Center 1-800-732-2677
Components
Wrist Strap
Remote
Transmitter
Charging
Adapter
Operating and
Training Guide
Receiver Collar
Citronella Spray
PAC19-12069
Features
:: 15 levels include 8 levels of spray and 7 levels of tone + spray
:: Tone button reinforces good behavior
:: Up to 400 yard range
:: Waterproof Handheld Remote and Receiver Collar
:: All batteries are rechargeable
Other Items You May Need
:: Scissors
:: Non-metallic collar and 10-foot leash for training
How the System Works
The PetSafe Elite Remote Spray Trainer has been proven safe, comfortable, and effective
for pets of any size. This system assists you in controlling your pet without a leash in a
range up to 400 yards. There are 15 levels of spray, a tone button, or spray including tone to
reinforce training. At the push of a button, the Handheld Remote sends a signal activating the
Receiver Collar to spray. Using the Elite Remote Spray Trainer consistently and correctly, many
misbehaviors that your pet exhibits can be corrected and any basic obedience commands can
be taught.
®
www.petsafe.net5
Key Definitions
Handheld Remote: Transmits the signal to the Receiver Collar. It is waterproof.
Digital Display
Digital Display
Level of Spray: Shows Dog 1 or Dog 2 level of spray (Low-1 to
Battery
Dog 1
Dog 2
Indicator
High-15). Also indicates +2 Boost.
Dog 1: The active collar symbol will display to indicate Dog 1.
Dog 2: Dog 1 and Dog 2 symbols will be displayed (additional purchase
required for 2 dog system).
Tone: The spray level will flash when the Tone button or Spray button
is pressed.
Battery Indicator: The battery indicator provides constant awareness
of your battery’s power level.
Level of Stimulation
or Tone Indication
1d or 2d: This appears when programming for the 2-Dog mode.
Note: The Digital Display symbols are shown in more detail on pages 9 and 10.
Button Definitions (factory default settings for Dog 1 mode)
Tone - Upper Left Button (Green):
Produces a training tone from the collar. No
spray is delivered.
Spray - Lower Left Button (Purple): Delivers Digital Display
continuous spray up to 10 seconds long.
Spray Up - Upper Right Button (Grey):
Tone
Adjust the spray level UP through a range of
levels from Low-1 to High-15. Also becomes
Spray
the Tone Button in Two Dog Mode.
Spray Down - Lower Right Button (Grey):
Adjust the spray level DOWN through a
range of levels from High-15 to Low-1. Also
becomes the Spray Button in Two Dog Mode.
Note: See Two Dog System on page 14 for
Dog 2 mode.
+2 Boost (Red): Delivers continuous spray
that is 2 levels higher than the currently selected level.
Note: When a Continuous Spray button is held for 10 seconds or more, the
Handheld Remote will “time-out.” The button will need to be released and
pressed again before additional Spray can be delivered. The Elite Remote
Training systems will never exceed a Spray Level above High-15.
Spray
Up
Spray
Down
+2 Boost
Charging Jack
(with cover)
Belt Clip
Release
Lever
Belt Clip
Wrist Strap
Clip
6
Customer Care Center 1-800-732-2677
Receiver Collar: Delivers spray or tone on a signal from
the Handheld Remote. All Elite Trainers are waterproof.
Spray Nozzle: Where the spray ejects when signal is received
from the Handheld Remote.
Refill Port: Where the spray is refilled.
On/Off Button: Momentarily pressing and holding this button
turns the Receiver Collar on and off.
Receiver Indicator Light: Indicates when the Receiver Collar has
been turned on or off and also serves as a low-battery indicator.
Charging Jacks: For connecting the charger. Although the
Handheld Remote and Receiver Collar are waterproof without the
charger covers, keep the covers in place when not charging to
keep debris out of the openings.
Spray
Nozzle
Refill
Port
On/Off
Button
Two Color LED
Charging
Jack
www.petsafe.net7
Operating Guide
Step 1
Prepare the Handheld Remote
Charge the Handheld Remote
1.Lift the rubber cover protecting the Handheld Remote
Charging Jack.
2.Connect one of the charger connectors to the Handheld
Remote Charging Jack.
3.Plug the charger into a standard wall outlet.
4.Charge the Handheld Remote for 5 hours for the first
charge. Recharges take only 3-4 hours. Note: The Battery
Indicator will scroll while charging and will become solid
when fully charged.
5.When charging is completed, replace the rubber cover.
Charger
connector
placed in the
Handheld
Remote
Charging Jack
Note: Approximate battery life between charges is 40 to 60 hours, depending on frequency of use.
Turning ON the Remote
Power up the Remote by pressing any button. You will see the display turn on when you press
any button.
Remote Digital Display
The display stays on for 1 minute after a button is pressed. After 1 minute with no buttons pressed,
the display shuts off and the Remote goes into battery conservation mode. Pressing any button
will cause the display to turn back on. The various display symbols are explained below.
Numeric readout
Displays the spray level for Dog 1 or Dog 2.
Dog 1/ Dog 2
The symbol displayed is the active dog receiver
collar. See Two Dog System on page 13.
Tone or Spray
When pressing Tone or Spray the Dog 1 or Dog 2
symbol will appear in bold or emphasized.
Tone Only
When pressing Tone Only for Dog 1 or Dog 2 the
number zero appears.
Battery Indicator
The battery indicator provides constant
awareness of your battery’s power level. See
Battery Indicator for more detailed information.
Note: Factory preset is for Dog 1 mode, you will not see the Dog 2 symbol unless the unit is
programmed for Dog 2 (see Two Dog System on page 13).
8
Customer Care Center 1-800-732-2677
Battery Indicator
Battery is at 2⁄3 to Full capacity.
Remote is fully functional.
Battery is at 1⁄3 capacity. Remote
is still fully functional.
Battery is at 1⁄6 capacity. Remote will
operate the Receiver, but should be
recharged as soon as possible.
Battery is almost dead. Remote
is unable to operate the
Receiver.
When the Battery Indicator shows the low battery symbol (1⁄6 capacity), recharge your Remote soon.
When the battery outline is displayed, the Remote’s battery is unable to power transmissions to the
Receiver. Remote must be recharged to regain operation.
Handheld Remote Functions for Dog 1
Remote Function
Button Color
Digital Display Response
Upper Left Button
Green
Tone Only
Lower Left Button
Purple
Spray
Upper Right Button
Grey
Spray level Up
Lower Right Button
Grey
Spray level Down
Boost Button
Red
+2 above selected Spray Level
See Two Dog System on page 13 for Handheld Remote functions in Dog 2 mode.
Handheld Remote Belt Clip
To remove:
1.Press and hold the Release Lever on the Belt Clip, pulling away from the Remote.
2.Slide the Belt Clip out of the insert.
To replace:
1.Slide the Belt Clip into the insert until it clicks, locking into place.
Step 2
Prepare the Receiver Collar
Charge the Receiver Collar
1.Lift the rubber cover protecting the Receiver Collar
Charging Jack.
2.Connect the charger connector to the Receiver Collar
Charging Jack (2A).
3.Plug the charger into a standard wall outlet.
4.Charge the Receiver Collar until the Green Indicator Light
comes on and is solid. Recharges take only 4-5 hours.
5.When charging is completed replace the rubber cover.
2A
Charger connector
placed in the Receiver
Collar Charging Jack
www.petsafe.net9
To turn the Receiver Collar On
1.Press and hold the On/Off Button until the Green LED comes on and the Receiver Collar
beeps low to high.
2.Release the On/Off Button. The Green LED will flash once every 5 seconds until the Receiver
Collar is turned off. The flashing light indicates the Receiver Collar is ready to receive a signal
from the Handheld Remote.
3.Once the Receiver Collar has been turned on, press the Tone Button of the Handheld
Remote. Upon pressing, the Receiver Collar should beep for as long as the Tone Button is
pressed. If it does not, see “To Pair the Handheld Remote and the Receiver Collar” in the
Troubleshooting section.
Note: To extend the life of the battery, turn the Receiver Collar off when it is not in use.
Turning the Receiver Collar Off
1.Press and hold the On/Off button until the Red LED comes on and the Receiver Collar beeps
high to low. Release the On/Off Button.
To extend the life between charging cycles, turn the Receiver Collar off when it is not in use.
Approximate battery life between charges is 40-50 hours, depending on frequency of use.
Rechargeable Batteries
:: The rechargeable Lithium Ion batteries are not memory sensitive and do not require depletion
before charging.
:: The batteries come partially charged from the factory, but will require a full charge before the first use.
:: When storing the unit for long periods, remember to regularly give batteries a full charge (4 hours).
This should be done once every 4 to 6 weeks.
:: The Elite Trainers are equipped with a safety feature to prevent over charging.
:: If your equipment has not been charged for an extended period, you may experience a decrease in
battery life the first few uses. Afterwards, the battery life will return to previous capacity levels.
:: You should expect hundreds of recharge cycles from your batteries. However, all rechargeable
batteries lose capacity over time relative to the number of recharge cycles they experience. This is
normal. If your operating time drops to half of the original life, contact the Customer Care Center to
purchase a new battery.
:: When a battery needs replacement, contact our Customer Care Center or visit our website. Please do
not open the Receiver Collar or Handheld Remote.
Do not attempt to cut into or pry open the battery. Be sure to discard the used
battery properly.
Receiver Indicator Light – Function and Response
Receiver Function
Indicator Light Response
Receiver Beeper
Response
Receiver Collar is turned ON
Green LED flashes one time
Beeps low to high
Unit is on
Green LED flashes once every five seconds
None
Spray activation
Red LED flashes between corrections when
transmitter button is held down
None
Low battery condition
Red LED flashes three times every five seconds None
Tone being received
Green LED flashes
10
Customer Care Center 1-800-732-2677
Tone beep
Step 3
Fit the Receiver Collar
Important: The proper fit and placement of your Receiver Collar is important for effective operation.
To assure a proper fit, please follow these steps:
3A
1.Make sure that the Receiver Collar is turned off.
2.Start with your dog standing comfortably (3A).
3.Place the Receiver Collar on your dog’s neck close to the ears. Center
the Receiver underneath your dog’s neck, touching the skin (3B). Make
sure the PetSafe logo on the front of the unit is upright. Note: It is
sometimes necessary to trim the hair along the path of the
3B
spray. It is important that the spray reaches your dog’s
snout to be effective.
Do not shave the pet’s neck as this may
increase the risk of skin irritation.
®
4.Check the tightness of the Receiver Collar by inserting
one finger between the collar and your dog’s neck (3C).
The fit should be snug but not constricting.
5.Allow your dog to wear the Receiver Collar for several
minutes then recheck the fit. Check the fit again as your
dog becomes more comfortable with the Receiver Collar.
6.Trim the collar as follows: (3D)
a.Mark the desired length of the collar with a pen.
Allow for growth if your dog is young or grows a
thick winter coat.
b.Remove the Receiver Collar from your dog and cut
off excess.
c.Before placing the Receiver Collar back onto your
dog, seal the edge of the cut collar by applying a
flame along the frayed edge.
3C
3D
The Receiver Collar should not be worn for more than 12 hours out of every
24-hour period. Leaving the collar on too long could lead to skin irritation. Please
refer to page 2 for additional information.
To Re-Thread the Collar
Slide Buckle
Ridges
:: The slide buckle prevents the collar from becoming loose around your pet’s neck.
:: The ridges must be facing up; the collar will slip if it is not properly threaded.
www.petsafe.net11
Ensure a Proper Spray Pattern
For the PetSafe Elite Remote Spray Trainer to perform properly, the nozzle must be positioned
correctly and there must be a clear path from the Spray Nozzle to your dog’s snout. Follow
these steps:
1.Make sure the PetSafe logo on the front of the unit is upright
and the Spray Nozzle is angled out and pointing up towards the
dog’s snout.
2.For long-haired dogs, it may be necessary to trim the neck hairs
along the path of the spray. It is important that the spray reaches
the dog’s snout to be effective.
Do not shave the pet’s neck as this may increase
the risk of skin irritation.
®
®
To Fill and Refill the Spray
:: Remove the collar from your dog and turn the unit off.
:: Ensure the refill port is clean. Note: If any dirt or debris enters
the refill port when refilling, it could cause the unit to become
clogged and malfunction.
:: Hold the spray can upright and firmly press the nozzle down into
the Refill Port. Hold for 15 seconds and remove. Note: If spray
leaks out, you may need to press harder to complete the seal.
:: For optimal performance the Receiver Collar should be
refilled before each use.
15 seconds
:: Never fill the device while your dog is wearing it because it
may damage the Refill Port.
:: It is important that your dog’s hair doesn’t block the Spray
Nozzle. Try tying a bandanna (handkerchief) around your dog’s
neck, then place the spray collar over it. If necessary, you may
also consider trimming a little of the long hair around the dog’s neck for better spray effect.
:: Never fill the Remote Spray Trainer with any substance other than the one provided by
the manufacturer. Using another substance, as well as opening the device, will void the
manufacturer’s warranty.
:: The spray from the Remote Spray Trainer may stick to the hair under your dogs snout. Clean your
dog’s hair weekly with a washcloth and a mild hand soap. Rinse and dry your dog’s neck thoroughly.
:: If the spray accumulates on the Remote Spray Trainer, wipe the receiver clean with a damp
cloth and dry thoroughly.
Do not puncture or incinerate the spray collar or the refill canister. Do not
expose to extreme heat or store at temperatures above 113°F.
Refill canisters are available. Choose from citronella or unscented spray. Contact the Customer
Care Center or visit our web site at www.petsafe.net to locate a retailer near you.
12
Customer Care Center 1-800-732-2677
Find the Best Spray Level for Your Pet
The Spray Trainer has fifteen (15) different Spray Levels (8 levels of spray and 7 levels of tone + spray).
This allows you to choose the amount of spray that is best for your pet. Note: Always start at the
lowest level and work your way up.
Once you have placed the Receiver Collar on your pet, it is time to find the Spray Level that is
best for your pet. This is called the Recognition Level.
A slight change in your pet’s behavior, such as looking around in curiosity, scratching at his
collar, or flicking his ears, indicates the Recognition Level that is best for him.
Follow the steps below to find your pet’s Recognition Level:
1.Press the Tone Button. If your pet reacts to this, you
Spray Level
may use this button for training. Simply substitute the
1
Tone Button whenever Spray Button is used in the
2
Training Guide section. If your pet shows no reaction,
3
go to the next step.
2.Starting at Level 1, press the Spray Button
4
continuously for 2 to 3 seconds.
5
3.If your pet shows no reaction, go to the next Spray
6
Level and repeat the process.
7
4.Repeat each Spray Level several times before moving
8
to the next level.
9
5.YOUR PET SHOULD NOT VOCALIZE OR PANIC.
IF THIS HAPPENS, GO BACK TO THE PREVIOUS
10
LEVEL AND REPEAT THE PROCESS.
11
6.If your pet continues to show no response at Level 8,
12
check the fit of the Receiver Collar, then continue at
13
levels 9-15.
14
If all of these steps have been done and your pet
continues to show no reaction to the spray stimulation,
15
contact the Customer Care Center.
Spray Type
1 Short spray
2 Short sprays
3 Short sprays
4 Short sprays
5 Short sprays
6 Short sprays
7 Short sprays
8 Short sprays
Tone + 1 short spray
Tone + 2 short sprays
Tone + 3 short sprays
Tone + 4 short sprays
Tone + 5 short sprays
Tone + 6 short sprays
Tone + 7 short sprays
Step 4
Two Dog System
Note: If you wish to add another receiver collar to the training system, Add-A-Dog collars are
available through our Customer Care Center.
®
To Add Dog 2
Handheld Remote
Digital Display
1.Press the Spray Down (lower right) button consecutively until
Tone
Spray
“2d” appears on the Digital Display.
Up
2.After the “2d” appears press the +2 Boost button.
Spray
Spray
3.Set Dog 1 Spray level to the desired level using the Spray Up and
Down
Down buttons.
+2 Boost
4.Press the +2 Boost to lock the correction level for Dog 1.
5.Set Dog 2 Spray level to the desired level using the Spray Up and
Charging Jack
Down buttons.
(with cover)
6.Press the +2 Boost to lock the correction level for Dog 2.
www.petsafe.net13
Dog 2 Receiver Collar
1.With the Receiver Collar off your pet, turn the Receiver Collar off.
2.Press and hold the On/Off button for 5 seconds.
3.The Receiver Collar will beep and the LED will flash.
4.On the Handheld Remote, press the Upper Right or Lower Right button.
5.The Receiver Collar will respond and pair.
6.If the Receiver Collar does not respond, please contact the Customer Care Center.
Handheld Remote Functions for Dog 2 Mode
Upper Left Button
Dog 1 Tone
Lower Left Button
Dog 1 Spray
Dog 1 +2 Boost
Press Boost and the Lower Left Button simultaneously
Upper Right Button
Dog 2 Tone
Lower Right Button
Dog 2 Spray
Dog 2 +2 Boost
Press Boost and the Lower Right Button simultaneously
Dog 1/Dog 2 Correction Levels
To change the correction level for Dog 1 or Dog 2, press and hold the +2 Boost for 5 seconds. The Dog
1 icon along with it’s selected correction level will appear. You can now use the Upper Right button
to increase the correction level for Dog 1 and the Lower Left button to decrease the correction level.
Press the +2 Boost button to lock the correction level. Now you can adjust the Dog 2 correction level
using the same method. Press the +2 Boost button to lock the correction level and return to normal 2
Dog operation.
Note: To view the currently selected correction level for Dog 1, press the +2 Boost button once
and the display will show the Dog 1 symbol along with the selected correction level.
To view the currently selected correction level for Dog 2, press the +2 Boost button twice and the
display will show the Dog 2 symbol along with the selected correction level.
To Remove Dog 2 from the Handheld Remote
Press and hold the +2 Boost button for 5 seconds. Press the Right Lower button until
the “1d” symbol appears on the Digital Display. Press +2 Boost to exit the menu.
Step 5
To Pair Dog 1 Receiver Collar and the Handheld
Remote
If your Receiver Collar does not beep when the Upper Left button of the Handheld Remote is pressed,
or if the Receiver Collar is not responding to the Handheld Remote, follow these steps:
1.With the Receiver Collar off your pet, turn the Receiver Collar off.
2.Press and hold the On/Off button for 5 seconds.
3.The Receiver Collar will beep and the LED will flash.
4.Press the Tone button .
5.The Receiver Collar will respond and pair.
6.If the Receiver Collar does not respond, please contact the Customer Care Center.
Note: Pairing is for Dog 1 only.
14
Customer Care Center 1-800-732-2677
Training Guide
General Tips
:: Eliminate one misbehavior or teach one obedience command at a time. If you move too fast
with the training, your pet may become confused.
:: Be consistent. Give your pet a tone or spray stimulation with each misbehavior.
:: Do not over-correct your pet. Use as few sprays as possible to train your pet.
:: Unless you can supervise him, it is recommended that you restrict your pet from situations in
which he has a history of misbehaving. However, setting up a situation as a training session
can dramatically improve your chances of success.
:: If your pet reacts to the training by hiding or acting fearful, redirect his attention to a simple
and appropriate behavior such as the “Sit” command.
:: Pets should be at least 6 months old before using the Trainer.
:: Only let responsible family members use the Trainer. It is not a toy!
Never use the Elite Remote Spray Trainer to correct or eliminate any form
of aggressive behavior. If you are unsure if your dog is aggressive, please
consult your veterinarian or a certified trainer.
Training Your Pet with Tone
Before using the Trainer to correct your pet, spend 10 to 15 minutes per day for 2 or 3 days
helping him create the association of the tone with reward and praise. To accomplish this:
1.Push the Tone button for 2 consecutive seconds.
2.Release the button and immediately reward your pet with verbal praise, petting, or a small food
reward. Spend 3 to 5 seconds on your rewarding.
3.Wait a few minutes and repeat holding the Tone button for 2 seconds following with praise.
Vary the reward to prevent your pet from anticipating a specific type. This stage of training is
complete when your pet obviously anticipates a reward when he hears the tone.
To Train using Spray Stimulation
You control the timing of the spray being applied to your pet. If you continue to press the Spray
Button the spray will time out after 10 seconds. It will remain in time out until the button is
released.
Note: For any of these training methods to be effective, they must be used consistently along
with the command you are trying to teach your pet.
Teaching Basic Obedience
The “Sit” Command
1.Put a separate, non-metallic collar on your pet’s neck BELOW the Receiver Collar, and attach
a 10-foot leash.
2.Hold the leash and the Handheld Remote in one hand. Keep your other hand free to guide
your pet into a “Sit” position.
3.Press and hold the Spray Button.
4.Immediately give the “Sit” command while continuing to hold the Spray Button.
www.petsafe.net15
5.Release the Spray Button as soon as your pet is in position, and praise him.
6.Release your pet from the “Sit” command and play.
7.Repeat Steps 2 through 6.
Note: If your pet breaks the “Sit” command, repeat steps 3 through 6. Keep your pet close to
you while teaching the “Sit” command.
The “Recall” Command
1.Put a separate, non-metallic collar on your
pet’s neck BELOW the Receiver Collar, and
attach a 10-foot leash.
2.Hold your leash in one hand and the
Handheld Remote in the other.
3.Wait for your pet to walk away from you.
4.Using the Recognition Level for your pet,
press and hold the Spray Button while
saying “Recall” and if necessary, use the
leash to guide your pet toward you.
5.Immediately release the Spray Button as
soon as your pet steps towards you, and
praise him enthusiastically.
6.Quickly move backwards as your pet begins to walk toward
you, praising him the entire time.
7.Repeat Steps 3 through 8.
8.Once your pet responds readily to the “Recall” command
several times, back away from him without giving a
command. When your pet turns toward you, give the
command “Recall” (WITHOUT SPRAY STIMULATION) and
praise him while you continue to back up. Stop moving
backwards and praise your pet when he returns to you.
9.Use your leash to prevent your pet from running past you. If
your pet manages to run past you, repeat Steps 3 through 8.
The “Stay” Command
1.Put a separate, non-metallic collar on your pet’s neck BELOW the Receiver Collar, and attach
a 10-foot leash.
2.Visibly identify a designated area where you want your pet to sit by placing his bed or a large
piece of cloth on the ground.
16
Customer Care Center 1-800-732-2677
3.After identifying a place, put your pet in that area. Hold your leash in one hand and the
Handheld Remote in the other.
4.Staying within approximately 3 feet, walk around the perimeter of the designated
area. Do not say anything to your pet.
5.If your pet tries to leave that area, press and hold the Spray Button while saying “Stay”, and
if necessary use the leash to guide your pet onto the designated area.
6.Immediately release the Spray Button as soon as your pet returns to the area, and praise him
enthusiastically.
7.Once your pet has settled for a few seconds, release him and play calmly.
8.Repeat steps 1 through 5 several times.
www.petsafe.net17
Eliminating Unwanted Behavior
Jumping Up
Pets typically jump up to get attention. If you do not want your pet to jump on you, then friends
or members of the family should not encourage this behavior. That means every time your pet
jumps on someone, he should be reprimanded or redirected to an alternate and acceptable
behavior, for which he can receive praise.
Note: It is best if your pet first understands the “Sit” command.
1.Choose your pet’s Recognition Level.
2.As soon as your pet lifts his paws off the
ground to jump on you, press the Spray
Button and give the command “Sit.”
3.Release the Spray Button immediately once
your pet is sitting, and verbally praise him.
4.If your pet ignores the spray correction,
increase the Spray Level by 1.
5.Practice this exercise in several different areas
and use different people for distractions.
Digging
It is important to first understand why your pet is digging. Many dogs, such as terriers, were
bred to flush out prey, and digging is very innate to them. Other dogs may be digging to find a
cool spot to lie down, or simply out of boredom. Your pet may no longer have the desire to dig
if he is provided with the following:
:: A cool, shaded area in which to lie down, and plenty of water.
:: An alternate activity, such as a favorite toy.
:: Plenty of play, exercise, and attention.
:: A yard free from rodents or prey that he may be trying to flush out.
1.Choose the Spray Level 1 higher than your pet’s Recognition Level.
2.Place the Receiver Collar on your pet and wait at least 10 minutes
before placing him in the yard. No other people or pets should be
in the yard, as you do not want your pet to associate the spray
correction with anything other than his digging. Your pet must be
securely fenced in or contained during training.
3.From a window or area where your pet cannot see you, wait until
your pet begins to dig.
4.While your pet digs, press the Spray Button and release it when
he stops digging. Only press the button while your pet is in the act
of digging, and do not say anything to him.
5.If your pet ignores the spray stimulation, increase the Spray Level by 1.
6.Continue to watch your pet, as he may choose another area to dig.
7.Do not allow your pet in the yard unsupervised until he has
completely stopped digging.
18
Customer Care Center 1-800-732-2677
Chasing
Chasing is an instinctive behavior stimulated by moving objects. Some dogs have a particularly
strong desire to chase that can put them in harm’s way and leave you helpless. Never allow
your dog off the leash or out of a contained area until he has learned the “Recall” command,
regardless of the distraction. Be consistent and correct your dog every time he chases something.
It is vitally important that you and your dog remain safe while carrying out this training.
Your dog should be on a strong leash, long enough for him to attempt to chase an
object, but short enough for him not to reach a road or other unsafe area. You must
also be physically strong enough to restrain your dog when he tries to chase.
1.Choose the Spray Level 1 higher than your dog’s Recognition Level.
2.Set up a scenario where your dog is enticed to chase an object. Common items could be
cars, motorcycles, bicycles, etc. (do not use toys).
3.When the object passes in front of your dog, make sure to hold the leash with a firm grip. As
soon as your dog begins to chase the object, press and hold the Spray Button until he stops.
4.When your dog stops chasing the object, immediately release the button, walk backwards
and give the command “Recall.” Praise your dog as he comes to you.
5.Repeat the process until your dog responds consistently to the “Recall” command.
Trash Raiding
The easiest way to prevent trash raiding is to remove garbage and
tempting food from your pet’s environment. You can use the Elite Remote
Spray Trainer to teach your pet to stay away from these items; however,
you must be prepared to correct your pet every time he approaches them.
1.Choose the Spray Level 1 higher than your pet’s Recognition Level.
2.Pick a temptation for your pet and position yourself where he cannot
see you.
3.While your pet’s mouth is touching the temptation, press and hold the
Spray Button. Immediately release the button when your pet leaves
the temptation.
4.Do not say anything, as you want your pet to associate the spray with
his behavior, not you.
5.If your pet does not respond to the Spray Stimulation, increase the
Spray Level by 1 and repeat the process.
6.Repeat this process in several different locations with different temptations.
www.petsafe.net19
Frequently Asked Questions
How old does my pet have to :: Your pet should be at least 6 months old and able to
be before using the PetSafe
recognize basic obedience commands such as “Sit”
Elite Remote Spray Trainer?
or “Stay”.
:: Probably not. You may need to reinforce training with the
Once my pet is trained
and has been obeying my
Receiver Collar from time to time.
commands, will he have
to continue to wear the
Receiver Collar?
:: Yes. When charging the battery, be sure to keep the area
Is the Receiver Collar
waterproof?
free of dirt and debris.
:: We do not recommend any of our products to be used on
Can I use the Elite Remote
Spray Trainer on aggressive
aggressive dogs. If you are unsure if your dog is aggressive,
dogs or stop my dog from
please consult your veterinarian or a certified trainer.
being aggressive?
:: The range of the Elite Remote Spray Trainer will vary
Will I get exactly 400 yards
of range with the Elite
according to terrain, weather, vegetation, as well as
Remote Spray Trainer?
transmission from other radio devices.
:: No. The spray is very fine and simply creates a mist in the
Does the spray need to hit
my dog’s nose?
region of the snout.
®
Troubleshooting
:: Make sure the Receiver Collar has been turned on.
:: If your range has reduced from the first time you used the
Remote Trainer, the battery(s) may be low in either the
Handheld Remote or Receiver Collar. This is indicated by the
Indicator Light or the LED flashing.
:: Increase the Spray Level by 1. See “Find the Best Spray
Level for Your Pet.”
The Receiver Collar will not :: Make sure the Receiver Collar has been charged. For the
turn on.
initial charge, be sure to charge it for 2 hours. Subsequent
charges only take 4-5 hours.
:: Verify the Receiver Collar is on.
The Receiver Collar is not
responding to the Handheld :: See “To Pair the Handheld Remote and the Receiver Collar.”
Remote.
:: If the Receiver Collar is still not responding, contact the
Customer Care Center.
My pet does not respond
when I press a button.
20
Customer Care Center 1-800-732-2677
To Pair the Handheld Remote and Receiver Collar
If your Receiver Collar does not beep when the Upper Left Button of the
Handheld Remote is pressed, or if you feel the Receiver Collar is not
responding to the Handheld Remote:
1.With the Receiver Collar off your pet, turn the Receiver Collar off.
2.Press and hold the On/Off Button for 5 seconds.
3.The Receiver Collar will beep and the LED will flash.
4.Press the Tone button on the Handheld Remote.
5.The Receiver Collar will respond and pair.
6.If the Receiver Collar does not respond, please contact the Customer
Care Center.
Digital Display
Tone
Spray
Up
Spray
Spray
Down
+2 Boost
Charging Jack
(with cover)
Customer Care International
USA & Canada - Tel: 800-732-2677
Monday - Friday 8 AM - 8 PM / Saturday 9 AM – 5 PM
Australia - Tel: 1800 786 608
Monday - Friday 8:30 AM - 5 PM
New Zealand - Tel: 0800 543 054
Monday - Friday 10:30 AM - 7 PM
Terms of Use and Limitation of Liability
1.Terms of Use
This Product is offered to you conditioned upon your acceptance without modification of the terms,
conditions and notices contained herein. Usage of this product implies acceptance of all such
terms, conditions, and notices.
2.Proper Use
This Product is designed for use with pets where training is desired. The specific temperament or
size/weight of your pet may not be suitable for this Product (please refer to “How the System Works”
in this Operating Guide). Radio Systems Corporation recommends that this Product is not used if
your pet is aggressive and accepts no liability for determining suitability in individual cases. If you are
unsure whether this Product is appropriate for your pet, please consult your veterinarian or certified
trainer prior to use. Proper use includes, without limitation, reviewing the entire Operating Guide and
any specific Caution statements.
3.No Unlawful or Prohibited Use
This Product is designed for use with pets only. This pet training device is not intended to harm, injure,
or provoke. Using this product in a way that is not intended could result in violation of Federal, State or
local laws.
4.Limitation of Liability
In no event shall Radio Systems Corporation be liable for any direct, indirect, punitive, incidental,
special or consequential damages, or any damages whatsoever arising out of or connected with the
use or misuse of this Product. Buyer assumes all risks and liability from the use of this Product.
5.Modification of Terms and Conditions
Radio Systems Corporation reserves the right to change the terms, conditions and notices under
which this Product is offered.
®
®
www.petsafe.net21
Battery Disposal
Separate collection of spent batteries is required in many regions; check the regulations in
your area before discarding spent batteries. At the end of the product life, please contact our
Customer Care Center to receive instructions on proper disposal of the unit. Please do not
dispose of the unit in household or municipal waste. For a listing of Customer Care Center
telephone numbers in your area, visit our website at www.petsafe.net.
Perchlorate Battery
Perchlorate Material – special handling may apply.
See www.dtsc.ca.gov/hazardouswaste/perchlorate.
Compliance
This device complies with part 15 of the FCC Rules. Operation is subject to the following two conditions:
(1) This device may not cause harmful interference, and (2) this device must accept any interference
received, including interference that may cause undesired operation.
CAUTION: Modification or changes to this equipment not expressly approved by Radio Systems
Corporation may void the user’s authority to operate the equipment.
®
NOTE: This equipment has been tested and found to comply with the limits for a Class B digital device,
pursuant to part 15 of the FCC Rules. These limits are designed to provide reasonable protection against
harmful interference in a residential installation. This equipment generates, uses, and can radiate radio frequency
energy and, if not installed and used in accordance with the instructions, may cause harmful interference to
radio communications. However, there is no guarantee that interference will not occur in a specific installation. If
interference does occur to radio or television reception, which can be determined by turning the equipment off
and on, the user is encouraged to try to correct the interference by one or more of the following measures:
:: Reorient or relocate the receiving antenna.
:: Increase the separation between the equipment and the receiver.
:: Connect the equipment to an outlet on a circuit different from that to which the receiver is connected.
:: Consult customer care, the dealer, or an experienced radio/TV technician for help.
ACMA - Australia
This device complies with the applicable EMC requirements specified by the ACMA (Australian
Communications and Media Authority).
Warranty
One Year Non-Transferrable Limited Warranty
This Product has the benefit of a limited manufacturer’s warranty. Complete details of the warranty
applicable to this Product and its terms can be found at www.petsafe.net and/or are available by
contacting your local Customer Care Centre.
:: Radio Systems PetSafe Europe Ltd, 2nd Floor, Elgee Building, Market Square, Dundalk, Co.
Louth. Ireland
:: Radio Systems Corporation, 10427 PetSafe Way, Knoxville, TN 37932 USA
22
Customer Care Center 1-800-732-2677
Australia/New Zealand – In compliance with the Australian Consumer Law, Warranties Against
Defects, effective January 1, 2012, warranty details of this Product are as follows:
One Year Non-Transferrable Limited Warranty
What is covered: Radio Systems Australia Pty Ltd (hereinafter referred to as “Radio Systems”)
warrants to the original retail purchaser, and not any other purchaser or subsequent owner,
that its Product, when subject to normal and proper residential use, will be free from defects
in material or workmanship for a period of one (1) year from the purchase date. An “original
retail consumer purchaser” is a person or entity who originally purchases the Product, or a gift
recipient of a new Product that is unopened and in its original packaging. When serviced by
Radio Systems Customer Service, Radio Systems covers labor and parts for the first year of
ownership; after the first year, a service or upgrade charge will apply relative to replacement of
the Product with new or refurbished items at Radio Systems’ sole discretion.
The limited warranty is non-transferrable and shall automatically terminate if the original retail
consumer purchaser resells the Radio Systems Product or transfers the property on which the Radio
Systems Product is installed. This Limited Warranty excludes accidental damage due to dog chews;
lightning damage; or neglect, alteration, and misuse. Consumers who purchase products outside of
Australia, New Zealand, or from an unauthorized dealer will need to return the Product to the original
place of purchase for any warranty issues.
Please note that Radio Systems does not provide refunds, replacements, or upgrades for change of
mind, or for any other reason outside of these Warranty terms.
Claims Procedure
Any claim made under this Warranty should be made directly to Radio Systems Australia Pty Ltd
Customer Care Centre at:
Radio Systems Australia Pty Ltd
PO Box 765, Mudgeeraba QLD 4213
Australia Residents: 1800 786 608
New Zealand Residents: 0800 543 054
Email: [email protected]
To file a claim, a proof of purchase must be provided. Without a proof of purchase, Radio Systems will
not repair or replace faulty components. Radio Systems requests the Consumer to contact the Radio
Systems Customer Care Centre to obtain a Warranty Return number, prior to sending the Product.
Failure to do so may delay in the repair or replacement of the Product.
If the Product is deemed to be faulty within 30 days from date of original purchase, Radio Systems
will organise for a replacement to be sent in advance of returning the faulty Product. A Post Bag will
be included with the replacement Product for the return of the faulty Product. The Product must be
returned within 7 days of receiving the replacement. If the Product is deemed to be faulty after 30
days from the date of original purchase, the consumer will be required to return the Product to Radio
Systems at the consumer’s own expense. Radio Systems will test and replace the faulty unit or its
components and return to the consumer free of charge, provided the Product is within its said warranty
period. This warranty is in addition to other rights and remedies available to you under the law. Radio
Systems goods come with guarantees that cannot be excluded under the Australia Consumer Law. You
are entitled to a replacement or refund for a major failure and for compensation for any other reasonably
foreseeable loss or damage. You are also entitled to have the goods repaired or replaced if the goods
fail to be of acceptable quality and the failure does not amount to a major failure.
www.petsafe.net23
Should you have any queries or require any further information, please contact our Customer Care
Centre on 1800 786 608 (Australia) or 0800 543 054
(New Zealand).
Radio Systems Corporation
10427 PetSafe Way
Knoxville, TN 37932
1-800-732-2677
www.petsafe.net
400-1559/1
®
©2007 Radio Systems Corporation
DO NOT PRINT
THIS PAGE
RSC Part #: 400-1559-1
Description: MANUAL PDT00-11234 ROHS
Created by: TF
Material: 100gsm Wood Free
Paper
Printing: Black
Finishing: Die Cut, Fold, 2
Saddle Stitch, and Bulk Pack
Initial Creation Date: 10-25-13
Approved by: LTAYLOR
Date Approved: 12-3-13
Program used: INDESIGN CS6
Revision: 001
ECO: RSC10223
Revision Description: New instructions/illustrations
Revision Date: 12-2-13