1
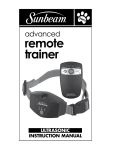
advanced
remote
trainer
STATIC
INSTRUCTION Manual
IMPORTANT SAFEGUARDS
• This device should only be used when training dogs for deterring unwanted
behaviors.
• This device is not a toy; keep out of reach of children.
• This device is not intended to provide protection against aggressive dogs.
• This basic remote trainer should only be used on one dog at a time.
• Your dog should be in good health when using this product.
• This product is not to be used on dogs less than 9 lbs.
• This product is not to be used on dogs less than 6 months old.
• Your dog should not be left unattended with this collar on. Avoid leaving
the collar on the dog for more than 8 continuous hours per day. Prolonged
collar use can cause pressure sores which may lead to skin irritation such as
contact dermatitis or decubitus ulcers. If a rash is discovered discontinue use
until the skin area heals completely. If condition persist for more than 48
hours, contact your veterinarian.
• Do not attach a leash to the Sunbeam® Advanced Remote Trainer. A separate
collar or harness may be used provided it does not interfere with
the remote trainer.
• Warning: This collar uses two Lithium (CR 2032) coin type batteries. Keep
the batteries out of reach of children. If swallowed, immediately seek
medical help as serious injury may occur.
SAVE THESE INSTRUCTIONS
• This product should be used when training dogs to deter unwanted
behaviors.
• This product can be used indoors and outdoors.
• Adjustable collar fits neck sizes between 6 and 28 inches.
• 3 levels of correction can be adjusted for your dog
• Low battery indicator
• Weatherproof
DO NOT USE THIS Remote Trainer UNTIL YOU
HAVE READ THESE INSTRUCTIONS
1
Product Overview:
Collar
INDICATOR LIGHTS:
• Low • Med • High
MAIN CONTROL
BUTTON:
Solid Green:
Correction level selected
and functioning properly
• On/Off
• C orrection
level adjustment
• System reset
Flashing Green:
Correction
administered
and received
All 3 Flashing Red:
Low battery
STAINLESS STEEL
PROBES: Correction
administering system
BATTERY DOOR:
Located on bottom of unit
for battery installation
and removal
FABRIC
COLLAR
ADJUSTABLE
BUCKLE
EXTERNAL
ANTENNA
QUICK RELEASE
CLASP
2
Product Overview:
Remote Control
INDICATOR LIGHTS:
POWER
INDICATOR
LIGHTS: TRANSMIT
Solid Green:
Remote is on
Flashing Green:
The warning or
correction has
been transmitted
effectively
Flashing Red:
Over Correction
Mode
Flashing Red:
Low battery
• Correction button • On/Off • Warning tone button
BATTERY DOOR:
Located on the back
of remote control for
battery installation
and removal
WRIST LANYARD:
To prevent the
remote from being
dropped
3
How it Works:
The Sunbeam® Advanced Remote Trainer should be used as a training aid for
you and your pet. This specially designed system will shut off if there is an
excess of corrections, for example, if something is leaning on the correction
button or if there is continuous pressing. This is called Over Correction Mode
and will cause the unit to turn off and automatically reset.
IMPORTANT: The Sunbeam® Advanced Remote Trainer has a range of up to
150 yards. For the best results at long ranges, hold the remote above your
head and point to the receiver. Other factors that may affect range include
weather, terrain and other radio frequencies transmitted in the area.
OPERATING INSTRUCTIONS
Collar Battery Installation:
IMPORTANT: This step is to be completed
when the collar is NOT on your dog.
• Remove two screws securing the battery
compartment using a cross head or Phillips
head screwdriver. (fig. 1)
• Lift battery compartment from main body of
figure 1
collar. (fig. 2)
• Insert two CR2032 Lithium coin batteries
into battery compartment. Batteries should
be placed with the positive side facing down.
IMPORTANT: Follow orientation as
described on graphics illustrated on battery
compartment. (fig. 3)
figure 2
• Replace battery compartment with two
CR2032 Lithium coin batteries back into main
body. Note: The battery compartment can
only be assembled in one orientation, do not
force closed.
• Tighten the two screws using the cross head
screwdriver, do not over tighten.
figure 3
• To test the unit turn on by pressing and
holding the main control button for 4 seconds. The unit will beep twice and
flash twice leaving one LED illuminated to indicate which correction level is
in use. To choose the right correction level, refer to the READY TO USE section
of this manual.
• To turn off the unit, press and hold the main control button for 4 seconds.
4
The unit will beep twice and flash twice leaving no LEDs illuminated
indicating the unit is off.
• When replacing batteries after usage you must completely discharge the
collar by holding a plastic handle screwdriver across both stainless steel
probes for 5 seconds. Make sure the metal portion of the screwdriver is
touching both stainless steel probes and the unit is in the OFF position.
Remote Control Battery
Installation:
•Remove the battery door from back of the
remote control.
•Insert one 9 volt alkaline battery. (fig. 4)
•Replace battery door on the back of the remote
control.
•To test the unit, turn on by pressing and
holding the on/off button for 2 seconds. The
power indicator light will illuminate green.
(fig. 5)
figure 4
COLLAR FITTING
Proper fit of the Sunbeam® Advanced Remote
figure 5
Trainer is essential to establish a good training
foundation and optimal performance.
Note: Batteries should be installed properly and collar should be in the OFF
position before proceeding with fitting the collar to your dog.
STEP 1: Ensure dog is in a relaxed position.
STEP 2: With the collar clasp open loosen
the adjustment buckle such that it can reach
completely around your dog’s neck. (fig. 6)
Place sensor probe directly over the dog’s
voicebox. When buckled, the collar should rest
directly behind the dog’s ears (the highest part
figure 6
of the neck). (fig. 7)
Note: Make sure both stainless steel probes go
through the coat completely and make contact
with the skin.
Use the longer stainless steel probes if the coat
does not allow the shorter probes to reach the
skin.
figure 7
Before changing the stainless steel probes you
must completely discharge the collar by holding
a plastic handle screwdriver across both stainless steel probes for 5 seconds.
5
Make sure the metal portion of the screwdriver is touching both stainless
steel probes and the unit is in the OFF position.
Trimming the hair around the dog’s neck where the stainless steel probes
will touch the skin is optional, DO NOT trim the hair so short that the skin is
completely exposed as this might allow for an irritation or rash to occur.
Use a wrench when assembling or
disassembling the stainless steel probes, do not
over tighten. (fig. 8)
STEP 3: Close and lock clasp. (fig. 9)
STEP 4: Adjust for proper fit by pulling on strap
until you can fit two fingers in between your
dog’s neck and the collar. (fig. 10)
figure 8
Note: Verify that the main body of the collar
unit is directly over the dog’s voicebox. The collar
should be firm but not excessively tight.
STEP 5: Let your dog wear the product for
sufficient time confirming that they are moving
around normally. This step is to ensure that
under daily activity the collar will remain secure
and not become loose.
figure 9
STEP 6: Reattach collar to your dog. Check the
fit of the collar several times per day. Wipe the
stainless steel probes weekly with a damp cloth
while collar is in off position.
Reminder: If you choose to use a 2nd collar,
leash or harness system make sure it does not
interfere with the operation of the Sunbeam®
Advanced Remote Trainer.
figure 10
READY TO USE
Note: The BATTERY INSTALLATION and COLLAR FITTING steps must be
completed before you are ready to use.
STEP 1: Holding the main body of the Sunbeam® Advanced Remote Trainer
in both hands PRESS and HOLD the Main Control Button for 4 seconds.
Note: You will hear 2 audible beeps and 3 LEDs flash green indicating the
device is on.
The default correction level is LOW; this setting will illuminate green for
10 seconds and then turn off. During the ten seconds, you may toggle to
different correction levels by pressing the Main Control Button.
STEP 2: Set correction level by pressing and holding (approximately 2 seconds) the
Main Control Button until a green LED illuminates at the desired setting.
6
When a green LED is illuminated press the Main Control Button once to
toggle to the next correction level. Once a correction level is chosen all
3 green LEDs will illuminate every 10 seconds to advise the unit is on.
IMPORTANT: Always make sure to turn off the collar when not in use to
conserve battery life.
Note: It is recommended to start on
the LOW setting and monitor your dog’s
behavior before determining if a higher
correction level is needed. The Sunbeam®
Advanced Remote Trainer retains the last
correction level setting and will resume
this mode when the unit is turned on.
STEP 3: Attach collar to your dog as you did
in the COLLAR FITTING stage.
STEP 4: Turn on the remote control by
pressing the On/Off button for 2 seconds.
STEP 5: To begin using the remote trainer, find your dog’s recognition level
starting with the warning button. Once an unwanted behavior takes place, such
as chewing, digging, barking, jumping, biting or whining, immediately press the
warning button. Each dog will react differently and reactions may include a dip of
the head, shaking the head, whining, excessive barking or confusion. Some dogs
will respond to the warning button and stop the unwanted behavior. If this is the
case, continue training your dog using the warning button and skip to STEP 7.
IMPORTANT: Your timing on this step is crucial. If the unwanted behavior
has stopped before you have time to press the warning or correction button,
DO NOT press the warning or correction button. The warning or correction
button should only be used at the exact moment the unwanted behavior is
taking place.
STEP 6: If the dog does not respond to the warning button, starting on the LOW
setting, press the correction button. If your dog does not respond to the correction
on the LOW setting, toggle the collar setting to MEDIUM and HIGH, if necessary.
STEP 7: Once your dog’s recognition level has been identified, continue training
with that setting. As soon as the unwanted behavior stops, be sure to reward your
dog with praise, petting or a treat.
Note: If you use the warning button to first alert your dog of the unwanted
behavior and then use the correction button, there is a chance your dog will
associate the warning tone with the correction. Once your dog has made this
association, continue use of the remote trainer utilizing the warning button
only.
7
SPECIAL OPERATING NOTES
REMOTE CONTROL: For precaution, the collar will be ready to use 10 seconds
after the user has selected or made adjustments to the correction level on the
collar. The collar will not react to the handheld remote when the user turns the
collar on and/or toggles the correction settings during this period.
WARNING BUTTON: If the user presses the warning button on the remote
control, the transmit green LED on the remote will flash. There will be an
audible beep at the collar unit.
CORRECTION BUTTON: If the user presses the correction button on the
remote control, the transmit green LED on the remote will flash. If the collar
can receive the signal from the remote control, the collar’s green LED of the
selected correction level will light up during the correction period.
Over Correction Mode: If too many corrections occur within a 60
second period, the remote control will be deactivated for two minutes.
This is to protect the dog in case something may be accidentally activating
the correction button. The transmit red LED on the remote control will be
flashing during the entire two minute period. The unit will resume normal
operation after this two minute period.
Low Battery Mode: On the collar all 3 LEDs will flash RED for 5 seconds
when the battery needs to be replaced. On the remote control the power LED
will flash RED and automatically turn off.
TRAINING GUIDE
Proper training is essential to achieving the best results from the Sunbeam®
Advanced Remote Trainer. For best results, prior to use of the remote trainer,
you should put the collar on your dog for a few days without turning it
on. You do not want the dog to associate the collar with the correction
because the dog can become collar smart. The dog that is collar smart will
only behave when the collar is on. Your goal is to eliminate the unwanted
behavior whether the collar is on or off.
When first starting to use the remote trainer you should closely monitor
your dog’s reaction to the correction. You should be inside a protected area.
The protected area should not be a cage, crate or kennel. If outside, your dog
should be in a safe protected area so that it cannot run away when it receives
a correction from the remote trainer.
Do not let your dog see the handheld remote when you are pushing the
warning button or the correction button. You do not want your dog to
associate the correction with you.
Each dog can have a different reaction to the correction it receives from the
remote trainer. Reactions can vary from a dip of the head, to shaking the
head, whining, excessive barking, confusion or running away. In the event
8
of an extreme reaction or aggression, wait until your dog is calm before
approaching your dog.
The remote trainer should be used when you want to deter unwanted
behavior. Do not leave the remote trainer collar on your dog when you are
not present. Consistently using the remote trainer at the right time will give
you the best results. The more disciplined you are when using the remote
trainer the better your dog will understand that unwanted behaviors are not
acceptable.
It is important for the training process to be interactive. Once your dog has
received a correction and stopped the unwanted behavior you should reward
your dog with a treat or praise.
HINTS AND TIPS
Is this product right for me and my dog?
• The Sunbeam® Advanced Remote Trainer is best used in conjunction
with behavior training from a qualified behaviorist or obedience trainer.
• Before using the remote trainer on an aggressive or phobic dog, consult a
qualified behaviorist or obedience trainer.
• If your dog begins to display aggressive behavior during or after using the
Sunbeam® Advanced Remote Trainer, discontinue use immediately and
consult a qualified obedience trainer or behaviorist.
• All training methods require time, commitment and consistency to achieve
optimum results.
CARE AND MAINTENANCE
The Sunbeam® Advanced Remote Trainer is weatherproof but is NOT
submersible so care must be taken when cleaning.
• Always remove the battery before cleaning
• Use a clean damp cloth, water only
• Never use any household or industrial cleaners
• Do not submerse the unit in water or any other liquid
• Keep the dog’s coat and skin clean in the area where the collar makes
contact
• Check the fit of the collar several times per day
• Wipe the Stainless Steel Probes weekly with a damp cloth while collar is in
off position
Note: The Lithium coin batteries used in this product contain perchlorate
material. Special handling may apply in California. Go to: www.dtsc.ca.gov/
hazardouswaste/perchlorate for more information.
9
FCC STATEMENT
Potential for Radio/Television Interference
This device complies with part 15 of the FCC Rules. Operation is subject to the
following two conditions: (1) This device may not cause harmful interference,
and (2) this device must accept any interference received, including interference
that may cause undesired operation.”
Note: This equipment has been tested and found to comply with the limits
for a Class B digital device, pursuant to part 15 of the FCC Rules. These limits
are designed to provide reasonable protection against harmful interference
in a residential installation. This equipment generates, uses and can radiate
radio frequency energy and, if not installed and used in accordance with
the instructions, may cause harmful interference to radio communications.
However, there is no guarantee that interference will not occur in a particular
installation. If this equipment does cause harmful interference to radio or
television reception, which can be determined by turning the equipment off
and on, the user is encouraged to try to correct the interference by one or more
of the following measures:
• Reorient or relocate the receiving antenna.
• Increase the separation between the equipment and receiver.
• Connect the equipment into an outlet on a circuit different from that to which
the receiver is connected.
• Consult the dealer or an experienced radio/TV technician for help.”
Changes or modifications not expressly approved by the party responsible for
compliance could void the user’s authority to operate the equipment.
This class B digital apparatus complies with Canadian ICES-003.
Cet appareil numerique de la classe B est con forme à la norme NMB-003 du Canada.
1 YEAR WARRANTY
In the U.S.A. and Canada
If you have any question regarding this warranty or would like to obtain warranty service, please
call 1-866-537-2249 and a convenient service center address will be provided to you.
Sunbeam® Products, Inc. doing business as Jarden Consumer Solutions, or if in Canada, Sunbeam®
Corporation (Canada) Limited doing business as Jarden Consumer Solutions (collectively “JCS”)
warrants that for a period of one year from the date of purchase, this product will be free from defects
in material and workmanship. JCS, at its option, will repair or replace this product or any component of
the product found to be defective during the warranty period. Replacement will be made with a new
or remanufactured product or component. If the product is no longer available, replacement may be
made with a similar product of equal or greater value. This is your exclusive warranty.
10
DO NOT attempt to repair or adjust any electrical or mechanical functions on this product. Doing so
will void this warranty.
This warranty is valid for the original retail purchaser from the date of initial retail purchase
and is not transferable. Keep the original sales receipt. Proof of purchase is required to obtain
warranty performance. JCS dealers, service centers, or retail stores selling JCS products do not
have the right to alter, modify or any way change the terms and conditions of this warranty. This
warranty does not cover normal wear of parts or damage resulting from any of the following:
negligent use or misuse of the product, use on improper voltage or current, use contrary to the
operating instructions, disassembly, repair or alteration by anyone other than JCS or an authorized
Sunbeam® service center. Further, the warranty does not cover: Acts of God, such as fire, flood,
hurricanes and tornadoes.
What are the limits on Sunbeam’s Liability?
JCS shall not be liable for any incidental or consequential damages caused by the breach of any
express, implied or statutory warranty or condition. Except to the extent prohibited by applicable
law, any implied warranty or condition of merchantability or fitness for a particular purpose
is limited in duration to the duration of the above warranty. JCS disclaims all other warranties,
conditions or representations, express, implied, statutory or otherwise. JCS shall not be liable for
any damages of any kind resulting from the purchase, use or misuse of, or inability to use the
product including incidental, special, consequential or similar damages or loss of profits, or for any
breach of contract, fundamental or otherwise, or for any claim brought against purchaser by any
other party.
Some provinces, states or jurisdictions do not allow the exclusion or limitation of incidental or
consequential damages or limitations on how long an implied warranty lasts, so the above
limitations or exclusion may not apply to you. This warranty gives you specific legal rights, and
you may also have other rights that vary from province to province, state to state or jurisdiction to
jurisdiction.
In the U.S.A., this warranty is offered by Sunbeam® Products, Inc. doing business as Jarden
Consumer Solutions located in Boca Raton, Florida 33431.
In Canada, this warranty is offered by Sunbeam® Corporation (Canada) Limited, doing business as
Jarden Consumer Solutions located at 20 B Hereford Street, Brampton, Ontario L6Y 0M1.
PLEASE DO NOT RETURN THIS PRODUCT TO ANY OF
THESE ADDRESSES OR TO THE PLACE OF PURCHASE.
© 2011 Sunbeam Products, Inc. doing business as Jarden Consumer Solutions. All rights
reserved. Distributed by Sunbeam® Products, Inc. doing business as Jarden Consumer
Solutions, Boca Raton, Florida 33431.
Printed in China
SPR-092311-733
PN 152309