1
Aligning the
Print Head Plate with the
Print Table
Technical Note – 10100147 Rev. B
10100147 - B
© Matan Digital Printers Ltd.
Page 1 of 17
Safety Procedures
Before reading this Technical Note, please refer to the section
on Safety Procedures in the Barak User's Manual.
About this Technical Note
This technical note describes how to adjust the PRINT HEAD
PLATE on the Barak printer.
Introduction
To achieve optimized print quality and as part of the printer
adjustment procedures, the PRINT HEAD PLATE must be adjusted
so that it is parallel with the PRINT TABLE.
Adjusting the Print Head Plate
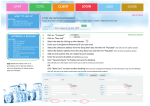
1. Prepare a sheet of paper and draw a table as shown below.
10100147 - B
© Matan Digital Printers Ltd.
Page 2 of 17
2. The following tools must be prepared before proceeding:
•
Feeler gauge (0.1 – 2 mm)
Figure 1:
•
Feeler Gauges
Four 2 mm shims
Figure 2:
Shims
3. Shut down the printer.
10100147 - B
© Matan Digital Printers Ltd.
Page 3 of 17
4. Disconnect the X-MOTOR POWER and
shown below.
Figure 3:
ENCODER CABLES,
as
X Motor and Encoder with disconnected cables
5. Remove the CRASH PROTECTOR SENSOR (as shown below).
Crash
Protector
Sensor
Figure 4:
10100147 - B
The Crash Protector Sensor
© Matan Digital Printers Ltd.
Page 4 of 17
6. Power up the printer, but do not turn on the PC or/and
open the Barak FE Application.
7. Raise the CARRIAGE to a safe height.
8. Manually move the carriage to the left, over the PRINT TABLE,
until the mid-point is located above the 2nd hinge from the
left, as shown by the white broken line in the second figure
below.
Figure 5:
Manually Moving the Carriage
Mid-point
2nd Hinge
Figure 6:
10100147 - B
The Print Table's Mid-point
© Matan Digital Printers Ltd.
Page 5 of 17
9. Insert a 2 mm shim (Figure 2, page 3,) under each corner of
the PRINT HEAD PLATE.
10100147 - B
Figure 7:
Inserting a shim
Figure 8:
Two shims inserted at front corners of the Print Head Plate
© Matan Digital Printers Ltd.
Page 6 of 17
10. Lower the CARRIAGE using the MOTOR SWITCH as shown
below, until it just touches one or more of the shims in a
way that you can still remove the shims without forcing
them.
Figure 9:
Lowering the Carriage using the Motor Switch
11. Remove the four shims from the PRINT TABLE.
10100147 - B
© Matan Digital Printers Ltd.
Page 7 of 17
12. Using the FEELER GAUGE, measure the gap between the
PRINT HEAD PLATE and the PRINT TABLE, on each of the four
corners, as shown below.
Figure 10: Measuring the gap between the Print Head Plate and the
Print Table
13. Write down the measurements on the table you have
prepared.
10100147 - B
© Matan Digital Printers Ltd.
Page 8 of 17
14. Manually move the CARRIAGE so that the PRINT HEAD PLATE'S
mid-point is located over the next hinge.
Figure 11: Manually moving the Carriage to the next Mid-point
15. Repeat steps #11, #12 and #13, until the PRINT HEAD PLATE'S
mid point is located over the last hinge.
10100147 - B
© Matan Digital Printers Ltd.
Page 9 of 17
Last Hinge
Figure 12: The Carriage at the last hinge
16. At this stage, carry out the final measurement only on the
front and back left corners of the PRINT HEAD PLATE.
(The right corners are no longer above the PRINT TABLE.)
17. Analyze the results from the table.
The tolerance between the different measurements between
the hinges and the PRINT HEAD TABLE, shouldn't exceed
Δ=0.4 mm. Meaning ±0.2 mm, along the entire PRINT TABLE.
10100147 - B
© Matan Digital Printers Ltd.
Page 10 of 17
18. Review the results on the table and decide which corners
have to be adjusted by adding or removing shims, between
the CARRIAGE FRAME and the PRINT HEAD PLATE corners.
A Shim located at a
corner
19. After adjusting the corners, repeat the complete procedure
until the results fall within the tolerance.
20. Raise the CARRIAGE to a safe height.
21. Manually bring the CARRIAGE over the middle point of the
PRINT TABLE and insert the 2 mm shims under the four
corners of the PRINT HEAD PLATE.
10100147 - B
© Matan Digital Printers Ltd.
Page 11 of 17
22. Lower the CARRIAGE using the MOTOR SWITCH, until it just
touches one or more of the shims in a way that you can still
remove the shim without forcing it.
23. Adjust the CARRIAGE HEIGHT GAUGE to zero.
Figure 13: The Carriage Height Gauge
10100147 - B
© Matan Digital Printers Ltd.
Page 12 of 17
24. Adjust the two CARRIAGE STOPPER SCREWS.
Figure 14: A Carriage Stopper Screw
25. Remove the four shims.
26. Shut down the printer.
10100147 - B
© Matan Digital Printers Ltd.
Page 13 of 17
27. Reassemble the CRASH SENSOR.
Crash Sensor
28. Manually return the CARRIAGE to the Home position,
without touching the LIMIT SWITCH.
29. Reconnect the POWER and ENCODER X-MOTOR CABLES, as
shown below.
30. Power up the printer.
10100147 - B
© Matan Digital Printers Ltd.
Page 14 of 17
Appendix A: Damage Report Form
(not for Print Head)
Customer’s Name:
Address:
Barak5 Printer S/N*
Faulty Part Name
Details of faulty
part:
Remarks:
Signed:
Name:
Position in
Company:
Date:
* The Printer’s Serial Number is displayed on the label located at the rear of the
printer near the left end of the rollers, as shown below.
10100147 - B
© Matan Digital Printers Ltd.
Page 15 of 17
Document History
Rev
ECO #
Written by
Date
Approved by
Date
Remarks
A
B
10000049
10000049
F. Taylor Technical Writer
F. Taylor Technical Writer
15-07-10
08-02-11
Gaby
Ronen Shalil
08-02-11
Cataloging
Updating
Head Office
Matan Digital Printers Ltd., 14 Amal Street, Park Afek, Rosh Ha'ayin 48092, Israel.
Tel: (+972) 3 9002720 Fax: (972) 3 9002721 Email: [email protected]
U.S. Office
Matan USA Inc., 90, Earhart Drive, Suite 4, Williamsville NY 14221.
Tel: (+1) 716 631 3770 Fax: (1) 716 631 3576
Email for customer support: [email protected]
Europe Office
Matan EU, C/ Rosalia de Castro, 21, 08025, Barcelona, Spain.
Tel: (+34) 902 932825 Fax: (+34) 902 932826
Email for customer support: [email protected]
10100147 - B
© Matan Digital Printers Ltd.
Page 16 of 17
10100147 - B
© Matan Digital Printers Ltd.
Page 17 of 17