1
USER’S MANUAL
Rev 1-2011, ENG
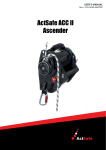
ActSafe ACC II
Ascender
User’s Manual ACC II Ascender
2
ACC II Ascender User’s Manual revision 1-2011
© Copyright 2011 ActSafe Systems AB
www.actsafe.se
[email protected]
2
© Copyright ActSafe Systems AB
Table of contents
INTRODUCTION4
Remote control usage
22
Foreword4
Emergency stop
22
About ActSafe
4
Emergency descent
23
About this manual
4
Charging24
Definitions
5
Transportation25
Disclaimer5
Storage25
SAFETY6
SERVICE & MAINTENANCE
26
Ascender safety
6
Clean the ascender
26
General safety measures
6
Clean the charging pins
26
Work method analysis recommendation 7
Changing the rope grab system
27
Rope system safety
8
Changing the primary connection sling 28
Rope recommendations
9
Remote control, changing the batteries 28
Personal safety
10
Training11
Equipment list
28
Material28
Spare parts
28
TROUBLE SHOOTING GUIDE
29
Battery14
WARRANTY & GUARANTEE
32
Battery indicator
15
Limitation of liability
32
Remote control
16
Emergency descent
17
TECHNICAL DATA
33
SYSTEM DESCRIPTION
12
General13
Control panel
13
Charger18
Overload/heat monitoring/protection 18
APPENDIX34
USAGE19
Checklist before and after use
19
Connect to rope
20
Ascent & descent
21
User’s Manual ACC II Ascender
3
INTRODUCTION
INTRODUCTION
Foreword
About this manual
Thank you for choosing a product from
Act Safe Systems AB®.
The information in this manual cannot
replace training and exercise. The ascender
must only be used by personnel who have
undergone proper training. Improper use
may result in serious injury or death.
When used correctly this ascender will
revolutionize the way you work at height.
This hoisting equipment makes it much less
stressful for you to reach your workplace
in combination with lifting materials and
tools.
About ActSafe
ActSafe offers you a full range of personal
protective equipment (PPE), and comprehensive training in the use and handling of
this equipment.
Visit our website for more information
on ActSafe Power Ascenders. You will find
important information and latest versions
of manuals. www.actsafe.se
Description of the manual
Safety messages of extra importance are
presented with the words danger and caution. The meanings of the signal words are:
CAUTION
Not following these instructions may result
in INJURY or damage to the equipment.
DANGER
Not following these instructions may result
in SERIOUS INJURY or DEATH.
RECOMMENDATION
User recommendation is described like this.
Further information about consequences and
other details is presented like this.
NOTE!
The word “Note” will precede important
information about the equipment used
together with the ascender.
4
© Copyright ActSafe Systems AB
INTRODUCTION /DISCLAIMER
Definitions
WORD
DESCRIPTION
Anchor
Attachment point for rope or ascender.
Ascending
Moving up on the rope.
Descending
Moving down on the rope.
Primary rope
Main rope used with ascender. Approved according to EN 1891.
Backup rope
/ Secondary rope
Safety rope that takes load if failure with primary rope.
Approved according to EN 1891.
Fall arrest
Device that stops a fall and limits the load.
Approved according to EN 353-2.
Active / Live rope
Rope that is loaded during work.
Passive / Dead rope
Unloaded rope during work.
User / Operator
Operator of the ascender, either by speed control handle
or by remote control. There can be two or more at the same time.
Competent person
Personnel with adequate training and certification for the assignment.
Factor 1 fall
A fall of distance X m with X m of rope catching the fall.
Fall factor is fallendistance divided by length of rope catching it.
DISCLAIMER
Since ActSafe Systems AB is unable to
control the use of the equipment, the user
and the user only is responsible for any damage, personal injuries or death resulting
from improper use and maintenance of this
product.
The ascender is not safety equipment. It is
a tool for hoisting and lowering a person
and/or equipment. It must therefore always
be used in combination with an approved
secondary system including approved components for fall arrest.
ActSafe Systems AB, including our distributors or working partners do not accept
any responsibility or liability for payment
due to damage, personal injuries or death
resulting from use of uncertified personnel
or the improper use and maintenance of
this product.
The product must not be used by
personnel that have not been certified
by ActSafe Systems AB or our distributors.
User’s Manual ACC II Ascender
This manual covers the basic features
and use of the ascender only and does not
replace adequate training and certification
for working in rope access systems.
5
SAFETY
SAFETY
Users of this product must have been certified or have undergone proper approved
training either by ActSafe Systems AB or by
ActSafe approved distributors.
DANGER
Read this chapter carefully and make sure
you understand its contents.
Ascender safety
The ascender must not be used:
• For anything other than that for which
it has been designed.
• In an explosive environment.
• If modified in any way by anyone
other than ActSafe Systems AB.
• After a free fall from a height more
than 1 meter against any hard surface.
• If subjected to a dynamic load as it is
designed to work in static systems only.
• If subjected to mis-use in any way
those parts or components may have
been damaged.
• In combination with other than
ActSafe original battery charger.
Use only original spare parts / material
recommended by ActSafe Systems AB.
Other battery chargers may damage the
battery and may cause development of toxic
gases or in worst-case scenarios cause an
explosion.
If unclear of the condition of the ascender, it must be inspected and approved by
ActSafe Systems AB or an ActSafe approved
distributor before use.
The ActSafe Ascender and its equipment
must be checked before and after every use
and must be subject to at least one inspection per year (national regulations may
require more frequent inspections).
• In combination with damaged
or modified battery charger.
General safety measures
• Draw up a risk analysis and a minimum
of 2 separate rescue plans.
• Make suitable rescue equipment
available.
• Check all components in the system.
RECOMMENDATION
Plan for rescue when rigging the rope system.
The area of risk under someone working at
height is within a radius of 2/3 of the height and
larger due to strong wind. Other persons must
keep away from the area of risk.
Always secure tools and equipment.
6
© Copyright ActSafe Systems AB
SAFETY
Work method analysis recommendation
This diagram is made for a general situation where the main operator (the operator
primarily using the winch) and the 2nd
operator (rescue personnel) are situated in
different positions. Consider this as an aid
in analysing the work situation and doing
the risk analysis.
This will normally take longer than just
descending directly without needing to
access the injured person.
Traditional rescue methods refer to climbing/ascending the unloaded rope to the
injured operator and lowering/descending
to safety with the help of equipment.
Is the main operator
conscious and able to
operate the winch?
YES
NO
Is the ascender operable?
(battery capacity,
emergency stop,
powered up etc)
ReComMendation
Have 2 separate ways of controlling the ascender (direct and with remote, I’D or other). The
backup operating method should be available
to the 2nd operator/rescue personnel.
Start the assignment with fully charged
batteries to minimise time and risk in case
of an accident.
YES
Descend to safety
QUICK RESCUE!
YES
Descend to safety
QUICK RESCUE!
YES
Descend to safety
QUICK RESCUE!
YES
Descend to safety
QUICK RESCUE!
NO
Is the emergency descent
handle / emergency
descender available for
the main operator?
NO
Is the remote, ascender
or emergency descender
available for rescue
personnel?
NO
Traditional rescue
YES
Is the ascender operable?
(battery capacity,
emergency stop,
powered up etc)
NO
Is the emergency descent
handle / emergency
descender available for
rescue personel?
NO
Traditional rescue
User’s Manual ACC II Ascender
7
SAFETY
Rope system safety
The rope system must consist of a primary
rope (1) and a secondary back-up rope
(2), both must be approved according to
EN1891 and have a diameter of 10-13mm.
The two ropes must have separate
anchor points that must hold at least 15 kN
each. A competent person shall judge if the
separate anchor points are sufficient.
National regulations may require more.
1
3
2
The ACC ascends or descends on the
primary rope. If any part of the load carrying system should break then the load is
immediately transferred to the secondary
rope which, together with the fall arrester
(3) according to EN 353-2, provides a fall
arrest system.
Do not descend on a twisted rope. It may
result in a rope jam or in the worst-case
scenario the rope being forced off the rope
grab.
Rope characteristics are an important
issue when using the ascender. Ropes with
characteristics not suitable for the ascender
might, in the worst-case scenario, result in
a jam between the rope grab and the knife,
with a damaged rope as a consequence.
DANGER
Do not use the Ascender without a backup
system.
The lifting capacity of the ascender is higher
than the Safe Working Load (SWL) of the most
common fall arrest devices. Therefore, when
lifting a load it may be necessary with separate
fall arrest system(s) for the load. See the user’s
manual of the fall arrest device to find out the
SWL.
The dead rope must be unloaded. Do not
build cableways using the primary rope as
shown in the picture.
8
© Copyright ActSafe Systems AB
SAFETY
Rope recommendations
ActSafe PME is designed for EN 1891 ropes.
However, all EN 1891 ropes does not perform well with the ascender. ActSafe has
tested a variety of ropes; please contact us
for more information about different rope
qualities.
Please read and understand the tips and
directions regarding ropes below and you
will get more out of your ropes as well as
your ActSafe Ascender.
As a rule of the thumb one can say that
extremely soft ropes don’t get good grip in
the rope grab. A very soft rope may result
in poor lifting capacity since the rope starts
to slip or in the worst-case scenario even a
jam.
NOTE! Not all EN 1891 ropes perform in a
similar way. They have slightly different characteristics (stiff, soft, thick/thin mantle etc).
User’s Manual ACC II Ascender
DANGER
A rope that has been in contact with acid
must not be used under any circumstances.
Scrap the rope!
ReComMendation
The user should carry out tests with the rope
normally used prior to operations involving the
ascender. Consult ActSafe for more information
and assistance in the test of the rope.
A new rope will get an increased service life if it
is put to soak in cold water before the first use.
Avoid getting sand or dirt onto/into the ropes
since it will wear the rope grab and loop. Use a
rope mat, rope bag or similar.
If the rope has been soiled by dirt, sand, gravel,
oil or grease, consult your manufacturer on the
proper action.
9
SAFETY
Personal safety
The user must wear a combination harness (1,2) approved
according to EN813: (low attachment point for the primary rope, 3) as well as EN361 (high attachment point for the
secondary rope or fall arrester, 4).
Do not use the ascender if you are tired, ill or under the
influence of alcohol, drugs or medication.
5
4
Before use make
sure that you
•• Check all components
in the system.
•• Use appropriate PPE
(Personal Protective
Equipment, for example
helmet, gloves and
protective eye wear, 5).
•• Use appropriate
clothes without
loose hanging parts.
•• If necessary bind
long hair and beards
to keep the shoulder
region free.
3
When using make
sure that you
1
2
•• Pay attention and use
common sense.
•• Do not hold the rope
just above the winch;
there is a risk of being
pinched.
•• Keep your hands and
feet off rotating parts.
•• Avoid pendulum
movement when
starting to ascend.
10
© Copyright ActSafe Systems AB
SAFETY
Training
Users of this product must have been certified or have undergone proper approved
training either by ActSafe Systems AB or by
ActSafe approved distributors.
The ActSafe ACC ascender makes it possible to access heights and depths in a very
quick, safe and reliable way.
The ascenders are very easy to implement within various work methods and is
invaluable in places where access is difficult
or impossible by other means. Because
of the variety of use in different areas and
circumstances training is essential.
Working at height or in locations presenting difficult or confined access requires
great skill and such standards can only be
achieved as a result of extensive training
and regular refresher courses.
The below three different levels applies.
Please consult your local ActSafe distributor
for further information.
ASA Level 1
Basic PME Operator
ASA Level 2
Advanced PME Operator
ASA Level 3
Master Operator
(1-day course)
(1 day course)
(5-day comprehensive course)
In this basic course we learn the
user how to effectively use the
ascender for basic operations in a
safe and effective manner.
He/she is competent:
In the advanced course we learn
the user how to effectively use
the ascender in more complex
rope access and rescue operations.
Prerequisite for this course is a
Level ASA 1 certificate.
He/she is competent:
In this comprehensive course we
learn the user how to effectively use
the ascender in basic-, complexand very specific rope access and/
or rescue operations. We teach the
end user how to implement use of
ascenders in their specific working
environment. Techniques, legislation
and procedures in one package. There
is no prerequisite for this course as
Level 1 and 2 are integrated.
He/she is competent:
•• to perform a pre-use checking
•• in ascending on vertical rigged
ropes
•• in using the ascender as a winch
•• in use of the ascender in a basic
lowering system
•• in rigging basic rigging
•• in self-rescue
•• able to identify and solve simple
technical problems
A level one also has basic knowledge of international legislation in
the field of rope access operations.
User’s Manual ACC II Ascender
•• in all points of the level 1 syllabus
•• in more complicated rigging
•• in performing team rescue
operations
•• in all points of the level 2 syllabus
(more indepth)
•• conversant with relevant work
techniques and legislation
•• implementing use of ascenders in
existing working procedures
•• use of the ascender in specific
working environment (end user
specific)
11
SYSTEM DESCRIPTION
SYSTEM DESCRIPTION
3
2
1
4
14
13
12
11
5
7
9
10
12
6
8
NO
PART
NO
PART
1
Rope grab system
8
Primary connection (9+10)
2
Lifting handle
9
Sling
3
Control Panel
10
Attachment karabiner
4
Pocket for Emergency Descender handle
11
Chassis
5
Speed control handle
12
Secondary Connection point
6
USB connection for service (inside)
13
Charging Connector (hidden)
7
Emergency stop
14
Accessories bag / for extra battery
© Copyright ActSafe Systems AB
SYSTEM DESCRIPTION
1
4
2
3
NO
PART
1
Loop (Rope guide)
2
Knife
3
Rope cover
4
Rope grab with heat protection shield
General
Control panel
This ascender has been designed for
lifting/lowering a person or load in a static
rope system (including backup rope), with
ropes of 10-13mm approved by EN1891.
The dead rope shall be unloaded.
All buttons are equipped with LEDs that
indicate the travel mode that is active.
The karabiner in the primary connection
can be replaced by any other karabiner
approved by EN362. The sling in the chassis
cannot be replaced, by anything other than
an original spare part from ActSafe Systems
AB.
User’s Manual ACC II Ascender
1
2
NO
PART
1
Battery indicator
2
Power button
3
Ascend button
4
Descend button
3
4
13
SYSTEM DESCRIPTION
Battery
ActSafe ACC uses high power lithium ion
batteries. The batteries are equipped with
monitoring electronics that ensure safe
operation and charging. These batteries
can be charged at any time, no so called
memory effect will reduce the battery
capacity.
ReComMendation
ActSafe recommends having at least one extra
battery when working in order to avoid undesired breaks as a result of a flat battery.
Use in low temperatures
The capacity of the battery depends on the
battery temperature. Extreme temperatures
will affect the capacity, most noticeably in
cold temperatures.
When the battery is cold it can behave as
if the charge level is low. This may cause the
battery indicator to show the wrong level.
The indicator will return to normal after
next recharge.
ReComMendation
When used in cold environments maintain the
battery temperature by keeping the battery in
the transportation box as long as possible. This
will prolong the time before performance is
limited.
When using the ascender with a cold battery,
be aware that the initial lift speed capacity
will be limited. It is only possible to ascend at
lower speeds before the battery warms up and
normal performance can be expected.
Connecting the battery
to the ascender
1. Align the slit of the battery connector
with the tap of the male connector
placed inside the bag of the ascnder.
2. Make sure the connecting pins are in
the correct position.
1
14
2
3. Rotate the ring of the connector all way
to the stop position in order to look the
connector in its place. There might be a
small spark when connecting the battery. This is normal.
3
© Copyright ActSafe Systems AB
SYSTEM DESCRIPTION
Use in high temperatures
The capacity is less affected by high
battery temperature. The lifted height will
be slightly decreased. The ascender is well
designed to do its work in the full temperature range. The risk of over heating is very
small.
Battery indicator
The battery indicator has 4 LEDs each representing 25% charge.
When connecting a fully charged battery
to the ACC all LEDs of the indicator will be
activated, i.e. indicating a full battery.
The battery indicator only functions correctly if a fully charged battery is connected. If a battery with less than full charge is
connected the indicator will show the last
known value, i.e. the indicator will show an
incorrect value.
LEDs
BATTERY CAPACITY
1 red 3 green
75-100%
1 red 2 green
50-75%
1 red 1 green
25-50%
1 red
0-25%
Cold temperatures (a cold battery) will
affect the battery indicator and it might
show a charge level lower than the actual
of the battery.
User’s Manual ACC II Ascender
15
SYSTEM DESCRIPTION
Remote control
The remote is primary a rescue tool, allowing another person to move the operator
up or down in case of an emergency. However, the possibilities when using the remote
in other applications are numerous. Such
application shall be trained in a safe environment, and as always a back-up system
shall be used.
The remote control allows the ascender
to be operated from a distance. The remote
control will override the control buttons on
the ascender, i.e. when the remote is switched on it will not be possible to operate
the ascender by its own controls. If the remote is not used it will automatically switch
off after 10 seconds. The ascender will need
to be switched on for the remote to function. When shutdown the ascender will be
in standby mode for 4 hours allowing the
remote to start it.
5
6
1
3
4
2
NO
PART
1
Ascend speed button
2
Activate button
3
Descend speed button
4
Slow speed LED (red)
5
Fast speed LED (red)
6
Power LED (green)
Several remote controls can be used with
one ascender, of which only one can be
active at each time. Contact ActSafe or your
distributor for more information. When
used with several remote controls the first
one to contact the ascender will be active.
To change remote, wait until the first remote automatically turns off.
The remote allows ascending and descending at 2 different speed alternatives; slow
and fast. (25% and 75% of maximum speed
respectively)
When the ascender is powered off it can
be reactivated from the remote control for
4 hours.
The remote control is not watertight.
The protection class is IP65 (i.e. no ingress
of dust and water projected by a nozzle
against enclosure from any direction shall
have harmful effect).
16
The remote control holder is equipped
with a full strength sling allowing it to be
used to connect person or load. This sling
is a part of the ascender system and cannot
be used as a separate sling in other applications.
ReComMendation
When ascending remote controlled with
the ascender in the anchor, attach the remote
holder to the harness and connect to the upper
part of the remote holder sling to get an ergonomic operating position.
The remote shall have visual contact with the
ascender to ensure maximal range.
© Copyright ActSafe Systems AB
SYSTEM DESCRIPTION
Emergency descent
A brake is always engaged when power
is switched off or when the speed control
handle is at rest.
The emergency descent handle shall be
used like any other descent device.
The speed and descent distance shall be
adjusted according to the circumstances.
Use the emergency in normal speed.
CAUTION
Emergency descending results in uncontrolled
charging of the battery which may damage the
battery. The risk is increased with a fully charged
battery.
User’s Manual ACC II Ascender
17
SYSTEM DESCRIPTION
Charger
When the battery is at room temperature
the charging time is approximately 3,5
hours.
The charger is not capable of measuring
the charging level; hence it cannot determine when the battery is fully charged. For
this reason the charger is timer controlled.
The charging consists of two cycles as
described below:
1. Constant current charging. During this
cycle the LED (on charger) is RED. This
phase takes approximately 1 hour and
15 minutes. When the cycle is finished
the battery is charged to 80 %.
The timer of the second cycle is set to
4 hours, i.e. the total time for the two cycles
are 5 hours and 15 minutes. Consequently
the battery is fully charged before the LED
on the charger shows a green light.
Note that if the mains supply is interrupted the charger will begin a new cycle.
If the interruption occurred during the
second cycle the charger will return to the
second cycle but the timer will be reset and
starts for 4 new hours.
2. Constant voltage charging. Durin g this
phase the LED (on charger) is YELLOW.
This cycle is timer controlled in order to
make sure that the battery is fully charged after the cycle is completed.
3. Charging cycle complete. The LED is
GREEN.
DANGER
If the mains supply is interrupted several times
during the second cycle (and the 4 hr timer
reset) there is a risk of over charging, i.e. a risk
of damaging the battery.
Over load and heat monitoring and protection
The ascender is well designed for strenuous
work with loads up to 200 kg. The risk of
over heating is slim.
The load is monitored electronically and
if the load exceeds 250 kg, the motor is
switched off.
18
The internal temperature of the ascender is
monitored continuously and performance
(lift speed) is limited if there is a risk of over
heating.
Overheating is however very unlikely to
happen.
© Copyright ActSafe Systems AB
USAGE
USAGE
Checklist before and after use
The user must make sure that the ascender
is in full working order and the correct preparations have been made before each use
of the ascender. If in doubt do not use the
ascender and consult ActSafe or an approved distributor.
Check the ascender and its components
for loose parts, excessive wear and damages. Damage includes cracks, marks and/or
abnormal wear indicating the product has
been subject to excessive force or impact
energy.
Further inspect
• The primary connection; the sling
and the karabiner.
• The chassis, especially the area for
the primary connection.
• That the ascender functions
and controls are fully functional.
• The battery charge level is sufficient
for the assignment.
• Annual inspection performed
according to ActSafe’s recommendations
as well as national regulations.
Inspect the rope grab system in particular;
• The battery charge level is enough
for the assignment.
• The rope grab, for example the ridges,
should be intact.
• All other parts.
• The rope cover.
If in doubt about the condition of the
ascender consult either ActSafe Systems AB
or an approved distributor.
• The rope guide.
• The knife.
Pay attention to the following points
when assessing the work situation
• Rescue plan and rescue equipment
available.
• Risk analysis performed.
Worn out!
• Backup rope system installed and the fall
protection device (EN 353-2) attached to
the front or rear connection point
(EN 361) of the full body harness.
DANGER
A broken loop will result in the rope to leave
the rope grab with a free fall as the result.
Warning! The picture shows a loop that is worn
to a dimension far from what is acceptable/safe.
User’s Manual ACC II Ascender
19
USAGE
Connect to rope
Check that the live rope exits to the left and
that the rope cover is fully closed.
Attaching the rope incorrectly can result
in serious injury or death.
Always use the ascender with a backup
rope system.
DANGER
Make sure that the rope is attached
correctly before use.
ReComMendation
Use the motor to facilitate when placing the
rope around the rope grab.
Drive the ascender to waist level to simplify
connection to harness.
20
1. Place the ascender on the ground
2. Open the rope cover.
3. Form a loop on the rope and
push it through the rope guide
just above the rope grab.
4. Put the rope around the rope grab
5. Close the rope cover.
6. Connect the primary connection
karabiner to the EN 813:2008
connection point of the full body
harness and check the karabiner
is locked.
© Copyright ActSafe Systems AB
USAGE
Ascent & descent
1. Switch the ascender on.
2. Choose travel direction up/down.
3. Turn the speed control towards you to
increase the speed.
4. Feed away the dead rope gently
during the first few meters of ascent.
After approx 5 meters the weight of
the rope will be sufficient to “clean”
itself from the ascender.
5. Stop the motion by turning the handle
away from you or letting it go.
Always make sure that the rope feeds
smoothly. During ascent make sure the
outgoing rope is not blocked in any way.
During descent make sure no twists pass
the rope guide.
CAUTION
Do not hold the rope just above the winch,
there is a risk of being pinched.
RECOMMENDATION
Stand straight beneath the anchor point in
order to avoid a pendulum movement when
starting off the ground.
Adjust the speed according to the circumstances, be aware and use common sense.
If balance is needed, hold on to the primary
connection sling or karabiner.
1
2
Twisted ropes, rotation
Badly twisted ropes, e.g. as a result of the
operator rotating/spinning during ascent/
descent may be dangerous and should be
avoided.
A badly twisted rope may cause a rope
jam that makes the ascender non operable.
In the worst-case scenario the rope can
be forced off the rope grab, with serious
injury or death as a result (if a back-up rope
system is not used).
DANGER
When descending, make sure the rope is goes
cleanly in to the rope grab, i.e. that there are
no curls or similar on the rope.
User’s Manual ACC II Ascender
4
3
21
USAGE
Remote control usage
The power for the ascender must be
turned on (if not recently used).
1. Press any button on the remote to
activate it. (The green LED will flash
3 times before going steady if connection with ascender is successful)
2. Press the down/up button once for
slow speed, twice for fast speed.
3. Press the “Activate” button to
ascend/descend at selected
speed and direction.
RECOMMENDATION
Be careful operating the remote if you don’t
have visual contact with the ascender.
Always use the remote in combination with a
stop knot at each end of the rope.
The remote shall have visual contact with the
ascender to ensure maximal range.
2
3
1
Emergency stop
1. Press the emergency stop to
immediately turn the ascender off.
2. Reactivate the emergency stop
by twisting it clockwise.
22
© Copyright ActSafe Systems AB
USAGE
Emergency descent
Whenever the ascender is not running the
mechanical brake is activated. This brake
can be controlled manually to allow an
emergency descent. The function should
be treated as a normal descending device.
DANGER
Emergency descending results in uncontrolled
charging of the battery which may damage
the battery. The risk is increased with a fully
charged battery.
In most cases the emergency descent
is not needed as the ascender can be
restarted to allow normal descent with
the motor.
CAUTION
Do not use the emergency descender over
very long distances.
1. Switch the power off.
RECOMMENDATION
2. Place a hand on the dead rope.
3. Descend by gently pressing
the handle. to the side.
In most cases the emergency descent is not
needed as the ascender can be restarted to
allow normal descent with the motor.
4. Stop the descent by letting go
of the descend handle.
Adjust the speed according to the circumstances, be aware and use common sense.
1
3
2
User’s Manual ACC II Ascender
23
USAGE
Charging
NOTE! The ACC Mark II ascender does not
have an internal battery like its precursor
ACC I. All batteries are connected directly
to the charger.
When it after 1 hour and 15 minutes switches to yellow the battery has received
80 % charge. If necessary the battery can
be disconnected and used at this point.
Charging can be done no matter whether
the battery only is used a little or if it is
completely empty. No so called “memory”
effect will occur.
3. When the LED is showing green the
charging cycle is complete. This occurs
after around 5 hours.
1. Connect the charger to the battery.
2. Connect the charger to the main supply.
The LED on the charger will turn RED.
4. Disconnect the charger from the mains
supply.
5. Disconnect the battery from the charger.
NOTE! The battery indicator only functions
correctly if a fully charged battery is connected. If a battery with less than full
charge is connected the indicator will show
the last known value, i.e. the indicator will
show an incorrect value.
ReComMendation
CAUTION
The total charging cycle is all together around
5 hours. The battery is however fully charged
already after 3,5 hours. The battery may therefore be disconnected after 3,5 hours, there is no
need to wait until the LED shows GREEN.
Failure to disconnect the charger from the
battery when the charger is disconnected
from the mains supply will slowly drain the
battery to a level where charging is no more
possible.
24
© Copyright ActSafe Systems AB
USAGE
Transportation
Storage
For short transports, carry the ascender by
the lifting handle.
Always clean and dry the ascender and the
transportation box before putting it away
for storage.
During normal transport the transportation box is optimal as it protects the ascender from damage.
Always make sure the Ascender is secured
before being transported in a vehicle.
ReComMendation
Use the transportation box to extend the service life of the ascender.
User’s Manual ACC II Ascender
Store the ascender and the remote in a
cool, dark and dry place. It can be stored in
the transportation box, make sure it is dry.
ReComMendation
Make it a routine to charge the battery before
putting it into storage so that you always have
a fully charged battery when the ascender is
taken into use.
25
SERVICE & MAINTENANCE
SERVICE & MAINTENANCE
Use only original spare parts / material
recommended by ActSafe Systems AB.
Clean the unit regularly. Check the
charging pins and karabiners for oxidation.
Clean and lubricate if needed.
Clean the ascender
NOTE! Do not use running water, never use
a high-pressure washer!
• Wipe the ascender with a wet cloth
and let it dry.
• Clean the karabiner thoroughly,
lubricate with thin oil.
Clean the battery connector pins
1. Remove the plug.
2. Spray the pins with a multi purpose
lubricant such as “CRC 5-56” or similar.
26
RECOMMENDATION
Go through “Checklist before and after usage”
at every maintenance to increase the safety for
the user (/users) of the ascender.
© Copyright ActSafe Systems AB
SERVICE & MAINTENANCE
Changing the rope grab system
DANGER
The below service must only be performed by
ActSafe or an authorized ActSafe distributor.
1. Unscrew the rope guide (2 nuts).
2. Pull out the rope guide, lift up the knife
with spacer washers.
3. Unscrew the rope grab, take off the heat
shield (1 screw).
4. Pull out the rope grab with shims and
the rope cover.
Replace any damaged parts.
5. If parts are not replaced, clean them
before reassembling.
6. Put the rope cover, rope grab and heat
protection shield on the axle, with the
bolt tightened to 10 Nm and LocTite
243. Remount the original shims.
7. Put the knife, spacing washers and knife
in place. Attach the rope cover to the
rope guide. Tighten the nuts to 10 Nm.
Make sure the Nordlock washers are
assembled correctly.
8. Check that the knife is centred
in the rope grab.
User’s Manual ACC II Ascender
27
SERVICE & MAINTENANCE
Changing the primary connection sling
If unsure of any of these steps, contact
ActSafe Systems AB or local distributor.
1. Use pliers to force the captive bar out.
2. Remove the karabiner and the sling.
3. Push the new sling through the chassis
holes. Use thin, long pliers to do this.
4. Connect the new karabiner and lock it
with a captive bar.
Remote control, changing the battery
1. Remove the battery cap (2 screws).
2. Replace the batteries.
3. Reattach the battery cap (2 screws).
Equipment list
Hex key 5mm – straight end
Wrench 10 mm
Phillips Screwdriver
Thin, long pliers
Torx T25 screwdriver
Pliers and hammer
Material
Spare parts
The most common parts are listed here,
contact ActSafe Systems AB or your local
distributor if you don’t find your part here.
Rope grab 49-150-201
Cover50-160-103
Knife 28
50-150-105
Thin Oil
Loop49-160-309
CRC 5-56
Sling50-160-135
Loctite 243
Karabiner50-105-052
© Copyright ActSafe Systems AB
TROUBLE SHOOTNG GUIDE
TROUBLE SHOOTING GUIDE
If this guide does not solve your problems,
contact ActSafe Systems AB or by ActSafe
approved distributor.
No power when main switch is pressed
PROBABLE CAUSE
REMEDY
The emergency stop is activated.
Disengage the emergency stop.
The battery is flat.
Recharge the battery.
No response to speed handle
PROBABLE CAUSE
REMEDY
The ascender is not switched on.
Switch the power on.
The remote control is switched on.
Restart the ascender or wait for the remote to turn off.
The battery is flat.
Recharge the battery.
The ascender stops on ascent/descent
PROBABLE CAUSE
REMEDY
The ascender is overloaded.
Ensure the load is not exceeding lifting capacity and restart
by return the handle to zero.
The rope is jammed.
Clear the jam.
The battery is flat.
Recharge the battery.
User’s Manual ACC II Ascender
29
TROUBLE SHOOTNG GUIDE
The ascender switches off when newly recharged
PROBABLE CAUSE
REMEDY
The battery is cold.
Let the battery heat up (can be done by running
at low speed with load).
The charger is broken/damaged.
Repair/Replace the charger, contact ActSafe
or an approved distributor.
The battery is flat.
The ascender is in need of repair and service,
contact ActSafe or an approved distributor.
Ascender operates at very low speed
PROBABLE CAUSE
REMEDY
The battery is running low.
Recharge the battery.
The ascender is over loaded.
Lighten the load.
The grab on the rope is poor, the rope slips
PROBABLE CAUSE
REMEDY
Rope connected incorrectly.
Reconnect the rope.
The rope is not suitable
for the ascender.
Change the rope.
The rope grab is worn.
The ascender is in need of repair and service,
contact ActSafe or an approved distributor.
The lifting capacity is notably weak
30
PROBABLE CAUSE
REMEDY
The battery is cold.
Let the battery heat up (can be done by running
at low speed with load)
The rope diameter is too big.
Change to recommended rope.
© Copyright ActSafe Systems AB
TROUBLE SHOOTNG GUIDE
The remote control cannot operate the winch when LED is green
PROBABLE CAUSE
REMEDY
The distance to the winch is too far.
Move closer to the ascender or replace the battery of the remote.
There are objects disturbing
the signal.
Move closer to the ascender to get a stronger signal.
The ascender is not powered up.
Turn the ascender on.
The ascender is broken/damaged.
Check the trouble shoot guide regarding the ascender.
Wrong remote control is used.
Change to correct remote control.
The LED on the remote flashes red
PROBABLE CAUSE
REMEDY
The battery is running low.
Replace the batteries of the remote control.
The remote is corrupt.
Consult ActSafe or an approved distributor.
The charging process does not start, the LED on the ascender
does not start to flash
PROBABLE CAUSE
REMEDY
Charger not connected
to main supply.
Connect charger to main supply, then switch it on.
Emergency stop activated.
Disengage the emergency stop.
The ascender is very hot and there is no response to the speed handle
or it operates at very slow speed
PROBABLE CAUSE
REMEDY
The ascender is over heated.
Wait for the ascender to cool down.
User’s Manual ACC II Ascender
31
WARRANTY & GUARANTEE
WARRANTY & GUARANTEE
ActSafe is responsible for the proper function of the product during the warranty
period. If a defect is detected while under
warranty, the product will be repaired by
ActSafe or an authorized Service Dealer.
The validity of the warranty must be proved by a copy of the invoice and the serial
no. of the product.
The warranty period is 12 months after the
date of purchase, unless otherwise agreed,
and must be proved by the documentation
mentioned above.
Repairs will be carried out by ActSafe or
an authorized service dealer. Please contact
ActSafe for your nearest service dealer.
Limitation of liability
The cost of transportation of the product to
and from the Authorized Service dealer is
the responsibility of the Customer.
ActSafe cannot be held liable for:
• Periodic inspection, maintenance and
repair or replacement of parts as a result
of normal use.
• Consumption of consumable materials.
• Modifications made without ActSafes
authorization.
• Defects due to modifications that have
been made without the consent of
ActSafe.
• Costs due to the necessity of adapting or
modifying the product as a result of new
national or international standards.
32
Repair under warranty will not be made
if damage has arisen due to:
• Improper use or abusive handling
of the product.
• Insufficient maintenance.
• The use of spares and other parts that
are not compatible with the product.
• Repairs and modifications done by
personnel not authorized by ActSafe.
• Insufficient packing of the product
when sending it to ActSafe or an
authorized service dealer.
• Accident, natural catastrophe or
circumstances beyond the control
of ActSafe.
© Copyright ActSafe Systems AB
TECHNICAL DATA
TECHNICAL DATA
NOTE The performance is tested with an
unused 11 mm, unwatered rope at room
temperature.
Speed, load, characteristics of ascent/
descent will affect the battery capacity; in
many cases the capacity may well exceed
the XX meters on one charge.
PERFORMANCE/PART
VALUE
Rope
Static / Semi Static rope
10-13 mm EN1891
Max working load
250 kg
Safe Working Load (SWL)
200 kg
Overload limit
250 kg (approx)
Ascent speed
0-22 m/min
Continuous adjustment.
Descent speed
0-25 m/min
Continuous adjustment.
Emergency descent speed
0-25 m/min
Continuous adjustment.
Battery capacity
200 m with 120 kg load
At 20°C
Charging time
3,5 h
Internal temperature range
-20 °C to + 50°C
Over heating protection
Yes
Weight
15 kg
Dimentions
38 x 25 x 30 cm
Remote control range
Up to 100 meters
User’s Manual ACC II Ascender
COMMENT
Excluding battery.
The remote shall have visual contact with the
ascender to ensure maximal range.
33
APPENDIX
APPENDIX
Declaration of conformity and EC Type test Certificate.
Declaration of EC conformity
In accordance with Machinery Directive 2006/42/EC, appendix II A
ActSafe Systems AB
Sagbäcksvägen 13
SE43731 Lindome, Sweden
We hereby declare that the power ascender type ActSafe ACC (Mark II) for the lifting and lowering of loads and
persons meets the fundamental requirements of the below stated EC directives:
EC Machinery Directive 2006/42//EC
Low Voltage Directive 2006/95/EC
Including the associated amendments.
Applied harmonized standards, in particular
DIN EN 14492-1
Cranes - Power driven winches and hoists
Part 1: Power driven winches (02.2007)
Applied national directives, in particular
BGR 159
Hochziehbare Personenaufnahmemittel
(hoistable access equipment)
The design was inspected by
Fachausschuss Maschinenbau, Hebezeuge, Hütten- und Walzwerksanlagen
Prüf- und Zertifizierungsstelle im BG-PRÜFZERT
BG-Bescheinigung Nr. 08 006
(Committee of experts - mechanical engineering,
lifting gear, smelting works and rolling mills
Testing and certification body in BG-PRÜFZERT
BG-certification No. 08 006)
Lindome 2009-12-29
ActSafe Systems AB
Magnus Glans
Managing Director
ActSafe Systems AB
Sagbäcksvägen 13
SE43731 Lindome
SWEDEN
34
Phone: +46 (0) 31 655 660
Fax: +46 (0) 31 655 669
[email protected]
www.actsafe.se
VAT:SE556035133901
© Copyright ActSafe Systems AB
SERVICE CARD
ActSafe Serial No:
year of manufacture
Date of purchase
Date first put into service
Name of owner
Date of service
DATE
INSPECTOR
OK
Signature
User’s Manual ACC II Ascender
35
© Copyright ActSafe Systems AB
Distributor:
1
ActSafe Systems AB
Sagbäcksvägen 13 | SE-437 31 Lindome | Sweden
Phone +46 31 65 56 60 | Fax +46 31 65 56 69
info@ actsafe.se | www.actsafe.se
www.actsafe.se
© Copyright ActSafe Systems AB