1
Vision
Installation & Configuration Manual
Version 1.5
September 2013
Vision Installation and Configuration Manual
Document No. 009
Version No. V1.5/0913/9
© Copyright SpliceCom Ltd
SpliceCom Ltd
The Hall Business Centre, Berry Lane
Chorleywood, Herts WD3 5EX
Tel: 01923 287700
Website: www.splicecom.com
Vision Installation & Configuration Manual
Contents
Introduction ......................................................................................................................................................... 1
Installation ........................................................................................................................................................... 2
Specifications .................................................................................................................................................. 2
Call Server set up ............................................................................................................................................ 2
Linux PC set up ................................................................................................................................................ 3
Apple Mac Set up ............................................................................................................................................ 6
Licensing ....................................................................................................................................................... 10
Installing Vision ............................................................................................................................................. 11
Vision Admin Portal ........................................................................................................................................... 19
Database ....................................................................................................................................................... 19
LDAP & Call Server ......................................................................................................................................... 19
Call Logging and Recording ......................................................................................................................... 20
Report Settings .............................................................................................................................................. 21
Configure Recording .................................................................................................................................... 21
Wallboard Images ......................................................................................................................................... 22
Call Pricing ..................................................................................................................................................... 22
Administrator................................................................................................................................................. 27
Utilities ........................................................................................................................................................... 28
Call Recording ................................................................................................................................................... 29
Licensing ....................................................................................................................................................... 29
Recording Incoming Calls ............................................................................................................................. 29
Recording Outgoing Calls ............................................................................................................................ 33
Archive Recordings ....................................................................................................................................... 34
Vision Portal ....................................................................................................................................................... 36
Configure Managers ..................................................................................................................................... 37
Configure Mobility ........................................................................................................................................ 41
Call Logs............................................................................................................................................................. 43
Accessing the Call Logs ................................................................................................................................ 43
Using the Call Logs ....................................................................................................................................... 43
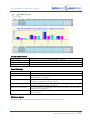
Calls In Today ................................................................................................................................................ 44
Calls Out Today ............................................................................................................................................. 46
Search Calls ................................................................................................................................................... 47
Call Status ...................................................................................................................................................... 49
Accessing Call Recordings ............................................................................................................................ 49
Reports............................................................................................................................................................... 52
Accessing the Reports .................................................................................................................................. 53
Reporting Groups.......................................................................................................................................... 53
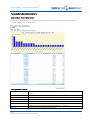
Peak Trunk Group Usage .............................................................................................................................. 55
Peak Trunk Usage ......................................................................................................................................... 57
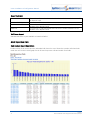
Peak Voicemail Port Usage ........................................................................................................................... 59
Peak IntraModule Trunk Usage .................................................................................................................... 61
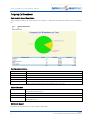
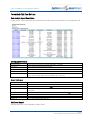
Outgoing Call Breakdown ............................................................................................................................ 64
Top Outgoing Call Users by Cost ................................................................................................................. 65
Itemised Cost Report .................................................................................................................................... 67
Total Cost By Account Code ......................................................................................................................... 68
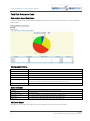
Frequently Called Destinations .................................................................................................................... 69
Most Expensive Calls..................................................................................................................................... 70
Forwarded Calls Cost By User ....................................................................................................................... 72
Cost Report Filtered By Cost Centre ............................................................................................................. 73
Contents
Vision Installation and Configuration Manual V1.5/0913/9
i
Vision Installation & Configuration Manual
Transferred Calls By Cost .............................................................................................................................. 74
Trunk To Trunk Calls ...................................................................................................................................... 75
First and Last Calls ......................................................................................................................................... 75
Abandoned Calls Overview .......................................................................................................................... 76
Abandoned Calls Detail ................................................................................................................................ 78
Incoming Call Response ............................................................................................................................... 80
Incoming Call Response Consise ................................................................................................................. 82
Incoming Call Breakdown by Hour .............................................................................................................. 84
Incoming Call Breakdown by Department .................................................................................................. 86
Incoming Call Breakdown by Day ................................................................................................................ 88
Incoming Call Breakdown by Week ............................................................................................................. 90
Incoming Call Breakdown by Month ........................................................................................................... 92
Incoming Calls Breakdown by DDI .............................................................................................................. 93
Incoming Calls Breakdown by User ............................................................................................................. 95
Overview by Talk Time .................................................................................................................................. 96
Overview by User.......................................................................................................................................... 98
Calls Abandoned In Auto Attendant .......................................................................................................... 102
Contact Report ............................................................................................................................................ 103
Standard Drill Down Report ........................................................................................................................ 104
Scheduled Reports ...................................................................................................................................... 106
My Reports .................................................................................................................................................. 107
Quick Reports.............................................................................................................................................. 108
Call Alarms ................................................................................................................................................... 109
Live Wallboards ............................................................................................................................................... 113
Licensing ..................................................................................................................................................... 113
Creating a Wallboard .................................................................................................................................. 113
Wallboard Ownership ................................................................................................................................. 114
Design a Wallboard ..................................................................................................................................... 114
Statistic Panel .............................................................................................................................................. 116
Status Panel ................................................................................................................................................. 119
Report Panel ................................................................................................................................................ 122
Web Panel ................................................................................................................................................... 123
Edit a Panel .................................................................................................................................................. 124
Delete a Panel ............................................................................................................................................. 124
Change a Wallboard name ......................................................................................................................... 125
Delete a Wallboard ..................................................................................................................................... 125
Viewing a Wallboard ................................................................................................................................... 125
Maintenance ................................................................................................................................................... 127
Utilities ......................................................................................................................................................... 127
Upgrading Vision ........................................................................................................................................ 129
Uninstalling Vision ...................................................................................................................................... 130
Schedule a backup of the SQL database ................................................................................................... 134
Generating demonstration call logs .......................................................................................................... 135
Index ................................................................................................................................................................ 136
ii
Contents
Vision Installation and Configuration Manual V1.5/0913/9
Vision Installation & Configuration Manual
Introduction
SpliceCom Vision is a web based application suite developed from the ground up by SpliceCom to work
with maximiser – and to only work with maximiser. Utilising the latest AJAX and Web 2.0 technologies,
Vision has been designed to deliver business critical information, in an easy to understand manner,
wherever and whenever it’s needed. Vision offers four services; Reports (historical), Recording (capture) ,
Live (real-time) & Mobility (freedom).
Introduction
Vision Installation and Configuration Manual V1.5/0913/9
1
Vision Installation & Configuration Manual
Installation
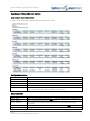
Specifications
Vision can be installed on the following systems:
Linux
The minimum specifications for a Linux PC, taken from a HP Proliant MicroServer, is:
OpenSuse 12.1 or above Gnome or KDE
Processor:
AMD Turion™ II Neo N40L (1.5GHz)
AMD RS785E/SB820M chipset
Memory:
Two (2) DIMM slots
2GB (1x2GB) Standard
Apple Mac
The minimum specifications for an Apple Mac PC is:
Intel Mac
2.0 Ghz Intel Core Duo
1 GB RAM
120 GB hard drive
MAC OS X 10.5 or above
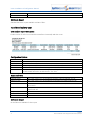
If you wish to run Vision on a Mac OS X Server please refer to the Vision (OS X) Installation and
Configuration Notes available on the SpliceCom website. Please note: that Vision is not supported on
Lion Server or Mountain Lion Server.
The storage required on both systems will be dependent on how many calls will be recorded.
Maximiser
Each call server being used with Vision v1.4 will require software version 3.2.1568 or higher. However,
this may change with subsequent versions of software, therefore, please refer to the forums for the
version required for the version of Vision you are installing.
Call Server set up
Voicemail Ports
Each Voicemail Port on the maximiser system must be configured with the relevant Call Server to ensure
accurate data is displayed in the Voicemail Port Usage report. Where voicemail is being hosted by an
external PC the H323 address field must also contain the IP address of this PC. In most configurations
these fields will already have an entry but this will need to be checked.
1
2
3
2
Using Manager open the Voicemail Port
In the Call Server field enter the relevant Call Server
If voicemail is being hosted by an external PC in the H323 Address field enter the IP address of
this PC.
Installation
Vision Installation and Configuration Manual V1.5/0913/9
Vision Installation & Configuration Manual
Where a multi-Call Server site is using the default BuiltIn Voicemail Port only, additional BuiltIn Voicemail
Ports must be created for each Call Server. Again this is to ensure accurate data in the Voicemail Port
Usage report. Create a new Voicemail Port called BuiltIn (this is case sensitive) for each Call Server and in
the Call Server field enter the relevant Call Server.
Linux PC set up
The following facilities need to be set up on the Linux PC before the Vision can be installed.
Log In
The Linux PC must have a user account called “splicecom” (all lower case) with a secure password of your
choice. This can be done either during the installation of Linux or via User & Group Management (KDE
version), which can be found by opening YaST, and selecting Security and Users.
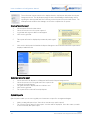
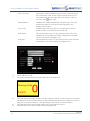
Disable automatic log in
It is recommended that you disable the Auto Login facility so that you have
to log on to the Linux PC after a reboot which makes the Vision server more
secure. However this is not essential to the operation of Vision.
This option can be found by selecting Expert Options then Login Settings
within User and Group Management (KDE version).
Installation
Vision Installation and Configuration Manual V1.5/0913/9
3
Vision Installation & Configuration Manual
Please note that it is not necessary for a user account to be logged in on
the Linux pc in order for the Vision server to be operational.
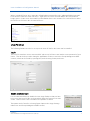
Connection to the maximiser system
It is recommended that the Linux PC is connected to the maximiser system via a cable and not via
wireless. It is also recommended that the Linux PC is using a static IP address, similar to this example in
the KDE version of Linux.
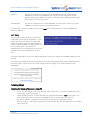
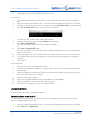
You can check the network configuration settings of the PC by entering /sbin/ifconfig in a Terminal
session.
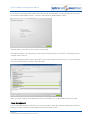
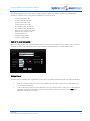
It is also necessary to turn off the firewall on the Linux PC. On a Linux PC running the KDE version this
can be disabled by opening YaST, selecting Security and Users and then Firewall. Select Yes when asked
if you wish to “Stop the firewall after the new configuration is written?”
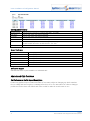
Remote Management
In order to manage the Vision server remotely VNC should be enabled on the Linux PC.
4
Installation
Vision Installation and Configuration Manual V1.5/0913/9
Vision Installation & Configuration Manual
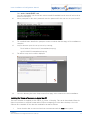
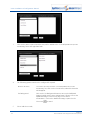
On a Linux PC running the KDE version this can found by opening YaST, selecting Network Services and
then Remote Administration (VNC). Select the Allow Remote Administration option.
This will enable you to VNC to the Linux PC on port 5901.
You may also wish to use ssh to log on to the Linux PC using a client such as PuTTY. This facility must be
enabled on the Linux PC.
If you are running the KDE version, open YaST, select System and then System Services. Select sshd and
select the Enable button to start the sshd daemons.
When you have finished check that the list of services displays “Yes” in the Enabled column for sshd.
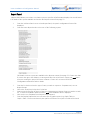
Power Management
It is recommended that the Linux PC is not set to hibernate or shut down after a certain amount of time
otherwise it will be unable to collect data or provide the Vision services.
Installation
Vision Installation and Configuration Manual V1.5/0913/9
5
Vision Installation & Configuration Manual
On a Linux PC running the KDE version, from the Kickoff Application Launcher, select the Applications tab,
then System Settings. Select Power Management and within the relevant Power Profile ensure that the
Suspend Session option is not set to Hibernate or Shut Down.
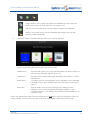
Apple Mac Set up
The following facilities need to be set up on the Mac before the Vision software can be installed.
Connection to the maximiser system
It is recommended that the Mac is connected to the maximiser system via a cable and not via wireless.
Therefore on the Mac you will need to turn off the Airport facility (this is the wireless card in the Mac)
which, by default, is active.
1
6
Open System Preferences
(either via the Dock or via the Apple menu)
Installation
Vision Installation and Configuration Manual V1.5/0913/9
Vision Installation & Configuration Manual
2
3
From the System Preferences window select the Network icon.
Ensure that Airport has been turned off as per the example below.
(If not, select Airport and click on Turn AirPort Off)
You will then need to configure the TCP/IP settings for the Mac.
4
5
Click on Ethernet
Ensure that the IP Address settings are as per the network you are going to be connecting to. It
is recommended that the Mac running Vision is using a static IP address.
6
Click on the Show All button at the top of the Network window to go back to the System
Preferences window.
Remote Management
In order to manage the Vision server remotely the following setting should be configured.
Installation
Vision Installation and Configuration Manual V1.5/0913/9
7
Vision Installation & Configuration Manual
8
1
2
From the System Preferences window click on the Sharing icon.
Ensure that File Sharing, Remote Login and Remote Management are all enabled as per the
diagram below.
3
4
5
6
Select Remote Management
Click on the Computer Settings button
Enable “VNC viewers may control screen with password”
Enter a password for VNC Viewers to use.
7
8
Select OK when ready
Click on the Options button and enable all the options
Installation
Vision Installation and Configuration Manual V1.5/0913/9
Vision Installation & Configuration Manual
9
10
Select OK when ready
Click on the Show All button at the top of the Sharing window to go back to the System
Preferences window.
Turn off Energy Saving
To ensure the Vision server is always able to collect data the stand by facility on the Mac should be
disabled.
1
2
3
From the System Preferences window, click on the Energy Save icon
Set Computer sleep: to Never
Un-tick Put the hard disk(s) to sleep when possible
Disable automatic log in
It is recommended that you disable the Automatic Login facility so that you have to log on to the Mac
after a reboot which makes the Vision server more secure. However this is not essential to the operation
of Vision. Please note that it is not necessary for a user account to be logged in on the Mac pc in order
for the Vision server to be operational.
1
2
3
From the System Preferences window click on Accounts.
Click on the Login Options button at the bottom left hand corner of the window.
From the Automatic Login list box select Disabled.
Installation
Vision Installation and Configuration Manual V1.5/0913/9
9
Vision Installation & Configuration Manual
4
Click on the Show All button at the top of the Accounts window to go back to the System
Preferences window
Licensing
Before installing Vision it is recommended that you install the Vision licences purchased on to the
maximiser system. If licences are not installed Vision will run for 30 days as an evaluation version. It will
be fully functional but cannot be accessed after the 30 days.
If during this time or after, Vision licenses are entered onto the maximiser system then the Vision Server
will become a fully licensed version.
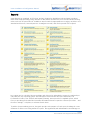
The Vision licences available are as follows:
VisionReport
This licence enables the use of the Reports facility which reports on each User of the
maximiser system. Therefore, a VisionReport licence will be needed for each User
configured on the maximiser system. The User Status utility will assist with
calculating the number of VisionReport licences required as described below.
VisionRecording
This licence enables the playback of a recording. You will require one licence for
each concurrent recording. All calls are recorded (dependent on the number of
Voicemail Port channels available) but a recording can only be listened to if a licence
was available at the time of the recording. If more licences are installed this
additional number of concurrent recordings can then be listened to.
10
Installation
Vision Installation and Configuration Manual V1.5/0913/9
Vision Installation & Configuration Manual
VisionLive
This licence enables a concurrent view of a wallboard. You can create as many
wallboards as you like but wallboards can only be viewed concurrently by the
number of licences installed. Two people viewing the same wallboard at the same
time count as 2 concurrent viewers.
VisionMobility
This licence enables the use of VisionMobility. You will require a licence for each
Mobility user and this licence is assigned to that user.
For information on how to install licences onto a maximiser system please refer to the Installation &
Reference Manual.
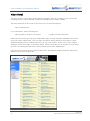
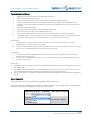
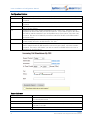
User Status
You can find out how many Users have been
configured on the system via Manager. Select
Utilities and then User Status. This page will
display the number of IPUser and IPVirtualUser
licences loaded (available) and the number of
Users created (used). The number of
VisionReport licences required will be the total
number of IPUser and IPVirtualUser licences
used.
For further information on the User Status utility please refer to the SpliceCom Installation and Reference
manual.
If you have not installed sufficient VisionReport licences the following message will be displayed within
the Vision Portal. (Please refer to the Vision Portal section from page 36 for further details on this
application.)
Installing Vision
Installing the Vision software on a Linux PC
1
2
3
Ensure you are logged on as a User account called “splicecom”. For further details please refer
to the Log In section from page 3.
Ensure that the Linux PC is connected and can communicate with the maximiser system. The
PC must also have access to the Linux installation CD or a connection to the Internet.
The Vision software is supplied as a file called, eg Vision-Linux.1.4.8.tar.gz or VisionLinux.1.4.8.tar.tar. Open this file and copy the Vision folder into the Desktop folder, for example,
on the Linux PC.
Installation
Vision Installation and Configuration Manual V1.5/0913/9
11
Vision Installation & Configuration Manual
4
5
6
Open a Terminal session (KDE version – select the Kickoff Application Launcher then Terminal)
Change to the directory where the Vision folder is stored by entering cd /directory path/folder
name, eg cd /home/splicecom/Desktop/Vision (case sensitive)
Go to step 9
Alternatively,
3
Open a Terminal session (KDE version – select the Kickoff Application Launcher then Terminal)
4
Change to the directory where the file is located by entering cd /directory path/folder name,
eg cd /home/splicecom/Desktop
5
Enter tar -xf name of file, eg tar –xf Vision-Linux.1.4.8.tar.tar.
12
6
This will unzip the file (once you have been returned to the prompt the extraction is complete)
and create a folder called Vision. (If you enter ls to list all the files in this directory you will see
the Vision folder that has been created.)
7
8
Change to this directory by entering cd Vision (case sensitive)
Go to step 9
9
Enter sudo ./install.SUSE
(use this command if you have the Linux install CD available
or
Installation
Vision Installation and Configuration Manual V1.5/0913/9
Vision Installation & Configuration Manual
10
11
12
Enter sudo ./install.SUSE –net
(use this command if you do not have a Linux install CD available but the Linux PC will need an
internet connection)
When prompted for the root’s password enter the password for the root user on your Linux PC
The install will start. Wait for the prompt to return to indicate that this stage of the installation is
complete.
Via your browser open the set up screen by entering:
The IP address of the Linux PC/visionadmin/Setup.cgi
eg 192.168.0.252/visionadmin/Setup.cgi
13
The Vision set up screen will be displayed.
14
Go to the Running the Vision Setup section from page 14 to continue the Vision installation.
Installing the Vision software on an Apple Mac PC
The Vision software is supplied as a file called, eg, Vision.1.2.8.mpkg. This can be downloaded from the
SpliceCom website in a zipped format and will require unzipping on to the Mac’s desktop. Once the
software file is available on the Mac the installation can start as follows.
1
Ensure that the Mac is connected and can communicate with the maximiser system.
Installation
Vision Installation and Configuration Manual V1.5/0913/9
13
Vision Installation & Configuration Manual
2
3
4
5
6
7
8
9
10
Double click on the software file
At the Introduction screen select Continue
At the Destination Select screen change the destination if required, otherwise select Continue.
(Please note that the Vision must be installed on the system drive.)
At the Custom Install screen select Continue
At the Standard Install screen select Install
You will be prompted for a password. This is the password of the User on the Mac that you are
currently logged in as.
The setup process will install all the files needed for Vision
Once the installation is complete the SpliceCom Vision Setup page will be displayed.
Go to the Running the Vision Setup section below to continue the Vision installation.
Running the Vision Setup
1
2
3
14
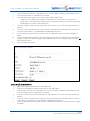
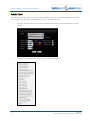
At the “Welcome to the SpliceCom Vision Setup” screen select Continue
The MySQL setup screen will be displayed. A random user name and password are provided. It
is recommended that these are not changed.
Make a note of the MySQL User and Password details. These will be required when performing
a factory default of the Vision server. (Please refer to the Factory Default section from 128 for
further details.)
Installation
Vision Installation and Configuration Manual V1.5/0913/9
Vision Installation & Configuration Manual
4
5
6
7
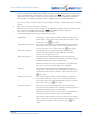
Select Set when ready.
After the database structure has been created the LDAP settings page is displayed. These
settings will allow the Vision server access to the database on the maximiser system.
In the Callserver IP Address field enter the IP address of a Call Server. If there is only one Call
Server on the system enter the IP address for this call server. On a multiple call server site it is
recommended that you enter the address of the local call server.
In the Manager Login fields enter the name and password of an administrator on the maximiser
system that has full administrator rights.
8
9
10
11
12
13
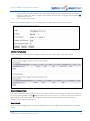
Select Next when ready
The next screen will display all the Call Servers found on the system.
Tick Call Logging Enabled if the Vision server is to collect call data
Enable call logging on the Call Servers required by selecting the IP address field
Tick Call Recording Enabled if the Vision server is to collect call recordings
Enable call recording on the Call Servers required by select the IP address field
14
15
Select Next when ready
The next screen will enable you to configure the settings for the reports facility. Firstly the
details of the email server to be used when scheduling reports can be entered if relevant. This
will also be the email account that will be used when forwarding a recording to email.
In the Email Server field enter the IP address of the email server that will be hosting this facility.
In the Email Address field enter the email account that will be receiving and sending out the
reports. This account must be a relay account it so it can send emails to any account on your
email server.
In the Email Username and Password fields enter the log in details for the email server if
authentication is required
In the Domain for Email Links field enter the domain name or IP address of the domain. This
will enable the links within the email being sent, and therefore enable the drill down links
within the report sent.
16
17
18
19
Installation
Vision Installation and Configuration Manual V1.5/0913/9
15
Vision Installation & Configuration Manual
20
21
22
In the Currency Symbol field enter the currency symbol you wish to be displayed in the Reports.
By default this is set to £.
From the Week Start Day list box select the first day of the working week. By default, this is set
to Monday.
From the Week Length For Reporting list box select the number of days to be used when
selecting This Week in a report. By default this is set to 7 days.
Please note that changing the Week Start Day and Week Length fields does not stop calls being
logged for the remaining days of the week.
23
24
25
26
16
Select Next when ready
The following screen is used to set up administrator access to Vision either locally or remotely.
This will be the only Administrator that will be able to access the Vision Admin Portal and initially
will be the only administrator with access to the Vision Portal.
In the Admin Email Address field enter the email address of the user to have administrator
access to Vision. (This address will also be automatically entered in a scheduled report as the
default email address and will be the email address that warnings will be sent to.)
In the Password and Confirm Password field enter the password that will be used by the above
administrator to access Vision.
Installation
Vision Installation and Configuration Manual V1.5/0913/9
Vision Installation & Configuration Manual
Please ensure that you have entered these details correctly and make a note of them as you
will be required to enter them in the next screen and you will not be able to go back.
27
28
29
30
31
32
Select Next when you are ready.
At the “Password Required” screen enter the administrator login details created in the previous
screen.
Select Login when ready
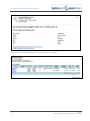
The Setup Complete screen will be displayed together with the URLs to the Vision portals.
Close your browser and reboot either the Mac (from the Apple menu select Restart) or Linux PC
(select the Kickoff Application Launcher, select the Leave tab and then select Restart)
Note in Manager that the Vision install has created a new Administrator called Vision that has
full access rights to the system database, and the Vision server is listed as within the Modules
section.
Please note that if you do not wish to reboot the Linux PC after the install and set up of Vision you can
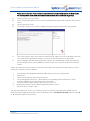
enable the required services as follows:
1
2
3
4
5
6
7
From the Kick Off Application Launcher (KDE version),select the Computer tab
Select YaST
Select System and then open System Services
Select calllogging from the list. (Note that the Yes is displayed with an asterisk (*) which
indicates that this service with start on the next reboot.)
Select the Enable button and the asterisk will be removed
Repeat steps 4 and 5 for the callrecording and visiond services
Select OK when you are ready.
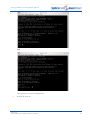
You can check that these services are running correctly by opening a Terminal session (KDE version –
select the Kickoff Application Launcher then Terminal) and enter cd /SpliceCom/logs and then enter ls
or ls –l and the log files will be listed.
Installation
Vision Installation and Configuration Manual V1.5/0913/9
17
Vision Installation & Configuration Manual
18
Installation
Vision Installation and Configuration Manual V1.5/0913/9
Vision Installation & Configuration Manual
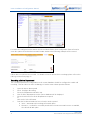
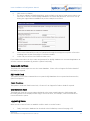
Vision Admin Portal
The Vision Admin Portal is used to view and amend the configuration set up during installation, configure
call recording, upload pictures for use with wallboards, change the Administrator password, perform a
back up of the database and, if necessary, default the database.
The Vision Admin Portal can be accessed on the Vision Server via the following link:
http://localhost/visionadmin/
or via a network PC via the following link:
http://ip address of vision server/visionadmin
eg http://192.168.0.251/visionadmin
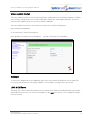
Database
As show in the diagram above the Database page of the Vision Admin Portal allows you to change the
User name and password to the MySQL database. Select Update if changes have been made.
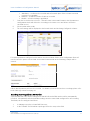
LDAP & Call Server
This page of the Vision Admin Portal allows you to change the IP address and administrator log in details
that enable the Vision server to access the database on the maximiser system. Select Update if changes
have been made.
Vision Admin Portal
Vision Installation and Configuration Manual V1.5/0913/9
19
Vision Installation & Configuration Manual
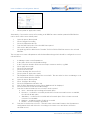
Call Logging and Recording
This section of the Vision Admin Portal allows you to amend the call logging and call recording settings
configured during the installation. Select Update if changes have been made.
Please note that if the message “The following Voicemail Ports have no location set. Is this correct?” is
displayed return to the Call Server set up section from page 2 and configure the relevant Voicemail Ports,
if required.
Call Recording Time Plans
Time Plans can also be assigned to each Call Server enabled for call recording. This means that Vision will
only grab call recordings from the Call Server during the time specified by the Time Plan. This is useful on
a multiple call server site, for example, where you do want the links between all the sites taken up with
downloading recordings. The recordings can be downloaded out of office hours.
1
20
Create your Time Plan on the maximiser system via Manager
Vision Admin Portal
Vision Installation and Configuration Manual V1.5/0913/9
Vision Installation & Configuration Manual
2
3
From the list box under the relevant Call Server select this Time Plan
Select Update when ready
.
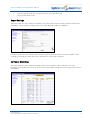
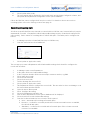
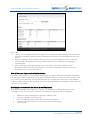
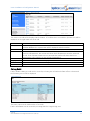
Report Settings
This page within the Vision Admin Portal allows you to amend the Report settings configured during the
installation. Select Update if changes have been made (this will update the database)
If a value is entered in the default Uplift % and/or VAT % fields these fields will become available when
creating a Cost Analysis report, and can be amended for each report if required.
Configure Recording
This page within the Vision Admin Portal will enable you to configure call recording for the Users,
Departments and DDIs on the system. Please refer to the Call Recording section from page 29 for further
information.
Vision Admin Portal
Vision Installation and Configuration Manual V1.5/0913/9
21
Vision Installation & Configuration Manual
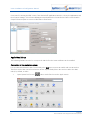
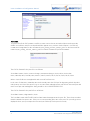
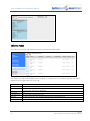
Wallboard Images
This section of the Vision Admin Portal enables you to upload images on to the Vision server that can be
used with a Status Panel within a wallboard, eg an office seating plan. Please refer to Live Wallboard
section from page 113 for details on how these images are used. The number of images that can be
uploaded is only limited by the disk space available on the Vision server. All standard graphic formats, eg
bmp, jpeg, png etc, are supported.
An image can be uploaded as follows:
1
2
3
Click the Wallboard Images link
Click on Browse or Choose File
Select the file you wish to upload
4
Click the Add button and the image will be uploaded to the Vision server and displayed on this
page.
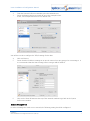
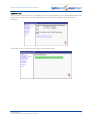
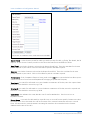
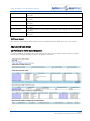
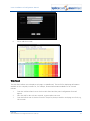
Call Pricing
Pricing Groups
We use a pricing group to group together a number of trunks that require billing to be handled in a
common manner. For example we may have a group of trunks which use a particular carrier to route their
calls.
A pricing group has a name to identify it and a Pricing Scheme assigned to it that dictates the call prices
(Pricing Schemes are the number matches and the costs associated – more details in the Pricing Scheme
section below).
In the Trunk Members section you can add trunks to the Pricing Group. Any calls made on this trunk will
now be priced according to the Pricing Scheme assigned to the group. A Pricing Group that has a Trunk
Member named Default dictates that any trunk that isn’t assigned to any other specific Pricing Group will
be treated as if it is a member of this Pricing Group.
When adding a Trunk Member you can assign an international prefix to it and a full prefix
(international+STD). This allows you to bill local/international calls in more sophisticated manner (if
required) i.e. when a call is made to a number (e.g. 287700) it is checked against the number matches
(part of the pricing scheme - more details in the Pricing Scheme section below) if there are no
corresponding number matches the international prefix is appended and the number is searched again.
So if the international prefix is 0044 we search for 0044287700. If this doesn’t match a number the full
prefix is added to the original number and we search again. eg if the full prefix on the trunk is 00441923
we search for 00441923287700 in the number match. There is no requirement to use the prefixes but it
can help make your pricing more robust.
22
Vision Admin Portal
Vision Installation and Configuration Manual V1.5/0913/9
Vision Installation & Configuration Manual
The final section in the Pricing Group is the Scheme Digit Match Override - what this allows you to do is to
price calls according to a different Pricing Scheme if they match a particular digit prefix.
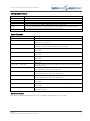
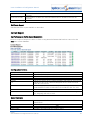
Pricing Schemes
A Pricing Scheme is a set of number matches and pricing rates used to assign prices to calls. In the Pricing
Scheme you can Import and Export Details (more information in the Importing and Exporting Pricing
Schemes section below). This is also the section where you assign the number matches for pricing
scheme. For every number match you create you assign a Pricing Rate that you have created (more
details in Pricing Rates section below). This allows you to have multiple number matches with the same
rate e.g. UK national calls starting 01 and 02 do not need a separate rate.
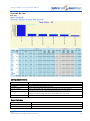
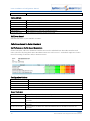
Pricing Rates
A Pricing Rate specifies how a call is charged. For a particular Pricing Rate you can specify a connect
charge, a minimum charge and up to three different rates. You can then assign the different rates to be
applied to calls made during different time bands (one hour increments) to achieve on/off peak charging.
You may also assign different rates for use on weekdays, Saturdays and Sundays.
Example
As an example we might want to create a new set of pricing rules.
1
2
3
Under Pricing Schemes add a new pricing scheme named My Pricing Scheme
Under Pricing Group add a new Pricing Group named My Pricing Group and assign the Pricing
Scheme you created in step 1.
Under Pricing Group select the My Pricing Group group you created in step 2. Add a trunk from
your configuration to this group - every call made on that trunk will now be billed according to
the rules we set up in My Pricing Scheme.
At this point we could go in to the Pricing Scheme and import a pricing scheme (see Importing and
Exporting Pricing Schemes section below). In this example we will manually create the pricing rate and
number matches.
4
5
6
Under Pricing Rates select My Pricing Scheme from the drop down list of schemes and add a
new rate named USA.
Under Pricing Rates select My Pricing Scheme from the drop down list of schemes and select
the rate named USA which you created in step 4. Assign cost details and time bands as you
wish.
Under Pricing Schemes select My Pricing Scheme. Add a prefix of 001 and assign it the Pricing
Rate of USA you created in step 4.
Now all calls starting with 001 you make on the trunk you chose in step 3 will be priced according to the
rates you set up in step 6.
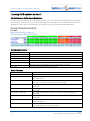
Importing and Exporting Pricing Schemes
To allow the editing of pricing to be performed using a spread sheet application Vision includes a facility
to import and export from CSV. The import/export section can be viewed by clicking on Pricing Schemes,
selecting the scheme you wish to use and then clicking on the Import/Export Pricing Details button.
Vision Admin Portal
Vision Installation and Configuration Manual V1.5/0913/9
23
Vision Installation & Configuration Manual
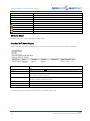
File Format
To get an idea of the file format it is useful to create a new scheme as outlined above and export the
details. You will have two files to download (links appear once you have clicked Export). One file will
contain the Pricing Rates for the call named <your_pricing_scheme_name>_price.csv and a second file
named <your_pricing_scheme_name>_prefix.csv which contains the prefix information.
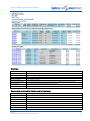
The CSV file format for the price file is as follows:
<Price Rate Name>,<N/A>,<connect charge>,<minimum charge>,<N/A>,<N/A>,<N/A>,<day
rate>,<saturday rate>,<sunday rate>,<rate1>,<rate2>,<rate3>,<N/A>,<N/A>,<N/A>,<N/A>,<N/A>
Where <N/A> fields are not applicable and reserved for future use.
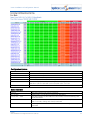
In the case of <day rate>,<saturday rate> and <sunday rate> the field is a 24 digit string which describes
which rate to use in an hour period, eg. to use rate1 from midnight to7am, rate2 from 7am until 7pm and
rate3 from 7pm until midnight the string would be:11111122222222222233333
The CSV file format for the prefix file is as follows:
<Price Rate Name>,<digit match>,<N/A>
The Price Rate Name MUST MATCH a Price Rate Name that appears in the price file. This is how a number
match is attached to a price rate. If there is no corresponding price rate in the price file you will get errors
displayed when you try to import the files and your calls may not be priced correctly.
24
Vision Admin Portal
Vision Installation and Configuration Manual V1.5/0913/9
Vision Installation & Configuration Manual
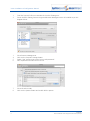
Upload the files
Once you have edited your files or obtained the files from your provider you can upload them both in the
import section. Note that you must provide BOTH a prefix file and a pricing file for an import to be
attempted.
Click import. If there are any errors you will be alerted at this stage.
Vision Admin Portal
Vision Installation and Configuration Manual V1.5/0913/9
25
Vision Installation & Configuration Manual
You can then view the data imported within the relevant pricing scheme.
26
Vision Admin Portal
Vision Installation and Configuration Manual V1.5/0913/9
Vision Installation & Configuration Manual
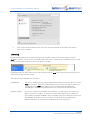
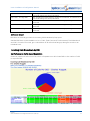
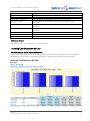
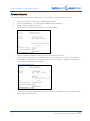
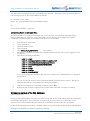
Appendix A - Call billing diagram
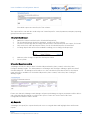
Administrator
The Administrator section of the Vision Admin Portal allows you to change the email address and
password for the Administrator that was created during installation. This is the only Administrator that can
access the Vision Admin Portal.
Vision Admin Portal
Vision Installation and Configuration Manual V1.5/0913/9
27
Vision Installation & Configuration Manual
Utilities
The Utilities section of the Vision Admin Portal enables you create a back up of the Vision database and to
perform a factory default of the database. Please refer to the Maintenance section from page 127 for
further details.
28
Vision Admin Portal
Vision Installation and Configuration Manual V1.5/0913/9
Vision Installation & Configuration Manual
Call Recording
Licensing
In order to record calls and access these recordings via Vision the required number of VisionRecording
licences must be installed. You will require one licence for each concurrent recording. All calls are
recorded but a recording can only be listened to if a licence was available at the time of the recording. If
more licences are installed this additional number of concurrent recordings can then be listened to.
Please note that recordings are deleted after 45 days if not licensed.
If you wish to store recordings on an external drive please refer to the “Mounting Drives for Vision Record”
document available on the SpliceCom website.
Recording Incoming Calls
Incoming calls to a User, Department or via a specific DDI can be recorded and stored on the Vision
server. Each User and Department must have a MessageBox licence previously configured. Incoming
external and internal calls will be recorded. Each 1 minute of recording take 0.5 MB of disk space.
Recording calls to a User
The relevant User’s configuration on the system database should be configured to enable call recording.
This can either be done via Manager or via the Vision Admin portal as follows.
1
2
3
4
5
6
7
8
Open the Vision Admin portal
Select Configure Recording
A list of all the Users on the system will be displayed
Select the tick box(s) for all the Users for whom calls are to be recorded
or
Click on the Select All button
From the Set Record Mode list box select the mode required
None – automatic call recording will not take place
Resource – a call will be recorded provided the relevant voicemail resource is available,
the call will still take place
Mandatory – a call must be recorded and will not take place if the relevant voicemail
resource is not available
Random – a random number of calls are recorded
Disable – all call recording is prohibited
Trunk – all external incoming calls will be automatically recorded. The User will be
unable to turn off recording via their handset. The User can activate the recording of
incoming internal calls by selecting the relevant Record button/icon on their handset.
From the Set Archive list select Yes. (This will create a Voicemail Contact in the User’s
configuration which will deliver the recording to the Vision server and delete it from the
voicemail server.)
Select Update when ready
The new settings will be displayed in the Record Mode and Archiving Configured columns
Call Recording
Vision Installation and Configuration Manual V1.5/0913/9
29
Vision Installation & Configuration Manual
For each User configured in this manner the Record Mode field in their configuration form will now be
set to the option selected and a Voicemail Contact similar to the following example will be entered.
Calls to this User will now be recorded. For details on how to access these recordings please refer to the
Call Logs section from page 43.
Recording calls to a Department
The relevant Department’s configuration on the system database should be configured to enable call
recording. This can either be done via Manager or via the Vision Admin portal as follows.
1
2
3
4
5
6
30
Open the Vision Admin portal
Select Configure Recording
Select the Departments tab at the top
A list of all the Departments on the system database will be displayed
Select the tick box(s) for all the Departments required
or
Click on the Select All button
From the Set Record Mode list box select the mode required
a. None – automatic call recording will not take place
b. Resource – a call will be recorded provided the relevant voicemail resource is available,
the call will still take place
Call Recording
Vision Installation and Configuration Manual V1.5/0913/9
Vision Installation & Configuration Manual
7
8
9
c. Mandatory – a call must be recorded and will not take place if the relevant voicemail
resource is not available
d. Random – a random number of calls are recorded
e. Disable – all call recording is prohibited
From the Set Archive list select Yes. (This will create a Voicemail Contact in the Department’s
configuration which will deliver the recording to the Vision server and delete it from the
voicemail server.)
Select Update when ready
The new settings will be displayed in the Record Mode and Archiving Configured columns
For each Department configured in this manner the Record Mode field in their configuration form will
now be set to the option selected and a Voicemail Contact similar to the following example will be
entered.
Calls to this Department will now be recorded. For details on how to access these recordings please refer
to the Call Logs section from page 43.
Recording incoming calls to a DDI number
A specific DDI Plan entry can be configured so that all calls to this DDI number will be automatically
recorded. A department called InboundRecordings must be created and configured for call recording.
This facility can be configured as follows:
1
2
In Manager open the relevant DDI Plan entry
In the Translate To field add an equal sign before the entry in this field
Call Recording
Vision Installation and Configuration Manual V1.5/0913/9
31
Vision Installation & Configuration Manual
3
Select Update or Apply when ready
Alternatively, if you wish to set up call recording on all DDI Plan entries within a particular DDI Plan this
can be done via the Vision Admin portal
1
2
3
4
5
6
Open the Vision Admin portal
Select Configure Recording
Select the DDIs tab at the top
From the DDI Plan list box select the DDI Plan required
Click on the Add Prefix button
An equal sign will be added to the Translate To field of all the DDI Plan entries in the selected
DDI Plan.
The next step is to create a Department called InboundRecordings which should be configured to record
calls as follows.
1
2
3
4
5
6
7
8
9
10
11
12
13
14
15
16
32
In Manager create a new Department
In the Name field enter InboundRecordings
In the Telephone Number field enter an unique extension number, eg 8009
Select Apply when ready.
Select the Voicemail tab
Select the Licences tab
Tick the Message Box Licence field
Select Update or Apply when ready.
This Department must be configured to record calls. This can either be done via Manager or via
the Vision Admin portal as follows.
Open the Vision Admin portal
Select Configure Recording
Select the Departments tab at the top
A list of all the Departments on the system database will be displayed
Select the tick box beside InboundRecordings
From the Set Record Mode list box select the mode required
a. None – automatic call recording will not take place
b. Resource – a call will be recorded provided the relevant voicemail resource is available,
the call will still take place
c. Mandatory – a call must be recorded and will not take place if the relevant voicemail
resource is not available
d. Random – a random number of calls are recorded
e. Disable – all call recording is prohibited
From the Set Archive list select Yes. (This will create a Voicemail Contact in the Department’s
configuration which will deliver the recording to the Vision server and delete it from the
voicemail server.)
Call Recording
Vision Installation and Configuration Manual V1.5/0913/9
Vision Installation & Configuration Manual
17
18
Select Update when ready
The new settings will be displayed in the Record Mode and Archiving Configured columns, and
will update the Departments configuration on the system database.
Calls to the DDI Plan entries configured will now be recorded. For details on how to access these
recordings please refer to the Call Logs section from page 43.
Recording Outgoing Calls
All calls on a specific Dial Plan entry (internal or external calls) or LCR Plan entry (external calls only) can be
automatically recorded. A Department called OutboundRecordings must be created and configured for
call recording. Each 1 minute of recording take 0.5 MB of disk space. This facility can be configured as
follows:
1
2
In Manager open the relevant Dial Plan entry or LCR Plan entry
From the Action list box select DialRecord
3
Select Update or Apply when ready.
The next step is to create a Department called OutboundRecordings which should be configured to
record calls as follows.
1
2
3
4
5
6
7
8
9
10
11
12
13
14
15
In Manager create a new Department
In the Name field enter OutboundRecordings
In the Telephone Number field enter an unique extension number, eg 8008
Select Apply when ready.
Select the Voicemail tab
Select the Licences tab
Tick the Message Box Licence field
Select Update or Apply when ready.
This Department must be configured to record calls. This can either be done via Manager or via
the Vision Admin portal as follows.
Open the Vision Admin portal
Select Configure Recording
Select the Departments tab at the top
A list of all the Departments on the system database will be displayed
Select the tick box beside OutboundRecordings
From the Set Record Mode list box select the mode required
a. None – automatic call recording will not take place
b. Resource – a call will be recorded provided the relevant voicemail resource is available,
the call will still take place
c. Mandatory – a call must be recorded and will not take place if the relevant voicemail
resource is not available
Call Recording
Vision Installation and Configuration Manual V1.5/0913/9
33
Vision Installation & Configuration Manual
16
17
18
d. Random – a random number of calls are recorded
e. Disable – all call recording is prohibited
From the Set Archive list select Yes. (This will create a Voicemail Contact in the Department’s
configuration which will deliver the recording to the Vision server and delete it from the
voicemail server.)
Select Update when ready
The new settings will be displayed in the Record Mode and Archiving Configured columns, and
will update the Departments configuration on the system database.
All outgoing calls made via the Dial Plan entry or LCR Plan entry configured will now be recorded. For
details on how to access these recordings please refer to the Call Logs section from page 43.
Archive Recordings
If you wish to store the recordings on an external drive please refer to the Mounting External Drives for
Vision (Linux) - Installation and Configuration Notes and Mounting External Drives for Vision (OS X) Installation and Configuration Notes documents available on the SpliceCom website.
VisionArchiver
The VisionArchiver is an application, available with Vision installed on an Apple Mac, that will archive
recordings to CD. This application can be found in the Applications Folder on your Vision server and is
installed as part of the Vision Package.
34
1
2
3
On the Vision Server open Finder
Select Applications
Double click on VisionArchiver
4
In the Name of Archive field enter the name you wish to give the archive or use the default
entry. Make sure that you make a note of this name, eg write this on the CD, as this is the
archive that Vision will request if you select a recording via the Call Logs that has been archived.
Call Recording
Vision Installation and Configuration Manual V1.5/0913/9
Vision Installation & Configuration Manual
5
6
7
8
9
From the Start Date and End Date calendars select the date range for the recordings you wish to
archive.
Click on the Calculate button
The amount of disk space required will be displayed
Click on the Click to Burn button when ready
The recordings will be archived to the CD
To close this application, from the VisionArchiver menu, select Quit VisionArchiver.
If you wish to store recordings on an external drive please refer to the “Mounting Drives for Vision Record”
document available on the SpliceCom website.
Call Recording
Vision Installation and Configuration Manual V1.5/0913/9
35
Vision Installation & Configuration Manual
Vision Portal
The Vision Portal is used to view all call logging information, listen to recordings, create reports and
reporting groups, create wallboards, create new Managers and configure Mobility.
The Vision Portal can be accessed on the Vision Server by the following link:
http://localhost/vision
or on a network PC via the following link:
http://ip address of vision server/vision
eg http://192.168.0.251/vision
Initial you will need to log in using the Administrator log in created during the installation and used to
access the Vision Admin Portal. Once you have opened the Vision portal you will be able to create
additional Manager access to allow Vision users to, eg, create reports. Please refer to the Configure
Managers section from page 37 for further details. Please note that if you are a Vision user you will be
given the relevant log in details to the Vision portal by your System Administrator.
Once the Vision portal is open the Reports page will be automatically displayed with the Main Menu
displayed on the top left hand side.
36
Vision Portal
Vision Installation and Configuration Manual V1.5/0913/9
Vision Installation & Configuration Manual
If the Vision installation is running in trial mode this will be displayed at the top of this screen, this will
disappear when licences are loaded.
Configure Managers
The Configure Managers link allows you to create additional Managers with access to the Vision Portal.
These Managers will only have access to the Vision Portal and not the Vision Admin Portal.
1
2
3
4
5
6
7
8
9
10
11
12
Select on the Configure Manager link
The list of current Managers is listed
Click on the Add Manager link
If the Companies feature is being used on the maximiser system from the Company Name list
box select the Company relevant to this Manager. This will ensure he/she can only view data
via the reports and call logs relevant to his/her company
In the Email field enter this Manager’s email address.
In the Username field enter the user name to be entered when logging on to the Vision portal.
In the Password field enter the password to be entered when logging on to the Vision portal
In the Confirmation Password field enter the password again
If necessary select the time zone relevant to this Manager from the TimeZone list box. This will
ensure that the call logs are displaying the correct time. By default this is set to GMT.
Select Add when ready.
You will be returned to the Configure Managers page and you will see the new Manager in the
list.
This Manager will now be able to log in to the Vision portal, view the call logs, create reports,
create reporting groups, create schedule reports and design a wallboard. This Manager will be
able to view and analyse data on all Users and Departments.
Please note that if Vision is being run on an Apple Mac PC/server it will take 5 minutes before the new
Manager can be used to log in to the Vision portal. The same applies to any changes made to a
Manager’s configuration.
When a Manager logs in to the Vision portal their Username must be entered in the Name field.
Vision Portal
Vision Installation and Configuration Manual V1.5/0913/9
37
Vision Installation & Configuration Manual
The bottom panel of the Vision portal will display which Manager is currently logged to this session of the
Vision portal.
Changing the security rights and permissions for a Manager
When a Manager is created, by default that Manager will be able to log in to the Vision portal, view the
call logs, create reports, create reporting groups, create schedule reports, create cost alarms and design a
wallboard. This Manager will be able to view and analyse data on all Users and Departments. However,
you can increase or reduced these rights as follows.
(Please note: do NOT make any changes to the Default Administrator account.)
Amending a Manager’s Security rights
1
2
3
Within the Vision portal select the Configure Managers link
Select the Manager you wish to edit.
The following list will be displayed
Configure Mobility – allows a Manager to enable the use of the VisionMobility application for a
User
Voice Recording Access – allows a Manager to listen to call recordings
Configure Manager – allows a Manager to create additional Manager accounts, and enable
security rights and permissions for that Manager
Read Only – reduces the rights of the Manager to read only access. The Manager will be able
to view and search the call logs; run reports, use Quick Reports and My Reports; and view a
wallboard. This Manager will not be able to create a wallboard, create reporting groups or
schedule reports, or create Call Cost Alarms.
No Reports – the Manager will be able to view and search the call logs, create wallboards,
schedule reports and create cost alarms. He/she will not be able to create or view reports.
38
Vision Portal
Vision Installation and Configuration Manual V1.5/0913/9
Vision Installation & Configuration Manual
4
Click on the required security and this will move to the Assigned Security box. For example, if
you wish to give the Manager access to call recordings click on Voice Recording Access.
5
Click on the Update button when ready.
When the Manager next logs in to the Vision portal the Main Menu will display the rights available to this
Manager, similar to these examples.
Read Only
No Reports
Read Only &
No Reports
Configure Mobility
and
Configure Managers
Restricting access to the call data
By default, each Manager can view the data within the call logs and reports for all Users and Department
of the system. However, it may be necessary that Managers should only view data relevant to members
of their team, for example, because data relating to other members of staff is sensitive, or it may be
necessary for a Manager to view all the logs but that Manager should not be allowed to listen to the
recordings for the Personnel Director, for example. A Manager’s privileges can be restricted as follows:
1
2
3
4
5
6
7
8
9
10
Within the Vision portal select the Configure Managers link
Select the Manager you wish to edit
From the Manager Settings pane at the top select Permissions
Note that currently this Manager has full privileges to all Users and Departments
Within the Manager Edit pane, ensure the Users and/or Departments Show: tick box(es) are
selected, dependent on whether you wish to search for a User, a Department or both.
In the For: field start to enter the name of the User or Department you wish to add
A list of the Users and/or Departments beginning with these letters will be displayed
Select the User/Department required.
The User’s or Department’s extension number will be displayed in the For: field
Select Add and the User/Department will be displayed in the list below
Vision Portal
Vision Installation and Configuration Manual V1.5/0913/9
39
Vision Installation & Configuration Manual
Please note
Once a User or Department has been added to the permissions list the Manager will only be able
to view the call data for that User and/or Department until further Users/Departments have been
added.
When the Manager creates a Report and searches for a User/Department in the For: field, the
search list will only display the Users/Departments that have been added to the Manager’s
permissions list.
When a Manager creates a Reporting Group he/she will only be able to add Users and
Departments that he/she has permissions for. For further information on please refer to the
Reporting Groups section from page 53.
Enter all Users and Departments within Permissions
If you have a large number of Users and/or Departments you wish to add to the Manager’s Permissions
you many find it easier to add all the Users and Departments and then remove the ones you don’t need.
Or you may need to add all the Users and Departments for use with Vision Call Centre or the Manager
needs to be able to listen to the recordings for all Users and Departments, for example. If this is the case
select the Add All button.
Specifying the permissions to the data for a User/Department
By default the Manager will be able to view a User’s or Department’s Call logs and listen to their
recordings, however if one of these options is not required the following can be configured:
1
2
3
4
5
40
Within the Vision portal select the Configure Managers link
Select the Manager you wish to edit
From the Manager Settings pane at the top select Permissions
Untick the field under either View Call Logs or Listen to Recordings
Select Update
Vision Portal
Vision Installation and Configuration Manual V1.5/0913/9
Vision Installation & Configuration Manual
Removing a User or Department from the Permissions list
1
2
3
Untick the fields under the View Call Logs and Listen to Recordings columns for the User or
Department you wish to remove
Select Update
The User/Department will be removed from the Permissions list
Delete a Manager
1
2
3
Within the Vision portal select the Configure Managers link
Select the Manager you wish to delete.
Click on the Delete button
Configure Mobility
The Configure Mobility link allows you to set up Users on the system to use the Mobility portal. Vision
Mobility allows a User to control his/her handset via an application similar to the PCS 60 but accessed via
a web browser.
1
2
3
4
5
6
Within the Vision portal select the Configure Mobility link
A list of the Users on the maximiser system will be displayed. Use the search facility to find the
User required
Select this User and a configuration form for the User will be displayed
Enter a Voicemail Access code for the User, if not already configured
Enter a Remote Working Code for the User, if not already configured. (Please note that the
Users’ Remote Working Code must match the Partner Login Code for that User’s phone.)
Tick Mobility Licence
(You can also assign a User with a MessageBox licence and select their Record mode via this
screen, if required.)
7
Select Update or Apply when ready.
Vision Portal
Vision Installation and Configuration Manual V1.5/0913/9
41
Vision Installation & Configuration Manual
Access Vision Mobility
Users can access the Vision Mobility application as follows:
On the Vision Server:
http://localhost/visionmobility/
or via a network PC:
http://ip address of vision server/visionmobility/
eg http://192.168.0.251/visionmobility/
The User will then be required to login via the following screen, entering their extension number and
voicemail access code.
Once the log in is complete the Vision Mobility application will be displayed.
Please refer to the Vision Mobility User manual, available on the SpliceCom website, for further
information on how to use this application.
If you wish to use this application on an iPhone enter the following URL:
http://ip address of vision server/visionmobility/iphone.cgi
If you wish to use this application on a Blackberry or HTC mobile phone, for example, enter the following
URL:
http://ip address of vision server/visionmobility/basic.cgi
42
Vision Portal
Vision Installation and Configuration Manual V1.5/0913/9
Vision Installation & Configuration Manual
Call Logs
Accessing the Call Logs
To view the logs via the Vision portal a user will require a Manage account as described in the Configure
Managers section from page 37. The Manager will have full rights to view all User and Department call
data unless Permissions to specific Users and Departments are configured.
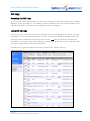
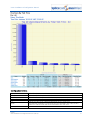
Using the Call Logs
The Logs link in the Main Menu of the Vision portal will show live call logging for the system. This page
will update every 30 seconds and display up to 30 calls. The most recent calls are displayed at the top.
This page will also indicate that Vision has connected to the maximiser system and is collecting call
information. As a test to ensure that call logging is working make an internal or external call and wait for
the page to update with the call you have just made.
This data can be copied and pasted into another document, for example, MS Excel.
Call Logs
Vision Installation and Configuration Manual V1.5/0913/9
43
Vision Installation & Configuration Manual
Date = this column will display the date and time the calls was made or received.
Source Name = this column displays for
Outgoing calls - the name of the User who made the call
Incoming calls - the name of the external contact the call has been received from (if the Source Number
has been matched in the Contacts database), or name of the User ringing from a number stored in their
User configuration. If no match was found the entry in this column will be blank..
Source Number = this column will display either the extension number of the User who made the call or
the incoming CLI received with this call.
Destination Name = this column will display
Internal calls – the name of the User or Department the call was made to
Outgoing calls – the name of the external contact dialled (if the number dialled is matched in the
Contacts database), or the name of the User dialled on a number stored in their User configuration.
Incoming calls - the name of the User or Department the call was made to.
Destination Number = this column will display the number dialled.
Internal calls – the extension number of the User or Department the call was made to
Outgoing calls - the external number dialled
Incoming calls - the extension number of the User or Department the call was made to
Answered by Number = Internal and incoming calls only. This column displays the extension number that
answered the call. This will show which member of a Department answered the call or will show where a
call was forwarded to.
Answered by Name = Internal and incoming calls only. This column displays the User name of the
extension that answered the call. This will show which member of a Department answered the call or will
show where a call was forwarded to.
Duration = this will show the amount of time the call was active, including ringing time.
Connected = this column will show the amount of time from the call being answered to the call ending.
Cost = this will display the cost of the call dependent on the Pricing Scheme being used.
When the Logs are displayed the Call Logs Menu is also available.
Calls In Today
The Calls In Today link will display all incoming external calls received today.
44
Call Logs
Vision Installation and Configuration Manual V1.5/0913/9
Vision Installation & Configuration Manual
The most recent call will be displayed at the bottom. If a call has been recorded the Speaker icon will be
displayed on the right hand side of the call.
Date & Time
Source
Destination
Extension
Forwarded by
Ringing
Connected
Cost
The time and the date the call was received
The incoming CLI received with this call, if presented. If this CLI is matched in the
Contacts database the contact name will be displayed with the number
The extension that the call was routed to.
The User and extension number or voicemail that answered the call. If the call was
routed to a Department, this column will show which Department member answered
the call. If the call was routed to a User account this column will show which User
picked up the call or which User the call was forwarded to.
The User that forwarded the call.
The amount of time the call was ringing before it was answered
The amount of time from the call being answered to the call being ended
N/A
Call Log Detail
Further details relating to a call can be viewed by selecting the call within the Date & Time column and
the following screen will be displayed.
The times represent the total number of seconds.
Further information can be viewed by selecting Switch to engineering view.
Call Logs
Vision Installation and Configuration Manual V1.5/0913/9
45
Vision Installation & Configuration Manual
Calls Out Today
The Calls Out Today link will display all outgoing external calls made today.
The most recent call will be displayed at the bottom. If a call has been recorded the Speaker icon will be
displayed on the right hand side of the call.
Date & Time
Source
Destination
Extension
Forwarded by
Ringing
Connected
Cost
46
The time and the date the call was made.
The User and their extension number making the call
The number that was dialled. If this number is matched in the Contacts database the
Contact name will also be displayed.
N/A
The User that forwarded the call
The amount of time the call was ringing before it was answered
The amount of time from the call being answered to the call being ended
The cost of the call dependent on the Pricing Schemes entered
Call Logs
Vision Installation and Configuration Manual V1.5/0913/9
Vision Installation & Configuration Manual
Call Log Detail
Further details relating to a call can be viewed by selecting the call within the Date & Time column and
the following screen will be displayed.
Further information can be viewed by selecting Switch to engineering view.
Search Calls
The Search Calls link will enable you to search for specific calls in the logs, for example, internal calls
made today, calls to a specific extension, all calls made last week, and so on.
Call Log Search dialogue box will allow you to search for calls by filling in the relevant fields. The asterisk
(*) can be used as a wild card.
Call Logs
Vision Installation and Configuration Manual V1.5/0913/9
47
Vision Installation & Configuration Manual
Report Period = select the time period for which you wish to search for calls, eg Today, This Month, last 30
days etc. If you choose Custom you will need to fill out the Date (from) and Date (to) fields.
Date (from) = used when Custom is selected in the Report Period field. This is the start date for the time
period required in your search. Click on Select Date to pick the start date required.
Date (to) = used when Custom is selected in the Report Period field. This is the end date for the time
period required in your search. Click on Select Date to pick the end date required.
For Company = if the Companies feature is being used on the maximiser system this list box allows you to
search for calls to or from Users and Department belonging to a particular Company.
Time (start) = to search for calls made or received within a certain time of the day enter the required start
time here. This should be entered as, eg 17:00
Time (end) = to search for calls made or received within a certain time of the day enter the required end
time here. This should be entered as, eg 20:00
Cost Centre = this indicates the entity that the cost of a call is attributed to. Enter here a User or
Department name.
Source Name = to search for calls made by a specific User or received from a specific Contact enter either
the name of the User who made the calls or the name of the external contact the calls were received
from. (Please note the external contact’s incoming CLI must have been matched in the Contacts
database at the time of the call.)
48
Call Logs
Vision Installation and Configuration Manual V1.5/0913/9
Vision Installation & Configuration Manual
Source Number = to search for calls made by a specific extension or received from a specific incoming
number enter the extension number of the User who made the calls or the incoming CLI received with
the calls.
Target Name = to search for calls made to a specific User or Department enter the name of the User or
Department the calls were made to.
Target Number = to search for calls made to a specific extension number enter the extension number of
the User or Department the calls were made to.
Answered by Number = to search for calls answered by a specific extension enter the extension number
that answered the calls.
Answered by Name = to search for calls answered by a specific User enter the User name of the
extension that answered the calls.
Account Code = if account coding is being used on the maximiser system and you wish to search for calls
assigned to a specific account code enter the required account code here.
Once you have completed the required fields click on Generate Report.
Call Status
The following icons may be displayed within the Call Logs and represent the following:
The call was abandoned before it could be answered by the extension or voicemail
This call was parked
This call was picked up from a park slot
This indicates the transferred leg of the call.
This indicates the second leg of a transferred call
Accessing Call Recordings
1
2
3
To view calls that have been recorded firstly search for the required calls using Calls In Today,
Calls Out Today or Search Calls.
Calls that have been recorded will be indicated by the Speaker icon displayed on the right hand
side of the call.
Click on the speaker icon you will be taken to the Recordings page for that call:
Call Logs
Vision Installation and Configuration Manual V1.5/0913/9
49
Vision Installation & Configuration Manual
4
If your browser has the relevant QuickTime plug in then you will be able to listen to the
recording via your Web Browser, this will play automatically. If you do not have the QuickTime
plug in installed, then your default application for listening to .wav files will open.
Downloading a recording
In the Recordings page click on the Download icon
instructions of your PC.
and following the relevant download/save
Recording Access Log
The next time a call recording is listened to the Recording Access Log at the bottom of the screen will
display when and by whom (the relevant Manager’s email address) the recording has been listened to in
the past..
The Remote Address (IP) column will display the IP address of the PC that listened to the recording. If the
number one (::1) is displayed this indicates that the recording was listened to locally on Vision server.
Forward a recording to an email account
After listening to a recording this recording can be forwarded to an email account. Please note that the
email address and server hosting this facility must have been previously configured within the Report
Settings screen in the Vision Admin Portal – please refer to the Report Settings section on page 21 for
further details.
50
1
2
Click on the speaker icon beside the relevant call.
Within the Forward Message section, in the Email/Search field enter the email address where
the recording is to be sent.
3
4
Click on the Send To Email button
Confirmation that the message has been sent will be displayed.
Call Logs
Vision Installation and Configuration Manual V1.5/0913/9
Vision Installation & Configuration Manual
5
A record of this action will be displayed in the Recording Access Log next time the recording is
listened to.
Call Logs
Vision Installation and Configuration Manual V1.5/0913/9
51
Vision Installation & Configuration Manual
Reports
Vision Reports are graphical, in full colour, and are designed to highlight trends and assist in analysis,
rather than simply providing a huge amount of data, which must then be processed and analysed using
other tools such as spread sheets. Available to anyone with the appropriate access rights, anywhere via a
standard web browser, Vision Reports are “management ready” and can be printed off if required.
Key reports can be scheduled by time and date and delivered to individuals or groups by email and you
can build your own reporting groups. Vision Reports is broken down into three main areas; Call
Performance Profiles, Cost Analysis and Capacity Planning. Vision provides 21 standard reports, which
focus on providing the detailed and summary information that are required to effectively measure – and
therefore manage – telephony on a business-wide basis.
To aid the decision-making process, this guide provides a description of each report, detailing the exact
definition of all the terms using within the reports. This significantly aids administrators and managers in
52
Reports
Vision Installation and Configuration Manual V1.5/0913/9
Vision Installation & Configuration Manual
understanding how each Department and the business as a whole is performing, and therefore assists in
making the correct decisions to further improve the overall company performance.
Each of the standard Vision Reports can be run over a range of dates (the Report Period). The options for
the Report Period are:
Today
Yesterday
This Week
This Month
This Year
Last Week
Last Month
7 Days
30 Days
60 Days
90 Days
Custom (allows any Start Date and End Date to be defined)
A specific time period during the day can also be specified, with a start and end time in 24 hour
format.
Each report can be printed or exported in a CSV format. The reports are divided into three major
categories; Capacity Planning, Cost Analysis and Call Performance Profiles.
If an Uplift % and/or VAT% have been configured within the Vision Admin portal Report Settings these will
be automatically displayed when creating a Cost Analyis Report. These can be amended for each report if
required.
Please note:
1. If additional reports, not covered within this section of the manual, are displayed with the Reports
screen your maximiser system is running the Vision Call Centre software. Please refer to the Vision
Call Centre Configuration manual for further details.
2. Crystal Reports can be connected to the Vision database to provide custom reports. Please refer to
the Vision & SAP Crystal Reports Integration document available on the SpliceCom website for further
details.
Accessing the Reports
To view and use the reports a user will require a Manage account as described in the Configure
Managers section from page 37. The Manage will have full rights to view all User and Department call
data unless Permissions to specific Users and Departments are configured.
Reporting Groups
If a collection of Users and/or Departments need to be reported on these Users and Departments can be
entered into to a Reporting Group. A report or a Statistic Panel within a wallboard can then be created
using this Reporting Group.
Reports
Vision Installation and Configuration Manual V1.5/0913/9
53
Vision Installation & Configuration Manual
Create a Reporting Group
1
2
3
4
5
6
7
8
9
Within the Vision Portal click on the Reporting Group link
Click on the Create Group button.
In the Group Name field enter the text that will identify this Reporting Group.
In the Description field enter the text that will describe the usage of this Reporting Group.
(Both the Group Name and Description fields must be populated with text for the group to be
created.)
Select the Add Group button.
The new group will be added to the Reporting Groups list
Select the group you have just created from this list.
A list of Users and Departments on the system will be displayed on the left hand side
To add a member to the group click on the User or Department required. This entry will move
over to the right hand screen, indicating that they are a member of the group.
Alternatively,
9
To add multiple members to the group, select the tick boxes beside all the Users and/or
Departments you wish to add to the group.
10
Select the Submit button (at the bottom left hand side). These entries will move over to the right
hand screen, indicating that they are a member of the group.
Alternatively,
9
To add all Users and/or all Departments to the group, select the Add all Users and/or Add all
Departments link at the top.
10
All Users and/or Departments will move over to the right hand screen, indicating that they are a
member of the group.
Please note:
A Manager will only be able to add Users and Departments that he/she has permission to view their
call logging data.
A Reporting Group created with no Group Members will report on everyone on the system or every
User and Department that the Manager creating the group has permission for.
When a User Name is changed via Manager this will be automatically reflected within the Reporting
Group.
Report Ownership
The group will be owned by the Manager creating the Reporting Group.
The Administrator or a Manager with Configure Manager rights can create a Reporting Group for another
Manager by selecting this Manager from the Owned By list box.
54
Reports
Vision Installation and Configuration Manual V1.5/0913/9
Vision Installation & Configuration Manual
A Manager without Configure Manager rights will not be given the Owned By list box so will only be
creating his/her own groups. These Groups can only be used and edited by the Manager or by the
Administrator or a Manager with Configure Manager rights.
The Administrator or a Manager with Configure Manager rights can create Global Reporting Groups by
selecting this option from the Owned By list box. A Global Reporting Group can be used by all Managers,
but can only be edited by the Administrator or a Manager with Configure Manager rights.
Each group will be displayed with the Manager’s name within the Creator column.
A Manager without Configure Manager rights will only be able to use and view his/her own Reporting
Groups and Global Reporting Groups. This Manager will only be able edit his/her own Groups.
Peak Trunk Group Usage
Capacity Planning Report Description
Gives “the big picture” on trunk usage per day, where multiple lines are combined together to form a
Trunk Group. Gives the background info required for the need to add/reduce the overall number of lines
within a Group. Also clearly shows the peak time for calls in/out of the business on a per Trunk Group
basis.
Reports
Vision Installation and Configuration Manual V1.5/0913/9
55
Vision Installation & Configuration Manual
Configuration Options
Report Period
Start Date
End Date
In Time Period
Trunk Group
Select from 11 presets or Custom start date - end date
Select date from drop down Calendar
Select date from drop down Calendar
Allows report start and stop time to be defined in 24 hour format
List automatically populated from the maximiser database
Report Columns
Date
Peak Concurrent Usage
Peak Outbound Usage
Peak Inbound Usage
Maximum Trunk Capacity
Peak Percentage Used
Day, Date and Month
The maximum total number of trunk channels used simultaneously on that
date
The maximum number of trunk channels used for simultaneous outbound
calls on that date
The maximum number of trunk channels used for simultaneous inbound
calls on that date
The total number of trunk channels available. This information is obtained
from the trunk licences registered on maximiser
The Peak Concurrent Usage divided by Maximum Trunk Capacity expressed
as a percentage
Drill Down Report
Drill down on Date gives a graphical representation and statistics broken down into hourly segments.
56
Reports
Vision Installation and Configuration Manual V1.5/0913/9
Vision Installation & Configuration Manual
Peak Trunk Usage
Capacity Planning Report Description
Displays how much trunk capacity is being used on a per trunk, per day basis. Enables you to make
informed choices on the need to add more trunks to prevent calls being lost – or alternatively to reduce
your costs if trunks are lying dormant. Clearly shows the peak time for calls in/out of the business on an
individual trunk basis.
Reports
Vision Installation and Configuration Manual V1.5/0913/9
57
Vision Installation & Configuration Manual
Configuration Options
Report Period
Start Date
End Date
In Time Period
For Trunk
Select from 11 presets or Custom start date - end date
Select date from drop down Calendar
Select date from drop down Calendar
Allows report start and stop time to be defined in 24 hour format
List automatically populated from the maximiser database
Report Columns
Date:
Peak Concurrent Usage
Peak Outbound Usage
Peak Inbound Usage
Maximum Trunk Capacity
Peak Percentage Used
Day, Date and Month
The maximum total number of trunk channels used simultaneously on
that date
The maximum number of trunk channels used for simultaneous
outbound calls on that date
The maximum number of trunk channels used for simultaneous inbound
calls on that date
The total number of trunk channels available. This information is
obtained from the trunk licences registered on maximiser
The Peak Concurrent Usage divided by Maximum Trunk Capacity
expressed as a percentage
Drill Down Report
Drill down on Date gives graph and statistics broken down into hourly segments
58
Reports
Vision Installation and Configuration Manual V1.5/0913/9
Vision Installation & Configuration Manual
Peak Voicemail Port Usage
Capacity Planning Report Description
Shows peak Voicemail Port usage per day on a per service basis. Allows you to clearly see when it’s time
to add more Voicemail Port and/or ESP licences.
Reports
Vision Installation and Configuration Manual V1.5/0913/9
59
Vision Installation & Configuration Manual
Configuration Options
Report Period
Start Date
End Date
In Time Period
Select from 11 presets or Custom start date - end date
Select date from drop down Calendar
Select date from drop down Calendar
Allows report start and stop time to be defined in 24 hour format
Report Columns
Date
Name
Location
Port Capacity
Peak Usage
EA Capacity
Peak EA
Peak VM
Peak AA
Peak Recording
Peak Conference
Peak Queue
Percentage Used
60
Day, Date and Month
Name allocated to the voice processing system on maximiser
Name of the maximiser Call Server, or standalone Apple Mac OS X/Linux Server/PC
on which the Voice Processing Application is running
The maximum number of available Voicemail Ports
The maximum no of ports used simultaneously by all Voice Processing services at
any one time during the day
The maximum number of available Extended Auto Attendant/Enhanced Speech
Processing/Interactive Voice Response channels
The maximum no of channels used simultaneously by the Extended Auto
Attendant/Enhanced Speech Processing/Interactive Voice Response service at any
one time during the day
The maximum no of channels used simultaneously by the Voicemail service at any
one time during the day
The maximum no of channels used simultaneously by the standard Auto Attendant
service at any one time during the day
The maximum no of channels used simultaneously by the Call Recording service at
any one time during the day
The maximum no of channels used simultaneously by the Meet-Me-Conference
service at any one time during the day
The maximum no of channels used simultaneously by the In-Queue Message
service at any one time during the day
The Peak Usage divided by Port Capacity expressed as a percentage
Reports
Vision Installation and Configuration Manual V1.5/0913/9
Vision Installation & Configuration Manual
Drill Down Report
Drill down on Date gives graph and statistics broken down into hourly segments.
Peak IntraModule Trunk Usage
Capacity Planning Report Description
Shows the peak number of calls between Call Servers over IP trunks. Broken down into inbound,
outbound calls and total calls, this report clearly identifies when more bandwidth is required on these
IntraModule Trunks to prevent calls being blocked.
Reports
Vision Installation and Configuration Manual V1.5/0913/9
61
Vision Installation & Configuration Manual
Configuration Options
Report Period
Start Date
End Date
In Time Period
Select from 11 presets or Custom start date - end date
Select date from drop down Calendar
Select date from drop down Calendar
Allows report start and stop time to be defined in 24 hour format
Report Columns
Date
Trunk Name
Peak Concurrent Usage
Peak Outbound Usage
Peak Inbound Usage
Maximum Trunk Capacity
Peak Percentage Used:
Day, Date and Month
The name given to the IntraModule Trunk on maximiser
The maximum total number of IntraModule Trunk channels used
simultaneously on that date
The maximum number of IntraModule Trunk channels used for
simultaneous outbound calls on that date
The maximum number of IntraModule Trunk channels used for
simultaneous inbound calls on that date
The total number of IntraModule Trunk channels available. This information
is obtained from maximiser
The Peak Concurrent Usage divided by Maximum Trunk Capacity expressed
as a percentage
Drill Down Report
Drill down on Date gives graph and statistics broken down into hourly segments.
62
Reports
Vision Installation and Configuration Manual V1.5/0913/9
Vision Installation & Configuration Manual
Reports
Vision Installation and Configuration Manual V1.5/0913/9
63
Vision Installation & Configuration Manual
Outgoing Call Breakdown
Cost Analysis Report Description
Allows outgoing calls to be broken down by call type, i.e. National, International, Mobile, Non-Geographic,
etc.
Configuration Options
Report Period
Start Date
End Date
In Time Period
For
Show
Select from 11 presets or Custom start date - end date
Select date from drop down Calendar
Select date from drop down Calendar
Allows report start and stop time to be defined in 24 hour format
Searches for any of the entities that appear on the “Show” line
Automatically populated. Un-checking the box alongside each entry means that
these search results will not be included in the “For” box
Report Columns
Destination Type
Number of Calls
Total Time
Total Cost
Type of outbound call made, i.e. International, National, Mobile, Non-Geographic,
Corporate Numbering, etc.
Total number of calls made in the overall Report Period to the Destination Type
Total call time over the duration of overall Report Period to the Destination Type
Total cost of the calls made over the duration of the overall Report Period to the
Destination Type
Drill Down Report
Drill down on Destination Type gives further granularity.
64
Reports
Vision Installation and Configuration Manual V1.5/0913/9
Vision Installation & Configuration Manual
A further drill down on Destination Type delivers the standard drill down report.
Top Outgoing Call Users by Cost
Cost Analysis Report Description
Shows who’s spent most on outgoing calls over a manager/administrator definable time period.
Reports
Vision Installation and Configuration Manual V1.5/0913/9
65
Vision Installation & Configuration Manual
Configuration Options
Report Period
Start Date
End Date
In Time Period
For
Show
Select from 11 presets or Custom start date - end date
Select date from drop down Calendar
Select date from drop down Calendar
Allows report start and stop time to be defined in 24 hour format
Searches for any of the entities that appear on the “Show” line
Automatically populated. Un-checking the box alongside each entry means that
these search results will not be included in the “For” box
Report Columns
Cost Owner
Extension
Name
Number of Calls
Total Cost
The cost owner for billing purposes
Extension number that made the outgoing calls
Name associated with the extension number that made the outgoing calls
Total number of outbound calls made by the Extension/Name over the overall
Report Period
Total cost of the outbound calls made by the Extension/Name over the overall
Report Period
Drill Down Report
Standard drill down report available on Cost Owner or Name.
66
Reports
Vision Installation and Configuration Manual V1.5/0913/9
Vision Installation & Configuration Manual
Itemised Cost Report
Cost Analysis Report Description
Shows a complete list of individual outgoing calls over a user definable time period.
Configuration Options
Report Period
Start Date
End Date
In Time Period
For
Show
Account Code
Select from 11 presets or Custom start date - end date
Select date from drop down Calendar
Select date from drop down Calendar
Allows report start and stop time to be defined in 24 hour format
Searches for any of the entities that appear on the “Show” line
Automatically populated. Un-checking the box alongside each entry means that
these search results will not be included in the “For” box
Enter individual customer Account Code as defined on maximiser
Report Columns
Time
Forwarded by
Cost Centre
Name
Extension
Destination Name
Number Dialled
Connected Duration
Cost
Date (yyyy-mm-dd) & Time (hh:mm:ss – in 24 hour format) of the individual call
The person who caused this call to be forwarded
User that made the call
Name of the caller
Extension number associated with the caller
The name associated with the number called (if matched in the Contacts
database on the maximiser)
The number called
The total time that this call was connected
The cost associated with this call dependent on the Price Scheme entered
Drill Down Report
Standard drill down report available on Time.
Reports
Vision Installation and Configuration Manual V1.5/0913/9
67
Vision Installation & Configuration Manual
Total Cost By Account Code
Cost Analysis Report Description
Shows a complete list of calls and associated costs broken down by Account Code over a user definable
time period.
Configuration Options
Report Period
Start Date
End Date
In Time Period
For
Show
Account Code
Select from 11 presets or Custom start date -end date
Select date from drop down Calendar
Select date from drop down Calendar
Allows report start and stop time to be defined in 24 hour format
Searches for any of the entities that appear on the “Show” line
Automatically populated. Un-checking the box alongside each entry means
that these search results will not be included in the “For” box
Enter individual customer Account Code as defined on maximiser
Report Columns
Contact
Account Code
Number of Calls
Total Time
Total Cost
Contact name associated with the Account Code
Account Code
The total number of calls made using this Account Code
The total time of all calls made using this account code
The total cost of all calls made using this account code
Drill Down Report
Drill down on Account Code takes you to the Itemised Cost report (see next section).
68
Reports
Vision Installation and Configuration Manual V1.5/0913/9
Vision Installation & Configuration Manual
Frequently Called Destinations
Cost Analysis Report Description
Shows which numbers have been called the most. This report can be run for internal numbers only,
external number only, or all numbers.
Configuration Options
Report Period
Start Date
End Date
In Time Period
For
Show
Call Type
Select from 11 presets or Custom then select a start date, end date and In Time
Period
Select date from drop down Calendar
Select date from drop down Calendar
Allows report start and stop time to be defined in 24 hour format
Searches for any of the entities that appear on the “Show” line
Automatically populated. Un-checking the box alongside each entry means
that these search results will not be included in the “For” box
Tick boxes for Internal and/or External calls
Reports
Vision Installation and Configuration Manual V1.5/0913/9
69
Vision Installation & Configuration Manual
Report Columns
Times Called
Number Dialled
Total Connected Time
Total Cost
The number of times that this number has been called over the duration of
the Report Period
The number called
The total time that calls were connected to the Number Dialled over the
duration of the Report Period
The total cost for calls associated with calls to the Number Dialled over the
duration of the Report Period
Drill Down Report
Standard drill down report available on Number Dialled
Most Expensive Calls
Cost Analysis Report Description
Produces a list of the most expensive individual calls, based on cost. Shows the number called and who
made the call. Produces a bar graph for the 20 most expensive calls and a table for all calls.
70
Reports
Vision Installation and Configuration Manual V1.5/0913/9
Vision Installation & Configuration Manual
Configuration Options
Report Period
Start Date
End Date
In Time Period
For
Show
Select from 11 presets or Custom then select a start date, end date and In Time
Period
Select date from drop down Calendar
Select date from drop down Calendar
Allows report start and stop time to be defined in 24 hour format
Searches for any of the entities that appear on the “Show” line
Automatically populated. Un-checking the box alongside each entry means
that these search results will not be included in the “For” box
Report Columns
Time
Forwarded by
Cost Centre
Name
Extension
Destination Name
Number Dialled
Connected Duration
Cost
Date (yyyy-mm-dd) & Time (hh:mm:ss – in 24 hour format) of the individual call
The User that caused this call to be forwarded
The Cost Centre associated with this call for billing purposes
Name of the caller
Extension number associated with the caller
The name associated with the number called (if entered on maximiser)
The number called
The total time that this call was connected
The cost associated with this call dependent on the Pricing Scheme entered
Drill Down Report
Standard drill down report available on Number Dialled.
Reports
Vision Installation and Configuration Manual V1.5/0913/9
71
Vision Installation & Configuration Manual
Forwarded Calls Cost By User
Cost Analysis Report Description
Produces a list of forwarded calls, their associated costs and who was responsible for forwarding the call.
Configuration Options
Report Period
Start Date
End Date
In Time Period
For
Show
Select from 11 presets or Custom start date - end date
Select date from drop down Calendar
Select date from drop down Calendar
Allows report start and stop time to be defined in 24 hour format
Searches for any of the entities that appear on the “Show” line
Automatically populated. Un-checking the box alongside each entry means that
these search results will not be included in the “For” box
Report Columns
Date & Time
Forwarded By
Source Name
Source Number
Target Name
Target Number
Connected
Total Cost
Date (yyyy-mm-dd) & Time (hh:mm:ss – in 24 hour format) of the individual call
The user who caused this call to be forwarded
Name of the caller (if entered on maximiser)
The external or extension number from which the caller placed the call (if
presented)
The name associated with the number called (if entered on maximiser)
The number called
The total time that this call was connected
The cost associated with this call
Drill Down Report
Standard drill down report available on Date & Time.
72
Reports
Vision Installation and Configuration Manual V1.5/0913/9
Vision Installation & Configuration Manual
Cost Report Filtered By Cost Centre
Cost Analysis Report Description
Produces a list of forwarded calls and their associated cost centres.
Configuration Options
Report Period
In Time Period
Start Date
End Date
For
Show
Select from 11 presets or Custom start date - end date
Allows report start and stop time to be defined in 24 hour format
Select date from drop down Calendar
Select date from drop down Calendar
Searches for any of the entities that appear on the “Show” line
Automatically populated. Un-checking the box alongside each entry means that
these search results will not be included in the “For” box
Report Columns
Cost Centre
Date & Time
Source Name
Source Number
Target Name
Target Number
The Cost Centre to which this call is allocated
Date (yyyy-mm-dd) & Time (hh:mm:ss – in 24 hour format) of the individual call
Name of the caller (if entered on maximiser)
The external or extension number from which the caller placed the call (if
presented)
The name associated with the number called (if entered on maximiser)
The number called
Reports
Vision Installation and Configuration Manual V1.5/0913/9
73
Vision Installation & Configuration Manual
Connected
Total Cost
The total time that this call was connected
The cost associated with this call
Drill Down Report
Standard drill down report available on Date & Time.
Transferred Calls By Cost
Cost Analysis Report Description
Produces a list of calls received and then transferred externally and their costs.
Configuration Options
Report Period
Start Date
End Date
In Time Period
For
Show
Select from 11 presets or Custom start date - end date
Select date from drop down Calendar
Select date from drop down Calendar
Allows report start and stop time to be defined in 24 hour format
Searches for any of the entities that appear on the “Show” line
Automatically populated. Un-checking the box alongside each entry means that these
search results will not be included in the “For” box
Report Columns
Original Target
Transferred By
Source Name
Source Number
Target Name
Target Number
Connected Duration
Total Cost
The name of the User or Department that the call was originally sent to
The name of the User or Department responsible for transferring the call
Name of the caller (if entered on maximiser)
The external or extension number from which the caller placed the call (if
presented)
The name associated with the number called (if entered on maximiser) for the
transferred call
The number called for the transferred call
The total time that this call was connected
The cost associated with this call
Drill Down Report
No drill down is available for this report.
74
Reports
Vision Installation and Configuration Manual V1.5/0913/9
Vision Installation & Configuration Manual
Trunk To Trunk Calls
Cost Analysis Report Description
Produces a list of destination numbers called, which have had incoming calls redirected to them
alongside their associated costs.
Configuration Options
Report Period
Start Date
End Date
In Time Period
For Prefix
Uplift %
VAT %
Select from 11 presets or Custom start date - end date
Select date from drop down Calendar
Select date from drop down Calendar
Allows report start and stop time to be defined in 24 hour format
Shows a drop-down list of forwarding prefix numbers
Allows cost to be increased by a manually entered percentage when using this report
to generate a bill. Overrides the standard Uplift percentage.
Allows VAT to be added manually as a percentage when using this report to generate a
bill. Overrides the standard VAT percentage
Report Columns
Destination
Number of Calls
Total Time
Net Cost
VAT
Total Cost
The telephone number which incoming calls have been redirected to.
The number of calls made in a specific time period to the specific number
The total time that these calls were connected for
The cost of these calls, including the uplift %, but excluding VAT
The VAT cost associated with these calls
The total cost associated with calls to this destination, including uplift % and VAT
Drill Down Report
No drill down is available for this report.
First and Last Calls
Call Performance Profile Report Description
Provides a daily list of first, first answered, last answered and last inbound calls, along with first and last
outbound calls. Shows who’s first to start working and last to leave.
Reports
Vision Installation and Configuration Manual V1.5/0913/9
75
Vision Installation & Configuration Manual
Configuration Options
Report Period
Start Date
End Date
In Time Period
For
Show
Call Type
Select from 11 presets or Custom start date - end date
Select date from drop down Calendar
Select date from drop down Calendar
Allows report start and stop time to be defined in 24 hour format
Searches for any of the entities that appear on the “Show” line
Automatically populated. Un-checking the box alongside each entry means that these
search results will not be included in the “For” box
Tick boxes for Internal and/or External calls
Report Columns
Date
First Call In
First Answered Call In
First Call Out
Last Call Out
Last Answered Call In
Last Call In
Date in yyyy-mm-dd format
Time of the first call in
Time of the first call in that was answered
Time of the first call out
Time of the last call out
Time of the last call in that was answered
Time of the last call in
Drill Down Report
Standard drill down reports available on individual calls.
Abandoned Calls Overview
Call Performance Profile Report Description
Produces a graphical representation and table of how many callers are hanging up, which numbers
they’re calling and how long they’re waiting before they do so. The time taken for callers to hang-up
periods are broken down into bands and colour coded to make the trends easier to see.
76
Reports
Vision Installation and Configuration Manual V1.5/0913/9
Vision Installation & Configuration Manual
Configuration Options
Report Period
Start Date
End Date
In Time Period
For
Show
Duration Longer Than
Call Type
Select from 11 presets or Custom start date - end date
Select date from drop down Calendar
Select date from drop down Calendar
Allows report start and stop time to be defined in 24 hour format
Searches for any of the entities that appear on the “Show” line
Automatically populated. Un-checking the box alongside each entry means
that these search results will not be included in the “For” box
Searches for all calls that have been abandoned after a specific time period in
seconds.
Tick boxes for Internal and/or External calls
Report Columns
Destination Name
Destination Number
Total Abandoned
Minimum Time
Maximum Time
Average Time
The name associated with the number called
Extension number associated with the number called
The total number of calls to this name/number that were abandoned during the
Report Period
The shortest duration a call rang for before the caller hung-up
The longest duration a call rang for before the caller hung-up
The average duration a call rang for before the caller hung-up over the Report
Period
Reports
Vision Installation and Configuration Manual V1.5/0913/9
77
Vision Installation & Configuration Manual
Under 10 seconds
10 – 20 seconds
20 - 30 seconds
30 – 45 seconds
45 - 60 seconds
Over 60 seconds
The total number of calls that were abandoned after ringing for less than 10
seconds
The total number of calls that were abandoned after ringing between 10 and 20
seconds
The total number of calls that were abandoned after ringing between 20 and 30
seconds
The total number of calls that were abandoned after ringing between 30 and 45
seconds
The total number of calls that were abandoned after ringing between 45 and 60
seconds
The total number of calls that were abandoned after ringing for more than 60
seconds
Drill Down Report
Drill down on Destination Number takes you to the Abandoned Calls Total report (see next section).
Abandoned Calls Detail
Call Performance Profile Report Description
Provides individual call details behind the Abandoned Calls Overview report. Helps to reduce potential
lost business through abandoned calls to an absolute minimum.
78
Reports
Vision Installation and Configuration Manual V1.5/0913/9
Vision Installation & Configuration Manual
Configuration Options
Report Period
Start Date
End Date
In Time Period
For
Show
Select from 11 presets or Custom start date - end date
Select date from drop down Calendar
Select date from drop down Calendar
Allows report start and stop time to be defined in 24 hour format
Searches for any of the entities that appear on the “Show” line
Automatically populated. Un-checking the box alongside each entry means
that these search results will not be included in the “For” box
Searches for all calls that have been abandoned after a specific time period in
seconds.
Tick boxes for Internal and/or External calls
Duration Longer Than
Call Type
Report Columns
Abandoned Calls Summary
Total Abandoned Calls
Lost Abandoned Calls
They Called Back
We Called Back
The total number of abandoned calls over the Report Period
The total number of calls where the caller hung-up and have neither called
back, not have been called back, over the Report Period
The total number of calls where the caller hung-up, but they later called back,
over the Report Period
The total number of calls where the caller hung-up, but we later called them
back, over the Report Period
Abandoned Calls Total
Date & Time
Calling Number
Calling Name
Destination Number
Destination Name
Wait(s)
Date (yyyy-mm-dd) & Time (hh:mm:ss – in 24 hour format) of the abandoned
call
Number of the caller (if presented)
Name associated with the calling number (if configured in maximiser)
The extension associated with the number called
The name associated with the number called
The duration that the caller waited for before hanging-up
Abandoned Calls That Were Lost
Date & Time
Calling Number
Calling Name
Destination Number
Destination Name
Date (yyyy-mm-dd) & Time (hh:mm:ss – in 24 hour format) of the abandoned
call
Number of the caller (if presented)
Name associated with the calling number (if configured in maximiser)
The extension associated with the number called
The name associated with the number called
Abandoned Callers That Have Called Back In
Date & Time
Calling Number
Calling Name
Destination Number
Destination Name
Date (yyyy-mm-dd) & Time (hh:mm:ss – in 24 hour format) of the abandoned
call
Number of the caller (if presented)
Name associated with the calling number (if configured in maximiser).
The extension associated with the number called
The name associated with the number called
Reports
Vision Installation and Configuration Manual V1.5/0913/9
79
Vision Installation & Configuration Manual
Retried At
Spoke To
Date (yyyy-mm-dd) & Time (hh:mm:ss – in 24 hour format) of the call when the
original Calling Number dialled back
Extension Number/Associated Name that the returning caller was connected to
Abandoned Callers That We Have Called Back
Date & Time
Calling Number
Calling Name
Destination Number
Destination Name
Retried at
Called By
Date (yyyy-mm-dd) & Time (hh:mm:ss – in 24 hour format) of the abandoned
call
Number of the caller (if presented)
Name associated with the calling number (if configured in maximiser)
The extension associated with the number called
The name associated with the number called
Date (yyyy-mm-dd) & Time (hh:mm:ss – in 24 hour format) of the call when the
original Calling Number was called back
Extension Number/Associated Name of the person who called back the
original caller
Drill Down Report
Standard drill down available on Date and Retried At.
Incoming Call Response
Call Performance Profile Report Description
Shows how quickly calls to a Department or Reporting Group were answered, how many went to
voicemail and how many were abandoned. Results are grouped in hourly time bands.
80
Reports
Vision Installation and Configuration Manual V1.5/0913/9
Vision Installation & Configuration Manual
Configuration Options
Report Period
Start Date
End Date
In Time Period
For
Show
Call Type
Select from 11 presets or Custom start date - end date
Select date from drop down Calendar
Select date from drop down Calendar
Allows report start and stop time to be defined in 24 hour format
Searches for any of the entities that appear on the “Show” line
Automatically populated. Un-checking the box alongside each entry means that
these search results will not be included in the “For” box
Tick boxes for Internal and/or External calls
Report Columns
Interval
Total
Max Q
<10 seconds - Ans
<10 seconds - Aban
Timeband divided into hourly segments
Total number of calls during each hourly timeband
The maximum number of calls queuing at any one time during each hourly
timeband
The total number of calls answered in less than 10 seconds during each hourly
timeband
The total number of calls abandoned in less than 10 seconds during each hourly
timeband
Reports
Vision Installation and Configuration Manual V1.5/0913/9
81
Vision Installation & Configuration Manual
<10 seconds - % ans
<20 seconds - Ans
<20 seconds - Aban
<20 seconds - % ans
<30 seconds - Ans
<30 seconds - Aban
<30 seconds - % ans
<45 seconds - Ans
<45 seconds - Aban
<45 seconds - % ans
<60 seconds - Ans
<60 seconds - Aban
<60 seconds - % ans
Voicemail – Total
Voicemail - %
Abandoned – Total
Abandoned - %
The total number of calls answered in less than 10 seconds, divided by total calls
and expressed as a percentage, during each hourly timeband
The total number of calls answered in less than 20 seconds during each hourly
time band
The total number of calls abandoned in less than 20 seconds during each hourly
time band
The total number of calls answered in less than 20 seconds, divided by total calls
and expressed as a percentage, during each hourly time band
The total number of calls answered in less than 30 seconds during each hourly
timeband
The total number of calls abandoned in less than 30 seconds during each hourly
timeband
The total number of calls answered in less than 30 seconds, divided by total calls
and expressed as a percentage, during each hourly timeband
The total number of calls answered in less than 45 seconds during each hourly
timeband
The total number of calls abandoned in less than 45 seconds during each hourly
timeband
The total number of calls answered in less than 45 seconds, divided by total calls
and expressed as a percentage, during each hourly timeband
The total number of calls answered in less than 60 seconds during each hourly
timeband
The total number of calls abandoned in less than 60 seconds during each hourly
timeband
The total number of calls answered in less than 60 seconds, divided by total calls
and expressed as a percentage, during each hourly timeband
The total number of calls forwarded or transferred to voicemail, during each
hourly timeband
The total number of calls forwarded or transferred to voicemail, divided by total
calls and expressed as a percentage, during each hourly timeband
The total number of calls abandoned during each hourly timeband
The total number of calls abandoned, divided by total calls and expressed as a
percentage, during each hourly timeband
Drill Down Report
Standard drill down reports available on Total, Answered and Abandoned
Incoming Call Response Consise
Call Performance Profile Report Description
Shows how quickly calls to a Department or Group were answered, how many went to voicemail and
how many were abandoned. Results are grouped in hourly time bands.
82
Reports
Vision Installation and Configuration Manual V1.5/0913/9
Vision Installation & Configuration Manual
Configuration Options
Report Period
Start Date
End Date
In Time Period
For
Show
DDI
Call Type
Select from 11 presets or Custom start date - end date
Select date from drop down Calendar
Select date from drop down Calendar
Allows report start and stop time to be defined in 24 hour format
Searches for any of the entities that appear on the “Show” line
Automatically populated. Un-checking the box alongside each entry means that
these search results will not be included in the “For” box
Enter the DDI number to be reported on
Tick boxes for Internal and/or External calls
Report Columns
Interval
Total
<10 seconds - Ans
<10 seconds - Aban
<10 seconds - % ans
<20 seconds - Ans
Timeband divided into hourly segments
Total number of calls during each hourly timeband
The total number of calls answered in less than 10 seconds during each hourly
timeband
The total number of calls abandoned in less than 10 seconds during each hourly
timeband
The total number of calls answered in less than 10 seconds, divided by total calls
and expressed as a percentage, during each hourly timeband
The total number of calls answered in less than 20 seconds during each hourly
timeband
Reports
Vision Installation and Configuration Manual V1.5/0913/9
83
Vision Installation & Configuration Manual
<20 seconds - Aban
<20 seconds - % ans
<30 seconds - Ans
<30 seconds - Aban
<30 seconds - % ans
<45 seconds - Ans
<45 seconds - Aban
<45 seconds - % ans
<60 seconds - Ans
<60 seconds - Aban
<60 seconds - % ans
Voicemail – Total
Voicemail - %
Abandoned – Total
Abandoned - %
The total number of calls abandoned in less than 20 seconds during each hourly
timeband
The total number of calls answered in less than 20 seconds, divided by total calls
and expressed as a percentage, during each hourly time band
The total number of calls answered in less than 30 seconds during each hourly
timeband
The total number of calls abandoned in less than 30 seconds during each hourly
timeband
The total number of calls answered in less than 30 seconds, divided by total calls
and expressed as a percentage, during each hourly timeband
The total number of calls answered in less than 45 seconds during each hourly
timeband
The total number of calls abandoned in less than 45 seconds during each hourly
timeband
The total number of calls answered in less than 45 seconds, divided by total calls
and expressed as a percentage, during each hourly timeband
The total number of calls answered in less than 60 seconds during each hourly
timeband
The total number of calls abandoned in less than 60 seconds during each hourly
timeband
The total number of calls answered in less than 60 seconds, divided by total calls
and expressed as a percentage, during each hourly timeband
The total number of calls forwarded or transferred to voicemail, during each
hourly timeband
The total number of calls forwarded or transferred to voicemail, divided by total
calls and expressed as a percentage, during each hourly timeband
The total number of calls abandoned during each hourly timeband
The total number of calls abandoned, divided by total calls and expressed as a
percentage, during each hourly timeband
Drill Down Report
Standard drill down reports available on Total, Answered and Abandoned
Incoming Call Breakdown by Hour
Call Performance Profile Report Description
Identifies incoming call flow on an hourly basis over the required period. Breaks down incoming calls into
those that have been connected, those that were forwarded to voicemail and those that were
abandoned. This report is for Incoming external calls only (it does not include DDI to DDI calls).
84
Reports
Vision Installation and Configuration Manual V1.5/0913/9
Vision Installation & Configuration Manual
Configuration Options
Report Period
Start Date
End Date
In Time Period
For
Show
Call Type
Select from 11 presets or Custom start date - end date
Select date from drop down Calendar
Select date from drop down Calendar
Allows report start and stop time to be defined in 24 hour format
Searches for any of the entities that appear on the “Show” line
Automatically populated. Un-checking the box alongside each entry means
that these search results will not be included in the “For” box
Tick boxes for Internal and/or External calls
Report Columns
Interval
No. of Calls
Connected – Total
Connected – Sub-5 Seconds
Connected – Max Wait
Connected – Average Wait
Timeband divided into hourly segments
Total number of calls during each hourly timeband
The total number of calls that were successfully connected during each
hourly timeband
The total number of calls that were successfully connected, but lasted less
than 5 seconds, during each hourly timeband
The longest time that it took a call to be answered during each hourly
timeband
The average time that it took a call to be answered during each hourly
timeband
Reports
Vision Installation and Configuration Manual V1.5/0913/9
85
Vision Installation & Configuration Manual
Connected – Max Talk
Connected – Average Talk
Connected – Total Talk
Voicemail – Total
Voicemail – Max Wait
Voicemail – Average Wait
Abandoned – Total
Abandoned – Max Wait
Abandoned – Average Wait
The longest time that a call was connected for during each hourly
timeband
The average time that a call was connected for during each hourly
timeband
The total length of time that all calls were connected for during each
hourly timeband
The total number of calls that were forwarded, or transferred, to voicemail
during each hourly timeband
The longest time that it took for a call to be forwarded, or transferred, to
voicemail during each hourly timeband
The average time that it took for a call to be forwarded, or transferred, to
voicemail during each hourly timeband
The total number of calls where thee caller hung-up during each hourly
timeband
The longest time that it took for a caller to hang-up during each hourly
timeband
The average time that it took for a caller to hang-up during each hourly
timeband
Drill Down Report
Standard drill down available on No. of Calls, Total Connected, Total Voicemail, Total Abandoned and Sub5 Seconds Connected.
Incoming Call Breakdown by Department
Call Performance Profile Report Description
Identifies the activity and/or success of multiple DDI numbers/Departments/campaigns/etc. It allows the
number of calls per Department to be clearly identified. Breaks down incoming calls into those that have
been connected, those that were forwarded to voicemail and those that were abandoned.
86
Reports
Vision Installation and Configuration Manual V1.5/0913/9
Vision Installation & Configuration Manual
Configuration Options
Report Period
Start Date
End Date
In Time Period
For
Show
Call Type
Select from 11 presets or Custom start date -end date
Select date from drop down Calendar
Select date from drop down Calendar
Allows report start and stop time to be defined in 24 hour format
Searches for any of the entities that appear on the “Show” line
Automatically populated. Un-checking the box alongside each entry means that
these search results will not be included in the “For” box
Tick boxes for Internal and/or External calls
Report Columns
Department
No. of Calls
Connected – Total
Connected – Sub-5 Seconds
Connected – Max Wait
Connected – Average Wait
Connected – Max Talk
Connected – Average Talk
Connected – Total Talk
Voicemail – Total
Voicemail – Max Wait
Voicemail – Average Wait
Abandoned – Total
Abandoned – Max Wait
Abandoned – Average Wait
Name of Department
Total number of calls during each hourly time band
The total number of calls that were successfully connected during
each hourly time band
The total number of calls that were successfully connected, but lasted
less than 5 seconds, during each hourly time band
The longest time that it took a call to be answered during each hourly
time band
The average time that it took a call to be answered during each hourly
time band
The longest time that a call was connected for during each hourly
time band
The average time that a call was connected for during each hourly
time band
The total length of time that all calls were connected for during each
hourly time band
The total number of calls that were forwarded, or transferred, to
voicemail during each hourly time band
The longest time that it took for a call to be forwarded, or transferred,
to voicemail during each hourly time band
The average time that it took for a call to be forwarded, or transferred,
to voicemail during each hourly time band
The total number of calls where callers hung-up during each hourly
time band
The longest time that it took for a caller to hang-up during each hourly
time band
The average time that it took for a caller to hang-up during each
hourly time band
Drill Down Report
Drill down on Department takes you to the Incoming Call Breakdown by User report.
Reports
Vision Installation and Configuration Manual V1.5/0913/9
87
Vision Installation & Configuration Manual
Incoming Call Breakdown by Day
Call Performance Profile Report Description
Identifies incoming call flow on a daily basis over the required period. Breaks down incoming calls into
those that have been connected, those that were forwarded to voicemail and those that were
abandoned. This report is for Incoming external calls only (it does not include DDI to DDI calls).
88
Reports
Vision Installation and Configuration Manual V1.5/0913/9
Vision Installation & Configuration Manual
Configuration Options
Report Period
Start Date
End Date
In Time Period
For
Show
Call Type
Select from 11 presets or Custom start date - end date
Select date from drop down Calendar
Select date from drop down Calendar
Allows report start and stop time to be defined in 24 hour format
Searches for any of the entities that appear on the “Show” line
Automatically populated. Un-checking the box alongside each entry means
that these search results will not be included in the “For” box
Tick boxes for Internal and/or External calls
Report Columns
Interval
No. of Calls
Connected – Total
Connected – Sub-5 Seconds
Connected – Max Wait
Timeband divided into hourly segments
Total number of calls during each hourly timeband
The total number of calls that were successfully connected during each
hourly timeband
The total number of calls that were successfully connected, but lasted less
than 5 seconds, during each hourly timeband
The longest time that it took a call to be answered during each hourly
timeband
Reports
Vision Installation and Configuration Manual V1.5/0913/9
89
Vision Installation & Configuration Manual
Connected – Average Wait
Connected – Max Talk
Connected – Average Talk
Connected – Total Talk
Voicemail – Total
Voicemail – Max Wait
Voicemail – Average Wait
Abandoned – Total
Abandoned – Max Wait
Abandoned – Average Wait
The average time that it took a call to be answered during each hourly
timeband
The longest time that a call was connected for during each hourly
timeband
The average time that a call was connected for during each hourly
timeband
The total length of time that all calls were connected for during each
hourly timeband
The total number of calls that were forwarded, or transferred, to voicemail
during each hourly timeband
The longest time that it took for a call to be forwarded, or transferred, to
voicemail during each hourly timeband
The average time that it took for a call to be forwarded, or transferred, to
voicemail during each hourly timeband
The total number of calls where thee caller hung-up during each hourly
timeband
The longest time that it took for a caller to hang-up during each hourly
timeband
The average time that it took for a caller to hang-up during each hourly
timeband
Drill Down Report
Drill down on Interval generates the Incoming Call Breakdown By Hour report.
Standard drill down reports available on No. of Calls, Total Connected, Total Voicemail, Total Abandoned
and Sub-5 Seconds Connected.
Incoming Call Breakdown by Week
Call Performance Profile Report Description
Identifies incoming call flow on a weekly basis over the required period. Breaks down incoming calls into
those that have been connected, those that were forwarded to voicemail and those that were
abandoned. This report is for Incoming external calls only (it does not include DDI to DDI calls).
90
Reports
Vision Installation and Configuration Manual V1.5/0913/9
Vision Installation & Configuration Manual
Configuration Options
Report Period
Start Date
End Date
In Time Period
For
Show
Call Type
Select from 11 presets or Custom start date - end date
Select date from drop down Calendar
Select date from drop down Calendar
Allows report start and stop time to be defined in 24 hour format
Searches for any of the entities that appear on the “Show” line
Automatically populated. Un-checking the box alongside each entry means
that these search results will not be included in the “For” box
Tick boxes for Internal and/or External calls
Report Columns
Interval
No. of Calls
Connected – Total
Connected – Sub-5 Seconds
Connected – Max Wait
Connected – Average Wait
Connected – Max Talk
Connected – Average Talk
Connected – Total Talk
Voicemail – Total
Voicemail – Max Wait
Voicemail – Average Wait
Abandoned – Total
Abandoned – Max Wait
Abandoned – Average Wait
Timeband divided into hourly segments
Total number of calls during each hourly timeband
The total number of calls that were successfully connected during each
hourly timeband
The total number of calls that were successfully connected, but lasted less
than 5 seconds, during each hourly timeband
The longest time that it took a call to be answered during each hourly
timeband
The average time that it took a call to be answered during each hourly
timeband
The longest time that a call was connected for during each hourly
timeband
The average time that a call was connected for during each hourly
timeband
The total length of time that all calls were connected for during each
hourly timeband
The total number of calls that were forwarded, or transferred, to voicemail
during each hourly timeband
The longest time that it took for a call to be forwarded, or transferred, to
voicemail during each hourly timeband
The average time that it took for a call to be forwarded, or transferred, to
voicemail during each hourly timeband
The total number of calls where thee caller hung-up during each hourly
timeband
The longest time that it took for a caller to hang-up during each hourly
timeband
The average time that it took for a caller to hang-up during each hourly
timeband
Drill Down Report
Drill down on Interval generates the Incoming Call Breakdown By Day report.
Standard drill down reports available on No. of Calls, Total Connected, Total Voicemail, Total Abandoned
and Sub-5 Seconds Connected, gives a breakdown of all calls in that category during the week on an
individual basis.
Reports
Vision Installation and Configuration Manual V1.5/0913/9
91
Vision Installation & Configuration Manual
Incoming Call Breakdown by Month
Call Performance Profile Report Description
Identifies incoming call flow on a calendar month basis over the required period. Breaks down incoming
calls into those that have been connected, those that were forwarded to voicemail and those that were
abandoned. This report is for Incoming external calls only (it does not include DDI to DDI calls).
Configuration Options
Report Period
Start Date
End Date
In Time Period
For
Show
Call Type
Select from 11 presets or Custom start date - end date
Select date from drop down Calendar
Select date from drop down Calendar
Allows report start and stop time to be defined in 24 hour format
Searches for any of the entities that appear on the “Show” line
Automatically populated. Un-checking the box alongside each entry means
that these search results will not be included in the “For” box
Tick boxes for Internal and/or External calls
Report Columns
Interval
No. of Calls
Connected – Total
Connected – Sub-5 Seconds
Connected – Max Wait
Connected – Average Wait
Connected – Max Talk
Connected – Average Talk
Connected – Total Talk
Voicemail – Total
92
Timeband divided into hourly segments
Total number of calls during each hourly timeband
The total number of calls that were successfully connected during each
hourly timeband
The total number of calls that were successfully connected, but lasted
less than 5 seconds, during each hourly timeband
The longest time that it took a call to be answered during each hourly
timeband
The average time that it took a call to be answered during each hourly
timeband
The longest time that a call was connected for during each hourly
timeband
The average time that a call was connected for during each hourly
timeband
The total length of time that all calls were connected for during each
hourly timeband
The total number of calls that were forwarded, or transferred, to
voicemail during each hourly timeband
Reports
Vision Installation and Configuration Manual V1.5/0913/9
Vision Installation & Configuration Manual
Voicemail – Max Wait
Voicemail – Average Wait
Abandoned – Total
Abandoned – Max Wait
Abandoned – Average Wait
The longest time that it took for a call to be forwarded, or transferred, to
voicemail during each hourly timeband
The average time that it took for a call to be forwarded, or transferred, to
voicemail during each hourly timeband
The total number of calls where thee caller hung-up during each hourly
timeband
The longest time that it took for a caller to hang-up during each hourly
timeband
The average time that it took for a caller to hang-up during each hourly
timeband
Drill Down Report
Drill down on Interval generates the Incoming Call Breakdown By Day report.
Standard drill down reports available on No. of Calls, Total Connected, Total Voicemail, Total Abandoned
and Sub-5 Seconds Connected, gives a breakdown of all calls in that category during the month on an
individual basis.
Incoming Calls Breakdown by DDI
Call Performance Profile Report Description
Shows the number of calls received by a User or Department on all relevant DDIs or the number of calls
on a specific DDI.
Reports
Vision Installation and Configuration Manual V1.5/0913/9
93
Vision Installation & Configuration Manual
Configuration Options
Report Period
Start Date
End Date
In Time Period
For
Show
DDI:
Select from 11 presets or use Custom to specify the start date and end date required
Used with the Custom Report Period. Click on Select Date to select the Start date
required.
Used with the Custom Report Period. Click on Select Date to select the End date
required.
Specify the time period within each day of the Report Period that you wish to report
on, in 24 hour format
Searches for any of the entities that appear on the “Show” line. Enter the User or
Department whose DDI calls you wish to report on. As you start to type in the name
this will be matched with the Users or Departments on your system, select the entry
required. This can be left blank if you wish to search for all calls on the DDI number
specified below.
Automatically populated. Un-checking the box alongside each entry means that these
search results will not be included in the “For” box
Enter the DDI number you wish to report on. As you start to type in the number this
will be matched with the DDI numbers entered on your system, select the number
required. This can be left blank if you wish to search for all DDI calls to the User or
Department specified above.
Report Columns
DDI - Target
# Calls
Connected – Total
Connected – Sub-5 Seconds
Connected – Max Wait
94
The DDI number and the User or Department that received the call
Total number of incoming calls connected to the User or Department
over the Report Period
The total number of calls that were successfully connected.
The total number of calls that were successfully connected, but lasted
less than 5 seconds.
The longest time that it took a call to be answered.
Reports
Vision Installation and Configuration Manual V1.5/0913/9
Vision Installation & Configuration Manual
Connected – Average Wait
Connected – Max Talk
Connected – Average Talk
Connected – Total Talk
Voicemail – Total
Voicemail – Max Wait
Voicemail – Average Wait
Abandoned – Total
Abandoned – Max Wait
Abandoned – Average Wait
The average time that it took a call to be answered.
The longest time that a call was connected.
The average time that a call was connected for.
The total length of time that the calls were connected for.
The total number of calls that were forwarded, or transferred, to
voicemail.
The longest time that it took for a call to be forwarded, or transferred, to
voicemail.
The average time that it took for a call to be forwarded, or transferred, to
voicemail.
The total number of calls where the caller hung-up.
The longest time that it took for a caller to hang-up.
The average time that it took for a caller to hang-up.
Drill Down Report
Standard drill down report available on each DDI-Target.
Incoming Calls Breakdown by User
Call Performance Profile Report Description
Shows which individuals have been answering calls for Departments on maximiser or a pre-configured
Reporting Group on Vision. A bar graph is produced for the top 20 by number of calls answered.
Reports
Vision Installation and Configuration Manual V1.5/0913/9
95
Vision Installation & Configuration Manual
Configuration Options
Report Period
Start Date
End Date
In Time Period
For
Show
Call Type
Select from 11 presets or Custom start date - end date
Select date from drop down Calendar
Select date from drop down Calendar
Allows report start and stop time to be defined in 24 hour format
Searches for any of the entities that appear on the “Show” line
Automatically populated. Un-checking the box alongside each entry means that
these search results will not be included in the “For” box
Tick boxes for Internal and/or External calls
Report Columns
User
Number
Number of Calls
Ring Time - Maximum
Ring Time - Minimum
Ring Time - Average
Talk Time - Maximum
Talk Time - Minimum
Talk Time - Average
Name associated with the Extension number
Extension number on maximiser
Total number of incoming calls connected to the User/Number over the Report
Period
The longest time an incoming call rang for, before being answered by the
User/Extension
The shortest time an incoming call rang for, before being answered by the
User/Extension
The average time an incoming call rang for, before being answered by the
User/Extension
The longest time the User/Extension was talking to an incoming caller
The shortest time the User/Extension was talking to an incoming caller
The average time the User/Extension was talking to an incoming caller
Drill Down Report
Standard drill down report available on User.
Overview by Talk Time
Call Performance Profile Report Description
Produces a list of inbound, outbound and total number of calls and talk time for individuals and
Departments. Graph produced for the top 20 by total talk time. Clearly identifies who’s spending the most
time on the phone.
96
Reports
Vision Installation and Configuration Manual V1.5/0913/9
Vision Installation & Configuration Manual
Configuration Options
Report Period
Start Date
End Date
In Time Period
For
Show
Call Type
Select from 11 presets or Custom start date - end date
Select date from drop down Calendar
Select date from drop down Calendar
Allows report start and stop time to be defined in 24 hour format
Searches for any of the entities that appear on the “Show” line
Automatically populated. Un-checking the box alongside each entry means
that these search results will not be included in the “For” box
Tick boxes for Internal and/or External calls
Reports
Vision Installation and Configuration Manual V1.5/0913/9
97
Vision Installation & Configuration Manual
Report Columns
Name
Number
Inbound - Total
Inbound - Connect
Inbound - Abandoned
Inbound - VM
Inbound – Maximum Call
Length
Inbound - Talk Time
Outbound – Number of
Outbound Calls
Outbound – Total
Outbound Talk Time
Total Talk Time
Name associated with the Extension number
Extension number on maximiser
The total number of inbound calls presented to this Name/Number
The total number of inbound calls answered by this Name/Number
The total number of inbound calls presented to this Name/Number
that were abandoned by the caller
The total number of inbound calls presented to this Name/Number
that were answered by voicemail
The longest inbound call handled by this Name/Number
The total connection time for inbound calls for this Name/Number
The total number of outbound calls made by this Name/Number
The total connection time for outbound calls made by this
Name/Number
The total connection time for inbound and outbound calls for this
Name/Number
Drill Down Report
Standard drill down report available on Name.
Overview by User
Call Performance Profile Report Description
Delivers a report on individual users. How many DDI and Departmental calls they received, how many
were answered, how many were abandoned and how many went to voicemail, total, average and
maximum talk time and average ring time. For outbound calls, the total number of calls made, the
number of these that were un-answered, the average talk time and total “dial tone” time is shown. Ideal
for tracking overall individual and/or Departmental performance.
98
Reports
Vision Installation and Configuration Manual V1.5/0913/9
Vision Installation & Configuration Manual
Configuration Options
Report Period
Start Date
End Date
In Time Period
For
Show
Call Type
Select from 11 presets or Custom start date - end date
Select date from drop down Calendar
Select date from drop down Calendar
Allows report start and stop time to be defined in 24 hour format
Searches for any of the entities that appear on the “Show” line
Automatically populated. Un-checking the box alongside each entry means
that these search results will not be included in the “For” box
Tick boxes for Internal and/or External calls
Report Columns
Name
Extension
Total Calls
Name associated with the Extension number
Extension number on maximiser
Total number of inbound at outbound calls for this Name/Extension
Reports
Vision Installation and Configuration Manual V1.5/0913/9
99
Vision Installation & Configuration Manual
Inbound - Total
Inbound - Direct
Inbound – Department Calls
Inbound - Answered
Inbound - Abandoned
Inbound - VM
Inbound - Talk Time
Inbound – Average Talk
Time
Inbound – Maximum Talk
Time
Inbound – Average Ring
Time
Outbound – Number of
Outbound Calls
Outbound – Unanswered
Outbound – Average Talk
Time
Outbound – Dial Tone Time
The total number of inbound calls presented to this Name/Extension
The total number of direct inbound calls answered by this
Name/Extension
The total number of direct, inbound Department calls answered by this
Name/Extension
The total number of inbound calls answered by this Name/Extension
The total number of inbound calls presented to this Name/Extension that
were abandoned by the caller
The total number of inbound calls presented to this Name/Extension that
were answered by voicemail
The total connection time for inbound calls for this Name/Extension
The average connection time for inbound calls to this Name/Extension
The longest connection time for inbound calls to this Name/Extension
The average ring time for inbound calls for this Name/Extension
The total number of outbound calls made by this Name/Extension
The total number of outbound calls made by this Name/Extension that
were not answered
The average connection time for outbound calls made by this
Name/Extension
The total time by this Name/Extension spent off-hook/dialling outbound
calls
Drill Down Report
Drill down on Name gives a breakdown of all calls for that User or Department during the Report Period
on an individual basis and is broken down into inbound Direct Calls, inbound Departmental calls and
outbound calls.
100
Reports
Vision Installation and Configuration Manual V1.5/0913/9
Vision Installation & Configuration Manual
Direct Calls
Date & Time
Name
Number
Target Name
Target Number
Answered By Name
Answered By
Ringing Time
Connected Time
Date (yyyy-mm-dd) & Time (hh:mm:ss – in 24 hour format) of the individual call
Name of the caller (if entered on maximiser)
Caller’s number (if presented)
The name associated with the number called
The number called
The name associated with the extension that actually answered the call
The extension that actually answered the call
The total time that this call was ringing before being answered
The total time that this call was connected
Departmental And Picked Up Calls Grouped By Department
Date & Time
Name
Number
Target Name
Target Number
Answered By Name
Answered By
Ringing Time
Date (yyyy-mm-dd) & Time (hh:mm:ss – in 24 hour format) of the individual call
Name of the caller (if entered on maximiser)
Caller’s number (if presented)
The name associated with the number called
The number called
The name associated with the extension that actually answered the call
The extension that actually answered the call
The total time that this call was ringing before being answered
Reports
Vision Installation and Configuration Manual V1.5/0913/9
101
Vision Installation & Configuration Manual
Connected Time
The total time that this call was connected
Outbound Calls
Date & Time
Name
Number
Target Name
Target Number
Call Duration
Connected Time
Date (yyyy-mm-dd) & Time (hh:mm:ss – in 24 hour format) of the individual call
Name of the caller (if entered on maximiser)
Caller’s number (if presented)
The name associated with the number called
The number called
The total time for this call, including ring time
The total time that this call was connected
Drill Down Report
Standard drill down report available on Name.
Calls Abandoned In Auto Attendant
Call Performance Profile Report Description
Shows how many calls were abandoned whilst connected to individual Auto Attendant numbers and
when. Ideal for checking which auto attendant routines are well received – and which might need some
more fine-tuning of structure and/or announcements.
Configuration Options
Report Period
Start Date
End Date
In Time Period
Call Type
Select from 11 presets or Custom start date - end date
Select date from drop down Calendar
Select date from drop down Calendar
Allows report start and stop time to be defined in 24 hour format
Tick boxes for Internal and/or External calls
Report Columns
Attendant
Total
Under 10 seconds
Under 20 seconds
Under 30 seconds
102
Name of the Auto Attendant, as configured on maximiser
Total number of calls to the Auto Attendant that were abandoned
Total number of calls to the Auto Attendant that were abandoned before 10
seconds
Total number of calls to the Auto Attendant that were abandoned before 20
seconds
Total number of calls to the Auto Attendant that were abandoned before 30
seconds
Reports
Vision Installation and Configuration Manual V1.5/0913/9
Vision Installation & Configuration Manual
Under 45 seconds
Under 60 seconds
Over 60 seconds
Total number of calls to the Auto Attendant that were abandoned before 45
seconds
Total number of calls to the Auto Attendant that were abandoned before 60
seconds
Total number of calls to the Auto Attendant that were abandoned after 60 seconds
Drill Down Report
Standard drill down report available on Attendant.
Contact Report
Call Performance Profile Report Description
Delivers a report of telephone calls to or from on any particular Contact that has been entered on the
maximiser system database.
Configuration Options
Report Period
Start Date
End Date
In Time Period
Contact
For
Show
Contact Number 1 to 6
Inbound/Outbound
Select from 10 presets or Custom start date - end date
Select date from drop down Calendar
Select date from drop down Calendar
Allows report start and stop time to be defined in 24 hour format
Searches for entries in the Contacts database matching the text entered
Searches for any of the entities that appear on the “Show” line that
match the text entered
Automatically populated. Un-checking the box alongside each entry
means that these search results will not be included in the “For” box
Allows calls from up to six numbers to be searched for
Both/Inbound/Outbound – select whether to report on incoming calls
only, outgoing calls only or both
Report Columns
Date & Time
Source Name
Source Number
Target Name
Date (yyyy-mm-dd) & Time (hh:mm:ss – in 24 hour format) of the
individual call
Name of the caller (if entered on maximiser)
Number of the caller (if presented)
The name associated with the number called
Reports
Vision Installation and Configuration Manual V1.5/0913/9
103
Vision Installation & Configuration Manual
Target Number
Extension Name
Extension
Duration
Connected
Cost
The number called
The name associated with the extension that actually answered the call
The extension that actually answered the call
The total time that this call lasted; ringing and connected
The total time that this call was connected
The cost associated with this call
Inbound call - answered
Inbound call - unanswered
Outbound or Forwarded call - answered
Outbound or Forwarded call - unanswered
Drill Down Report
Standard drill down report available on Date & Time.
Standard Drill Down Report
Where available, drill down reports are presented in the following format (unless stated otherwise).
Date & Time
Source
Destination
Extension
Forwarded By
Ringing
Connected
Cost
Date (yyyy-mm-dd) & Time (hh:mm:ss – in 24 hour format) of the individual
call
Name (if entered on maximiser) and number (if presented) of the caller
The name associated with the number called and the number called
The name associated with the extension that actually answered the call and
the number of that extension
The name associated with the extension that caused the call to be forwarded
and the number of that extension
The total time that this call was ringing before connected
The total time that this call was connected
The cost associated with this call
A second drill down on Date & Time provides a complete call record.
104
Reports
Vision Installation and Configuration Manual V1.5/0913/9
Vision Installation & Configuration Manual
An expanded engineering view of the call record, displaying a greater depth of information is also
available.
Reports
Vision Installation and Configuration Manual V1.5/0913/9
105
Vision Installation & Configuration Manual
Scheduled Reports
The Scheduled Reports link allows a Report to be sent as HTML to a specified email account.
106
1
2
3
4
Within the Vision Portal click on the Scheduled Reports link
Select the Add Button. The list of Reports available will be displayed.
Select the type of Report to be sent.
The Select Scheduled Report Criteria screen will be displayed
5
6
Select the options required to determine when the report is to be sent.
In the Send to: field enter the email address of where the report is to be sent. (By default the
email address configured in the Manager’s account is entered here.) Multiple email addresses
can be entered, separated by a comma.
7
Select the Set Scheduled Report button and you will see confirmation of your scheduled report
in the Scheduled Reports list.
Reports
Vision Installation and Configuration Manual V1.5/0913/9
Vision Installation & Configuration Manual
Scheduled reports are sorted by the Time column.
The reports will be sent with the email subject as “Vision Report for <user/department/company/reporting
group selected><report name>.
Edit a Scheduled Report
1
2
3
4
5
Within the Vision Portal click on the Scheduled Reports link
The Scheduled Reports list will be displayed, sorted by the Time column
Use the Previous Page and Next Page links to find the Scheduled Report you require, if relevant
Click on the link, under the Report column, for the Scheduled Report to be amended
A Change Report link will become available enabling you to change the Report type
6
7
Make any other changes required to the Report criteria
Select Update
Scheduled Report ownership
A Manager will only be able to edit a Scheduled Report that they have created, unless they have
Configure Manager rights. The Administrator or a Manager with Configure Manager rights can edit all
Scheduled Reports. All Managers will be able to see the scheduled reports but the link on the Report
name will only be available on a Scheduled Report they have created, unless they have Configure
Manager rights.
Please note that only Managers with Manage as Queue and Manage as Agent permissions will be able to
edit a Scheduled Report based on a Call Centre report. Please refer to the Vision Call Centre
Configuration manual for further details.
My Reports
A Manager can specify the reports that he/she uses on a regular basis and highlight them as favourite
reports.
Reports
Vision Installation and Configuration Manual V1.5/0913/9
107
Vision Installation & Configuration Manual
These favourite reports can then be displayed via the My Reports link within the Report
Categories menu. The My Reports page becomes that Managers default page when
opening the Vision portal and when clicking on the Reports link in the Main Menu. The
All Reports link will allow the Manager to view the complete list of reports.
Create a favourite report
1
2
3
4
Select Reports from the Main Menu
Hover the mouse over the report required.
A gold star with a green add icon will appear
Click on the gold star
5
This report will now be displayed permanently with a gold
star
6
Click on the My Reports link within the Report Categories menu and the favourite report will be
displayed within this list
Remove a favourite report
1
2
3
4
5
Select either the My Reports or All Reports link from the Report Categories list
Hover the mouse over the gold star of the report to be
removed from My Reports
The gold star will be display with a red delete icon
Click on the gold star
The report will be removed from My Reports
Quick Reports
Quick reports enable you to save regularly used criteria in a report for use again and again.
1
2
108
While creating a Report select “Save these criteria to my quick reports?
The “Please enter a name for this report:” text box will be displayed. Enter the name you wish
to use to identify this quick report
Reports
Vision Installation and Configuration Manual V1.5/0913/9
Vision Installation & Configuration Manual
3
Select the Generate Report button. The report will be created and the criteria used will be
saved for future use.
To use a Quick Report perform the following:
1
2
Select the report you wish to create
The Quick Reports saved with this report will be displayed at the top right hand corner
3
4
Select the Quick Report required
A report using the criteria saved in the Quick Report will be created
Call Alarms
The Call Alarms feature enables Vision to be configured to send an email in the event of an exceptional
number of calls or call duration which might indicate the system is a target of fraud. All outbound ISDN
and SIP trunks can also be closed down at the same time to stop all outbound calls. (Please note the
maximiser system must be running v3.2.1568 or higher for this feature to be available.)
Create a Call Cost Alarm
1
2
3
4
Within the Vision Portal click on the Call Alarms link
Under Call Cost Alarms section click on the Add button
The Select Cost Alarm Criteria dialogue box will be displayed
In the For: field enter the User or Reporting Group that the call costs are to be compared
against. If left blank, the cost of calls will be checked against all Users.
Reports
Vision Installation and Configuration Manual V1.5/0913/9
109
Vision Installation & Configuration Manual
5
6
7
8
9
10
11
In the Email: field enter the email address to receive the alarm. Multiple email addresses can
be entered and must be separated by a comma.
From the Alarm Type: list box select either Single Call or Hourly Total
Single Call = the alarm will be triggered if a single call exceeds the Cost Limit below
Hourly Total = the alarm will be triggered if the total cost of calls over an hourly period (eg
09.00-10.00) exceeds the Cost Limit below.
From the On Days: list box select whether the call costs are to be check Every Day, Mon-Fri or
Sat-Sun.
From the In Time Period list boxes select the time period that the call costs will be checked on
the days selected above, eg 18:00-08:00 or 00:00-00.00 (24 hours)
In the Cost Limit (£) field enter the total cost of the calls that must be reached to trigger the
alarm
Tick the Block Outbound Calls tick box if all outgoing calls are to be blocked when the alarm is
triggered. (When the alarm is triggered this option will turn on the Outgoing Call Bar field in all
ISDN and SIP trunks.)
Select Update when ready.
Create a Call Duration Alarm
1
2
3
4
5
6
110
Within the Vision Portal click on the Call Alarms link
Under the Call Duration Alarms section click on the Add button
In the Email: field enter the email address to receive the alarm. Multiple email addresses can
be entered and must be separated by a comma.
From the On Days: list box select whether the call costs are to be check Every Day, Mon-Fri or
Sat-Sun.
From the In Time Period list boxes select the time period that a call’s duration will be checked
on the days selected above, eg 18:00-08:00 or 00:00-00.00 (24 hours)
In the Duration Limit (hhmm) field enter the total time the length of a call must reach to trigger
the alarm
Reports
Vision Installation and Configuration Manual V1.5/0913/9
Vision Installation & Configuration Manual
7
8
Tick the Block Outbound Calls tick box if all outgoing calls are to be blocked when the alarm is
triggered. (When the alarm is triggered this option will turn on the Outgoing Call Bar field in all
ISDN and SIP trunks.)
Select Update when ready.
Please note: this alarm applies to all Users during the On Days and In Time Period selected.
Call Alarms Summary
Once configured each alarm will be displayed within the Call Alarms page of the Vision portal.
Block Outbound Calls
If the Block Outbound Calls option has been selected in an alarm and this alarm is triggered this will turn
on the Outgoing Call Bar field in all ISDN and SIP trunks on the system. To return the system to normal so
that outbound calls can be made the Outgoing Call Bar field in all the ISDN and SIP trunks must be
disabled via the Manager application.
Alarm Emails
When an alarm is triggered the following examples show the information provided within the email that
is sent.
Reports
Vision Installation and Configuration Manual V1.5/0913/9
111
Vision Installation & Configuration Manual
Click on the Itemised Cost Report link to view the details of the call(s).
112
Reports
Vision Installation and Configuration Manual V1.5/0913/9
Vision Installation & Configuration Manual
Live Wallboards
A Live Wallboard can be designed to monitor Departmental or an individual’s performance. These are
created via the Live Wallboards link within the Vision portal.
Licensing
Before creating a wallboard the number of VisionLive licences required must be considered. A VisionLive
licence enables a concurrent view of a wallboard. You can create as many wallboards as you like but
wallboards can only be viewed concurrently by the number of licences installed. Two people viewing the
same wallboard at the same time count as 2 concurrent viewers.
If VisionLive licences have not been entered the following message will appear when a wallboard is
created and every time a wallboard is opened.
You can only have one trial Wallboard open at any one time and the following message is displayed if
more than one is opened.
Creating a Wallboard
Any Manager logged into the Vision portal can create a Wallboard, unless their account has been
configured Read Only Assigned Security.
1
2
Open the Vision portal
Click on the Live Wallboards link
Wallboards
Vision Installation and Configuration Manual V1.5/0913/9
113
Vision Installation & Configuration Manual
3
4
Click on Add Additional Wallboard.
In the Name field enter the text that will be used to identify this wallboard
5
Click on Update. The new wallboard will now be listed.
Wallboard Ownership
The Manager that creates the wallboard becomes the owner of that wallboard. Only that Manager, the
Administrator and a Manager with Configure Manager rights can amend and delete the wallboard.
The Live Wallboards link within the Vision portal will only list the wallboards that the Manager owns,
unless he/she has Configure Manager rights.. However, he/she can open and view a wallboard, via a
web browser, he/she does not own but will be unable to amend it. Please refer to the Viewing a
Wallboard section from page 125 for further details.
Design a Wallboard
1
2
3
114
To design your new Wallboard, click on the wallboard name.
This will take you to a blank screen with a padlock on the bottom right hand corner of the page.
Click on the padlock and two additional icons will be displayed:
Wallboards
Vision Installation and Configuration Manual V1.5/0913/9
Vision Installation & Configuration Manual
Toggle Borders - once you have designed your wallboard you can remove the
title bar and borders on all the panels by selecting this icon
Add - this icon will enable you to choose a panel to add to your wallboard
Padlock - click on this icon to lock the wallboard and changes to the design
cannot be made accidentally
4
Click on the Add icon and the Add New Panel screen will be displayed.
You can now decide which type of panel you wish to create.
Statistic Panel
This panel will enable you to view call information such as the number of
calls queuing, maximum ring time and so on.
Status Panel
This panel can be used to display BLF information for specific Users and
Departments
Report Panel
A real time report on call information can be displayed on the wall board.
Full details of the reports available are listed in the Reports section from
page 52.
Web Panel
This will enable you to select a web page to be displayed on the
wallboard. This useful for displaying information available on the
company’s intranet or, for example, financial information available on an
external website
Please note that if further Panel Types are displayed your maxismiser system is running the Vision Call
Centre software. Please refer to the Vision Call Centre Configuration manual for further details.
Wallboards
Vision Installation and Configuration Manual V1.5/0913/9
115
Vision Installation & Configuration Manual
Statistic Panel
The Statistic Panel will enable you to view call information such as the number of calls queuing, busiest
User, average wait and so on for a Department, User or Reporting Group.
116
1
From the Add New Panel screen click on Statistic Panel and the panel configuration form will
appear
2
From the Panel Type list box select one of the following options
Wallboards
Vision Installation and Configuration Manual V1.5/0913/9
Vision Installation & Configuration Manual
(Please note that if the Statistic Panel dialogue box gives you the ability to choose a Panel Type
Group - Standard Panels, Agent Panels or Queue Panels your maximiser system is running the
Vision Call Centre software. Please refer to the Vision Call Centre Configuration manual for
further details. The panels listed above will be available if you select Standard Panels.)
3
4
5
6
7
From the For list box select the type of entry you wish to monitor - Departments, Users or Report
Groups
Click in the Search box below the For list box.
Start to type the first few of letters of the User, Department or Report Group you wish to search
for. A list of the available options from the maximiser database will be displayed.
Click on the User, Department or Report Group required
The following options can then be configured if required.
Background
Background Text Colour
Flash when Alerting
Warn when value is
Click on the coloured square beside Background to access the
Colour Panel. Click on the colour required for your panel. Click
on the Close icon
when ready.
Click on the coloured square beside Background Text Colour to
access the Colour Panel. Click on the colour required for the
text on your panel. Click on the Close icon
when ready.
If alerting has been set below this option will determine
whether the panel will flash or stay static when an alert is
received. Select either Yes or No.
This option can be used to display the panel in a different
colour to warn, for example, if the number of calls queuing for
a Department has gone above a certain value.
Firstly from the list box select < (less than) or > (greater than).
Then in the text box enter the value to be compared.
Warning
Click on the coloured square beside Warning to access the
Colour Panel. Click on the colour required for the panel when
the Warning value has been reached. Click on the Close icon
when ready.
Warning Text Colour
Click on the coloured square beside Warning Text Colour to
access the Colour Panel. Click on the colour required for the
text on your panel when the Warning value has been reached
Click on the Close icon
when ready.
Alert when value is
This option can be used to display the panel in a different
colour to alert, for example, if the number of calls queuing for a
Department has gone above a certain value.
Firstly from the list box select < (less than) or > (greater than).
Then in the text box enter the value to be compared.
Alert
Click on the coloured square beside Alert to access the Colour
Panel. Click on the colour required for the panel when the Alert
value has been reached. Click on the Close icon
when
ready.
Wallboards
Vision Installation and Configuration Manual V1.5/0913/9
117
Vision Installation & Configuration Manual
8
9
10
11
12
118
Alert Text Colour
Click on the coloured square beside Alert Text Colour to access
the Colour Panel. Click on the colour required for the text on
your panel when the Alert value has been reached. Click on
the Close icon
when ready.
Min Duration(s)
Available with Today’s Abandoned Calls panel type. Enter the
minimum number of seconds the call is ring before it is
displayed in the panel.
Type of Call
Available with some panel types. From the list box select to
display All Calls or Internal only or External only.
Show Name
This will determine where on the panel the name of the User,
Department or Reporting Group will be displayed on the panel.
Select Top, Bottom, Left, Right or No.
Show Title
This will determine where on the panel the title of the panel will
be displayed. Select Top, Bottom, Left, Right or No.
Select Add when ready
Your panel will appear at the top left hand side of the wallboard.
Click and drag on the panel to move it to the position required. (Please note that a new Panel
will appear in the top left hand corner on the wallboard and will therefore appear on top of a
Panel if one already exists there. Click and drag the panel to the required position.)
Click and drag on the bottom right hand corner of the panel to resize it.
Repeat all the above steps to create another Statistic Panel.
Wallboards
Vision Installation and Configuration Manual V1.5/0913/9
Vision Installation & Configuration Manual
The following Panel Types have been enabled with the ability to create a report on the information
displayed. Double click on the panel to display the relevant report.
Todays Incoming Calls
Todays Abandoned Calls
Todays Voicemail Calls
Todays Connected Calls
Percentage Calls Answered
Percentage Calls Abandoned
Busiest User (number of calls)
Busiest User (time on call)
Todays Total Cost
Todays Longest Wait
Todays Average Wait
Calls In To Attendant panel
When creating a Calls In To Attendant panel the For: field must contain the same path as entered in the
Translate To field of the DDI plan entry for the relevant auto attendant or extended attendant.
Status Panel
A Status Panel will display BLF information for specific Users and Departments that you add to that Panel.
1
2
From the Add New Panel screen click on Status Panel and the Search For Users/Departments
screen will be displayed
In the search box at the top left hand side enter the first few letters of the User or Department
you wish to search for and the list below will populate with the entries from the maximiser
database matching your search.
Wallboards
Vision Installation and Configuration Manual V1.5/0913/9
119
Vision Installation & Configuration Manual
3
Click on the name required and this entry will be added to the “Users/Departments you are
monitoring” list on the right hand side.
4
The following options can then be configured if required.
Remove an entry
To remove an entry from the “Users/Departments you are
monitoring” list, click on the relevant entry within this list and it
will disappear
Set Background
Click on the Set Background button to access the Wallboard
Images loaded via the Vision Admin Portal. (Please refer to the
Wallboard Images section from page 22 for further
information.) Click on the Wallboard image required or the
Close icon
5
120
to cancel.
Select Add when ready
Wallboards
Vision Installation and Configuration Manual V1.5/0913/9
Vision Installation & Configuration Manual
BLF Status
The following icons will display the status of the User’s or Department’s extension
The extension is available
The extension is receiving a call
The extension is currently busy
The User has Do Not Disturb set
BLF Information
On Call To
This will show who the User is currently on a call to – displaying the name of the
caller or the person called (if known by the system), the number called or dialled;
or whether the user is leaving a message for a colleague or accessing their own
voicemail
Missed Calls
This will be displayed the number calls that have not been answered by this
extension or by voicemail
Not Logged In
This User is not logged on to any handset on the system
Forwarding to
This will display the type of forwarding set for this User and where the calls have
been forwarded to eg Personal Forwarding to 2009
New Messages
This will display the number of new messages that this User has received and not
yet listened to
Wallboards
Vision Installation and Configuration Manual V1.5/0913/9
121
Vision Installation & Configuration Manual
Report Panel
A Report Panel allows you to have a real time report on specific call information displayed on a wall board.
Full details of the reports available are listed in the Reports section from page 52.
1
2
From the Add New Panel screen select Report Panel, the panel configuration form will be
displayed.
From the Vision Report list box select one of the following reports
Full details on these reports are available in the Reports section from page 52. Please note that
if you are also given the ability to create a panel based on a Call Centre report your maximiser
system is running the Vision Call Centre software. Please refer to Vision Call Centre
Configuration manual for further details.
3
4
5
6
7
122
From the For list box select the type of entry you wish to report on - Departments, Users or
Report Groups
Click in the Search box below the For list box.
Start to type the first few of letters of the User, Department or Report Group you wish to search
for. A list of the available options from the maximiser database will be displayed.
Click on the User, Department or Report Group required
From the Display Options list box select the style of graph required, eg Graph, Table or
Graph + Table. Please note that only the options relevant to the report selected will be listed.
Wallboards
Vision Installation and Configuration Manual V1.5/0913/9
Vision Installation & Configuration Manual
8
Select Add when ready
Web Panel
The Web Panel allows you to display a web page on a Wallboard. This useful for displaying information
available on the company’s intranet or, for example, financial information available on an external
website
1
2
3
From the Add New Panel screen click on Web Panel and the panel configuration form will
appear
Enter the URL for the web site required, eg www.splicecom.com
From the Refresh rate (s) list box select the frequency that you wish the web page to refresh, eg
120 seconds
Wallboards
Vision Installation and Configuration Manual V1.5/0913/9
123
Vision Installation & Configuration Manual
4
Select Add when ready
Edit a Panel
1
2
3
4
Unlock the panel for editing, if necessary, by clicking on the Padlock icon at the bottom right
hand corner of the wallboard. (Please note that you will only be able to unlock a wallboard if
you are logged in as the Manager that created the wallboard, a Manager account that has
Configure Manager rights, or the Administrator.)
Click on the Information icon of the relevant panel and the panel configuration form will be
displayed.
Make the changes required.
Click on OK to save the changes or Cancel to discard the changes.
Delete a Panel
1
124
Unlock the panel for editing, if necessary, by clicking on the Padlock icon at the bottom right
hand corner of the wallboard. (Please note that you will only be able to unlock a wallboard if
Wallboards
Vision Installation and Configuration Manual V1.5/0913/9
Vision Installation & Configuration Manual
2
3
4
you are logged in as the Manager that created the wallboard. a Manager account that has
Configure Manager rights, or the Administrator.)
Click on the Close icon at the top left hand corner of the panel
You will be asked if you are sure you wish to delete the panel
Select OK to delete the panel or Cancel if you do not wish to delete the panel
Change a Wallboard name
1
2
3
4
Open the Vision portal
Select the Live Wallboards link
Beside the Wallboard name to be amended click on Edit Wallboard
Make the changes required
5
Select Update to save the changes, or Cancel to discard the changes
Delete a Wallboard
1
2
3
4
5
Open the Vision portal
Click on the Live Wallboards link
Beside the Wallboard name to be amended click on Edit Wallboard
Select Delete
You will be returned to the wallboard list and the wallboard will be deleted
Viewing a Wallboard
Authorisation to view a wallboard is provided via a Manager account. The Manager account will not
require additional Assigned Security; however the User and Department data they can view will be
dependent on the Permissions configured. (Please refer to the Configure Managers section from page
37 for further information.)
There are three ways to access and view a wallboard as follows:
Via the Vision portal
1
2
3
Open the Vision portal
The list of wallboards that the Manager owns will be listed at the bottom left hand side of the
screen
Click on the wallboard required
Wallboards
Vision Installation and Configuration Manual V1.5/0913/9
125
Vision Installation & Configuration Manual
Via the Live Wallboards link within the Vision portal
1
2
3
4
Open the Vision portal
Click on the Live Wallboards link
The list of wallboards that the Manager owns will be listed
Click on the Wallboard Name required
Directly via a web browser
Each wallboard is given a reference number, eg wb=3, which is used to access this particular wallboard.
This number is assigned when the wallboard is created; the first wallboard to be created is given a
reference of 1 and the next 2 and so on.
On the the Vision server enter:
http://localhost/vision/VisionLive/?wb=1
On a network PC enter:
http://ip address of the vision server/vision/VisionLive/?wb=wallboard no
eg http://192.168.0.251/vision/VisionLive/?wb=1
At the log in prompt enter the relevant Manager account’s User Name and Password. If this Manager
does not own the wallboard it cannot be amended. The padlock icon will not be available.
126
Wallboards
Vision Installation and Configuration Manual V1.5/0913/9
Vision Installation & Configuration Manual
Maintenance
Utilities
Do Backup
Creating a Back Up
The Do Backup link within the Vision Admin portal allows you to create a backup of the MySQL database.
1
2
3
4
Open the Vision Admin portal
Select Utilities
Select the Do Backup link
Click on the Do Backup button. Wait for the backup to complete.
5
A back up of the MySQL database will be made and will be displayed at the bottom of the
Backup Files on the Server list.
Downloading a back up
You may wish to download a back up of the Vision database to the Mac pc so that you can then keep a
copy on another server, or off-site etc.
1
2
3
Find the back up that you wish to download from the Backup Files on the Server list
Click on the Download link.
The file will be downloaded to the Downloads folder on the Mac pc where you can save it in
any location for back up purposes.
Restore a back up
You can also restore the MySQL database to a previous state via a back up file.
1
2
3
Find the back up that you wish to use from the Backup Files on the Server list
Click on Restore to DB beside this file
The following warning will be displayed:
Maintenance
Vision Installation and Configuration Manual V1.5/0913/9
127
Vision Installation & Configuration Manual
When restoring a database a backup of the current database is taken and will be shown in the
same list but will be marked with the tag Restore.
4
5
You will be returned to the Backups screen when the restoration of the database is complete.
The back up of the old database will be listed at the bottom of the Backup Files on the Server list
Please note that if you wish to schedule a backup please refer to the Schedule a backup of the SQL
database section from page 134,
Recalculate Call Costs
When pricing schemes have been updated new calls are priced via the new scheme. Old calls can also
be priced via this new scheme as follows.
1
2
3
4
From the Vision Admin portal select Utilities
Select Recalculate Call Costs.
Enter the start date and end date of the range of calls to be re-priced
Select Recalculate.
Factory Default
The Factory Default link via the Vision Admin portal will allow you to default the MySQL Database and set
up which Call Servers you want to log and record calls. (Please note that the MySQL Database user name
and password stays the same.)
128
1
2
3
4
Open the Vision Admin portal
Select Utlities
Click on the Factory Default link
You will get the following warning window:
5
Tick “Also delete recordings?” option if required
Maintenance
Vision Installation and Configuration Manual V1.5/0913/9
Vision Installation & Configuration Manual
6
7
Click on the Yes button
The Vision software will default and then send you back to the Vision Setup screens where you
will need to enter the current MySQL Database User name and password. These were set up
during the original Vision installation as per this example screenshot:
8
Once entered this will then carry on forward to through the setup process (please refer to the
Installing Vision section from page 11 for further details)
At the end you will need to reboot the Mac server.
9
If you cannot remember the User name and password for MySQL database use a terminal application to
view the entries in cat admin.cfg stored in \SpliceCom\Config
Generate SSL Certificate
This facility will enable https access to the Vision database. Please refer to Support for further details if
this facility is required.
SQL Health Check
This option will run a few command lines to repair the SQL database when required and instructed by
SpliceCom Support.
Public IP Address
This option is used with Total Control only. Please refer to Support for further details if required.
Clear Collection Status
This facility will clear any error messages displayed in the Vision portal (within the Call Logging and
Recording Status screen displayed when Logs is selected) when, for example, a Call Server has been
removed from the system.
Upgrading Vision
When a new version of Vision is available it will be made so via the forums.
1
Firstly, back up the database (as described in the Do Backup section from page 127)
Maintenance
Vision Installation and Configuration Manual V1.5/0913/9
129
Vision Installation & Configuration Manual
2
Download the new Vision software to the Vision Server
On a Linux PC:
3
4
5
6
7
8
9
10
11
12
13
The software will most likely be supplied in a .tar.tar format the file will need to be unzipped
first.
Open a Terminal session (KDE version – select the Kickoff Application Launcher then Terminal)
Change to the directory where the file is located by entering cd folder name, eg cd Downloads
Enter tar -xf name of file, eg tar –xf Vision-Linux.1.5.20.tar.tar.
This will unzip the file and create a folder called Vision.
Change to this directory by entering cd Vision (case sensitive)
Enter sudo ./install.SUSE
(use this command if you have the Linux install CD available
or
Enter sudo ./install.SUSE –net
(use this command if you do not have a Linux install CD available but the Linux PC will need an
internet connection)
When prompted for the root’s password enter the password for the root user on your Linux PC
The install will start. Wait for the prompt to return to indicate that this stage of the upgrade is
complete.
Go to step 13
On an Apple Mac:
3
4
5
13
14
15
16
Double click on the new software file to run it.
Once the install wizard is complete you will be requested for the user name and password for
Administrator
When the upgrade is complete the final set up screen will be displayed informing you to open
the Vision Admin portal. Go to step 13
Open the Vision Admin Portal
Click on the Upgrade Database link, this will update your SQL database
When the update is complete reboot the Mac or Linux PC.
Once reboot is complete, back up your database again.
Uninstalling Vision
At present Vision can only be uninstalled manually.
Uninstalling Vision on an Linux PC
To remove Vision from a Linux PC you will need to delete everything in the SpliceCom directory and
delete the MYSQL database as follows:
1
2
130
Open a Terminal session (KDE version – select the Kickoff Application Launcher then Terminal)
Enter sudo rm –r /SpliceCom
Maintenance
Vision Installation and Configuration Manual V1.5/0913/9
Vision Installation & Configuration Manual
3
4
When prompted for the root’s password enter the password for the root user on your Linux PC.
You will be returned to the prompt if this has been entered correctly.
Then enter the following commands:
mysql –uroot –p[mysql root password] –h 127.0.0.1
eg mysql -uroot -pr00t0940 -h 127.0.0.1
This will log you onto the MySQL server.
UPDATE mysql.user SET Password=PASSWORD('') WHERE User='root';
(use apostrophes)
Maintenance
Vision Installation and Configuration Manual V1.5/0913/9
131
Vision Installation & Configuration Manual
FLUSH PRIVILEGES;
Drop database [database name]
eg Drop database TC_splicecom;
132
Maintenance
Vision Installation and Configuration Manual V1.5/0913/9
Vision Installation & Configuration Manual
quit
This will log you out of the MySQL server.
5
Reboot the Linux PC
Maintenance
Vision Installation and Configuration Manual V1.5/0913/9
133
Vision Installation & Configuration Manual
You may wish to check that you have uninstalled Vision correctly. This can be done by checking that you
can no longer log on to the mysql database as follows:
In a Terminal session enter:
mysql –utc –p[mysql password] [mysql database name]
eg
mysql -utc -ptc17ps00 TC_splicecom
Uninstalling Vision on an Apple Mac
To remove all traces of Vision from an Apple Mac you need to run the following commands via the
Terminal Application on your Mac. Please note that once you type the first command you will be
prompted for a password, this is the password for the User on your Mac.
1
2
3
4
5
6
7
From the Dock open Finder
Select Applications
Open the Utilities folder
Open Terminal
Enter sudorm-r/SpliceCom/
( = a space)
You will be prompted for a password. Enter the password for the User you are logged in as on
the Mac pc..
Enter all the following commands
sudo rm -r /opt/
sudo rm -r /etc/apache2/other/0001_tc_apache.conf
sudo rm -r /Library/StartupItems/SpliceComVision/
sudo rm -r /Library/StartupItems/MySQLCOM/
sudo rm -r /ftp/
sudo rm -r /logs/
sudo rm -r /Voice/
sudo rm -r /usr/local/my*
If no error messages are displayed after you enter each line the command has been accepted
and actioned.
You can use the Up arrow on your keyboard to display the previous line entered. This can be
amended and will save you typing in the same text in again.
8
9
From the Terminal menu, select Quit Terminal or press Q
Reboot the Mac (from the Apple menu select Restart). Vision will no longer be running.
Schedule a backup of the SQL database
(Linux version only)
Running a SQL backup adds overhead to the Vision server and ‘locks’ certain tables within the SQL whilst
the backup is being taken. This could have a negative effect on the efficiency of the Vision server.
Therefore it is recommended that SQL backups are scheduled to run at a quiet time, as follows.
Create the following file and make it executable. When you run this it takes a backup of the SQL database
and names it backupfileyyyymmdd in /SpliceCom/backup.
134
Maintenance
Vision Installation and Configuration Manual V1.5/0913/9
Vision Installation & Configuration Manual
cd /SpliceCom
sudo vi SQLBackup
and add the following commands to it
#!/bin/sh
cd /SpliceCom/backup
sudo touch backupfile`date +%Y%m%d`.sql
sudo chmod 777 backupfile`date +%Y%m%d`.sql
sudo chown wwwrun backupfile`date +%Y%m%d`.sql
mysqldump --hex-blob --skip-comments --socket /tmp/mysql.sock -h 127.0.0.1 -uroot -pr00t0940
TC_splicecom > backupfile`date +%Y%m%d`.sql
(Assuming the SQL database is using the default setup, otherwise use the relevant database name and
password)
Make the file executable
sudo chmod 755 SQLBackup
This can then be run from the command line as:
cd /SpliceCom
sudo ./SQLBackup
or run via a crontab by adding the following entry to the /etc/crontab file
59 23 * * * root /SpliceCom/SQLBackup
Generating demonstration call logs
Available with Vision is the ability to import dummy call logging information that can be used for
demonstration purposes. Your maximiser system must contain two extensions numbered 2001 and 2002,
and a Department with an extension number of 8000 in order to use this data.
1
2
3
Open the Vision Admin portal
Click on any link within the Admin portal, eg Database
Edit the URL displayed in the Address Bar so that, eg =database, is changed to =generate
eg http://192.168.0.251/visionadmin/Admin.cgi?sessionId=1770745928&pagename=generate
4
5
Run this URL
Click on the Generate button. This will clear any call logging information currently stored and
create a dummy database of call logging information.
Please note that the Clear button will clear all existing call logging information. This is useful if
wish to clear the demonstration data and start using the Vision server for live call logging.
Maintenance
Vision Installation and Configuration Manual V1.5/0913/9
135
Vision Installation & Configuration Manual
Index
Abandoned Calls Detail report, 78
Abandoned Calls Overview report, 76
accessing call recordings, 49
Administrator, 27
alarms, 109
apple mac set up, 6
connection to maximiser, 6
disable automatic log in, 9
remote management, 7
turn off stand by, 9
back up, 127
schedule a backup, 134
Block Outbound Calls, 111
Call Alarms, 109
alarm emails, 111
Block Outbound Calls, 111
Outgoing Call Bar, 111
Call Cost Alarm, 109
Call Duration Alarm, 110
Call Logging and Recording, 20
call logs, 43
Calls In Today, 44
Calls Out Today, 46
demonstration data, 135
Search Calls, 47
Call Pricing, 22
importing and exporting Pricing Schemes, 23
Pricing Groups, 22
Pricing Rates, 23
Pricing Schemes, 23
call recording, 29
accessing call recordings, 49
download a recording, 50
forward a recording to an email account, 50
licensing, 29
Recording Access Log, 50
recording incoming calls, 29
recording outgoing calls, 33
Time Plans, 20
call server set up, 2
Calls Abandoned In Auto Attendant report, 102
Calls In Today, 44
call log details, 45
engineering view, 45
Calls Out Today, 46
call log details, 47
engineering view, 47
Clear Collection Status, 129
Configure Managers, 37
Configure Mobility, 41
Configure Recording, 21
Contact Report, 103
Cost Report Filtered By Cost Centre report, 73
136
Database, 19
demonstration call logs, 135
Do Back Up, 127
download a recording, 50
Factory Default, 128
First and Last Calls report, 75
forward a recording to an email account, 50
Forwarded Calls Cost By User report, 72
Frequently Called Destinations report, 69
Generate SSL Certificate, 129
Global Reporting Groups, 55
importing and exporting Pricing Schemes, 23
Incoming Call Breakdown by Day report, 88
Incoming Call Breakdown by Hour report, 84
Incoming Call Breakdown by Month report, 92
Incoming Call Breakdown by Week report, 90
Incoming Call Response Concise report, 82
Incoming Call Response report, 80
Incoming Calls Breakdown by DDI report, 93
Incoming Calls Breakdown by User report, 95
installation, 2
apple mac set up, 6
call server set up, 2
installing vision, 11
linux set up, 3
specifications, 2
voicemail ports, 2
Itemised Cost Report, 67
LDAP & Call Server, 19
licencing, 10
linux set up, 3
connection to maximiser, 4
disable automatic log in, 3
log in, 3
power management, 5
remote management, 4
Live Wallboards, 113
Add icon, 115
delete a panel, 124
delete a wallboard, 125
edit a panel, 124
edit a wallboard, 125
Padlock icon, 115
Report Panel, 122
Statistic Panel, 116
Status Panel, 119
Toggle Borders icon, 115
view a wallboard, 125
Web Panel, 123
Managers, 37
Assigned Security, 38
Permissions, 39
restricting access, 39
Index
Vision Installation and Configuration Manual V1.5/0913/9
Vision Installation & Configuration Manual
Most Expensive Calls report, 70
My Reports, 107
Outgoing Call Bar, 111
Outgoing Call Breakdown report, 64
Overview by Talk Time report, 96
Overview by User report, 98
Peak IntraModule Trunk Usage report, 61
Peak Trunk Group Usage report, 55
Peak Trunk Usage report, 57
Peak Voicemail Port Usage report, 59
Pricing Groups, 22
Pricing Rates, 23
Pricing Schemes, 23
Public IP Address, 129
Quick Reports, 108
Recalculate Call Costs, 128
Recording Access Log, 50
recording incoming calls, 29
recording outgoing calls, 33
Report Panel, 122
Report Settings, 21
Reporting Groups, 53
Global groups, 55
Owned by, 54
report ownership, 54
Reports, 52
Abandoned Calls Detail, 78
Abandoned Calls Overview, 76
Calls Abandoned In Auto Attendant, 102
Contact Report, 103
Cost Report Filtered By Cost Centre, 73
First and Last Calls, 75
Forwarded Calls Cost By User, 72
Frequently Called Destinations, 69
Incoming Call Breakdown by Day, 88
Incoming Call Breakdown by Hour, 84
Incoming Call Breakdown by Month, 92
Incoming Call Breakdown by Week, 90
Incoming Call Response, 80
Incoming Call Response Concise, 82
Incoming Calls Breakdown by DDI, 93
Incoming Calls Breakdown by User, 95
Itemised Cost Report, 67
Most Expensive Calls, 70
My Reports, 107
Outgoing Call Breakdown, 64
Overview by Talk Time, 96
Overview by User, 98
Peak IntraModule Trunk Usage, 61
Peak Trunk Group Usage, 55
Peak Trunk Usage, 57
Peak Voicemail Port Usage, 59
Quick Reports, 108
Maintenance
Vision Installation and Configuration Manual V1.5/0913/9
Reporting Groups, 53
Scheduled Reports, 106
Top Outgoing Call Users by Cost, 65
Transferred Calls by Cost, 74
Trunk to Trunk Calls, 75
schedule a back up, 134
Scheduled Reports, 106
Search Calls, 47
specifications, 2
SQL Health Check, 129
Statistic Panel, 116
Status Panel, 119
Time Plans, 20
Top Outgoing Call Users by Cost report, 65
Transferred Calls by Cost report, 74
Trunk To Trunk Calls report, 75
uninstalling Vision, 130
upgrading, 129
User Status, 11
Utilities, 28, 127
Clear Collection Status, 129
Do Back Up, 127
Factory Default, 128
Generate SSL Certificate, 129
Public IP Address, 129
Recalculate Call Costs, 128
SQL Health Check, 129
Vision Admin Portal, 19
Administrator, 27
Call Logging and Recording, 20
Configure Recording, 21
Database, 19
LDAP & Call Server, 19
Report Settings, 21
Utilities, 28
Wallboard Images, 22
Vision Portal, 36
call logs, 43
Configure Managers, 37
Configure Mobility, 41
Live Wallboards, 113
Reports, 52
VisionArchiver, 34
VisionLive licence, 11
VisionMobility, 41
VisionMobility licence, 11
VisionRecording licence, 10
VisionReport licence, 10
User Status, 11
voicemail ports, 2
Wallboard Images, 22
wallboards, 113
Web Panel, 123
137
SpliceCom
Britain’s leading developer of telephone systems
The Hall Farm Business Centre, Berry Lane, Chorleywood, Hertfordshire WD3 5EX Tel: 01923 287700 Fax: 01923 287722
Email: [email protected] Website: www.splicecom.com