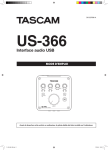
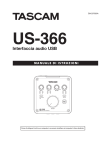
Download US-322/US-366 Owner`s Manual 12 Use only with the cart
Transcript
D01193220A US-322/366 USB Audio Interface O W N E R ' S M A N UA L Before connecting this unit to a computer, you must install the dedicated driver from the included CD-ROM onto the computer. IMPORTANT SAFETY PRECAUTIONS 88 For European Customers WARNING: TO PREVENT FIRE OR SHOCK HAZARD, DO NOT EXPOSE THIS APPLIANCE TO RAIN OR MOISTURE. 88 For U.S.A TO THE USER This equipment has been tested and found to comply with the limits for a Class B digital device, pursuant to Part 15 of the FCC Rules. These limits are designed to provide reasonable protection against harmful interference in a residential installation. This equipment generates, uses, and can radiate radio frequency energy and, if not installed and used in accordance with the instruction manual, may cause harmful interference to radio communications. However, there is no guarantee that interference will not occur in a particular installation. If this equipment does cause harmful interference to radio or television reception, which can be determined by turning the equipment off and on, the user is encouraged to try to correct the interference by one or more of the following measures. a) Reorient or relocate the receiving antenna. b) Increase the separation between the equipment and receiver. c) Connect the equipment into an outlet on a circuit different from that to which the receiver is connected. d) Consult the dealer or an experienced radio/TV technician for help. CAUTION Changes or modifications to this equipment not expressly approved by TEAC CORPORATION for compliance could void the user's authority to operate this equipment. Declaration of Conformity Model Number: US-322/US-366 Trade Name : TASCAM Responsible party: TEAC AMERICA, INC. Address : 7733 Telegraph Road, Montebello, California, U.S.A. Telephone number: 1-323-726-0303 This device complies with Part 15 of the FCC Rules. Operation is subject to the following two conditions: (1) this device may not cause harmful interference, and (2) this device must accept any interference received, including interference that may cause undesired operation. This appliance has a serial number located on the rear panel. Please record the model number and serial number and retain them for your records. Model number Serial number 2 TASCAM US-322/366 Disposal of electrical and electronic equipment (a) All electrical and electronic equipment should be disposed of separately from the municipal waste stream via collection facilities designated by the government or local authorities. (b)By disposing of electrical and electronic equipment correctly, you will help save valuable resources and prevent any potential negative effects on human health and the environment. (c)Improper disposal of waste electrical and electronic equipment can have serious effects on the environment and human health because of the presence of hazardous substances in the equipment. (d)The Waste Electrical and Electronic Equipment (WEEE) symbol, which shows a wheeled bin that has been crossed out, indicates that electrical and electronic equipment must be collected and disposed of separately from household waste. (e) Return and collection systems are available to end users. For more detailed information about the disposal of old electrical and electronic equipment, please contact your city office, waste disposal service or the shop where you purchased the equipment. 88 For Canada THIS CLASS B DIGITAL APPARATUS COMPLIES WITH CANADIAN ICES-003. CET APPAREIL NUMÉRIQUE DE LA CLASSE B EST CONFORME À LA NORME NMB-003 DU CANADA. IMPORTANT SAFETY INSTRUCTIONS 1 Read these instructions. 2 Keep these instructions. 3 Heed all warnings. 4 Follow all instructions. 5 Do not use this apparatus near water. 6 Clean only with dry cloth. 7 Do not block any ventilation openings. Install in accordance with the manufacturer's instructions. 8 Do not install near any heat sources such as radiators, heat registers, stoves, or other apparatus (including amplifiers) that produce heat. 9 Do not defeat the safety purpose of the polarized or grounding-type plug. A polarized plug has two blades with one wider than the other. A grounding type plug has two blades and a third grounding prong. The wide blade or the third prong are provided for your safety. If the provided plug does not fit into your outlet, consult an electrician for replacement of the obsolete outlet. 10 Protect the power cord from being walked on or pinched particularly at plugs, convenience receptacles, and the point where they exit from the apparatus. • The apparatus draws nominal non-operating power from the AC outlet with its POWER or STANDBY/ON switch not in the ON position. • The mains plug is used as the disconnect device, the disconnect device shall remain readily operable. • Caution should be taken when using earphones or headphones with the product because excessive sound pressure (volume) from earphones or headphones can cause hearing loss. • If you are experiencing problems with this product, contact TEAC for a service referral. Do not use the product until it has been repaired. CAUTION • Do not expose this apparatus to drips or splashes. • Do not place any objects filled with liquids, such as vases, on the apparatus. • Do not install this apparatus in a confined space such as a book case or similar unit. • The apparatus should be located close enough to the AC outlet so that you can easily grasp the power cord plug at any time. • If the product uses batteries (including a battery pack or installed batteries), they should not be exposed to sunshine, fire or excessive heat. • CAUTION for products that use replaceable lithium batteries: there is danger of explosion if a battery is replaced with an incorrect type of battery. Replace only with the same or equivalent type. 11 Only use attachments/accessories specified by the manufacturer. 12 Use only with the cart, stand, tripod, bracket, or table specified by the manufacturer, or sold with the apparatus. When a cart is used, use caution when moving the cart/apparatus combination to avoid injury from tip-over. 13 Unplug this apparatus during lightning storms or when unused for long periods of time. 14 Refer all servicing to qualified service personnel. Servicing is required when the apparatus has been damaged in any way, such as power-supply cord or plug is damaged, liquid has been spilled or objects have fallen into the apparatus, the apparatus has been exposed to rain or moisture, does not operate normally, or has been dropped. TASCAM US-322/366 3 Contents 1 – Introduction...............................................5 5 – Using the US-322/366 Mixer Panel.........17 Main features......................................................................... 5 Product parts......................................................................... 5 Conventions used in this manual................................... 5 Trademarks............................................................................. 6 Cautions on installation..................................................... 6 Beware of condensation.................................................... 6 Cleaning the unit.................................................................. 6 Mixer panel settings.........................................................17 “INTERFACE” page ......................................................17 “MIXER” page ...............................................................18 “EFFECTS” page ...........................................................21 Resetting settings to their default values .........24 6 – Application Guide....................................25 Top panel................................................................................ 7 Rear panel .............................................................................. 9 Windows XP and Windows Media Player..................25 Windows 7 and Windows Media Player.....................25 Windows 8 and Windows Media Player.....................26 Mac OS X and iTunes.........................................................26 3 − Installation............................................... 11 7 – Troubleshooting......................................27 System requirements....................................................... 11 Windows......................................................................... 11 Mac OS X........................................................................ 11 Installing the driver........................................................... 11 Installing the driver for Windows.......................... 11 Installing the driver for Mac OS X..........................12 Uninstalling the driver...............................................13 Frequently asked installation questions and answers (FAQ)...............................................................13 Improving computer performance.............................13 8 – Specifications...........................................29 2 − Names and Functions of Parts..................7 4 – Connections..............................................14 USB connections................................................................15 Audio connections............................................................15 Microphones.................................................................15 Guitars.............................................................................15 Sound module/MD/CD etc. (digital connection, US-366 only)..................................................................16 Connecting keyboards, drum machines, sound modules, cassette/MD/CD players and other analog line level devices...........................................16 Analog record player.................................................16 Monitor speakers.........................................................16 Headphones..................................................................16 Foot switch (US-366 only) .......................................16 Ratings...................................................................................29 Analog audio inputs and outputs................................29 Analog audio inputs...................................................29 Analog audio outputs...............................................29 Digital audio inputs(US-366 only) .................................................29 Digital audio outputs(US-366 only)..............................................29 Control I/O............................................................................30 Audio performance...........................................................30 Computer requirements..................................................30 Windows.........................................................................30 Mac OS X........................................................................30 Supported audio drivers..........................................30 Supported remote control protocol....................30 Audio flow diagrams.........................................................32 88 For China 产品有毒有害物质或元素的名称及含量 机种 :US-322/US-366 品名 1 2 3 4 5 6 CHASSIS 部份 PCB Assy 部份 线材部份 附属品部份 SEAL 部份 包装部份 铅 (Pb) ○ × ○ ○ ○ ○ 汞 (Hg) ○ ○ ○ ○ ○ ○ 有毒有害物质或元素 镉 六价铬 (Cd) (Cr(VI)) ○ ○ ○ ○ ○ ○ ○ ○ ○ ○ ○ ○ 多溴联苯 (PBB) ○ ○ ○ ○ ○ ○ ○ :表示该有毒有害物质在该部件所有均质材料中的含有量均在 SJ/T11363-2006 标准规定的限量要求以下。 × :表示该有毒有害物质至少在该部件的某一均质材料中的含量超出 SJ/T11363-2006 标准规定的限量要求。 (针对现在代替技术困难的电子部品及合金中的铅 ) 4 TASCAM US-322/366 多溴二苯醚 (PBDE) ○ ○ ○ ○ ○ ○ 1 – Introduction Thank you for your purchase of the TASCAM US-322/366 USB Audio Interface. Before connecting and using the unit, please take time to read this manual thoroughly to ensure you understand how to properly set up and connect the unit, as well as the operation of its many useful and convenient functions. After you have finished reading this manual, please keep it in a safe place for future reference. You can also download the Owner’s Manual from the TASCAM web site (http://tascam.com/). If any data is lost from another device (hard disk, optical disc, etc.) in the same system where this unit is used, TASCAM will bear no responsibility for its recovery, nor will it provide any compensation for such loss. Main features • US-366 is a 24-bit/192kHz USB2.0 audio interface with the DSP mixer and built-in effects that supports up to 6 channels (4 analog and 2 digital*) of simultaneous output depending on the LINE I/O switch setting on its bottom panel (*2 analog and 2 digital if sampling frequency is 176.4/192 kHz) • US-322 is a 24-bit/96kHz USB2.0 audio interface with the DSP mixer and built-in effects that supports 2 channels of simultaneous analog output US-322/366 features • Powered by USB bus power, increasing its portability • TASCAM original High Definition Discrete Architecture (HDDA) microphone preamps provide high-quality recording inputs • Can supply 48V phantom power to 2 mic inputs • 2 XLR mic inputs (balanced), 2 standard jack inputs (balanced/unbalanced) and RCA pin jack inputs (unbalanced, US-366 only) • One standard jack (1/L) can be switched to allow direct connection of an electric guitar/bass or similar instrument • Independent volume knobs for each mic/line input (INPUT 1 and INPUT 2) • Independent input signal and overload indicators for both INPUT 1 and INPUT 2 channels • Onboard digital mixer with switchable mode enables advanced mixing according to the application • Dynamics effects that can be used on inputs and send effects that use a send bus are built-in (fully usable at 44.1/48 kHz sampling frequencies and with some limitations at 88.2/96 kHz) • Direct monitoring function enables input monitoring with little delay • MON MIX knob allows the balance between the input signals and the output from the computer to be adjusted for monitoring • Stereo line outputs include standard jacks (balance) and RCA pin jacks (unbalanced) • Dedicated volume knobs for the 1/L and 2/R line (LINE OUT) and headphone (PHONES) outputs • MIXER PANEL button provides one touch access to the Mixer Panel on a computer • Cubase LE software included US-366 only • RCA pin jacks can be switched between input and output function • Digital input connector for either a coaxial or optical cable can be activated using the DIGITAL IN switch • Digital output possible simultaneously through two types of connectors (coaxial and optical) • Remote control possible using a TASCAM RC-3F foot switch (sold separately) A note about computer operation If you are unsure about how to perform basic computer operations appearing in this manual, please refer to the owner’s manual that came with your computer. To use this unit, you must use the included CD-ROM to install the dedicated driver on your computer. For details about installation, see “Installing the driver” on page 11 in “3 – Installation”. Product parts The US-322/366 package contains the following items. Take care when opening the package not to damage the items. Keep the package materials for transportation in the future. Please contact the store where you purchased this unit if any of these items are missing or have been damaged during transportation. • • • • • • Main unit................................................................................................ x1 USB Cable............................................................................................... x1 CD-ROM (containing drivers) ......................................................... x1 DVD-ROM (Cubase LE)....................................................................... x1 Warranty card....................................................................................... x1 Quick Start Guide................................................................................ x1 Conventions used in this manual In this manual, we use the following conventions: • Buttons, jacks and other parts on the unit and external devices are indicated like this: PHONES. • Words that appear on the computer display are shown in quotation marks like this: “US-322”. • Additional information is introduced in the styles below when needed: TIP These are tips about how to use the unit. NOTE These provide additional explanations and describe special cases. CAUTION Failure to follow these instructions could result in injury, damage to equipment or lost recording data, for example. TASCAM US-322/366 5 1 – Introduction Trademarks • TASCAM is a trademark of TEAC Corporation, registered in the U.S. and other countries. • Microsoft, Windows, Windows XP, Windows Vista, Windows 7, Windows 8 and Windows Media are either registered trademarks or trademarks of Microsoft Corporation in the United States and/or other countries. • Apple, Macintosh, Mac OS, Mac OS X and iTunes are trademarks of Apple Inc. • Cubase is a registered trademark of Steinberg Media Technologies GmbH. ASIO is a trademark of Steinberg Media Technologies GmbH. • Mackie and HUI are trademarks of LOUD Technologies Inc. • Other company names, product names and logos in this document are the trademarks or registered trademarks of their respective owners. Cautions on installation • The unit’s nominal operating temperature is between 5° and 35° C (41° – 95° F). • Do not install in the following types of places. Doing so could degrade the sound quality and/or cause malfunctions. Places with significant vibrations or that are otherwise unstable Near windows or other places exposed to direct sunlight Near heaters or other extremely hot places Extremely cold places Places with bad ventilation or high humidity Very dusty locations • Make sure that the unit is mounted in a level position for correct operation. • Avoid installing this unit on top of any heat-generating electrical device such as a power amplifier. Beware of condensation If the unit is moved from a cold to a warm place, or used after a sudden temperature change, there is a danger of condensation; vapor in the air could condense on the internal mechanism, making correct operation impossible. To prevent this, or if this occurs, let the unit sit for one or two hours at the new room temperature before using. Cleaning the unit To clean the unit, wipe gently with a soft dry cloth. Do not use any paint thinner, ethyl alcohol or other chemical agents to clean the unit as they could damage the surface. 6 TASCAM US-322/366 2 − Names and Functions of Parts Top panel 1 INPUT 1 knob 5 SIG indicators 2 INPUT 2 knob 6 OL indicators 3 MON MIX knob 7 MIC/LINE-GUITAR switch Adjusts the input level from the INPUT 1/L MIC connector or LINE/GUITAR jack. Turn all the way left to minimize the level and all the way right to maximize it. Set so that the OL (overload) indicator does not light. Adjusts the input level from the INPUT 2/R MIC connector or LINE jack. Turn all the way left to minimize the level and all the way right to maximize it. Set so that the OL (overload) indicator does not light. If the MODE switch on the bottom of the unit is set to MULTITRACK, adjusts the balance between the mix of signals input through this unit's input connectors and the signal mix output from the computer. Turn all the way left toward INPUT to maximize the mix of signals input through this unit's input connectors (and minimize the signal mix output from the computer over USB). Turn all the way right toward COMPUTER to maximize the signal mix output from the computer (and minimize the mix of signals input through this unit's input connectors). NOTE When the MODE switch on the bottom of the unit is set to STEREO MIX, the MON MIX knob is disabled (the MON MIX on the mixer panel screen will not move left or right even if this knob is moved). 4 PHONES knob The SIG indicators light green when a signal (of at least –30 dBFS) is input to the corresponding INPUT 1/L or INPUT 2/R channel. The INPUT 1/L indicator is below the INPUT 1 knob, and the INPUT 2/R indicator is below the INPUT 2 knob. The OL indicators light red when a signal that is about to distort (–2 dBFS or higher) is input to the corresponding INPUT 1/L or INPUT 2/R channel. The INPUT 1/L indicator is below the INPUT 1 knob, and the INPUT 2/R indicator is below the INPUT 2 knob. Set this according to what is connected to the INPUT 1/L LINE/GUITAR jack. Set this to GUITAR when connecting an electric guitar, electric bass or other instrument with high output impedance. Set this to MIC/LINE when connecting an electronic instrument, audio equipment, microphone or other device. 8 LINE OUT knob Adjusts the output level of the line output jacks (OUT 1/L and OUT 2/R). 9 USB indicator This lights blue when the USB connection is normal. 0 48V indicator This indicator lights red when the switch just below it is set to 48V (phantom power on). Adjusts the PHONES jack output level. CAUTION Turn the PHONES knob to the minimum volume before connecting headphones. Failure to do so could cause sudden loud noises and damage hearing, for example. TASCAM US-322/366 7 2 − Names and Functions of Parts q 48V switch Use this switch to supply 48V phantom power to the INPUT 1/L and INPUT 2/R MIC connectors When this switch is set to 48V (phantom power on), the indicator just above it lights red. CAUTION • Before turning a 48V switch ON or OFF, turn the output volume down using the PHONES and LINE OUT knobs on the front panel. Depending on the mic, loud noises might be produced and damage could be caused to equipment or to people’s hearing. • Do not connect or disconnect a mic with an input when its 48V switch is ON. • Turn 48V switch ON only when connecting a condenser microphone that requires phantom power. • Do not supply phantom power to an unbalanced dynamic microphone. • Some ribbon mics can be damaged by phantom power. If unsure, do not supply phantom power to a ribbon mic. • Before connecting headphones, minimize the volume with the PHONES knob. Failure to do so could result in sudden loud noises that might damage your hearing or cause other harm. w MIXER PANEL button Press this button to open and close the dedicated mixer panel window on the display of a computer connected by USB cable. this button opens the window when it is closed and closes it when it is open. Use the mixer panel to set the audio clock source and other operation settings, use the mixer and effects and conduct other operations. Front panel e MIC connectors (balanced) [INPUT 1/L and INPUT 2/R] These are balanced XLR mic input connectors. (1: GND, 2: HOT, 3: COLD) r LINE/GUITAR jack (balanced/unbalanced) [INPUT 1/L] This standard TRS jack is a balanced line input connector that can also be used for guitar input. When the MIC/LINE-GUITAR switch on the top of the unit is set to GUITAR, this functions as an unbalanced guitar input jack (tip: HOT, sleeve: GND). When the MIC/LINE-GUITAR switch is set to MIC/LINE, this functions as a balanced line input jack (tip: HOT, ring: COLD, sleeve: GND). NOTE INPUT 1/L and INPUT 2/R both have two input connectors (XLR and TRS). Do not input signals through both connectors for the same channel at the same time. Doing so will cause the signal input to be distorted. 8 TASCAM US-322/366 t PHONES jack Use this standard stereo phones jack to connect stereo headphones. Use a plug adapter when connecting headphones with mini-plugs. CAUTION Turn the PHONES knob to the minimum volume before connecting headphones. Failure to do so could cause sudden loud noises and damage hearing, for example. y LINE jack (balanced) [INPUT 2/R] This standard TRS jack is a balanced line input connector (tip: HOT, ring: COLD, sleeve: GND). 2 − Names and Functions of Parts Rear panel US-322 u DIGITAL IN OPTICAL connector (US-366 only) This optical digital input connector complies with the S/PDIF (IEC 60958 consumer) standard. Signals cannot be simultaneously input through this connector and the DIGITAL IN COAXIAL jack. Set the DIGITAL IN switch on the bottom of the unit to OPTICAL to use this connector. i DIGITAL IN COAXIAL jack (US-366 only) This coaxial digital input connector complies with the S/PDIF (IEC 60958 consumer) standard. Signals cannot be simultaneously input through this jack and the DIGITAL IN OPTICAL connector. Set the DIGITAL IN switch on the bottom of the unit to COAXIAL to use this connector. o REMOTE jack (US-366 only) Connect a TASCAM RC-3F foot switch remote control (sold separately) to this 2.5mm TRS mini jack. When a foot switch is connected, you can operate the transport in applications that support Mackie control or HUI protocols. p USB port Use the included USB cable to connect this unit with a computer (supports USB 2.0). CAUTION • USB 1.1 is not supported. • This is not compatible with computer Suspend (Sleep) mode. For this reason, the unit might not operate properly after a connected computer is brought out of Suspend (Sleep). In this case, disconnect the USB cable once and then reconnect it. a DIGITAL OUT OPTICAL connector (US-366 only) This optical digital output connector complies with the S/ PDIF (IEC 60958 consumer) and AES/EBU (IEC 60958 pro) standards. US-366 s DIGITAL OUT COAXIAL jack (US-366 only) This coaxial digital output connector complies with the S/ PDIF (IEC 60958 consumer) and AES/EBU (IEC 60958 pro) standards. NOTE • The US-366 COAXIAL IN/OUT jacks support simultaneous 24-bit /192kHz input and output. • The US-366 DIGITAL IN connectors include an OPTICAL and a DIGITAL input, but they cannot both be used at the same time. Use the DIGITAL IN switch on the bottom of the unit to set which is active. • The US-366 has two DIGITAL OUT connectors. Both the OPTICAL connector and the COAXIAL jack can be used simultaneously for digital output. The same signal is output from both. d LINE OUT 1/L and 2/R jacks (unbalanced) (US-322 only) These RCA pin jacks are analog line outputs. These output the same signals as the balanced LINE OUT 1/ L and 2/R jacks. f LINE I/O 3 and 4 jacks (unbalanced) (US-366 only) These RCA pin jacks can be used for analog line input or output. Use the LINE I/O switch on the bottom of the unit to set whether they are used for input or output. CAUTION When the LINE I/O switch is set to OUTPUT and the unit is operating with a 176.4/192kHz sampling frequency, regardless of the setting on the “INTERFACE” page of the Mixer Panel, the DIGITAL OUT signal will also be output from the LINE IN-OUT 3/4 jacks. g LINE OUT 1/L and 2/R (balanced) jacks These standard TRS jacks are analog line outputs (tip: HOT, ring: COLD, sleeve: GND). These output the same signals as the unbalanced LINE OUT 1/L and 2/R jacks. (US-322 only). TASCAM US-322/366 9 2 − Names and Functions of Parts Bottom panel US-322 US-366 h DIGITAL IN switch (US-366 only) Sets whether the COAXIAL or OPTICAL digital inputs on the rear of the unit are used. j LINE I/O switch (US-366 only) Sets whether the LINE I/O RCA pin jacks on the rear of the unit are used for input or output. k MODE switch Sets the mixer mode according to the application. MULTITRACK: Use this setting when using Cubase or another DAW, for example, for multitrack recording. The signal from each input is sent independently via USB to the computer for multitrack recording. At the same time, you can mix each input sound and playback sounds from the computer in the mixer and apply effects to prepare the monitoring sound as you like. They are output in stereo from the mixer, however, so they can be listened to using speakers or headphones. Mic Guitar Mic LINE/GUITAR MIC Mixer Headphone PHONES LINE/GUITAR DIGITAL Live Internet broadcast Mixer Headphone US-366 NOTE Please be aware that when using the STEREO MIX mode to broadcast live over the Internet, for example, the sound could be looped, causing an echo-like repetition. Set the volume in the application that you are using to zero to avoid this. Volume (0) 10 TASCAM US-322/366 USB PHONES DIGITAL USB US-366 Game device Guitar Computer Game device Computer MIC STEREO MIX: Use this setting to broadcast or record a stereo mix for live broadcasting over the Internet or recording audio for video, for example. All the input signals and the playback signals sent from the computer by USB are mixed to stereo and then sent to the computer and output connectors. In addition, the mixer output can also be listened to using speakers or headphones. For more information about multitrack and stereo mix modes, see “Audio flow diagrams” on page 32. 3 − Installation System requirements See the TASCAM website (http://tascam.com/) for updated information about OS compatibility. Windows 88 Supported operating systems Windows XP 32-bit SP3 or later Windows XP 64-bit SP2 or later Windows 7 32-bit SP1 or later Windows 7 64-bit SP1 or later Windows 8 32-bit Windows 8 64-bit 88 Supported computer systems Windows compatible computer with a USB 2.0 port 88 CPU/clock speed Dual core processor 2GHz or faster (x86) 88 Memory 2GB or more CAUTION Although this product has been checked for use with typical computers that meet the above operating requirements, we cannot guarantee that it will operate with all computers that meet these requirements. Please be aware that even in the same conditions, computer processing capabilities can vary depending on differences in design and specifications. Mac OS X 88 Supported operating systems Mac OS X 10.6.8 (Snow Leopard) Mac OS X 10.7.X (Lion) Mac OS X 10.8.X (Mountain Lion) Installing the driver In order to use this unit, you must install the driver on to your computer. As described below, this is an easy process using the CD-ROM included with the unit. Drivers are updated from time to time. You can download the most recent version of the driver from the TASCAM website (http://tascam.com/). CAUTION • Never play the included CD-ROM in an ordinary audio CD player. Doing so will cause noise that could damage speakers or harm your hearing. • Handle the included CD-ROM with care. If the disc becomes scratched or dirty, a computer might not be able to read it, making installation of the software impossible. If the included driver CD-ROM becomes damaged, it can be replaced for a fee. • After completing installation, it might be necessary to restart the computer. Before doing so, save your data and conduct other necessary operations, and then quit running applications. Installing the driver for Windows CAUTION When installing the driver, a message saying something like, “The software you are installing for the hardware has not passed Windows Logo testing to verify its compatibility with Windows” might appear. If this message appears, click “Continue Anyway” to proceed with the installation. Install the driver on the computer before connecting the unit to it with the USB cable. If you connect the USB cable first and Windows tries to install a driver, cancel it and disconnect the cable. 1. Insert the included driver installation CD-ROM into the PC where you will install it. 88 Supported computer systems Apple Macintosh computer with a USB 2.0 port 88 CPU/clock speed Dual core processor 2GHz or faster (x86) 88 Memory 2GB or more 2. Click the “Install Driver” button when the screen below appears. (If this screen does not appear automatically, find and open the “Autorun2.exe” program in the “Autorun” folder on the driver CD-ROM.) 3. When the language selection screen (below) appears, select the language you prefer and then click the “OK” button. TASCAM US-322/366 11 3 − Installation 4. Click the “Install the Driver” button when the screen below appears. 7. When the screen below appears, the installation is complete. Click the “Reboot now” button to restart the PC to use the driver. 5. Read the contents of the License Agreement, and select “I accept the agreement” if you agree to the terms. Next, click the “Install” button to start installation. Installing the driver for Mac OS X Disconnect the USB cable from the unit before starting installation. 6. When the screen below appears, use the supplied USB cable to connect the unit to the PC. 1. Load the included driver CD-ROM into the computer you are using. 2. Double-click the CD icon that appears. Depending on the Mac's settings, the CD icon might not appear. In this case, use the Finder or another application to access the files on the CD. 3. Double-click the driver disk image file (TASCAM_US-322_ US-366_driver_1.00.dmg), and then double-click the “TASCAM US-322 US-366 1.00” file inside the open folder. 4. After the installer launches, follow the instructions on the screen to proceed with the installation. Computer USB 12 TASCAM US-322/366 5. Click the “Restart” button to quit the installer and restart the computer. 3 − Installation Uninstalling the driver 88 Windows There are two ways to uninstall the driver as shown below. Using the Installation CD-ROM: 1. Follow steps 1 to 4 under “Installing the driver for Windows” (See page 11.) 2. At step 5 of the procedure, click Remove the driver. 3. Follow the instructions on the screen for the remaining procedure. Windows Programs and Features 1. From the Start menu, open the Control Panel and then open Programs and Features. 2. Select “US-322 driver” (or US-366 driver) from the list and double-click it. 3. Follow the instructions on the screen for the remaining procedure. 88 Mac OS X 1. Load the included driver CD-ROM in the computer you are using. 2. Double-click the CD icon that appears. 3. Double click the driver disk image file (TASCAM_ US-322_ US-366_driver_1.00.dmg), and double-click “TASCAM US-322 US-366 remover” in the folder that opens. Frequently asked installation questions and answers (FAQ) Windows driver installation Q: When I connect the unit to a computer, the Windows Hardware Wizard appears and I cannot install the driver. Am I making a mistake during the installation procedures? A: Close the Windows “Hardware Wizard” and disconnect the unit. You must install the driver before connecting this unit. Insert the CD-ROM included with the product. The menu for installing the driver appears automatically. A: Select Install Driver, and follow the instructions shown on the screen. If you have downloaded the driver from the TASCAM website (http://tascam.com/), expand the ZIP archive, launch the setup.exe file, and follow the instructions on the screen. Q: I loaded the installation CD-ROM into a Windows computer, but the driver installation menu does not appear. How can I access this menu? A: The automatic playback settings for the disc drive might be disabled. Open the supplied driver CD-ROM using Windows Explorer, and double-click the Autorun2.exe file to manually open the installation menu. Follow the procedures in “Installing the driver for Windows” on page 11 to install the driver. Improving computer performance In this manual, we will offer only the following basic tip to improve performance when using this unit. • Do not run other applications. Processing digital audio places a considerable load on your computer. You probably use the computer for applications other than audio, but we recommend that you avoid running them when using audio programs. This means that if you are running other applications (especially ones that are graphics-intensive or that use Internet tools) at the same time as an audio application, processing may not be able to keep up the audio data. 4. Follow the instructions on the screen for the remaining procedure. TASCAM US-322/366 13 4 – Connections Connections Bass guitar Guitar Headphones Vocal mic Computer Footswitch TASCAM RC-3F (sold separately) USB Game device Digital recorder Set the LINE I/O switch to: • INPUT to use for CD player input, etc. • OUTPUT to use for output to speakers, etc. Powered monitor speakers or amplifier and speakers with balanced connections CD player Powered monitor speakers or amplifier and speakers with unbalanced connections Example of using US-366 connections 14 TASCAM US-322/366 4 – Connections USB connections Use the included USB cable to connect the US-322/366 to your computer as shown in the illustration. When the USB connection is active, the USB indicator on the top of the unit lights. CAUTION Some USB devices access the USB bus frequently. To avoid dropouts and clicks in the audio signal, we strongly recommend that you do not connect any USB devices other than keyboards and mice to the USB bus used by this unit. Microphones Connect microphones to the INPUT 1/L and INPUT 2/R MIC connectors (XLR) on the front panel. When using a condenser microphone that requires phantom power, set the 48V switch on the front panel to ON. When the 48V switch is set to ON, the 48V indicator on the top panel lights. Audio connections Connect the output signal of your mic, guitar, keyboard, or other audio device to the US-322/366, where it will be converted into digital audio and sent via USB to your computer. Connect the output of the US-322/366 to your speakers (via an amp) or headphones, so you will be able to monitor the audio signals coming into the US-322/366 or being produced by your computer. 48V indicator CAUTION Before connecting an audio device, set the INPUT 1/2, PHONES and LINE OUT knobs to their minimum values. Failure to do so could cause loud noises, which might damage equipment or harm the hearing of people nearby. CAUTION • Connecting a dynamic microphone with an unbalanced connection to the unit when the 48V switch is ON could damage this unit and make it unusable. • Do not connect or disconnect a mic with an input when this switch is ON. Loud noises might be produced and damage could be caused to equipment. • Before turning a 48V switch ON or OFF, turn the output volume down using the PHONES and LINE OUT knobs on the front panel. Depending on the mic, loud noises might be produced and damage could be caused to equipment or to people’s hearing. • Always set the 48V switch to OFF before turning the unit’s power on or off (connecting or disconnecting the AC adaptor). • Do not use phantom power when line level equipment is connected to an XLR connector. It might damage equipment. Guitars Connect a guitar or bass guitar to the INPUT 1/L LINE/GUITAR jack on the front of the unit and set the MIC/LINE-GUITAR switch on the top to GUITAR. TASCAM US-322/366 15 4 – Connections Sound module/MD/CD etc. (digital connection, US-366 only) Connect the digital inputs and outputs of these types of devices to the unit’s DIGITAL IN and OUT jacks on the rear panel. Connect a coaxial cable for input to the COAXIAL IN jack and one for output to the COAXIAL OUT jack. Connect an optical cable for input to the OPTICAL IN connector and one for output to the OPTICAL OUT connector. The output signal can be output from both connectors at the same time, but both digital inputs cannot be used at the same time. Set the DIGITAL IN switch on the bottom of the unit to select which input to use. NOTE This unit can output either S/PDIF or AES/EBU digital signals. Set the type of output using the control panel. Set the type of output on the “INTERFACE” page of the “Mixer Panel”. CAUTION When using a digital input, you must set “Sample Clock Source” to “automatic” on the “INTERFACE” page of the “Mixer Panel”. This makes the connected device into the clock master. If “Sample Clock Source” is set to “internal” no signal will be input through the DIGITAL IN jack, and the DIGITAL OUT signal will be looped back inside the US-366 to the digital input. In this case, depending on the settings of the computer software that you are using, the digital out signal could become looped, causing noise. We describe an example of this situation and measures to prevent it below Example: In the DAW application, suppose that the input of a track is assigned to the US-366 DIGITAL IN and its output is assigned to the US-366 DIGITAL OUT. In this case, the following noise loop is created if the input of that track is monitored: track output to US-366 digital output to US-366 digital input to track input to track output, and so on. Countermeasure: To prevent this type of loop, turn input monitoring off in the DAW software or assign the input of that track to anything besides the US-366 digital input. 16 TASCAM US-322/366 Connecting keyboards, drum machines, sound modules, cassette/MD/CD players and other analog line level devices Connect the analog signal outputs of these types of devices to the INPUT 1/L LINE/GUITAR and INPUT 2/LINE jacks on the front of the unit. When using a US-366, you can also set the LINE I/O switch on the bottom of the unit to INPUT to enable input connection to the LINE I/O 3 and 4 RCA pin jacks. Analog record player The output of an analog record player cannot be connected directly to the US-366. You must connect a phono amp between your analog record player and the US-366. (Alternatively, you can connect it via an audio amp that has PHONO inputs.) Monitor speakers You can connect monitor speakers (powered speakers or an amplifier and speakers) with a balanced connection to the LINE OUT 1/L and 2/R TRS jacks on the rear panel. US-322: You can also connect monitor speakers with an unbalanced connection to the LINE OUT 1/L and 2/R RCA pin jacks on the rear panel. US-366: You can also connect monitor speakers with an unbalanced connection to the LINE I/O 3 and 4 RCA pin jacks on the rear panel when the LINE I/O switch on the bottom is set to OUTPUT. Headphones Connect headphones to the standard stereo PHONES jack on the front panel. Foot switch (US-366 only) You can connect a TASCAM RC-3F foot switch (sold separately) to the REMOTE jack (2.5mm mini). 5 – Using the US-322/366 Mixer Panel Press the MIXER PANEL button on the top of the unit to open the Mixer Panel on the display of the connected computer. The mixer panel has three pages. Click on a tab to open the corresponding page. INTERFACE: View information about the driver status and connection and make various settings. MIXER: Make built-in mixer settings. EFFECTS: Make built-in effects settings. Mixer panel settings “INTERFACE” page the smallest buffer size, while the “highest latency” setting is the largest. When using Mac OS X, you can adjust the buffer size for each audio application that you are using. For this reason, there is no “Audio Performance” control panel in Mac OS X. For details, see the operation manual for the audio application that you are using. Sample Clock Source You can set the clock source to “Automatic” or “Internal”. Set it to “Automatic” if you are using a digital input. When set to “Automatic”, the “Sample Clock Source” will automatically switch to “Digital” when there is a digital input and switch to “Internal” (internal clock) when there is no digital input. • Automatic (default): If a clock signal is input through the DIGITAL IN jack, it is used. If no signal is input through the DIGITAL IN jack, this unit’s internal clock is used. • Internal: This unit’s internal clock is always used. Digital Output Format Set the digital output format to “S/PDIF” or “AES/EBU” . LINE OUTPUTS and DIGITAL OUTPUTS (output selection) The “INTERFACE” page appears divided into the following two sections. 1 Status display section This shows information about the current driver and the connected hardware. The current settings of the switches on the bottom of the unit are also shown. NOTE • If the “Digital Input Status” is “Valid Signal”, a valid digital signal is being input. If it is “No Valid Signal”, no valid digital signal is being detected. Check the setting of the switch on the bottom of the unit and confirm that the digital output of the connected equipment meets the requirements for input into this unit. • Settings cannot be made in this section. 2 Setting section This has various driver settings that can be changed. US-322 This model outputs two signal channels. Use the “LINE OUTPUTS 1-2” item to set the signal output from the LINE OUT 1/L and 2/R jacks to either “mixer outputs L-R” or “computer 1-2”. US-366 This model outputs up to six signal channels. The options available depend on the settings of the LINE I/O and MODE switches on the bottom of the unit. Refer to the following table for a summary of the available options. Setting item MODE*** Output (connector) MILTITRACK mixer outputs L-R LINE OUTPUTS 1-2 LINE OUT 1/L, 2/R DIGITAL OUTPUTS DIGITAL OUT computer 3-4 computer 5-6** mixer outputs L-R computer 1-2 computer 3-4 computer 5-6** Audio Performance This unit's driver temporarily stores the audio signals input to and output from the computer in a buffer. The size of this buffer can be adjusted. The smaller the size of the buffer, the shorter the audio signal delay (latency). However, the smaller the size, the greater the demand on the computer processor. If the audio data cannot be processed in time due to the demands of other system operations, for example, clicking and popping noises as well as audio dropouts and other audio problems might occur. The larger the buffer size, the more stable the operation, making the processing of audio signals less likely to be hindered by other system operations. However, larger buffer sizes also increase the latency of the audio handled by the computer. You can set the buffer size used for this unit according to your conditions. When using Windows, adjust the buffer size using its “Audio Performance” Control Panel. The “lowest latency” setting is computer 1-2 LINE OUTPUTS 3-4* mixer outputs L-R LINE OUT 3, 4 computer 1-2 computer 3-4 computer 5-6** STEREO MIX mixer outputs L-R computer 1-2 mixer outputs L-R computer 1-2 mixer outputs L-R computer 1-2 *Usable only when the LINE I/O switch on the bottom of the unit is set to INPUT. **Selectable only when the LINE I/O switch on the bottom of the unit is set to OUTPUT. ***Set using the MODE switch on the bottom of the unit. NOTE If you want to output Windows Media Player or iTunes, for example, through this unit’s DIGITAL OUT, set the “DIGITAL OUTPUTS” to “computer 1-2” in the Control Panel. TASCAM US-322/366 17 5 – Using the US-322/366 Mixer Panel CAUTION With the US-366 model, if the sampling frequency is set to 176.4 kHz or 192 kHz, the signal selected using the “DIGITAL OUTPUTS” item will be output regardless of the “LINE OUTPUTS 3-4” setting. “MIXER” page Foot Switch Mode (US-366 only) When using a US-366 with a DAW application, you can connect a TASCAM RC-3F foot switch remote control (sold separately) to control the DAW. You can select from two types of functions for the pedals (switches). • PLAY (REW, PLAY/STOP, FWD) (default setting) These assigned functions are particularly useful for playback operations. The PLAY/STOP function assigned to the center pedal allows you to press it briefly to PLAY and press and hold it to STOP. • RECORD (PLAY, REC, STOP) The assigned functions are useful particularly for recording operations. PLAY RECORD FOOT SW L (brief) L (long) REW ----PLAY ----- C (brief) C (long) PLAY STOP REC ----- R (brief) R (long) FWD ----STOP ----- Foot Switch Protocol (US-366 only) You should set the protocol to match the DAW application you are using. If the foot switch remote control does not function, change the setting. Mackie: Mackie control protocol HUI: HUI protocol For information about these protocols and how to use them with a DAW application, refer to that application's operation manual. Click the MIXER tab to open the page shown above. On this page, you can adjust the built-in mixer settings. 1 DYNAMICS EFFECTS type selection Select the type of dynamics effect to use. You can select and use one type of effect at a time. (Simultaneous selection of two or more effects is not possible.) ON: Effect name blue OFF (default): Effect name gray Click the name of the effect that you want to use to turn it on. When on, the effect name appears blue. Click the name of the effect that is on (name blue) to turn it off. When off, the effect name appears gray. To use a different effect, click the name of that effect to turn it on. The previously used effect is automatically turned off. This setting is retained even when the unit is turned off and on again. NOTE Depending on the sampling frequency setting, it might not be possible to turn an effect on. 2 Dynamics effect assignment Select the channel that you want to use the dynamics effect on. You can select one mono or one stereo channel. (Simultaneous selection of multiple channels is not possible.) ON: Channel name blue OFF (default): Channel name gray Click the name of a channel to assign the dynamics effect to it. When assigned, the channel name becomes blue. At the same time, the line between the dynamics effects area and the channel name turns blue. To stop applying the dynamics effect to the assigned channel, click that channel's button. The line between the dynamics effect area and the channel turns gray. To reassign the dynamics effect to a different channel, click the button of that channel. The dynamics effect will automatically be removed from the previous channel (line turns gray) and assigned to the new channel (line turns blue). This setting is retained even when the unit is turned off and on again. 18 TASCAM US-322/366 5 – Using the US-322/366 Mixer Panel 3 Effects send bus signal setting There are three options. The signal can be sent to the send bus either before (PRE) or after (POST) the fader, or not sent at all (OFF). PRE: Signal sent before fader POST (default):Signal sent after fader OFF: Signal not sent (nothing appears) This setting is retained even when the unit is turned off and on again. Click the top of the frame to cycle through the options in the following order. OFF w PRE w POST w OFF Use the knob inside the frame to adjust the send level. Level: 0 (–inf ) – 127 (0dB) (default: 0 (–inf )) Click and hold the knob that you want to adjust and drag up and down to adjust the level. The current value appears beneath the knob while the mouse button is being held down. Level settings are retained even when the unit is turned off and on again. 4 SOLO buttons Use these buttons when you want to listen to or mix only audio from selected channels. You can solo multiple channels at the same time. When one or more channels is soloed, all other channels are automatically muted. This is convenient when you only want to listen to or mix a few channels because it is easier than using multiple “MUTE” buttons. ON: Button appears red OFF (default): Button appears gray Click a SOLO button to turn the function on/off for that channel. When all the “SOLO” buttons are off, clicking the “SOLO” button for one channel activates solo mode, automatically muting all the other channels. When all the “SOLO” buttons are turned off again, solo mode is deactivated. At this time all channels that had been automatically muted are unmuted again, and mute settings are restored to their state before solo mode was activated. NOTE • Solo mode does not automatically activate the master channel “MUTE” button. • Solo settings are not retained when the unit is turned off and on again (solo buttons are turned off). 6 Pan sliders These adjust the stereo position (left – center – right) of the channel signal sent to the master bus. When set all the way left (L15), the signal from that channel is sent only to the master bus left channel. No signal is sent to the right bus. When set all the way right (R15), the signal from that channel is sent only to the master bus right channel. No signal is sent to the left bus. When set to the center (C), the channel signal level is lowered –3dB and sent to both the left and right channels of the master bus. Including the central position and 15 steps to both left and right, there are 31 steps total. The slider appears blue when set to the center (C) and yellow at all other positions. Click and drag the pan slider left or right to change the stereo position. While you are clicking the pan slider, the pan position appears in the area where the fader levels are shown (8 in the illustration on page 18). You can reset the pan slider to the center (C) position by control-clicking it when using a Windows PC or commandclicking it when using a Mac. When two channels are linked (“LINK” button is on), the pan slider adjusts the volume balance between the left (odd) and right (even) channels. This setting is retained even when the unit is turned off and on again. 7Faders These adjust the levels of each channel in the mix. Range: +6dB to –inf in 147 steps, default: 0dB Click and drag a fader up or down to adjust its level. Drag it up to increase its level (–inf w 6dB), or drag it down to decrease its level (6dB w –inf ). The fader level gain value is shown in the fader level area (8 in the illustration on page 18). You can reset the fader to 0dB by control-clicking it when using a Windows PC or command-clicking it when using a Mac. 8 Fader level and pan position display area This shows the level of the fader above as a digital value. This shows the pan position when the pan slider above is being moved using the pointer. 5 MUTE buttons Use these to turn the mute function on/off for each channel. ON: Button appears orange (channel muted) OFF (default): Button appears gray Click a “MUTE” button to turn the function on/off for that channel. This setting is retained even when the unit is turned off and on again. NOTE In addition to being turned on and off when they are clicked, “MUTE” buttons are also automatically turned on and off when “SOLO” buttons are used. See “4 SOLO buttons” above for details. TASCAM US-322/366 19 5 – Using the US-322/366 Mixer Panel 9 Link buttons These buttons allow you to link adjacent odd (left) and even (right) channels, such as channels 1 and 2 or 3 and 4, into stereo pairs in the mixer. The mixer functions of two linked channels are combined into a single channel strip. ON: Button appears yellow OFF (default): Button appears gray Click a “LINK” button when the link is off to turn it on and unite the two channel strips into one stereo channel strip. The following mixer settings are applied to this stereo channel. Dynamics effect: Setting of odd (left) channel Send effect: Setting of odd (left) channel Solo: Setting of odd (left) channel Mute: Setting of odd (left) channel Pan slider: Center (C) (now used to adjust balance) Fader: Setting of odd (left) channel The two linked channel strips function as a single channel strip. Press the “LINK” button when the link is on to turn it off and split the stereo channel strip into two mono channel strips. The following mixer settings are applied to those channels. Dynamics effect: If the effect had been on previously, it will continue to be on for the odd (left) channel, but it will be off for the even (right) channel. If the effect had been off previously, it will continue to be off for both channels. Send effect: Both channels retain the previous setting. Solo: Both channels retain the previous setting. Mute: Both channels retain the previous setting. Pan sliders: Center (C) (now used to adjust pan) Faders: Both channels retain the previous setting. This setting is retained even when the unit is turned off and on again. 0 Channel names These are the channel names of the unit's input connectors and the computer's outputs. Channels that can be used appear lit, while channels that cannot be used appear dimmed. The channels that can be used change according to the following settings. US-366: According to MODE and LINE I/O switch settings US-322: According to MODE switch setting This setting is retained even when the unit is turned off and on again. q Status display section The main items related to the driver status and connected hardware shown in the Status display section of the “INTERFACE” page are shown here. “Sample Rate”: Sampling frequency “Sample Width”: Quantization bits “Digital Input Status”: status of digital input Message Meaning “Valid signal” Valid digital signal being detected “No valid signal” Valid digital signal not detected “Digital Input Select”:Shows the digital input currently selected by the DIGITAL IN switch on the bottom of the unit. 20 TASCAM US-322/366 w Monitor mix setting This shows the setting of the monitor mix volume knob on the top of the unit. This only shows the value. You cannot change it here. The closer it is to “Input”, the higher the volume of the signals input through the unit will be. The closer it is to “Computer”, the higher the volume of the computer playback signals will be. e SEND EFFECTS Set to use the send effects (REVERB). ON (REVERB) (default): Name appears purple OFF: Name appears gray Click the effect name (REVERB) inside the “SEND EFFECTS” frame to turn it on. When on, the name turns purple. Click the name of the effect (REVERB) when it is on (appears purple) to turn it off (turns gray). This setting is retained even when the unit is turned off and on again. NOTE You cannot turn a send effect on when it is disabled due to the sampling frequency setting. r SEND master and RETURN level knobs Use these to adjust to send and return levels (default: 0 (–inf ) for both). SEND: Use to adjust the level input to the effect send bus. RETURN: Use to adjust the send effect output level. Click and drag a knob up or down to adjust the level. Drag it up to increase its level (0 w 127), or drag it down to decrease its level (127 w 0). When you are clicking a knob, its setting appears beneath it. This setting is retained even when the unit is turned off and on again. NOTE This SEND knob adjusts the overall level of all channels sent to the effect. To adjust the send level of a specific channel, use the knob in 3 above. 5 – Using the US-322/366 Mixer Panel “EFFECTS” page NOTE • The dynamics effect ON/OFF setting on this page is linked to its setting on the mixer panel, so turning it on or off here will also change its setting there. • Depending on the sampling frequency setting, it might not be possible to turn an effect on. 4 Effect type selection switch Click the “EFFECTS” tab to open the effects page where you can adjust the built-in effect settings. Limitations on the use of the built-in effects The number of built-in effects that can be used depends on the sampling frequency. • At 44.1/48kHz, one dynamics and one send effect can each be used. • At 88.2/96kHz, either one dynamics effect or one send effect can be used. (Turning on an effect will automatically turn off the other effect if it has been on.) • At 176.4/192kHz, the built-in effects cannot be used. 1 Dynamics effect tabs Use to select the dynamics effect that is shown. Click a tab to bring that effect to the front. The dynamics effects are “COMPRESSOR” (default), “NOISE SUPPRESSOR”, “DE-ESSER”, “EXCITER” and “EQ”. This setting is retained even when the unit is turned off and on again. You can select the type of reverb used for the send effect. Click the name of the type that you want to use to change the selection. The switch will point to the new selection, and the name of the selected type will appear green. The other types will appear white. (The default setting is HALL.) For details about each parameter, see “Effect explanations” on page 22. This setting is retained even when the unit is turned off and on again. 5 Send effect ON/OFF button and indicator Use this button to turn the send effect on and off. ON: The button turns red and “ON” appears next to it. OFF (default):The button dims and “OFF” appears next to it. When a send effect is off, click its ON/OFF button or name to turn it on. When on, click the button or name to turn it off. This setting is retained even when the unit is turned off and on again. NOTE • The send effect ON/OFF setting on this page is linked to its setting on the mixer panel, so turning it on or off here will also change its setting there. • Depending on the sampling frequency setting, it might not be possible to turn an effect on. 2 Parameter knobs Use these to adjust the effect parameters. Click and drag a knob up or down to adjust its setting value. Drag up to increase the value and turn the knob clockwise. Drag down to decrease the value and turn the knob counterclockwise. The current value of each parameter is shown above its knob. For details about each parameter, see “Effect explanations” on page 22. These settings are retained even when the unit is turned off and on again. 3 Dynamics effect ON/OFF button and indicator Use this button to turn a dynamics effect on and off. ON:The button turns red and “ON” appears next to it. The name of the effect appears brighter. OFF (default):The button dims and “OFF” appears next to it. The name of the effect appears dimmed. When a dynamics effect is off, click its ON/OFF button or name to turn it on. When on, click the button or name to turn it off. Moreover since only one dynamics effect can be used at a time, when an effect is on, turning on another effect will automatically turn that effect off. This setting is retained even when the unit is turned off and on again. TASCAM US-322/366 21 5 – Using the US-322/366 Mixer Panel 88 Effect explanations Dynamics effects 0Compressor When the input volume exceeds the “THRESHOLD” level set in advance, the input volume will be compressed, reducing output volume variation. For example, by reducing the high level parts when sound occurs, the lower level sounds become relatively louder, creating a more even volume. You can also use this as a limiter to prevent signal levels from becoming too high. THRESHOLD: −84 to −24 dB (default: −64 dB) Sets the threshold level that will cause noise suppression if the input signal becomes less than it. SUPPRESSION: 12 to 72 dB (default: 42 dB) Sets the amount the output level will be reduced when the input sound becomes less than the threshold level. The higher the value, the more the output level and noise will be reduced. ATTACK: 0 to 4000 ms (default: 5 ms) Sets the amount of time until the set suppression level is reached after the input sound goes below the threshold. The three meters show the level of the signal input to the compressor (“INPUT”), the level of the signal output from the compressor (“OUTPUT”) and the gain reduction caused by the compressor (“GR”). THRESHOLD: −32 to 0 dB (default: –12dB) Sets the threshold level that will cause the input signal volume to be compressed when it is exceeded. RATIO: 1.0:1 to inf:1 (default: 1.5:1) Sets the compression ratio for the volume. Turning it right raises the compression ratio, increasing the amount of compression. RELEASE: 0 to 4000 ms (default: 32 0 ms) Sets the amount of time until suppression stops after the input sound exceeds the threshold. When the input is a stereo signal, if both the left and right input channels go below the threshold level, noise suppression will start. 0De-esser This is a compressor specialized for high frequencies that reduces “s” sounds and other harsh high-frequency noises. ATTACK: 2 to 200 ms (default: 20 ms) Sets the amount of time until the compression reaches the compression RATIO setting after the input sound exceeds the threshold. RELEASE: 10 to 1000 ms (default: 420 ms) Sets the amount of time until the compression stops and the sound returns to its uncompressed level after the input sound goes below the threshold. GAIN: 0 to 32 dB (default: 4 dB) Sets the gain of the output signal. When the volume is compressed, the output level becomes lower than the input level. Use the “GAIN” to amplify the output level so that it is close to the input level. If the input is a stereo signal, compression will start and be applied to both channels when either the left or right input channel exceeds the threshold level. NOTE When the compressor is off, the compressor curve will appear but the meters will not be active. 0Noise suppressor When the input volume becomes less than the threshold level set in advance, the output level will be reduced automatically to suppress noise. When the threshold level is exceeded, the sound will be output at its ordinary level. This effect is useful in applications to reduce noise during pauses in performance or other sound input. 22 TASCAM US-322/366 FREQUENCY: 1 to 4 kHz (default: 1.15 kHz) Sets the lowest frequency that the de-esser effects. DEPTH: 1 to 100 (default: 25) Sets the amount of compression. The higher the value the greater the compression (and de-essing effect). 5 – Using the US-322/366 Mixer Panel 0Exciter This effect emphasizes high-frequency harmonics to add clarity and sparkle while maintaining the original sound. Send effect 0Reverb This effect adds reverberations to the original sound by adding multiple sounds delayed at various times with damping over time that produces a sound that is as natural as possible. Reverberations like those of a hall, live-music club or a studio, for example, can be generated. FREQUENCY: 1 to 4 kHz (default: 2.00 kHz) Sets the frequency above which harmonics are emphasized. DEPTH: 1 to 100 (default: 75) Sets the amount that harmonics are emphasized. The higher the value, the more they are emphasized. 0Three-band parametric equalizer This can be used to increase or decrease the levels of specific frequency ranges. This can be used to enhance the sound of individual instruments, to adjust the balance of a wide frequency range and to cut specific unwanted frequencies, for example. ROOM TYPE: HALL, ROOM, LIVE, STUDIO, PLATE Select the type of reverb. Depending on the setting, the density and level of the reverb sound changes. PRE DELAY: 0 to 250 ms (default: 90 ms) Set the amount of time until the first reverberations. The larger the value, the larger the reverberations make the room sound. REVERB TIME: 0.1 to 10 sec (default: 2.7 sec) Set the amount of time that the reverberations continue. The larger the value, the longer they continue. The frequency response is shown even when the equalizer is off. The equalizer has a high-shelf HIGH band, a low-shelf LOW band and a peaking (bell-shaped) MID band. HIGH GAIN: −12 to 12 dB (default: 0 dB) Sets the amount the level is increased or decreased for the high shelf. HIGH FREQ: 1.7 to 18 kHz (default: 10 kHz) Sets the cutoff frequency of the high self. Mid GAIN: −12 to 12 dB (default: 0 dB) Sets the amount the level is increased or decreased for the mid peak. Mid FREQ: 32 Hz to 18 kHz (default: 1.0 kHz) Sets the center frequency of the peak. Mid Q: 0.25 to 16 (default: 0.5) Sets the acuteness of the peak. The higher the value the narrower it becomes, making it effect a narrower frequency band. The lower the value, the wider it becomes, making it effect a broader frequency band. Low GAIN: −12 to 12 dB (default: 0 dB) Sets the amount the level is increased or decreased for the low shelf. Low FREQ: 32 Hz to 1.6 kHz (default: 100 Hz) Sets the cutoff frequency of the low shelf. TASCAM US-322/366 23 5 – Using the US-322/366 Mixer Panel i LINE OUTPUTS 3-4: computer 1-2 Resetting settings to their default values If you want to reset all the current settings to their original values, You can restore the mixer and effect settings to their factory defaults. 88 Resetting the mixer Follow these procedures to reset the mixer and output channel settings. 88 Resetting the effects Follow these procedures to reset all the effects, including the one currently shown, to their default values. 1. Click “File (F)” in the toolbar on a Windows PC or click “TASCAM US-322 US-366 Mixer Panel” in the menu bar on a Mac to open a pulldown menu. 1. Click “File (F)” in the toolbar on a Windows PC or click “TASCAM US-322 US-366 Mixer Panel” in the menu bar on a Mac to open a pulldown menu. 2. Click “Effect Reset...” in the pulldown menu. 3. When a warning appears as shown below, click “OK”. 2. Click “Mixer Reset...” in the pulldown menu. 3. When a warning appears as shown below, click “OK”. CAUTION After resetting, you cannot restore the previous settings. Before clicking “OK”, confirm that you want to reset the settings. CAUTION After resetting, you cannot restore the previous settings. Before clicking “OK”, confirm that you want to reset the settings. NOTE Click “Cancel” to return to the Mixer Panel without resetting. The mixer and other settings are reset to their default values. The items reset and their default values are as follows. “MIXER” page items i Dynamics effect: Off i Dynamics effect assignment: Off i Send effect signal position setting (all channels): POST i Send level (all channels): 0 (–inf ) i Solo (all channels): Off i Mute (all channels): Off i Pan slider (all channels): Center i Fader (all channels): 0 dB i Link (all channel pairs): Off i Send effect: REVERB ON i Send/return levels: 0 (–inf ) “INTERFACE” page items US-322 MULTITRACK mode i LINE OUTPUTS 1-2: mixer output L-R STEREO MIX mode i LINE OUTPUTS 1-2: mixer output L-R US-366 MULTITRACK mode i LINE OUTPUTS 1-2: mixer output L-R i DIGITAL OUTPUTS: computer 1-2 i LINE OUTPUTS 3-4: computer 3-4 STEREO MIX mode i LINE OUTPUTS 1-2: mixer output L-R i DIGITAL OUTPUTS: mixer output L-R 24 TASCAM US-322/366 NOTE Click “Cancel” to return to the Mixer Panel without resetting. The effect settings are reset to their default values. The items reset are as follows. COMPRESSOR THRESHOLD, RATIO, ATTACK, RELEASE, GAIN NOISE SUPPRESSOR THRESHOLD, SUPPRESSION, ATTACK, RELEASE DE-ESSER FREQUENCY, DEPTH EXCITER FREQUENCY, DEPTH EQ GAIN and FREQ for all bands (LOW, MID, HIGH) and MID band Q REVERB ROOM TYPE, PRE DELAY, REVERB TIME NOTE This does not change the effect on/off status or the assignment of the dynamics effect. These items are restored to their defaults by resetting the mixer. See the “Effect explanations” for the default settings of each effect. 6 – Application Guide In this chapter, we explain how to set some audio applications for use with this unit. DAW software Procedures for making settings differ among DAW software applications. When using a DAW, refer to its operation manual. Windows XP and Windows Media Player 1. Close all applications and then open the “Control Panel” from the “Start” menu. 2. Open “Sounds and Audio Devices”. NOTE If you do not see the above item, click “Sounds, Speech, and Audio Devices” and it should appear. Windows 7 and Windows Media Player 1. Close all applications and then open the “Control Panel” from the “Start” menu. 2. Open “Sound”. NOTE If the above item does not appear, click “Hardware and Sound” and it should appear. 3. Click the Playback tab, click “TASCAM US-322” (or “TASCAM US-366") and click the “Set Default” button. This moves the green check mark to “TASCAM US-322” (or “TASCAM US-366"). 3. Click the “Audio” tab, and set the “Default device:” for “Sound playback” to “TASCAM US-322” (or “TASCAM US-366"). If you plan to use this unit for live broadcast over the Internet or otherwise as a recording device, make the following additional setting. In the window above, set the “Default device:” for “Sound recording” to “TASCAM US-322” (or “TASCAM US-366"). 4. Click “OK”. 5. Start Windows Media Player, select an audio file and begin playback. NOTE • If you change this setting while Windows Media Player is running, the software will not recognize that the device has been changed. In this case, restart Windows Media Player. • If you still cannot hear sound after making the setting and completing the procedures above, restart the computer. • After making this setting, sound will be output through this unit, but no sound will be output by the computer’s speakers or headphone jacks. • If you want to output the signal from Windows Media Player through the DIGITAL OUT without passing through the unit's mixer, set “DIGITAL OUTPUTS” to “computer 1-2” on the “INTERFACE” page of the Mixer Panel. (US-366 only) If you plan to use this unit for live broadcast over the Internet or otherwise as a recording device, make the following additional setting. Click the Recording tab, and click “Line In TASCAM US-322” (or “Line In TASCAM US-366") and set it as the “Default Device”. When you do this, the green check mark will move to “Line In TASCAM US-322” (or “Line In TASCAM US-366"). 4. Click “OK”. 5. Start Windows Media Player, and play an audio file. NOTE • After making this setting, sound will be output through this unit, but no sound will be output by the computer’s speakers or headphone jacks. • If you change this setting while Windows Media Player is running, the software will not recognize that the device has been changed. In this case, restart Windows Media Player. • If you still cannot hear sound after making the settings and completing the procedures above, disconnect the USB cable and restart the computer. • If you want to output the signal from Windows Media Player through the DIGITAL OUT without passing through the unit's mixer, set “DIGITAL OUTPUTS” to “computer 1-2” on the “INTERFACE” page of the Mixer Panel. (US-366 only) TASCAM US-322/366 25 6 – Application Guide Windows 8 and Windows Media Player 1. Close all applications and then right-click the Start screen to open the application bar at the bottom of the screen. 2. Click the “All apps” button at the bottom right and open the “Control Panel” from the Apps page. 3. Click “Hardware and Sound” and then open “Sound”. 4. Click the Playback tab, and click “Speakers TASCAM US-322” (or “Speakers TASCAM US-366"), and click “Set Default”. When you do this, the green check mark will move to “Speakers TASCAM US-322” (or “Speakers TASCAM US-366"). Mac OS X and iTunes 1. Open the “Utilities” folder, which is inside the “Applications” folder, and double-click “Audio MIDI Setup” to launch it. 2. Control-click the “US-322” (or “US-366"). Check use this device for sound input and use this device for sound output. This moves microphone icon and speaker icon to “US-322” (or “US-366"). If you plan to use this unit for live broadcast over the Internet or otherwise as a recording device, make the following additional setting. Open the Audio Devices pane. Control-click “US-322” (or “US-366") and select “Use this device for sound input”. When you do this, the mic icon will move to “US-322” (or “US-366"). If you plan to use this unit for live broadcast over the Internet or otherwise as a recording device, make the following additional setting. Click the Recording tab, and click “Line In TASCAM US-322” (or “Line In TASCAM US-366") and set it as the “Default Device”. When you do this, the green check mark will move to “Line In TASCAM US-322” (or “Line In TASCAM US-366"). 5. Click “OK”. 6. Start Windows Media Player, and select and play an audio file. NOTE • Windows Media Player will not recognize the device change if you change these settings while it is running. In this case, restart Windows Media Player. • If you still cannot hear sound after making the settings and completing the procedures above, disconnect the USB cable and restart the computer. • After making these settings, sound will be output from this unit, but sound will not be output from the computer speakers or headphone jack. • If you want to output the signal from Windows Media Player through the DIGITAL OUT without passing through the unit's mixer, set “DIGITAL OUTPUTS” to “computer 1-2” on the “INTERFACE” page of the Mixer Panel. (US-366 only) 26 TASCAM US-322/366 3. Launch iTunes, select an audio file and start playback. NOTE If you want to output the signal from iTunes through the DIGITAL OUT without passing through the unit's mixer, set “DIGITAL OUTPUTS” to “computer 1-2” on the “INTERFACE” page of the Mixer Panel. (US-366 only) 7 – Troubleshooting Please read this chapter if you are unable to use the unit properly even after setting it up following the procedures in this manual. If you are still unable to resolve your problems please contact TASCAM customer support with the following information about the operating environment and details about the trouble. Operating environment 0 Computer manufacturer 0 Model 0 CPU 0 Installed memory 0 OS 0 Applications used 0 Antivirus software use 0 Wireless LAN use Please see the back of this manual for contact information. Mac OS X 1.Shut down all applications and open “System Preferences” from the Apple menu. 2. Open “Sound”. 3.From the “Output” tab, select “TASCAM US-322” (or “TASCAM US-366"). After completing the settings, restart the computer and check the playback sound. Depending on the application you are using, other device settings might also be necessary in addition to those above. In particular, since DAW (Digital Audio Workstation) software operates using audio engines that are different from OS settings, confirm the DAW driver settings first after installing the driver for this unit. Check the manuals for the software that you are using for details about how to make these settings. For the bundled Cubase LE software, see the manual on the included Cubase LE DVD-ROM. 88 Installation fails. Installation completes, but the computer does not recognize the unit. If some trouble is causing installation to fail, or installation completes but the computer does not recognize the unit, check the following. 1) USB indicator lit Is the USB indicator on the front panel of the unit lit? If the USB indicator is not lit, confirm that the USB cable is properly connected. NOTE Always use the included USB cable. 2) Change the USB port Since the unit might not function properly with some USB ports, try connecting to a different built-in USB port on the computer, and reinstall the driver (when using Windows). NOTE • Try again after disconnecting other USB devices. (Keyboards and mice can be left connected.) • Do not use a USB hub. Always connect the unit directly to a built-in USB port on the computer. 3) Stop other software running in the background Since antivirus software and other software that runs in the background can interfere with installation, stop other software before beginning installation. See “3 − Installation” on page 11 of this manual for how to install and uninstall the driver. 88 There is no sound even when audio is playing back. The audio output must be set on the computer. Please confirm the following while the unit is connected to the computer. Note that after making the following settings, sound will be output through the unit, but no sound will be output by the computer's speakers or headphone jacks. Windows XP/7/8 Make the settings for the operating system as described in the previous chapter (6 – Application Guide). Set the default playback device for Windows XP/7 by completing steps 1–3 and for Windows 8 by completing steps 1–4. 88 The sound breaks up or there is noise. The processing load on the computer can cause sound to break up and noise to occur. Some ways to reduce the load on a computer are introduced below. 1) If a wireless LAN, antivirus software or other software are running in the background, they regularly use the computer's CPU, and this burden can cause sound to break up and noise to occur. Stop wireless LAN transmission, antivirus software and other software running in the background when using this unit. 2) Try increasing the buffer size (latency) setting in the audio application that you are using and/or in the control panel for this unit. NOTE Consult the maker of your audio application for methods to reduce its burden on your computer. 3) Change the settings of your computer so that they are optimal for audio processing. Windows XP 1.Right-click “My Computer” and select “Properties”. 2.Click the “Advanced” tab. 3.Click “Settings” in the “Performance” section. 4.On the “Performance Option” screen, select the Adjust for “Best Performance option”. Windows 7 a) Turn “Aero off”. 1.Right-click the desktop and select “Personalize”. 2.Select any theme from “among Basic and High Contrast Themes”. b) Performance settings 1.Right-click “Computer” and select “Properties”. 2.Click “Advanced System Settings”. 3.Click the “Advanced” tab. 4.Click “Settings” in the “Performance” section. 5.On the “Visual Effects” tab in the “Performance Options” window, select Adjust for “best performance”. Windows 8 1.Right-click the ordinary Windows 8 Start screen (Metro interface), and click “All apps”. TASCAM US-322/366 27 7 – Troubleshooting 2.Right-click “Computer” and select “Properties. 3.Click “Advanced system settings”. 4.Click the “Advanced” tab. 5.Click “Settings…” in the “Performance” area. 6.On the “Visual Effects” page of the “Performance Options” screen, select “Adjust for best performance”. Mac OS X 1.Open “System Preferences” from the Apple menu and select “Energy Saver”. 2.Click the “Sleep” tab. 3.Set “Put the computer to sleep when it is inactive” for: to “Never”. 4.Set “Put the display(s) to sleep when the computer is inactive” for: to “Never”. 5.Click the “Options” tab. If a “Processor performance setting” is available, set it to “Highest”. NOTE Depending on the Mac OS version and model these settings might not be available. 88 The volume is not right. Mixer functions might be affecting the volume. Check the settings on the “MIXER” page of the Mixer Panel. 88 The sound is strange. A built-in effect might be changing the sound. Check the settings on the “EFFECTS” page of the Mixer Panel. 28 TASCAM US-322/366 8 – Specifications Ratings Analog audio outputs Sampling frequency Line outputs (LINE OUT 1/L, LINE OUT 2/R) 44.1/48/88.2/96 kHz (US-322) 44.1/48/88.2/96/176.4/192 kHz (US-366) Quantization bit rate 24-bit Analog audio inputs and outputs Analog audio inputs Microphone inputs (INPUT 1/L, INPUT 2/R) Balanced Connectors: XLR-3-31 equivalent (1: GND, 2: HOT, 3: COLD) Input impedance: 2.2 kΩ Nominal input level (INPUT knob at maximum): –65 dBu Minimum input level (INPUT knob at minimum): –22 dBu Maximum input level (INPUT knob at minimum): – 6 dBu Line inputs (INPUT 1/L, INPUT 2/R) Balanced Connectors: 6.3 mm (1/4") standard TRS jacks (Tip: HOT, Ring: COLD, Sleeve: GND) • INPUT 1/L when MIC/LINE-GUITAR switch set to MIC/ LINE and INPUT 2/R Input impedance: 15kΩ Nominal input level (INPUT knob at maximum): –39 dBu Minimum input level (INPUT knob at minimum): +4 dBu Maximum input level (INPUT knob at minimum): +20 dBu • INPUT 1/L when MIC/LINE-GUITAR switch set to GUITAR Input impedance: 1 MΩ Nominal input level: (INPUT knob at maximum): –55 dBV Nominal input level: (INPUT knob at minimum): –12 dBV Maximum input level: (INPUT knob at minimum): +4 dBV Line inputs (LINE I/O 3-4, US-366 only) Unbalanced Connectors: RCA pin jacks • When LINE I/O switch set to INPUT) Input impedance: 15 kΩ Nominal input level: –10 dBV Maximum input level: +6 dBV Balanced Connectors: 6.3 mm (1/4") standard TRS jacks (Tip: HOT, ring: COLD, sleeve: GND) Output impedance: 100 Ω Nominal output level: +4 dBu Maximum output level: +20 dBu Line outputs (LINE OUT 1/L, LINE OUT 2/R, US-322 only) Unbalanced Connectors: RCA pin jacks Output impedance: 200 Ω Nominal output level: –10 dBV Maximum output level: +6 dBV Line outputs (LINE I/O 3-4, US-366 only) Unbalanced Connectors: RCA pin jacks • When LINE I/O switch set to OUTPUT Output impedance: 200 Ω Nominal output level: –10 dBV Maximum output level: +6 dBV Headphones outputs (PHONES) Connectors: 6.3 mm (1/4") stereo phone jack Maximum output: 18 mW + 18 mW (THD+N 1% or less, into 32Ω) Digital audio inputs(US-366 only) COAXIAL (DIGITAL IN) • When DIGITAL IN switch set to COAXIAL Connector: RCA pin jack Format: IEC 60958-3 (S/PDIF) OPTICAL (DIGITAL IN) • When DIGITAL IN switch set to OPTICAL) Connector: TOS (JEITA RC-5720C) Format: IEC 60958-3 (S/PDIF) Digital audio outputs(US-366 only) COAXIAL (DIGITAL OUT) Connector: RCA pin jack Signal format: IEC 60958-3 (S/PDIF)/IEC 60958 professional (AES/EBU) (Set on the “INTERFACE” page of the Mixer Panel) OPTICAL (DIGITAL OUT) Connector: TOS (JEITA RC-5720C) Signal format: IEC 60958-3 (S/PDIF)/IEC 60958 professional (AES/EBU) (Set on the “INTERFACE” page of the Mixer Panel) TASCAM US-322/366 29 8 – Specifications Control I/O Computer requirements USB (USB) Connector: B-type 4-pin Format: USB 2.0 HIGH SPEED (480 MHz) REMOTE input (US-366 only) Connector: 2.5 mm TRS jack Supported protocol: TASCAM RC-3F protocol Audio performance Analog-digital/digital-analog conversion ADC chipset dynamic range: 102 dB (48 kHz, A-weight) DAC chipset dynamic range: 106 dB (44.1 kHz, A-weight) Frequency response MIC IN to LINE OUT 10 Hz – 40 kHz, ±3.0 dB (88.2/96 kHz, JEITA) (US-322) 10 Hz – 68 kHz, ±3.0 dB (176.4/192 kHz, JEITA) (US-366) MIC IN to PHONES 10 Hz – 30 kHz, ±1.0 dB (88.2/96 kHz, JEITA) (US-322) 10 Hz – 30 kHz, ±1.0 dB (176.4/192 kHz, JEITA) (US-366) S/N ratio 98 dB or higher (MIC IN to LINE OUT, gain knob at minimum, 88.2/96 kHz, JEITA) (US-322) 98 dB or higher (MIC IN to LINE OUT, gain knob at minimum, 176.4/192 kHz, JEITA) (US-366) Equivalent input noise -120 dBu or less (MIC IN to LINE OUT, gain knob at maximum, 88.2/96 kHz, JEITA) (US-322) -120 dBu or less (MIC IN to LINE OUT, gain knob at maximum, 176.4/192 kHz, JEITA) (US-366) Total harmonic distortion 0.0045% or less (MIC IN to LINE OUT, gain knob at minimum, 88.2/96 kHz, JEITA) (US-322) 0.0045% or less (MIC IN to LINE OUT, gain knob at minimum, 176.4/192 kHz, JEITA) (US-366) See the TASCAM website (http://tascam.com/) for updated information about OS compatibility. Windows Supported Operating system Windows XP 32-bit SP3 or later Windows XP 64-bit SP2 or later Windows 7 32-bit SP1 or later Windows 7 64-bit SP1 or later Windows 8 32-bit Windows 8 64-bit (Windows Vista 32-bit /64-bit not supported) Supported computer system Windows compatible computer with a USB 2.0 port CPU/clock Dual core processor 2GHz or faster (x86) Memory 2GB or more CAUTION This unit has been confirmed to work with standard computers that meet the above system requirements, but this is not a guarantee that it will work with all computers that meet the above requirements. Even if a computer meets the above requirements, its processing abilities will differ according to its unique design specifictions and operating conditions. Mac OS X Supported Operating system Mac OS X 10.6.8 (Snow Leopard) Mac OS X 10.7.X (Lion) Mac OS X 10.8.X (Mountain Lion) Supported computer system Apple Macintosh with a USB2.0 port CPU/clock Dual core processor 2GHz or faster (x86) Memory 2GB or more Supported audio drivers ASIO2.0, WDM (MME) Core Audio Supported remote control protocol Mackie Control HUI 30 TASCAM US-322/366 8 – Specifications General Power Weight Supplied by USB from a computer (5 V, 500 mA maximum current) Power consumption 500 g/1.10 lb Operating temperature range 5-35ºC/41-95ºF 2.5 W Bundled software External dimensions (W x H x D) 140 x 42 x 140 mm/5.51 x 1.65 x 5.51 in. (without projections) Cubase LE (for Windows or Mac OS X) Dimensional drawing (54.5mm) 42mm 140mm 140mm • Illustrations in this manual may differ in part from the actual product. • Specifications and the external appearance may be changed without notification to improve the product. TASCAM US-322/366 31 32 TASCAM US-322/366 8 – Specifications Audio flow diagrams 8 – Specifications TASCAM US-322/366 33 34 TASCAM US-322/366 8 – Specifications US-322/366 TEAC CORPORATIONhttp://tascam.jp/ Phone: +81-42-356-9143 1-47 Ochiai, Tama-shi, Tokyo 206-8530 Japan TEAC AMERICA, INC.http://tascam.com/ Phone: +1-323-726-0303 7733 Telegraph Road, Montebello, California 90640 USA TEAC MEXICO, S.A. de C.V.http://teacmexico.net/ Phone: +52-55-5010-6000 Río Churubusco 364, Colonia Del Carmen, Delegación Coyoacán, CP 04100, México DF, México TEAC UK LIMITEDhttp://tascam.eu/ Phone: +44-8451-302511 Suites 19 & 20, Building 6, Croxley Green Business Park, Hatters Lane, Watford, Hertfordshire, WD18 8TE, UK TEAC EUROPE GmbHhttp://tascam.eu/ Phone: +49-611-71580 Bahnstrasse 12, 65205 Wiesbaden-Erbenheim, Germany


