1
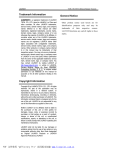
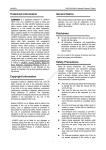
LAUNCH
TBM-111/121/131/212/222/132 USER MANUAL
TBM Series
Short Wave Infrared Painting Machine
USER MANUAL
LAUNCH TECH CO., LTD.
I
LAUNCH
TBM-111/121/131/212/222/132 USER MANUAL
publication may be reproduced, stored in a
retrieval system, or transmitted in any form or
by any means, electronic, mechanical,
photocopying, recording or otherwise,
without the prior written permission of
LAUNCH. The information contained herein
is designed only for the use of this unit.
LAUNCH is not responsible for any use of
this information as applied to other units.
Trademark Information
LAUNCH is a registered trademark of
LAUNCH TECH. CO., LTD. (short for
LAUNCH ) in China and other countries. All
other LAUNCH trademarks, service marks,
domain names, logos, and company names
referred to in this manual are either
trademarks, registered trademarks, service
marks, domain names, logos, company
names of or are otherwise the property of
LAUNCH or its affiliates. In countries where
any of the LAUNCH trademarks, service
marks, domain names, logos and company
names are not registered, LAUNCH claims
other rights associated with unregistered
trademarks, service marks, domain names,
logos, and company names. Other products
or company names referred to in this manual
may be trademarks of their respective
owners. You may not use any trademark,
service mark, domain name, logo, or
company name of LAUNCH or any third
party without permission from the owner of
the applicable trademark, service mark,
domain name, logo, or company name. You
may contact LAUNCH by visiting LAUNCH at
http://www.cnlaunch.com, or writing to
Launch Industrial Park ,North Wuhe
Avenue,
Banxugang
Industrial
Park,Longgang District., Shenzhen,
Guangdong Province, P. R. C., to request
written permission to use Materials on this
manual for purposes or for all other
questions relating to this manual.
Neither LAUNCH nor its affiliates shall be
liable to the purchaser of this unit or third
parties for damages, losses, costs, or
expenses incurred by purchaser or third
parties as a result of: accident, misuse, or
abuse of this unit, or unauthorized
modifications, repairs, or alterations to this
unit, or failure to strictly comply with
LAUNCH operating and maintenance
instructions.
LAUNCH shall not be liable for any damages
or problems arising from the use of any
options or any consumable products other
than those designated as Original LAUNCH
Products or LAUNCH Approved Products by
LAUNCH.
General Notice
Other product names used herein are for
identification purposes only and may be
trademarks of their respective owners.
LAUNCH disclaims any and all rights in
those marks.
Copyright Information
Copyright © 2000 by LAUNCH TECH. CO.,
LTD. All rights reserved. No part of this
II
LAUNCH
TBM-111/121/131/212/222/132 USER MANUAL
Contents
1.Installation of TBM......................................................................................................... 1
1.1 Installation of Equipment TBM-111/121/131/132 ................................................... 1
1.2 Installation of Equipment TBM-212 and TBM-222 ................................................. 2
2、Operating Instruction of TBM-131/212/222 ............................................................... 3
2.1 Instruction of keyboard ............................................................................................ 3
2.2 Operating Instruction................................................................................................ 3
3.Operating Instruction of TBM-132/132-1/132-2 ........................................................ 4
3.1 Buttons Instruction: ............................................................................................ 4
3.2 Operating Instruction................................................................................................ 4
3.3 Other Parts Instruction:.......................................................................................... 6
4.Equipment Maintenance and General Notice ........................................................... 6
5.Dismounting of Radiation Tubes ................................................................................. 6
6.Problems and Solutions ............................................................................................... 7
7.Warranty Cards.............................................................................................................. 8
8.Packing list ..................................................................................................................... 9
8.1 TBM-212/222 Packing list ....................................................................................... 9
8.2 TBM-111/121/131/132 Packing list ......................................................................... 9
III
LAUNCH
TBM-111/121/131/212/222/132 USER MANUAL
1.Installation of TBM
1.1 Installation of Equipment TBM-111/121/131/132 (Fig.1)
Fig.1
1) First, take the equipment base (1)and wheel(2).(3) out. Wheel (2 )put on the back
base, Wheel(3) put on the front base.
2) Install the equipment post (4) on the base.
Notices: Do not touch the handle on the post when you install the equipment, the
rest (6) will hurt you when you install.
3) Take the balance unit (6)on the post unit(4).
4) Take the radiation unit (lamp unit) (7) on the rest (6).
5) The step of install radiation unit you can consult the installation of radiation tube.
6) Install the power plug.
1
LAUNCH
Notices:
TBM-111/121/131/212/222/132 USER MANUAL
(1) Electrical Input: 220V (AC).
(2) There are three wires in it: brown for power, blue for zero line and yellow
with green for earth.
(3) Require of plug: 15Amp
(4) Move the write foam before you turn on the power. In case of melted
down.
1.2 Installation of Equipment TBM-212 and TBM-222 (Fig.2)
Fig.2
1、Take all the accessories out, compare with packing list and check all the
accessories are ready.
2
LAUNCH
TBM-111/121/131/212/222/132 USER MANUAL
2、First, take the wheel units(18) on the bracket (15).
3、Fix the bracket(15) on the bottom post(11).
4、Install the up post (9)on the bottom post together.
5、Install the frame (3) on the lamp head (4) together.
6、Install and fix the frame on the post.
6、Install the control box on the top of the post.
7、Install the power plug.
2、Operating Instruction of TBM-131/212/222
5、 Start or Pause LED indicator
6、 selection button for working
lamp head
1
7、 Start or Pause
8、 Power switch
2
3
2.2 Operating Instruction
1)Assemble the device according
to the instruction, connect the
4
5
power line correctly.
2)Adjust the height and angle of
the
6
lamp
to
the
right
position.
7
3)Turn on the power switch,
Displaying “ 一 ” in the time
window. Press the start button
8
and select the lamp switch, the
machine is working.
4)Timer settings:Two kinds of
working modes are available,
semi-power work mode and full
power work mode. Press button
2, it displays the pulse digit of “0”
TBM Series control box
2.1 Instruction of keyboard
in
the
window,
adjust
the
working time through button 3, it
1、 Time display window
2、 Timing function button
enters the semi-power
3、 Timing adjustment button
mode. Press button 2 again, it
4、 LED indicator for working
displays the stable digit of “0”,
lamp head
work
adjust the time through press
3
LAUNCH
TBM-111/121/131/212/222/132 USER MANUAL
7 ) Select the working lamp :
the button 3, it enters the full
power work mode.
Selecting
5)Working mode converting :
button 6.
the
lamp
switch
The working mode can be
8)Memory function: The system
converted when the lamp is shut
has the special remembering
off. Press button 2, the working
function, the working mode will
mode can be converted between
be
the two modes. When the lamp
machine is stopped working,
is working, the converting of the
press the start button again, the
working mode is not allowed.
working mode is recovered.
remembered
when
the
6)Start or pause: Press button
start or pause, machine can be
started or stopped working.
3.Operating Instruction of
3.1 Buttons
TBM-132/132-1/132-2
Instruction:
1、High Temp. Select
2、Working Light Switch
3、Working Start Switch
4、Digital Temp.
5、Digital Time
6、Dis.Adm Start Switch
7、Pulse mode Select Switch
8、Full-power Select Switch
9、 Working Pause / Replace
3.2 Operating Instruction
1) Connected the power cord to
the power outlet, and then turn
on
total power switch which is
in the stand.;
2). Adjust the lamp components
in the suitable place (height and
angle) and adjust the distance
of lamp head to the baking area
(usually at around 50cm, it can
adjust to between 40 ~ 50cm).
In the adjusting process of lamp
head, the display board behind
4
LAUNCH
TBM-111/121/131/212/222/132 USER MANUAL
the
lamp
components
will
time choice;
the
6).Through button 8 to adjust
distance between the lamp
Full-power baking time, the
head and baking range, the
range of 0 ~ 60 minutes,
green light for the factory set up
adjusting button 8 at the same
the best temperature away
time, the time display window
from baking. After adjusting the
shows the value of working
good
position,
time choice;
brake
fixed
automatically
show
through
the
the
7)
.Through button 2 to select the
device’s
operating position.
number of radiation tubes, the
3)Through the button 1 to choose
a
normal
temperature
indicator lights, that is the lamp
or
work;;
high-temperature paint baking
8)
.Through button 3 to start the
mode (with temperature sensor
equipment working, equipment
equipment proprietary function),
set up in accordance with the
the indicator light does not
beginning of baking good work
shine
at
automatically, while the time
when
baking,
room
temperature
that
is,
70
display
window
shows
the
degrees alarm, shut down 80
corresponding procedures for
degrees; indicator light for the
the remaining time. After the
high-temperature baking paint,
program
and that is 130 degrees alarm,
equipment
shut down 140 degrees
automatically;
to
shut
the
down
9)
.If you want to change work
4)Through the button 6 to choose
whether
finished,
automatically
procedures, can use button 9
manage the distance function,
to suspend work procedures,
when the indicator light shines ,
the initial set up procedures to
the
restore or re-provision of new
distance
automatically
protection
start.,
the
working
procedures.
After
equipment set up to protect
change the process, through
from the distance to be baked
button 3 to start a new work
for the lamp from the baking
procedures.
area is less than 40cm.
10)If the device with temperature
5).Through button 7 to adjust
sensor,
temperature
window
pulsed baking time, baking time,
will be real-time show the
the range of 0 ~ 60 minutes,
baking
adjusting button 7 at the same
and at the same time starts the
time, the time display window
temperature alarm equipment
shows the value of working
and protection automatically.
5
surface
temperature.
LAUNCH
TBM-111/121/131/212/222/132 USER MANUAL
3.3 Other Parts Instruction:
12
10、Temp. Sensor
11、Dis.Sensor
12、Dis.Range Display Board
4.Equipment Maintenance and General Notice
4.1 Avoid hitting.
4.2 Avoid hard things put in radiation unit.
4.3 Please pay attention to the ground when you move the equipment.
4.4 Please use soft cloth or cotton with alcohol clean the radiation tubes and baffle-board,
keep it cleanness.
4.5 Keep the equipment well grounded.
4.6 If the equipment is to be used in a spray booth, the air in the booth must be purified
before switching on the equipment, since flammable gas may cause explosion.
4.7 Keep the equipment away from painting area, about 3-4 meters.
4.8 Please don’t turn on the power when adjust the angle and distance of the lamp.
4.9 Do not pull the wire when you want move the equipment.
4.10 If the radiation tubes don’t work, please check up power switch,
5.Dismounting of Radiation Tubes
5.1 Turn off the power switch.
5.2 Take the protecting net which is in front of radiation tubes out.
5.3 Get the screws out in the radiation unit back, and remove the back.
5.4 Get baffle-board down at two sides.
5.5 Take the old radiation tubes (broken one) out.
5.6 Fit the new radiation tubes on it.
5.7 Link all wires like before.
5.8 Fit the baffle-board.
5.9 Cover the radiation unit back.
5.10 Fit the protecting net.
6
LAUNCH
TBM-111/121/131/212/222/132 USER MANUAL
6.Problems and Solutions
Problems
Cause
Solutions
1. Radiation tubes were too
1.
near from repair place.
paint solvent have
pinhole
3. There is speedy thinner in
illegibility
impurity
Increase
the
time
of
warm-up.
1.
2. Work time too short.
1. Work time too long.
2. Distance of radiation tubes
and repair place is too near.
Keep
the
distance
of
radiation tubes and repair
away from repair place.
3. Skin of paint is too thick.
Paintwork have
of
3. Use normal thinner.
1. Radiation tubes are far
Paintwork is
distance
place.
2.
paint.
the
radiation tubes and repair
2. Time of warm-up is too
short.
Keep
place.
2. Increase the time of work.
3. Keep the skin of paint thin.
1.
Reduce work time.
2.
Keep
the
distance
of
radiation tubes and repair
place.
1. Separate into two places to
repair.
margin is illegibility
2. Please warm-up in the first
Repair place is too large
time.
3. Without warm-up in the
second times.
Heat is asymmetry
Radiation
units
and
repair
place not in the same level.
7
Adjust
radiation
units
and
repair place in the same level.
LAUNCH
TBM-111/121/131/212/222/132 USER MANUAL
7.Warranty Cards
Warranty
THIS WARRANTY IS EXPRESSLY LIMITED TO PERSONS WHO PURCHASE WHO
PURCHASE PRODUCTS FOR PURPOSES OF RESALE OR USE IN THE ORDINARY
COURSE OF THE BYER’S BUSINESS.
TBM electronic product is warranted against defects in materials and workmanship for
one year (radiation tubes half year)(12 months) from date of delivery to the user. This
warranty does not cover any part that has been abused ,altered ,used for a purpose other
than for which it was intend , or used in a manner inconsistent with instructions regarding
use .The exclusive remedy for any automotive meter found to be defective is repair or
replacement ,and shall not be liable for any consequential or incidental damages .Final
determination of defects shall be made by in accordance with procedures established by
us .No agent ,employee ,or
representative of us has any authority to bind us to any
affirmation ,representation ,or warranty concerning us equipments ,except as stated herein .
Company
Address
P.C.
Telephone
Product Name
Serial No.
Product Model
Purchase Date
Remarks
Company
Address
P.C.
Telephone
Product Name
Serial No.
Product Model
Purchase Date
Remarks
8
LAUNCH
TBM-111/121/131/212/222/132 USER MANUAL
8.Packing list
8.1 TBM-212/222 Packing list
items
name
specification
unit
TBM-212
TBM-222
1
User manual
B5
pcs
1
1
2
qualification
page
1
1
3
Heater lamp
set
1
2
4
wheels
set
4
4
pcs
4
4
5
Bracket for
wheels
6
Down stand
pcs
1
1
7
Up stand
pcs
1
1
8
Control box
pcs
1
1
9
Frame for lamp
pcs
1
2
10
Handles
pcs
2
4
pcs
1
2
pcs
1
1
11
M10
Adjustable
handles
12
Top screws
13
Screws
M4 X 10
pcs
1
1
14
Screw/bits
M8 X 90
set
4
4
8.2 TBM-111/121/131/132 Packing list
Items
Name
Unit
131/132
111
121
Quantity
1
User manual
pcs
1
1
1
1
2
Qualification
page
1
1
1
1
3
Radiation units
set
3
1
2
3
4
Stand unit
set
1
1
1
1
5
Base unit
set
1
1
1
1
6
Balance bar
set
1
1
1
1
9
LAUNCH
TBM-111/121/131/212/222/132 USER MANUAL
-
Warranty
THIS WARRANTY IS EXPRESSLY LIMITED
TO PERSONS WHO PURCHASE LAUNCH
PRODUCTS FOR PURPOSES OF RESALE
OR USE IN THE ORDINARY COURSE OF
THE BUYER’S BUSINESS.
Quantity
Part number
Item description
Customer Service
If you have any questions on the operation of
the unit, please contact us:
Tel: 86-755-84528046
Fax: 86-755-84528051,
E-mail: [email protected].
LAUNCH electronic product is warranted
against defects in materials and workmanship
for one year (12 months) from date of delivery
to the user. This warranty does not cover any
part that has been abused, altered, used for a
purpose other than for which it was intended,
or used in a manner inconsistent with
instructions regarding use. The exclusive
remedy for any automotive meter found to be
defective is repair or replacement, and
LAUNCH shall not be liable for any
consequential or incidental damages. Final
determination of defects shall be made by
LAUNCH in accordance with procedures
established by LAUNCH. No agent, employee,
or representative of LAUNCH has any authority
to bind LAUNCH to any affirmation,
representation, or warranty concerning
LAUNCH automotive meters, except as stated
herein.
If your unit requires repair service, return it to
the manufacturer with a copy of the sales
receipt and a note describing the problem. If
the unit is determined to be in warranty, it will
be repaired or replaced at no charge. If the unit
is determined to be out of warranty, it will be
repaired for a nominal service charge plus
return freight. Send the unit pre-paid to:
Attn: Overseas Department
LAUNCH TECH. CO., LTD.
Launch Industrial Park,
North Wuhe Avenue,
Banxugang Industrial Park,
Longgang District.,
Shenzhen, Guangdong Province, P.R.China
Disclaimer
THE ABOVE WARRANTY IS IN LIEU OF ANY
OTHER WARRANTY, EXPRESSED OR
IMPLIED, INCLUDING ANY WARRANTY OF
MERCHANTABILITY OR FITNESS FOR A
PARTICULAR PURPOSE.
Order Information
Replaceable and optional parts can be ordered
directly from your LAUNCH authorized tool
supplier. Your order should include the
following information:
10