1
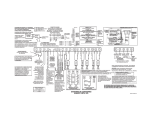
El Grupo de Alcantarilla
Culvert Inventory Geodatabase
User Reference Manual
Texas State University – San Marcos, Department of Geography
5/6/2011
Table of Contents
Introduction .................................................................................................................................... 1
General Description..................................................................................................................... 1
Migrating Data ............................................................................................................................. 2-5
Microsoft Access Interface .......................................................................................................... 5-8
Image Management ........................................................................................................................ 8
Culvert Table Data Definitions ................................................................................................... 9-10
Overtopping History Table Data Definitions ................................................................................. 10
Details of Culvert Table ............................................................................................................ 11-19
Details of Overtopping History Table............................................................................................ 20
Culvert Inventory Access Form ..................................................................................................... 21
Field Data Entry Form .............................................................................................................. 22-23
Technical Support ......................................................................................................................... 24
This manual provides:
o Detailed procedures for migrating Texas Reference Marker (TRM) data from
ArcGIS to the MS Access interface, and back to ArcGIS
o Detailed information about the procedures for entering/editing data through the
MS Access interface
o Image management procedures
o Definitions of each field in the tables (Figures 1 and 2)
o Detailed descriptions of the fields and their data types
Note: The example data contained in this manual and the databases is for informational
purposes only; it does not reflect true attributes for each of the locations.
General Description
The TxDOT Culvert Inventory geodatabase was developed in 2011 by El Grupo de Alcantarilla,
Texas State University-San Marcos to facilitate data collection for Texas culverts. The inventory
consists of two components, an ESRI ArcGIS geodatabase and a Microsoft (MS) Access
database. The MS Access database is provided to allow users to enter and edit culvert data
through a graphical interface (an Access form). The data can be exported from MS Access as a
MS Excel table and then added into the ArcGIS geodatabase to facilitate mapping, modeling,
and analysis of the data.
The two components are:
Culvert_Inventory_Geodatabase.mdb
Culvert_Inventory_Access.accdb
Warning: The Culvert_Inventory_Geodatabase.mdb should not be edited in MS Access; this will
disrupt the integrity of its spatial data.
1
Migrating data between the ArcGIS Geodatabase and the MS Access database
Overview
TRM shapefiles may be migrated from ArcGIS to MS Access to allow the entry of attribute data.
After all data has been entered, the Access table can be brought back into the GIS for mapping
and analysis. To enjoy the complete functionality of the geodatabase, an ArcInfo or ArcEditor
license is required. Following are detailed steps to migrate TRM data on a complete round trip.
Data Migration Procedure
Step 1 – Adding X/Y coordinates
a. Open ArcMAP and add the TRM shapefile to the map.
b. Open the attribute table.
c. Click on “Options” and select “Add Field” from the context menu.
d. Name the field “LATITUDE” (a complete list of field names and data types can be
found in the section, Details of Culvert Table).
e. Select “Double” as the data type and set the precision to 11 and the scale to 8.
f. Repeat steps c – e to add the field “LONGITUDE”.
g. Right click the “LATITUDE” field name and select “Calculate Geometry” from the
context menu.
h. Set the property source to “Y Coordinate of Point” from the dropdown.
i. Select “Use coordinate system of the data source”.
j. Set the units to “Decimal Degrees” in the dropdown.
k. Click OK and the geometry will be calculated.
l. Repeat steps g – k to calculate the geometry for the “LONGITUDE” field, making
sure that the property source is set to “X Coordinate of Point”.
Step 2 – Exporting to MS Excel
a. From the attribute table, select options and choose “Export” from the context
menu.
b. Choose to export “All records” and click on the browse button to specify the
location where the output table is to be saved.
c. Browse to the save location and give the file a meaningful name. Make sure to
save the export as a “Text” file by selecting this option from the “Save as type”
dropdown menu.
d. Click “Save” and then click “OK”.
e. Open MS Excel and click on the “Data” tab at the top of the screen.
f. Choose the option “From Text” from the “Get External Data” group.
2
g.
h.
i.
j.
Select “Delimited” and choose to “Start import at row: 1”, click “Next”.
Check the Delimiter box “Comma” and click “Next”.
Click “Finish” and then “OK” in the resultant dialog.
Add all field names to “Row 1” making sure to exactly follow the naming
conventions in Figure 1: Culvert table data definitions.
k. Create the “Culvert_ID” by entering the following expression in “Row 2” of that
field: = CONCATENATE(B2,C2,D2,E2). Press Enter.
l. Apply the expression to all rows in the “CULVERT_ID” field.
m. Once all field names have been added and the Culvert ID has been added, save
the file and close MS Excel.
Step 3 – Adding the table to the MS Access database
a. Open the Culvert_Inventory_Access.accdb file in MS Access.
b. Right click the RM0150 table in the list to the left of the switchboard.
c. Hover on “Import” and select “Excel” from the context menu.
d. Click the “Browse” button and select the Excel file that was created in Step 2.
e. Select the option “Import the source data into a new table in the current
database” and click “OK”.
f. Select “Sheet 1” from the list of worksheets and click next.
g. Make sure the box “First row contains column headings” is checked and click
“Next”.
h. In the “Field Options” dialog, select each of the fields and set their data types.
The section “Details of Culvert Table” in the manual describes each appropriate
data type. Click “Next”.
i. Select “No primary key” and click “Next”.
j. Assign an appropriate name to the new table and click finish. Your table has now
been added to the database.
k. Navigate to the newly added table by clicking on the heading “Unassigned
Objects” from the list to the left. Right click the table, hover on “Add to group”
and select “TxDOT Group” from the context menu.
l. From the TxDOT group, double click the “TxDOT_Culvert_Inventory_Form” to
open it. From the menu at the top left, select design view. Click on the data tab
in the “Property Sheet” and set the form’s “Record Source” to the table that you
have just added. Data can now be edited/entered in the new table from the
form (see the section “MS Access Database Overview” in this manual).
3
Step 4 – Adding the Access tables to the Geodatabase
a. In MS Access, make sure that the table you wish to export is closed. Right click it
from the list in the “TxDOT Group”, hover on “Export” and select “Excel” from
the context menu.
b. Browse to a suitable location and make sure to save the table as a MS Excel
Workbook. Check the box “Export data with formatting and layout” and click
“OK”. Close the resulting dialog.
c. Repeat steps a - b to export the “Overtopping_History” table and quit MS Access.
d. Open ArcCatalog and navigate to Culvert_Inventory_Geodatabase.mdb.
e. Right click the geodatabase, hover on “Import” and select “Table (single)” from
the context menu.
f. Under “Input Rows” specify the Overtopping History MS Excel file. Make sure
the “Output Location” is set to the geodatabase and Specify a name for the
“Output Table”. Click “OK”.
g. Open ArcMap and add the Culvert Table MS Excel file to the map. From the
“Tools” menu select “Add XY Data”.
h. Select your culvert table from the dropdown menu and specify the “LONGITUDE”
field as the X Field and the “LATITUDE” field as the Y Field. Ensure that the
“Coordinate system of input coordinates” is set to GCS_North_American_1983
and click “OK”. Your table will be added to the map as an event layer displaying
point locations for each culvert feature.
i. Right click the event layer, hover to “Data” and select “Export Data”. Click the
browse button and designate the Culverts Feature Dataset inside the
Culvert_Inventory_Geodatabase.mdb as the location and name the export.
Select to save as a type “File and Personal Geodatabase feature classes” and click
save. Choose to export “All Features” and click “OK”. Add the feature class to
the map.
Step 5 – Setting relationships and domain codes
a. Open ArcCatalog and navigate to Culvert_Inventory_Geodatabase.mdb.
b. Right click the geodatabase, hover on “New” and select “Relationship Class”
from the context menu.
c. Name the relationship class, select your culvert table as the “Origin table/feature
class” and select the overtopping history table as the “Destination table/feature
class”. Click “Next”.
d. Select “Composite relationship” as the relationship type and click “Next”.
e. Select “Both” as the message propagation direction and click “Next”.
4
f. Select 1 – M (one to many) as the cardinality for the relationship class and click
“Next”.
g. Select “No” when asked to add attributes to the relationship class and click
“Next”.
h. Choose “CULVERT_ID” as the primary key from the dropdown and choose
“CULVERT_ID” as the foreign key. Click “Next”.
i. Click “Finish”. Your relationship class is now set.
j. Navigate to the culvert table, right click it and select “Properties”. Click on the
tab “Fields”.
k. Set the domain codes according to the section “Details of Culvert Table” in this
manual. Click “Apply” and then “OK”. Your domain codes have now been set.
MS Access Interface
Overview
The database application was developed using Microsoft Access 2007. The application can be
run under Windows 7and Windows XP. The system is comprised of a switchboard that allows a
user to navigate to the TxDOT Culvert Inventory Form and the Overtopping History Subform.
The application has only been tested on Windows 7.
All database tables reside within the application. The Culvert Inventory Access database has
the following main tables, and forms:
Culverts_RM0150 table – This is the main table where all culvert data is recorded as an
example.
Overtopping_History table – This table records the dates of overtopping events for each of the
culvert features.
Note: Details of Culvert Table and Details of Overtopping History Table contain a list of
all fields with details on how to code each one.
TxDOT_Culvert_Inventory_Form – This is the main form where all culvert data is entered and
later recorded in a culvert table.
Overtopping_History_Subform – This is a subform that is attached to and automatically opens
once the “TxDOT_Culvert_Inventory_Form” is opened.
5
Installation and Usage Procedure
Step 1 - Make sure that Microsoft Access 2007 is installed on the computer where this
application is to be used.
Step 2 - Open the file Culvert_Inventory_Access.accdb. The TxDOT Culvert Inventory Database
switchboard will automatically open.
Step 3 - Click on the button that says “TxDOT Culvert Inventory” to add, inventory, or review
culvert data. Click on “Overtopping History Form” to review or print that form. Click on
“Quit Access” to end the application and quit Microsoft Access.
Step 4 - Once the “TxDOT Culvert Inventory” form is open, you are able to enter/edit the
database. As an alternative, a user may enter or edit the tables directly by double
clicking the table from the list to the left of the screen.
Step 5 – View the culvert record information by scrolling forward to the next record or
backwards to a previous record. When adding data to a new record always remember
to click the “save” button or the new record cannot be viewed in the table.
Function Buttons
The Access Database is provided with the following function buttons for navigation and editing.
These function buttons are located at the bottom of the data entry form. Ten function buttons
are provided:
1.
3.
5.
7.
9.
First Record
Next Record
Save Record
Delete Record
Exit Form
2. Previous Record
4. Last Record
6. Add Record
8. Print Form
10. Quit Access
1
2
3
6
7
8
4
5
9
10
6
The functionality of each button is described below:
1. First Record
This is the first of four browse buttons. When the First Record button is clicked, the
information for the first record in the table is displayed on the screen.
2. Previous Record
This is the second of four browse buttons. When the Previous Record button is clicked, the
information for the previous record in the table is displayed on the screen. If the control is at
the first record, then the program will display a message “You can’t go to the specified record”
3. Next Record
This is the third of four browse buttons. When the Next Record button is clicked, the
information for the next record in the table is displayed on the screen. If the control is at the
last record, then the program will display a message “You can’t go to the specified record”
4. Last Record
This is the last of the four browse buttons. When the Last Record button is clicked, the
information for the last record in the table is displayed on the screen.
5. Save Record
When the Save button is clicked, all information on the screen is saved to the table. If a new
record is added or an existing record is edited, then click the Save button to save the record.
6. Add Record
When the Add button is clicked, all information on the screen is cleared for entering a new
record. After entering all information, click the Save button to save the record.
7. Delete Record
When the Delete button is clicked a message is displayed, “You are about to delete 1 record(s).
If you click Yes, you won’t be able to undo this Delete operation. Are you sure you want to
delete these records?”
If “No” is clicked then the deletion is aborted.
If “Yes” is clicked then the record is deleted and the screen comes to the browse mode.
7
8. Print Form
When the Print Form button is clicked, the report is printed. Use the options is the print range
to specify what report(s) to print and how many to print.
9. Exit Form
When the Exit Form is clicked, it closes the current screen and loads the previous screen.
10. Quit Access
When the Quit Access button is clicked, the program Microsoft Access closes.
Image Management
Digital images related to each culvert feature will be saved inside of a file structure that is
created by the user. The image files should be stored in a location that is accessible to the
computer terminal where the geodatabase is stored. The file structure should consist of a root
folder named “photos” with individual folders inside of the root named by culvert ID (see detail
of CULVERT_ID field), an example has been provided.
The images will be available for the creation of reports either through Microsoft Access or
ArcGIS. It is also possible to hyperlink the images to a map that is created in ArcGIS. The best
approach is to set up dynamic hyperlinks using relative path names. An overview of this
procedure can be found in ArcGIS desktop help under the topic, “Adding hyperlinks to
features”. If the map is to be shared with other terminals, the image files will need to be
accessible by all participating terminals either through a network connection or by simply
copying the files to each local machine.
8
Figure 1: Culvert Table Data Definitions (continued on following page)
Field Name
OBJECTID
Shape
CNTY
HWY
REFNBR
REFDISP
RDBD
RWYCODE
RWYGRD
RWYSKEW
INTFTYPE
RWYNOTE
DFO
CSECT
MSECT
LATITUDE
LONGITUDE
RTE_PRFX_C
RTE_NBR
CULVERT_ID
LENGTH
WIDTH
HEIGHT
DIAMETER
STREAM_NAME
DA
Tc
CN
RC
FLOW_DIR
MAT_TYPE
AGE
Definition
Object ID
Definition of the kind of feature class (point,
line, polygon)
County designation number, see TRM manual
page 2-9
Highway designation type and number, see TRM
code index
Number of Reference Marker that is on the
route where the feature is located
The distance of the feature (miles) downstream
from the nearest upstream Reference Marker
Roadbed ID
Total Width (feet) of the Right-of-Way at the
location of the feature in, see TRM manual page
10-14
How the feature sits relative to the roadway
grade: D – below, S – on surface, U - above
Diagonal skew of crossing feature relative to the
downstream direction of the route, see TRM
manual page 11-4
Intersecting feature type, see TRM code index
Catch-all descriptor of intersecting feature
Distance from the origin Reference Marker
(miles) for the route
Control section number
Maintenance section number
Latitude (decimal degrees)
Longitude (decimal degrees)
Route prefix
Route number
Culvert identification number
Length of the feature (feet)
Width of the feature (inches)
Height of the feature (inches)
Diameter of the feature (inches)
Name of the stream associated with the feature
Drainage area (miles2)
Time of concentration (minutes)
Curve number
Runoff coefficient
Flow direction
Material type
Year feature was emplaced on site
9
Figure 1: Culvert Table Data Definitions (continued from previous page)
Field Name
BARRELS
SAFETY_RAIL
HEADWALL
WINGWALLS
SFTY_END_TRTMT
OVERTOP_HIST
CONDITION
MAINT_WKR
NOTES
PHOTOS
Definition
Number of barrels associated with the feature
Presence of a safety rail
Presence of a headwall
Presence of wingwalls
Presence of safety end treatments
Presence of overtopping history
Condition of feature
user who recorded or inspected the feature
Notes
Presence of photos
Figure 2: Overtopping History Table Data Definitions
Field Name
OBJECTID
OVERTOP_DATE
CULVERT_ID
NOTES
Definition
Object ID
Records of overtopping events (by date)
Culvert identification number
Notes
10
Details of Culvert Table
OBJECTID - (Object ID – Auto generated)
This field is auto generated by the geodatabase and should not be edited by the user.
Shape - (Geometry – Describes the geometry type associated with the record)
This field will be generated by the geodatabase and describes each record as being a
point feature type.
CNTY - (Short Integer – 2 bytes) This field allows for the entry of numbers without fractions
within a specific range (-32,768 to 32,767).
Data: County designation number, see TRM manual page 2-9. The designation
number consists of 3 digits.
Example: 106
HWY - (Text – 254 characters)
Data: Highway designation type and number, see TRM code index. The designation
type consists of 2 characters and the designation number consists of 4 digits.
Example: RM0150
REFNBR - (Short Integer – 2 bytes) This field allows for the entry of numbers without fractions
within a specific range (-32,768 to 32,767).
Data: Number of Reference Marker that is on the route where the feature is
located. The Reference Marker number consists of 4 digits.
Example: 0460
11
REFDISP - (Float – 4 bytes) This field is a single-precision floating point number, it allows for the
entry of numbers with fractions within a specific range (approx. -3.4E38 to 1.2E38).
Data: The distance of the feature (in miles) downstream from the nearest upstream
Reference Marker.
Example: 0.46
RDBD - (Text – 254 characters)
Data: Roadbed ID, see TRM code index.
Example: KG
RWYCODE - (Short Integer – 2 bytes) This field allows for the entry of numbers without fractions
within a specific range (-32,768 to 32,767).
Data: Total Width of the Right-of-Way at the location of the feature in feet, see
TRM manual page 10-14.
Example: 33
RWYGRD - (Text – 254 characters)
Data: How the feature sits relative to the roadway grade: D – below, S – on surface,
U – above.
Example: D
RWYSKEW - (Double – 8 bytes) This field is a double-precision floating point number, it allows
for the entry of numbers with fractions within a specific range (approx. -2.2E308 to
1.8E308).
Data: Diagonal skew of the crossing feature relative to the downstream direction of
the route, see TRM manual page 11-4.
Example: 4100
12
INTFTYPE - (Short Integer – 2 bytes) This field allows for the entry of numbers without fractions
within a specific range (-32,768 to 32,767).
Data: Intersecting feature type, see TRM code index.
Example: 73
RWYNOTE - (Text – 254 characters)
Data: Catch-all descriptor of the intersecting feature. Typically indicates P for pipe,
PA for pipe arch, and BC for box culvert, and the size.
Example: 24” P
DFO - (Double – 8 bytes) This field is a double-precision floating point number, it allows for the
entry of numbers with fractions within a specific range (approx. -2.2E308 to 1.8E308).
Data: Distance from the origin Reference Marker (in miles) for the route.
Example: 12.65
CSECT - (Double – 8 bytes) This field is a double-precision floating point number, it allows for
the entry of numbers with fractions within a specific range (approx. -2.2E308 to 1.8E308).
Data: Control section number associated with the feature. The last 2 digits are
always the section and the prior digits (2 to 4) are the control.
Example: 80504
MSECT - (Double – 8 bytes) This field is a double-precision floating point number, it allows for
the entry of numbers with fractions within a specific range (approx. -2.2E308 to 1.8E308).
Data: Maintenance section number responsible for the segment of road where the
feature is located.
Example: 6
13
LATITUDE - (Double – 8 bytes) This field is a double-precision floating point number, it allows
for the entry of numbers with fractions within a specific range (approx. -2.2E308 to
1.8E308).
Data: Latitude of the feature in decimal degrees.
Example: 30.04635
LONGITUDE - (Double – 8 bytes) This field is a double-precision floating point number, it allows
for the entry of numbers with fractions within a specific range (approx. -2.2E308 to
1.8E308).
Data: Longitude of the feature in decimal degrees.
Example: -97.979948
RTE_PRFX_C - (Text – 50 characters)
Data: Route prefix, see TRM code index.
Example: RM
RTE_NBR - (Text – 50 characters)
Data: Route number, should be recorded as a 4 digit number.
Example: 0150
CULVERT_ID - (Text – 255 characters)
Data: Unique identifier for culvert features. This field is the primary key for the
geodatabase, relating the culvert table to the overtopping history table. This field
should not be deleted. The naming convention is based on the Texas Reference
Marker System (TRM). Each unique ID is composed of the following elements:
CNTY + RTE_PRFX_C + RTE_NBR + REFNBR + REFDISP
Example: 106RM015004600.46
14
LENGTH - (Float – 4 bytes) This field is a single-precision floating point number, it allows for the
entry of numbers with fractions within a specific range (approx. -3.4E38 to 1.2E38).
Data: Length of the feature in feet.
Example: 42.35
WIDTH - (Float – 4 bytes) This field is a single-precision floating point number, it allows for the
entry of numbers with fractions within a specific range (approx. -3.4E38 to 1.2E38).
Data: Width of the feature in inches.
Example: 21
HEIGHT - (Float – 4 bytes) This field is a single-precision floating point number, it allows for the
entry of numbers with fractions within a specific range (approx. -3.4E38 to 1.2E38).
Data: Height of the feature in inches.
Example: 15
DIAMETER - (Float – 4 bytes) This field is a single-precision floating point number, it allows for
the entry of numbers with fractions within a specific range (approx. -3.4E38 to 1.2E38).
Data: Diameter of the feature in inches.
Example: 30
STREAM_NAME - (Text – 100 characters)
Data: The name of the stream associated with the feature. This is a hydrologic
characteristic. The name should not include any spaces.
Example: York Creek
15
DA - (Float – 4 bytes) This field is a single-precision floating point number, it allows for the entry
of numbers with fractions within a specific range (approx. -3.4E38 to 1.2E38).
Data: Drainage area in square miles. This is a hydrologic characteristic.
Example: 1.352
Tc - (Float – 4 bytes) This field is a single-precision floating point number, it allows for the entry
of numbers with fractions within a specific range (approx. -3.4E38 to 1.2E38).
Data: Time of concentration in minutes. This is a hydrologic characteristic.
Example: 59
CN - (Float – 4 bytes) This field is a single-precision floating point number, it allows for the entry
of numbers with fractions within a specific range (approx. -3.4E38 to 1.2E38).
Data: Curve number, this is a hydrologic characteristic.
Example: 72
RC - (Float – 4 bytes) This field is a single-precision floating point number, it allows for the entry
of numbers with fractions within a specific range (approx. -3.4E38 to 1.2E38).
Data: Runoff coefficient, this is a hydrologic characteristic.
Example: .43
FLOW_DIR - (Text – 10 characters)
Data: Flow direction, this is a hydrologic characteristic. This is a coded field which
only allows a user to enter N, NE, E, SE, S, SW, W, or NW.
Example: NE
16
MAT_TYPE - (Text – 50 characters)
Data: The type of material the feature is constructed from. This is a coded field
which only allows a user to enter CCB (Caste-In-Place Reinforced Concrete Box), CMP
(Corrugated Metal Pipe), CPA (Precast Reinforced Concrete Pipe Arch), MPA (Corrugated
Metal Pipe Arch), RCB (Precast Reinforced Concrete Box), RCP (Precast Reinforced
Concrete Pipe), or OTH (Other). If other, a user could specify the details of the
construction in the NOTES field.
Example: CMP
AGE - (Short Integer – 2 bytes) This field allows for the entry of numbers without fractions
within a specific range (-32,768 to 32,767).
Data: The year the feature was emplaced on site.
Example: 1935
BARRELS - (Short Integer – 2 bytes) This field allows for the entry of numbers without fractions
within a specific range (-32,768 to 32,767).
Data: The number of barrels associated with the feature.
Example: 4
SAFETY_RAIL - (Text – 10 characters)
Data: Indicates the presence of a safety rail. This is a coded field which only allows
a user to enter Y (Yes) or N (No).
Example: Y
17
HEADWALL - (Text – 10 characters)
Data: Indicates the presence of a headwall. This is a coded field which only allows
a user to enter Y (Yes) or N (No).
Example: N
WINGWALLS - (Text – 10 characters)
Data: Indicates the presence of wingwalls. This is a coded field which only allows
a user to enter Y (Yes) or N (No).
Example: Y
SFTY_END_TRTMT - (Text – 10 characters)
Data: Indicates the presence of a safety end treatment. This is a coded field which
only allows a user to enter Y (Yes) or N (No).
Example: Y
OVERTOP_HIST - (Text – 10 characters)
Data: Indicates the presence of overtopping histories for the feature. This is a
coded field which only allows a user to enter Y (Yes) or N (No). If Y, the over topping
events can be catalogued in the related over topping history table by
culvert ID (see section on CULVERT_ID).
Example: Y
18
CONDITION - (Text – 50 characters)
Data: Indicates the condition of the feature at the time of inspection. This is a
coded field which only allows a user to enter 1 (Good condition), 2 (Maintenance
required), or 3 (Significant damage). Additional information pertaining to the feature’s
condition may be entered into the NOTES field.
Example: 2
MAINT_WKR - (Text – 50 characters)
Data: The name of the user who recorded or inspected the feature.
Example: Jim Crawford
NOTES - (Text – 1000 characters)
Data: This field allows the user to enter any notes about the feature that he/she
feels will be useful information for future users who inspect the data.
Example: Debris accumulation at culvert entrance
PHOTOS - (Text – 10 characters)
Data: Indicates the presence of photos for the feature. This is a coded
field which only allows a user to enter Y (Yes) or N (No). This field is intended as a
reference so that a user will not have to search through the photo file directory for
photos that may not be
on file (see the section on Image Management).
Example: Y
19
Details of Overtopping History Table
OBJECTID - (Object ID – Auto generated)
This field is auto generated by the geodatabase and should not be edited by the user.
OVERTOP_DATE - (Date – 8 bytes) This field allows for the entry of date and/or time.
Data: Dates and/or time in the formats mm/dd/yyyy, hh:mm:ss, or AM/PM.
Example: 03/15/2011
CULVERT_ID - (Text – 255 characters)
Data: Unique identifier for culvert features. This field is the foreign key for the
geodatabase, relating the culvert table to the overtopping history table. This field
should not be deleted. The naming convention is based on the Texas Reference
Marker System (TRM). Each unique ID is composed of the following elements:
CNTY + RTE_PRFX_C + RTE_NBR + REFNBR + REFDISP
Example: 106RM015004600.46
NOTES - (Text – 1000 characters)
Data: This field allows the user to enter any notes about the feature that he/she
feels will be useful information for future users who inspect the data.
Example: Debris accumulation at culvert entrance
20
Figure 3: Culvert Inventory Access Form
21
Figure 4: Field Data Entry Form
CULVERT INSPECTION REPORT
County: ________________________
Highway: ____________________
Cont-Sec-Str No: _________________
Location: ____________________
Reference Marker: ________
Maintenance Section: ______
Attribute
Value
Notes
REFDISP
RDBD
RWYCODE
RWYGRD
RWYSKEW
INTFTYPE
RWYNOTE
DFO
Route Prefix
Route Number
Latitude
Longitude
Culvert ID
Length
22
Attribute
Value
Notes
Width
Height
Diameter
Stream Name
DA
TC
CN
RC
Flow Direction
Material Type
Age
Barrels
Safety Rail
Headwall
Wingwalls
Safety End
Treatment
Overtopping
History
Condition
Photos
Inspector: ____________________________________________
Date/Time: __________________________________________
23
Technical Support
For technical questions or assistance contact:
Jason Kleinert
[email protected]
24