1
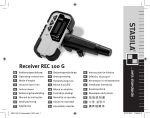
User Manual The battery symbol 5 lights up when the battery voltage is too low. Replace the batteries as soon as possible. • Insert the batteries observing the correct polarity • Use alkaline batteries or rechargeable batteries only • Remove the batteries if the instrument is not to be used for a long period of time (to prevent corrosion) English Before using the product for the first time, please read carefully through the Safety Instructions and the User Manual. The person responsible for the instrument must ensure that all users understand these directions and adhere to them. en GB F I E P NL DK Contents S Start up ..................................................................... 1 Operation ................................................................. 2 Operation LLE 11 ................................................. 10 Care and advice on operation .......................... 11 Transport ................................................................ 11 Warranty ................................................................. 11 Technical data PLL 11/CLL 11 ......................... 12 Technical data LLE 11 ........................................ 13 Safety instructions .............................................. 13 N FIN J CN ROK PL HR H RUS Start up CZ GR Inserting / replacing batteries LT Slide the locking button forwards to unlock the battery compartment. Open the battery compartment cover and insert the batteries, observing the correct polarity. Then press the battery compartment cover back down until it engages. LV EST SLO SK 1 Start up M TR en GB Operation F Keypad and control elements I 1 On/Set key 2 Pulse key 3 Lock switch E P NL DK S N FIN J CN Display 4 5 6 7 8 9 AT Locked Battery voltage too low Pulse/Power save mode ON Horizontal laser line Vertical laser line Plumbing point Plumbing and crossline intersection point 3 6 5 4 ROK PL HR 1 H RUS CZ 6 5 4 GR LT LV EST 1 SLO SK M TR Operation 2 PLL 11 set on pulse CLL 11 set on pulse 7 8 9 AT 2 7 8 2 Switching on/off ON: Briefly press the On/Set key 1. OFF: Press and hold down the Pulse key 1. • • Laser functions Pressing the On/Set key 1 activates the following laser functions: PLL 11 Action 1x 2x 3x 4x all points all lines and points en The instrument automatically levels itself within the specified grade range (Refer to "Technical data") . Press the Lock switch 3 in order to transport or tilt the instrument beyond the self-levelling range. When locked, the pendulum is fixed and the self-levelling function is deactivated. GB not in Lock mode in Lock mode only horizontal line all lines only horizontal line only vertical line horizontal line F I E P NL Pulse CLL 11 not in Lock in Lock mode mode Self-levelling and Lock functions DK To be able to detect the laser lines over long distances (> 15 m) or in unfavourable lighting conditions, a laser detector can be used. The detector is able to locate the laser beam in Pulse mode, even over long distances. (Laser detector refer to accessories) S N FIN J CN ROK only vertical line PL HR only plumbing point again as 1x again as 1x - vertical line H again as 1x RUS again as 1x CZ - GR LT LV EST SLO SK 3 Operation M TR en GB Applications PLL 11 set on 1x set on 2x set on 3x set on 1x + F I E P NL DK S N pulse FIN J CN ROK PL HR H RUS CZ GR LT LV EST SLO SK M TR Operation 4 1x set on 2x + en Applications CLL 11 set on set on 1x 1x + set on GB 2x + F I E P NL DK S set on 2x pulse N 1x FIN J CN ROK PL HR H set on 3x RUS CZ GR LT LV EST SLO SK 5 Operation M TR en How to use the wall mount bracket: GB F I E P NL DK S N FIN J CN ROK PL HR H RUS CZ GR LT LV EST SLO SK M TR Operation 6 Checking the accuracy en ) GB Check the accuracy of your CLL 11/PLL 11 regularly and particularly before important measuring tasks. F I E Checking the accuracy of the levelling A1 A2 5m B1 P B2 NL DK S Then place the instrument at the same elevation as close as possible to wall A and again mark the horizontal laser line or the laser dot on wall A (-> A2) . Rotate the instrument by 180° again and mark the laser on wall B (> B2). Measure the distances of the marked points A1A2 and B1-B2. Calculate the difference of the two measurements. If the difference does not exceed 2 mm, then the CLL 11/PLL 11 is within tolerance. | (A1 - A2) - (B1 - B2) | ≤ 2 mm B1 A1 2.5 m 2.5 m Set the instrument on a tripod half-way between two walls (A+B) that are approx. 5 m apart. Place the Lock switch 3 in the "Unlocked" ( ) position. Direct the instrument at wall A and switch on the instrument. Activate the horizontal laser line or laser dot and mark the position of the line or the dot on wall A (-> A1). Rotate the instrument by 180° and mark the horizontal laser line or the laser dot in exactly the same way on wall B (-> B1). N FIN J CN ROK PL HR H RUS CZ GR LT LV EST SLO SK 7 Operation M TR en Checking the accuracy of the horizontal line: Checking the accuracy of the vertical line: GB F I E max. 2 mm max. 3 mm P NL DK 5m S 1.5 m N FIN J CN ROK PL HR H RUS CZ Place the Lock switch 3 in the "Unlocked" ( ) position. Position the instrument approx. 5 m away from the wall. Direct the instrument at the wall and switch on with the On/Set key 1. Activate the laser line with the On/Set key 1 and mark the intersection point of laser crosshairs on the wall. Swivel the instrument to the right and then to the left. Observe the vertical deviation of the horizontal line from the marking. If the difference does not exceed 3 mm, then the CLL 11/PLL 11 is within tolerance. Place the Lock switch 3 in the "Unlocked" ( ) position. As reference, use a plumb-bob and attach it as close as possible to an approx. 3 m high wall. Position the instrument at a distance of approx. 1.5 m from the wall at an elevation of approx. 1.5 m. Direct the instrument at the wall and switch on with the On/Set key 1. Activate the laser line with the On/Set key 1. Rotate the instrument and align it with the bottom of the plumb line. Now read off the maximum deviation of the laser line from the top of the plumb line. If the difference does not exceed 2 mm, then the CLL 11/PLL 11 is within tolerance. GR LT LV EST SLO SK M TR Operation 8 Checking the accuracy of the vertical plumbing of the PLL11: Place the Lock switch 3 in the "Unlocked" ( position. Checking the upper plumbing point: B1 so that the laser beam hits point A1 exactly. If point B2 is no further than 2 mm away from point B1, then the PLL 11 is within tolerance. ) ) Should your CLL 11/PLL 11 be outside of the specified tolerance, please contact an authorised dealership of Würth Electronics. B2 max. 2 mm 1 Falling below or exceeding the permissible temperature range: The laser switches off and all symbols flash. Outside of the self-levelling range: The laser switches off and the symbol of the function used starts to flash. Pendulum locked: The laser beam is not levelled and the Lock symbol 4 lights up. 2 A1 Checking the lower plumbing point: A1 F I E P Display notices 1.5 m en GB NL DK S N FIN J CN ROK PL 1 2 HR H 1.5 m RUS CZ B1 B2 max. 2 mm Set up the laser on its tripod or wall mount bracket near point A1 at a minimum distance of 1.5 m from point B1. The horizontal laser is aligned in direction 1. Mark the laser dots A1 and B1 with a pin. Rotate the instrument by 180° so that it points in the opposite direction 2 to direction 1. Adjust the instrument GR LT LV EST SLO SK 9 Operation M TR en GB Display status symbols Operation LLE 11 F Würth LLE 11 I E The Würth LEE 11 is a robust and easy to use laser receiver and can be used with all Würth line lasers. P Keypad 5 1 6 2 7 NL DK 1 S N 3 2 FIN 4 J CN ROK 3 PL HR 1 2 3 4 5 6 7 8 9 H RUS CZ GR LT LV 1 ON/OFF key: switch the receiver on/off 2 Beeper key: change the sound level of the beeper 3 Sensitivity key: switch sensitivity (±1mm/±3mm) EST SLO SK M TR Operation LLE 11 10 Sensivity: fine ±1 mm (default) Sensivity: coarse ±3 mm Battery status: full Battery status: low Beep medium Beep high Beep off Move receiver down Move receiver up 8 9 Care and advice on operation en Warranty Do not immerse the instrument in water. Wipe off dirt with a damp soft cloth. Do not use aggressive cleaning agents or solvents. Treat the instrument with the same care that you would apply to binoculars or a camera. Dropping or violent shaking of the instrument may damage it. Check the instrument for any damage before using it. Check the levelling accuracy of the instrument regularly. GB For this Würth tool, we provide a warranty in accordance with statutory/country-specific regulations from the date of purchase (proof of purchase by invoice or delivery note). Damage that has occurred will be corrected by replacement or repair. Damage caused by normal wear, overloading or improper handling is excluded from the warranty. Claims can only be accepted if the power tool is sent undisassembled to a Würth branch office, your Würth sales representative or a customer service agent for Würth compressed-air and power tools. Transport To safely transport the instrument, set the Lock switch 3 to "Locked" ( ). F I E P NL DK S N FIN J CN ROK PL HR H RUS CZ GR LT LV EST SLO SK 11 Care and advice on operation M TR en GB Technical data PLL 11/CLL 11 F I E P NL DK S N FIN J CN Range Range with detector Levelling accuracy @ 5 m Self-levelling range Accuracy of plumbing point @ 5 m Accuracy of horizontal line @ 5 m Vertical accuracy @ 3 m line length Beam divergence Number of laser dots Number of laser lines Beam direction ROK PL Laser type HR Batteries Type H RUS PLL 11 CLL 11 up to 15 m* > 30 m ± 1,5 mm ± 1 mm 4° ± 0,5° ± 1,5 mm ± 1,5 mm ± 0,75 mm <180° 4 vertical, horizontal, vertical, up, down, horizontal right, left 635 nm, laser class II Typ AA 4 x 1,5 V LT Operating temperature Storage temperature Dimensions (H x D x W) Weight without batteries Tripod thread LV * depending on lighting conditions CZ GR 2 Protection class spray water / dust Beam direction Laser type Batteries Type -10°C to 40°C -25°C to 70°C 108 x 115 x 76 mm 485 g 1/4" 12 2 vertical, horizontal, vertical, up, down, horizontal right, left 635 nm, laser class II Typ AA 4 x 1,5 V * depending on lighting conditions SK TR <180° 4 Operating temperature Storage temperature Dimensions (H x D x W) Weight without batteries Tripod thread SLO Technical data PLL 11/CLL 11 ± 1/32 “ Protection class spray water / dust IP 54 EST M PLL 11 CLL 11 up to 50 ft* > 100 ft ± 1/16 “ ± 0.04 in 4° ± 0.5° ± 1/16 “ ± 1/16 “ Range Range with detector Levelling accuracy @ 16 ft Self-levelling range Accuracy of plumbing point @ 16 ft Accuracy of horizontal line @ 16 ft Vertical accuracy @ 10 ft line length Beam divergence Number of laser dots Number of laser lines IP 54 14°F to +104°F -13°F to +158°F 4.2 x 4.5 x 3.0 in 17.1 oz 1/4" Technical data LLE 11 Safety instructions The person responsible for the instrument must ensure that all users understand these directions and adhere to them. LLE 11 Sensitivity (switchable) Detection field length ±1mm / ±3mm 42 mm Protection Operation temperature Storage temperature Battery type Dimensions Weight with batteries ±0.04/ ±0.12inch IP54 -20 - +70°C -4°F - +158°F 147.5 x 75.5 x 29.5 mm 5.8 x 2.9 x 1.2 inch 260 g 9.1oz DK CAUTION: Indicates a potentially hazardous situation or an unintended use which,if not avoided, may result in minor injury and/or appreciable material, financial and environmental damage. ) Important paragraphs which must be adhered to in practice as they enable the product to be used in a technically correct and efficient manner. All rights reserved for changes (on drawings, descriptions and technical data). E NL 1x 6LR61, 9V I The symbols used have the following meanings WARNING: Indicates a potentially hazardous situation or an unintended use which, if not avoided, will result in death or serious injury. -10°C - +50°C +14°F - +122°F F P Symbols used 1.65inch en GB S N FIN J CN ROK PL HR H RUS Permitted use CZ • GR Projection of horizontal and vertical laser lines and laser dots Prohibited use • • LT LV Using the product without instruction Using outside the stated limits EST SLO SK 13 Technical data LLE 11 M TR en GB • • F I E P NL • • • Deactivation of safety systems and removal of explanatory and hazard labels Opening of the equipment by using tools (screwdrivers, etc.), as far as not specifically permitted for certain cases Carrying out modification or conversion of the product Deliberate dazzling of third parties; also in the dark Inadequate safeguards at the surveying site. Responsibilities of the person in charge of the instrument: The person in charge of the instrument has the following duties: • To understand the safety instructions on the product and the instructions in the User Manual. • To be familiar with local safety regulations relating to accident prevention. Hazards in use DK S Limits of use N Refer to section "Technical data". The CLL 11/PLL 11 is designed for use in areas permanently habitable by humans. Do not use the product in explosion hazardous areas or in aggressive environments. FIN J CN ROK PL HR H RUS CZ GR LT LV CAUTION: Watch out for erroneous measurements if the instrument is defective or if it has been dropped or has been misused or modified. ) ) Carry out periodic test measurements. Particularly after the instrument has been subject to abnormal use, and before, during and after important measurements. Refer to section "Checking the accuracy". Areas of responsibility Responsibilities of the manufacturer of the original equipment Adolf Würth GmbH & Co. KG, D-74650 Künzelsau (for short Würth): • Würth is responsible for supplying the device, including the User Manual, in a completely safe condition. • Würth is not responsible for third party accessories. WARNING: Flat batteries must not be disposed of with household waste. Care for the environment and take them to the collection points provided in accordance with national or local regulations. EST SLO SK M TR Safety instructions 14 The product must not be disposed of with the household waste. Dispose of the product appropriately in accordance with the national regulations in force in your country. Always prevent access to the product by unauthorised personnel. WARNING Using a battery charger not recommended by Würth can destroy the batteries. This can cause fire or explosions. Precautions: Only use chargers recommended by Würth to charge the batteries. Electromagnetic Compatibility (EMC) WARNING: The CLL 11/PLL 11 conforms to the most stringent requirements of the relevant standards and regulations. Yet, the possibility of it causing interference in other devices cannot be totally excluded. FCC statement (applic. in U.S.) en This equipment has been tested and found to comply with the limits for a Class B digital device, pursuant to part 15 of the FCC Rules. These limits are designed to provide reasonable protection against harmful interference in a residential installation. This equipment generates, uses and can radiate radio frequency energy and, if not installed and used in accordance with the instructions, may cause harmful interference to radio communications. However, there is no guarantee that interference will not occur in a particular installation. If this equipment does cause harmful interference to radio or television reception, which can be determined by turning the equipment off and on, the user is encouraged to try to correct the interference by one or more of the following measures: • Reorient or relocate the receiving antenna. • Increase the separation between the equipment and receiver. • Connect the equipment into an outlet on a circuit different from that to which the receiver is connected. • Consult the dealer or an experienced radio/TV technician for help GB WARNING: Changes or modifications not expressly approved by Würth for compliance could void the user’s authority to operate the equipment. F I E P NL DK S N FIN J CN ROK PL HR H RUS CZ GR LT LV EST SLO SK 15 Safety instructions M TR en Laser classification GB The CLL 11/PLL 11 produces visible laser beams, which are emitted from the instrument: F It is a Class 2 laser product in accordance with: • IEC60825-1 : 2007 "Radiation safety of laser products" I Laser Class 2 products: Do not stare into the laser beam or direct it towards other people unnecessarily. Eye protection is normally afforded by aversion responses including the blink reflex. E P NL DK CLL 11 WARNING: Looking directly into the beam with optical aids (e.g. binoculars, telescopes) can be hazardous. S N FIN CAUTION: Looking into the laser beam may be hazardous to the eyes. J PLL 11 CN ROK PL HR H RUS CZ GR LT LV EST SLO SK M TR Safety instructions 16 en Labelling GB F I PLL 11 E Laser Radiation Do not stare into the beam Laser class 2 in acc. with IEC 60825-1:2007 Maximum radiation power: <1.0mW c.w. Emitted wavelength: 620-690nm Beam divergence <180° P NL DK S N Laser Radiation Do not stare into the beam Laser class 2 in acc. with IEC 60825-1:2007 Maximum radiation power: <1.0mW c.w. Emitted wavelength: 620-690nm Beam divergence <1.5 mrad FIN J CN ROK PL HR CLL 11 H Laser Radiation Do not stare into the beam Laser class 2 in acc. with IEC 60825-1:2007 Maximum radiation power: <1.0mW c.w. Emitted wavelength: 620-690nm Beam divergence <180° RUS CZ GR LT LV EST SLO SK 17 Safety instructions M TR