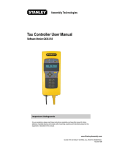
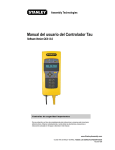
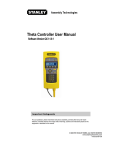
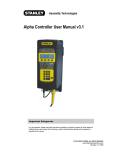
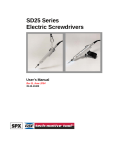
Download Instruction Manual - Stanley Engineered Fastening
Transcript
Instruction Manual Cordless Tool Software Version 5.2.5 English - Original Document - 20Z103300 - Revision 0 © 2015 STANLEY Black and Decker, Inc. All rights reserved. Table of Contents Introduction ��������������������������������������������������������������������������������1 1.1 Tool Model Nomenclature �������������������������������������������������������������������� 2 1.2 Tool Components ������������������������������������������������������������������������������ 2 1.3 CE Declaration of Conformity ��������������������������������������������������������� 4 1.3.1 According to the EC Machinery Directive 2006/42/EC Annex II 1A ���� 4 1.4 Regulatory Notices for Transmitter��������������������������������������������������������� 4 1.4.1 FCC Notice (USA) ������������������������������������������������������������������������������� 4 1.4.2 Industry Canada Notice (Canada) ������������������������������������������������������ 4 1.4.3 CE Notice (Europe) ������������������������������������������������������������������������������� 5 1.5Safety���������������������������������������������������������������������������������������������������� 5 1.5.1 1.5.2 1.5.3 1.5.4 1.5.5 Warnings and Cautions ������������������������������������������������������������������������������� 5 Safety Instructions for Cordless Tools and Controllers ������������������������������ 7 Safety Instructions for All Battery Packs������������������������������������������������������ 8 Specific Safety Instructions for Lithium Ion (Li-Ion) ������������������������������ 9 Safety Instructions for Battery Pack Charger ������������������������������������������ 9 1.6 Tool Kinetic Specifications �������������������������������������������������������������������� 9 1.6.1 Operating Conditions ������������������������������������������������������������������� 9 1.6.2 Noise Level �������������������������������������������������������������������������������������������10 1.6.3 Vibration Level �������������������������������������������������������������������������������������������10 1.7 Operator Protection ���������������������������������������������������������������������������� 10 1.7.1 Torque Reaction Forces ������������������������������������������������������������������������������11 1.7.2 Repetitive Motion ������������������������������������������������������������������������������11 1.7.3 Hearing Protection ������������������������������������������������������������������������������12 1.7.4Vibration �������������������������������������������������������������������������������������������13 1.7.5 Breathing Protection ������������������������������������������������������������������������������14 1.7.6 Projectile Hazards ������������������������������������������������������������������������������14 1.7.7 Entanglement Hazards ������������������������������������������������������������������������������14 1.7.8 Operating Hazards ������������������������������������������������������������������������������15 1.7.9 Accessory Hazards ������������������������������������������������������������������������������15 1.7.10 Workplace Hazards ������������������������������������������������������������������������������16 Getting Started ��������������������������������������������������������������������� 19 2.1 Battery Pack ���������������������������������������������������������������������������������������� 20 2.1.1 Fuel Gauge ������������������������������������������������������������������������������������������ 20 2.1.2 The RBRC™ Seal ����������������������������������������������������������������������������� 20 II Cordless Tool Table of Contents 2.1.3 Storage Recommendations 2.2Charger 2.2.1 2.2.2 2.2.3 2.2.4 ����������������������������������������������������������������� 20 ���������������������������������������������������������������������������������������� 21 Safe Operating Instructions ����������������������������������������������������������������� 21 Regulatory Notices for Charger ����������������������������������������������������������������� 22 Charging Procedure ����������������������������������������������������������������������������� 23 Storage Recommendations ����������������������������������������������������������������� 25 2.3 Cordless tool���������������������������������������������������������������������������������������� 25 2.3.1 General Power Tool Safety Instructions ���������������������������������������������������� 25 2.4 Installing and Removing the Battery Pack ���������������������������������� 26 2.5 Pairing Tool to Controller ������������������������������������������������������������������ 27 2.5.1 2.5.2 2.5.3 2.5.4 Connect to QPM Expert Alpha Controller �����������������������������������������27 Set SSID ������������������������������������������������������������������������������������������ 28 Pair QPM Cordless Tool to QPM Expert Alpha Controller���������������������������� 29 Add the QPM Cordless Tool as a Trailing Spindle ���������������������������� 29 2.6 Tool Installation ���������������������������������������������������������������������������� 29 2.6.1 Sockets and Adapters ����������������������������������������������������������������������������� 30 2.6.2 Suspension Devices ����������������������������������������������������������������������������� 30 2.6.3 Torque Reaction Devices ����������������������������������������������������������������� 30 Tool Operation ���������������������������������������������������������������������33 3.1Display ���������������������������������������������������������������������������������������� 34 3.1.1 3.1.2 3.1.3 3.1.4 Status Lights and Matrix ����������������������������������������������������������������� 34 Ready Light Matrix ����������������������������������������������������������������������������� 34 PM Light Matrix ����������������������������������������������������������������������������� 34 Indicator Light Matrix ����������������������������������������������������������������������������� 35 3.2 Multiple Function Button ������������������������������������������������������������������ 35 3.2.1 MFB Mode ������������������������������������������������������������������������������������������ 35 3.3 Start Trigger Switch ���������������������������������������������������������������������������� 36 3.4 Tool Memory���������������������������������������������������������������������������������������� 36 3.4.1 Fastening Cycle Counters ����������������������������������������������������������������� 36 3.4.2 Fastening Cycle Data ����������������������������������������������������������������������������� 37 3.5Worklights ���������������������������������������������������������������������������������������� 37 3.6 Tool Operation Instruction Manual ���������������������������������������������������������������������������� 37 III Table of Contents 3.6.1 3.6.2 3.6.3 3.6.4 3.6.5 3.6.6 3.6.7 Program Selection ����������������������������������������������������������������������������� 37 Directional Control ����������������������������������������������������������������������������� 38 Tool Temperature ����������������������������������������������������������������������������� 38 Setting Operating Parameters ����������������������������������������������������������������� 39 Assembly (Forward) Operation ����������������������������������������������������������������� 39 Disassembly (Reverse) Operation ���������������������������������������������������� 39 Sleep Mode ������������������������������������������������������������������������������������������ 39 3.7 Special Application Tools ������������������������������������������������������������������40 3.7.1 Exposed Gear Socket Tools ����������������������������������������������������������������� 40 3.7.2 Tubenut Nutrunners ����������������������������������������������������������������������������� 40 Maintenance ������������������������������������������������������������������������������43 4.1 Battery and Charger����������������������������������������������������������������������������44 4.1.1 Charger Cleaning Instructions ����������������������������������������������������������������� 44 4.2 QPM Cordless Tool ����������������������������������������������������������������������������44 4.2.1 Preventive Maintenance ����������������������������������������������������������������� 44 4.2.2Calibration ������������������������������������������������������������������������������������������ 44 4.2.3Repairs ������������������������������������������������������������������������������������������������������� 44 4.2.4Lubrication ������������������������������������������������������������������������������������������ 45 4.2.5Cleaning ������������������������������������������������������������������������������������������ 45 4.3Disposal ���������������������������������������������������������������������������������������� 45 Limited Warranty ��������������������������������������������������������������������� 47 5.1 Mechanical Products Limited Warranty ��������������������������������������������48 5.2 Electronic Products Limited Warranty ��������������������������������������������48 5.3 Software Products Limited Warranty ��������������������������������������������48 5.4 OEM Products Limited Warranty �������������������������������������������������������48 5.5 General Terms ����������������������������������������������������������������������������48 5.6 Specification Changes IV ������������������������������������������������������������������48 5.7 Warranty Claims ���������������������������������������������������������������������������� 49 5.8 Product Services ���������������������������������������������������������������������������� 49 Cordless Tool Table of Contents 5.9 Return Material Authorization (RMA) Procedures Instruction Manual ����������������������� 49 V Cordless Tools 1 Introduction Tool Model Nomenclature Tool Components CE Declaration of Conformity Regional Notices for Transmitter Safety Tool Kinetic Specifications Operator Protection Tool Model Nomenclature 1 About the Cordless tool The QPM cordless tool from STANLEY Assembly Technologies is designed to secure, or fasten, threaded fasteners in industrial assembly operations or for precision position and or adjustment applications only. It utilizes closed loop control of torque, speed and angle so that it can perform various routines to secure each fastener with the highest quality results. The high precision torque and angle sensors provide feedback to the integrated digital control circuit. This circuit compares the feedback values to the programmed values and adjusts the servo motor’s power and speed values to maintain the programmed speed on the output of the tool until the fastener has achieved the programmed target torque and/or angle value. Once the programmed target value is sensed the control circuit turns off the servo motor leaving the fastener with the desired amount of preload or clamping force. The QPM cordless tool uses a STANLEY MCB204 or DCB204 20V Lithium Ion battery pack as its power source. Use a STANLEY MCB101 12V Max*– 20V Max* Lithium Ion Battery Charger to charge the MCB204 or DCB204 battery pack. Programming tightening strategies into the QPM cordless tool requires a QPM Expert Alpha controller. The cordless tool has an embedded transceiver and communicates to the QPM Expert Alpha controller via an IEEE 802.11b/g WIFI connection. See section “2.5 Pairing Tool to Controller” on page 27 for instructions on pairing the cordless tool to the controller. See the QPM Expert Alpha controller manual for instructions on programming. After programming, the tool can remain paired to the controller for program selection, error proofing operations or data management requirements or it can be used independent of the controller. The QPM cordless tool stores data for 500 fastening cycles and 1 trace. These values can be viewed and retrieved using the QPM Expert Alpha controller. Periodic preventive maintenance and calibration will keep the QPM cordless tool in optimum working condition allowing it to continue to achieve high quality results. 1.1 Tool Model Nomenclature B12PB - 14 Max Torque (Nm) Head Size/ Number Output Type . . . . . . . A - Angle B - Inline C - Crowfoot T - Tube Nut P - Push to Start Trigger Type. . . . . . . P - Pistol Start Style Modular Gear Set . . 2 Motor Size . . . . . . . . 1 Power Source . . . . . B - High-Power Electric Brushless Battery Motor 1.2 Tool Components Tool components are explained in chapter “3 QPM Cordless tool” on page 34. The standard output that is shipped with each pistol tool is the quick change chuck. However, a 1/4” or 3/8” square drive can be requested instead. The square drive outputs may be purchased separately and used to change the output on the tool after the initial purchase. The battery pack and charger and their operation are explained in chapater “2 Open the Box” on page 20. 2 Cordless Tool Introduction Output Push-to-Start Worklights Quick Change Chuck Display Multifunction Button (MFB) 1/4” or 3/8” Square Drive Optional Start Trigger Switch Worklights Comfort Grip Handle Integrated Digital Control Circuit (Inside Handle) Charger Battery Release Button Battery Pack Instruction Manual Battery Pack Fuel Gauge (On back of battery) 3 CE Declaration of Conformity 1.3 CE Declaration of Conformity 1.3.1 According to the EC Machinery Directive 2006/42/EC Annex II 1A STANLEY Engineered Fastening Assembly Technologies declares that the QPM Cordless Tool conforms to all the applicable regulations of the Machinery Directive. See the CE Declaration of Conformity that is delivered with each QPM Cordless Tool. The safety instructions on the supplied product information are to be followed. 1.4 Regulatory Notices for Transmitter It is mandatory that national, state and local codes and standards be followed. 1.4.1 FCC Notice (USA) This device complies with Part 15 of the FCC Rules. Operation is subject to the following two conditions: (1) this device may not cause harmful interference, and (2) this device must accept any interference received, including interference that may cause undesired operation. The FCC requires the OEM to be notified of any changes or modifications. Changes or modifications not expressly approved by STANLEY Assembly Technologies could void the user’s authority to operate the equipment. This device, using the integrated antenna, has been tested to comply with FCC CFR Part 15. The device meets the requirements for modular transmitter approval as detailed in the FCC public notice DA00.1407. This equipment has been tested and found to comply with the limits for a Class B digital device, pursuant to Part 15 of the FCC Rules. These limits are designed to provide reasonable protection against harmful interference in a residential installation. This equipment generates, uses and can radiate radio frequency energy and, if not installed and used in accordance with the instructions, may cause harmful interference to radio communications. However, there is no guarantee that interference will not occur in a particular installation. If this equipment does cause harmful interference to radio or television reception, which can be determined by turning the equipment off and on, the user is encouraged to try to correct the interference by one or more of the following measures: • reorient or relocate the receiving antenna, • increase the separation between the equipment and receiver, • connect the equipment into an outlet on a circuit different from that to which the receiver is connected, or • consult the dealer or an experienced radio/TV technician for help. This device contains transmitter module FCC ID: QPU8200. CAUTION • To satisfy FCC RF exposure requirements for mobile transmitting devices, a separation distance of 20 cm (7.87 in) or more should be maintained between the antenna of this device and persons during operation. To ensure compliance, operations at closer distances than this are not recommended. 1.4.2 Industry Canada Notice (Canada) The term “IC” before the certification/registration number only signifies that the Industry Canada technical specifications were met. Le terme “IC” devant le numéro de certification /d’enregistrement signifie seulement que les spécifications techniques Industrie Canada ont été respectées. This device complies with Industry Canada license-exempt RSS standard(s). Operation is subject to the following two conditions: (1) this device may not cause interference, and (2) this device must accept any interference, including interference that may cause undesired operation of the device. Cet appareil est conforme avec Industrie Canada RSS standard exempts de licence (s). Son 4 Cordless Tool Introduction utilisation est soumise à Les deux conditions suivantes: (1) cet appareil ne peut pas provoquer d’interférences et (2) cet appareil doit accepter Toute interférence, y compris les interférences qui peuvent causer un mauvais fonctionnement du dispositif. This device complies with Health Canada’s Safety Code 6 / IC RSS-210. The installer of this device should ensure that RF radiation is not emitted in excess of the Health Canada’s requirement. Information can be obtained at: http://www.hc-sc.gc.ca/ewh-semt/pubs/radiation/radio_guide-lignes_direct-eng.php Cet appareil est conforme avec Santé Canada Code de sécurité 6 / IC RSS-210. Le programme d’installation de cet appareil doit s’assurer que les rayonnements RF n’est pas émis au-delà de l’exigence de Santé Canada. Les informations peuvent étre obtenues: http://www.hc-sc. gc.ca/ewh-semt/pubs/radiation/radio_guide-lignes_direct-eng.php This device contains transmitter module IC: 4523A-SN8200 1.4.3 CE Notice (Europe) This device has been tested and certified for use in the European Union. See “1.3 CE Declaration of Conformity” on page 4 The ‘CE’ mark has been placed on the device per the labeling requirements of the Directive. Given that the operating frequency band is not harmonized by a few European countries, the restriction or alert sign has been placed alongside the ‘CE’ mark as shown below. As of the date of this document, only France has a restriction. The restriction is that, if the radio is operated outdoors in the 2450-2483.5 MHz band, the power must be limited to 10 mW instead of 100 mW. 1.5 Safety 1.5.1 Warnings and Cautions The safety notices and warnings for protection against loss of life (the users or service personnel) or for the protection against damage to property are highlighted in this document by the terms and pictograms defined here. The terms used in this document and marked on the equipment itself have the following significance: DANGER Indicates that death or severe personal injury will result if proper precautions are not taken. WARNING Indicates that death or severe personal injury may result if proper precautions are not taken. CAUTION Indicates that property damage may result if proper precautions are not taken. Indicates an electrical hazard. This icon appears as a part of a DANGER, WARNING, or CAUTION notice. Indicates a fire hazard. This icon appears as a part of a DANGER, WARNING, or CAUTION notice. Indicates a general hazard. This icon appears as a part of a DANGER, WARNING, or CAUTION notice. Instruction Manual 5 Safety Indicates that eye protection should be worn. This icon appears as a part of a DANGER, WARNING, or CAUTION notice. Read and understand all the safety r ecommendations and all operating instructions before operating tools and controllers. ! Indicates an item of special interest. Indicates a pinch point hazard. This icon appears as a part of a DANGER, WARNING, or CAUTION notice. Indicates an open wrench pinch point hazard. This icon appears as a part of a DANGER, WARNING, or CAUTION notice. Indicates an environmental hazard. Do not throw equipment into the normal housekeeping refuse bin. 6 Cordless Tool Introduction 1.5.2 Safety Instructions for Cordless Tools and Controllers WARNING To Avoid Injury: • Save these instructions for future reference. • Read and understand all the safety recommendations and all operating instructions before operating tools and controllers. Failure to follow all instructions listed below may result in electric shock, fire and/or serious personal injury. • Train all operators in the safe and proper use of power tools. Operators should report any unsafe condition to their supervisor. • Follow all safety recommendations in the manual that apply to the tools, battery packs and chargers being used and the nature of the work being performed. • Verify that all warning labels illustrated in this manual are readable. Replacement labels are available at no additional cost from STANLEY Assembly Technologies. • Only allow suitably qualified personnel to install, program, or maintain this equipment and or system. Follow all manufacturer installation instructions and applicable regulatory electrical codes and safety codes. • These persons must be knowledgeable of any potential sources of danger and maintenance measures as set out in the Installation, Operations, and Maintenance manual. • This product must be transported, stored, and installed as intended, and maintained and operated with care to ensure that the product functions correctly and safely. • Persons responsible for system planning and design must be familiar with the safety concepts of automation equipment. • Install tools in dry, indoor, non-flammable, and non-explosive environments only–Humidity: 0 to 95% noncondensing and T emperature: 32 to 122 ºF (0 to +50 ºC). • Do not install worn, damaged, or modified equipment that may be unsuitable for safe use. • Controller plugs must match the outlet and must be earth grounded. Never modify a plug in any way or use any adaptor plugs. • Avoid body contact with electrically energized surfaces when holding a grounded tool. • Prior to connecting a power source, always ensure the tool or controller is turned off. • Limit controller access to trained and qualified personnel. Lock controller cabinets. • Only use equipment and accessories specifically designed to operate with Stanley assembly tools and use them only in the m anner for which they are intended. • Store idle tools and accessories in a safe location accessible only by trained persons. • Disconnect power source (battery pack, electricity, etc.) from tool or controller prior to making adjustments, changing accessories, or storing. • Prior to operation, always check and test tools and accessories for damage, misalignment, binding or any other condition that may affect operation. Maintenance and repair should be performed by qualified personnel. • Do not operate tools in or near explosive environments or in the presence of flammable liquids, gases, dust, rain or other wet conditions. • Keep the work area clean, well lit and uncluttered. • Keep unauthorized personnel out of the work area. Instruction Manual 7 Safety WARNING ELECTRICAL HAZARD To Avoid Injury: • Install tools and controllers in dry, indoor, non-flammable, and non-explosive environments only. • Do not use this product near water, for example near a washbowl, wet basement, or the like. • This product should be located away from heat sources such as radiators or other devices that produce heat. • This product should not be subjected to vibration or shock or in close contact with water or other liquids. • To minimize electrical interference, place the tools and controllers as far away from possible sources of electrical noise, such as arc welding equipment. CAUTION • When not in use, place tool on its side on a stable surface where it will not cause a tripping or falling hazard. Some tools with large battery packs will stand upright on the battery pack but may be easily knocked over. 1.5.3 Safety Instructions for All Battery Packs WARNING To Avoid Injury: • When using electric tools, basic safety precautions should always be followed to reduce risk of fire, electric shock, and personal injury, including the following: • Read and understand all the safety recommendations and all operating instructions before operating tools and controllers. Failure to follow all instructions listed below may result in electric shock, fire and/or serious personal injury. • Do not charge or use the battery pack in explosive atmospheres, such as in the presence of flammable liquids, gases or dust. Inserting or removing the battery pack from the charger may ignite the dust or fumes. • Never force the battery pack into the charger. Do not modify the battery pack in any way to fit into a noncompatible charger as battery pack may rupture causing serious personal injury. Consult the chart at the end of this manual for compatibility of batteries and chargers. • Charge the battery packs only in designated STANLEY chargers. • DO NOT splash or immerse in water or other liquids. DANGER To Avoid Injury: • Never attempt to open the battery pack for any reason. • DO NOT probe pack with conductive objects. • Do not store or use the tool and battery pack in locations where the temperature may reach or exceed 105°F (40°C) (such as outside sheds or metal buildings in summer). For best life store battery packs in a cool, dry location. ! 8 NOTE: Do not store the battery pack in a tool with the trigger switch locked on. Never tape the start trigger switch in the ON position. Cordless Tool Introduction WARNING FIRE HAZARD To Avoid Injury: • Never attempt to open the battery pack for any reason. If the battery pack case is cracked or damaged, do not insert into the charger. Do not crush, drop or damage the battery pack. Do not use a battery pack or charger that has received a sharp blow, been dropped, run over or damaged in any way (e.g., pierced with a nail, hit with a hammer, stepped on). Damaged battery packs should be returned to the service center for recycling. • Do not store or carry the battery pack so that metal objects can contact exposed battery pack terminals. For example, do not place the battery pack in aprons, pockets, tool boxes, product kit boxes, drawers, etc., with loose nails, screws, keys, etc. Transporting batteries can possibly cause fires if the battery pack terminals inadvertently come in contact with conductive materials such as keys, coins, hand tools and the like. The US Department of Transportation Hazardous Material Regulations (HMR) actually prohibit transporting batteries in commerce or on airplanes (e.g., packed in suitcases and carry-on luggage) UNLESS they are properly protected from short circuits. So when transporting individual battery packs, make sure that the battery pack terminals are protected and well insulated from materials that could contact them and cause a short circuit. 1.5.4 Specific Safety Instructions for Lithium Ion (Li-Ion) Do not incinerate the battery pack even if it is severely damaged or is completely worn out. The battery pack can explode in a fire. Toxic fumes and materials are created when lithium ion battery packs are burned. If battery contents come into contact with the skin, immediately wash area with mild soap and water. If battery liquid gets into the eye, rinse water over the open eye for 15 minutes or until irritation ceases. If medical attention is needed, the battery electrolyte is composed of a mixture of liquid organic carbonates and lithium salts. Contents of opened battery cells may cause respiratory irritation. Provide fresh air. If symptoms persist, seek medical attention. WARNING BURN HAZARD To Avoid Injury: • Battery liquid may be flammable if exposed to spark or flame. • Do not submerge the battery pack in any liquid or allow any liquid to enter the battery pack. Never attempt to open the battery pack for any reason. If the plastic housing of the battery pack breaks or cracks, return it to a service center for recycling. 1.5.5 Safety Instructions for Battery Pack Charger WARNING SHOCK HAZARD To Avoid Injury: • Don’t allow any liquid to get inside the charger. Electric shock may result. 1.6 Tool Kinetic Specifications 1.6.1 Operating Conditions Temperature Instruction Manual 32 to 122 ºF (0 to +50 ºC) 9 Operator Protection Humidity 0 to 95 % non-condensing 1.6.2 Noise Level A-weighted emission sound pressure level at the work station < 70dBA (ref 20μPa) as determined according to ISO 15744-2002. 1.6.3 Vibration Level STANLEY Assembly Technologies hereby declares the following sound and vibration emission levels as required by the Machinery Directive 98/37/EC. A-weighted emission sound pressure level at the work station LpA (ref 20µPa) is < 70dB(A). Value determined according to ISO 15744‑2002 * using as basic standards ISO 3744 and ISO 11203. Weighted emission root mean square acceleration level at the handle is < 2.5 m/s². Value determined according to ISO 28927-2:2009 * (3-axis) * Operating conditions for all measurements: full rated speed, no load, rated supply voltage. WARNING VIBRATION HAZARDS To Avoid Injury: • This information is provided to assist in making rough estimates of sound and vibration exposure levels in the workplace. The declared emission values were obtained by laboratory type testing in accordance with the stated standards. Levels measured in individual workplaces may be higher. • The actual exposure levels and risk of harm experienced by an individual user depends upon the work piece, workstation design, duration of exposure, and the physical condition and work habits of the user. To help prevent physical impairment, a program of health surveillance is highly recommended to detect early symptoms which may relate to sound and/or vibration exposure, such that appropriate preventive measures may be taken. 1.7 Operator Protection WARNING ROTATING EQUIPMENT To Avoid Injury: • Always wear eye and foot protection when operating, installing, or maintaining power tools, and when in areas where power tools are being used, maintained, or installed. Some applications may require the use of safety glasses and face shields. Use eye protection that conforms to ANSI Z87.1.[3] and ANSI Z41-PT99M I/75 C/75. • Always stay alert when operating tools and/or their accessories. Do no operate tools and/or their accessories while tired, under the influence of drugs, alcohol or any other mind-altering substance. • Repetitive work motions or vibration may be harmful to your hands, arms, shoulders or back. • Use suitable protective equipment and work methods whenever an application presents a hazard. 10 Cordless Tool Introduction 1.7.1 Torque Reaction Forces WARNING TORQUE REACTION FORCE To Avoid Injury: • Be alert and maintain good balance, footing, and posture at all times in anticipation of the power tool torque reaction. Do not over-extend or over-reach. • Always check directional control setting before operating the power tool. UNEXPECTED REACTION FORCES To Avoid Injury: • Be prepared – when a power tool operates in the disassembly direction, the torque reaction is opposite to the reaction produced when the power tool operates in the assembly direction. • The power tool can have a higher initial reaction force when loosening a fastener. • Always stop the power tool before changing the direction of spindle rotation. 1.7.2 Repetitive Motion WARNING REPETITIVE MOTION HAZARD To Avoid Injury: • When using a power tool, you may experience discomfort in your hands, arms, shoulders, neck, or other parts of your body. • While using a power tool, position your body in a comfortable posture. Maintain secure footing and avoid awkward or off-balance postures. Changing your body posture during extended tasks may help avoid discomfort and fatigue. • If you experience symptoms such as persistent or recurring discomfort, pain, throbbing, aching, tingling, numbness, burning sensations, or stiffness, do not ignore these warning signs. Promptly tell your employer and consult a qualified health professional. The use of power tools may involve highly repetitive motions of the fingers, hands, wrists, and shoulders. These repetitive motions can lead to cumulative trauma disorders (CTD). Many personal and workplace factors can contribute to these disorders. Currently available data have identified the following risk factors. These risk factors are not necessarily causation factors of CTDs. The mere presence of a risk factor does not necessarily mean there is excessive risk of injury. Generally, the greater the exposure to a single risk factor or combination of factors the greater the risk for CTDs. • Forceful exertions and motions • Extreme postures and motions • Repetitive exertions and motions • Intended duration of exertion, postures, motions, vibration, and cold • Insufficient rest or pauses • Work organization risk factors • Environmental risk factors These risk factors span job design and content, operator training, work method, work pace, work environment, proper tool selection and other work place factors beyond the control of the tool manufacturer. Tool owners and Instruction Manual 11 Operator Protection employers should analyze jobs for all of the risk factors identified above and take appropriate action. Some measures which may reduce the risk of CTDs: • Use minimum hand grip force consistent with proper control and safe operation. • Keep wrists as straight as possible. • Avoid repetitive movements of the hands and wrists. • If wrist pain, hand tingling, numbness, or other disorders of the shoulders, arm, wrist or finger occur; notify supervisor, discontinue task, reassign user to a different job; if relief is not found contact experts skilled in treating such disorders. Wrist supports, torque reaction devices, and balancers should be used if it can be determined that such devices can reduce the risk of repetitive motion disorders. 1.7.3 Hearing Protection WARNING NOISE HAZARD To Avoid Injury: • Unprotected exposure to high noise levels can cause permanent, disabling, hearing loss and other problems, such as tinnitus (ringing, buzzing, whistling or humming in the ears). • Risk assessment and implementation of appropriate controls for these hazards are essential. • Appropriate controls to reduce the risk may include actions such as damping materials to prevent work pieces from “ringing”. Power tool operators and adjacent personnel may be exposed to excessive sound levels. The tool in use is generally only one of many sources of noise that an operator experiences. Other tools and machines in the area, joint assembly noise, work processes, and other ambient noise sources all contribute to the sound level to which operators are exposed. The actual sound level an individual is exposed to and the individual’s exposure time over the work day are important factors in determining hearing protection requirements. Worker sound level exposure can only be determined at the job site and is the responsibility of tool owners and employers. Measure worker sound level exposure and identify high-risk noise areas where hearing protection is required. Follow federal (OSHA), state or local sound level statues, ordinances and or regulations. 12 Cordless Tool Introduction 1.7.4 Vibration WARNING VIBRATION HAZARDS To Avoid Injury: • Long-term exposure to vibration can cause disabling damage to the nerves and blood supply of the hands and arms. • Keep the hands away from the nutrunner sockets. • Wear warm clothing when working in cold conditions and keep your hands warm and dry. • If you experience numbness, tingling, pain or whitening of the skin in your fingers or hands, stop using the nutrunner, tell your employer and consult a physician. • Operate and maintain the nutrunner as recommended in this manual, to prevent an unnecessary increase in vibration levels. • Do not use worn or ill-fitting sockets or extensions, as this is likely to cause a substantial increase in vibration. • Select, maintain and replace the drive socket as recommended in this manual, to prevent an unnecessary increase in vibration levels. • Sleeve fittings can help align rotating spindles and should be used where practical. • Support the weight of the nutrunner in a stand or balancer, if possible. • The risk from vibration is generally greater when the grip force is higher. Hold the nutrunner with a light but safe grip, taking account of the required hand reaction forces. Power tools can vibrate during use. To minimize the possible effects of vibration: • Keep hands and body dry. • Avoid anything that inhibits blood circulation such as tobacco, cold temperatures and certain drugs. • Operators should notify their employer when experiencing prolonged symptoms of pain, tingling, numbness or blanching of the fingers. • Wear vibration damping gloves if it can be determined that they reduce the risk of vibration disorders without introducing other hazards. Instruction Manual 13 Operator Protection 1.7.5 Breathing Protection WARNING DUST AND FUME HAZARD To Avoid Injury: • Dust and fumes generated when using assembly power tools for threaded fasteners can cause ill health (for example, cancer, birth defects, asthma and/or dermatitis); risk assessment and implementation of appropriate controls for these hazards are essential. • Risk assessment should include dust created by the use of the nutrunner and the potential for disturbing existing dust. • Where dust or fumes are created, the priority shall be to control them at the point of emission. • All integral features or accessories for the collection, extraction or suppression of airborne dust or fumes should be correctly used and maintained in accordance with the manufacturer’s instructions. • Use respiratory protection in accordance with employer’s instructions and as required by occupational health and safety regulations. Respirators shall be used where contaminants in the work area present a hazard. 1.7.6 Projectile Hazards WARNING PROJECTILE HAZARD To Avoid Injury: • Failure of the work piece, of accessories, or even of the inserted tool (socket) itself may generate high velocity projectiles. • Always wear impact-resistant eye protection during operation of the nutrunner. The grade of protection required should be assessed for each use. • Ensure that the work piece is securely fixed. 1.7.7 Entanglement Hazards WARNING ENTANGLEMENT HAZARD To Avoid Injury: • Entanglement hazards such as choking, scalping and/or lacerations can occur if loose clothing, personal jewelry, neck ware, hair or gloves are not kept away from the power tool and accessories. • Gloves can become entangled with the rotating drive, causing severed or broken fingers. • Rotating drive sockets and drive extensions can easily entangle rubber coated or metal reinforced gloves. • Do not wear loose fitting gloves or gloves with cut or frayed fingers. • Never hold the drive, socket or drive extension. • Keep hands away from rotating drives. 14 Cordless Tool Introduction 1.7.8 Operating Hazards WARNING OPERATING HAZARD To Avoid Injury: • Use of the nutrunner may expose the operator’s hands to hazards including crushing, impacts, cuts, abrasions and heat. Wear suitable gloves to protect hands. • Operators and maintenance personnel must be physically able to handle the bulk, weight and power of the nutrunner. • Hold the nutrunner correctly; be ready to counteract normal or sudden movements – have both hands available. • Maintain a balanced body position and secure footing. • In cases where the means to absorb the reaction torque are requested it is recommended to use a suspension arm whenever possible. If that is not possible, side handles are recommended for straight nutrunners and pistol grip nutrunners. In any case it is recommended to use means, such as reaction bars, to absorb the reaction torque above: for straight nutrunners 4 Nm, for pistol grip nutrunners 110 N, for angle nutrunner 200 N. • Use only lubricants recommended elsewhere in this instruction manual. • Fingers can be crushed in open-ended crowfoot nutrunners. • Do not use in confined spaces: beware of crushing hands between nutrunner and work piece, especially when in Disassembly mode. 1.7.9 Accessory Hazards WARNING ACCESSORY HAZARD To Avoid Injury: • Disconnect the nutrunner from the power supply (battery pack) before changing the inserted tool or accessory. • Do not touch sockets or accessories during operation, as this increases the risk of cuts, burns or vibration injuries. • Use only sizes and types of accessories and consumables that are recommended elsewhere in this instruction manual. Instruction Manual 15 Operator Protection 1.7.10Workplace Hazards WARNING WORKPLACE HAZARD To Avoid Injury: • Slips, trips and falls are major causes of workplace injury. Be aware of slippery surfaces caused by the use of the nutrunner. • Proceed with care in unfamiliar surroundings. Hidden hazards, such as electricity or other utility lines, can exist. • The nutrunner is not intended for use in potentially explosive atmospheres and is not insulated against coming into contact with electric power. • Make sure there are no electrical cables, gas pipes, etc., that can cause a hazard if damaged by use of the nutrunner. 16 Cordless Tool Introduction Instruction Manual 17 Cordless Tools 2 Getting Started Battery Pack Charger Cordless tool Installing /Removing the Battery Pack Pairing Tool to Controller Tool Installation Battery Pack 2 Open the Box Each cordless tool is shipped in a box with a battery pack and a charger. This chapter explains their operation and how these components fit together. 2.1 Battery Pack Before using the battery pack, read all instructions and cautionary markings on the charger, battery pack and the QPM cordless tool. The battery pack is not fully charged out of the box. Before using the battery pack and charger, read the safety instructions in “1.5 Safety” on page 5 and then follow charging procedures outlined in the charger manual. The battery pack should be recharged when it fails to produce sufficient power on jobs which were easily done previously. DO NOT CONTINUE to use it under these conditions. Follow the charging procedure “2.2.3 Charging Procedure” on page 23. You may also charge a partially used pack whenever you desire with no adverse effect on the battery pack. When ordering replacement battery packs, be sure to include the part number. Battery packs with model numbers MCB204, DCB204 or DCB205 part # are compatible with charger MCB101. 2.1.1 Fuel Gauge The battery packs include a fuel gauge which consists of three green LED lights that indicate the level of charge remaining in the battery pack. To actuate the fuel gauge, press and hold the fuel gauge button. A combination of the three green LED lights will illuminate designating the level of charge left. When the level of charge in the battery pack is below the usable limit, the fuel gauge will not illuminate and the battery pack will need to be recharged. ! NOTE: The fuel gauge is only an indication of the charge left on the battery pack. It does not indicate tool functionality and is subject to variation based on product components, temperature and end-user application. 2.1.2 The RBRC™ Seal The RBRC™ (Rechargeable Battery Recycling Corporation) seal on the nickel cadmium, nickel metal hydride or lithium ion batteries (or battery packs) indicate that the costs to recycle these batteries (or battery packs) at the end of their useful life have already been paid by STANLEY. In some areas, it is illegal to place spent nickel cadmium, nickel metal hydride or lithium ion batteries in the trash or municipal solid waste stream and the RBRC program provides an environmentally conscious alternative. RBRC™, in cooperation with STANLEY and other battery users, has established programs in the United States and Canada to facilitate the collection of spent nickel cadmium, nickel metal hydride or lithium ion batteries. Help protect our environment and conserve natural resources by returning the spent nickel cadmium, nickel metal hydride or lithium ion batteries to an authorized STANLEY service center or to your local retailer for recycling. You may also contact your local recycling center for information on where to drop off the spent battery pack. RBRC™ is a registered trademark of the Rechargeable Battery Recycling Corporation. 2.1.3 Storage Recommendations The best storage place is one that is cool and dry, away from direct sunlight and excess heat or cold. 20 Cordless Tool Getting Started ! 2.2 For long storage, it is recommended to store a fully charged battery pack in a cool dry place out of the charger for optimal results. NOTE: Battery packs should not be stored completely depleted of charge. The battery pack will need to be recharged before use. Charger Before using the charger, read all instructions and cautionary markings on the charger, battery pack and the QPM cordless tool. The MCB101 battery pack charger is designed to charge STANLEY 12–20V Max* lithium ion battery packs. This charger requires no adjustment and is designed to be as easy as possible to operate. Simply place your battery pack into the receptacle of a plugged in MCB101 charger and it will automatically charge the pack. 2.2.1 Safe Operating Instructions CAUTION • Under certain conditions, with the charger plugged into the power supply, the charger can be shorted by foreign material. Foreign materials of a conductive nature, such as, but not limited to, grinding dust, metal chips, steel wool, aluminum foil or any buildup of metallic particles should be kept away from the charger cavities. Always unplug the charger from the power supply when there is no battery pack in the receptacle. Unplug the charger before attempting to clean it. DO NOT attempt to charge the battery pack with any chargers other than the ones in this manual. The charger and battery pack are specifically designed to work together. These chargers are not intended for any uses other than charging STANLEY rechargeable batteries. Any other uses may result in risk of fire, electric shock or electrocution. Do not expose the charger to rain or snow. Pull by the plug rather than the cord when disconnecting the charger. This will reduce the risk of damage to the electric plug and cord. Make sure that the cord is located so that it will not be stepped on, tripped over or otherwise subjected to damage or stress. Do not use an extension cord unless it is absolutely necessary. Use of improper extension cord could result in risk of fire, electric shock or electrocution. When operating a charger outdoors, always provide a dry location and use an extension cord suitable for outdoor use. Use of a cord suitable for outdoor use reduces the risk of electric shock. An extension cord must have adequate wire size (AWG or American Wire Gauge) for safety. The smaller the gauge number of the wire, the greater the capacity of the cable, that is, 16 gauge has more capacity than 18 gauge. An undersized cord will cause a drop in line voltage resulting in loss of power and overheating. When using more than one extension to make up the total length, be sure each individual extension contains at least the minimum wire size. The following table shows the correct size to use depending on cord length and nameplate ampere rating. If in doubt, use the next heavier gauge. The lower the gauge number, the heavier the cord. Instruction Manual 21 Charger Ampere Rating More Than 0 6 10 12 Minimum Gauge for Cord Sets Volts Total Length of Cord in Feet (meters) 120V 25 (7.6) 50 (15.2) 100 (30.5) 150 (45.7) 240V 50 (15.2) 100 (30.5) 200 (61.0) 300 (91.4) Not More Than 6 10 12 16 AWG 18 18 16 14 16 16 16 12 16 14 14 12 14 12 Not Recommended Do not place any object on top of the charger or place the charger on a soft surface that might block the ventilation slots and result in excessive internal heat. Place the charger in a position away from any heat source. The charger is ventilated through slots in the top and the bottom of the housing. Do not operate the charger with a damaged cord or plug. Do not operate the charger if it has received a sharp blow, been dropped or otherwise damaged in any way. Take it to an authorized service center. Do not disassemble the charger; take it to an authorized service center when service or repair is required. Incorrect reassembly may result in a risk of electric shock, electrocution or fire. Disconnect the charger from the outlet before attempting any cleaning. This will reduce the risk of electric shock. Removing the battery pack will not reduce this risk. NEVER attempt to connect 2 chargers together. The charger is designed to operate on standard 120V household electrical power. Do not attempt to use it on any other voltage. 2.2.2 Regulatory Notices for Charger It is mandatory that national, state and local codes and standards be followed. 2.2.2.1 FCC Notice (USA) This device complies with Part 15 of the FCC Rules. Operation is subject to the following two conditions: (1) this device may not cause harmful interference, and (2) this device must accept any interference received, including interference that may cause undesired operation. This equipment has been tested and found to comply with the limits for a Class B digital device, pursuant to Part 15 of the FCC Rules. These limits are designed to provide reasonable protection against harmful interference in a residential installation. This equipment generates, uses and can radiate radio frequency energy and, if not installed and used in accordance with the instructions, may cause harmful interference to radio communications. However, there is no guarantee that interference will not occur in a particular installation. If this equipment does cause harmful interference to radio or television reception, which can be determined by turning the equipment off and on, the user is encouraged to try to correct the interference by one or more of the following measures: • reorient or relocate the receiving antenna, • increase the separation between the equipment and receiver, • connect the equipment into an outlet on a circuit different from that to which the receiver is connected, or • consult the dealer or an experienced radio/TV technician for help. 2.2.2.2 Industry Canada Notice (Canada) This Class B digital apparatus complies with Canadian ICES-003. The term “IC” before the certification/registration number only signifies that the Industry Canada technical specifications were met. Le terme “IC” devant le numéro de certification /d’enregistrement signifie seulement que les 22 Cordless Tool Getting Started spécifications techniques Industrie Canada ont été respectées. This device complies with Industry Canada license-exempt RSS standard(s). Operation is subject to the following two conditions: (1) this device may not cause interference, and (2) this device must accept any interference, including interference that may cause undesired operation of the device. Cet appareil est conforme avec Industrie Canada RSS standard exempts de licence (s). Son utilisation est soumise à Les deux conditions suivantes: (1) cet appareil ne peut pas provoquer d’interférences et (2) cet appareil doit accepter Toute interférence, y compris les interférences qui peuvent causer un mauvais fonctionnement du dispositif. 2.2.3 Charging Procedure 1. Plug the charger into an appropriate outlet before inserting the battery pack. 2. Insert the battery pack into the charger, as shown, making sure the pack is fully seated in the charger. The red (charging) light will blink continuously indicating that the charging process has started. 3. The completion of charge will be indicated by the red light remaining ON continuously. The pack is fully charged and may be used at this time or left in the charger. Instruction Manual 23 Charger 2.2.3.1 Charge Indicators PACK CHARGING PACK CHARGED HOT/COLD DELAY x PROBLEM PACK OR CHARGER PROBLEM POWERLINE This charger is designed to detect certain problems that can arise. Problems are indicated by the red light flashing at a fast rate. If this occurs, re-insert the battery pack into the charger. If the problem persists, try a different battery pack to determine if the charger is working properly. If the new pack charges correctly, then the original pack is defective and should be returned to a service center or other collection site for recycling. If the new battery pack elicits the same trouble indication as the original, have the charger and the battery pack tested at an authorized service center. 2.2.3.2 Hot/Cold Delay This charger has a hot/cold delay feature: when the charger detects a battery pack that is hot, it automatically starts a delay, suspending charging until the battery pack has cooled. After the battery pack has cooled, the charger automatically switches to the battery pack charging mode. This feature ensures maximum battery pack life. The red light flashes long, then short while in the hot/cold delay mode. 2.2.3.3 Leaving the Battery Pack in the Charger The charger and battery pack can be left connected with the charge indicator showing pack charged. 2.2.3.4 Weak Battery Packs Weak battery packs will continue to function but should not be expected to perform as much work. 2.2.3.5 Faulty Battery Packs ! 2.2.3.6 This charger will not charge a faulty battery pack. The charger will indicate faulty battery pack by refusing to light or by displaying problem pack or charger. NOTE: This could also mean a problem with a charger. Problem Power Line Some chargers have a Problem Powerline indicator. When the charger is used with some portable power sources such as generators or sources that convert DC to AC, the charger may temporarily suspend operation, flashing the red light with two fast blinks followed by a pause. This indicates the power source is out of limits. 2.2.3.7 Important Charging Notes Longest life and best performance can be obtained if the battery pack is charged when the air temperature is between 65°F and 75°F (18° – 24°C). DO NOT charge the battery pack in an air temperature below +40°F 24 Cordless Tool Getting Started (+4.5°C), or above +105°F (+40.5°C). This is important and will prevent serious damage to the battery pack. The charger and battery pack may become warm to the touch while charging. This is a normal condition, and does not indicate a problem. To facilitate the cooling of the battery pack after use, avoid placing the charger or battery pack in a warm environment such as in a metal shed or an uninsulated trailer. A cold battery pack will charge at about half the rate of a warm battery pack. The battery pack will charge at that slower rate throughout the entire charging cycle and will not return to maximum charge rate even if the battery pack warms. If the battery pack does not charge properly: • Check operation of the receptacle by plugging in a lamp or other appliance; • Check to see if the receptacle is connected to a light switch which turns the power off when you turn out the lights; • Move the charger and battery pack to a location where the surrounding air temperature is approximately 65°F – 75°F (18° – 24°C); • If charging problems persist, take the tool, battery pack and charger to your local service center. 2.2.4 Storage Recommendations ! 2.3 The best storage place is one that is cool and dry, away from direct sunlight and excess heat or cold. For long storage, it is recommended to store a fully charged battery pack in a cool dry place out of the charger for optimal results. NOTE: Battery packs should not be stored completely depleted of charge. The battery pack will need to be recharged before use. Cordless tool Before using the QPM cordless tool, read all instructions and cautionary markings on the charger, battery pack and the QPM cordless tool. 2.3.1 General Power Tool Safety Instructions Prevent unintentional starting. Ensure the switch is in the off position before connecting to power source and/or battery pack, picking up or carrying the tool. Carrying power tools with your finger on the switch or energizing power tools that have the switch on invites accidents. Do not force the power tool. Use the correct power tool for your application. The correct power tool will do the job better and safer at the rate for which it was designed. Disconnect the battery pack from the power tool before making any repairs, changing accessories, or storing power tools. Such preventive safety measures reduce the risk of starting the power tool accidentally. Maintain power tools. Check for misalignment or binding of moving parts, breakage of parts and any other condition that may affect the power tool’s operation. If damaged, have the power tool repaired before use. Accidents are caused by poorly maintained power tools. Use the power tool, accessories and tool bits, etc. in accordance with these instructions, taking into account the working conditions and the work to be performed. Use of the power tool for operations different from those intended could result in a hazardous situation. Use power tools only with specifically designated battery packs. Use of any other battery packs may create a risk of injury and fire. Hold power tool by insulated gripping surfaces when performing an operation where the fastener may contact hidden wiring. Fasteners contacting a “live” wire may make exposed metal parts of the power tool “live” and could give the operator an electric shock. Use clamps or other practical way to secure and support the workpiece to a stable platform. Holding the work by Instruction Manual 25 Installing and Removing the Battery Pack hand or against your body is unstable and may lead to loss of control. CAUTION • When not in use, place tool on its side on a stable surface where it will not cause a tripping or falling hazard. Some tools with large battery packs will stand upright on the battery pack but may be easily knocked over. The label on your tool may include the following symbols. The symbols and their definitions are as follows: V Volts Nm Newton meter Wh Watt hours 2.3.1.1 Ah Amp hours RPM Revolutions per minute Safety alert symbol Accessories Since accessories, other than those offered by STANLEY, have not been tested with this product, use of such accessories with this tool could be hazardous. To reduce the risk of injury, only STANLEY recommended accessories should be used with this product. Recommended accessories for use with your tool are available from your local service center. 2.4 Installing and Removing the Battery Pack ! 26 NOTE: For best results, make sure your battery pack is fully charged. To install the battery pack into the tool handle, align the battery pack with the rails inside the tool’s handle and slide it into the handle until the battery pack is firmly seated in the tool and ensure that it does not disengage. Installing the battery pack into the tool does not turn the tool on. After the battery pack is inserted in the tool, press the start trigger switch to turn the tool on. After the tool turns on it will connect wirelessly to the associated QPM Expert Alpha controller if it is setup to do so. One of the two blue READY lights will illuminate when the tool is ready to run. Cordless Tool Getting Started Battery Release Button Insert To remove the battery pack from the tool, press the release button and firmly pull the battery pack out of the tool handle. Insert it into the charger as described in the charger section of this manual. 2.5 Pairing Tool to Controller STANLEY QPM cordless tools must be connected, or paired, to a controller to receive programming and for certain functions such as error proofing and fastening cycle data streaming to a network. The connection between the QPM cordless tool and the QPM Expert Alpha controller is an IEEE 802.11b/g/n wireless link. This QPM cordless tool is a device that connects to the QPM Expert Alpha controller’s access point. To make the connection perform the following steps: • Connect to the QPM Expert Alpha controller and set its SSID name and password. • Pair the QPM cordless tool to the QPM Expert Alpha controller. • Add the QPM cordless tool as a trailing spindle to the QPM Expert Alpha controller. • Program fastening strategies into the QPM cordless tool using the QPM Expert Alpha controller. 2.5.1 Connect to QPM Expert Alpha Controller Connect a computer to the Alpha Toolbox port using a standard CAT 5, 5E or 6 Ethernet cable. It does not matter if the cable is straight-through or crossover. The computer’s Ethernet port must be set to DHCP rather than a static IP Address to the computer. Observe the computer’s notifications to determine when the QB Expert Alpha controller has provided the IP Address. Open a web browser, any current browser will do, and type http://ATB. QPM into the uniform resource locator’s bar. The controller’s web server will provide the Alpha Toolbox screens and controls. Instruction Manual 27 Pairing Tool to Controller 2.5.2 Set SSID Click on the COMMUNICATIONS tab under the SETUP section. Click on the WIFI tab on the COMMUNICATIONS screen. Enable wireless communications for the QPM Expert Alpha controller, type in an SSID value, type in a PASSWORD and choose the applicable REGION. Click on Apply to save the changes. Enable 28 Yes - Enables the radio in the QPM Expert Alpha controller. No - Disables the radio in the QPM Expert Alpha controller. The following parameters do not appear unless Enable is set to YES. Cordless Tool Getting Started Name This parameter sets the Service Set Identifier (SSID) for the access point in the QPM Expert Alpha controller. The maximum number of case sensitive, alphanumeric (ASCII) characters is 32. It is recommended to use a value that best defines the station under test from other stations. Use the up and down arrows on the keypad to insert characters. Use the right arrow to move the cursor for the next character. If left blank the default SSID for the QPM Expert Alpha controller is QB-serialnumber, where serialnumber is the serial number of the controller; i.e. QB-032014007. Password This parameter sets the encryption key needed to connect a wireless device to the access point in the QPM Expert Alpha controller. Must be a minimum of 8 characters and no longer than 63 printable characters or 64 hexadecimal digits. Use the up and down arrows on the keypad to insert characters. Use the right arrow to move the cursor for the next character. This parameter can be left blank. Region Select from the drop-down list the region of the world where the tool is operating. This selects the correct frequency channels allowed by that region. 2.5.3 Pair QPM Cordless Tool to QPM Expert Alpha Controller ! NOTE: Do not remove the battery pack from the QPM cordless tool during this process. Navigate to the WIFI tab under SETUP/ COMMUNICATIONS. Press the PAIR button. WAIT 45 SECONDS AFTER PRESSING THE PAIR BUTTON BEFORE CONTINUING. This will put the QPM Expert Alpha controller into search mode. Bring the QPM cordless tool within range of the associated QPM Expert Alpha controller. Install the battery pack into the tool. Press and hold the MFB then tap the start trigger switch at the same time. The tool will emit a chirp indicating it is starting the pairing process. This may take up to 15 seconds. Release the MFB. The orange PM light will flash slowly to indicate it is searching for the QPM Expert Alpha controller. When it connects the PM light will extinguish. If the tool does not make a connection to the QPM Expert Alpha controller after 2 minutes the QPM cordless tool will exit pairing mode and the process will need to be started again. 2.5.4 Add the QPM Cordless Tool as a Trailing Spindle The QPM cordless tool’s status lights will flash in sequence indicating it is requesting to be added as a trailing spindle on the QPM Expert Alpha controller. Select the desired number for the trailing spindle and press the OK button. The tool will attach itself as a trailing spindle of the QPM Expert Alpha controller. Press the BACK button. The tool will briefly disconnect from the QPM Expert Alpha controller and then reconnect. Do not remove the battery pack during this process. Select the spindle tab which corresponds to the QPM cordless tool recently connected and program it to run the desired fastening strategy. 2.6 Tool Installation Connect the STANLEY QPM cordless tools to a QPM Expert Alpha controller and program it for the operation Instruction Manual 29 Tool Installation where the tool will be used. Follow the pairing procedure here “2.5 Pairing Tool to Controller” on page 27. 2.6.1 Sockets and Adapters WARNING To Avoid Injury: • Use only industrial or grade impact accessories. Other grade accessories may break and cause a hazardous condition. Inspect accessories prior to use to ensure that it contains no cracks. CAUTION • Inspect square drives and detent pins prior to use. Missing or damaged items should be replaced before use. Use only industrial grade sockets and adapters (power bit and power or impact socket type). Replace worn or damaged sockets, adapter and bits that are unsuitable for safe operation immediately. Always ensure drive socket is fully seated and locked into position before connecting the battery pack to the tool. 2.6.1.1 Quick Change Chuck ! 2.6.1.2 NOTE: The chuck accepts 1/4” (6.35 mm) hex accessories and bit tips only. Remove battery pack before changing accessories and bits. To install an accessory or bit , pull the chuck collar away from the front of the tool and fully insert the accessory, make sure the accessory is locked into place. To remove an accessory, pull the chuck collar away from the front of the tool. Remove the accessory. Square Drive Remove battery pack before changing accessories. To install an accessory on the square drive, align the hole in the side of the accessory with the detent pin on the anvil square drive. Press the accessory on until the detent pin engages in the hole. Depression of detent pin may be necessary to aid installation of the accessory. To remove an accessory, depress the detent pin through the hole and pull the accessory off. 2.6.2 Suspension Devices Tool suspension devices or bails help support the weight of the tool during tightening operations. If needed, attach these devices securely and periodically inspect them for damage or loosening. 2.6.3 Torque Reaction Devices WARNING PINCH POINT BETWEEN TORQUE REACTION BAR AND WORK PIECE To Avoid Injury: • Never place any body part between a reaction bar and the work piece. ! • The torque reaction device will tend to rotate counter to the tool rotation direction. • Before starting the tool, position the reaction bar firmly against a stationary rigid member that is opposite to the spindle rotation. Torque reaction devices absorb tool torque reaction forces. Always use reaction devices when high reaction force could injure an operator. Some reaction devices may require modification to fit the application. Follow all appropriate installation 30 Cordless Tool Getting Started instructions. Torque reaction devices are generally recommended for the following nutrunners and applications: Nutrunner Type Straight Reaction Torque Absorbed by the Operator Exceeds 4 Newton Meters Pistol 110 Newtons Angle 200 Newtons Provisions for mounting second handles or reaction bars may be required at lower reaction torque values than those indicated above, depending upon factors such as the expected frequency and duration of operation, the physique and posture of the operator, the type of joint and use of accessories such as extensions. Instruction Manual 31 Cordless Tools 3 Tool Operation Display Multiple Function Button Start Trigger Switch Tool Memory Worklights Tool Operation Special Application Tools Display 3 QPM Cordless tool This chapter promotes proper and safe use and gives guidance to owners, employers, supervisors and others responsible for training and safe use by operators. Cordless tools from STANLEY Assembly Technologies are intended for use in industrial threaded fastening or precision position and or adjustment applications only. Some instructions may not apply to all tools. Please contact your STANLEY Sales Engineer for information or assistance on STANLEY training for assembly tool operation. 3.1 Display Refer to the pictures under section “3.2.1 MFB Mode” on page 35 QPM cordless tools have a display for operator feedback of tool operation status. Two sets of lights [3 and 6] indicate fastening cycle status. Two blue lights indicate whether the tool is armed (light on) or not armed (light off) and tool rotation direction, disassembly [1] or assembly [2]. A single multiple function button [5] can change tool direction and or switch between two programs. When the button is used to select the Job or Task, one of two orange indicators [4] illuminates to show the active Job or Task. The orange LED [7] indicates the status of the wireless connection to the controller or if there is an error or preventtive maintenance is required. See PM Light table below to determine status of wireless link between the tool and the controller. 3.1.1 Status Lights and Matrix QPM tools have three (green, yellow, and red) status lights. The tool status lights mirror, or copy, the status lights on the controller. If a controller input selects a Job or Task greater than 2 the lights will extinguish. Function Lights Pattern Programmed high torque or high angle limits exceeded Solid Cycle OK Solid Programmed low torque or low angle limits not met Solid Abort, or high and low torque or angle limits violated Solid Disassembly mode Slow Flash Adding spindle to controller Flash in Sequence Tool is in hibernate mode or the battery pack is dead None 3.1.2 Ready Light Matrix The blue ready lights [1], [2] will illuminate when the tool is ready to run in the designated rotation direction. Only one ready light may be illuminated at a time. Function Lights Pattern Tool enabled and ready in assembly mode Solid Tool enabled and ready in disassembly mode Solid Tool disabled None 3.1.3 PM Light Matrix The orange Preventive Maintenance (PM) light [7] when illuminated indicates a tool fault, a controller warning, when the PM Threshold has been exceeded by the PM counter, or if the tool has lost connection to a controller. The light will indicate the first priority event only, even if a second or third priority event is active. Second priority event will indicate if there is no first priority event active. Third priority event will indicate if there are no first or second priority events active. If a controller input selects a Job or Task greater than 2 the lights will extinguish. 34 Cordless Tool Tool Operation Function Lights Pattern Tool Fault or Warning; first priority Fast Flash PM Threshold exceeded; second priority Solid Tool radio disconnected from controller; third priority Slow Flash None of the above None 3.1.4 Indicator Light Matrix The MFB can be assigned to select Jobs or Tasks. It can only select Job/Task 1 or Job/Task 2 since it is a binary switch. These lights [4] indicate the selected Job or Task. If a controller input selects a Job or Task greater than 2 the lights will extinguish. Function 3.2 Lights Pattern Job 1 or Task 1 selected Solid Job 2 or Task 2 selected Solid Some other Job or Task besides 1 or 2 is selected None Multiple Function Button The multiple function button (MFB) is used to select direction of rotation for the output of the tool and to select different modes. The first activation type is a quick press of the MFB called the TAP and the second activation is the HOLD which requires the operator to hold the MFB for over 1 second to activate the assigned mode. 3.2.1 MFB Mode 1 4 2 3 6 5 7 The MFB Mode configures the multiple function button for handheld QPM tools. Two of these modes may be assigned at any one time as the MFB has two types of activation. The activations are TAP and HOLD. One mode may be assigned to each type of activation. The activations can be configured to operate in any of the following modes: Instruction Manual 35 Start Trigger Switch Function 3.3 Description Disable The Multi-Function button does nothing. Reverse (Disassembly) Pressing the button toggles between assembly and disassembly modes and illuminates the appropriate blue light [1] or [2]. All tool status lights [3] and [6] flash when the tool is in disassembly mode. Job/Task Select Pressing the button toggles between Job/Task 1 and Job/Task 2 and illuminates the appropriate orange indicator light [4]. Arm Pressing the button arms (activates) the trigger but does not start the tool. The blue assembly light [2] illuminates to show that the tool is armed for five seconds. Reset Reject This function, when selected, will cause the tool to disable after a NOK fastening cycle. The Reject Tone, when enabled, will sound. Pressing the button re-enables the tool indicating the operator acknowledges the rejected fastening cycle and wishes to repair it. Job Reset Pressing the button causes the selected Job to be reset. This means that the fastener count is reset and the tool, if disabled due to Error Proofing requirements, re-enables. Reset and Reverse This function, when selected, causes the tool to disable after a NOK fastening cycle. The Reject Tone, when enabled, will sound. Pressing the button re-enables the tool in Reverse mode and indicates that the operator acknowledges the rejected fastening cycle and wishes to repair it. The tool switches to the forward direction after the controller detects a fastener has been removed. Start Trigger Switch The trigger switch is used to start the tool in either direction. The speed of the tool is programmed and the internal digital circuit controls the speed of the tool, not the trigger switch. It is not a variable speed trigger. The trigger switch function is on or off. Press the trigger switch to start the tool. Release the trigger switch to allow the tool to stop. 3.4 Tool Memory QPM tools have an on board tool memory that stores tool identification, calibration factors and fastening cycle counters. Memory parameters include: • Model Number • Serial Number • Torque Cal (calibration) factor • Gear Ratio • Fastening cycle counters • Jobs parameters • Fastening cycle data • Trace data 3.4.1 Fastening Cycle Counters QPM tools have on board counters that record the number of fastening cycles completed by the tool. There is a limited number of times the controller can write to this memory. The cycle counts are updated on the tool 36 Cordless Tool Tool Operation memory every 100 cycles or every hour. If the tool is de-energized before the cycle counts are written the number buffered since last write will be lost. Odometer Counter Records the total number of fastening cycle the tool has completed during its lifetime. Trip Counter Records the number of fastening cycles the tool completed since the last reset to zero. PM Counter Records the number of fastening cycles the tool completed since the last reset to zero. Interacts with PM Threshold. PM Threshold A static value set by the end user. When the PM Counter exceeds the PM Threshold (Limit), the controller provides a maintenance alert. The alert is an orange indicator on the front of the controller and on the tool. The controller reads the fastening cycle counters from the tool on each power up. 3.4.2 Fastening Cycle Data The QPM cordless tool stores data for 500 fastening cycles and 1 trace. These values can be viewed and retrieved using the QPM Expert Alpha controller. This data can be analyzed to determine root cause of failures when securing the fastener. Please contact your STANLEY Sales Engineer for information or assistance on STANLEY training and data analysis. This data can be retrieved manually or automatically. If an enterprise level client/server data collection software system is employed all the data from all the tools in the facility can be collected into one database and displayed using the end users graphic reports software. The QPM cordless tool will need to remain in radio contact with an assigned QPM Expert controller to facilitate data collection. 3.5 Worklights ! 3.6 There are two worklights located above the MFB, below the motor. The worklights are activated when the trigger switch is depressed, and will automatically turn off after the programmed amount of seconds after the trigger switch is released. If the trigger switch remains depressed, the worklights will remain on. NOTE: The worklights are for lighting the immediate work surface and are not intended to be used as a flashlight. Tool Operation Pair the tool to a QPM Expert controller. See “2.5 Pairing Tool to Controller” on page 27. Read the QPM Expert controller to understand programming of strategies to run the QPM cordless tool. 3.6.1 Program Selection The QPM cordless tool can have up to 16 Tasks programmed. Those Tasks are divided amongst up to 16 Jobs. The MFB can be used to select Job/Task 1 and 2. If it is desired to select and run more than two programmed Jobs or Tasks the QPM cordless tool will need to remain in radio contact with an assigned QPM Expert Alpha controller. The QPM Expert Alpha controller has various means of changing the selected Job/Task such as inputs or barcode scans of product. Read the QPM Expert Alpha controller manual to understand how to select a Job/Task. 3.6.2 Directional Control Instruction Manual 37 Tool Operation WARNING UNEXPECTED REACTION FORCES To Avoid Injury: • Be prepared – when a tool operates in reverse, the tool’s torque reaction is opposite to the reaction produced when the tool operates in forward direction. • The tool can have a higher initial reaction force when loosening a fastener. • Always stop the tool before changing direction of spindle rotation. Clockwise is the normal direction for securing a fastener, however a fastener can have left hand threads which requires the tool’s output to turn counter-clockwise to secure the fastener. The direction of rotation to secure a fastener is programmed in the controller. If a disassembly, or reverse, operation is required the operator must press the MFB to change the tool’s mode to disassembly. Then the start trigger switch is pressed to run the tool in disassembly mode. While the tool is in disassembly mode, the blue disassembly ready light [1] will illuminate if the tool is ready to run, all the tool’s display status lights [3] and [6] will flash and the tool’s noise maker will emit a tone that alternates between on and off. To return the direction of rotation to assembly, or forward, the operator must press the MFB again. The blue assembly ready light [2] will illuminate if the tool is ready to run, the tool’s status lights will no longer flash and the alternating tone will stop. 3.6.3 Tool Temperature WARNING POTENTIAL BURN HAZARD To Avoid Injury: • Wear thermal protective gloves when handling tools performing high duty cycles. STANLEY cordless tools are thermally protected to prevent overheating. Temperature is sensed inside the tool and the value is reported to the controller. The thermal protection does not allow the tool to operate if the tool temperature rises abnormally – the thermal protector resets automatically when the tool cools down. The maximum tool temperature before damage occurs is 150°C. EN60745-1 Hand-Held Motor-Operated Electric Tools - Safety is the most applicable standard to the tools. It defines +60°C as the limit for thermal rise over ambient of a contactable surface (e.g. if the ambient is 25°C, the surface limit is 85°C.) Since the default limit is 85°C inside the tool regardless of ambient, no external surface can exceed this value no matter what the ambient temperature. This temperature limit may be modified to provide flexibility to the industrial user. Owners, employers, supervisors and others responsible for the training and safe use by operators must ensure the safety of the user when making any changes to the temperature limit setting. Controller parameter settings can have a significant effect on tool operating temperatures. 38 Cordless Tool Tool Operation 3.6.4 Setting Operating Parameters WARNING EXCESSIVE TORQUE CONDITION To Avoid Injury: • Only trained and qualified personnel should program controllers. • Never set control limits above the maximum rating of the tool. • Setting control limits above the maximum rating of the tool can cause high reaction torque. • Always test for proper tool operation after programming via the controller. CAUTION • Ensure fastener and/or system will withstand the level of torque generated by the tool. Excessive torque may cause breakage and possible personal injury. The QPM Alpha Expert controller is used to setup the tool’s fastening strategies inside Jobs and Tasks. Read the QPM Alpha Expert manual to learn how to program strategies. Even though the QPM Expert Alpha controller is used to program the QPM cordless tool the parameters are stored in the tool and not the controller. The tool can be preprogrammed in a lab or tool crib prior to placing on line in a facility. 3.6.5 Assembly (Forward) Operation Prepare to resist the tool’s torque reaction. Keep the tool axis in line with the axis of the fastener, i.e. make sure the tool is perpendicular to the fastener (workpiece). Start the tool by depressing the start trigger switch. The tool stops after reaching torque. Release start trigger switch after the cycle is complete. For Push-to-Start tools press the tool into the workpiece to apply pressure to the output of the tool to start the tool. The tool stops after reaching torque. Release the pressure after the cycle is complete. 3.6.6 Disassembly (Reverse) Operation Prepare to resist the tool’s torque reaction which will be the opposite of the assembly reaction. Start the tool by depressing the start lever or push-to-start switch. The tool is not running inside of a strategy so it will not stop on its own. Release start lever or push-to-start switch after sufficient time or rotation to stop the tool. 3.6.7 Sleep Mode The QPM cordless tool has a sleep timer that allows it to conserve battery power when not in use. The sleep timer can be enabled or disabled. If disabled the QPM cordless tool will never go to sleep. This is not recommended. If the sleep timer is enabled a time value in minutes must be entered. The minimum value is 1 minute; the maximum value is 60 minutes. Instruction Manual 39 Special Application Tools 3.7 Special Application Tools 3.7.1 Exposed Gear Socket Tools WARNING PINCH POINT AT THE EXPOSED GEARS OR TEETH To Avoid Injury: • Keep body parts and clothing away from the exposed gear sockets. Dress properly. Do not wear loose-fitted clothing or jewelry. Exposed gear socket tools are designed to fit into tight spaces where other tools do not fit. These tools have exposed gears or ratchet teeth. It is recommended to use the MFB ARMING feature for these types of tools. 3.7.2 Tubenut Nutrunners WARNING PINCH POINT AT THE EXPOSED GEARS OR TEETH To Avoid Injury: • Never place body parts or clothing, near the socket opening. Dress properly. Do not wear loose-fitted clothing or jewelry. • Follow the Tubenut Nutrunner Sequence of Operation Tubenut nutrunners are used for installing tube fittings. 3.7.2.1 General Sequence of Operation Place nutrunner socket around the tube and onto the nut. Press the MFB to ARM the start function if this is programmed. Depress start trigger to start the tool’s tightening strategy. The tool stops after reaching torque. Release the start trigger and lift the tool from the nut. All tool status lights flash to indicate the tool will now run in reverse to open the socket. Depress the start trigger until the socket returns to the open position. Release the start trigger. Remove the tool from the tube. 3.7.2.2 ARM Mode All tubenut tools are programmed with ARM required for personal safety. End users are free to reprogram the tool so that ARM is not required. The tubenut operation will behave differently between ARM required and not required. This table explains the operations of the tubenut tool with and without ARM required. 40 Cordless Tool Tool Operation Arming Normal Operation Assembly Mode: Not Required Required Tool is Disabled Assembly Mode: Tool will run in Normal Assembly mode when operator presses the start trigger switch. When operator releases start trigger switch the tool will switch to Homing mode. Assembly Mode: After the operator starts the tool and when the trigger switch is released the tool switches to Homing mode. Tool does not have to reach target. Homing Mode: Homing Mode: Homing Mode: Assembly Mode: Assembly Mode: Assembly Mode: Operator must ARM the tool by pressing the MFB once quickly. Operator must start the tool before ARM times out. When the start trigger switch is released the tool switches to Homing mode. Tool does not have to reach target. The tool will not run. The controller display will indicate “Arming Required”. The tool will not run when operator presses the start trigger switch. The controller display will indicate “Error Proofing”. When operator releases start trigger switch the tool will switch to Homing mode. Homing Mode: Homing Mode: Homing Mode: Tool will run in Homing mode when operator presses the start trigger switch. Tool will remain in Homing mode until one of the following conditions is met: 1. Dog Torque is achieved. 2. T otal Homing angle is <360° when operator releases the start trigger switch. 3. ARM Timeout has elapsed. Tool will remain in Homing mode until one of the following conditions is met: 1. Dog Torque is achieved. 2. T otal Homing angle is <360° when operator releases the start trigger switch. 3. ARM Timeout has elapsed. Instruction Manual Operator Does Not Press MFB to Arm Tool Tool will run in Normal Homing mode when operator presses the start trigger switch. The tool cannot enter Homing mode unless the tool has been armed in the assembly mode at least once. The tool will not run when operator pulls the trigger. The controller display will indicate “Error Proofing”. When operator releases start trigger switch the tool will switch to Homing mode. Tool will run in Normal Homing mode when operator presses the start trigger switch. Tool will run in Normal Homing mode when operator presses the start trigger switch. 41 Cordless Tools 4 Maintenance Preventive Maintenance Calibration Repairs Cleaning Disposal Battery and Charger 4 Maintenance WARNING POTENTIAL FOR UNSAFE CONDITIONS To Avoid Injury • To reduce the risk of serious personal injury, disconnect battery pack before performing maintenance, making any adjustments or removing/installing attachments or accessories. • Failure to perform proper maintenance could result in unsafe and hazardous conditions. • Failure to perform proper maintenance could significantly reduce gear life. These nutrunners are designed to give the industrial user long service and superior performance provided they are given reasonable care and maintenance and are used under normal operating conditions. 4.1 Battery and Charger The charger and battery pack are not serviceable. There are no serviceable parts inside the charger or battery pack. READ ALL OF THE INSTRUCTIONS IN THE BATTERY CHARGER SECTION OF THIS MANUAL BEFORE ATTEMPTING TO CHARGE THE BATTERY PACK FOR YOUR TOOL. If you have any questions, call +1 (440) 461-5500. 4.1.1 Charger Cleaning Instructions Disconnect the charger from the AC outlet before cleaning. Dirt and grease may be removed from the exterior of the charger using a cloth or soft non-metallic brush. Do not use water or any cleaning solutions. 4.2 QPM Cordless Tool 4.2.1 Preventive Maintenance All power tools will experience wear of internal parts throughout their normal working life. A good preventive maintenance program will allow worn components to be replaced before actual failure occurs. Because of the wide variety of assembly applications and user techniques in industrial applications, it is impossible to predict the life expectancy of any particular component. We recommend following the STANLEY Assembly Technologies Preventive Maintenance Guidelines document schedule for inspecting the internal components. This power tool’s maintainer should keep records and adjust the maintenance schedule for each particular assembly operation. Contact your local STANLEY Assembly Technologies representative for a copy of the Preventive Maintenance Guidelines. We recommend: • Schedule all power tools for periodic inspection and maintenance. • Replace noticeably worn parts before wear occurs on adjoining parts. • Replace bearings when any axial or radial play becomes apparent. • Use only genuine STANLEY replacement parts 4.2.2 Calibration The QPM cordless tool’s torque transducer must be calibrated annually or after repair to maintain its accuracy. 4.2.3 Repairs Consult the repair parts lists for part identification and assembly instructions. Order all replacement parts by part number from your local STANLEY Assembly Technologies representative. 44 Cordless Tool Maintenance 4.2.4 Lubrication Proper lubrication is required for satisfactory operation. This grease specification is for all planetary, bevel and crowfoot/tubenut gearing and o-ring lubrication. STANLEY Assembly Technologies specifies the grease at the amounts indicated. 4.2.4.1 Planetary, Bevel and Crowfoot/Tubenut Gearing Fill to approximately 80% of capacity of housing with Dow Corning MOLYKOTE® G-4700 Extreme Pressure Synthetic grease or Kluber Lubrication Isoflex Topas NB 52 grease. 4.2.4.2 Bearing Surfaces, Splines and Couplers Place a light coating of Dow Corning MOLYKOTE® G-4700 Extreme Pressure Synthetic grease or Kluber Lubrication Isoflex Topas NB 52 grease on surfaces. 4.2.4.3 O-Rings Coat O-rings with Parker O-lube before assembly. 4.2.5 Cleaning Never use solvents or other harsh chemicals for cleaning the non-metallic parts of the tool. These chemicals may weaken the plastic materials used in these parts. Use a cloth dampened only with water and mild soap. Never let any liquid get inside the tool; never immerse any part of the tool into a liquid. 4.3 Disposal CAUTION ENVIRONMENTAL HAZARD To Avoid Personnel / Environment Contamination: • Dispose of all materials used for maintenance properly and in accordance with local laws and regulations so as not to impose hazards to personnel or the environment. • Catch all fluids (oil, grease) drained or removed from the tool and dispose of them in accordance with local laws. • Do not dispose of battery packs into standard housekeeping refuse, fire or any body of water. Follow all local laws or regulations such as the European WEEE directive for disposal of equipment. Separate the packing material from the tool, battery pack and charger and their manuals. Dispose of the packing materials into recycling bins. Return the used/ defective tool, battery pack or charger to the end user collection facility or to a local service center. Instruction Manual 45 Cordless Tools 5 Limited Warranty Mechanical Products Limited Warranty Electronic Products Limited Warranty Software Products Limited Warranty OEM Products Limited Warranty General Terms Specification Changes Warranty Claims Product Services Return Material Authorization (RMA) Procedures Mechanical Products Limited Warranty 5 Limited Warranty 5.1 Mechanical Products Limited Warranty Stanley Black&Decker, Inc. (“STANLEY”) warrants its Assembly Technologies mechanical products to the original purchaser to be free from deficiencies in material or workmanship for the useful life of the product. Under this lifetime limited warranty STANLEY will, at its discretion, repair or replace any product which, upon inspection, is acknowledged by STANLEY to be defective. This limited lifetime warranty shall apply to products which have been used under normal operating conditions for their intended use and shall not apply to products which have been subjected to: abnormal wear and tear, abuse, misuse, improper maintenance, negligence, continued use after partial failure, accident, alterations or repairs with non-genuine STANLEY replacement parts. 5.2 Electronic Products Limited Warranty STANLEY warrants its Assembly Technologies electronic products to the original purchaser to be free from deficiencies in material or workmanship for a period of one year after the date of shipment. Under this limited warranty STANLEY will, at its discretion, repair or replace any product which, upon inspection, is acknowledged by STANLEY to be defective. This warranty shall apply to products which have been used under normal operating conditions for their intended use and shall not apply to products which have been subjected to: abnormal wear and tear, neglect, component degradation, improper handling, overload, abuse, misuse, improper maintenance, use with improper accessories, or where alterations have been made. 5.3 Software Products Limited Warranty STANLEY warrants its Assembly Technologies software products to the original purchaser to be free from deficiencies in material or workmanship for a period of one year after the date of shipment. Under this limited warranty STANLEY will, at its discretion, make available replacement software or an upgrade for any product which, upon inspection, is acknowledged by STANLEY to be defective. Installation of the software shall be the responsibility of the requestor. This warranty shall apply to products which have been used with specified, compatible hardware under normal operating conditions for their intended use and shall not apply to products which have been: modified, misused, improperly handled, improperly maintained, or used with non-compatible hardware or accessories. 5.4 OEM Products Limited Warranty Some STANLEY Assembly Technologies custom engineered systems include components manufactured by others. The limited warranties of each individual manufacturer shall apply to these components and STANLEY makes no representation or warranty of any kind, expressed or implied, with respect to such components. 5.5 General Terms This limited warranty gives you specific legal rights and is in lieu of all other warranties, expressed or implied, including the implied warranties of merchantability and fitness for a particular purpose. Some states and countries do not allow limitations on implied warranties, so the above may not apply to you. You may also have other rights which vary by state or country. STANLEY shall not be responsible for incidental or consequential damages or the inability to use its products for any purpose whatsoever. STANLEY’s maximum liability shall not in any case exceed the contract price for the products claimed to be defective. Some states and countries do not allow the exclusion or limitation of incidental or consequential damages, so this specific limitation or exclusion may not apply to you. 5.6 48 Specification Changes Cordless Tool Limited Warranty STANLEY retains the right to discontinue and/or change specifications of any Assembly Technologies products without responsibility for incorporating changes in products already sold. 5.7 Warranty Claims To apply for warranty consideration, the original purchaser should take the following action: a. Contact the STANLEY Assembly Technologies customer service department to obtain a “Return Authorization Number” and “Warranty Claim Report Form.” b. Package the product including proof of purchase and the completed warranty claim form. c. Note the Return Authorization Number on the exterior of the package and return freight to: STANLEY Assembly Technologies Central Repair Facility 5335 Avion Park Drive Cleveland, Ohio 44143-2328 In the event that a product is repaired or replaced under the terms of the warranty, the warranty period of the repaired or replacement product shall be limited to the remaining portion of the original warranty period. 5.8 Product Services STANLEY provides full services for design, modification, service, repair, and training on STANLEY products. Contact STANLEY Assembly Technologies or their agents for information on training courses to aid users in becoming familiar with operations, maintenance, or programming of the STANLEY DC electric tools and controllers. No modification of STANLEY tools and controllers can be made without the express permission of STANLEY Assembly Technologies. Refer all service to STANLEY Assembly Technologies, or their representatives. 5.9 Return Material Authorization (RMA) Procedures A Return Material Authorization or RMA is required before returning any material for warranty or repair service. • Contact STANLEY Assembly Technologies or their agents. • Request Customer Service or Repair Services. ! NOTE: An RMA can be given without a purchase order. However, non-warranty repairs cannot be performed until a written purchase order or credit card authorization is received. Have the following information available for the person answering the telephone to obtain an RMA: • Company name and address. • A contact name and telephone number. If possible, have facsimile and pager numbers (if any) available. • The STANLEY model number, serial number, and description for the item • A short description of the problem. User’s Manual 49 GLOBAL LOCATIONS World Headquarters Germany STANLEY Assembly Technologies 5335 Avion Park Drive Cleveland, Ohio 44143-2328, USA Tel: +1.440.461.5500 Fax: +1.440.461.5592 Email: [email protected] STANLEY Engineered Fastening Germany Max-Eyth-Str. 1, 35394 Giessen, Germany Tel: +49 (0) 641 405 - 728 Fax: +49 (0) 641 405 - 383 Email: [email protected] Sales and Support Americas/Asia-Pacific STANLEY Engineered Fastening INDIA 6th Floor, Apex Towers, No 54, 2nd Main Road, R A Puram CHENNAI – 600 028, India Tel: +91 44 4343 7100 Fax: +91 44 4306 0768 Email: [email protected] India STANLEY Assembly Technologies 49201 Gratiot Chesterfield, MI 48051, USA Tel: +1.586.949.0440 ext. 720 Fax: +1.586.949.0443 Sales: 877.709.8006 Service: 877.787.7830 Email: [email protected] China STANLEY Engineered Fastening CHINA BUILDING NO. 9, 615 FENGDENG ROAD MALU TOWN, JIADING DISTRICT Shanghai 201801, China Tel: +86 21.3915.5588-5511 Fax: +86 21.3915.5555 Email: [email protected] France STANLEY Engineered Fastening France Outils Portatifs et Systemes d’Assemblage Zone Imoparc bat Loire 4, 78190 Trappes, France Tel: +33 (1) 3050 9100 Fax: +33 (1) 3051 0708 Email: [email protected] Italy STANLEY Engineered Fastening Italy c/o Energipark – Building 03/Sud Via Energy Park, 6 – 20871 Vimercate (MB) Italy Tel: +39 (039) 9590.200 Fax: +39 (039) 9590.318 Email: [email protected] Japan STANLEY Engineered Fastening JAPAN Hosoda, Noyori-cho, Toyohashi-shi Aiti (Aichi) 441-8540, Japan Tel: +81 0532.25.1126 Fax: +81 0532.25.1120 Email: [email protected] Spain STANLEY Engineered Fastening Spain Carretera M300 km.29,700 28802 Alcalá de Henares (Madrid), Spain Tel: +34 (91) 877-0380 Email: [email protected] www.StanleyEngineeredFastening.com


