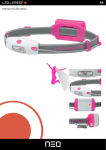
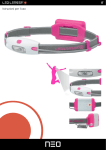
Download neo *neo
Transcript
Led Lenser®*
EN
Operating Instructions
*
neo
Led Lenser®*
Table of Contents
1. 1.1
1.2
1.3
1.4
1.5
General Product Information 4
Product Description 4
Versions 4
Scope of Delivery 4
Range of Use 4
Product Properties 5
2. 2.1
2.2
2.3
2.4
2.4.1
Important Notes on Safe Use 6
Information Regarding Headlamp Identification 6
Information Regarding Operating Instructions Identification 6
Warranty 6
Completeness 6
Damage 6
2.5
2.5.1
2.5.2
2.5.3
Purpose of the System 6
Standards and Regulations 6
Intended Use 7
Target Group 7
2.6
Disposal 7
3. 3.1
3.1.1
3.1.2
3.1.3
Safety Notes 8
Safety Notes Structure 8
Risk of Injuries Markings 8
Damage to Property Markings 8
Marking of Additional Information 8
3.2
3.3
3.4
3.5
Additional Pictograms Regarding Safety Notes 8
Pictograms on the Headlamp 8
Pictograms on the Packing 8
Overview of the Key Safety Notes 8
4. Overview of Terms and Abbreviations 12
5. 5.1
5.2
5.3
5.4
5.5
5.6
5.7
5.8
Operation 13
Adapting the Headband Width 13
Putting on the Headlamp 13
Switching the Headlamp On or Off 13
Using the Lighting Functions 14
Replacing the Batteries 15
Cleaning 15
Checks 16
Warranty 16
6. Technical data 17
EN Operating instructions NEO_V.01 | 7/31/2014 2
Led Lenser®*
Thank you
We are delighted that you have decided in favor of one of our products. In these
Operating Instructions you will find notes regarding safety and operation to help
you to familiarize yourself with your new product.
Carefully read these Operating Instructions prior to using this product.
They should be kept and handed over to third parties when passing on the
product to third parties.
This also helps to ensure that you obtain maximum benefit from the product,
get your questions answered and avoid incorrect operation.
Above all, observe the warning and safety instructions and dispose of the
headlamp, batteries/battery packs packaging materials properly.
EN Operating instructions NEO_V.01 | 7/31/2014 3
Led Lenser®*
1. General Product Information
1 2 3
4
5
6
7
1 89A
C
D
B
6
1.1
① Headlamp head
② Adjustable band range
③ Band adjustment
④Headband
⑤ Cable
⑥ Anatomically formed battery cover (rubber)
⑦ Sliding cable duct
⑧ On/Off switch
⑨ Front white light-emitting diode (LED)
⑩ LED cover
⑪ Headlamp head cable attachment
⑫ Battery box
⑬ Rear red light-emitting diode (LED)
⑭ Cable pull relief
⑮ Battery box cable attachment
1.2
E
Product Description
Versions
Designation
Color
Article no
NEO
Blue
6010
Green
6011
Pink
6012
Orange
6013
Yellow
6014
F
1.3
Scope of Delivery
• Headlamp NEO,
• Blister pack,
• General safety precautions and warnings,
• NEO quick initial start guide,
• 3 x AAA 1.5 V batteries.
1.4
Range of Use
Suitable for outdoor use. Protected against spray water from
all sides (IPX4).
EN Operating instructions NEO_V.01 | 7/31/2014 4
Led Lenser®*
1. General Product Information
1.5
1
Product Properties
• Extremely low weight,
• 16:9 Bright & Wide Beam ②
XY
--with particularly wide radiation angle ① and
--bright illumination,
NEO
• Smart Light Technology (SLT) ③ with
--3
different lighting modes (Power / Low Power / Blink)
for the front light,
--r ear red flashing light (LED) ④ for more safety,
• All-side splash-proof housing (IPX4),
• Stable cabling with sliding cable duct and pull relief,
2
--compact, aerodynamic shape,
• Rear of the headlamp head and battery cover ⑥ adapted
to human anatomy,
• Simple 1-switch operation ⑤.
3
4
5
6
EN Operating instructions NEO_V.01 | 7/31/2014 5
Led Lenser®*
2. Important Notes on Safe Use
2.1
Information Regarding Headlamp Identification
hese Operating Instructions are designed exclusively for the headlamps and
T
accessories identified using the following specifications:
Identification
– Type designation:
2.2
NEO
Information Regarding Operating Instructions
Identification
All pages are marked as a indication of the currency of the Operating
Instructions using the type designation containing the 2-digit version number,
release status and country designation(s):
Release
– Marking:
– Status at:
NEO_V.01
7/31/2014
This marking is binding for the validity of the Operating Instructions and should
not be removed regardless of the type of publication (printed, data format or in
excerpts).
2.3
Warranty
WarrantyLED LENSER ensures the safety and proper functioning of the headlamp only
under the condition that:
• The headlamp is only used according to the intended purpose and
operated and maintained in accordance with the information contained in
these Operating Instructions,
• Only original spare parts or accessories approved by LED LENSER are
used,
• The headlamp is not modified in any way.
2.4
Completeness
Check the headlamp for completeness and any damage before installation.
• Unpack all components for checking and perform a visual inspection.
• The components can be identified using these Operating Instructions.
2.4.1
Damage
Please contact the vendor / distributor in the event of damage or missing items.
2.5
Purpose of the System
2.5.1
Standards and Regulations
Headlamp,
accessories and Operating Instructions comply with the
requirements of following standards and regulations:
• General Product Safety Directive 2001/95/EG / Product Safety Act
(GPSG),
• Directive 2014/30/EU of the European Parliament and the Council on
the Harmonization of the Laws of the Member States on electromagnetic
compatibility,
• Regulation (EC) No 1907/2006 of the European Parliament and the
Council on the Registration, Evaluation, Authorization and Restriction of
Chemicals (REACH),
• DIN EN 62471:2009 Photobiological safety,
• Directive 2011/65/EU "Restriction of the use of certain hazardous subEN Operating instructions NEO_V.01 | 7/31/2014 6
Led Lenser®*
2. Important Notes on Safe Use
stances (RoHS) in electric and electronic devices" of the European
Parliament and the Council,
• IEC 82079-1:2012 - Preparation of instructions for use – Structuring,
content and presentation - Part 1: General principles and detailed
requirements.
2.5.2
Intended Use
NEO is a high-performance headlamp with a light cone. It is designed to
enable you to see and be seen in the dark, for use as emergency light or to
read in the dark.
• The headlamp is suitable for continuous operation.
• The headlamp is suitable for outdoor use.
• Any use beyond the above-mentioned conditions is considered to be
improper use. The user is liable for any damage resulting from such
use.
2.5.3
Target Group
he headlamp is suitable for persons above 12 years of age without any
T
limitations.
Persons with physical or technical limitations and children between 6 and
11 years may only use the headlamp under the supervision of a parent or
guardian.
2.6
Disposal
• The headlamp must be disposed of at a suitable place of disposal for
recycling electric and electronic equipment according to the
country-specific regulations.
• Submit used batteries/battery packs to a local battery collection point
or anywhere where batteries/battery packs are sold in accordance with
country-specific regulations.
EN Operating instructions NEO_V.01 | 7/31/2014 7
Led Lenser®*
3. Safety Notes
3.1
Safety Notes Structure
Important notes are marked with pictograms and signal words in these Operating
Instructions.
3.1.1
Risk of Injuries Markings
ignal words, such as DANGER, WARNING or CAUTION designate the grading
S
of a potential risk of injuries. The different triangle symbols emphasize the level of
risk optically.
1 Danger
DANGER indicates an immediately dangerous situation that, if not avoided, may
lead to death or serious injury.
1 Warning
ARNING indicates a potentially dangerous situation that, if not avoided, may
W
lead to death or serious injury.
1 Caution
CAUTION indicates a potentially dangerous situation that, if not avoided, may
lead to slight or minor injury.
3.1.2
Attention
ATTENTION indicates a potentially dangerous situation that, if not avoided, may
lead to property damage.
3.1.3
Note
Damage to Property Markings
Marking of Additional Information
OTE gives you added information and helpful tips on safe and efficient use of
N
the headlamp.
3.2
Additional Pictograms Regarding Safety Notes
Explosion hazard: warns of explosion of the batteries caused by strong heating.
Risk of glare: warns of glare caused by light beam with high brightness.
Follow the Operating Instructions: refers to compliance with these Operating
Instructions.
3.3
Pictograms on the Headlamp
Optical radiation: warns of potential damage to the retina caused by
photobiological radiation.
3.4
Pictograms on the Packing
CE marking: confirms conformity with the applicable standards and legal
provisions.
3.5
Overview of the Key Safety Notes
• The following safety notes should be read carefully before using the
headlamp!
• If the headlamp is passed on to another person, the operating instructions
and these precautions and warnings must also be passed on.
• If there are warnings or warning symbols on the item, they may not be
removed.
EN Operating instructions NEO_V.01 | 7/31/2014 8
Led Lenser®*
3. Safety Notes
Health risk
1 Warning
IMPAIRMENT CAUSED BY THE FLASHING FUNCTION
When using the flashing function, dizziness, vision-impairment,
convulsions, loss of consciousness, disorientation or cramps may
occur.
Therefore:
• In the event that one of the symptoms mentioned above occur,
immediately switch off the flashing function/headlamp.
• People who suffer from reflex epilepsy (photosensitivity) when exposed
to flashing lights may not use the flashing function.
What to do:
→→ In the event that symptoms occur, switch off the headlamp and consult
a doctor.
1 Warning
ACCIDENT/INJURY RISK FOR CHILDREN
Do not permit the headlamp to be operated by children, by persons
under the influence of medication or drugs, or by persons with
physical or mental disabilities/illnesses, as there is a risk of injury to
the eyes and a risk of accidents.
Therefore:
• Do not allow children to play with the headlamp.
• Persons with limitations should only use the device under the
supervision or instruction of a responsible person.
1 Warning
RISK OF GLARE
The strong glare-effect of the headlamp may, however, cause
temporarily limited vision and after-images that may cause
irritation, disturbances or accidents.
Therefore:
• N
ever ever look directly into the beam of light or illuminate the eyes of
another person, do not carry out pupil testing.
• Do not point the beam of light at people or animals as they may be
dazzled.
• Do not use any optically highly-focused devices to observe the beam of
light.
• Do not use multiple headlamps at once as this increases the optical
radiation and thus increases the risk of retina damage.
• Commercial users or users in the public services are to be instructed in
the applicable laws and regulations.
What to do:
→→ If a beam of light hits the eyes, deliberately close the eyes and move the
head out of the beam of light.
EN Operating instructions NEO_V.01 | 7/31/2014 9
Led Lenser®*
3. Safety Notes
1 Caution
RISK OF INJURY
Do not wear the headband around the neck. Do not use headlamp or
accessories if they are damaged, since there is a risk of injury.
Therefore:
• T
ake damaged parts out of operation and replace or have them repaired
professionally.
1 Caution
PHOTOBIOLOGICAL SAFETY (EYE SAFETY)
The headlamp is classified in risk group 2 (medium risk) in
accordance with standard IEC 62471 and thus extends beyond
the “free group”. The risk of damage to the retina caused by optical
radiation (blue light from 400 nm to 780 nm) is inherent, yet the
thresholds are considerably undercut.
Note
ELECTROMAGNETIC COMPATIBILITY
he flashlight meets the requirements of the 2014/30/EC guideline with
T
regard to electromagnetic compatibility.
Modifications / Repairs
1 Caution
DO NOT MAKE ANY MODIFICATIONS/REPAIRS
Repairs, additions or modifications to the flashlight are not permitted
as these may lead to damages to the headlamp or a risk to persons:
Therefore:
• LEDs cannot be replaced.
• Do not open the headlamp unless this is expressly permitted by the
operating instructions.
• Never carry out repairs yourself, always take the headlamp to a
specialist dealer.
Batteries and battery packs
1 Warning
EXPLOSION OR RISK OF ACID BURNS
Batteries/battery packs can explode as a result of strong
heating.
Leaking of battery fluid can cause chemical burns.
Therefore:
Do not expose batteries and battery packs ...
• To direct sunlight or great heat over an extended period of time.
• Do not heat them or throw them into the fire and avoid heat buildup in
the headlamp by covering it, for instance.
• Do not throw them into water or leave out in the rain.
• Do not swallow them.
• Do not open, damage or short-circuit them.
• Only recharge them if they are labeled accordingly.
• Do not store them within the reach of children.
• Only insert them into the battery compartment in accordance with the
EN Operating instructions NEO_V.01 | 7/31/2014 10
Led Lenser®*
3. Safety Notes
displayed markings (+/-).
• R
emove from the headlamp if you will not be using it for some time or if
they are empty.
What to do:
→→ In the event of leaking batteries, place a cloth underneath and prevent
the skin, eyes and mucous membranes from coming into contact with
battery fluid. In the event of contact, immediately rinse the affected parts
with plenty of clean water and consult a doctor.
Attention
CHANGING THE BATTERY
• S
tore batteries/battery packs in a clean, dry place between -10 °C and
+ 25 °C.
• Only insert batteries in accordance with the markings (+/-).
• If necessary, clean the battery and/or headlamp contacts before
inserting.
• Never use new and used batteries/battery packs together,
• Only use high-quality batteries of the same type.
• Always change all batteries at the same time.
Attention
RISK OF SHORT-CIRCUITING
In order to avoid the risk of a short-circuit when recharging:
• Do not touch the charging contacts with damp or metal objects.
• If need be, clean the charging contacts.
• Only recharge headlamp/battery packs in dry rooms.
Attention
MALFUNCTIONING OF THE HEADLAMP
Always check the headlamp for functionality prior to use and, to be
on the safe side, carry a replacement lamp and sufficient replacement
batteries with you. If the headlamp does not function or does not
function correctly, proceed as follows:
• Check whether all the batteries/battery packs have been inserted with
the poles (+/-) the correct way round and are fully charged.
• Check the flashlight or battery/battery pack contacts and clean if
necessary.
What to do:
→→ To use all the functions again, insert new batteries or recharge the
battery packs.
Disposal / environmental protection
Attention
DISPOSAL/RECYCLING
Headlamps and used batteries/battery packs may not disposed of
in the household or residual waste. They must be disposed of in
accordance with national legal requirements.
The materials are recyclable according to their labeling.
Reuse of the materials makes an important contribution toward
environmental protection.
EN Operating instructions NEO_V.01 | 7/31/2014 11
Led Lenser®*
3. Safety Notes
Therefore:
• S
ubmit headlamps in to a local collection point for the recycling of
electrical and electronic devices.
• Submit used batteries/battery packs to a local battery collection point
or anywhere where batteries/battery packs are sold.
• Batteries, lithium batteries in particular, and battery packs may only be
disposed of when discharged.
• Separate the packaging materials and dispose of correctly.
4. Overview of Terms and Abbreviations
The following technical terms / abbreviations are used in these Operating
Instructions:
SLT Smart Light Technology
LED Short for Light-Emitting Diode
Battery pack Short for rechargeable battery, i.e. rechargeable energy source
EN Operating instructions NEO_V.01 | 7/31/2014 12
Led Lenser®*
5. Operation
1 2 3
4
5
6
7
5.1
Adapting the Headband Width
1. In order to extend the headband ④ further, hold the
band adjustment ③ between the fingers and pull the
headband ④ in direction of the battery cover ⑥ until the
headband ④ has reached the desired length.
2. In order to adjust the headband ④ tighter, hold the
band adjustment ③ between the fingers and pull the
8
headband ④ in direction of the lamp head ① on the
6
outermost part of the adjustable band range ② until the
headband ④ has reached the desired length.
3. Move the battery box ⑧ with battery cover ⑥ in such a
way that the battery box ⑧ is facing the lamp head ①.
4. Move the cable duct ⑦ in such a way that the cable ⑤ is
slack against the headband ④.
5.2
Putting on the Headlamp
1. Align the headband ④ in such a way that the cables ⑤
are on the outside.
2.
2. Press the curved lamp head ① rear up against the
forehead using one hand.
1.
3. Using the other hand, pull the battery cover ⑥ backward
3.
gently and pull it with the headband ④ downward over
the back of the head.
→→T
ake care to ensure that the anatomically shaped rear
8
1
4
5
7 6
of the battery cover ⑥ is in place on the back of the
head.
4. If necessary, move the battery box ⑧ with the battery
cover ⑥ or cable ducts ⑦ in such a way that the
headlamp fits comfortably.
5. Adapt the width of the headband ④ according to Chap.
5.1 as required.
1
9
5.3
Switching the Headlamp On or Off
1. Press the On/Off switch ⑨ on top of the lamp head 1x to
switch the headlamp ① on.
2.Press the On/Off switch ⑨ on top of the lamp head once
more to switch the headlamp ① off.
Note
Switching off
The headlamp can only be switched off after 2-3
seconds because the lighting functions would
otherwise be enabled.
EN Operating instructions NEO_V.01 | 7/31/2014 13
Led Lenser®*
5. Operation
1
5.4
2 3
Using the Lighting Functions
The headlamp has 2 LEDs, a white LED ③ on the
front (in the lamp head ①) and a red LED
⑤ on the rear battery box ④. This enables
a white front light for illumination and an optional
flashing red warning light at the rear.
4
5
6
1.Press the On/Off switch ② quickly several times in order
to use the lighting functions.
→→ Each time you press the switch, you activate the next
lighting function.
On/Off switch
press
7
White front light
Red rear light
1x
on, very bright
light
off
2x
very bright light
flashing
3x
dimmed light
flashing
4x
flashing
flashing
5x
off
off
1x
2x
3x
4x
5x
EN Operating instructions NEO_V.01 | 7/31/2014 14
Led Lenser®*
5. Operation
1
5.5
2
Replacing the Batteries
The battery box ① is located at the rear of the headlamp for
optimal weight distribution.
1.Pull back the flexible battery cover ② of the battery box
① on the side labeled ”Open” to replace the batteries.
2.Carefully pull out the battery box ① and cable ④ from
the battery cover ② and twist the battery box ①.
3.Removed the empty batteries and dispose of them in
accordance with national legislation.
4 3
1
4.Insert the new batteries ⑤ in accordance with the (+/-)
2
markings in the battery box ①.
1.
5.Push the battery box ① into the battery cover ⑥ while
inserting the cable attachment into the corresponding
opening ③ of the battery cover ②.
6.Put the flexible battery cover ② over the battery box ①
on the side marked with ”Open”, slightly depressing the
cover ② such that it closes flush.
1 Caution
Explosion hazard
lways insert the batteries according to the
A
(+/-) markings as there is otherwise a risk of
damaged or even exploding batteries.
2.
5.6
Cleaning
The following should be noted for cleaning:
• Clean the headlamp and its accessories only dry using a
lint-free cloth.
• If the headlamp comes into contact with salt water, remove
the salt water immediately and fully with a lint-free cloth.
• Wash the headband in clear water and let it dry before use.
• Do not use any chemical or solvent-based detergents or
disinfectants.
3.
5
Attention
Damage to surfaces
Solvents can damage surfaces or decompose
materials!
4.
Therefore:
• D
o not use any cleaning agents or disinfectants.
• Do not use scouring agents.
• Do not use gasoline, paint thinners or similar
products.
EN Operating instructions NEO_V.01 | 7/31/2014 15
Led Lenser®*
5. Operation
Attention
Warranty exemption
No warranty will be assumed for damage resulting from the use of
inappropriate cleaning agents or disinfectants.
5.7
Checks
very product is prone to wear over time. Annually, and prior to each use,
E
check the safety and function of the headlamp as well as the batteries/battery
packs.
Attention
Replace and dispose of damaged or old batteries / battery packs.
--------------------------------------------------------------------------------------------Do not use defective headlamps or accessory parts and contact
vendor / distributor.
5.8
Warranty
Our products are subjected to stringent quality control. Please contact the
vendor / distributor in the event that this headlamp does not function according
to expectations.
Attention
Improper repairs
Unauthorized repair shopsThe device may only be repaired by an authorized repair shop,
otherwise legal warranty will become void.
EN Operating instructions NEO_V.01 | 7/31/2014 16
Led Lenser®*
6. Technical data
NEO
Parameter value
Value
LED
1 x High End Power LED
Weight
54 g (without batteries) / 80 g
Batteries
3 x AAA 1.5 V, use of battery pack (NiMH) possible
Energy tank***
5.4 Wh
Lighting modes
Power
Low Power
Flash
Luminous flux*
90 lm
20 lm
20 lm
Burning life**
10 hours
40 hours
100 hours
Beam distance*
10 m
Waterproof
IPX4
* Luminous flux (lumen) or maximum beam distance (in meters) is measured using the setting specified in the table on switching on with a set of
fresh alkaline batteries. These are average values that may deviate by +/- 15% in individual instances in accordance with chip and batteries.
** Average burning life up to a luminous flux of 1 lumen.
*** Calculated value of the capacity in Watt hours (Wh). This applies to the fully charged batteries or battery pack(s) contained in the relevant
article in the delivered state.
EN Operating instructions NEO_V.01 | 7/31/2014 17
EN Operating instructions NEO_V.01 | 7/31/2014 *
ZWEIBRÜDER® OPTOELECTRONICS GMBH & CO. KG
Kronenstr. 5-7 • 42699 Solingen • Germany
Tel. +49 212 / 5948 - 0 • Fax +49 212 / 5948 - 200
[email protected] • www.zweibrueder.com


