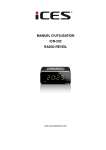
Download INSTRUCTION MANUAL ICR
Transcript
INSTRUCTION MANUAL
ICR-232
CLOCK RADIO
www.-ices-electronics.com
SAFETY INSTRUCTIONS
Explanation of symbols:
This symbol indicates that there are important operating maintenance instructions in the user
manual accompanying the device.
This symbol indicates that dangerous voltage is present within this device, constituting a risk
of electronic shock or personal injury.
CAREFULLY READ THE FOLLOWING SAFETY INSTRUCTIONS BEFORE USE.
WARNING
RISK OF ELECTRIC SHOCK
DO NOT OPEN THIS DEVICE
WARNING: DO NOT REMOVE ANY SCREWS OR OTHER COMPONENTS OF THE
DEVICE TO PREVENT THE RISK OF ELECTRIC SHOCK.
Install and use the device only as described in the user manual.
This device must be used in combination with a power supply as specified in the specification
table. If you are not sure of the type of power supply used in your home, consult your power
company.
Do not use loose or damaged cords and/or plugs.
The power outlet must be located close the device and must be easily accessible.
Make sure that power outlets or extension cables are not over overloaded. Overloading can
cause short-circuits or fire.
Always pull the plug when removing it from the power outlet.
Do not pull the power cord. This may cause a short-circuit.
If you notice smoke, an excessive build-up of heat or any other unexpected phenomena, you
should disconnect the plug from the power outlet immediately.
Disconnect the plug from the power outlet during lightning storms.
Disconnect the plug from the outlet when the device will not be used for a long time.
Do not step on the power cord and don’t pinch the power cord.
Do not place heavy objects on the power cord or any other cables as this may damage the cord
or cables.
Keep the device away from children! When they play with the power cord, they can seriously
injure themselves.
Keep the power cable away from rodents and rabbits.
Make sure all ventilation openings are clear at all times, do not cover or block them.
Leave 5 cm (2”) free space around the device.
Always make sure the device is well ventilated.
Keep the device away from heat sources such as radiators, heaters, stoves, candles and other
heat-generating products
Avoid using the device near strong magnetic fields.
Do not use this device when condensation may occur.
Do not use this device near water or other liquids.
Do not use this device in a damp room.
Do not use this device near a swimming pool.
Electrostatic interference may interfere with the normal use of this device. If this occurs, reset
the device and restart it according to the instructions in the user manual.
The display is made of plastic and might break when it’s damaged. Beware of sharp plastic
splinters when the screen breaks to avoid injury.
Should the unit become wet, immediately remove the plug from the power outlet and let the
appliance fry for 72 hours before trying to use it again.
Remove the batteries from the device and/or remote control if they will not be used for a long
time.
This device and the supplied accessories contain sensitive components. Never drop them, put
them in a microwave, burn them or paint them.
Do not bite or suck on the device and/or supplied accessories.
Do not insert the device or the supplied accessories in your ears, mouth or other body orifices.
This device and/or accessories contain small parts that may lead to a choking hazard. Therefore,
keep it away from children.
When connecting the device, if a connector does not seem to fit, do not force it.
Be careful when using this device when participating in traffic, the sound might distract your
attention.
**** AC ADAPTOR AND BATTERUES ARE NOT INCLUDED. ****
FEATURES
• Power battery AA*4 (not included)
• 12/24 hours system: clock + year + month + date + week (2000
• FM radio (frequency 87 108MHz)
• Alarm + snooze
• Alarm ringing: 2 options: BIBI or FM radio
• Digital display
• 0 15 digtal volume (Defaulted volme is 3 grade)
:
: ~
~2099)
~
KEYS
1. Keys: MODE key SET key TURN+ key TURN- key ALARM key SNOOZE
key RADIO key VOL+ key VOL- key
2. Power saving switch switch to “OFF”, the product will not always display (disconnect with
outer Power).
【
、【
】 、【 】 、【
】 、【 】 、【
:
】 、【
】 、
】 、【
】 、【
】
Operations:
1). After power on 2 seconds, the buzzer will issue one sound of “BI”, then the product will display
Time. Default time is set 00:00 Jan 1st, 2012
2). Clock mode
a). After power on, clock will display on the LED screen.
b). Press SET key to display year, then press SET to display month, then date. If no
operation during 30 seconds, then the unit will exit from setting to clock mode.
c). Press SET key 3 seconds to set time. Press SET to change setting contents. The
setting order is : time minute year month date exit; when setting, the setting
digits of time will flash, press TURN+ OR TURN- adjust setting time. If no any operation
during 30 seconds the unit will exit from setting.
d). At clock mode press TURN+ to change 12/24 hours system.
e). Press ALARM to make alarm on or off.
【 】
【 】
【 】
【 】
】 【
】
【
【
3). Alarm mode
】
【
】
【 】
【 】
【
a). At clock mode, press MODE key to activate the alarm mode.
b). At alarm mode press SET key to set the alarming time. Press SET key to change the
setting content; setting order is: alarming hour minuteexit. When setting, the set
digits of time will flash. Press TURN+ or TURN- key to adjust the setting alarming
time. If no any operation during 30 seconds then the unit will exit from setting, once set,
then alarm will be activate.
c). At alarm mode, if no operation 30 seconds then exit to clock mode.
d). Alarm ringing
d). When setting alarm, press RADIO key, then the playing radio station will be as the
alarming ringing (the playing radio frequency is set as the last playing radio
frequency), .Ringing will last 15 minutes.
dd). If no above setting, then alarming ringing is BIBI sound, and ringing only last 1 second.
ddd). After setting alarming ringing, press MODE key to exit to clock mode
e). Press ALARM key, alarm mode will be on ALARM light will be on /off ALARM light off .
f). When it is the set alarming time , the product begins alarming. When alarming, press any
key(except the SNOOZE key) to stop alarming. If press SNOOZE key then activate the
snooze mode and SNOOZE light will flash. Snooze time is 5 minutes (snoozing at most 2
times)
【 】
】 【
【
【
】
【
(
】
【
】
】
】
【
)(
】
)
4). Radio mode:
a). When not at alarm mode, press RADIO key to activate radio. At radio mode, press
RADIO key to exit from radio mode.
b). At radio mode, then the frequency will display
c). Press SET key to play the saved radio frequency, and continually press SET key to
choose the next radio frequency.
d). Press SET key 3 seconds then one sound “BI”then the playing radio frequency will be
saved as the last memory. Can save 20 stations, after full 20, if continue saving, then the
last saved frequency will make the first saved one lost.
e). Press TRUN+ to get former frequency, TRUN- to get the next press TRUN+
or TRUN- to auto scan stations forward or backward.
f). Press ALARM key 3 seconds to set sleeping time of radio, then press TRUN+ or
TRUN- to change the sleeping time for 10/20/30/40/50/60 minutes. After setting
sleeping time, repress ALARM key to exit the setting. When it is the set time , then
radio will be off.
g). At radio mode, press SNOOZE key to change to clock mode, 10 seconds later radio
will
automatically restore.
h). Short press VOL+ or VOL- key to adjust the volume, each time one grade;
Long press VOL+ or VOL- key to fast adjust the volume.
【
【
】
【 】
【 】
【 】
【
】
【
】
【
】
【
】
【
】
,
【
【
【
【
【
【
】
】
】
】
】
】 【 】
】 【 】
:
5). Sound-control
a). When it can’t always display, then sound- control can be effective
b). If can receive the sound signal, then display can last 10 seconds.
6). LED digital display
When disconnect outer power and only make it be clock mode, better push the “Display”
Switch to the “off” to save power.
a). The product can display long time (need much power)/ display by sound-control. When push
the "display” switch to the “off”, display will be off within 10 seconds , then press any key
display will last 10 seconds or by sound control it also can be light 10 seconds.
~
b). When display is light, display will be only half bright during 21:00 PM 06:59:59 AM.
c). Connect with outer power then the product will always display(DC 6V 600mA)
:
7). AUX IN function During radio play back mode, you may insert any other audio device into to the
3.5mm plug into the “AUX IN (Ф3.5mm” jack)
SERVICE AND SUPPORT
For information: http://www.ices-electronics.com/
For support:
http://icessupport.zendesk.com
ICES helpdesk:
Germany
The Netherlands
Belgium
France
0900-1520530
0900-23553626
02-6200115
0170480005
(Local charges)
(Local charges + 1ct P/min)
(Local charges)
(Local charges)
The helpdesk is accessible from Monday to Friday from 9 AM till 6 PM.
In case your device needs repair, our helpdesk will redirect you to your local dealer.
ICES offers service and warranty in accordance to European law, which means that in case of repair
(both during and after the warranty period), you should contact your local dealer.
Please note: It is not possible to send products directly to ICES for repair.
Important note: If this unit will be opened, or accessed in any way by a non-official service center,
the warranty expires immediately.
This symbol indicates that the relevant electrical product or battery should
not be disposed of as general household waste in Europe. To ensure the
correct waste treatment of the product and battery, please dispose them in
accordance to any applicable local laws of requirement for disposal of
electrical equipment or batteries. In so doing, you will help to conserve
natural resources and improve standards of environmental protection in
treatment and disposal of electrical waste (Waste Electrical and Electronic
Equipment Directive).
Products with the CE marking comply with the EMC Directive (2004/108/EC) and the
Low Voltage Directive (2006/95/EC) issued by the Commission of the European
Community.
®All rights reserved


