1
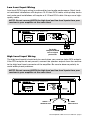
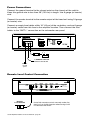
6. Connect all line inputs and outputs (if
used) using high-quality cables. Connect
all speakers, following the diagrams in
this manual. Be sure to observe proper
polarity to avoid audio phase problems.
7. Insert fuse(s) into the battery fuse
holder(s).
8. Recheck all connections before
powering up the subwoofer.
9. Set all level controls to minimum
position, and set all crossover
controls/switches to the desired
frequency points.
10. Power up the head unit and the
subwoofer. Then set the volume control
on the head unit to about 3/4 volume,
and adjust the subwoofer's input level
controls to just below the level of
distortion.
11. Further fine tuning of the various
controls may be necessary to obtain best
results.
USS8 Amplified Subwoofer User’s Manual - page 6
Don't misuse the
level control!
Do not mistake the input level control
for a volume control! It is designed
ONLY to match the output level of
your audio source to the input level
of your subwoofer.
Do not adjust this input level to
maximum unless your input level
requires it.
Ignoring these instructions will result
in an input overload to the amplifier
in the subwoofer, and excessive
audio distortion. It can also cause
the protection circuit to engage.