1
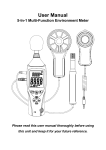
User Manual Thermocouple Thermometer Please read this user manual thoroughly before using this unit and keep it for your future reference. Contents 1. Safety .................................................................. 1 2. Features .............................................................. 2 3. Specifications ...................................................... 3 4. Meter Description ................................................ 4 5. LCD Display Description ..................................... 5 6. Operating Instructions ......................................... 6 7. Notes ................................................................... 9 8. Accessories ......................................................... 9 1. Safety Read the following safety information carefully before attempting to operate the meter. Use the meter only as specified in this manual; otherwise, the warranty may be invalidated. Environment conditions: Altitude up to 2000 meters RH≤90%(Non-Condensation) Operating Temperature: -25°C ~ 70°C Maintenance Repairs or servicing should only be performed by ATP Instrumentation Ltd. Cleaning: Wipe the unit with a dry soft cloth. Do not use abrasives or solvents on this instrument. Safety Symbol Complies with EMC 1 2. Features This device is a contact thermometer with Type K/J dual input. It is widely used in safety and fire inspection, plastic moulding, asphalt, marine, printing ink and ink dryer temperature, diesel and fleet maintenance. Precise contact measurement Type K/J dual input measurement Dual measurement and dual display Large LCD display with backlight MAX,MIN,AVG,HOLD function °C/°F selection Auto power off 2 3. Specifications Type K -200℃ ~ 1370℃ (-328℉~2498℉) Type J -200℃ ~ 1100℃(-328℉~2012℉) Range -200℃~0℃(-328℉~32℉);±(0.5%rdg+2℃/3.6℉) Type K 0℃~1000℃(32℉~1832℉);±(0.15%rdg+1℃/1.8℉) 1000℃~1370℃(1832℉~2498℉);±(0.5%rdg+1℃/1.8℉) Accuracy -200℃~0℃(-328℉~32℉);±(0.5%rdg+2℃/3.6℉) Type J 0℃~1000℃(32℉~1832℉);±(0.15%rdg+1℃/1.8℉) 1000℃~1100℃(1832℉~2012℉);±(0.5%rdg+1℃/1.8℉) , Resolution 0.1℃/ ℉ AVG The average value for last 10 readings Power Supply 1x 9V battery Power Life At least 30 hours Operating conditions -20℃~60℃,10%RH~90%RH Storage conditions -20℃~60℃,10%RH~75%RH Dimensions(L*W*H) 185 x 66 x 33 mm Weight 245g <1000 3 1℃ / ℉ / > 1000 4. Meter Description ① T1 thermocouple input connector ② LCD display ③ T1-T2 function button ④ Backlight button ⑤ AVG button ⑥ HOLD button ⑦ Power ON/OFF button ⑧ °C/°F selection button ⑨ MAX/MIN button ⑩ SET button ⑪ T2 thermocouple input connector ⑫ ¼” Tripod bush ⑬ Battery cover ⑭ Battery cover screw 4 5. LCD Display Description ① Min icon ② Max icon ③ Low battery Icon ④ Temp. units icon ⑤ T1 reading ⑥ Temp. units icon ⑦ T2/T1-T2 reading ⑧ Data Hold icon ⑨ AVG icon ⑩ Type K/J thermocouple ⑪ Auto power off icon ⑫ T2 icon ⑬ T1-T2 icon ⑭ T1 icon Note: W hen T2 icon appears, the ⑦ area displays the T2 value, when T1-T2 icon appears, the ⑦ area displays the DIF value for T1-T2. 5 6. Operating Instructions 6.1 Operating steps: 6.1.1 Open the battery compartment, install a 9V battery and close the battery compartment cover. 6.1.2 Connect thermocouples 6.1.3 Power the meter on to start measurement. Note: 1. When the low battery icon “ ” appears, replace the meters’ battery. 2. Whilst measuring, the tip of the temperature sensor must be fully in contact with the object being measured. 6.2 Button Function 6.2.1 Button: After powering the meter on, press " K-type or J-type measurement. 6 " button to select 6.2.2 Button: Whilst measuring, press “ ” button once, T1-T2 icon will appear on the LCD display, the DIF value for T1-T2 will be displayed at the T2 display area. Press this button again to enter into T2 measurement mode. 6.2.3 Button: After powering the meter on, press " " button to turn the backlight on/off. The meter will be automatically powered off after 30 seconds inactivity. 6.2.4 Button: After powering the meter on, press " " button to freeze the current reading, press it again to return to normal mode. 6.2.5 Button: Whilst measuring, press “ ” button, AVG icon will appear, 7 then the LCD screen will display the average of the last 10 readings. Press this button again to return to normal mode. 6.2.6 Button: Whilst measuring, press “ ” button once to view the current MAX/MIN reading. Press and hold “ ” button for 3 seconds to return to normal mode. 6.2.7 Button; After powering the meter on, press " " button to select °C or °F. 6.2.8 Button:After installing the battery, press " " button to power the meter on. Press and hold this button for 3 seconds to turn the meter off. 8 7. Notes Repairs or servicing should only be performed by ATP Instrumentation Ltd. Remove the battery when the meter is to be stored for long periods of time to avoid battery leakage. Check if the thermocouple is well connected with the meter (Plug the thermocouple into the meter's thermocouple input jack). 8. Accessories User manual Tripod (Optional) 9V Battery Type-K thermocouple 9 ATP Instrumentation Ltd Tournament Way Ashby-de-la-Zouch Leicestershire LE65 2UU Sales: 01530 566 800 [email protected] Repair and Calibration: 01530 566 804 [email protected] www.atp-instrumentation.co.uk