1
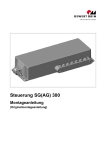
SG(AG) 300 control unit Installation Instructions (Translation of the original installation instructions) SG(AG) 300 control unit Foreword Foreword Disclaimer and Exclusion of Liability DewertOkin is not responsible for damage resulting from: Failure to observe these instructions, Changes made to this product which have not been approved by DewertOkin, or The use of replacement parts which have not been approved or manufactured by DewertOkin. Contact address DewertOkin GmbH Weststraße 1 32278 Kirchlengern Germany Tel: +49 (0)5223/979-0 Fax: +49 (0)5223/75182 http://www.dewertokin.de [email protected] Creation of a complete operating instruction manual for the entire end product These instructions are only intended to be used by the end-product manufacturer. They should not be given to the operator of the end product. The factual information contained within may be used as a basis when creating the end-product manual. The warning and danger notices are best suited for use in the end product's manual. However it is not sufficient to simply follow these notices. You should also carry out an internal risk assessment for your end product. This can then be used as the basis for the safety notices in your manual. Usage in medical products The SG(AG) 300 control unit is not a medical product. If used in a medical end product, you (the end manufacturer) are obliged to ensure compliance with EC directives and to ensure that other pertinent medical product regulations are maintained. 75082(-) 3 Table of contents SG(AG) 300 control unit Table of contents 4 Foreword 3 Disclaimer and Exclusion of Liability 3 Contact address 3 Creation of a complete operating instruction manual for the entire end product 3 Usage in medical products 3 Table of contents 4 1. General Information 5 1.1 About these installation instructions 5 1.2 Conventions used 5 2. Safety Notices 6 2.1 Proper and Intended Usage 6 2.2 Selection and qualification of personnel 7 2.3 Notice on safety during operations 7 2.4 Product labelling 8 3. Possible combinations 9 3.1 Control unit variants 9 3.2 Layout of system connections 9 4. Device description 10 4.1 Components 10 5. Technical data 14 6. Installation 16 6.1 Safety notices to observe during installation 16 6.2 Installation procedure 17 7. Operating Notes 24 7.1 General information 24 7.2 Notice for operating with optional configuration 26 8. Troubleshooting 27 9. Maintenance 29 9.1 Maintenance 29 9.2 Cleaning and care 30 10. Disposal 31 EU Declaration of Conformity 32 75082(-) SG(AG) 300 control unit General Information 1. General Information 1.1 About these installation instructions In order to install the SG(AG) 300 control unit successfully and safely in the end product, these installation instructions must be observed. These instructions are not an operating manual for the end product. These instructions will help you to minimize danger, repair costs and down times. They will also help you to maximize the reliability and lifespan of the end product. CAUTION The notices in these instructions must be followed! Following the guidelines during installation and connection procedures will help to minimize: the risk of accident and injury, and damage to the SG(AG) 300 control unit or the end product. These installation instructions have been written with due care and attention. However, we cannot guarantee that the data, images and drawings are complete and correct nor do we accept any liability for the information contained therein, unless required by law. We reserve the right to make unannounced technical changes in the course of our continual product improvement process! 1.2 Conventions used Notices which do not relate to safety are indicated in these instructions with a symbol: Triangular notice symbol Explanations of warning notices DANGER DANGER indicates a hazardous situation which, if not avoided, will result in serious injury or death. WARNING WARNING indicates a hazardous situation which, if not avoided, could result in serious injury or death. CAUTION CAUTION indicates a hazardous situation which, if not avoided, could result in minor or moderate injury. NOTICE NOTICE about a harmful situation, possible consequences: the product itself or surrounding objects could be damaged. 75082(-) 5 Safety Notices SG(AG) 300 control unit 2. Safety Notices 2.1 Proper and intended usage The SG(AG) 300 control unit is designed for use as a control unit and power supply for the appropriate DewertOkin drive systems. it can be used for care purposes (CARE model). it can be used in a hospital (HOSP model). CAUTION The SG(AG) 300 control unit should only be used for the applications described above. Any other form of usage is not permitted and can lead to accidents or destruction of the unit. Such non-approved applications will lead immediately to the expiration of all guarantee and warranty claims on the part of the end-product manufacturer against the manufacturer. 2.1.1 Improper usage Be sure to follow the notices below concerning improper usage. You should include them in your product manual in order to inform the users of your end product. WARNING The SG(AG) 300 control unit should not be used: in any environment where combustible or explosive gases or vapours (e.g., anaesthesiology) may be present, in the proximity of open fires or other heat sources (such as furnaces, ovens or direct sunlight), as a power source for toys or games, in any application that will be cleaned with an automated washing system, outdoors. CAUTION The SG(AG) 300 control unit may not be operated by: by small children, by frail or infirm persons without supervision, or in the proximity of small children. CAUTION You should only use spare parts which have been manufactured or approved by DewertOkin. Only original or approved spare parts guarantee sufficient levels of safety. 6 75082(-) SG(AG) 300 control unit Safety Notices Using the drive systems in medical applications This DewertOkin product is in compliance with the safety requirements found in IEC 60601-1/ EN60601-1. We strongly recommend that the end product (including all its components) which you are manufacturing for a medical application should also be in compliance with the safety requirements found in IEC 60601-1/EN 60601-1. You should make sure that the mechanical movement of the motor in your end product poses no risk of injury. Conduct a risk analysis for the end product for this purpose. You should also include safety notices in the instructions for the end product and technical safeguards in your product to eliminate any risk. 2.2 Selection and qualification of personnel This SG(AG) 300 control unit should only be installed into the end product by someone who has completed training in electronic motor assembly or has equivalent qualifications. You should only install the SG(AG) 300 control unit when you are qualified to do so. Otherwise, a properly qualified person should be found for this task. 2.3 Notice on safety during operations Basic safety rules must be followed in order to ensure that the end product can be continually operated in a safe manner. These rules must be observed while using the end product and while installing the SG(AG) 300 control unit. These rules and safety measures can be categorized as follows: Construction measures before the installation (refer to page 17, section 6.1.2) Safety fundamentals during the installation of the SG(AG) 300 control unit and during cable and wire routing (refer to page 17, section 6.2.2) Basic safety rules during operation (refer to page 25, section 7) The creation of a manual for the end product which contains these and other safety rules. 2.3.1 Creating a user's manual The manufacturer of the end product must create a manual for the users of that product. The safety notices in the end-product manual must be written based on the end product's risk assessment. 2.3.2 Electrical safety WARNING There is a danger of electric shock! Be sure to unplug the power cord on the SG(AG) 300 control unit before you begin assembly! The SG(AG) 300 control unit should not be opened! You must properly dispose of malfunctioning or broken units. 75082(-) 7 Safety Notices SG(AG) 300 control unit 2.4 Product labelling 2.4.1 Type label A type label on each SG(AG) 300 control unit specifies the exact name and serial number of the drive. It also states the technical specifications valid for that particular control unit. The following illustration shows where the specifications are located on the ratings plate of the SG(AG) 300 control unit. The type label shown is an example. The specifications for SG(AG) 300 II control unit may differ from this illustration. Figure 1 Type label example for the SG(AG) 300 control unit SG 300 CARE Model name xxxxx Article No: 100V - 240V ~ 50/60Hz Input voltage and frequency max. 3,15A Current consumption Intermittent Operation 2min/18min Intermittent operation: 2 minutes / 18 minutes Prod.Date Calendar week / year Serial-No. Serial number of the control unit IP66 Degree of protection Labelling in accordance with the directives IEC 60601-1 and EN 60601-1, 3rd edition. Use in dry rooms only! Protection class II Follow all special disposal instructions! Conformity mark 8 75082(-) SG(AG) 300 control unit 3. Possible combinations Possible combinations The SG(AG) 300 control unit can be combined as follows. The following basic combinations are possible: SG 300 control unit max. 5 single drives, max. 2 handsets, one locking element or operating element: e.g. supervisor, locking device or short circuit plug SGAG 300 control unit max. 5 single drives, max. 2 handsets, one locking element or operating element: e.g. supervisor, locking device or short circuit plug, one rechargeable AG 300 battery optional extra operating elements, e.g. MEDITOUCH, FOOT SWITCH Systems can be customized by combining drives, control units, handset, locking element or operating element and rechargeable AG300 battery as needed. DewertOkin has separate system instruction manuals containing additional information and instructions needed for these systems. 3.1 Control unit variants Variant 1: SG 300 Variant 2: SGAG 300 (with pluggable rechargeable AG 300 battery) 3.2 Layout of system connections Refer to the sticker on the control unit for details about layout and positioning of the connections. The sticker is located above the sockets. It indicates the proper type of connections. The layout of the connection scheme is individual and depends on the system specifications. Figure 2 is only an example and shows you where the label is attached. A Figure 2 An illustration of where the connection layout sticker is positioned on the control unit A Layout of connections (example) NOTICE Only connect the components according to the specifications found on the sticker on the control unit. Any other arrangement of connections may damage the control unit. 75082(-) 9 Device description 4. SG(AG) 300 control unit Device description The SG(AG) 300 control unit is a control unit and power supply for one or more DewertOkin drives. A pluggable power cord is used to connect the SG(AG) 300 control unit to the mains power supply. The SG(AG) 300 control unit has a non-referenced (unearthed) circuit which is separated from the supply voltage by means of doubled reinforced insulation. 4.1 We reserve the right to make unannounced technical changes in the course of our continual product improvement process! Components The housing of the SG(AG) 300 control unit has a connection for the power feed-in and connections for the drives, locking-/ operating element and handset. The connection for the drive/ handset/locking-/operating element is fitted with a mechanism to guard against accidental unplugging. 4.1.1 Variant 1: SG 300 control unit D B E C A Figure 3 E D Components for the SG 300 control unit A Power supply via pluggable power cord B SG 300 control unit C Connection sockets for drives, locking/operating element and handset with mechanism to protect again pulling out D Screw fixing point to the end product E Locking clip 10 75082(-) SG(AG) 300 control unit 4.1.2 Device description Variant 2: SGAG 300 control unit D E F C A D B Figure 4 G G Components for the SGAG 300 control unit A Power supply via pluggable power cord B SGAG 300 control unit C Connection sockets for drives, locking/operating element and handset with mechanism to protect again pulling out D Screw fixing point to the end product E Rechargeable AG 300 battery F Snap element G Locking clip 75082(-) 11 Device description 4.1.3 SG(AG) 300 control unit Optional grounding cable The optional grounding cable can be used to connect the end product with the grounding conductor on the power supply cord. Attach the grounding cable to your application in compliance with all applicable standards and using state-of-the-art methods. A Figure 5 A Power cord 12 B Grounding cable on the power supply cord of the SG(AG) 300 control unit B Optional grounding cable 75082(-) SG(AG) 300 control unit 4.1.4 Device description Mains power supply WARNING Please follow these operating instructions carefully. You could be injured by fire or electrical shock if you do not follow these assembly instructions. The appropriate power cord is included, depending on the regional version (USA, continental Europe, the UK, Australia or Japan). WARNING Only use the proper power cable that is permitted in your country. Be sure to use the correct plug shape (refer to Figure 6). A B Figure 6 C D E F Power cord, regional variants A SG(AG) 300 control unit B Power plug (USA version) C Power plug (German version) D Power plug (Australian version) E Power plug (United Kingdom version) F Power plug (Japan version) 75082(-) 13 Technical data 5. SG(AG) 300 control unit Technical data Mains power supply 100 - 240V AC, 50/60Hz Current consumption at nominal operations max. 4.0 A – 1.6 A (depending on input voltage, depending on the used power supply) Mode of operations 1) Intermittent duty 2 min./18 min. Protection class II Permitted current consumption of all 2) additional drives max. 13 A (depending on version) Protection degree IP66 Dimensions and weight Length x width x height (SG 300) 357 mm x 134 mm x 62 mm Weight (without power cord) approx. 1.0 Kg Length x width x height (SGAG 300) 357 mm x 134 mm x 96 mm Weight (without power cord) approx. 2.6 Kg Ambient conditions for operation, storage and transport 14 Transport / storage temperature from -20 °C to +50 °C from -4 °F to +122 °F Operating temperature from +10 °C to +40 °C from +50 °F to +104 °F Relative humidity from 30% to 75% Air pressure from 800 hPa to 1060 hPa Altitude < 2000m 1) Mode of operation: intermittent duty 2 min./18 min. This means that after the unit is operated with its rated load for up to two minutes it must then be paused for 18 minutes. The system can malfunction if this pause is not observed! 2) No more than two drives may be operated at rated load simultaneously! 75082(-) SG(AG) 300 control unit Technical data 134 357 Figure 7 Dimensions of the SG(AG) 300 control unit, top view (in mm) 335 Figure 8 Dimensions of the SG(AG) 300 control unit, front view (in mm) 96 62 110 SG 300 Figure 9 75082(-) 110 SGAG 300 Dimensions of the SG(AG) 300 control unit, side view (in mm) 15 Installation SG(AG) 300 control unit 6. Installation 6.1 Safety notices to observe during installation Basic safety rules must be followed in order to ensure that the end product can be continually operated in a safe manner. These rules must be observed while using the end product and while installing the SG(AG) 300 control unit. 6.1.1 Avoiding electrical faults The power supply cord is designed to be connected to an outlet near the floor. Be sure to consider the length of the power cord when designing the dimensions for your end product in order to minimize the associated risks. 6.1.2 Ensuring operational reliability during installation The safety and reliability of the end product containing DewertOkin components can be ensured by using the proper construction methods described below. Overheating A thermal fuse switches the SG(AG) 300 control unit off if it overheats. CAUTION The SG(AG) 300 control unit is equipped with a thermal fuse that triggers when the unit overheats. If the temperature control has triggered, remove the control unit from the power supply, allow to rest for 20 - 30 minutes and try again. If the control unit still does not function, please contact your supplier / dealer. Mechanical construction A shield covering the sockets protects the connections from mechanical damage and accidental unplugging. 16 75082(-) SG(AG) 300 control unit 6.2 Installation Installation procedure Before installing the SG(AG) 300 control unit, make sure that you are observing all of the safety notices found in the "Safety notices to observe during installation" section. 6.2.1 Installation and dismounting for the control unit There are four mounting holes in the SG(AG) 300 control unit which can be used to attach it to the end product with the appropriate screws (for example, use screws meeting the requirements of DIN EN ISO 7049 with Ø 4,8 mm and of suitable length: 6 mm plus the screw-in depth into the application). The SG(AG) 300 control unit should be mounted so that it lies flat against its supporting material. In the end product, no mechanical forces (such as torsion) should be put on the SG(AG) 300 control unit or its housing. Such forces could lead to damage (such as cracks) in the housing. 5,5 78 320 Figure 10 75082(-) SG(AG) 300 control unit mounting points (in mm) 17 Installation 6.2.2 SG(AG) 300 control unit Electrical connection CAUTION Electrical components should be connected or disconnected only when the power supply cord is unplugged. NOTICE There is a delay after the supply voltage is applied before the device actually turns on. Wait at least 15 seconds before commissioning. Routing the electrical cables When routing the cables, be sure that: the cables cannot get jammed, no mechanical load (such as pulling, pushing or bending) will be put on the cables, and the cables cannot be damaged in any way. Fasten all cables (especially the connecting cables) to the end product using sufficient kink prevention methods. Be sure that the design of the end product prevents the connecting cables from coming into contact with the floor during transport. Connecting the components to the SG(AG) 300 control unit The electrical connection from the components e.g. drives, handset or locking-/ operating element to the SG(AG) 300 control unit is made by plugging the plug into the SG(AG) 300 control unit. Take off the shield cover (refer to page 20, figure 11) and plug the component plug into the proper socket. Make sure that you use the proper connection position as specified in the connection layout illustration (refer to page 10, figure 2). 18 75082(-) SG(AG) 300 control unit Installation Opening the shield cover B A B Figure 11 Opening the shield cover on the SG(AG) 300 control unit A Shield cover B Locking clip 1 Pull out the mains plug from the outlet. CAUTION You should only connect and disconnect the cables when they are completely disconnected from any live current! 2 Use a suitable tool to loose the both locking clips, refer to figure 11. 3 Remove the shield cover. 4 You can now connect or disconnect a plug and socket. Be sure to use the proper socket, as shown in the connection layout diagram (refer to page 9, figure 2). 5 Close off the unused sockets using dummy plugs. NOTICE The dummy plugs ensure that the sockets are properly protected against IP66 splashed water. 75082(-) 19 Installation 6.2.3 SG(AG) 300 control unit Connecting the pluggable power cord to the SG(AG) 300 control unit WARNING Please follow these operating instructions carefully. You could be injured by fire or electrical shock if you do not follow these assembly instructions. The appropriate power cord is included, depending on the regional version (USA, continental Europe, the UK, Australia or Japan). WARNING Only use the proper power cable that is permitted in your country. Be sure to use the correct plug shape (refer to page 13, figure 6). Assembly the pluggable power cord A Figure 12 B C Connecting the pluggable power cord to the SG(AG) 300 control unit A Locking cap B Power plug C Mains connection socket 20 75082(-) SG(AG) 300 control unit Installation The pluggable power cord should be attached to the mains connecting socket (C) of the control unit. CAUTION You should only connect and disconnect the cables when they are completely disconnected from any live current! 1 Plug the power plug from the power cord (B) into the socket (C). 2 Push the locking cap (B) onto the inserted plug about the mains connecting socket (C) until you hear the locking cap snap in. Follow the notice below when plugging the power plug into the power outlet: NOTICE There is a delay after the supply voltage is applied before the device actually turns on. Wait at least 15 seconds before commissioning. Disassembly the pluggable power cord A B CAUTION You should only connect and disconnect the cables when they are completely disconnected from any live current! 1 Pull out the mains plug from the outlet. 2 Insert a suitable tool (a screwdriver) into the groove (A) of the locking cap (B) and then lever it up in the direction shown by the arrow. 3 Remove the locking cap (B) from the socket. 4 Remove the power cord from the mains connection socket. 75082(-) 21 Installation 6.2.4 SG(AG) 300 control unit Rechargeable AG 300 battery to the SGAG 300 control unit CAUTION Work on electrical components should be conducted only when the mains power connection is unplugged. Connection and installation of the rechargeable AG 300 battery C A B D Figure 1 22 E F Connecting the rechargeable AG 300 battery to the SGAG 300 control unit A Rechargeable AG 300 battery B SGAG 300 control unit C Snap element D Strain relief E Connecting cable of the rechargeable battery F Tapping screws (3.9 x 9.5 DIN EN ISO 7049) 75082(-) SG(AG) 300 control unit Installation 1 Insert the rechargeable AG300 battery (A) in the rear receptacle of the controller (B). Then press the rechargeable AG300 battery into the upper recesses until the snap element (C) engages. 2 Connect the cable (E) to the battery socket. 3 Wrap the strain relief (D) around the battery plug and tighten it in position with the screw (F, 3.9 x 9.5 DIN EN ISO 7049) to the SGAG 300 control unit. Taking out the rechargeable AG300 battery 1 Loosen and remove the screw (F) from the strain relief (D) on the control unit (B). 2 Remove the battery plug (E) from the battery socket of the control unit. 3 Press the snap element (C) and pull the recharcheable AG300 battery (A) up and out. 6.2.5 Connecting the optional, additional Supervisor, Control Box or Short Circuit Plug The Supervisor, the Control Box or the Short Circuit Plug can be connected to the optional Supervisor socket. The sticker above the sockets shows the position of the Supervisor socket (refer to page 9, figure 2). 1 Pull out the mains plug from the outlet. 2 Use a suitable tool to loose the locking clips (refer to page 19, figure 11). 3 Remove the shield cover from the control unit. 4 Insert plug of the Supervisor, Control Box or short-circuit plug in the Supervisor socket of the control unit. Be sure to use the proper socket (the assignments of plugs to sockets is shown in the connection layout diagram, refer to page 9, figure 2). 5 Push the shield cover with the locking clips onto the control unit. 6 Press the locking clips into the shield cover, until you hear it snap in. 6.2.6 Removing the SG(AG) 300 control unit 1 Pull out the mains plug from the outlet. CAUTION You should only connect and disconnect the cables when they are completely disconnected from any live current! 2 Open and remove the shield cover (refer to page 19, figure 11). 3 Disconnect all connecting cables from the SG(AG) 300 control unit. 4 Loose and remove all the mounting screws from the control unit. 5 Remove the control unit from the end product. 75082(-) 23 Operating Notes 7. SG(AG) 300 control unit Operating Notes The factual information contained within may be used when you are creating the end-product manual. The installation instructions do not contain all information required for the safe operation of the end product. They only describe the assembly and operation of the SG(AG) 300 control unit as a partially assembled piece of machinery. CAUTION When creating the operating instructions, remember that the installation instructions are intended for qualified specialists and are not for typical users of the end product. 7.1 General information Only drives from DewertOkin should be connected to the SG(AG) 300 control unit since they have already been verified to work together. Delayed start-up Follow the notice below when plugging the power plug into the power outlet: NOTICE There is a delay after the supply voltage is applied before the device actually turns on. Wait at least 15 seconds before commissioning. Power-on time / intermittent operations The SG(AG) 300 control unit has been designed for intermittent operations. Intermittent operation is an operational mode where the drive must pause after a specified maximum period of operation (power-on time). This protects the drive from overheating. In an extreme case, overheating can lead to a malfunction. The type label on the drive specifies the maximum power-on time and the required pause intervals. Avoiding toggle operations You should avoid switching from one direction of travel to the opposite direction without first stopping the motor. – Make sure that you pause between motions! A pause (motor stop time) can be activated using the controls. NOTICE You should always avoid a quick change ("toggle") of directions. 24 75082(-) SG(AG) 300 control unit Operating Notes Avoiding electrical risks WARNING Be sure that all live (current-carrying) parts of the drive system and power supply cannot be touched. In particular, be sure that unused power and control unit connections are covered adequately. Power cord WARNING Please follow these operating instructions carefully. You could be injured by fire or electrical shock if you do not follow these assembly instructions. WARNING Only use the proper power cable that is permitted in your country. Be sure to use the correct plug shape (refer to page 13, figure 6). Reducing the risk of overheating with the thermal fuse CAUTION The SG(AG) 300 control unit is equipped with a thermal fuse that triggers when the unit overheats. If the temperature control has triggered, remove the control unit from the power supply, allow to rest for 20 - 30 minutes and try again. If the control unit still does not function, please contact your supplier / dealer. Avoiding overheating NOTICE No more than two drives may be operated at rated load simultaneously! Emergency shut off of a connected drive or control unit CAUTION In an emergency, disconnect the SG(AG) 300 control unit's power plug in order to shut off the connected drive. The power plug must always be accessible during operations so that it is possible to shut down the drive or control unit at any time. If the optional rechargeable battery is connected, disconnect the battery plug from the socket on the SGAG 300 control unit. 75082(-) 25 Operating Notes SG(AG) 300 control unit Avoiding cable damage Be sure that your operating instructions inform the user about the possible cable risks. CAUTION The cables (particularly the connecting cable) should not be run over. In order to prevent injuries or damage to the drive and SG(AG) 300 control unit, no mechanical strain should be placed on the cables. 7.2 Notice for operating with optional configuration 7.2.1 Rechargeable battery with integrated charging circuitry If you have purchased the SGAG 300 with the integrated charging circuitry and external battery, then you should note the following: Load the battery for at least 24 hours before first use. The battery charge status is displayed on the handset when the handset is equipped with a battery display: - The battery is being loaded when the battery control light is blinking. - The battery is ready when the unit is plugged into the mains and the battery control light is continuously illuminated. Optional: A warning tone is issued when the battery charge is low. Shortly after the tone, the battery is switched off so that it cannot be damaged by a drain discharge. After you have used the battery-operated reset function, be sure to charge the battery until the ready signal is displayed (the battery control light, when present, stays illuminated). The integrated charging circuitry in the SGAG 300 control unit controls the charge automatically. Follow the additional information found in the rechargeable battery information sheet (ID No. 45564). 26 75082(-) SG(AG) 300 control unit 8. Troubleshooting Troubleshooting This chapter contains remedial actions should any malfunctions occur. If you experience an error that is not listed in this table, please contact your supplier. CAUTION Only qualified specialists who have received electrician training should carry out troubleshooting and repairs. Problem Possible cause Solution The drive or control unit is not functioning. There is no mains supply voltage. Connect the mains power. The drive or control unit is defective. Please contact your supplier or sales agent. The overheating protection or system protection has been triggered. Remove the overload (change or remove the load). The drive is suddenly not capable of movement. Remove the power plug and allow the system to rest for 20 to 30 minutes. If this does not resolve the problem, contact your supplier or distributor. The unit's fuse may have been triggered. Please contact your supplier or sales agent. There is no mains supply voltage. Connect the mains power. A cable has been disconnected (mains power, lifting column or control keypad). Check the cables and reinsert them, if required. Only SGAG 300 control The battery is empty. unit The battery is not connected. The battery-operated reset is not functioning. The battery is defective. 75082(-) Charge the battery. Connect the battery. Connect a new battery and dispose of the defective battery properly (refer to the Disposal Chapter). 27 Troubleshooting SG(AG) 300 control unit Signal tone Meaning Measure / Action Warning tone when the handset is used. The battery is discharged and has switched off. Recharge the battery completely. A continuous alarm tone 1) can be heard. The control unit is broken. Please contact your supplier or sales agent. 1) The continuous alarm tone is only available in the CARE and HOSP version. It is not available in the CARE L or HOSP L version. 2) LED signal Meaning Measure / Action The function LED or CARE LED on the handset does not illuminate when a button is pressed. The function LED or CARE LED on the handset stays illuminated. The control unit is broken. Please contact your supplier or sales agent. The control unit / handset is broken. Please contact your supplier or sales agent. 2) 28 Only available in the CARE and HOSP version. Not available in the CARE L or HOSP L version. 75082(-) SG(AG) 300 control unit 9. Maintenance Maintenance You should only use spare parts which have been manufactured or approved by DewertOkin. Only original or approved spare parts guarantee sufficient levels of safety. 9.1 75082(-) Maintenance Type of check Explanation Time interval Check the function and safety of the electrical system. A qualified electrician should carry out this inspection. (Refer to the "Electrical connection" section in the "Installation" Chapter.) Periodic inspections can be carried out at intervals based on the risk assessment which you conduct for your end product. Look over the housing periodically for any signs of damage. Check the housing for breaks or cracks. At least every six months. Look over the plug-in connections and electrical access points for signs of damage. Check that all electrical cables and connections are firmly seated and correctly positioned. At least every six months. Look over the cables for any signs of damage. Check the connecting cables for pinching or shearing. Also check the strain relief and kink protection mechanisms, in particular after any mechanical load. At least every six months. Check periodically to see if the rechargeable battery is ready and operational. (Battery is optional) If you can no longer move the drive in both directions with a fully charged battery, then you should replace the battery. At least every six months. 29 Maintenance 9.2 SG(AG) 300 control unit Cleaning and care The SG(AG) 300 control unit was designed so that it would be easy to clean. The smooth surfaces can be conveniently cleaned. ACHTUNG Never clean the SG(AG) 300 control unit in an automated washing system or with a high-pressure cleaner. Do not allow fluids to penetrate the lighting. Damage to the system could result. Do not use a cleanser that contains benzene, alcohol or similar solvents. 1 Be sure to unplug the power cord on the SG(AG) 300 control unit before you begin cleaning it! CAUTION For the optional rechargeable battery: Disconnect the battery plug from the socket on the SG(AG) 300 control unit. 30 2 Clean the SG(AG) 300 control unit with a moist cloth. 3 Be sure that you do not damage the connecting cables during the cleaning. 75082(-) SG(AG) 300 control unit Disposal 10. Disposal The SG(AG) 300 control unit consists of electronic components, cables and metal and plastic parts. You should observe all corresponding national and regional environmental regulations when disposing of the SG(AG) 300 control unit. The disposal of the end product is regulated in Germany by Elektro-G, internationally by the EU Directive 2002/95/EC (RoHS, from 1 Jul. 2006) and Directive 2011/65/EU (RoHS, from 3 Jan. 2013), or by any applicable national laws and regulations. (The end product is not regulated by the EU Directive 2002/96/EC (WEEE) and its amendment EU Directive 2003/108/EC.) The SG(AG) 300 control unit should not be disposed of with normal household waste! The disposal of the rechargeable battery is regulated in the EU by the Battery Directive 2006/66/EC, in Germany by the BattG battery law of 25.6.2009, and internationally by any applicable national laws and regulations. The rechargeable battery (AG 300) should not be disposed of with normal household waste! 75082(-) 31 EU Declaration of Conformity In compliance with Appendix IV of the EU EMC Directive 2004/108/EC In compliance with Appendix III of the EU Low Voltage Directive 2006/95/EC In compliance with Appendix VI of the EU RoHS Directive 2011/65/EU The manufacturer: DewertOkin GmbH Weststraße 1 32278 Kirchlengern Germany declares that the following product SG 300 CARE control unit SG 300 HOSP control unit SG 300 FURNIBUS control unit SGAG 300 CARE control unit SGAG 300 HOSP control unit SGAG 300 FURNIBUS control unit meets the requirements of the following EU directives: Electromagnetic Compatibility Directive 2004/108/EC Low Voltage Directive 2006/95/EC RoHS Directive 2011/65/EU of the European Parliament and of the Council of 8 June 2011 on the restriction of the use of certain hazardous substances in electrical and electronic equipment Applied standards: EN 60335-1/A14:2010 EN 55014-1/A1:2009 EN 55014-2/A2:2008 EN 61000-3-2/A2:2009 EN 61000-3-3:2008 EN 62233:2008 This declaration of conformity is no longer valid if constructional changes are made which significantly change the control unit (i.e., which influence the technical specifications found in the instructions or the intended use)! Kirchlengern, Germany on 30 November, 2012 Sascha Koltzenburg Head of R & D Additional Information The following standards and norms were used in the versions with at least IPX4, in accordance with EN 60601-1, IEC 60601-1, third Edition, Medical electrical equipment ( refer to the type label): EN60601-1, Section 4 General requirements EN60601-1, Section 6 Classification EN60601-1, Section 8 Protection against electrical shock hazard EN60601-1, Section 11.1 Protection against excessive temperatures EN60601-1, Section 11.2 Fire prevention EN60601-1, Section 11.3 Constructional requirements for fire enclosures EN60601-1, Section 13 Hazardous situations and fault conditions EN60601-1, Section 15.3 Mechanical strength EN60601-1, Section 15.4 Components and general assembly EN60601-1, Section 15.4.4 Replaced by EN60601-2-52, section 201.15.4.4 EN60601-1, Section 16.6 Leakage currents EN60601-1, Section 17 Electromagnetic compatibility In accordance with EN 60601-2-52:2010, IEC 60601-2-52:2009, "Particular requirements for the safety and essential performance of medical beds", the following standards are used: ( refer to the type label): EN 60601-2-52, Section 201.6.2 Protection against electrical shock: Protection class II EN 60601-2-52, Section 201.7.6.3 Control panel symbols (depending on model, customer requirements) EN 60601-2-52, Section 201.8.11.3.2 Power supply lead: only >= 2.5 m length Power supply lead: for example, EPR or similar EN 60601-2-52, Section 201.9.2.2.5 Continuous operations: Control unit only with button EN 60601-2-52, Section 201.9.2.3.1 Unintentional movement: Prevented by means of a locking mechanism (such ® as Control box, Supervisor, IPROXX SE, ® IPROXX , or Meditouch) EN 60601-2-52, Section 201.9.6.2.1 Noise level: <=65dB(A) (refer to EN 60601-2-38) EN 60601-2-52, Section 201.11.1.1 Temperatures EN 60601-2-52, Section 201.11.6.5.101 Protection against water ingress: only for >= IPX4 EN 60601-2-52, Section 201.11.8 Power outage: for example, battery usage, depending on version (customer requirement) EN 60601-2-52, Section 201.13.1.4 Special mechanical hazards: Prevented by means of a locking mechanism (such ® as Control box, Supervisor, IPROXX SE, ® IPROXX , or Meditouch) EN 60601-2-52, Section 201.15.3.4.1 Mechanical attachment – handset EN 60601-2-52, Section 201.15.4 Displays: Ready indicator is not required EN 60601-2-52, Section 201.17 Electromagnetic compatibility EN 60601-2-52, Section BB.3.3.3 Dimensions: vary according to the model (customer requirement) EN 60601-2-52, Section BB.3.4.1 Operating forces DewertOkin GmbH Weststraße 1 32278 Kirchlengern, Germany Tel: +49 (0)5223/979-0 Fax: +49 (0)5223/75182 http://www.dewertokin.de [email protected] ID No.: 75082