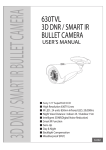
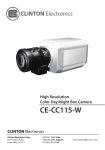
1
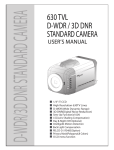
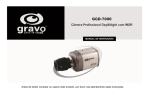
D-WDR/3D DNR STANDARD CAMERA
700 TVL
D-WDR / 3D DNR
STANDARD CAMERA
USER’S MANUAL
NIGHT
DAY
■
■
■
■
■
■
■
■
■
■
■
■
■
EC
iTAL NC
DiGRVEILLA
SU
R
AME
A
Sony 1/3” 960H CCD II
High Resolution 700TV Lines
D-WDR (Wide Dynamic Range)
3D DNR (Digital Noise Reduction)
Smart IR Function
LSC(Lens Shading Compensation)
DEFOG
Day & Night (ICR-Optional)
Intelligebt Motion Detection
Back Ligiht Compensation
PELCO-D / RS485(Option)
Privacy Mask (Polygonal, 8 Colors)
O.S.D menu function
9-001-1312
The lightning flash with an arrowhead symbol, within an equilateral triangle is
intended to alert the user to the presence of uninsulated “dangerous voltage”
within the product's enclosure that may be of sufficient magnitude to
constitute a risk of electric shock to persons.
The exclamation point within an equilateral triangle is intended to alert the user
to the presence of important operating and maintenance (servicing)
instructions in the literature accompanying the appliance.
INFORMATION This equipment has been tested and found to comply with
limits for a Class A digital device, pursuant to part 15 of the FCC Rules.
These limits are designed to provide reasonable protection against harmful
interference when the equipment is operated in a commercial environment.
This equipment generates, uses, and can radiate radio frequency energy
and, if not installed and used in accordance with the instruction manual, may
cause harmful interference to radio communications.
Operation of this equipment in a residential area is likely to cause harmful
interference in which case the user will be required to correct the interference
at his own expense.
WARNING -
Changes or modifications not expressly approved by the
manufacturer could void the user’s authority to operate the equipment.
CAUTION :
To prevent electric shock and risk of fire hazards:
Do NOT use power sources other than that specified.
Do NOT expose this appliance to rain or moisture.
This installation should be made by a qualified service person
and should conform to all local codes.
Precaution
Do not Keep the camera face to
strong light directly
Do not install the camera in
extreme temperature conditions.
Do not disassemble the camera
even if troubles happened
To avoid malfunctions, never
use the camera close to a gas
or oil leak
Do not drop the camera or
subject them to physical shocks.
Do not expose the camera to
rain or spill beverage on it.
Do not install the camera under
unstable lighting conditions
Do not install or use the camera
in an environment where the
humidity is high
1. Features
D-WDR(Wide Dynamic Range)
Delivers a powerful Wide Dynamic Range to the camera to provide D-WDR captures
the images at all light levels by correcting GAMMA CURVE. If you use an ordinary
camera in a scene with an intensive backlight, the object will be displayed dark on
the monitor affected by the backlight. To solve this problem, you can use the D-WDR
function to improve the dark part without saturation from bright part.
You can adjust SET LEVEL to get clearer images.
700 TVL ULTRA HIGH RESOLUTION
The horizontal resolution of 700 TV Lines with 960H CCD. It gives a vivid image
output with super high horizontal resolution using our own De-Mosaic Interpolation
algorithm and a specialised built-in sharpness filter.
3D DNR(Digital Noise Reduction)
Achieves excellent 3D-DNR (3 Dimensional-Digital Noise Reduction)
function very excellently by using upgraded 3D filtering and enables to keep this
function automatically while operating the camera to provide the clear and superior
images in very low light luminance. The SAMRT 3D-DNR will be work automatically if
There is any movement or motion. Also, this can be focus on the object in reduce the
“Ghost Effect” caused by moving object to it self.
Smart IR Function
LSC ( Lens Shading Compensation)
DEFOG
The Camera is able to recognize the concerntration of fog in the image, and automatically
defog, correct image of the bad weather such as fog, rain, mist, fumes, etc to make it clear
Sens-Up(x1024)
Achieves high quality pictures by supporting a long exposure time - more than
1/50second - and enables recognition of the shape and color of a suspended
object under no light conditions
POLYGONAL PRIVACY MASKING(Polygonal, 8colors)
Ensures privacy protection for private and specific areas on the video signal
output using a polygonal masking function. It allows the size and position of the
masking areas to be controlled very easily, and there are 8 mask areas which are
user programmable - color, brightness and mosaic.
HLC
Enables the recognition of a visible car license plate by blocking unwanted light
sources.
HIGH SENSITIVITY TRUE DAY&NIGHT
The Day & Night function delivers high quality color rendition and converts
automatically into monochrome as luminance levels drop.
2. Components
D-WDR/3D DNR Camera
DAY
NIGHT
MERA
E CA
iTAL NC
DiG VEILLA
SUR
Manual
WDR/3D DNR STANDARD CAMERA
L-Wrench
WDR / 3D DNR
STANDARD CAMERA
USER’S MANUAL
WDR/3D DNR
Zero Defect
High Resolution of 600 TV Lines
Sens Up(x512, DSS)
DIS(Digital Image Stabilization)
Polygonal Privacy Masking
D.Zoom(x1~x10)
Eclipse
High Sensitivity Day&Night
3. Names and Functions of Parts
1
2
3 4
T
DAY
NIGH
ER
CAM
iTAL NCE
DiGRVEILLA
SU
A
1) Front
① Lens protection cap
Please cover while it is out of use.
② CS-Mount lens adaptor
Please attach the CS-Mount lens here.
③ Back Focus clamp screw
Please loosen the clamp screw with a screwdriver before
adjusting the Back focal length.
4
Mounting bracket screw hole
Please use the screw hole when
fixing the camera onto the
mounting bracket. Please use
the clamp screw as specified in
the picture.
L
1/4"-20 UNC (20 THREAD)
L:4.5mm±0.2mm (ISO standard),
or 0.197" (ASA standard)
The mounting bracket can be separated and attached
to the top of the camera. In this instance please do not
tighten the screw to a depth of more than 5mm,
otherwise serious damage can influence in the inner parts
of the camera.
DC12V, DC12V/AC24V
VIDEO
U
4
AC 220V
VIDEO
U
2
R
L
4
2
R
L
D
D
+
3
RS 485
POWER
POWER
+
DC IRIS
1
3
+
RS 485
DC 12V
AC 24V
5
6
AC 90~240V
DC IRIS
1
3
6
2) Back
① Auto iris lens connector
This is the connection terminal for auto iris lens.
② Video composite Out
③ Power lamp
Light up when the correct power is supplied to the camera.
④ Setting button(OSD Joystick)
ENTER button : Use for menu display. This button can
be used to confirm settings after changing the value of the
selected function or current conditions.
UP & DOWN buttons : Use for selecting items by moving
the cursor up or down on the menu screen.
LEFT(L) & RIGHT(R) buttons : Use when changing item values
by moving the cursor to the left or right on the menu screen.
⑤ RS-485(Oprional)
The camera can be controlled by using external controller
like a remote controller.
6 Power input terminal
Connect to the power appropriate to each power
requirement, 12V DC or 24V AC or 90~240V AC.
4. Installation
1) Lens
Lenses are sold separately. Lenses such as auto iris lens,
CS-Mount lens and C-Mount lens can be used.
Note) How to operate this product effectively
• Please keep lens clean
• Any foreign objects and finger marks on the lens can cause
inferior image quality in low light conditions.
① When using an auto iris lens
Please peel off about 8mm of the outer skin of the auto iris
lens cable.
approx 8mm
Please peel off about 2mm of the outer skin of the insulated
conductor inside the lens cable.
approx 2mm
Please remove the cover of the auto iris lens connection
plug and solder the lens cable to the connector pin in the plug.
Pin No.
No.1 Pin
No.2 Pin
No.3 Pin
No.4 Pin
LENS
DC
DampingDamping+
Drive+
Drive-
Lens cable
No. 3 Pin
No. 1 Pin
connector
No. 4 Pin
No. 2 Pin
Please fit the auto iris lens connector plug and take off the
lens protection cap, and then attach the auto iris lens to the
camera by screwing it in clockwise.
Please insert the connection plug that is connected to the
auto iris lens cable into the auto iris lens connector, which is
located on the back of the camera.
DAY
NIGHT
ER
CAM
TALLLANCE
DiGi
EI
SURV
A
② When using a CS-Mount lens
Please take off the lens protection cap and attach the
CS-Mount lens to the camera by screwing it in clockwise.
③ When using a C-Mount lens
Please take off the lens protection cap and attach the
C-mount adaptor.
2) Power
* Be sure to connect power only after all installation is complete.
* Please use a power adaptor that meets the required standards.
[Recommended - Voltage : +/-20%, Current : Adapter with
rated power of 2 times(than real using current ]
3) RS485(option)
*The camera can be controlled by using external controllers
like a remote controller.
* Connect the RS485 cable(+, -) to the connection port of the
485 control that is connected to the DVR or
System Controller.
* Use the PELCO-D protocol.
* When controlling RS485, please check the following:
- Communication Speed : 4800 bps
- Data Bit Number : 8 bits
- Stop Bit Number : 1 bit
- Parity Bit : none
VIDEO
U
R
L
D
POWER
+
DC IRIS
RS 485
+
DC 12V
AC 24V
RS485 +
DVR
RS485 -
Monitor
5. Setup Menu Flow
EXPOSURE
LENS
AGC
SENSE-UP
BACK LIGHT
3D-DNR
RETURN
DC, MANUAL
OFF,LOW,MID,HIGH
AUTO, OFF, X2, X4, X8, X16, X32, X64,
X128, X256, X512, X1024
OFF
BLC - BLC LEVEL<OFF, LOW, MID, HIGH>
HLC
D-WDR-SET LEVEL<0~20>
OFF, LOW, MID, HIGH, AUTO
WHITE BALANCE
WB MODE
R-Y GAIN
B-Y GAIN
RETURN
ATW, MANUAL, PUSH
DAY&NIGHT
D&N MODE
BURST
C_SUP
S_SUP
SMART IR
RETURN
AUTO, COLOR, B&W, EXT, EXT2
ON, OFF
<0 ~ 100>
<0 ~ 100>
ON, OFF
IMAGE ADJUST
MIRROR
SHARPNESS
GAMMA
LSC
DEFOG
MONITOR
RETURN
OFF, MIRROR
<0~30>
0.45, 0.55, 0.65, USER<0.2 ~ 1.0>
OFF, ON <0 ~ 30>
OFF, MANUAL, AUTO
CRT, LCD
MOTION
MOTION
AREA
SENSITIVITY
DISPLAY
HOLD TIME
ALARM OUTPUT
RETURN
OFF, ON
AREA1 ~ AREA4
<1 ~ 30>
OFF, MESSAGE, TRACE
<0~15>
OFF, ON
PRIVACY
MASK1
MASK8
OFF
ON
OFF
ON
RETURN
SPECIAL
LANGUAGE
OSD COLOR
OSD TRANS
TITLE
COMMUNICATION
DPC
FACTORY SET
RETURN
EXIT
SAVE&EXIT
EXIT
RETURN
DOT SEL
DOT XY
MOVE XY
COLOR SET<1~8>
DOT SEL
DOT XY
MOVE XY
COLOR SET<1~8>
11 Language
COLOR1~COLOR8
0~15
OFF
ON
ID<0 ~ 255>
BAUD RATE<2400, 4800, 9600>
PROTOCOL<PELCO-D>
OFF, AUTO
NO, YES
6. Special Features
1. D-WDR(Wide Dynamic Range)
D-WDR captures the images at all light levels by correcting GAMMA CURVE.
If you use an ordinary camera in a scene with an intensive backlight,
the object will be displayed dark on the monitor affected by the backlight.
To solve this problem, you can use the D-WDR function to improve the dark
part without saturation from bright part.
You can adjust SET LEVEL to get clearer images.
EXPOSURE
LENS
AGC
SENS-UP
BACK LIGHT
3D-DNR
RETURN
DC
MID
AUTO
D-WDR
AUTO
D-WDR
SET LEVEL
RETURN
003
2. HLC
This function is to mask the bright color.
You can select 4 mask areas and DAY&NIGHT and adjust HLC level.
EXPOSURE
LENS
AGC
SENS-UP
BACK LIGHT
3D-DNR
RETURN
DC
MID
AUTO
HLC
AUTO
HBLC
MODE
HLC LEVEL
MASK1
MASK2
MASK3
MASK4
RETURN
HLC
MANUAL
ALL DAY
003
ON
ON
ON
ON
3. 3D DNR(Digital Noise Reduction)
Select 3D DNR ON or OFF.
3D-DNR function reduce the background noise in a low luminance
environment. Upgraded 3D filtering ensures even more clear image.
[DNR Level High : Picture image is more clear but Ghost is more increased.
DNR Level Low : Picture image is not clear but less Ghost.]
MAIN MENU
EXPOSURE
WHITE BALANCE
DAY & NIGHT
IMAGE ADJUST
MOTION
PRIVACY
SPECIAL
EXIT
EXPOSURE
LENS
AGC
SENS-UP
BACK LIGHT
3D-DNR
RETURN
DC
MID
AUTO
D-WDR
AUTO
4. SMART MOTION
With learning capability, it memorizes the previous screen on the
movement of the subject approximately in 3 to 5 seconds. When
there is a change, the alarm function goes off.
MAIN MENU
EXPOSURE
WHITE BALANCE
DAY & NIGHT
IMAGE ADJUST
MOTION
PRIVACY
SPECIAL
EXIT
MOTION
MOTION
AREA
SENSITIVITY
DISPLAY
HOLD TIME
ALARM OUTPUT
RETURN
ON
007
TRACE
003
OFF
7. SPECIFICATIONS
TV System
Sensor
Total Pixels
Effective Pixels
Synchronization
Scanning System
Horizontal Resolution
Min. Illumination Sens-Up Off
Sens-Up On
Video Output
γ Correction
Monitor
S/N
O.S.D
Electrical Shutter
Privacy Masking
Day & Night
Motion Detection
Sens-Up(Low Shutter)
Language
White Balance
D-WDR
Mirror
3D-DNR
LSC
DEFOG
Smart IR
Day & Night System
Lens
Operating Temperature/Humidity
Storage Temperature/Humidity
Supply Voltage
Current
Power Consumption
Dimension
NTSC
PAL
Sony 1/3” 960H CCD II
(H)1020 x (V)508
(H)1020 x (V)596
(H)976 x (V)494
(H)976 x (V)582
H/V 15.734/59.94Hz
H/V 15.625/50Hz
2:1 Interlace
700 TV Lines
0.12 Lux(15IRE), 0.2Lux(30IRE), 0.4Lux(50IRE) F1.2
0.0002Lux(15IRE), 0.0005Lux(30IRE), 0.0008Lux(50IRE) F1.2
1.0Vp-p/75ohm Video 0.71Vp-p
0.45, 0.55, 0.65, USER
CRT, LCD
More than 52dB (AGC off)
LENS, AGC, SENS-UP, BACK LIGHT(BLC, HLC, D-WDR),
3D-DNR, WHITE BALANCE, DAY & NIGHT
MIRROR, SHARPNESS, GAMMA, MONITOR, LSC, DEFOG
MOTION, PRIVACY (MASK1 ~MASK8), LANGUAGE
OSD COLOR, OSD TRANS, COMMUNICATION, DPC
1/60~1/100,000
1/50~1/100,000
8 Windows(Polygonal, 8 Colors)
AUTO, COLOR, BW, EXT, EXT2
ON / OFF
AUTO, OFF~x1024
11 Language
ATW / MANUAL / PUSH
ON / OFF (WDR LEVEL)
ON / OFF
OFF, LOW, MID, HIGH, AUTO
ON / OFF
OFF, MANUAL, AUTO
ON / OFF
ICR (Optional)
C /CS Mount
-20℃ ~60℃ / 30% ~80%
-30℃ ~60℃ / 20% ~90%
Only DC 12V
AC 24V / DC 12V
AC 90 ~240
110mA
80mA / 200mA
1.4W
2W / 2.4W
[Recommended-Voltage : +/- 20%, Current:
Adapter with rated power of 2 times(than real using current]
61(W) x 55(H) x 106(L)mm
Design and specifications are subject to change without notice
PRODUCT WARRANTY CARD
1) ITEM # :
2) S/N # :
3) INSTALLATION CONDITION
- Indoor
/ Outdoor
- Power supply SPECIFICATION :
DC12V
/ AC24V
CURRENT __________ mA
4) TROUBLESHOOTING
- No picture
- Bad image
- No power
- Water damage
- LED ON
/ OFF
- ETC. :
* Please keep this warranty card with the manual.
* Please fill out this warranty card and send us this warranty card
with the faulty units together.
Following cases can be charged even within the warrany period.
a. When defects are caused by user’s carelessness.
b. When improper or unauthorized repairs are done or when the inside is
modified or damaged.
c. Defects caused by natural disaster or power problem.
d. When the warranty card is not filled out or corrected unconfirmed.