1
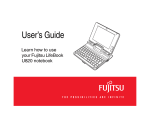
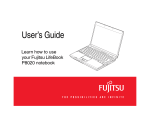
OmniPass 2.0
User's Guide
Version 1.2
i
Copyright
Copyright 2002 Softex Incorporated. No part of this publication may be reproduced, transmitted,
transcribed, stored in a retrieval system, or translated into any language or computer language, in
any form or by any means, electronic, mechanical, magnetic, optical, chemical, manual, or
otherwise, without the prior written permission of:
Softex Incorporated
9300 Jollyville Rd., Suite 201
Austin, TX 78759
Disclaimers
Softex Incorporated make no representations or warranties with respect to the documentation
herein described and especially disclaims any implied warranties of merchantability or fitness for
any particular purpose. Further, Softex Incorporated reserves the right to revise this documentation
and to make changes from time to time in the content without obligation of Softex Incorporated to
notify any person of such revisions or changes.
Trademarks
Many of the designations used by manufacturers and sellers to distinguish their products are
claimed as trademarks. Where those designations appear in this document, and Softex
Incorporated were aware of a trademark claim, the designations have been printed in initial caps or
all caps. References may be made to Softex, which is a trademark of Softex, Incorporated. All
other trademarks observed.
Document Inquiries
When referring to this document, please refer to the title and publication date. For additional
information about Softex products, visit our World Wide Web site at
http://www.softexinc.com/.
ii
Table of Contents
Table of Contents............................................................................................................... iii
Table of Figures .................................................................................................................. v
Introduction......................................................................................................................... v
Features ........................................................................................................................... v
Audience ........................................................................................................................ vi
Contents of this Manual ................................................................................................. vi
Conventions and Typefaces Used in This Manual ........................................................ vi
Additional Information ................................................................................................. vii
Chapter 1 - Installing and Setting Up Softex OmniPass..................................................... 1
System Requirements...................................................................................................... 1
Installing the Softex OmniPass Software ....................................................................... 1
Un-Installing the Softex OmniPass Software ................................................................. 2
Upgrading from a Previous Version of OmniPass Software .......................................... 2
Verifying Information About the Softex OmniPass Software........................................ 3
Master Password ............................................................................................................. 4
Chapter 2 – The Enroll Wizard........................................................................................... 5
Enroll............................................................................................................................... 5
Chapter 3 - Quick Guide to Using Softex OmniPass........................................................ 10
Creating users................................................................................................................ 10
Creating OmniPass Only User versus Using Existing Windows Logon Accounts ...... 11
Using an existing Windows Account........................................................................ 11
Creating an OmniPass User ...................................................................................... 12
Steps For Adding a User ............................................................................................... 12
Remembering a Password............................................................................................. 13
Friendly Name .......................................................................................................... 14
Automatically Enter the Protected Site When it is Activated…............................... 14
Automatically Click the “OK” or “Submit” Button… ............................................. 14
Entering a “Master” Password ...................................................................................... 15
Chapter 4 – The OmniPass Advanced User Guide........................................................... 15
Logging into / Logging out of OmniPass ..................................................................... 16
Using the OmniPass Control Panel............................................................................... 16
The User Management Tab........................................................................................... 16
Add / Remove Users ................................................................................................. 17
User Specific Settings ............................................................................................... 17
The Settings Tab ........................................................................................................... 18
The Password Vault ...................................................................................................... 19
Password Changing Issues............................................................................................ 19
Managing Identities ...................................................................................................... 20
Choose and Switch Identities.................................................................................... 20
Choose Identities During Log on.......................................................................... 20
Switch Identities.................................................................................................... 21
iii
Comprehensive Use of Biometric Devices with OmniPass.......................................... 21
Adding a Fingerprint................................................................................................. 21
Logging into OmniPass or Windows with a Biometric Device................................ 22
Logging into Windows with a Biometric Device ..................................................... 23
Password Changing Issues with a Biometric Device................................................ 23
Screensaver Password............................................................................................... 23
Importing and Exporting Users..................................................................................... 23
Exporting Users ........................................................................................................ 24
Importing Users ........................................................................................................ 24
Issues Associated with Export and Importing Users ................................................ 25
File and Folder Locking (File Encryption) ................................................................... 26
Encrypting Files or Folders....................................................................................... 26
Decrypting Files or Folders ...................................................................................... 27
Encrypted Files ......................................................................................................... 27
Appendix A: Troubleshooting .......................................................................................... 28
Creating a New User..................................................................................................... 28
Windows 9.x/ ME Logon Issues................................................................................... 28
Windows 9.x / ME Network Logon Issues................................................................... 29
File and Folder Locking Issues ..................................................................................... 29
Certain Files or Folders Cannot be Encrypted (locked)............................................ 29
Windows 2K / Windows XP issues .............................................................................. 29
Cannot add Windows users to OmniPass ................................................................. 29
Cannot Add a User to OmniPass with Blank Password ........................................... 30
Cannot Use Fingerprint to Log Into Windows XP ................................................... 30
Dialog Box Appears After Placing Finger on Sensor During Windows Logon........... 30
Index ................................................................................................................................. 32
iv
Table of Figures
Figure 1: The About Tab Window Page on the Softex OmniPass Control Panel .............. 3
Figure 2 - Enroll Wizard - First Screen.............................................................................. 5
Figure 3 - Enroll Wizard: Verify Password Screen............................................................ 6
Figure 4 - Enroll Wizard: Choose a Finger ....................................................................... 7
Figure 5 - Enroll Wizard: Capture Fingerprint ................................................................. 8
Figure 6 - Verify Fingerprint.............................................................................................. 9
Figure 7:Adding a New User in the OmniPass Control Panel......................................... 10
Figure 8: Choose the Type of User to Create................................................................... 11
Figure 9: The Two Step Process of Remembering a Password........................................ 13
Figure 10: Password Remember Options......................................................................... 14
Figure 11: "Master" Password Verification..................................................................... 15
Figure 12: User Management Tab ................................................................................... 17
Figure 13: The Settings Tab ............................................................................................. 18
Figure 14: Password Vault............................................................................................... 19
Figure 15: Choose Identity During Log on ...................................................................... 20
Figure 16: Switch User Identity From Taskbar................................................................ 21
Figure 17: Adding a Fingerprint ...................................................................................... 22
Figure 18: Logon Screen with Fingerprint Window......................................................... 22
Figure 19: Importing a User............................................................................................. 24
Figure 20: Import A User Dialog ..................................................................................... 25
Figure 21: Encrypt a File ................................................................................................. 26
Figure 22: Encrypting a Folder Containing Multiple Files ............................................. 26
Figure 23: Locked File Before and After.......................................................................... 27
Figure 24: XP/2K Security Setting ................................................................................... 29
Figure 25: Limit local account use of blank passwords ................................................... 30
Figure 26: Windows Logon Failure Dialog ..................................................................... 31
Figure 27: Windows Logon Failure Dialog Box 2 ........................................................... 31
v
Introduction
Softex OmniPass provides password management capabilities to Microsoft Window-based operating
systems. OmniPass allows a user to use one “master password” for all Windows, application and on-line
passwords. A “master password” is an OmniPass password that will be used to enter any passwordprotected site or program once you have registered those sites with OmniPass. OmniPass can also use an
optional hardware security device – such as fingerprint recognition devices or SmartCard device – to give
the user access to his applications, website, and other password protected resources.
OmniPass displays a convenient graphical user interface, which securely manages passwords, users, and
multiple identities for each user.
Features
Softex OmniPass enhances your ability to use your computer by giving you the following
features and advantages:
•
Easy to use “master password” for all types of Windows, application, and on-line
passwords
•
Easy to import and export existing passwords
•
Store unlimited number of passwords and related information in a secure database.
•
Supports other hardware security devices – such as Fingerprint and SmartCard devices
•
Compatible with Microsoft Passport support for Internet Explorer
•
Compatible with Windows XP Credential Manager
•
User-friendly GUI that is easy to install, customize and use
•
Full Windows OS support including 95, 98, ME, NT 4.0, Windows 2000 and XP
•
International Language Support
v
Audience
This manual is designed for computer users who are familiar with Windows conventions and
terminology. Specifically, this includes users who want to
•
Remember a single “master” password instead of 10-20 individual passwords.
•
Configure OmniPass for multiple users and multiple “identities” to keep various sets of
passwords for each user.
Contents of this Manual
This Softex OmniPass User’s Guide contains the following chapters.
Chapter 1 Installing and Setting Up Softex OmniPass: describes how to install the
product and defines system requirements.
Chapter 2 Quick Guide to Using OmniPass: describes the basic features of the Softex
OmniPass so that you can be up and running quickly.
Chapter 3 Advanced Guide to Using OmniPass: describes all the features of Softex
OmniPass and its graphical user interface.
Glossary: includes definitions for various terms used in this manual.
Conventions and Typefaces Used in This Manual
Choose
Within this manual, the term choose means to select a menu item by
highlighting it with the cursor and pressing <Enter> or clicking on it.
SETUP <Enter>
Boldfaced courier type indicates text as it appears onscreen or in a
program. It is used in text for instructions and for anything you must
type literally (such as A:\SETUP to install a program).
KEY1+KEY2
This indicates a command that requires you press KEY1 and hold it
down as you press KEY2.
Bold text
Within text, bold-faced type indicates menu options and commands.
Italic text
Within text, italics indicate placeholders, class names, variables, and
arrays. In syntax expressions, placeholders represent information that
you must provide.
SETUP.EXE
Within text, capital letters represent the names of files and directories.
This icon indicates material you should take special notice of.
vi
Additional Information
For additional information about Softex OmniPass as well as other Softex products, visit our
World Wide Web home page at http://www.softexinc.com
vii
Chapter 1 - Installing and Setting Up
Softex OmniPass
This chapter covers:
•
System Requirements for Softex OmniPass
•
Installing the Softex OmniPass software
•
Un-Installing the Softex OmniPass software
•
Upgrading from a previous version of Softex OmniPass software
•
Verifying information about your version of the Softex OmniPass program
•
Master Password Defined
To begin installing the components, however, your system must meet certain system requirements.
System Requirements
The recommended minimum system for running Softex OmniPass includes the following
components:
•
One of the following operating systems: Windows 95, Windows 98, Windows 98 Second
Edition, Windows ME, Windows NT, Windows 2000, Windows XP
•
Internet Explorer 5.0 or above, or Netscape X.X or above
•
At least 5MB of free hard disk space available on your computer
Installing the Softex OmniPass Software
If you already have a previous version of Softex OmniPass installed in the system, please refer to
the section, Upgrading the Softex OmniPass Software, for directions on how to upgrade your
system to the latest level of Softex OmniPass.
IMPORTANT: If you are installing OmniPass on Windows 9.X or Windows ME, please
refer to the section below in Appendix A which pertains to these operating system before you
install OmniPass.
To install Softex OmniPass for the first time on a system:
1.
Insert the installation media for the Softex OmniPass software into the appropriate media bay.
If your installation media is a CD then insert the CD into the CDROM drive and follow the
installation directions that are automatically displayed. Note: If you are not using a CD or if
you are not prompted, then it may be necessary to run the setup program manually.
1
2.
Follow the directions displayed in the Softex OmniPass installation program. Specify a
pathname in which you want Softex OmniPass to be installed.
3.
Reboot your system when prompted by the setup program. Once the system is running again,
you can use the Softex OmniPass software.
The installation program automatically places an icon, Softex OmniPass, in the Windows Control
Panel as well as a key shaped icon on the taskbar. Please refer to Chapter 2, Quick Guide to Using
OmniPass, for instructions on how to use OmniPass.
Un-Installing the Softex OmniPass Software
If you already have a version of Softex OmniPass installed on your system, you must uninstall you
existing version of OmniPass prior to upgrading.
1.
Click the Start button on the Windows Taskbar. Select Settings, and then Control Panel.
2.
Double-click the Add/Remove Programs Control Panel.
3.
Select Softex OmniPass, and then click the Add/Remove... button.
4.
Follow the directions to un-install the Softex OmniPass program
5.
Reboot your system when prompted by the setup program.
Note: All of your remembered passwords will be lost upon uninstalling OmniPass
Upgrading from a Previous Version of OmniPass
Software
If you already have a version of Softex OmniPass installed in the system, you must upgrade your
system to Softex OmniPass
1.
Un-install the previous version of Softex OmniPass software. Follow the steps outlined in the
section, Un-Installing the Softex OmniPass Software, earlier in this chapter.
2.
After the system has been rebooted, you can install the new version of Softex OmniPass.
Follow the steps outlined in the section, Installing the Softex OmniPass Software, earlier in
this chapter. You can use these steps because you have already un-installed the previous
version of Softex OmniPass.
3.
Reboot the system. Now you can use the new version of Softex OmniPass.
2
Verifying Information About the Softex OmniPass
Software
After you install all the software components and Softex OmniPass, it is a good idea to verify the
version number and other information about the Softex OmniPass program.
To verify information about Softex OmniPass:
1.
From the Windows Desktop, double-click on the Softex OmniPass icon on the taskbar in the lower
right-hand corner of the screen.
or
Click on the start button, find Settings, and choose on Control Panels (if you are using Windows
XP you will see control panel directly in the start menu. Click on this and then click on “switch to
classic view”). Double-click on the Softex OmniPass icon in the Control Panel. The Softex
OmniPass control panel appears. If the Softex OmniPass Control Panel does not appear, the
program is not correctly installed. Verify that you have completed the installation procedure
correctly and try to open the Control Panel again.
2.
Choose the About tab. The About tab Window page appears with version information about the
OmniPass software. See Figure 1 below
.
Figure 1: The About Tab Window Page on the Softex OmniPass Control Panel
3
Master Password
With OmniPass, a user creates a single master password that is used to “replace” all other
passwords. The first time a password secured website or application is used, the user simply
enters the original password and then tells OmniPass to “remember that password”. From that
point forward, anytime that website or application is used again, OmniPass will prompt the user to
enter the user’s master password and access to that site or application is automatically granted.
With OmniPass, the user only has to remember a single master password.
4
Chapter 2 – The Enroll Wizard
The Enroll Wizard takes you-step-by-step through the process of creating a user and enrolling a finger. It
also has a practice screen where you can practice using your biometric device.
The Enroll Startup Screen explains the steps required to enroll, and gives the option to proceed or cancel.
Figure 2 - Enroll Wizard - First Screen
Enroll
The enroll button brings you to the next screen where you can begin to create your user account.
5
Figure 3 - Enroll Wizard: Verify Password Screen
On the Verify Password screen, your current Windows user name has already been filled in (unless you are
using Windows 9x or Windows ME – see note). Type in your Windows password in the password field.
This is the same password that you use to log into Windows. Click Next to continue or Cancel to exit.
Note : If you are using Windows 9.x or Windows ME, you will be required to type in your Username as
well as your password. If you do not have a Windows user, one will be created for you during this process.
6
Figure 4 - Enroll Wizard: Choose a Finger
The Choose a Finger screen allows you to choose a finger to enroll and view which fingers have already
been enrolled. Click on the finger that corresponds to the one that you would like to enroll. Press Back to
go back to the Verify password screen; press next to capture a fingerprint; or press Cancel to exit the
program.
7
Figure 5 - Enroll Wizard: Capture Fingerprint
The Capture Fingerprint screen is where you enroll a fingerprint in OmniPass. Place your finger on the
sensor and keep it held down until you see the flashing green box below the fingerprint display register a
solid green. Then lift your finger and replace it on the sensor. Repeat this process until a message appears
indicating that you are finished
After the required number of captures has been successfully completed, the next screen, Verify Fingerprint,
will automatically appear.
8
Figure 6 - Verify Fingerprint
The Verify Fingerprint screen is the last step of the Enroll Wizard. At this point you will place your finger
on the sensor again. A message will come on the screen letting you know whether or not you were
successful. You may retry verification a few times if the first attempt is unsuccessful. If you were
successful, you can finish enrollment or enroll another finger. If if you were unsuccessful and you want to
use a biometric device, you must go through the enroll process again until you have successfully enrolled a
finger.
Once you have clicked Finish Enrollment, you are ready to use OmniPass.
9
Chapter 3 - Quick Guide to Using
Softex OmniPass
Once Softex OmniPass is installed in the system, you can easily manage your passwords. This chapter
gives a quick guide to using OmniPass so that you can immediately start “remembering” your passwords.
The basic operation of OmniPass consists of the following tasks:
•
Creating users in OmniPass and using existing Windows users.
•
Using a biometric device (if attached).
•
Remembering passwords.
Creating users
To begin using OmniPass, double-click on the key shaped OmniPass icon in the taskbar on the
lower right-hand corner of your screen. The main OmniPass control panel will open. Choose
Add New User (see figure 2 below).
Figure 7:Adding a New User in the OmniPass Control Panel
10
In the following screen, you will be prompted to use an existing Windows user or to create an
OmniPass only user. The default is to use an existing windows account. Please see Figure 3
below.
Please see the next section on Page 6 entitled “Creating OmniPass Only User versus Using
Existing Windows Logon Accounts” for a detailed explanation of the differences of these two
kinds of accounts.
Figure 8: Choose the Type of User to Create
Creating OmniPass Only User versus Using
Existing Windows Logon Accounts
There are two ways to create a user in OmniPass. The best way to decide which kind of user to
create is to examine how you log into your computer and who else uses your computer. The
default is to use an existing Windows account (see figure 3 on the previous page)
Using an existing Windows Account
Choosing Using an Existing Account will make your OmniPass username and password
identical to your windows user name and password. This option can be used if you are
required to type a username and password to get into your computer, such as in a
network/domain environment.
11
If you have a biometric device (fingerprint sensor.), and you would like to use your
fingerprint to log on to your computer, unlock your computer (Win2000/NT/XP), and
dismiss your screensaver password, it is recommended that you choose Using an
Existing Windows Account.
If you have Windows 98 and you are in a network environment, it is recommended that
you create a local user with the same username and password as your network logon.
You can do this by going to Start, Settings, Control Panels, and then clicking on Users.
Then create the windows user.
Note: If your Windows password changes, this will also change your OmniPass
password if you use an existing Windows account to log into OmniPass.
Creating an OmniPass User
Choosing Creating an OmniPass User creates a new user that exists only in OmniPass
and has nothing to do with your Windows users. This option can be used if you do not
use a password to log into your computer.
Steps For Adding a User
Once you have decided on which kind of user to create, please follow the following steps:
1.
Check the appropriate box (see figure 8 on the previous page) to pick the type of user to create.
2.
Type in a username
3.
Type in domain if you are creating a domain user and you are in a corporate or small business
environment. If you do not know domain, please contact your network administrator. If you are
not creating a domain user (you are adding a Windows user and you do not have a domain) then
you should put your computer name in the domain field.
4.
Choose Next.
5.
If you have a biometric device attached to your computer (i.e. a finger print reader etc.) then
please continue on to the next section, if not please choose Next then and then Finish.
6.
Choose Yes to the question “Would you like OmniPass to log in the new user?”
Now you are ready to begin remembering passwords. Please skip down to the section entitled
“Remembering Passwords” for further instructions.
12
Remembering a Password
Once you have created a user and logged on, you are ready to remember passwords.
Remembering adds the passwords into the OmniPass database so that you can enter this site or
program using your OmniPass “master” username and password
Open any program which requires a username and/or a password (an email program, a web page, a
database, etc.). Type in your name and password but do not press enter. Right-click on the
OmniPass icon in the taskbar, choose Remember Password (the cursor will change into a key
shape) and click on the area with the login fields. See figure 5 below.
Figure 9: The Two Step Process of Remembering a Password
At this point OmniPass presents you with several choices (see Figure 6 below): you can give the
password a “friendly name”, choose whether or not to let Omnipass choose Enter automatically
when you type in your “master” password, and choose whether or not to let OmniPass enter the
site automatically without your typing in your “master” password (only after you have logged in).
13
Figure 10: Password Remember Options
Friendly Name
The friendly name is a name that you must give to each password that you remember so
that you can identify it later. The default friendly name is the name that Windows gives
to the window. It is recommended that you give each password a name that you will
remember, such as “Yahoo Email” or “Freddy’s Checking”. This will make it easier to
remove a password associated with that name later on because they are all shown in a list
format in the protected Password Vault area.
Automatically Enter the Protected Site When it is
Activated….
Choosing Automatically Enter the Protected Site When it is Activated… will cause
OmniPass not to ask for your master password when the site or program is activated, but
will automatically enter the remembered fields and submit enter. This option can be
changed later with the Settings tab. This option is recommended for home users for who
inside security is not as great a concern (i.e. another user walking up to your computer
after you have logged in and an viewing your secure sites).
Automatically Click the “OK” or “Submit” Button…
Choosing Automatically Click the “OK” or “Submit” Button (this is checked by
default) will cause OmniPass to ask for your master password, and once you have entered
it (or used your finger print device if you have one) it will submit an Enter command and
automatically enter the site. This option can be changed later with the Settings tab.
Note: If you have selected Automatically Submit Enter option, you will enter the
program as soon as you type your master password. If you have selected Automatically
Enter the Protected Site, you will not be prompted for your master password after you
log in.
14
Entering a “Master” Password
Once you have remembered a password, go back to that site or application where you have
remembered a password. The password verification screen will pop up (see figure 7 below).
Figure 11: "Master" Password Verification
Type in your master password into the password field and your name and password will appear in
the remembered fields.
Chapter 4 – The OmniPass
Advanced User Guide
The Advanced user functions include:
•
Logging in to OmniPass
•
Using the OmniPass Control Panel
•
User Management including Adding and Removing Users
•
The Settings tab
•
The Password Vault
•
•
Managing Identities
Comprehensive Use of Fingerprint Biometric Devices with OmniPass
•
Adding or Removing a Fingerprint
•
Logging into OmniPass with a Fingerprint Biometric Device
•
Password Changes
.
15
Logging into / Logging out of OmniPass
Each set of passwords in OmniPass is user specific and can only be accessed when any given user
is logged in with a username and password (or uses a compatible Biometric Fingerprint reader).
For security reasons, no passwords can be remembered without a user logged in to Omnipass.
To log into OmniPass, right-click on the key-shaped OmniPass and choose Log in User. The
password verification screen will come up. Type in your user name, domain, and password. If
you do not know the domain, or if there is no domain, leave this field empty.
To log out of OmniPass, right-click on the key-shaped OmniPass and choose Log Out User. If
you log a new user in while another user is still logged in, the first user will be logged out
automatically.
Using the OmniPass Control Panel
To open the OmniPass control panel, from the Windows Desktop, double-click on the key-shaped
Softex OmniPass icon on the taskbar in the lower right-hand corner of the screen.
Or
Click on the start button, find Settings, and click on Control Panels (if you are using Windows XP
you will see Control Panels directly in the start menu. Click on this and then click on “switch to
classic view”). Double-click on the Softex OmniPass icon in the control panel. The Softex
OmniPass Control Panel appears. If the Softex OmniPass Control Panel does not appear, the
program is not correctly installed. Verify that you have completed the installation procedure
correctly and try to open the Control Panel again.
The User Management Tab
The User Management tab is where you:
1.
Add / Remove Users
2.
Change the user specific settings.
16
Figure 12: User Management Tab
Add / Remove Users
To add a user, press the Add New Users button and then follow the steps on pages 4 - 6.
The remove a user, choose the Remove User button and then type the name, password,
and domain (if you do not know this, leave it blank).
Note: Removing a user will automatically remove all passwords for that user from the
system and all passwords and identities associated with the user will be lost.
User Specific Settings
At the bottom of the User Management tab (see figure 8 on page 12, there are two
settings with radio buttons. These options are saved for each user.
Audio allows you to specify a preference of having no audio, only beeps, or full audio
alerts.
Taskbar Tips allows you to specify a preference for no tips, Beginner Mode, or
Advanced Mode.
17
The Settings Tab
The Settings tab is contains settings that will affect all users who use OmniPass on that machine.
These settings determine how a user will log onto OmniPass, and in some cases, the machine.
1
2
3
4
Figure 13: The Settings Tab
1.
Option 1 will automatically log into OmniPass using the user name and password of the user
that is logged into Windows. This setting is appropriate for an office setting or a setting
where a user is required a username and password to log into a computer and would like to
have these credentials also work for OmniPass.
The assumption here is that the current Windows user has already been added to OmniPass.
If a user who has not been added to OmniPass signs on to Windows, OmniPass will not log
anyone in automatically with this option.
2.
Option 2 will prompt for OmniPass Log on at startup. This is useful for scenarios where
several people may be using a machine, but no password is required to log into Windows.
3.
Option 3 will not prompt a user to log into OmniPass. With this option you must manually
log in to OmniPass by right clicking on the taskbar icon. This is the default setting.
18
The Password Vault
The Password Vault, the third tab on the OmniPass control panel, contains all fields that have been
remembered for each user and identity. It will require the username and password of whichever
user and identity is currently logged on to OmniPass. From here you can remove a password from
OmniPass, or change the friendly name settings (see page 9).
Figure 14: Password Vault
To remove a password from the vault, simply click on the friendly name and then choose Delete
Page. To change a setting, click on the desired friendly name and check or uncheck the box next
to the setting you would like to change.
To view your passwords, click on the Unmask Values button and the usernames and passwords
will be shown.
Password Changing Issues
If you change your Windows password on the same account that is enrolled in OmniPass, the next
time you type in your master password, OmniPass will prompt you to type in your new password
before letting you continue.
19
Managing Identities
Identities are different subsets of passwords from which you can seamlessly switch back and forth.
You can create an identity called “home” or “work”, anything that will help you to manage your
passwords.
One example of where identities can be used is if you have multiple web-based email addresses at
one site. You can create a different identity for each email address and switch back and forth at
will.
To add identities, click on <Click here to add a new identity> and the Identities screen will come
up. From there you can create new identities or remove them.
To remove an identity, select the identity that you want to remove and select Delete Identity.
Choose and Switch Identities
Choose Identities During Log on
To choose identities during log on: type in your user name in the user field. Then the
pull-down menu in the identity field will become available. Click on the down arrow to
choose an identity. Then press okay to log on.
Figure 15: Choose Identity During Log on
20
Switch Identities
To switch identities at any time, right click on the key-shaped OmniPass icon on the
taskbar and choose Switch User Identity. The logon user screen will pop up (see Figure
10 below). Choose the desired identity from the drop-down menu and choose Okay.
Figure 16: Switch User Identity From Taskbar
Comprehensive Use of Biometric Devices with
OmniPass
This section will include:
1.
Adding a Fingerprint
2.
Logging on to OmniPass or Windows with a Biometric Device
3.
Password Change Issues with a Biometric Device
When there is a biometric device attached to the system where OmniPass is installed, several
features become available and some of the Dialog boxes change. An enroll finger button is added
to the main User Management tab of the OmniPass control panel
Adding a Fingerprint
To add a fingerprint from OmniPass, choose Enroll Finger from the User Management
Tab of the OmniPass control panel.
21
Figure 17: Adding a Fingerprint
a.
To add a fingerprint, select the desired finger and then click Next.
Logging into OmniPass or Windows with a Biometric
Device
When you log into OmniPass with a biometric device installed, you will now see a
fingerprint windows next to the logon graphic
Figure 18: Logon Screen with Fingerprint Window
22
If a finger has been enrolled for a user, this user can now log in to OmniPass by placing a
finger onto the biometric device. The scrolling blue boxes indicate that OmniPass is
waiting for a fingerprint device to be pressed. Once a finger is placed on the device, the
fingerprint will be displayed in the window, and will turn green if the print is recognized.
If it is not recognized, the print will appear as red. Note: Sometimes it may take a few
tries to get a device to recognize the finger. Please try to place your finger exactly as you
did when it was enrolled.
Logging into Windows with a Biometric Device
When logging into Windows with a biometric device, the fingerprint window will now
appear next to the Windows Login screen. If you have used an existing Windows
account to log onto OmniPass and have enrolled a finger, place a finger on a biometric
device to log onto windows and OmniPass at once.
The window will also appear if you have used Crtl, Alt, Del to lock a system with
Windows 2000, Windows NT, or Windows XP, and the biometric device can be used to
log back in as stated above.
Note: If a machine is locked and OmniPass detects a different user logging back in with
a fingerprint, the first user will be logged out and the second user logged in.
In Windows XP, your login options must be set either for classic login, or for fast user
switching and logon screen to be enabled in order to use your fingerprint to log on to
Windows. To change this go to Control Panels, User Accounts and then click on
“Change the way users log on or off.”
Password Changing Issues with a Biometric Device
If you are using a biometric device to log into Windows and OmniPass, and you change
your Windows password, your OmniPass password changes automatically but yourr
fingerprint is not automatically updated. The next time a fingerprint is used to log in,
OmniPass will ask the user to verify the new password in order to log into the system.
Once the new password is added, the database is updated. This is for Administrative
purposes and allows a Network Administrator to lock a user out of a system without a
security breach.
Screensaver Password
If you have set a screensaver password and you have a fingerprint sensor installed, you
can use your fingerprint to log back into windows after the screensaver starts. OmniPass
adds a fingerprint box to the screensaver password Dialog box if it detects a sensor.
Place your finger on the sensor to dismiss the Dialog box.
Importing and Exporting Users
The import user and export user features allow users to save their profiles with all of their
remembered passwords to one secure file to move to another computer or to keep as a backup.
Enrolled finger are not backed up during this process so if you are using a fingerprint device you
must re-enroll your finger once you have imported a user into OmniPass.
23
Figure 19: Importing a User
Exporting Users
To export a user with all password information, open the OmniPass program and click on
the Export User button. You will be prompted for the username and password (and
domain if applicable) of the user you would like to export. OmniPass will prompt you to
provide a file name to be saved in the OmniPass Import Export file format. It is very
important to put this file in a place where you will remember it, because it contains all of
your password data. This file will be required when you import the user profile.
Fingerprints are not exported, so you will have to re-enroll your fingerprint once you
have imported the user information into the new machine.
Importing Users
Note: you cannot import a user if there is already a user of the same name in OmniPass.
To import a user back into OmniPass, open the OmniPass program and click on the
Import User button. OmniPass will prompt you to browse for the file that you had
previously exported (OmniPass import/export file). You will then be prompted for the
username and password (and domain if applicable) of the user you would like to import.
24
Figure 20: Import A User Dialog
If you cannot remember where the import/export files was saved, just search your hard
drive for a *.opi file, which is the OmniPass import/export file extension.
Issues Associated with Export and Importing Users
•
If you export an existing local Windows User profile from OmniPass to another machine,
there must be an identical user created on that machine (in Windows not in OmniPass)
before you import the user.
Example: I have a windows user with the username “Fred” and the password “Secret”
on my machine. I have enrolled this user, Fred in OmniPass and remembered
passwords. Now I want to take all of my passwords to a new machine. I export Fred’s
data and now I go to my new machine and I create a user with the username “Fred” and
the password “Secret” in Windows. I can now import the user data to this new computer
successfully.
•
You can export a Windows domain user to any other computer on the same domain
without recreating this user.
Example: Computer A and B are on the same domain called “Technut”. I work on
Computer A with the username “Fred” and the password “Secret” on the Technut
domain. I have enrolled this user, Fred in OmniPass and remembered passwords. Now I
want to take all of my passwords to Computer B. I export Fred’s and now I go to
Computer B and import Fred’s data. Since A and B are on the same domain, the import
works. If you are unsure what domain you are using, please contact your network
administrator.
•
You can export an OmniPass-only user to any other computer that is running OmniPass
as long as there is no user of the same name already in OmniPass.
•
If you try to import a user with the same name as one that already exists you will get the
following error message: OmniPass cannot import the specified user because a user with
the same name exists.
25
File and Folder Locking (File Encryption)
OmniPass allows you to securely lock files or entire folders on your machine, to protect yourself
from theft or unauthorized viewing of sensitive material. These files are locked with a method
called encryption, in which the data is converted to a form that unauthorized users cannot read.
Once encrypted, the files can only be unlocked, or decrypted with your master password or your
biometric device. Omnipass encrypted files will have the extension of .opf. You can always
search your hard drive for *.opf to find all encrypted files.
We recommend that you set up a new folder to put all of your encrypted files.
Figure 21: Encrypt a File
Encrypting Files or Folders
To encrypt a file or folder, browse to the file or folder that you would like to prevent
unauthorized access to and right click on it. The contextual menu will appear. Choose
“OmniPass Encrypt File” from the menu and left click. OmniPass will ask for your
username and master password or biometric device.
If a folder containing multiple files is encrypted, a window will appear with a list of the
files in the folder and their encryption status. Click Okay when the encryption is
complete.
Figure 22: Encrypting a Folder Containing Multiple Files
26
There are certain folders that cannot be encrypted because it would have a negative
impact on your system and your installed programs. The contents of “C:\Windows” and
“C:\Program Files” cannot be encrypted, nor can the folder where OmniPass is installed
be encrypted.
Decrypting Files or Folders
To decrypt a file or folder, browse to the file or folder that you would like to regain
normal access to and right click on it. The contextual menu will appear. Choose
“OmniPass Decrypt File” from the menu and left click. OmniPass will ask for your
username and master password or biometric device.
Other ways to decrypt files are to right click them and select open or double clicking the
files. Both of these actions will cause a password prompt and then the files will be
decrypted and open. They will stay decrypted unless you decide to manually encrypt
them.
Encrypted Files
Files that are encrypted by OmniPass have a new icon. These files cannot be accessed
until they are decrypted
Figure 23: Locked File Before and After
27
Appendix A: Troubleshooting
Creating a New User
If you are adding an existing Windows user to OmniPass and cannot decide what to put in the
fields, use this table as a guide:
Recommendations for adding an existing Windows user to OmniPass
Operating System
**Windows 98
Windows 98SE
Windows ME
Windows NT
Windows 2000
Windows XP
Classic logon
Windows XP
With fast user
switching enabled
Recommended
Username
Recommended Domain
Recommended
Password
Local Username
Local Computer Name
(pressing TAB after typing
Local Username will fill
this in automatically)
Local Password
Local Username
Local Computer Name
Local Password
Domain
Username
Domain Name
Domain
password
Local Username
Local Computer Name
Local Password
Domain
Username
Domain Name
Domain
password
Local Username
Local Computer Name
(pressing TAB after typing
Local Username will fill
this in automatically)
Local Password
** Note: If you need to access network drives on a Windows domain using Win 9X or ME, you will
need to create a user in Windows that has the same username and password as your network
account. You can do this by clicking on the Start button, choosing Settings, Control Panels, and then
choosing Users.
Windows 9.x/ ME Logon Issues
In Windows 9.X / ME OmniPass can replace the login screen to make the operating system
secure. In order to use this feature, check the box titled “Enable Desktop Security” under the
Settings tab in the OmniPass Control Pannel. Remembering your password is vital because if you
forget it you will not be able to log into your machine.
28
Windows 9.x / ME Network Logon Issues
If you are using a Windows 9.X / ME machine to logon to a network, your Windows password
and username must be identical to your network password and username. You can modify users
in Windows 9.X / ME by going to Start, Settings, Control Panels, and then clicking on Users.
Here you can modify all usernames and passwords.
File and Folder Locking Issues
Certain Files or Folders Cannot be Encrypted (locked)
OmniPass by design will not let you encrypt any files that would prevent programs on
your computer or your operating system from working. Nothing inside your Windows
directory or your program files directory can be locked. It is best to create a separate
folder on your hard drive to keep all encrypted files.
Windows 2K / Windows XP issues
Cannot add Windows users to OmniPass
If you experience a problem adding a Windows user to OmniPass, you may need to make
an adjustment to your local security settings. You can do this by going to Start, Control
Panels (or Settings and then Control Panel if you use Windows 2K), Administrative
Tools, Local Security Settings, and Security Options. Then click on Network Access:
Sharing and Security Model for Local Accounts. The correct setting should be Classic
Local Users Authenticate as Themselves. Please see figure 20 below.
Figure 24: XP/2K Security Setting
29
Cannot Add a User to OmniPass with Blank Password
If you experience a problem adding a user with blank password to OmniPass, you may
need to make an adjustment to your local security settings. Please try the steps listed
above in the Cannot add Windows Users to OmniPass section. If that does not work,
please try the following:
Click on Start, Control Panels (or Settings and then Control Panel if you use Windows
2K), Administrative Tools, Local Security Settings, and Security Options. Then click
on Accounts and Limit account use of blank passwords to console login only. This
setting should be disabled.
Figure 25: Limit local account use of blank passwords
Cannot Use Fingerprint to Log Into Windows XP
If the fingerprint sensor does not work while logging into Windows XP, you may have an
invalid configuration in your Windows user settings. Go to Control Panels, User
Accounts and then click on “Change the way users log on or off.” Make sure that there
are either checkboxes in both of the boxes on this screen or checkboxes in neither.
The fingerprint will not work to log into Windows if “Logon Screen” is enabled but “Fast
User Switching” is disabled.
Dialog Box Appears After Placing Finger on
Sensor During Windows Logon
If you place your finger on the sensor and get the following Dialog box:
30
Figure 26: Windows Logon Failure Dialog
This means that Windows was not able to verify your identity, which could happen for one of the
following reasons:
•
Your Windows password may have changed
•
The network connection may be absent and the cached credentials could not be found
•
The account which are trying to log in has been disabled
This means you need to manually retype your password. Click Reconfirm Password on the
Dialog box and you will see the following Dialog box:
Figure 27: Windows Logon Failure Dialog Box 2
Manually type in your password so your account can be updated. If this does not work and you
are in a corporate environment, please contact your network administrator.
31
Index
A
audience
for this document, vi
audience for Softex OmniPass, vi
Automatically Enter the Protected Site
option, 14
automatically log into OmniPass setting,
19
C
Cannot add Windows users, 30
contents of this manual, vi
D
Decrypt a File. See Unlocking Files or
Folders
E
Exporting Users, 25
F
File and Folder Locking. See Encrypt a
file
Files or Folders Cannot be Encrypted, 30
fingerprint
Add additional fingerprint, 23
remove a fingerprint, 22
I
identity
defined, 21
manage, 21
switch, 21
Importing Users, 25
installing
Card Executive software, 1
L
log into OmniPass, 16
log out of OmniPass, 16
logging into OmniPass
With a Biometric Device, 23
M
master password, v, 14, 15
defined, v
entering, 15
N
No Password
problems with, 31
O
OmniPass
verifying version number, 3
OmniPass control panel, 16
P
Password Changing
with a Biometric Device, 24
Password Vault, 20
prompt for OmniPass Log on at startup,
19
R
remember passwords, 13
remove password from OmniPass, 20
S
Settings tab, 19
Software, 1
Installing, 1
Un-Installing, 2
Upgrading, 2
Verifying, 3
System Requirements, 1
U
Unlocking Files or Folders. See
Decrypting a File
user
add new, 17
OmniPass only, 12
32
remove, 17
Windows user, 11
User Management tab, 17
users
Creating, 10
W
Windows NT files
DISK.SYS, 2
World Wide Web home page, vii
33