1
SOFTWARE MANUAL
Alpha VU E
USER'S MANUAL
DWM-OO1 00-15
REV. BOO
talpha
'niicro
Page ii
ALPHAVUE USER'S IIANUAL
C
'Alpha Micro', 'AMOS', 'AM—lOO',
'AIpha8ASIC', 'AIphaPASCAL', and 'AlphaLISP'
are trademarks of
ALPHA MICROSYSTEMS
Irvine, CA
92714
©1980 — ALPHA MICROSYSTEMS
ALPHA MICROSYSTEMS
17881 Sky Park North
Irvine, CA
92714
ALPHAVUE USER'S MANUAL
Page iii
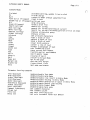
Table of Contents
CHAPTER 1
GETTING STARTED
1.1
1.2
1.3
1.4
1.5
THE KEYBOARD
FILES
CREATING A
NEW
1—1
1—3
1—3
FILE
THE CURSOR AND DISPLAY WINDOW
EDITING TEXT WITHIN A LINE
THE MENU
1.6
1.7 INSERTING AND DELETING CHARACTERS
1.8 DELETING WORDS
1.9 TABS
1.10 FORM FEEDS
1.11 LONG LINES
1.12 ADDING NEW LINES TO THE FILE
1.13 PAGE COMMANDS
1.14 MANIPULATING LINES
1.15 COMMAND MODE
1.15.1 Getting He Ip in Command mode
1.15.2
1.15.3
1.15.4
1.15.5
1.15.6
1.15.7
CHAPTER 2
Finishing an Editing Session
Re—editing
a File
Quitting an Editing Session
Searching
Replacing Text
Moving Blocks of Text
1—4
1—4
1—5
1—6
1—6
1—7
1—7
1—7
1—8
1—9
1—9
1—9
1—10
1—11
1—11
1—11
1—12
1—13
1—13
SCREEN MODE
2.1
LINE EDITING COMMANDS
2.1.1
2.1.2
Forward: Control—L (or right—arrow
key on some terminals)
Backspace: Control—H (or Left—arrow
key on some terminaLs)
2.1.3 Delete: RUBOUT
2.1.4 Insert: Control—F
2.1.5 Scrunch: Control—D
2.1.6 Go to Beginning of Line: Control—U
2.1.7 Go to End of Line: Control—N
2.1.8 DeLete to End of Line: Control—V
2.1.9 Go to Next Word: Control—W
2.1.10 Go to Previous Word: Control—A
2.1.11 Delete Word: Control—v
2.2
2.1.12 Erase Line: Control—RUBOUT
FILE EDITING COMMANDS
2.2.1
2.2.2
2.2.3
2—1
2—2
2—2
2—2
2—2
2—2
2—2
2—3
2—3
2—3
2—3
2—3
2—4
2—4
Down: Control—J (or Down—Arrow Key
or Linefeed Key on some terminals)
Up: Control—K (or Up—Arrow Key
on SOROC Terminals)
Home: ControL—
2—4
2—4
(or HOME Key on SOROC
and Lear Siegler Terminals)
2—4
ALPHAVUE USER'S MANUAL
Page iv
2.2.4
2.2.5
2.2.6
2.2.7
2.2.8
2.2.9
2.2.10
2.3
Ending Page: Control—E
Page Down: Control—T
Page Up: Control—P
Center Cursor: Control—S
Insert Line (Split Line): Control—B
Delete Line: Control—Z
Concatenate Lines: Control—O
2.2.11 RETURN
2.2.12 Next Match: Control—X
CONTRO L COMMANDS
2.3.1 ESCAPE
2.3.2
2.3.3
2.3.4
Break: Control—C
Toggle Entry Mode: Control—\
Toggle Character Insert Mode:
Control—Q
2.3.5
2.3.6
2.4
2—5
2—5
2—5
2—5
2—5
2—6
2—6
2—6
2—6
2—6
2—6
2—7
2—7
Setting Block Markers: Control—P
2—7
Absolute Character Insert Control—S .. 2—8
SCREEN—EDITING MODES
2.4.1
2.4.2
2.4.3
2.4.4
Character Insert Mode
Text Mode
Entry Mode
2.4.5
2—8
2—9
2—9
2—9
Wrap Mode
2.4.4.1
2.4.4.2
2.4.4.3
2.4.4.4
2.4.4.5
CHAPTER 3
2—5
Fields
Next Field
Folding
Line Inse rt
Entry Mode with BASIC 19 Les
(Auto Line Numbering).
Indent Mode
2—10
2—10
2—10
2—11
2—11
2—11
2—12
COMMAND MODE
3.1
3.2
3.3
ENTERING COMMAND MODE
COMMAND FORMAT
3.4
3.5
3—1
COMMANDS THAT ACCESS THE DISK
3.3.1
3.3.2
3.3.3
3.3.4
3.3.5
3.3.6
3.3.7
3.3.8
Finish
3—2
3—3
Save
3—3
Go
3—3
3—4
3—4
Quit
Yank {n) or Yank (filename)
lJnyank {n} or Unyank (filename)
Dir
3—5
3—6
Erase
3—6
STRING SEARCH AND STRING REPLACE COMMANDS
3.4.1
3.4.2
3.4.3
3.4.4
3.4.5
3.4.6
Search
Next
Whole
Replace
Global Replace
Wildcard
BLOCK OPERATIONS
3.5.1
3.5.2
3.5.3
3.5.4
3—1
Copy Block
Delete Block
Move Block
Clear
.
3—7
3—8
3—8
3—8
3—9
3—10
3—10
3—11
3—11
3—12
3—12
3—12
ALPHAVUE USERS MANUAL
3.6
3.7
3.8
3.9
FORMATTING COMMANDS
3.6.1
3.6.2
3.6.3
Center
..
Format
Width
ENVIRONMENT COMMANDS
3.7.1
3.7.2
Push
3.8.1
3.8.2
Split
..
Pop
MEMORY SPLIT COMMANDS .
EDIT
Unsplit
..
3.10 PAGE N
3.11 MARGIN N
3.12 BLANKS
.
...
3.13 PARAMETER SETTING COMMANDS
3.13.1
3.13.2
3.13.3
3.13.4
3.13.5
3.13.6
3.13.7
3.13.8
3.13.9
Text boolean
Wrap boolean
Searchfold boolean
Sblk boolean
Indent boolean
Help? boolean
Comment character
CoLumn n
Field n
3.13.10 Insert boolean
3.13.11 Fold boolean
3.13.12 Space booean
3.13.13 DeLta n
3.13.14 Control booleart
3.13.15 Smart boolean
3.13.16 Abbreviations ....
CHAPTER 4
.
Page v
3—12
3—12
3—13
3—13
3—13
3—14
3—14
3—14
3—14
3—14
3—15
3—15
3—15
3—16
3—16
3—16
3—17
3—17
3—17
3—17
3—17
3—17
3—18
3—18
3—18
3—19
3—19
3—19
3—19
3—19
3—20
EXECUTING VUE
4.1
4.2
4.3
INVOKING VUE
4.1.1
4.1.2
4.1.3
Options
Filename
Extension
ERROR RECOVERY
INITIALIZATION FILE (INI.VUE)
4.3.1 Default=extension
4.3.2 Helpboolean
4.3.3 Startlocation
4.3.4 Go=comniand string$
4.3.5 Textboolean
4.3.6 Wrap=boolean ..
4.3.7 Comment=character
4.3.8 Columncomment column
4.3.9 Space=boolean
4.3.10 Insertboolean
4.3.11 Fold=boolean
4.3.12 Field=character
4.3.13 SearchfoLd=boolean
4.3.14 Indentboolean
4.3.15 Width{number)
4—1
4—1
4—2
4—2
4—2
4—2
4—3
4—3
4—4
4—4
4—5
4—5
4—5
4—5
4—6
4—6
4—6
4—6
4—7
4—7
4—7
ALPHAVUE USER'S MANUAL
4.3.16 Wildcard{wjldcard characters)
4.3.17 Entry=boolean
4.3.18 SbllebooLean
4.3.19 Delta={number}
4.3.20 Controlboolean
4.4
CHAPTER 5
SAMPLE INI.VUE FILE
5.2
A.2
HARDWARE REQUIREMENTS
SOFTWARE REQUIREMENTS
NEW SCREEN MODE COMMANDS
NEW COMMANDMODE FEATURES
A.2.1
Disk Access Commands
Searches
8ock Commands
A..2.4 Formatting Commands
A.2.5 Memory Split Commands
A.2.6 New Menu Features
A.2.7 Parameter Commands
NEW INITIALIZATION FEATURES
A.2.2
A.2.3
A.3
A.4
INDEX
4—8
4—8
4—8
4—8
4—8
4—8
4—9
5—1
5—2
VUE 2.4 RELEASE NOTES
A.i
APPENDIX B
. 4—7
HARDWARE AND SOFTWARE REQUIREMENTS
5.1
APPENDIX A
4.3.21 smart=boolean
4.3.22 Dumbboolean
Page vi
IMPROVED HARDWARE SUPPORT
NEW MENU FORMAT
A—i
A—2
A—2
A—2
A—3
A—3
A—3
A—3
A—4
A—4
A—4
K
ALPHAVUE USER'S MANUAL
Page vii
Quick Reference Guide
Screen Editing Commands:
right
left
up
down
(Control—I.)
(ControL—H or backspace)
(Control—K)
(Control—J or Linefeec4)
page up
page down
(Control—R)
home
(Control—
(Control—I)
center cursor.. (Control—S)
end
return
— also home key on Lear Siegler and Soroc terminals)
(Control—fl
(Controt—M or return key)
insert Line.... (Control—B)
delete Line.... (Control—Z)
c on c a t eriat e .
• (Control—Q)
insert char...
(Control—F)
delete to eot.
(Control—?)
scrunch char.. (Control—D)
delete
erase line....
nextword
(RUBOtJT)
(Control—RijBouT)
next match...
(Control—w)
(Control—A)
(Control—v)
(Control—U)
(Control—N)
(Control—X)
escape
(escape key)
lastword
de leteword...
beg of line..
end of line..
break
toggle entry.
inscharmode..
set marker
(Control—C)
(Control—\)
(Control—Q)
(Controt—p)
ALPHAVUE USER'S MANUAL
Page viii
Command Mode:
Finished
Go
Quit
:finjshed editing, update fiLes to disk
:finish and go
:return to EXEC without updating files
Yank {n) or (Filespec) :read in text
Unyank (n} or {Filespec):write out text
Dir
:disk directory
Erase (Filespec)
:erase a disk file
Search (string)
:search for string
Next (string)
:search for string (starting at cursor)
Whole (string)
:search for string (including portion of fiLe on disk)
RepLace (string)
:replace string with query
Global (string)
:reptace string
Wildcarcf
:set wildcard characters
Copy
:copy a block of text
Delete
:delete a bLock of text
Move
:move a block of text
Clear
:clear block markers
Center
:center a line of text
Format
:format a paragraph of text
Width (n}
:set formatting width
Push
Pop
Split
Unsplit
Edit
Page {n)
Margin {n)
Blanks (n)
Help
:save current environment
:restore earlier environment
:split memory image
:inverse of Split
:return to Screen Mode
:go to new page
:set new left margin
:insert blank lines
:get some assistance
Parameter Setting Commands
Text (boolean)
Wrap Cboolean)
Insert (boolean)
Fold (bootean)
Space (bootean)
Searchfotd {boolean)
Indent {boolean)
Help? (boolean)
Comment (character)
Column (n)
Field (n)
Delta {n)
:enable/disable Text Mode
:enable/disable Wrap Mode
:enable/disable line insert in Entry
Mode
:enable/disable folding in Entry Mode
:enable/disable generation of space in Entry Mode
:enable/disable search case folding
:enable/disable Indent Mode
:enable/disable help menu
:set comment character
:set comment coLumn
:set next field character
:set auto increment value (for BASIC)
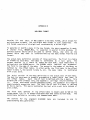
CHAPTER 1
GETTING STARTED
This
chapter is intended as an introduction for new users. It does not
cover every command and option available, but is designed to get you flying
quickly with the most commonly used commands. This chapter is designed to
be read linearly, while the rest of the manual i s intended for reference.
Users familiar with computer operation should skip the first two sections.
The emphasis of this chapter is on editing text (word processing).
The best way to learn how to use an interactive program like VLJE is to sit
and experiment.
Try the examples yourself.
Don't worry about
mistakes. It is impossible to damage the computer from the keyboard.
down
1.1
THE KEYBOARD
The user communicates with VIJE via a keyboard very similar to a typewriter
keyboard. However users not familiar with computer terminals will note that
there are a few important differences between a typewriter keyboard and a
computer terminal.
A normal, typewriter keyboard has about 55 keys.
However, the English
character set is a combination of approximately 90 symbols, including the
alphabet (represented in both upper and lower case Letters), punctuation
marks, and other symbols used very often. In order for the typewriter
keyboard to represent the extra characters, most keys have two definitions.
definition of each key is changed by the action of the SHIFT key. The
extra characters are produced by hitting a key at the same time as the shift
key. The SHIFT key allows 55 keys to produce the English character set.
For computer applications, even the keys for these 90 characters are not
enough.
Additional keys are needed so that the user may control the
computer in addition to entering text. On a typewriter, usually there are
only one or two of these "control" keys available: carriage
return and
The
backspace. An advanced text editor Like VtJE, however, may need over 30 of
these special keys, bringing the number of characters required to over 120.
In order to allow these extra characters to be entered without doubling the
size of the keyboard, most keys are given a third definition. The third
definition is activated by a key that operates in a manner similar to the
SHIFT
key,
called the CONTROL key.
As with the SHIFT key, the CONTROL key
GETTING STARTED
Page 1—2
is depressed simultaneously with another key to produce a character with
meaning. For instance, to erase a word in VUE, the CONTROL and Va
keys are pressed simultaneously. From now on, all references to these
"control—characters" will be made in the form "Control—v,"
where this means
"press the CONTROL and V keys simultaneously."
different
Some control—characters are used so often that terminal
manufacturers
have
added special keys for them so that they can be produced by hitting a single
key.
Unfortunately, some of the keys have not been standardized, so that a
similar key on two different terminals may produce different results.
The
following control keys are implemented on nearly all terminals:
return
linefeed
= Control—ti
= Control—L
backspace = Control—H
tab
= Control—I
escape
= Control—C or .ESC
These keys are used often, so it is a good idea to familiarize yourself with
their locations on your terminal. Many terminals provide other special
control keys. The manual for your terminal should be consulted to find out
what control—characters it produces.
it
is desirable to repeat a given key many times in a row. Many
terminals provide a repeat function for this purpose.
This function is
implemented in two ways. Some terminals, like SOROC 10120s, will
repeat a
key if it is held down for more than a second. Other terminals, like
Lear
Siegler ADM—3s, provide a separate REPEAT key. This REPEAT key works much
likethe SHIFT and CONTROL keys, in that it must be held down at the same
time as the key you want repeated. As long as both keys are held down,
the
desired character will be repeated about 10 times a second.
Often
Throughout this manual, we have adopted some graphic conventions to make our
clearer.
For instance, underlined characters indicate those
characters that the computer prints on your terminal display. For example,
you will often see examples that begin with an underlined dot C.).
The
underlined dot is the AMOS prompt symbol—— the symbol that the operating
system displays when it is ready for you to enter a command. The characters
in the examples that you are supposed to type are not underlined.
examples
Another example is this symbol:
This is the symbol that represents the special key usually labeled "RETURN'
or "RET". At the end of a line that you are supposed to type in,
it means,
"press the RETURN key."
GETTING STARTED
1.2
Page 1—3
FILES
The floppy diskette or disk pack on which the computer
information is
capable of storing hundreds of thousands of characters. stores
tJsualLy,
however,
only a small percentage of that space is
needed for any particular
application. A letter, for
example, may only be 20,000 characters Long
The computer, therefore, allows you to break up the disk
into small sections, called "files." Each file contains a single set of
related information; for instance, a single Letter or computer program.
(about
5
pages).
Since
a
single disk may contain many separate files, both you and the
computer need a way to identify them so that they
may be used later.
In
order to do this, each file is given a name. The name is assigned
to
the
file by you. It is generally a good idea to assign a name to a file that
relates somewhat to the contents of the tile, so that you can remember what
is in the file. Under AMOS, the filename can be
up to 6 characters long.
Some sample filenames are:
LETTER
TAX
ORDER
PLOTS
addition to the filename, AMOS also maintains a zero to three character
extension for each file. The extension tells the computer what kind of data
In
is in the file. The extension may be specifically mentioned by following
the normal filename with a period and the extension. For example:
1.3
We
LETTER.TXT
LETTER.BAK
LETTER.LST
TAX.DAT
— text file with a letter in it
PLOTS.BAS
— a BASIC language plotter program
— backup of letter
— formatted letter ready for printing
— tax data file (probably not
readable directly)
CREATING A NEW FILE
now have enough information to try our hand at some text editing.
that we will need a file.
Let's call our file
"LETTER."
Before
To do
can
create the file, the computer must be turned on, and the operating system
must be running. The AMOS operating system signals that it is running by
printing a period. When this prompt is issued, we can create our file by
typing in "vue letter" followed by
we
RETURN.
.vue letter
XlphaVue Version 2.4
LETTER.TXT does not exist — create it?
After we type RETURN,
telling
name, and then
indicates that the file LETTER does not exist yet. us Weits
now have a chance to
decide if we want to create a new tile. Since we do, type "Y" followed by
RETURN.
VUE
responds
by
GETTING STARTED
Page 1—4
After
a
short delay, a new display appears. The entire screen except for
the first line will be filled with asterisks.
In the upper left hand corner
of the screen, a small, white
block will appear.
1.4
This is the CURSOR.
THE CURSOR AND DISPLAY WINDOW
The cursor is the visual indicator of where we are in our file. Its actual
appearance varies with the terminal used.
On SOROC IQ12Os it appears.as a
small white block; on Hazettine terminals it appears
a blinking polygon.
The
cursor corresponds to the carriage position on as
a typewriter. The next
character entered always appears at the current cursor position, just as a
character entered on a typewriter will appear on the paper at the current
carriage position.
When editing with VUE, the file can be considered to be a giant roll of
paper 510 characters wide and a long as the file. The cursor may be moved
back and forth along a line just as the carriage can be moved on a
typewriter.
Moving up and down in the file is analagous to rolling the
paper back and forth in the typewriter.
Normally, the file cannot be
"rolled"
past
the
end
of the last line, just as the typewriter
cannot be
advanced past the end of a sheet of paper.
Whenever rows of asterisks
appear, they indicate positions off the end of the file, which cannot be
reached. As noted in the last section, when a new file is created, most
of
the display is asterisks.
This is because a new file contains only one
blank line. The rest of the screen is "off the end of the roll." Unlike
ordinary• paper, however, we can easily make the file longer, as if we were
gluing an extra piece of paper onto the end.
Although the file may be as long as desired and up to 510 characters wide,
only a small portion of the file may be displayed at any one time. Usually,
the terminal limits us to 24 lines by 80 characters, but some are smaller
and some larger. Therefore, we can only look at a small "window" of the
file at a time. When an attempt is made to move the cursor past the edge of
this window (for instance, down from the
bottom line of the screen), the
cursor "drags" the window along with it. Therefore, by moving the cursor
around in the file, we can drag the window around in the file and look at
any portion of the file.
1.5
EDITING TEXT WITHIN A LINE
Let's do back to our new file LETTER.
It presently contains just
blank
line, and the cursor is at the very first character of the entireone
file.
Now
enter
the character A. The A appears on the screen at the cursor position
and the cursor moves right one position. As we enter more characters, they
appear on the screen and the cursor moves farther right.
Now suppose you make a mistake on the last character typed in. You typed in
F, but
you really wanted to type in a G. Simply hit the "rubout" key,
usually marked RUB. The cursor backs up one position, and the F disappears.
an
You may now type in the G.
GETTING STARTED
Page 1—5
Perhaps you decide the entire line is wrong.
You could rubout the entire
Line.
However, VUE has a command that wilt delete the line for you. First
type Control—u. The cursor moves to the beginning of the Line.
Now
type
Control—V.
The entire line disappears.
that we have a blank line, type in "Now is the time to edit
computers". Then type Control—U to get the cursor to the beginning
of
line. We can now experiment with moving the cursor around in the line.
Now
with
the
First press Control—I..
On
some terminals, like SOROCs and Lear Siegler
ADM—ls and 2s, a separate key is set aside for this function. It is marked
with an arrow pointing right. Entering Control—I. causes the cursor to move
one position to the right. Now enter Control—H. This may also correspond
to a key with a left arrow, or a key marked BACK. Entering Control—H causes
the cursor to move one character to the left. In other words, the cursor
backspaces.
Now continue pressing Control—Ls until you reach the end of the line.
Control—I. again.
Nothing happens.
Enter
The cursor will not move past the end of
the line. This is an important difference between VUE and a typewriter.
When using VUE, blanks are not the same as nothingness. To prove this, type
a
few blanks. The cursor moves forward. The cursor may now be moved back
and forth within the blank area as well as within the rest of the line, but
it still may not be moved past the last blank.
We now know three methods for moving the cursor around in the file:
1. Control—U (cursor to beginning of line)
2. Control—L (advance cursor one position)
3. ControL—H (backspace cursor one position)
are three more commands for moving the cursor within a line.
Control—k) moves the cursor forward one whole word, and Control—A moves the
cursor back one word. Control—N moves the cursor to the end of the current
line. These commands are very useful for moving around quickly in your
There
text.
1.6
THE MENU
already learned the functions of five control—characters. When
using VUE, it can be difficult to
remember
what
all the
control—characters do.
Because of this, a built in "menu" has been
provided. To display the menu, simply press the ESC key.
The
screen is
cleared, and a menu of all available commands is displayed. Once you have
found the command you want, hit ESC again to return to normal text viewing.
We
have
first
In
addition to the control—character menu, additional menus may be
available.
More information on these additional menus is given in the
section on Command mode.
GETTING STARTED
1.7
Page 1—6
INSERTING AND DELETING CHARACTERS
Many times you will make a typing error and not notice it for quite
some
time.
Or you may simply wish to change the middle
of
a
line
at
a
Later
date. With VUE this is no problem. For instance, suppose you typed in
the
st ring:
Now is the tme for aLt go od men
course, you realty meant "time" and "good." To fix the problem, first
move the cursor to the "m" in "tme."
Then press
All the
characters to the right of the cursor move right oneControl—F.
character, leaving a
Of
blank at the cursor position:
Now is the t me for alt
go od men
You may now type in the "i", correcting the first error.
The second error may now be corrected.
the cursor to the blank between
"go" and "od". Then depress Control—D. Move
The blank wi IL disappear, and the
entire line to the right shifts left to fill the space. The line is now
correct.
Sometimes it is necessary to insert a lot of characters.
It is then
inconvenient to type in a lot of Control—Es. A special mode is provided for
this purpose called auto insert mode. When in this mode, every character
typed in activates an automatic insert. This mode is toggled on and off by
Control—Q.
in our previous example we had really wanted to say "the right
time." We could, of course, just move the
cursor to the first character of
"time," press Control—F six times, and then type in "right." To use auto
insert mode, first move the cursor to the first character of "time." Then
press Control—Q.
The terminal beeps, indicating that you are now in auto
insert mode and you see a Q in the top right—hand corner of your terminal
screen. Now type in "right." As you type in the word, the rest of the Line
Suppose
moves
over
to
make room.
and the rest of the line will
You can type in as many characters as you want,
move to make room.
Control—Q again to return to normal mode.
1.8
After
When you are
done,
press
DELETING WORDS
our
last
example,
we
decide
"right" in the sentence after all.
that
we really didn't want the word
One way of getting rid of it is with six
Control—os. However, a single command will do the whole job.
Simply move
the cursor to the first character of the word, and press Control—V.
The
word and the blank following it disappear, and the rest of the line moves in
to fill the space. If the cursor had not been at the beginning of the word,
only the end of the word would have been erased.
is truncated at the current cursor position.
In other words,
the
word
GETTING STARTED
Page 1—7
The Control—V function introduced earlier also truncates.
We used Control—V
at the beginning of the line, and the entire line was erased.
If Control—v
is used somewhere besides the beginning of the Line, only the line to the
right of the cursor is erased.
1.9
TABS
are used to columnize data. A tab is entered either with the TAB
key
or with ControL—I. The tab stops are set at every eight characters.
Tabs
When first using WE, it may take a while to get used to the behavior of
tabs. Although they appear as several spaces on the screen, they are stored
internally as one character. Therefore, these spaces on the screen do not
really exist. You may recall that the cursor cannot be moved to a position
where where there is no character, such as beyond the end of a line. The
cursor also may not move into the middle of a tab field. It may however,
around a tab field.
As
the cursor moves along a Line with tab
characters in it, it will appear to jump across the tab areas. Therefore, a
character may not be added in the middle of a tab field, only at either end.
It's not really as confusing as it sounds. A few minutes of practice and
you'll be an expert.
move
1.10
FORM FEEDS
When VUE encounters a form feed
(a ControL—L) in your text file, it replaces
the form teed with a line of * symboLs. This makes the page breaks easy to
find. When you leave VUE by using the F (Finish) command, VUE converts the
line of
symbols back into a single form feed. You can safeLy use the
symbol in your file; VUE only converts a line of * symbols into a form feed
if the line is as wide as the screen.
1.11
It
LONG LINES
earlier that lines in the file could be up to 510
Unfortunately, very few terminals are this wide, so we can
only look at a small portion of such a long line at one time. If we fill a
line on the screen with characters and then keep typing, we find the
characters we have already typed in moving to the left. The characters at
the left end of the screen disappear. The column at the extreme left of the
screen is no longer column zero.
We
can keep typing until the SlOth
character has been entered. At that point, the cursor no Longer advances.
By using the six cursor positioning commands we can move the cursor back and
forth through our line.
The windowhl displayed will move around as
necessary, so we can view the entire line.
was
mentioned
characters long.
GETTING STARTED
1.12
Page 1—8
ADDING NEW LINES TO THE FILE
to now, all our operations have taken place on a single line.
files, however, are nearly always Longer
than one line! To add a new Real
line
to the file, press RETURN. The cursor moves down
to
the
beginning
of
the
next line, and a row of asterisks disappears. The file is now two lines
long. We can make the file as long as we want by simply continuing
to press
RETURN.
Up
Now
that
we have our new lines, how can we move around in them?
cursor is at the end of the file, we probably want to
press Control—K.
go
up.
Since the
To
do
so,
(On some terminals the up—arrow key corresponds to this
The cursor moves up one position. Each time Control—K
control character.)
is pressed, the cursor moves up one line, until the beginning
reached.
of the file is
to get back down. We have two choices. The first is Control—a. (On
some terminals this may be the dbwn arrow key or the FEED key.) This moves
the cursor down one line. If possible, the
cursor will stay in the same
column. The second choice is the RETURN key. This also moves the
cursor
down one
line, but the cursor always goes to column zero. Note that
the
RETURN key does not make the file Longer unless you are already at the last
line in the file.
Now
When
the
cursor moves from one line to another,
an important consideration
is the tact that the cursor cannot wind up in a position
where there is no
character. If after changing lines, there is no character in the column
the
cursor was in before, the cursor moves until it is pointing to a character.
For example suppose the file contains the text:
This is an example of text
editing
I
cursor
cursor after Control—J
before Control—J
Before the Control—a, the cursor pointed just past
end of the first
line. Now we tell the cursor to move down a line. the
It
does
so, but notices
that it is now beyond the end of its new line. Therefore, it moves
backward
until it reaches a character (the carriage return at the end of the line).
If we now tell it to
move up a line (Control—K), the cursor simpLy moves up,
there is a valid character in this position. (In this case, a blank.)
These rules aLso apply to tab fields. If the cursor finds itself in the
middle of a tab field after moving from one line to another, it moves left
until it encounters a character.
since
If you have been trying the examples above on the computer, try some
now.
Get the feel of the commands already introduced. While
you are at it, type in a couple of pages of text. You will need a couple of
pages of text to try out the commands in the next section.
experimenting
GETTING STARTED
1.13
Page 1—9
PAGE COMMANDS
We have already learned how to move the cursor up and down in the file one
line at a time.
Often, however, we want to move much faster than this.
Four commands are available to move an entire page at one time. The first is
Control—S.
(The HOME key produces this character on SOROC and Lear Siegler
terminals.)
This command moves the cursor to the beginning of the entire
file. The Control—T command
moves the cursor down a page
screenful,
usually 24 Lines) at a time. Control—R moves the cursor up(one
one page. The
final page command is ControL—E, which moves the cursor to the last line in
the file.
When you use a ControL—E, the Last 1/4 of the screen is tilled
with asterisks that signify the end of the file.
1.14
MANIPULATING LINES
We already know how to add linesfo the end of a file, but suppose we need
to add more lines in the middLe of a file? VIJE provides for this need.
First, move the cursor to the beginning of the Line. Then press Control—B.
The
cursor does not move, but the line the cursor was on and alL the lines
below it move down one, Leaving a blank line behind. If more blank lines
are needed, press Control—B again.
course, sometimes what you really want to do is delete lines. This
function is also provided. Simply move the cursor to anywhere within the
line to be deleted. Then press Control—Z. The entire line disappears, and
all the lines below it move up to fill in the space previously used by the
deleted line.
Of
addition to inserting or deleting lines, it is also possible to split a
line in two or to concatenate ('i.e. join) two lines. To split a line, move
the cursor to the point in the line where the line is to be split. Then
press Control—B. The line splits, with the right half of the line moving
down to the next line. Note that Control—B is also the command that inserts
a blank line. In fact, inserting a blank line is really splitting a line at
In
its beginning.
concatenate two lines, move the cursor to anywhere in the upper line to
be concatenated. Then press Control—O. The line below the cursor moves up
and joins the end of the line that the cursor is on, creating a new line
consisting of the two old lines. This command is ignored if the new line
would be longer than the maximum of 510 characters.
To
1.15
Up
COMMAND MODE
to now, we have been using VUE in SCREEN
you are editing is always visible.
only
in
MODE.
Some commands,
another mode, called COMMAND MODE.
In Screen mode, the text
however, are available
In this mode, the text you are
editing is not visible. This mode is used for non text related
like
commands,
reading from and writing to the disk. To get into Command mode when
you are in Screen mode, simply type ESC. The screen is cleared; then VIJE
displays the name of the file it is editing and the amount of free space
GETTING STARTED
Page 1—10
left in memory.
approximately 500
(NOTE:
If
the
of
amount
free
gets
under
If, while in Command mode, you decide to go back to Screen
mode,
press the ESC key. You are immediately returned
to Screen mode.
simply
bytes,
space
some of your file should be written to the disk.
See the Unyank command, Section 3.3.5, "Unyank".)
VUE then prints the menu.
Finally, a > will appear on the fifth line of the screen.
prompt symbol, which means that VUE is in Command mode The > is the VUE
and is waiting for
your command.
rest
of this chapter discusses a few of the commands you can use whiLe
NOTE:
These commands can be altered
your system within
a certain range to help meet specific needs. For the on
most part, in this
manual we will assume that you are using VUE with aLl parameters set as they
came on your System Disk.
The
in Command mode.
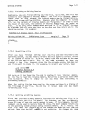
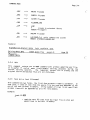
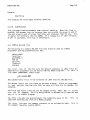
1.15.1
Getting Help in Command mode
Normally,
when
Command
mode
comes up, it prints a menu of screen control
After the first command (or just a RETURN) is entered,
however, a
new menu is displayed. Usually, this menu describes the VUE
Command
mode
commands.
However, additional menus may be avaiLable.
To find out what
menus are available, simply type HELP,
commands.
followed by a RETURN:
AlphaVue 2.4 Status:
Editing INTRO.TXT
space
fold srchfold
2630 bytes free
text
margin 0
Page 20
>HELP @A
Help is available for:
SCREEN
COMMAND
TXTFMT
BASIC
VUE responds with a list of the available menus.
get more information
one of the subjects listed, type HELP followed by To
the subject name:
AlphaVue 2.4 Status:
Editing INTRO.TXT
space
fold srchfold text
2630 bytes free
margin 0
Page 20
>HELP TXTFMT &D
TXTFMT Text Processor Commands:
F)ormat
— format mode
Number
— set page number
U)nformat
— unformat mode
P)age
— eject page
continued list of TXTFMT
commands
on
Page 1—11
GETTING STARTED
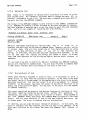
1.15.2
Finishing an Editing Session
EventuaLly, you wiLl finish editing your new fiLe. Up to now, your file has
existed in your computer's internal memory. The file is in internal memory
rather than on disk because the internal memory may be changed quickly,
making fast screen editing possibLe. However, when the computer is turned
off, alL the contents of internaL memory are "forgotten." In order to save
the resuLt of your work, the contents of internal memory must be saved on
To do this, enter Command mode and type in "F" or "FINISH" foLlowed
disk.
by a RETURN. VUE wilL save your text on the disk and then return you to the
operating system. For example:
AlphaVue 2.4 Status: space
Editing LETTER.TXT
foLd
srchfold text
24856 bytes free
Page 12
margin U
>FINISH....
1.15.3
Re—editing a File
you have finished editing your new fiLe and have returned to the
operat i ng system, you may n eed to re—edit the file again to correct errors
or to expand or revise it. To do so, simpLy type VUE followed by the name
of the file you want to edit. This is the same procedure as when you
created a new file. Howeve r, since the file already exists, VUE does not
After
ask if you want to create it.
For exampLe, to re—edit your letter, type:
.vue letterED
ALphaVue Version 2.4
Loading LETTER.TXT
VUE teLls us it has found the file and is loading it into internal
memory.
the fiLe is read into internaL memory, VUE prints a period as every 64th
line is read in. This is simply to Let you know that everything is
As
proceeding normally.
When
the
entire file has been read in, the screen switches to a display of
the first page of your file.
re—editing your file.
1.15.4
You are now
in
Screen
mode
and
may
begin
Quitting an Editing Session
VUE
provides so many powerful functions for editing your file, it is
possibLe to edit your file "to death." For instance, you may accidentally
erase 50 lines of text you really wanted to keep. If this happens, the QUIT
command
can be used to restore those 50 lines. The QUIT command returns you
to the operating system without saving internal memory. As a result, the
Since
disk file does not contain any of the changes you made the last time you
edited. Note that the QUIT command is not selective. ALL changes you made
GETTING STARTED
Page 1—12
are deleted, even if you wanted some of them. For instance, if you typed in
50
lines of text before deleting the other 50 lines, you can not recover
both the 50 deLeted Lines and the 50 new lines; you have to make a choice
between them.
To
invoke
For exampLe:
the quit command, simply type in Q or QUIT followed by a RETURN.
AlphaVue 2.4 Status:
space
fold srchfold text
23458 bytes free
Editing LETTER.TXT
margin U
Page 9
>Q &D
1.15.5
Searching
A common need when editing is to find a particular word or string of
characters in a fiLe. For instance, you might want to find where you had
used a person's name in a file, or where a particular section of a document
is located. VUE does this searching for you automatically, using the SEARCH
command.
The
SEARCH
command consists of S or SEARCH followed by a blank
followed by the string you are searching for. For example, suppose you were
editing this manual, and wanted to find every reference to the cursor.
You
would type:
>S CURSOR
(At this point, it should be noted that the search command considers upper
and lower case letters to be the same. Therfore, CURSOR is the same as
cursor and Cursor.)
If VUE finds the word CURSOR anywhere in the file, it displays the page on
which the word appears, with the cursor on the word itself. You are now in
Screen mode, and can edit with the normal screen editing commands.
After looking at and possibly editing the file around the first occurrence
of the word CURSOR, you may need to look at the next place in the file where
the word CURSOR exists. To do so, press Control—X. If VUE finds another
occurrence of the word CURSOR, it displays the new location of the word, and
again allows you to look at and edit the area. You may repeat this sequence
until
file.
you
have
located
every occurrence of the word CURSOR in the entire
When VUE cannot find the word you are
searching
for,
it
Command mode so that another SEARCH command may be executed.
returns
you
to
Page 1—13
GETTING STARTED
Replacing Text
1.15.6
Many
times
it is necessary to replace every occurrence of a word in a file
with another word.
For instance, you might want to change the word
CRT
to
Terminal everywhere in the file. VUE provides a command which does most of
the work for you; the REPLACE command.
The format of the REPLACE command is very similar to the SEARCH command——an
R
or REPLACE followed by a blank followed by the word you want to replace.
VUE then displays a question mark to ask you what you want the word replaced
with.
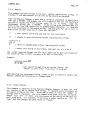
Let's try our example of replacing CRT with Terminal.
AlphaVue 2.4 Status: space
fold
srchfold text
margin 0
3064 bytes free
Editing LETTER.TXT
Page 2
>REPLACE CR1 1!D
Tlerminal ED
VUE will then begin searching for the word CRT, and if it finds it, it
displays the word just as the search command does. However, you will not be
in Screen mode. VUE will only accept one of five characters here as valid
input —— a Y, Q,N, Control—C, or ESC.
string.
hit N,
If
you
hit
Y,
VUE
replaces
the
If you
In either
In this case, the word CRT would be replaced with Terminal.
VUE
does
not
replace the string, but leaves it alone.
case, VUE then searches for the string CRT again, and the whole
process
is
repeated.
If you type in Q, ESC or Control—C, VUE will terminate the REPLACE command,
and you are returned to Command mode. You are also returned to Command mode
if VUE cannot find any more occurrences of the word in the file.
1.15.7
Moving Blocks of Text
Often, when editing a document or piece of text, it is necessary to move a
large block of text from one location to another. To do this, first move
the cursor (while in Screen mode) to the beginning of the block to be moved,
and press Control—P. The line the cursor is on wilL now appear in reduced
intensity on the screen. Now move the cursor to the end of the block to be
moved, and press Control—P again. All the text in the block wiLl now appear
in reduced intensity.
The cursor shouLd now be moved to the desired location of the block of text.
In
The cursor cannot be inside the marked block during this operation.
otherwords, you cannot move a block to be inside of itself. Press ESCAPE to
get into Command mode, then enter the command MOVE followed by a carriage
return. VUE will move the block of text to the new location and return you
to Screen mode. The block is removed from its old position.
If desired, you can copy the block instead of moving it. In this case, the
block is copied to the new location, but the old copy is not removed. To do
this, mark the block as for a move, but enter the command COPY instead of
MOVE.
GETTING STARTED
ALso,
Page 1—14
the marked block may simply be removed from the text with the command
The text found after the deleted block is brought together with any
text that preceded the deleted block.
DELETE.
When you are through with the marked block, it may be
CLEAR command.
"unmarked"
This restores aLl the text to fuLl intensity.
with
the
Some terminaLs, like ADM3As, do not have the reduced intensity feature. See
Chapter 3, "Command Mode," for methods for moving blocks of text with these
termi na Ls.
k
CHAPTER 2
SCREEN MODE
VUE has 29 commands that you can use while in Screen mode; you'll use these
rapidly position the cursor to any point in your text, and to
commands to
add and delete characters and words.
If any command is unclear, experiment. The result of any screen command is
immediately visibLe, so there is never any question as to what is happening
to your text. What you see is what you get!
Some terminal drivers may redefine the control characters used to
In particular, some Hazeltine terminals use
activate VUE commands.
different control characters than the ones described in this manuaL.
(NOTE:
Consult
the
question.)
2.1
sources
of
the terminal driver you are using if there is any
LINE EDITING COMMANDS
These comands are used to edit within a tine of text. A line of text is all
of the characters between two carriage return symbols.
VUE
can accept a
line of up to 510 characters.
you add or erase characters, this action takes place at the current
Move
the cursor, using the commands
cursor position on the text line.
described in this and the next sections, until it is at the point in the
When
text that you wish to change. At that point you can change the characters
there by simply typing your new text; the new characters will overwrite the
old characters on the line. To insert characters into a text line, use the
Insert command or enter character insert mode (see Section 2.5.1, "Character
Insert Mode").
To
delete characters, type a RUBOUT, use the SCRUNCH
command, or use the various word, line, and block—of—text delete commands
described later in the manual.
Page 2—2
SCREEN MODE
2.1.1
To
r
Forward: Control—L
move
Control—L.
cursor from left to right along a Line of text, type a
Each ControL—L moves the cu rsor one character position to the
the
When you reach the end of the text Line, the cursor stops. If the
new position of the cursor would be off the screen (because the text tine is
wider than the screen line), VUE shi fts the line left so that the cursor
right.
remains on the screen.
2.1.2
To
Backspace: Control—H
move
the cursor from right to left along a
Each Control—H moves the cursor Left one
line of text, type a
position.
When the cursor reaches the beginning of the line, the cursor stops. If the
ControL—H.
character
position of the cursor would be off the screen, VUE shifts the line right so
that the cursor remains on the s'creen.
2.1.3
Delete: RUBOUT
you
When
hit
the
RUBOUT
key,
replacing characters with blanks.
the cursor backspaces from
If you are in character
right to left,
insert
mode,
however, a RUBOUT acts as a BACKSPACE command (see above) and a SCRUNCH
command (see Section 2.2.5, "Scrunch: Control—b").
2.1.4
Insert: Control—F
To insert a blank into a text line, type a Control—F. Unless you are in
character insert mode, you wi LI want to type a Control—F for every new
character that you insert in a Line; otherwise VUE will overwrite the old
characters with the new ones
2.1.5
Scrunch: Control—D
delete the character to the right of the cursor, type a Control—b; this
removes the character, and shifts all of the characters from the right of
To
the cursor to the end of the line left one character—position.
2.1.6
Go to Beginning of Line: Control—U
the cursor to the beginning of the current line, type a Control—U.
zero until you
leave the line.)
To
move
(Side effect: if the left margin was not zero, it is set to
Page 2—3
SCREEN MODE
2.1.7
Go to End of Line: Control—N
To move the cursor to the end of the current Line, type a Control—N. If the
line is Longer than the screen width the left margin is shifted so that the
end of the Line is on the screen.
2.1.8
Delete to End of Line: Control—V
To delete aLL of the characters at and to the right of the cursor untiL
end of the line, type a Control—V.
2.1.9
the
Go to Next Word: Control—W
the cursor to the beginMng of the next word, type a Control—W. As
move
you type Control—Ws, the cursor continues to move to the right until it
To
reaches the end of the line. The cursor stops at the end of the line unless
you are editing a text file (i.e. Text Mode is on), in which case the cursor
moves to the first word at the beginning of the next line.
2.1.10
Go to Previous Word: Control—A
To move the cursor to the beginning of the previous word on the Line, type a
Control—A. As you type Control—As, the cursor stops at the beginning of the
Line
unLess
you
are
editing a text file (i.e. Text Mode is on), in which
case the cursor moves to the end of the previous Line.
2.1.11
Delete Word: ControL—V
To delete all characters from the right of the cursor up to the beginning of
the next word, type a ControL—V.
If the cursor is at
the
of
beginning
a
If you are
in a field of blanks, VUE erases all of the blanks in the fieLd to the right
of the cursor. If you are in the middle of a word, VUE deletes the rest of
the word and any trailing blanks.
word,
deletes that word and any blanks trailing that word.
VUE
Control—V does not delete tabs. If you deLete a word before a tab, VUE
replaces the word with tabs so that any characters following the traiLing
tab do not move.
VUE works this way so that you can change items in one
For
column of text without disturbing the placement of other columns.
A
example,
if
you
deLete
an
comment fieLd wiLl not move.
Scrunch command.
operand
in an assembly language program, the
To delete a tab, use the
RUBOUT
key
or
the
SCREEN MODE
2.1.12
Page 2—4
Erase Line: Controt—RUSOUT
delete aLl the characters in the current line, type a Control—RUBOUT.
This command is equivaLent to a Control—U followed by a Control—V. The line
To
itself is not deleted as it is with the Control—Z command.
2.2
FILE EDITING COMMANDS
Use the foLlowing commands to move the cursor up and down through
and to manipulate entire lines of text.
2.2.1
To
the
file
Down: ControL—J (or Down—Arrow Key or Linefeed Key on some terminaLs)
move
the
cursor down from bne line to the next, type a Control—J. When
you reach the end of the text, the cursor stops. As it moves down the
screen, the cursor stays in the same coLumn position on the screen unless it
encounters a tab or a blank line (see Section 1.9, "Tabs"). If you try to
move the cursor off the bottom of the screen, VUE moves the screen display
(the "window") up a line so that the cursor stays on the screen.
2.2.2
Up: Control—K (or Up—Arrow Key on SOROC Terminals)
move
the cursor up to the previous line, type a Control—K. When you
reach the beginning of the text, the cursor stops. As you type Control—Ks,
if you try to move the cursor past the top of the screen, VUE moves the
screen display down 12 Lines, and the cursor is in the middle of the screen
at the line that was previously off of the screen. As the cursor moves up
the screen, it stays in the same column position unLess it encounters a tab
or a blank line (see Section 1.9, "Tabs").
To
terminals, like ADM2s, support reverse scrolling. On these terminals,
VUE will scroll the display down one Line when it reaches the top of the
screen instead of 12 lines as described above.
Some
2.2.3
Home: Control—
(or HOME Key on SOROC and Lear Siegler Terminals)
cursor to the beginning of the first line of text, type a
(or hit the HOME key). The first page of text is displayed, with
the cursor in the upper left hand corner of the dispLay.
To
move
Control—
the
Page 2—5
SCREEN MODE
2.2.4
To
Ending Page: Control—E
cursor to the end of the last page of your text, type a
The cursor appears at the beginning of the last Line of text.
lower 1/4 of the screen dispLay consists of Lines of asterisks,
move
the
ControL—E.
The
indicating that you are seeing the end of the text file.
2.2.5
Page Down; Control—I
The next
To move the cursor one page down in your text, type a ControVT.
If the cursor position before the Page Down
page of text is displayed.
command was less than one page from the end of the file,
look the same as if you had used the Ending Page command.
2.2.6
the
will
screen
Page Up: ControL—R
To move
the cursor one page back in your text, type a Control—R. Ihe
previous page of text is displayed. If you were within one page of the
beginning of your text, the display looks the same as if you had entered a
Home command.
2.2.7
Center Cursor: Control—S
The Center Cursor command tells VUE to redispLay the screen so that the line
of text containing the current cursor position is in the middle of the
screen.
2.2.8
To
Insert Line (SpLit Line): Control—B
insert
a blank line into your text file (or to split an existing Line),
If the cursor is at the front of a Line, a Control—B
type a Control—B.
inserts a blank
Line (that is, a carriage return symbol alone on a line).
If the cursor has text to the Left of it on the Line, a Control—B splits the
line into two by inserting a carriage return at the cursor position.
2.2.9
Delete Line: Control—i
To deLete a line of text (or a bLank Line), type a
ControL—Z.
VUE
erases
the line and moves the text below the cursor up one Line on the screen.
SCREEN MODE
2.2.10
To
Page 2—6
Concatenate Lines: Control—O
two lines of text, type a ControL—O.
combine
VUE adds the Line of text
below the cursor onto the end of the line of text that contains the cursor.
lines
cursor move up one line on the screen. If the merged
than 510 characters, VUE does not execute the
Concatenate Line command; instead it rings the terminal bell..
ALL
below the
be
Longer
Line would
2.2.11
RETURN
move the
cursor to the beginning
(sometimes labeled RET on your keyboard).
To
of
the
next Line, type a RETURN
If you are already at the end of
your text, a RETURN creates a new line by entering a carriage return symbol.
(If
you
are in entry mode you can aLso cause RETURN to begin a new line of
text even if you are not at the end of text (see Section 2.5.4, "Entry
Mode").
This is very useful when you are entering new text into the middle
of a file.)
2.2.12
Next Match: Control—X
To find the next occurrence of a string you entered to the Search command
(see Section 3.4.1, "Search'), type a Control—X. The display on the screen
is of the page in the text file in which the string occurs. The cursor is
at the beginning of the found string. To look for the next occurrence of
the string in the file, type another ControL—X. If VUE cannot find another
occurrence of the string, it returns to Command mode.
2.3
CONTROL COMMANDS
Control
commands
do not
change the text or move the cursor, but they do
select various editing modes and perform special control. functions.
2.3.1
ESCAPE
The ESCAPE key (sometimes labeled ESC or ALT MODE on your keyboard), enables
you to switch between Screen and Command modes. You may enter Command mode
at any time while editing by typing an ESCAPE. You may return to Screen
mode by typing an ESCAPE after the Command mode prompt.
2.3.2
Break: Control—C
commands
to VUE than it can process
immediately.
For example, you might hold down the CONTROL and the 7 keys,
and so enter 10 or 20 Delete Line commands. VUE saves these commands that
you enter until it can process them. To clear the VUE storage area of
It is possible to enter many more
SCREEN MODE
Page 2—7
unprocessed commands, type a Control—C. Thig is a useful thing to be able
to do when you've typed ahead a great many commands, and you want to
interrupt VIJE from processing them all.
2.3.3
Toggle Entry Mode: Control—\
Type a Control—\ (Control—Backslash) to leave or enter entry mode (see
Section 2.5.4, "Entry Mode").
When
you are in entry mode, you see an
uppercase I in the upper right hand corner of the screen display.
VUE
reminds you that you have entered or left entry mode by sounding the
terminal beLl when you type a Control—\.
2.3.4
Toggle Character Insert Mode: Control—Q
To leave or enter character insert mode, type a Control—Q
(see Section
2.5.1, "Character Insert Mode"). To remind you that you are in Character
Insert Mode VUE displays an uppercase Q in the upper right hand corner of
the screen.
2.3.5
Setting Block Markers: Control—P
AlphaVue
supports
variety of operations on blocks of text. Among other
a
block of text.
In order to
block of text, the block must be defined in some manner. To
a
operations, you can move copy and delete
operate
on
a
define a block, the command Control—P is used.
To define a block of text, move the cursor to one end of the desired block.
Press Control—P.
The
line the cursor is on is redisplayed in reduced
intensity. Now move the cursor to the other end of the desired block and
press Control—P again.
The entire block of text is now redisplayed in
reduced intensity.
Until the markers are cLeared in Command mode (See Section 3.5.4,
all
the
text
"Clear'),
in the marked block wilL appear in lower intensity. You may
edit text in the block, and any new text inserted into the bLock also
appears in low intensity.
size of the block may be varied by moving the cursor and pressing
Control—P again. If the cursor is above the top of the current block, the
block is extended upwards. If the cursor is beLow the top of the current
The
block, the cursor position replaces the old bottom of the block.
Some terminals do not support
reduced intensity display.
The
Control—P
these terminals; however, it is not very convenient
because the block is not visible. For such terminals, an alternate method
of defining blocks is available, using delimiting symbols in the text. The
delimiters are:
command
will
work
on
SCREEN MODE
Page 2—8
— start block of text
— end block of text
Example:
text in a file
E*this is some text
hi there
The exampLe delimits the string "this is some text."
For more information on blocks, see Section 3.5, "BLOCK OPERATIONS."
2.3.6
AbsoLute Character Insert: Control—G
Normally, VUE uses control characters to control its operation in Screen
mode, and control characters are not aLlowed in the file.
However, some
applications may require control characters in a file. If you wish to edit
a
file with control characters in it, your initialization file should
contain the statement CONTROL=TRLJE. (For further infoimation, see Section
4.4, "INITIALIZATION FILE.") Otherwise, VUE removes all control characters
as it reads the file into memory, and the Control—C command is disabled.
(NOTE:
VUE
automatically assumes that CONTROL=TRtJE for files with a .LST
extension)
If
CONTROL=TRLJE,
the
Control—C
command
allows you to enter
control
The •key typed in after the Control—C is inserted
into the tile at the current cursor position, even if it is a control
character.
(However, carriage returns, linefeeds, and RUBOUTS may not be
characters
in
the
file.
inserted into the file.)
Once a control character has been
inserted into the file, it is displayed
as
an up arrow () followed by a letter representing the control character.
For instance, if the character 04 hex appears in the file, it is displayed
as "D." As the cursor moves along a line with control characters in it, it
appears to jump across the control characters, just as it jumps across tab
fields.
SCREEN MODE
2.4
Page 2—9
SCREEN—EDITING MODES
Screen
mode
encompasses several character—entry modes that affect the way
VIJE handles your text. These modes are character insert mode, entry mode,
text mode, wrap mode, and indent node: Character insert mode allows you to
easily insert text into the middle of a line; text mode is useful when
editing text files; wrap mode automatically adds carriage returns at the end
of the Line; entry mode is designed to make easier the task of entering
formatted text (e.g., assembly Language programs); and indent mode is usefuL
when entering structured—language programs, such as Pascal
Any combination of modes may be used at one time.
2.4.1
or
C
programs.
Character Insert Mode
VUE
usualLy overwrites existing text with new characters; that is, VUE
normalLy replaces the old characters at your current cursor position with
the new characters that you are entering.
To insert characters you use the
Insert command (Control—F) to enter blank spaces which are in turn replaced
by your new characters; or use the Insert line command (Control—B) to create
a blank Line on which to place your new text. This is somewhat inconvenient
when you want to add a few words in the middle of a text line.
Character insert mode allows you to enter characters WITHOUT overwriting
existing characters. That means that as you enter characters, the existing
characters on the line are shifted over to the right to make
room for the
VUE usuaLly responds to the RUBOUT key by backspacing and
writing a blank over the character you want to delete; in character insert
mode, a RUBOUT performs the same function as a BACKSPACE and a SCRUNCH
command. As you delete characters, the line of text shifts to the
left to
new
characters.
close up the gap.
Remember that Control—Q toggles the Character—Insert mode
2.4.2
Text
Text Mode
Mode changes the definitions of the Go to Next Word (Control—W) and Go
Normally when using these commands,
to Previous Word (Control—A) commands.
the cursor stops when it reaches either end of a line.
the
cursor
If Text Mode is set,
will continue to the next or last Line of text.
Text Mode also
disables all the features of Entry Mode except for the auto line insert
after carriage return.
Text Mode is turned on and off in either Command
mode or the initialization file.
(NOTE:
VUE automatically
Mode when you are editing files with a .TXT extension.)
turns
on
Text
SCREEN MODE
2.4.3
Page 2—10
Wrap Mode
Mode
allows you to enter text without having to worry about entering
carriage returns. When the cursor reaches the end of the screen, VUE
automatically creates a new line, and moves the last word typed into the new
line.
You
may enter
text continually without worrying about entering
carriage returns.
Wrap
Note that Wrap Mode only works when
you first enter text.
In
other
inserting a character in the middle of a line wilL not cause the lastwords,
word
on that line to wrap around. Wrap Mode is turned on and off either in
Command mode or the initialization
2.4.4
file.
Entry Mode
When editing text files (with Ten Mode on), you will find entry mode usefuL
for inserting lines of text into the middle of your file. Usually (if you
are not at the end of your text) a RETURN tells VUE to simply move the
cursor to the beginning of the next line. When you are in Entry Mode, a
RETURN tells VUE to create a new line below the current line of text.
This
allows you to enter text without using the Insert Line command (Control—B).
editing files with Text Mode off, Entry Mode enables a variety of
functions. Some of these functions are set up by the VUE initialization
file, INI.VUE (see Section 4.4, "INITIALIZATION FILE"). When you are in
Entry Mode, you see an uppercase I at the right hand corner of your screen
display.
To
enter
or
leave
entry mode, type a Control—\ (a
When
Control—backslash).
Below we discuss the features of Entry Mode that apply to non—text files.
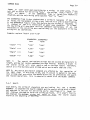
2.4.4.1
Fields — An important concept in entry mode is the field.
VUE
four fields: the label field, the opcode field, the operand
field, and the comment field. These correspond to the four fields used by
the assembler. Normally, these fields are set up as follows:
recognizes
0
8
16
40
I
I
I
; comment field columns 40—510
I
I
I
operand field columns 16—39
I
opcode field columns 8—15
I
label field columns 0—7
You
may change the location of the comment column (normally 40) by changing
You can also change the comment character
(normaLly a semicolon) to any character by changing the INI.VUE file.
the VUE initialization file.
Assuming
the
comment
either column 41 or 42.
column
is 40, the actual comment text may begin at
Some programmers Like to have a space
between
the
SCREEN MODE
Page 2—11
character (semicoLon) and the actual comment. In this case, the
SPACE flag should be turned on, causing the actual comment text to begin at
comment
column 42.
If a line begins with the comment character, VUE considers the entire line
to be the comment field.
2.4.4.2
Next Field — The following discussion assumes that you are in Entry
Mode and not in Text Mode.
You may define a next—field character in your INI.VUE file; the default
next—field character is a space. When you type the next—field character,
VIJE moves the cursor to the next field (see above) to the right of the
cursor.
If
is in the middle of a line, and you type the next—fieLd
character, the cursor will advance to the beginning of the next field.
For
instance, if the cursor is at column 9 (in the opcode field) it moves to
column 16, the beginning of the next field. The next time you type the
next—field character, the cursor advances to coLumn 41 (the position after
the start of the comment field). VUE assumes that you do not want to edit
the comment character; if you do, just backspace and do so. If the SPACE
flag is on, VUE moves the cursor to column 42, putting a space after the
the
cursor
comment character.
If
you try to move the cursor to an empty field, VUE creates the field for
In the case of our last example (with the cursor at column 9) VUE adds
a tab character to the line; this moves us up to column 16, and adds the
operand field. If we hit the next—field key again, VUE adds enough tabs to
the line to get us to the comment column (in this case 3 tabs, to get us to
column 40).
VUE then automatically adds the comment character to the line
and moves the cursor past it. If the SPACE feature is enabled, VUE also
automatically adds a space after the comment character.
you.
field, entering another next—field
into the file if it is a printabLe character.
Once
the
cursor
is
in
the
comment
character has no effect on the text file except for inserting that character
When editing a text file (extension .TXT) VUE sees the entire fiLe as
a comment field; the next—field character has no effect.
NOTE:
2.4.4.3
Another feature active in Entry Mode is character
This means that VUE changes all characters you enter from lower to
upper case unless they are in a comment field. This makes it easy to have
upper case program statements and lower case comments.
Simply leave the
folding.
Folding —
keyboard in lower case, and VUE will do the rest. This feature is disabled
when editing text tiles (extension .TXT); you may also disable it in the
INI.VUE file.
SCREEN MODE
Page 2—12
2.4.4.4 Line Insert — The final feature available in Entry Mode is line
insert after carriage return. When in Entry Mode, a line is inserted after
every carriage return entered. This is ha ndy when entering blocks of text
in the middle of the fiLe. You may disable this feature in the INI.VUE
file.
2.4.4.5 Entry Mode with BASIC files (Auto Line Numbering) — When editing
BASIC files (extension of .BAS), the operation of Entry Mode is slightly
modified.
The second operand field disappears, the comment character is set
to the exclamation mark (D, the next field character becomes a tab, and the
comment
field normally begins at column 56. The most important feature,
however, is auto line numbering.
When Entry Mode is on and a new tine is started, entering a TAB produces a
Line number followed by a tab. The text of the Line may then be typed in
normally. If desired, pressingTAB again moves the cursor out to the
comment field and adds the comment character, just as with assembly language
programs.
As
with assembLy language programs, the comment field is fuLly
configurable.
To calculate the line number, VUE looks up the line number on the preceding
Line. It then adds the current auto—increment value (normally 5) and enters
the number on the new line.
(
2.4.5
Indent Mode
Indent Mode is designed for use with structured Languages like Pascal. It is
by the Indent command in the initialization file and Command mode.
Its purpose is to make easier the task of editing programs with indented
blocks of text.
enabled
Indent Mode is on, the action of RETURN and the Beginning of Line
(Control—U) command is modified. Both commands now move the cursor to the
first text character instead of coLumn one. In other words, any leading
When
blanks or tabs are ignored and the cursor moves past them.
If a RETURN results in the creation of a new tine (i.e., you are already at
the end of fiLe or in Entry Mode with the insert option on), then the new
line is automatically indented with the optimum number of tabs and blanks so
that the indentation of the new line matches the line above it. If this is
not the amount of indentation required, you may then modify the indentati on
of the line with the space, RUBOUT, and/or TAB keys.
-
CHAPTER 3
COMMAND MODE
Forty—five commands are available in Command mode. These perform disk I/O,
string searching, text block handling, formatting, and parameter setting
functions.
3.1
ENTERING COMMAND MODE
To enter Command mode from Screen mode, type an ESCAPE.
The screen
several lines of text appear at the top of your screen.
text give you the folLowing information:
and
Flag Status
cLears,
These lines of
— see Section 3.13, "PARAMETER SETTING COMMANDS"
— name of fiLe you are editing
File Name
— amount of availabLe space in memory
Free memory
— current left margin
Margin
— current page number
Page
If the VUE intialization file tells VUE to print
the Menu (see Section
summary of the VUE commands is displayed every time ypu
enter Command mode. (You may enable or disable the Menu display by changing
INI.VUE.) VUE then prompts you with a >. You may now enter commands to
VUE.
End alL commands with a RETURN.
You must begin aLL commands in the
4.4.2,
"Help"),
a
first character position after the prompt symbol.
You may return to Screen mode at any time by typing
an ESCAPE.
NOTE: In the discussions below, the term "FILENAME" refers to the
the file you are editing.
3.2
COMMAND FORMAT
ALL VUE commands are in the following format:
command
blank(s) {command parameter)
name
of
COMMAND MODE
Page 3—2
At least one blank must separate the command
any parameters if they are
present,
If a numerical argument is missing,from
VUE assumes that it is zero.
NOTE: You may abbreviate some of the
Command
mode
(see
Section
on the line below the command line; it does not erase your command.
re—edit the command for another attempt.
You may
3.14, "ABBREVIATIONS").
If VUE does not understand your command,
commands
it prints:
What?
3.3
COMMANDS THAT ACCESS THE DISK
VUE
has eight commands that perform disk
access.
of these commands
access two files on the disk: the original source file, Four
and
the output file
produced by the editing session.
The other four commands may access other
files as well. During the editing session, lines of text may be read
into
memory from the source file,
or written to the output file.
source file
+
I
I
+
unread
source
I
text
J
I
I
Source
I
already
read
I
I
VUE
I
+
free
I
space
+
+
I
+
J
I
text
I
output file
memory
I
+
+
I
I
I
>J
+
I
text
I
in
Imemory
+
I
j
I
I
+
+
>
I
text
Ialready
I
+
output
I
+
creates the output file at the
beginning of the editing session. It is
given the same name as the source file
but an extension of .TMP.
When the
editing session is complete, the output file is renamed
to
match
the
extension of the original source file; the source file's extension is then
changed to
.BAK (to indicate a backup file). This way, the source fiLe is
not modified unless the editing session is successful,
and
always have a
copy of the original source file after each editing you
session.
(NOTE:
Because of this backup facility,
you
cannot
edit
files
with
extension
.BAK
or .TMP)
Normally, when VUE is first executed it reads in as much of the source file
as
it possibly can. If the file does not fit
memory, about 500 free
bytes are left. If desired, you can disable thisintoinitial
load with the
"/noyank" option when
you invoke VUE (see Chapter 4, "EXECUTING VUE").
it is necessary to edit files that are larger than the memory
available. Usually in these cases,
it is best to try to break the file up
into smaller pieces. But if this is not possible,
the file may be edited by
Sometimes
COMMAND MODE
Page 3—3
par t
reading
of the file into
memory with the Yank command,
output file with the Unyank
until the entire file has been edited.
then writing this to the
procedure is repeated
3.3.1
editing it, and
command.
This
Finish
Finish command tells VUE that you are done with your editing session.
VUE writes out to disk any text still in memory,
and makes sure that any
leftover text in the source file is copied to the output
file. VUE deletes
The
any file on the disk with the name FILENAME.BAK (i.e., a backup file on the
that has the name of your source file). VUE then renames the source
disk
file to FXLENAME.BAK, and renames the temporary output file to FILENAME.EXT,
where "FILENAME" is the name of the file being edited, and ".EXT" is the
extension of that source file.
3.3.2
Save
The
Save command allows you to update your text to the disk without leaving
It is equivalent to leaving VUE via the Finish command and then
re—editing the file. The Save command only works on tiles which completely
fit in memory. After the Save operation is completed, the internal
operation of VUE is unaffected. In other words, the cursor location and
VUE.
flag settings are not modified.
3.3.3
Go
Go is an Edit—and—go command.
command. Then,
depending on
First the text is output as in the Finish
the extension of the file, the appropriate
processor is invoked. For instance, if an assembly language file is being
edited (extension .MAC) the tile is automatically assembled. The following
is a list of the extensions supported and the command strings invoked. If a
command string has been defined in the INI.VUE file, it will be used it the
extension of the file being edited is the same as the default extension.
COMMAND MODE
Page 3—4
.MAC
———>
MACRO filename
.BAS
———>
COMPIL filename
.TXT
———>
TXTFMT filename
.CMD
———>
FILENAME.CMD
.LSP
———>
LISP
Y
;loads in extended library
(DSKIN "filname")
.PDL
———>
PDLFMT filename
.INI
———>
LOG DSKO:1,4 ;this reboots
MONTST SYSTEM,FILENAME.INI
the system
Example:
AlphaVue 2.4 Status: space
Editing OEFIL.BAS
>g
fold srchfotd text
12245 bytes free
margin 0
Page 20
.COMPIL OEFIL
3.3.4
This
Quit
returns you to AMOS command level without updating your file.
you've made irretrievable editing mistakes during the
editing session.
The temporary output file is erased, and the
command
It is useful if
current
original source and backup files are not disturbed.
3.3.5
Yank Cn} or Yank {filename}
This command has two forms.
The fir st form accepts a numeric parameter. In
that case, n lines of text from the source
file are read and appended to the
end of the text already in memory. If the number
of lines is not specified,
as many lines will be appended as wi II fit into memory.
Example:
>yank 50 c!!D
— read the next 50 lines from the input file on disk and
append them to the text in memory.
COMMAND MODE
Page 3—5
The second form of the command accepts
a fiLename rather than a number.
this case, the specified file
In
is read in and inserted into the text at the
current cursor location. If the extension
the file is not specified, it
defaults to the extension of the file beingofedited.
This command is useful
for combining files, and for "boilerplate" type applications,
where a number
of pre—prepared blocks of text are merged together
to form a custom
document.
Example:
>yank info.txt
— read in file INFO.TXT and insert it after the cursor.
3.3.6
The
tJnyank {n} or Unyank Cfitename}
Unyank
command
also
forms.
If a number is specified, this
the output file
and deletes them from memory. If the number of lines is
not
specified, all
the text in memory is written out to the disk.
has
two
command writes out the first n tines of text in memory to
Example:
>unyank 200 @!!J
— write the first 200 lines of text in memory to the output
file and del&te them from
memory.
If a filename is specified
the parameter, VUE writes a block of text out
to the specified file. Theasfilename
that is specified as the parameter must
not begin with a number. If the extension of the file is not specified, VUE
will use the same extension as the file currently being edited. If the file
already exists, it is deleted and any previous contents are lost. The block
to be written out is specified
3.5, "BLOcK OPERATIONS").
by standard block delimiters (see Section
>unyank sub1.mac
— write out the marked block to the file SUB1.MAC.
If the proper drivers are loaded into
device
memory
before
executing
VUE,
any
accessed.
For instance, you may directly output a marked
block to a printer named LISTER with the command:
may
be
>unyank trm:lister
COMMAND MODE
Page 3—6
3.3.7
Dir
The Dir command is used to find out what
to the DIR command at AMOS
files
on the disk.
It is
level.
If
no
filename
is
specified, all files with the same extension as the file being edited
on
the
current account are listed. Witdcard
wildcards are not allowed in the drive filenames are supported; however,
PPN specifications, and only one
file specification is allowed —— multipleorfilenames
separated by commas are
not allowed.
similar
Example:
are
command
assume editing PROGBAS
>dir *.*cj
— list all files in current
account
>dir @fl
— list all .BAS files in the current
account
>dir dskO:*.inicl,4J RET
— list all .INI files in System Account
3.3.8
Erase
This command is used to erase files on the disk.
is usually used to
erase temporary files created with the Unyank command,Itor
up space
if you are using a floppy disk system. If the extensiontoisfree
omitted, VUE
assumes the extension of the file you are editing. The erase command does
not support wildcards.
>erase subl.mac RET
— erase the file SUB1.MAC from the disk.
3.4
STRING SEARCH AND STRING REPLACE
COMMANDS
has five commands for locating and replacing strings. The string to be
located or replaced is specified following the command as with
any command
that accepts a parameter. If a replacement string is
required,
VUE
prompts
you for the second string with a question mark. Always end your search
and
replacement strings with a RETURN.
VUE
There are two possible modes for the string commands.
These are determined
by the SEARCHFOLD flag. If this flag is true, the search
ignores case
COMMAND MODE
Page 3—7
(upper
or
lower case) when
searching for a string. In other words, if you
tell VUE to search for the string
"text,"
strings "text," "Text," and
"TEXT" all match.
If the SEARCHEOLD the
flag
false, this feature is
disabled, and the only string which matches "Text" isis "Text."
The SEARCHFOLD flag is also checked when a string is replaced.
is false, the replacement
If the flag
string is put into the file with no modification.
the old string is replaced, it
upper
character. If it does,
the new string will also have its first charactercase
capitalized.
If all the
characters in the old string were capitalized, all the characters
in the new
string will be capitalized.
If the SEARCHFOLD flag is true, then before
is checked to see if it starts with an
Example: replace "chain" with "link"
SEARCHFOLD
true
"chain" ———>
"link"
"Chai n" ———>
"Li nk"
"CHain" ———>
"Li nk"
"CHAIN" ———>
"LINK"
SEARCHFOLD
false
"link"
"link"
"link"
1:
The search and replace strings may not exceed 40
characters in
length, and may not contain embedded carriage returns. However,
a blank in
the search string will also match a tab or carriage return.
Therefore,
search will find multiple word trings which are on more than one line.
NOTE
NOTE 2:
The search and replace commands are affected by
the operation of
flag. If this flag is set, and if a block is marked
in the text,
only strings that are within the marked block will be affected by the search
and replace operations. This is especially useful with the Global command.
the
3.4.1
SBLK
Search
Type Search, the string of characters you are looking for, and a RETURN.
Remember
to separate the Search command and the search string with a space.
VUE searches in the text for the string you've specified; if it finds it,
VUE
displays the page on which the string was found. If it didn't find it,
VUE displays the message: string not
starts at the beginning of the
file.
found
in
file.
The
search
always
COMMAND MODE
Page 3—8
This command has
two side effects:
1.
it returns to Screen
2.
specified string will be used for subsequent
Next Match
operations (see Section 2.3.12 "Next Match: Control-.x").
mode.
The
Example:
>search LABEL:
— searches for the string
3.4.2
"LABEL:"
Next
The Next command is
similar to the Search
However, instead of
starting the search at the beginning of thecommand.
file,
the
Next
command starts at
the current cursor position.
Example:
>next LABEL: @J1!J
— searches for the string "LABEL:", starting at the current
posit ion.
3.4.3
Whole
The Whole command is
command,
begins
also similar to the Search command. As with the search
searching for the specified string at the beginning of
memory. However, if it does not find
the string, it checks to see if any
more text can be brought in with the Yank command.
If so, it automatically
writes all the text in memory to the output file, and then
additional text as will fit. It then resumes the searchyanks in as much
operation. This
sequence continues until Whole either finds the string or runs
out of text
to read in.
it
that this command does not affect the operation of the
Next Match
(Control—X) command in Screen mode. In particular, the Next
Match command
never automatically yanks in more text from disk,
but only searches in the
Note
current memory buffer.
If the Whole command does not find the string,
you are left with the end of
the file in memory. If you wish to return
to
the beginning of the
file, you must leave VUE with the Finish commandediting
and re—edit the file.
COMMAND MODE
Page 3—9
3.4.4
Replace
This command replaces
strings in the text. Before replacing the string,
displays it and asks whether or not this string
should be replaced.
it
Type
the Replace command, a space and a string of characters
to search for;
then type a RETURN. VUE prompts you with
a
question
mark
for
the
characters
you wish to replace the first string with,
it
is
found.
Type the
replacement string and a RETURN.
If the string to be replaced does not
exist in the file, VUE returns you to Command
mode; otherwise, it displays
if
the first occurrence of the search string. VUE now waits for
what to do; you must type one of these four options;
V
:
you to tell it
yes, replace the string and look for next occurrence
advance to next occurrence without replacing this string
N
Control—C or
ESC or
Q
:
return to Command mode without
replacing this string
center this string on the screen, then wait for a Y, N or Q
The cursor advances through the file until
there are no more occurrences of
the search string, or until you enter a Q, ESC,
or Control—C.
:
C
Example:
>replace chain ED
Tlink
— will search through file for string "chain,'
and
replace it with "link' if you tell it to do so.
When entering the replacement string, either an ESC or Control—C cancels the
Replace command and returns you to Command mode.
3.4.5
Global Replace
This command is identical to the Replace command; however, it does not ask
you whether or not to replace each string.
replaces every occurrence of
the search string in the file. After VUE isIt done,
it lists the number of
strings that it replaced. Use this command with gre-at care; you can
easily
mangle your file if there
are
occurrences
of
the
search
string
that
you
don't know about. For instance, if you issue a Global replace for
"is"
to
"was," VUE also changes
the word "this' to "thwas."
COMMAND MODE
Page 3—10
Example:
>global chain @12J
Ilink
— replaces every occurrence of the string "chain"
with
the string "link."
The Global
Operations.
command
is
especially
useful
in conjuction with the Block
If the SBLI( flag is
a
marked block. This makes it true, Global will only replace text within
easy to replace all occurrences of a string
within a limited portion of your text.
3.4.6
Wildcard
VUE allows
wildcards.
characters.
of
you to search for strIngs containing ambiguous characters, i.e.,
A
wildcard is a special symbol that may match several
The wildcard facility is somewhat similar
to that used by some
the AMOS level commands. Normally, a question mark
to any
character, and an asterisk corresponds to any number of corresponds
characters.
For
example, the search string "(?fl" matches the strings:
CR0)
CAB)
(IN)
while the search string "(*)" matches those strings
as well as the strings:
(index)
(B)
(days of future passed)
Leading and trailing asterisks are not allowed in a search string.
If you need to search for a string that contains a question mark or
asterisk, you may change the wildcard characters.
To
do this, use the
WILDCARD
command.
Type WILDCARD, followed by a blank, followed by the two
new wildcard characters. If no characters are entered, the wildcard feature
is turned off.
COMMAND MODE
Page 3—11
Example:
>wildcard X#
— set the single wildcat-cl character to Z and the multiple
character wildcard to ft
>wi ldcard RET
— turn off wildcard ability.
>wildcard ?*
— this is the normal wildcard mode.
Although wildcards may be used in replace and global operations, they are
not recommended, since wildcards are not allowed in the replacement string.
3.5
BLOCK OPERATIONS
provides several commands for manipulating blocks of text.
The
techniques for delimiting blocks are covered in Section 2.4.5, "Setting
Block Markers".
VUE
When
a
block command is executed, the file
contain at least one valid
pair of markers, and the cursor MUST NOT be inmust
between these markers.
If
one of these conditions is not met, the message "marker error" is displayed
and the file is not modified.
If you are using the [*,*3 delimiting symbols, and more than one pair of
exist in the text, only the first pair is recognized by the block
markers
commands.
In addition to the commands described in this section, the Unyank and Search
commands can also use marked blocks.
To perform a block operation, enter Screen mode. Mark the block of text,
following the instructions in Section 2.4.5. If you are performing a COPY
or MOVE block, move the cursor to the desired location. Then enter Command
mode and type in the block command, foLlowed by RETURN.
3.5.1
Copy Block
This
command
copies a block of text.
COPY followed by a RETURN.
block is copied in front of the currentType
line (the line the cursor was
before
Command
mode
was
entered).
The
The
on
copy command may be executed
multiple times without leaving command mode; the block will be recopied
each time.
If you copy 5 times you will end up with six copies of the
block (the original and the five duplicates).
COMMAND MODE
Page 3—12
When you are done copying, be sure to clear the reduced intensity
markers or
remove the E*,*J delimiters.
3.5.2
Delete Block
This command deletes
a block of text. Type DELETE followed by a RETURN.
The block to be deleted is specified as in the paragraph
The reduced
intensity markers or the C*,*1 delimiters are cleared orabove.
deleted
with
the block. The user is returned to Screen mode after VUE deletesalong
the block
of text.
3.5.3
Move Block
This command moves
a block of tèt.
Type MOVE followed by
RETURN.
The
The Clear command deletes any block markers that have been set
Control—P.
If no markers have been set, this command is ignored.
with
block
to
3.5.4
CLear
a
is specified as in the example above.
copies the
block to the current cursor position, and then deletes from VUE
the file the
marked block along with the delimiters. This command is equivalent to a Copy
command
followed by a Delete command. VUE returns you to Screen mode after
it moves the block.
be
moved
not clear any [*,*J delimiting symbols.)
3.6
(It does
FORMATTING COMMANDS
VUE provides two commands
to assist in formatting text.
These commands
are
to replace TXTFMT; rather, they are designed for use in simple
applications where the power of TXTFMT is not needed.
not
3.6.1
meant
Center
This command centers the text on the current line (the line the cursor was
on before Command mode was entered).
Leading blanks are ignored, trailing
blanks are not. VUE returns you to Screen mode.
COMMAND MODE
Page 3—13
3.6.2
Format
This command formats the paragraph starting
at the current cursor position.
The text is formatted so that no tine is wider
than the screen. If the text
is in a comment, the comment
characters
are
not
formatted, but the text is.
(In other words, this command works
properly
on
comments.)
the current cursor position to the end of the paragraph. VISE formats from
If not formatting a comment, a paragraph is terminated
1. A blank in column
2. A slash (I) in
by —
one
column one
If formatting a comment, a paragraph is terminated
by —
1. A blank in column two
2. A character other than the current comment character in
column one
To
determine
if
it is formatting a comment, the
command checks the
character in column one of the first line formatted.format
If
it
is equal to the
current comment character, then it assumes that a comment
is being
formatted.
After VIlE formats the text, it returns you to Screen
3.6.3
mode.
Width
The Width command sets the width used by the Center and Format
commands.
Normally the width used is the width of the terminal
display. One numeric
argument is specified, which is the new width. If no argument is given, the
formatting width is reset to the width of the terminal display.
Example:
>width 50
— set a narrow formatting width
3.7
ENVIRONMENT COMMANDS
VISE provides two commands for saving and restoring the
environment.
Often when editing a file, it would be
current editing
convenient
to "mark
one's place" at the current point, and move somewhere else for a quick
look
modification.
Then, when this is done, it should
possible to return
to the original editing point and continue from there. beVUE
provides this
or
capability with the Push and Pop
commands.
COMMAND MODE
Page 3—14
3.7.1
The
Push
Push
command
"pushes"
the
current cursor location onto an internal
stack. This stack may be up to ten levels deep.
Push then returns you to
Screen mode.
3.7.2
This
Pop
command
"pops" a cursor location
from an internal stack. It restores
the location marked earlier by a Push command.
VUE
then returns you to
Screen mode at the restored position.
(That is, you see the page d i splayed
that you "pushed" earlier with the Push command.) If the stack is empty,
this command has no effect and you remain in Command mode.
3.8
MEMORY SPLIT COMMANDS
Often
when editing a Long file, VUE takes a long time to perform operations
In order to speed up this process,
allows you to
split the memory image of the fiLe in two parts. After the VUE
file
is split,
only the first part of it can be edited. However, operati on is much
faster.
This is especially useful when adding new text near th
e
beginning
of an
existing document.
which update the file.
3.8.1
Split
The Split command splits the current memory image at the cursor location.
When you return to Screen mode, the line the cursor was on appears to be the
last line of the file. While the file is split, the
"split" appears on
the Status Line and lines of &'s appear as the end ofword
file marker instead of
the usuaL asterisks.
3.8.2
Unsplit
Unsplit command performs the exact inverse of the Split
reattaches the text that was detached with the Split command.
has been split off, the Unsplit command has no effect.
The
The
Unsplit command is
operations are attempted.
executed
automatically
Specifically: the Finish,
It
command.
no text
If
before any disk transfer
Go,
Save,
Yank,
Unyank commands all perform an automatic Unsplit before they begin.
and
n
COMMAND MODE
Page 3—15
3.9
EDIT
Edit command exits
mode and
you to Screen mode. VUE
displays the page you were Command
editing when you returns
entered
Command
mode.
This
command is equivalent to typing ESC while in
Command mode.
The
3.10
PAGE N
The
Page command aLLows you to move the
cursor to a specific screen page.
VUE returns you to Screen mode, and moves the
cursor to the page of the
number you've specified. If
there is no sign in front of the number, the
cursor is moved to the absolute
specified by the number. If there is a
sign in front of the number, thepage
number is taken as an offset from the
current page.
Examples:
>page
—
5
>page
—
+3
RET
— moves the cursor to page 5
— moves the cursor forward 3 pages
>page
—
—6 D
— moves the cursor back 6 pages
that the definition of a page is one screenful (usually 24 Lines) of
text. This has no relation to any page—numbering
sequence which may be used
Note
in the final document.
3.11
MARGIN N
This command sets the left margin to n characters.
When you
resume
editing, everything you type will be displayed starting at column n.
for editing files with many lines wider than the screen dispLay.
screen
Useful
WARNING: VUE wilL not work with Lines longer than 510 characters!!
ExampLe:
>margin 50 tTh
— sets left margin at 50
that this command simply sets the VUE display margin.
change the actual text margin, only VUE's dispLay of the text.
Note
It does not
COMMAND MODE
Page 3—16
3.12
BLANKS N
This command is used to
generate
C
a
large number of blank lines.
taken as the number of blank lines.
is supplied, which is
lines are added at the current cursor Position.
argument
One
The
Example:
>blanks 20
— insert 20 blank lines at current cursor location
3.13
PARAMETER SETTING COMMANDS
You may modify a number of flags and constants
with commands in Command
Some
of these may also be modified by the
INI.VUE file. The
mode.
parameter setting commands follow one of the formats below:
Command bootean
The argument of this command may be "true,"
"t," "false," or "f" (e.g., Insert true).
true value sets the flag; a false value
disables it.
Command string
The argument of this command must be a
character (e.g., Comment U.
Command n
The argument of this command is a numerical
value (e.g., Column 25).
3.13.1
Text boolean
This command turns Text Mode on/off. For a
Mode, see Section 2.5.2, "Text Mode."
3.13.2
This
A
complete
description of
Text
Wrap boolean
command
turns Wrap Mode on/off.
When
Wrap Mode is
automatically suppLies carriage returns during text entry.
For a
description of Wrap Mode, see Section 2.5.3, "Wrap Mode."
on, VUE
complete
COMMAND MODE
Page 3—17
Example:
>wrap true
— turn on Wrap Mode
3.13.3
Searchfold boolean
This
command
turns the SEARCHFOLD flag on and
For a detailed
explanation of what this flag does, see Section 3.4, off.
"STRING SEARCH AND
STRING REPLACE COMMANDS." When this flag is
on, the word "srchfold" appears
on the VUE Status Line when in Command mode.
3.13.4
This
Sblk boolean
command
enables/disables
searches only in marked blocks.
If Sblk is
set to true, search operations only locate strings within marked blocks
(if
such blocks exist).
3.13.5
This
Indent boolean
command
enables/disables
Indent Mode.
Indent Mode, see Section 2.5.5,"Indent Mode."
word "indent' appears on the VUE Status Line.
3.13.6
file.
3.13.7
When Indent Mode is on, the
Help? boolean
This command enables/disables the printing of
Command
For a detailed description of
mode;
it
the
menu
when
you
are
in
has no effect if the menu was not enabled in the INI.VUE
Comment character
This command sets the current comment character used by Entry
Format command.
Mode
and
the
COMMAND MODE
Page 3—18
Example:
>comment
!
— this sets the comment character as the
exclamation point (as in BASIC)
3.13.8
CoLumn n
This command sets the current
comment
column
recommend that this number be a multiple of eight.
used
by
Entry Mode; we
Example:
>column 56 tETh
— this command sets the comment column to 56.
3.13.9
FieLd n
This command defines the next—field character
The
number n is the decimal value of the ASCII code used by Entry Mode.
of the character to be used.
For example, space is 32 and tab is 9.
Example:
>field 9 tED
— this sets the next—field character to tab.
3.13.10
Insert boolean
This statement enables/disables the
insertion of a new
RETURN (see Section 2.5.4, "Entry Mode"). When this
fLag is
"insert" appears on the VUE Status Line when in
Command mode.
line after every
on,
the
word
COMMAND MODE
Page 3—19
Example:
>insert true EIJ
— enables Line insertion
3.13.11
FoLd boolean
This
command enables/disables the
comment folding feature in entry mode.
When this fLag is on, the word "fold" appears
on the VUE Status Line when in
Command mode.
3.13.12
Space boolean
This command enables/disables the generation of a space after every comment
character in Entry Mode. When this feature is on, the word "space" appears
on the VUE Status Line when in Command mode.
3.13.13
Delta n
This command sets a new autoincrement Line number value when editing BASIC
files in Entry Mode.
If no value is supplied, the command is ignored.
Otherwise, the autoincrement vatue is set to the new number.
Example:
>delta 50 ED
— set autoincrenient to 50
3.13.14
Control bootean
This command enables/disables control characters.
If this command is set to
true, control characters may be entered into the text
with the Control—G
screen editing command.
Page 3—20
COMMAND MODE
3.13.15
Smart booLean
enabLes/disables the inteLligent terminal features of VUE. If
command
you use a terminal with insert and deLete Line functions, turning on this
flag wilt, improve some of VUE's screen handling abilities. If your terminal
does not have these features, enabling this flag wiLl cause problems. VUE
now
supports a new terminal driver format that makes the Smart command
unnecessary. However, oLd terminaL drivers may still need to use the Smart
This
command.
3.13.16
You
may
letter:
Abbreviations
abbreviate
several
f — finish
g — go
q — quit
s — search
r — replace
y — yank
u — unyank
m — margin
p — page
e — edit
d — dir
of
the
command mode commands to their first
CHAPTER 4
EXECUTING VUE
After
This section teLls you how to call VUE from the AMOS command level.
you invoke VUE, the first thing it does is to print a sign—on message. It
then searches for an initialization fiLe (INI.VUE); VUE processes the file
if it exists. Next VUE Looks for the file specified on the command Line.
If it finds it, VUE reads the file into your memory partition. As the file
is read
in, VUE prints a period for every 64 Lines that it reads in from
the file. While the file is being read in, you may interrupt VUE and return
to AMOS command level by pressing Control—C. When VUE finishes
the text, it displays the first page of text (if the INI.VUE
reading
in
is set up so
that you enter in Screen mode), and you can begin to edit your text.
If the desired file is not found, VUE asks if you want to create the
file.
If you enter V and a RETURN, VUE creates the file and you can begin to edit.
If you answer anything else, VUE returns you to AMOS command level.
4.1
INVOKING VUE
The format for invoking VUE is as follows:
.VUE {/optionsY FILENAME{.EXT}
Parameters in curly brackets are optional.
4.1.1
Options
The
only option presently supported is the /noyank option. This option
disables the reading in of the input file when VUE is invoked. VUE then
automatically comes
number of lines.
up
in Command mode so that you may yank in a specific
EXECUTING VUE
Page 4—2
ExampLe:
.vue /noyank letter.txt RET
— this invokes VUE but does not cause any text to
be read in.
4.1.2
FiLename
Filename specifies the name of the file you are editing.
FILE SPECIFICATION ERROR results.
4.1.3
If not present,
a
Extension
Extension specifies the extension of the file being edited. If the filetype
is missing, VUE uses the defauLt extension of UMAC. (You may change the
default extension in the VUE initialization file.)
4.2
ERROR RECOVERY
If an error occurs while writing out the output file (for instance,
the disk
is write protected), VUE gives you a chance to recover. It prompts you with
an error message describing the error and indicates that a copy of your text
is stored in a memory module IMAGE.VUE. This module may be saved using
SAVE command from AMOS command level, and then re—edited by VUE. NOTE:
the
The
does not contain any linefeeds, and will look odd if you try to type
or print it. Re—editing it with VUE restores the linefeeds.
module
4.3
INITIALIZATION FILE (INI.VUE)
When VUE is invoked, it looks for a file named INI.VUE. If found, this file
is read in and prOcessed. The file consists of a se ries of assignment
statements which modify VUE parameters. This allows you to "personalize"
VUE.
VUE searches for INI.VUE in three PPNs. Assuming that your ppn is
CP,PNJ, the search order is:
Page 4—3
EXECUTING VUE
1:
MEM:
(searches in user memory partition)
2:
EP,PNJ
(searches in your account)
3:
LP,OJ
(searches on project library account)
4:
E7,OJ
(searches on system library account, DSKO:)
The format of the assignments is:
pa rametera rgument
assignments may be in upper or lower case. In each case, the parameter
is assigned the value of the argument. The assignments may be in any order,
Each
and any parameter not assigned a value wiLl retain its default value.
The
assignment
must start on the first character of a line.
Several parameters
A boblean argument is either "true" or "false,"
of these words. For examp Le, "t," "t r," and "t rue" all.
require booLean arguments.
or
truncation
any
represent the boolean value TRUE.
If desired, a :T may be pLaced into the INI.VUE file.
This wiLL
cause
alL
lines following to be echoed to the consoLe as they are processed, just as
Any
line beginning with a semicoLon (;) is
with .CMD and .DO files.
ignored.
4.3.1
Defaultextension
This assigns the default extension. The extension must consist of three
valid RAD5O characters (upperc&se only). The defauLt extension if none is
assigned in the INI file is .MAC.
Example:
defaultTXT
This statement makes the default extension .TXT.
4.3.2
Helpboolean
This statement enables the display of a help menu in Command mode if HELP is
a
value of true.
If enabled, the available editing space is
When
this
reduced, because the menu takes up some of your editing room.
statement is processed, VUE searches for a file named MENU.VUE in the same
assigned
way that it
for INI.VUE. (However, VUE does not search for
found, VUE reads the menu into memory. Each time you
enter Command mode, the menu is displayed. Normally, the menu contains a
complete reference of VUE commands, but the user may change the file if he
would like to modify or replace the menu. The value of HELP defaults to
searched
MEM:MENtJ.VUE.)
If
false if the HELP statement does not appear in the .INI file.
Page 4—4
EXECUTING VUE
ExampLe:
he lpt rue
This statement enables the display of the command menu.
4.3.3
Startlocation
This statement determines the cursor starting Location of VUE after the file
is read in.
Normally, if this statement is not in the INI file,
VUE enters
the beginning of the file as if the HOME key had been hit.
This statement allows VUE to start up in three locations:
Screen
mode
at
if locationhome
VUE starts up normally it the home position
in Screen mode.
if location=end
VUE starts up in Screen mode at the end of file.
if Location=command
VUE starts up in Command mode.
Example:
Startcommand
This statement causes VUE to enter Command mode when started.
4.3.4
Gocommand string$
This statement allows the user to specify the command string to be executed
when the
GO
command
is invoked (see Section 3.3.2, "Go"). The command
string may be any sequence of characters including RETURNS and linefeeds.
The
string is terminated by a dollar sign ($). The percent sign (7.) is
treated as a special character. It is replaced by the name of the file
being edited. The new command string will only be used if the file you are
editing has the current default extension.
Example:
GoCOMPIL %$
This statement causes the file being edited to be compiled by the BASIC
compiler if the GO command is used and if the extension of the file being
edited is the same as the default extension.
Page 4—5
EXECUTING VUE
The GO command string cannot be longer than 100 characters, but
be more than one line. For example:
NOTE:
can
goTXTFMT HEADER,%
RENAME/D %HEADER.LST$
4.3.5
Textboolean
This statement enables/disables Text Mode. Normally, VUE begins with Text
Mode off. However, when editing a fiLe with an extension of .TXT, Text Mode
defaults to true.
4.3.6
Wrap=boolean
Mode.
If this statement
appear in the INI.VUE file, Wrap Mode is initially off.
This statement enables/disables Wrap
4.3.7
This
does
not
Comment=character
statement
sets
the comment character recognized by VUE in Entry Mode
(see Section 2.5.4, "Entry Mode"). The default character is the semicolon
C;), unLess a .BAS fiLe is being edited, in which case it is the excLamation
point C!).
Examp Le:
comment!
This
sets
the comment character to the exclamation point, which is used by
BASIC.
4.3.8
Columncomment column
This statement sets the normal starting column for comments. This value is
used in Entry Mode (see Section 2.5.4, "Entry Mode"). The default value is
40. (The default is 56 if you are editing a BASIC file.)
The column is
specified as a decimal number. For best results, multipLes of eight are
recommended.
EXECUTING VUE
Page 4—6
(Th
ExampLe:
cc lumn64
Sets the comment column to 64.
4.3.9
Space*oolean
This statement generates a space after the comment character in
(see Section 2.5.4, "Entry Mode"). The default value is true.
Entry
Mode
Example:
spacefaLse
-
This disables the generation of a space after the comment character.
4.3.10
Insert=boolean
This
statement telLs VUE to insert a new tine every time a carriage return
is hit in Entry Mode (see Section 2.5.4, "Entry Mode"). The default value
is true.
ExampLe:
insert=true
This enables the line insert feature.
4.3.11
This
Folthboolean
statement
tells
VUE
to fold all characters not in comment fields to
upper case while in Entry Mode
default value is true.
(see
ExampLe:
foldfalse
This disables the folding option.
Section
2.5.4,
"Entry
Mode").
The
Page 4—7
EXECUTING VUE
4.3.12
Fieldcharacter
This statement sets the next—field character used in Entry Mode (see Section
2.5.4, "Entry Mode"). The character is specified as a decimaL number which
corresponds to the ASCII value of the character. Normally, this character
defaults to a space (decimal 32).
Example:
Field9
This statement sets the next—field character to the tab key (decimaL 9).
4.3.13
Searchfolthboolean
statement enabLes/disableS the search option of ignoring upper/Lower
case when searching (see Section 3.13.3, "Searchfold"). The default value
This
is true.
Example:
Searchfoldt rue
This forces the search command to ignore case.
4.3.14
Indentboolean
This statement enables/disables Indent
Mode"). The default value is false.
Mode
(see Section 2.5.5, "Indent
Example:
Indentt rue
This enables Indent Mode when VUE is started.
4.3.15
Width{number)
This statement
sets
the
text
formatting
defaults to the terminal display width.
width.
Normally,
this width
EXECUTING VUE
4.3.16
Page 4—8
Wildcard={wj ldcard characters}
This statement sets the wiLdcard characters used in the search commands.
this statement does not appear in the INI file, the defauLt of:
If
wildcard?*
is assumed.
The statement:
wi ldcard
turns off the wildcard feature.
4.3.17
EntrybooLean
This
statement alLows you to automaticaLly turn on Entry Mode. NormalLy,
Entry Mode is toggled on/off with the Control—\ key in Screen mode.
The
Entry statement in INI.VUE automatically turns on Entry Mode if set to true.
4.3.18
SbLkboolean
If
set to true, this statement forces searches to only find strings in
marked blocks, if they exist. It corresponds to the Sblk command in Command
mode.
4.3.19
Delta={number}
This statement allows you to set the autoincrement used for
in BASIC programs.
4.3.20
If not set, it defaults to 5.
line
numbering
Controt=booLean
If set to true, this statement allows control characters to exist in the
file. If a file is to be read in containing control characters, this flag
must be set
in the INI.VUE file. (NOTE: When editing .LST files, VUE
defaults to ControL=true automatically.)
4.3.21
Smartboolean
This statement enables/disables the intelligent terminal screen handling
routines. If a terminal has hardware insert and delete line functions (such
as an ADM1, ADM2, or Hazeltine 1500) this fLag should be set true to enabLe
improved screen handling. The default value is false. If a release 4.4 or
Later terminal driver is available, this flag is
unnecessary.
Page 4-9
EXECUTING VIJE
Example:
Smartt rue
This enables the inteLLigent terminal handling.
4.3.22
Dumbboolean
This statement enabLes/disables dumb terminal handling. When this flag is
enabled, VUE assumes.that the terminaL does not provide the erase to end of
line and erase to end of screen functions, and simulates them for you. This
is useful for terminals like the ADM3A. If a release 4.4 or later terminal
driver is available, this fLag is unnecessary.
4.4
SAMPLE INI.VUE FILE
The following is a sample INI.VUE file that might be used by a BASIC
programmer getting acquainted with VUE:
defaultBAS
he lpt rue
goCOMPIL %
RUN 74
deltalO
comment!
The
field9
first line
of
the file sets the default extension to .BAS, since our
To edit
a
hypothetical programmer wilt be mostly editing BASIC programs.
file named LEDGER.BAS, simply type:
.VUE LEDGER
VUE automatically fills in the extension of .BAS from the INI.VIJE file.
The second line of the file turns on the menu display. Since our programmer
is just getting familiar with VUE, the menu wilt help him to remember the
commands.
The third and fourth lines set the GO command string. When VUE is exited
with the GO command, the file being edited is automatically compiled and
run, if it is a BASIC program.
The fifth line sets the autoincrement line numbering value to 10.
used when entering new lines of a BASIC program.
The
sixth
line sets the comment character to an excLamation mark.
the comment character used by BASIC.
This
is
This is
EXECUTING VUE
Page 4—10
The last line sets the next—field character to the tab key. Normally, the
next—field character is space,
but space is commonly used in BASIC
programs.
The TAB is a key not often used in BASIC programs.
Note that the last two lines actually have no useful effect, since
defaults to these settings when editing BASIC files.
VUE
now
CHAPTER 5
HARDWARE AND SOFTWARE REQUIREMENTS
5.1
HARDWARE REQUIREMENTS
The hardware required to run VUE 2.4 is:
1. An AM—100 or AM—100/T CPU with at least 48
kilobytes of memory.
2. A high speed CRT terminal (recommended 9600
baud or greater) with the following functions —
1. XV cursor positioning
2. Clear screen
these functions are desirable but not necessary —
3. Erase—to—end—of—line
4. Erase—to—end—of—screen
5. Reduced intensity (TCRT functions 11 and 12)
HARDWARE AND SOFTWARE REQUIREMENTS
5.2
Page 5—2
SOFTWARE REQUIREMENTS
(Th
The software required to run VUE 2.4 is:
1. AMOS version 4.4 or later
2. A terminal driver that supports the following functions:
1. XV cursor positioning
2. Clear screen (TCRT function 1)
3. Erase—to—end—of—line
4. Erase—to—end—of—screen
If
necessary, the last two functions may be simulated for dumb terminals
which do not have them (Lear Siegler ADM—3A). This may be done in one of
two ways.
The command DUMBTRUE may be used in the initialization file to
cause VUE to simulate these features. Alternately, VUE now supports a new
TDV format which contains a bit indicating that these features do not exist.
Terminals
that
software are:
fully
meet
these
requirements
with standard Alpha Micro
Soroc 1Q120
Lear Siegler ADM1, ADM2, ADM3A
Hazeltine 1500 series
Beehive B1SO
VUE is fully re—entrant and may be loaded into system memory if you plan
do a
lot of editing.
to
APPENDIX A
VUE 2.4 RELEASE NOTES
2.4 version of ALphavue contains a significant number of new features.
For users already famiLiar with VUE, this document provides a summary of the
The
changes.
(NOTE:
AlphaVue
releases.
2.4
is
approximateLy
5000
bytes
Longer
than
earlier
If you are running VUE in system memory, you may have to allocate
more system memory space.)
A.1
NEW SCREEN MODE COMMANDS
Several new controL characters have been added.
Control—N: Go to End of Line
current line in one operation.
Control—RIJBOUT:
Erase
Line
—-
These are:
This key moves the cursor to the end of the
(See Section 2.2.7.)
This key erases all the characters on the
It is equivalent to a Control—U
(See Section 2.2.12.)
—
current line, but does not delete the line.
foLlowed by a Control—V.
Control—p: Set Block Marker
—
AlphaVue 2.4 has a new way of marking blocks
which may be used instead of block delimiters in the text.
Control—P is
used to mark the ends of the block.
While block markers are active, the
text in the marked block is displayed in reduced intensity. The old
delimiter method is retained for use on terminals that do not support
reduced intensity, such as ADM—3As. (See Section 2.4.5, Section 3.5.)
Control—G: Absolute Character Insert
—
control characters into a file using VUE.
It is now possible to insert
(See Section 2--.-6t-)
(
most
In
addition to these control characters, several new modes have been added.
When Wrap Mode is active, it is not necessary to enter carriage returns.
VUE
automaticaLly wraps the the last word entered to the next line when the
end of the screen is reached. (See Section 2.5.3.) In addition, Entry Mode
has been upgraded for BASIC programmers. It will now perform automatic line
numbering if needed. (See Section 2.5.4.5.)
VUE 2.4 RELEASE NOTES
A.2
Page A—2
NEW COMMAND MODE FEATURES
There are now over 40 commands available in VUE Command mode. Some of the
interesting new commands are outlined below. The input processing has
more
been upgraded so that it is no longer possible to edit the prompt character.
A.2.1
Disk Access Commands
Save:
This command saves the current memory image as with the Finish
command, but does not leave VUE. (NOTE: Save only works on files which fit
in memory.)
This is useful for periodically backing up your work without
having to leave VUE. (See Section 3.3.2.)
Yank and Unyank:
and
These commands have been upgraded to allow you to merge
the current file. This allows "boilerplate type
split files into
operations, such as putting together a custom real estate document from a
number of standard paragraphs. In addition, the original forms of Yank and
Unyank no longer leave blank lines hanging around when editing long files.
To
specify a yank or unyank from a separate file, follow the command with
the name of the desired file, instead of a number of lines.
(See Section
3.3.4, Section 3.3.5.)
Dir
and Erase:
commands.
They
These
commands
are useful with the new Yank and Unyank
allow you to look at the disk and to erase temporary
(See Section 3.3.6, Section 3.3.7.)
A.2.2
files.
Searches
now allow
for ambiguous search strings (wildcards). New search
commands allow searching from the current cursor location and searching
files larger than memory. In addition, a number of inconvenient bugs in
these commands have been fixed.
Searches
Next:
This command is similar to the Search command.
However,
seardhing at the current cursor location. (See Section 3.4.2.)
Whole:
This command searches
than memory. (See Section 3.4.3.)
it
starts
entire files, even if the file is bigger
Replace and Global: It is now possible to escape while entering the
replacement string by typing Control—C or ESC. In addition, both Control—C
and ESC are now accepted to terminate a replace operation, as well as Q.
(See Section 3.4.4, Section 3.4.5.)
VUE 2.4 RELEASE NOTES
A.2.3
The
Page A—3
Block Commands
block
definition.
have
commands
been
upgraded
with
an
easier method of bLock
In addition, a block of text may be written to disk with the
Unyank
command and
searches and repLacments may be confined to marked
blocks. (See Section 2.4.5, Section 3.3.5.)
A.2.4
Formatting Commands
Format and Center operations may now be set to any tine width.
formatting width.
It is followed by a
the new width. If no number is specified, the
width is reset to the terminal width. (See Section 3.6.3.)
Width:
This command sets
number,
A.2.5
which
is
used
the
as
Memory Split Commands
Often when editing a long file, VUE takes a long time to perform operations
which update the file. In order to speed up this process, VUE allows you to
split the memory image of the file in half. After the file is split, only
the first part of it can be edited. However, operation is much faster.
This is especially useful when adding new text near the beginning of an
existing document.
Split:
location.
This
command
splits
(See Section 3.8.1.)
the
current
memory
image
at
the
cursor
Unsplit:
This command is the exact inverse of the Split command, It
reattaches the text that was detached with the Split command.
If no text
had been split off, the Unsplit command has no effect. The unspLit command
is executed automatically before any disk transfer operations, such as
Finish, Go, Save, Yank, or Unyank. (See Section 3.8.2.)
A.2.6
New Menu Features
now
supports a new menu format which alLows multiple menus.
number of subjects may be stored in the menu, and caLled up as needed.
AlphaVue
find out what subjects are available, type HELP or MENU.
will
displayed.
subject name.
be
A
To
A list of subjects
TO call up a subject, type HELP or MENU followed by the
When VUE enters Command mode, a menu of screen editing
commands
is shown.
second subject menu is displayed after the first command is entered. A
RETURN (blank line) may be used to display the second menu.
The
VUE 2.4 RELEASE NOTES
Page A—4
A.2.7
Parameter Commands
A number of new parameter commands
features:
Text and Wrap:
Mode
was
been
added
to
control
the
These commands enable and disable Text and Wrap modes.
described earlier.
did when editing .TXT
files.
when editing .TXT files.)
Sblk:
have
Text Mode makes VilE act
new
Wrap
like earlier versions
(NOTE:
Text Mode is aut omatically turned
(See Section 2.5.2, Section 2.5.3.)
on
This command, if set true, forces searches to only locate strings in
a marked block, if any.
A
block of text can
This is especially useful with the Global
command.
be marked, and a Global replacement done which only
affects the text in that marked block. (See Section
3.13.4.)
Delta:
This command sets the auto—increment value used in Entry Mode with
VUE comes up with this value set to 5, but it may be reset to
any value except zero by this command. (See Section 2.5.4.5.)
.BAS
A.3
files.
NEW INITIALIZATIoN FEATURES
The VUE initialization processing has been completely revised
internally.
It is now possible to break out of VUE while it is initially reading
file by pressing Control—C. VUE will now operate correctly with INI.VUEin a
in
memory, and it will find the menu on the system disk properly.
If
desired,
a :T may be placed in the
file so that the INI file is echoed as it
is processed, as with INI.VuE
CMD
and DO files. A number of new initialization
statements are available to control some of VilE's new features.
A.4
IMPROVED HARDWARE SUPPORT
VUE now supports a new terminal
driver
format
which
allows
non—standard
screen sizes and automatically determines what features a terminal
has.
APPENDIX B
NEW MENU FORMAT
later of VUE- support a new menu format, which al.lows for
The oLd single menu format is stiLl supported. The
old format consists of straight text terminated by a doflar sign.
Version
2.4
and
multiple menu screens.
To generate or modify a menu in the new format, the macro assembler is used.
A
library fiLe, MENDEF.MAC, is supplied to assist in this process. It
defines several macros which are used to define menus, and sets up the
header which VUE uses to differentiate the new menu format from the old
format.
The actual menu definition consists of three sections. The first is a table
of offsets to each menu. The table is terminated by a null word.
The
second section is a table of names for each menu.
Each table entry is
defined with the SCREEN macro.
The SCREEN
macro
requires
two
arguments.
The first is the name of the mehu. The second is the number of the menu, as
defined
by
the offset table.
In other words, the first menu in the offset
The name table is terminated
table is menu 1, the second is menu 2, etc.
with a null byte.
third section of the menu definition is the actual text of each menu.
The text for each menu is normally preceded by a label, which was used in
the offset table.
Each
line of text is defined with the L macro. This
accepts one line of ASCII text, and appends a carriage return/linefeed to
it. Since most menus contain embedded blanks, the assembler will require
angle brackets around the text. The last line of text in a menu is defined
by the LL macro. This macro terminates the text with a null byte instead of
The
with a CRLF.
first menu defined in the offset table is always used by VUE as the
screen menu; i.e., it is always displayed when VUE leaves Screen mode.
The
second menu defined is initially the Command mode menu.
The
for the standard
understanding menu generation.
The
sources
AlphaVUE
menu
are
included
to
aid
in
t
ALPHAVUE USER'S MANUAL — INDEX
Page Index—i
Index
Auto Line Numbering
.
.
.
2—11
Backspace command
BASIC fiLes
Beginning of Line command
Blank Line Generation
2—2
2—11
.
.
.
.
2—2
3—16
Block delimiting symbols
3—11
BLock Operations
1—13, 2—7, 3—11
Break command
2—6
Carriage return
2—6
Center command
3—12
Center Cursor command
2—5
Character insert mode
2—7, 2—9
Clear command
3—12
Column
4—5
Command abbreviations
3—20
Command format
3—1
Command mode
Comment
Concatenate Line command
Control—characters
Form feed
Control—characters in file
1—9, 3—1
.
.
.
.
1—1
.
.
.
Control, commands
Break
Toggle character insert mode
1—7
2—8
2—6
2—6
ESCAPE
Toggle entry mode
4—5
2—6
.
2—6
2—7
Copy Block command
Cursor
2—7
3—11
1—4
Cursor control commands
2—1
Backspace
Beginning of Line
Center Cursor
Down
End of Line
Ending Page
Forward
2—2
2—2
2—5
2—4
2—3
2—5
2—1
ALPHAVUE USER'S MANUAL — INDEX
Page Index—2
Go to Next Word
Go to Previous Word
2—3
2—3
2—4
2—5
Home
Page Down
PageUp
.2—5
Up
2—4
Delete Block command
Delete Line command •
Delete to End of Line
3—12
2—5
2—3
command
Delete Word command .
2—3
.
.
2—3
Deleting characters
Deleting lines
.
Deleting words
.
.
.
.
21 to 2—3
.
2—3
3—6
3—2
3—6
3—6
3—3
3—3
Directory command
.
Disk access commands
Dir
Erase
Finished
Go
35
UnYank
Yank
Down command
.
.
.
.
3—4
2—4
Edit command
.
.
.
.
3—15
End of Line command
Entry mode
.
End command
2—5
2—3
2—7, 2—10
Fields
Folding
Line insert
Next field
2—10
.
.
.
•
2—11
2—11
.
.
2—10
3—13
3—14
3—14
.
Environment commands
Pop
Push
Erase Command
.
.
.
.
.
.
.
Erase Line command
Erasing lines
Errors
.
.
36
2—4
2—4
4—2
2—6
ESCAPE
Extension
4—2
File editing commands
2—4
Filename
4—2
1—3
Files
Finish command
.
.
.
Folding
.
.
3—13
.
Form feeds
Format command
3—3
2—11
1—7
.
.
.
.
ALPHAVUE USER'S MANUAL — INDEX
Formatting commands
Center
.
.
Format
S
S
•
Width
Forward command
Page Index—3
S
3—12
3—12
3—13
3—13
2—2
Global Replace command
3—10
Go
4—4
3—3
2—3
2—3
Go command
Go to Next Word command
Go to Previous Word command
Help
Home command
4—3
2—4
.
Indent mode
INI.VUE
2—12
Insert command
.
.
Insert Line command
Inserting characters
Invoking VUE
.
4—2
2—2
2—5
2—1
4—1
Line length
2—1
Margin command
.
Maximum line Length
Memory Split commands
Split
Unsplit
Menu
Merging Files
3—15
1—7
3—14
3—14
3—14
1—5
.
3—5
Move Block command
3—12
Next command
3—8
Next field
.
Next Match command
Options
Page command
Page Down command
Page Up command
2—10
2—6
1
ALPHAVUE USER'S MANUAL — INDEX
Parameter setting commands
Column
Comment
Control
Delta .
Field .
Fold
Help
.
.
.
.
.
.
.
.
.
.
.
.
.
.
Indent
Insert
Sblk
.
.
.
Page Index—4
.
.
.
.
.
.
.
.
.
.
.
.
Searchfold
Smart . . . .
Space . . . .
Text
-
.
Wrap
.
.
.
.
.
.
Pop command .
Push command
.
.
Quit command
3—16
3—18
3—17
3—19
3—19
3—18
3—19
3—17
3—17
3—18
3—17
3—17
3—19
3—19
3—16
3—17
3—14
3—14
34
Replace String command
Replacing characters
3—9
3—9
RETURN
RUBOUT
1—2, 2—6
2—2, 2—9
Save command
3—3
Screen mode
2—1
Screen—editing modes
2—8
2—2
Scrunch command
Search command
Next match
Searching for characters
Split command
Splitting files
Splitting lines
TAB
.
.
.
.
3—8
2—6
3—8
3—14
3—5
2—5
Text Mode
1—7
2—9
4—5
Unsplit command
3—14
Text fiLes
Unyank
Up command
3_5
2—4
ALPHAVUE USER'S MANUAL — INDEX
VUE command line
. 4—1
VUE initialization file
Column
Comment
Control
Default
Field
Fold
Go
Help
Indent
Insert
Searchfold
Smart
Space
Start
Text
Wrap
4—2, 49
4—5
4—5
4—8
4—3
4—6
4—6
4—4
4—3
4—7
4—6
4.7
4—8
4—6
4—4
45
4—5
Whole command
Wrap Mode . .
3—8
4—5
Yank command
3'4
Page Index—5