1
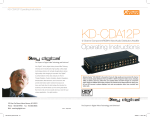
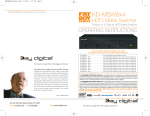
KD-HDMI2x4P Operating Instructions
KD-HDMI2x4P
2-to-4 HDMI Distribution Amplifier and Switcher
Operating Instructions
Key Digital®, led by digital video pioneer Mike Tsinberg,
develops and manufactures high quality, cutting-edge
technology solutions for virtually all applications where
high quality video imaging is important. Key Digital®
is at the forefront of the video industry for Home
Theater Retailers, Custom Installers, System Integrators,
Broadcasters, Manufacturers, and Consumers. We
provide total video system solutions because we
know and help drive the technology, the industry, the
business, and all the latest up-and-coming standards.
But most of all, we know exactly what you need for your
HDMI2x4P
™
The KD-HDMI2x4P by Key Digital® is a state-of-the-art two-inputs to four-outputs HDMI
Distribution Amplifier that ensures the absolute best, crystal-clear and pristine picture
quality. The KD-HDMI2x4P is ready to handle ALL of your digital HD and SD video
switching and distribution needs including 1080p/60, and a multitude of analog and
digital audio formats.
unique application - the right solution.
521 East 3rd Street, Mount Vernon, NY 10553
Phone :: 914.667.9700 Fax :: 914.668.8666
Web :: www.keydigital.com
HDMI2x4P_Manual.indd 2-1
Rev 0 – April 2006
5/15/06 12:33:49 PM
Page Page KD-HDMI2x4P Operating Instructions
Table of Contents
KD-HDMI2x4P Operating Instructions
Quick Facts and Quick Setup of the KD-HDMI2x4P
Quick Facts and Quick Setup of the KD-HDMI2x4P . . . . . . . . . . . . . . . . . . . . . . . . . . . . . . . . . . 1
Terminology . . . . . . . . . . . . . . . . . . . . . . . . . . . . . . . . . . . . . . . . . . . . . . . . . . . . . . . . . . . . . . . . 5
About the KD-HDMI2x4P . . . . . . . . . . . . . . . . . . . . . . . . . . . . . . . . . . . . . . . . . . . . . . . . . . . . . . 6
Key Features . . . . . . . . . . . . . . . . . . . . . . . . . . . . . . . . . . . . . . . . . . . . . . . . . . . . . . . . . . . . . . . . 9
What’s Included . . . . . . . . . . . . . . . . . . . . . . . . . . . . . . . . . . . . . . . . . . . . . . . . . . . . . . . . . . . . 11
Getting Started . . . . . . . . . . . . . . . . . . . . . . . . . . . . . . . . . . . . . . . . . . . . . . . . . . . . . . . . . . . . . 12
Basic Operation . . . . . . . . . . . . . . . . . . . . . . . . . . . . . . . . . . . . . . . . . . . . . . . . . . . . . . . . . . . . 20
IR Remote Control . . . . . . . . . . . . . . . . . . . . . . . . . . . . . . . . . . . . . . . . . . . . . . . . . . . . . . . . . . 27
Firmware Upgrades . . . . . . . . . . . . . . . . . . . . . . . . . . . . . . . . . . . . . . . . . . . . . . . . . . . . . . . . . 29
Thank you for purchasing the KD-HDMI2x4P by Key Digital®, an HDMI 2-input switcher to 4-output
distribution amplifier that supports 1080p/60 and HDCP copy protection. It is the perfect choice for
home theaters, custom installers, retailers, and all digital video applications.
The KD-HDMI2x4P handles HDMI video and audio, various analog audio formats, and is DVI-D
compatible with Key Digital® adapters and cables. It simply switches either of two (2) HDMI input
sources to all four (4) of its outputs simultaneously, driving up to four HDMI-enabled displays and
digital or analog audio systems. There is no video or audio processing, so your signals remain pure
and untouched.
The KD-HDMI2x4P is easy to control via front-panel pushbuttons, IR remote control, IR extender,
and RS-232. It comes complete with user-selectable options for display EDID and audio output
format. Conveniently located status-monitoring LEDs in two locations allow you to quickly see
your choices. Multiple units can be daisy chained for expansion, and up to eight (8) units can be
individually addressed in the same room.
If you are familiar with HDMI Switching and Distribution, use the following Quick
Setup to guide the hook-up, operation, and control of your KD-HDMI2x4P. Always
follow all detailed instructions provided in this entire Operating Manual.
RS-232 Commands . . . . . . . . . . . . . . . . . . . . . . . . . . . . . . . . . . . . . . . . . . . . . . . . . . . . . . . . . 29
Technical Specifications . . . . . . . . . . . . . . . . . . . . . . . . . . . . . . . . . . . . . . . . . . . . . . . . . . . . . . 30
How to Contact Key Digital . . . . . . . . . . . . . . . . . . . . . . . . . . . . . . . . . . . . . . . . . . . . . . . . . . . 34
®
The KD-HDMI2x4P Quick Setup Guide on the following pages covers the following topics:
› The Input and Output Capabilities of the KD-HDMI2x4P
› The Input and Output Ports
› Control Options for the KD-HDMI2x4P
› Operating the KD-HDMI2x4P
© 2006 Key Digital, Inc. All rights reserved.
HDMI2x4P_Manual.indd 2-1
5/15/06 12:33:52 PM
Page Page KD-HDMI2x4P Operating Instructions
KD-HDMI2x4P Operating Instructions
KD-HDMI2x4P Quick Setup Guide
The Input and Output Ports
Do not connect the external 5 Volt DC supply (provided) to
the back of the KD-HDMI2x4P unit until ALL of your video and
audio connections to the KD-HDMI2x4P unit are complete.
Input Ports
Output Ports
(two banks: Input 1 and Input 2) receive HDMI
video and a variety of audio options.
(four banks: Output 1, Output 2, Output 3,
and Output 4) drive up to four displays and
audio systems.
Analog Stereo
Left
(White)
& Right
Audio
Analog
Stereo
Left
(White)(Red)
& Right
(Red) Audio
The Input and Output Capabilities of the KD-HDMI2x4P
Analog Stereo
Left
(White)
& Right
Audio
Analog
Stereo
Left
(White)(Red)
& Right
(Red) Audio
› Handles ALL video frame rates and video resolutions (including 1080p/60 Hz)
and clock rates up to 165 MHz
VIDEO
VIDEO
HDMI*
HDMI*
HDMI Connector
Toslink Optical
HDMI Connector
AUDIO
Cable Box
DVD Player
AUDIO
Toslink Optical
Toslink Connector
Toslink Connector
Digital PCM
Digital PCM
White = Left
RCA Jack
White = Left
RCA Jack
Analog Stereo
HDMI SPDIF
HDMI SPDIF
Toslink wired
Toslink wired
Digital PCM
Digital PCM
HDMI Video
& Audio
HDMI
Video & Audio
Control Options for the KD-HDMI2x4P
Main IR sensor
Analog Stereo
HDMI or DVI-D Video, and
multiple Audio formats
White = Left
Red = Right
RCA Jack
HDMI Video
& Audio
Audio
HDMI
Video & Audio Toslink Optical
Toslink
Optical Audio
Digital PCM
Audio
Digital
PCM Audio
White = Left
Red = Right
RCA Jack
INPUTS
Wired
IR Input
OUTPUTS
RS-232
One of FOUR identical but totally separate
distribution amplifier outputs
VIDEO
HDMI*
HDMI Connector
AUDIO
Display
Digital PCM
• From Digital PCM Input
• From Toslink Input
• SPDIF from HDMI Audio Input
Be sure the Operation Mode switch
is in the “Normal” position
Second IR sensor
Can be used:
• In conjunction with an IR Extender (like a Xantech)
• To operate the unit with your IR remote control
IR Extender
IR or Wired IR
White = Left
RCA Jack
Analog Stereo
*Audio from the HDMI link
is also available at the
HDMI 2x4 output as SPDIF
HDMI2x4P_Manual.indd 2-3
• From Analog Stereo Input
Surround Sound
Optional
White = Left
Red = Right
RCA Jack
Contact Key Digital® with the Serial Number of your unit to
verify if your unit has the wired IR serial connector enabled.
5/15/06 12:34:00 PM
Page Page KD-HDMI2x4P Operating Instructions
KD-HDMI2x4P Operating Instructions
Operating the KD-HDMI2x4P
TERMINOLOGY
Note that if you choose the “Auto Select” mode of input selection, the KD-HDMI2x4P looks for an
active HDMI source on Input 1 to switch and distribute to your displays. In this mode, if your source
connected to Input 1 is not active, the HDMI2x4 automatically switches to Input 2.
OUTPUT EDID CONTROL pushbutton
lets you select the preferred display EDID:
› Display resolution connected to Output 1
› Display resolution connected to Output 2
› Display resolution connected to Output 3
› Display resolution connected to Output 4
› Factory default [480p is the default
resolution]
LEDs show your selection.
INPUT SWITCH CONTROL
pushbutton
selects the input Source that
you want to send to your
displays and audio systems.
LEDs show your selection.
DIGITAL AUDIO
SELECT pushbutton
selects the type of
audio you want to
send to your audio
systems.
CEC
Consumer Electronics
Control
CEC is an optional protocol used in HDMI systems that allows
HDMI devices to pass control functions along to all devices within
the system.
DVI-D
Digital Video Interface
- Digital
DVI-D is a digital interface standard created by the Digital Display
Working Group (DDWG) to convert analog video signals into digital
video signals to accommodate digital monitors. Typically used for
PC monitors, the video portion of HDMI as compatible with DVI-D
using simple adapters.
EDID
Extended Display
Identification Data
EDID is a VESA standard data format that contains basic
information about a monitor and its capabilities. Information
includes vendor information, maximum image size, color
characteristics, factory pre-set timings, frequency range limits, and
character strings for the monitor name and serial number.
HDCP
High-bandwidth Digital
Content Protection
HDCP is the copy protection scheme adopted for use with HDMI.
HDMI
High-Definition
Multimedia Interface
HDMI is an uncompressed, all-digital audio/video interface that
supports over one cable standard-, enhanced-, and high-definition
video, and multi-channel audio. It is backward compatible with
DVI-D for the video portion, using simple adapters.
IR
Infrared
IR, like the Infrared remote control. Simply point the front of an IR
remote control unit towards the IR sensor on the product to be
controlled.
LEDs show your
selection.
LED
Using the table on the right as a guide, the status LEDs
let you monitor your output audio selection (in addition
to the audio provided over the HDMI link). Digital audio is
output over the white [left] RCA jacks only
LEDs correspond to the selection of
the Input Switch Control
A handy, second set of LEDs allows you
to monitor your input source selection
from the side of the KD-HDMI2x4P.
PCM,
digital
PCM
LEDs (light-emitting diodes) are like small light bulbs that light up
to indicate a selection, and are used as status indicators.
Pulse Code Modulation
RCA jack
PCM is a sampling technique for digitizing analog signals,
especially audio signals. Used in this Operating Manual to refer to
digital audio.
An RCA jack or what was called a “phono plug” is an industry
standard audio connector used for the audio inputs and outputs of
the KD-HDMI2x4P. The left [white] jack is used for the digital audio
formats. Analog stereo audio uses both jacks, where white = the
left channel, and red = the right channel.
SPDIF,
S/PDIF
Sony/Philips Digital
Interface
SPDIF (also written as S/PDIF) is a standard audio file transfer
format, developed jointly by Sony and Philips corporations. S/PDIF
allows the transfer of digital audio signals from one device to
another without having to be converted first to an analog format.
Toslink™,
Toslink
Toslink was originally
created by Toshiba to
connect their CD players
to their receivers for
PCM audio streams
Toslink™ (also written as TOSLINK™) is a standardized optical fiber
connection system, most commonly used in consumer audio
equipment to carry a digital audio stream between components.
Each of the two (2) HDMI input connectors has a hot-plug detect LED,
as an indicator that there is an active HDMI source.
HDMI2x4P_Manual.indd 4-5
5/15/06 12:34:02 PM
Page Page KD-HDMI2x4P Operating Instructions
KD-HDMI2x4P Operating Instructions
About the KD-HDMI2x4P
KD-HDMI2x4Example
Application Example
KD-HDMI2x4P Application
2-to-4 HDMI Distribution Amplifier and Switcher
HDMI lets “source” devices (such as your DVD player, Satellite / Set Top Box, or PC) digitally
interconnect and “talk” with your “sink” devices (namely your displays and audio systems). Your
KD-HDMI2x4P HDMI distribution amplifier and switcher by Key Digital® will switch and distribute
directly to your displays and audio systems precisely the exact video and audio signals
delivered by your sources – transparently, pristinely, truly untouched, and crystal-clear!
Display w/Speakers
www.keydigital.com
Surround Sound
Display w/Speakers
HDMI/HDCP (or DVI Video*)
HDMI/HDCP (or DVI Video*)
L&R, PCM Audio
Display w/Speakers
HDMI/HDCP (or DVI Video*)
Display w/Speakers
HDMI/HDCP (or DVI Video*)
*To connect DVI-D Video
use HDMI to DVI adapter
OFF
KD-HDMI2x4
Front IR
EDID Select
D
Default
1
2
3
R1
R2
4
R3
Input Select
1
2
Auto
A
Audio Format Select
SPDIF
TOSL
PCM
ALOG
Device Select
1
2
3
4
5
6
7
8
HDMI/HDCP
(or DVI* Video)
HDMI/HDCP
(or DVI* Video)
Wired IR
Cable Box
Toslink Optical Audio
Toslink Optical Audio
Key Digital Exclusive Technologies
®
The KD-HDMI2x4P concurrently switches and distributes HDMI digital HD and SD video and audio,
and is DVI-D compatible with Key Digital® adapters and cables. It also allows you to separately
select for output on RCA audio jacks either: SPDIF audio (derived from the audio that can be
present on the selected HDMI source input), Toslink optical audio input converted to digital PCM
audio, digital PCM audio, or analog left & right stereo audio.
All the features of the KD-HDMI2x4P can be controlled via front-panel pushbutton switches, IR
remote control, or RS-232. Conveniently located status-monitoring LEDs in two locations allow you
to monitor the status of your selections. The product also provides a user-selectable display EDID
capability, and supports the HDMI “CEC” (Consumer Electronics Control).
The perfect blend of HDMI switching, distribution, and convenient features that
you’ve been looking for…
The KD-HDMI2x4P is ideally suited to interface your two favorite HDMI or DVI-D source devices,
like your DVD player, Satellite Box, HD DVR, Set Top Box, or even your PC, to up to four displays
with an HDMI or DVI-D input, all the way up to 1080p/60 resolution. Handles ALL frame rates
and clock rates up to 165 MHz. The KD-HDMI2x4P is engineered for crystal-clear switching and
distribution, delivering picture-perfect images to your displays. It also handles the switching and
distribution of digital and analog audio.
HDMI2x4P_Manual.indd 6-7
RS-232
DVD Player
Select either of two HDMI video & audio sources, and
outputs (displays and audio systems):
Supported Technologies
ISO 9001 them
switch
to up to four
First and foremost, you purchased your Key Digital® KD-HDMI2x4P as a distribution amplifier and
switcher. The product has two separate, independent HDMI inputs, capable of supporting source
and display products with HDCP (High-bandwidth Digital Content Protection) copy protection.
Simply connect any two HDMI video sources, like your DVD player and digital
cable Set Top Box, to the inputs of the KD-HDMI2x4P. Audio can be input in
a multitude of formats, including audio carried over the HDMI link (output as
HDMI and SPDIF), Toslink optical (output as wired digital PCM), digital PCM, and
analog stereo left and right channels. You can then independently drive up to
four separate displays and audio systems, all with the same video and audio
source of your choosing, delivering crystal-clear pictures and premium audio quality.
Versatile video and audio inputs and outputs:
Let’s look at the versatility offered by your KD-HDMI2x4P distribution amplifier and switcher.
HDMI, which carries both video and audio, is input and output on separate 19-pin HDMI Type A
connectors. Flexible user-selectable audio interfaces include HDMI inputs and outputs (HDMI
carries both video and audio), SPDIF output (derived from the HDMI audio input), Toslink optical
audio inputs converted to a wired digital PCM audio output, digital PCM audio inputs and outputs,
and analog left & right stereo audio inputs and outputs. If you have a DVI-D source device you
want to switch, or a display with a DVI-D input you want to drive, simply use Key Digital® HDMI / DVI
adapters and cables. All audio inputs and outputs (except HDMI inputs and outputs, and Toslink
inputs) are available on color-coded RCA female jacks.
5/15/06 12:34:18 PM
Page Page KD-HDMI2x4P Operating Instructions
Display EDID selection:
Because HDMI is a convenient plug-and-play standard, your source device (like your DVD player)
always “knows” the capabilities of your display. That’s because the display, through the HDMI link,
tells the source its preferred resolution format. This preferred resolution format, among other details
of the display, are a part of the display’s “EDID” (EDID = Extended Display Identification Data).
Since the KD-HDMI2x4P distribution amplifier and switcher lets you distribute the selected source
to up to four displays, you’ll want to be able to “tell” your selected source device which display
(and hence resolution format) is preferred. The KD-HDMI2x4P lets you select any one of the four
displays to provide the preferred EDID (that’s the jargon for the format), or you can select the factory
default of 480p.
So let’s say you have a DVD changer connected to a video processor that can output every
imaginable resolution, even true HD 1080p/60. If you connect the output of the video processor
using HDMI to a display that can only handle up to SD resolution, like 480p, then the display
EDID automatically “tells” the video processor to output no more than 480p. After all, if the video
processor output 1080p/60, that display would not operate!
Since the KD-HDMI2x4P lets you drive up to four different displays, its smart EDID selection
capability lets YOU tell the source device which display EDID should be the “master” that
determines the best display resolution for all your displays. For example, if three of your displays
handle HD 1080p/60 but one handles only SD 480p, then the only way to light up all four displays
is for you to set the KD-HDMI2x4P (via the EDID selection control switch) to tell the source to
output no more than 480p.
KD-HDMI2x4P Operating Instructions
Key Features
You’ve come to expect only the best from Key Digital®. Here are some of the practical and
convenient features you can enjoy with your state-of-the-art KD-HDMI2x4P distribution amplifier
and switcher.
HDMI 2-input switcher to 4-output distribution amplifier:
› Crystal-clear digital switching of two (2) separate HDMI inputs to four (4) separate HDMI outputs:
➔
›
›
›
Supports HDMI “CEC”:
Key Digital® has engineered it all into the KD-HDMI2x4P distribution amplifier and switcher, even
CEC pass-through. CEC (Consumer Electronics Control) is an optional protocol used in HDMI
systems that allows HDMI devices to pass control functions along to all devices within the system.
Your KD-HDMI2x4P supports this capability.
›
So easy to operate and control:
›
With so much versatility and so many features, you may be asking: “Is the KD-HDMI2x4P
distribution amplifier and switcher by Key Digital® easy to operate and control?” In fact, it couldn’t
be easier! Simply use the convenient front-panel pushbutton switches, the IR remote control
provided, an “IR extender” (optical or hardwired, like those manufactured by Xantech), or your RS232 control system to select the source you want to enjoy on your displays and audio systems.
Monitor the status of your selections with banks of LEDs mounted in two handy positions on the
unit, so you can see the status from convenient vantage points. There is even an intelligent autosense mode you can select to automatically detect the active HDMI source and switch it to the
outputs for display.
Here’s what you can control on your KD-HDMI2x4P distribution amplifier and switcher:
› Select the desired input video and corresponding audio source for distribution to up to four
displays and audio systems, with convenient front and side LEDs that indicate your selection
› Separately select the desired audio output format to be available on the output RCA audio jacks
for distribution to your audio system or simply the speakers built into your displays, with front
LEDs that indicate your selection
› Select the display EDID for your upstream source device, with front
HDMI2x4P_Manual.indd 8-9
Each output is totally independent, and carries the same, identical signal as the input
Maintains pure digital and pristine picture quality from either of your two input sources to
every output display and audio system
➔ HDMI Type A 19-pin connectors
➔ Supports DVI-D video inputs and outputs with Key Digital® HDMI/DVI-D adapters and cables
Compatible with all video resolutions, including:
➔ Up to 1080p/60
➔ ALL frame rates, including the popular 60 Hz, 50 Hz, and 72 Hz refresh rates
➔ Clock rates up to 165 MHz
Supports products complaint with HDCP Copy Protection
User-selectable or factory default output display EDID, for HDMI upstream source device:
➔ HDMI functionality with hot plug detection
Supports CEC (Consumer Electronics Control)
➔ An optional protocol used in HDMI systems that allows HDMI devices to pass control
functions along to all devices within the system
Auto-select switching of the active HDMI source input can be activated
Expandable and future-proof, can cascade and daisy chain multiple units to accommodate
additional HDMI sources and displays
➔
›
Switches and distributes video and audio with individual input and output
connectors for:
› HDMI with HDCP video and audio inputs (2 HDMI connectors) and outputs (4 HDMI connectors)
› All audio inputs and outputs (except HDMI inputs and outputs, and Toslink inputs) are available
on color-coded RCA female jacks
› Separately select the desired audio output format to be available on the output RCA audio jacks
for output to your audio system or simply the speakers built into your displays, either [see note 1]:
➔ Audio on the HDMI inputs (2 HDMI connectors) converted to SPDIF audio outputs (4 RCA
female jacks)
➔ Toslink optical audio inputs (2 Toslink connectors) converted to digital PCM audio outputs (4
RCA female jacks)
➔ Digital PCM audio inputs (2 RCA female jacks) and outputs (4 RCA female jacks)
➔ Analog stereo left & right audio inputs (2 RCA female jack pairs) and outputs (4 RCA female
jack pairs)
5/15/06 12:34:19 PM
Page 10
Page 11
KD-HDMI2x4P Operating Instructions
KD-HDMI2x4P Operating Instructions
Key Features (continued)
What’s Included
While SPDIF out is generated from the HDMI audio on the selected input, and Toslink inputs are
converted to wired digital PCM, your KD-HDMI2x4P does NOT perform any audio processing or
further audio conversions. Hence, the various audio output options require the corresponding form
of audio to be input to the unit.
Follow these instructions to quickly and easily set-up your KD-HDMI2x4P distribution amplifier and
switcher unit.
Easy to install, in minutes:
› Simple to connect in your system
› Built-in mounting flanges provided
Easy to control and operate:
Open the carton and you will find the following contents:
1.
2.
3.
4.
5.
One KD-HDMI2x4P distribution amplifier and switcher unit
Separate external 5-Volt power supply
IR remote control with batteries included
Operating Instructions Manual
Warranty card
› Convenient front-panel pushbuttons for control, and corresponding LEDs for status:
Pushbuttons provided on the face of the unit
Front- and side-mounted LEDs for switching status
➔ HDMI hot-plug detect LEDs provided on the input HDMI connectors allow the user to observe
the presence of active video on the connected HDMI inputs
› Easy-to-operate IR remote control:
➔ Front and rear-panel IR sensors provided (rear panel sensor, perfect for Xantech IR extender)
➔ Wired IR serial connector provided [see note 2]
› RS-232 port:
➔ Compatible with all control systems
➔ Firmware upgradeable [see note 3]
➔
➔
Caution: When unpacking and installing the unit, make all
video and audio hookups and connections before plugging
in the external power supply provided with your unit. Do NOT
apply power to the unit until all video and audio connections
have been made to your KD-HDMI2x4P unit from the “source”
devices to the display(s) and/or audio system(s). You MUST
use the external power supply provided with your unit or you
VOID the Key Digital® Warranty and risk damage to your unit
and associated equipment.
[1]The white [left] RCA female jacks are shared among these signals for each of the four separate output banks, so only
one of these audio formats [HDMI SPDIF, Toslink optical converted to digital PCM, digital PCM, or analog stereo left &
right] is available at a time.
[2]Contact Key Digital® with the Serial Number of your unit to verify if your unit has the wired IR serial connector enabled.
[3]Contact Key Digital® with the Serial Number of your unit to determine the correct Firmware Upgrade procedure for
your unit. Check our web site at www.keydigital.com for Firmware Upgrade instructions and notification of
any available Firmware Upgrades for you to optionally install in your unit.
Getting Started
Basic Operations
Connect your video
and audio sources, and
your displays and sound
systems, and control
and power supply, to
the KD-HDMI 2x4
Learn how to control and
operate your KD-HDMI
2x4 using the front-panel
pushbutton switches with
LEDs for monitoring your
selections
IR Remote Control
Technology
It’s the custom Key Digital® technology that allows us to deliver the highest level of picture
quality attainable in all of our products, like the proprietary technology we engineered for you into
the KD-HDMI2x4P:
HDMI2x4P_Manual.indd 10-11
Learn how to control and
operate your KD-HDMI
2x4 using the IR Remote
Control provided with
your unit
5/15/06 12:34:24 PM
Page 12
Page 13
KD-HDMI2x4P Operating Instructions
KD-HDMI2x4P Operating Instructions
Getting Started
Getting Started (continued)
1. Find a safe and convenient location to secure, mount,
or place your KD-HDMI2x4P unit.
Connect your video and audio sources, and your displays and sound systems,
and control and power supply, to the KD-HDMI 2x4
Setting up your KD-HDMI2x4P HDMI 2-to-4 distribution amplifier
and switcher for years of enjoyment is a snap:
Your KD-HDMI2x4P distribution amplifier and switcher by Key Digital® is easy to configure and
operate. In this section, you will first connect all of your video and audio input and output devices
to your KD-HDMI2x4P unit. These are the topics covered in detail in this section of the Operating
Manual that you must follow for the proper installation of your KD-HDMI2x4P unit:
1. Find a safe and convenient location to secure, mount, or place your KD-HDMI2x4P unit.
2. Connect your HDMI or DVI-D source devices to the input ports of your KD-HDMI2x4P
unit.
3. Then connect your HDMI or DVI-D Displays to the output ports of your KD-HDMI2x4P
unit.
4. If you do not plan on using the audio available from your sources over the HDMI link,
then connect your audio sources to the RCA and/or Toslink input ports of your
KD-HDMI2x4P unit.
5. If you do not plan on using the audio available from your sources over the HDMI link,
then connect your audio systems to the RCA output ports of your KD-HDMI2x4P unit.
6. Connect the Control inputs to your KD-HDMI2x4P unit, if desired.
7. Be sure the Operation Mode Switch is set to the “Normal” position.
8. Finally, connect the power supply provided with your KD-HDMI2x4P unit.
Take advantage of the convenient mounting flanges built into
the unit. Use proper care to secure the unit to walls or
other surfaces, using appropriate anchors and/or
mounting hardware [not included with your unit].
The KD-HDMI2x4P unit can run “hot” so it is recommended to leave
enough ventilation space to provide sufficient airflow and cooling,
especially if you are going to leave the unit “On” most of the time. Be sure
to allow sufficient airflow, and do not cover the ventilation openings on the side of the unit.
Before final installation of cables behind walls or ceilings, and permanently securing
the unit, it is recommended to test for proper operation of the unit and cables in
your system.
2. Connect your HDMI or DVI-D source devices to the input ports
of your KD-HDMI2x4P unit.
Do not connect the external 5 Volt DC supply (provided) to
the back of the KD-HDMI2x4P unit until ALL of your video and
audio connections to the KD-HDMI2x4P unit are complete.
Typical KD-HDMI2x4P interface configurations for the input (source) devices and the output (sink)
display and/or audio components of your home theater setup or other installation are illustrated in
the following instructions.
HDMI/HDCP
(or DVI* Video)
HDMI/HDCP
(or DVI* Video)
INPUT 1
Input Ports
Output Ports
A typical INPUT PORT (there are two individual
banks) to receive one of up to two sources of
HDMI video and a variety of audio options.
A typical OUTPUT PORT (there are four
individual banks) to drive one of up to four
displays and speakers (or audio systems).
Analog Stereo
Analog
Left (White)
Stereo &Left
Right
(White)
(Red)& Audio
Right (Red) Audio
HDMI Video HDMI
& Audio
Video & Audio
Toslink Optical
Toslink
Audio
Optical Audio
Digital PCM Digital
Audio PCM Audio
INPUT 2
*To connect DVI-D Video
use HDMI to DVI adapter
Cable Box
DVD Player
Connecting HDMI video from your sources to your KD-HDMI2x4P input ports is easy – video
is delivered digitally and transparently over the HDMI link (audio can also be carried over this
HDMI link).
If one or both of the sources you would like to connect to your KD-HDMI2x4P unit has only DVI-D
connectors, then you should use Key Digital® HDMI to DVI-D adapters at the source output,
followed by an HDMI cable, to connect that source to the HDMI connector inputs of your
KD-HDMI2x4P. Note that while HDMI supports both video and audio over an HDMI cable, DVI-D
HDMI SPDIFHDMI SPDIF supports video only and will therefore require that you connect any audio source separately to the
Toslink wiredToslink wired
Digital PCM Digital PCM KD-HDMI2x4P, as described later in this Operating Manual.
Analog Stereo
Analog
Left (White)
Stereo &Left
Right
(White)
(Red)& Audio
Right (Red) Audio
HDMI Video HDMI
& Audio
Video & Audio
DVI Connector
DVI-D
HDMI2x4P_Manual.indd 12-13
Key Digital
HDMI Cable
5/15/06 12:34:30 PM
Page 14
Page 15
KD-HDMI2x4P
HDMI/HDCP
HDMI/HDCP Operating Instructions
KD-HDMI2x4P Operating Instructions
(or DVI* Video)
(or DVI* Video)
INPUT 1
INPUT 2
Getting Started (continued)
*To connect DVI-D Video
Getting Started (continued)
use HDMI to DVI adapter
Cable sources
Box
DVI-D
3. Then connect your HDMI or DVI-D Displays to the output ports
of your KD-HDMI2x4P unit.
DVD Player
If your source does not support HDMI but has a DVI-D output, you will need a DVI-D to HDMI
Adapter at the output of your source.
The Key Digital® DVI to HDMI Adapter is the perfect choice.
OUTPUT 1
OUTPUT 3
Surround Sound
Display w/Speakers
DVI Connector
DVI-D
DVD Player
Display w/Speakers
HDMI/HDCP
(or DVI Video*)
HDMI/HDCP
(or DVI Video*)
Key Digital
HDMI Cable
HDMI Cable
HDMI/HDCP
(or DVI Video*)
HDMI/HDCP
(or DVI Video*)
Important notes about digital Cables and Cable lengths:
OUTPUT 1
CAUTION: Always test first, before permanently installing the KD-HDMI2x4P
Always test the picture and audio quality, integrity of the connections, and overall
operation before permanently installing the KD-HDMI2x4P in your system, and
especially before cables are pulled behind walls or ceilings.
OUTPUT 3
Surround Sound
Display w/Speakers
HDMI/HDCP
(or DVI Video*)
Display w/Speakers
OUTPUT 4
OUTPUT 2
HDMI/HDCP
(or DVI Video*)
Display w/Speakers
Surround Sound
➔
It is recommended that you always use high-quality HDMI (or
DVI-D, if applicable) cables, like those available from Key Digital®.
➔
Limitations of the HDMI source (sink) devices and/or the use of inferior cables
may further restrict the length of your cable runs.
➔
When using an HDMI cable extender, like the Key Digital® KD-HDB150, always
OUTPUT
2
test first for proper operation and error-free picture & audio quality, and
follow
Display w/Speakers
the instructions provided with the unit for proper installation and configuration.
HDMI/HDCP
(or DVI Video*)
Since HDMI can carry both video and audio, you can take advantage of the HDMI link from your
source selection to your display to drive the speakers built into your display, if you desire.
If any of the displays you would like to connect to your KD-HDMI2x4P unit has only DVI-D
connectors, then you
should use Key Digital® HDMI to DVI-D adapters at the KD-HDMI2x4P
HDMI/HDCP
Video*)
output, followed by(oraDVIDVI-D
cable, to connect from the output of your KD-HDMI2x4P to the DVI-D
input of the display. Note that while HDMI supports both video and audio over an HDMI cable,
DVI-D supports video only and will therefore require that you connect any audio outputs separately,
OUTPUT 4
as described later in this Operating Manual.
Surround Sound
Display w/Speakers
DVI-D Displays
*For DVI-D applications, use a Key Digital® HDMI to DVI-D Adapter at the Output of the KD-HDMI 2x4
Use extreme care when adapting DVI-D to HDMI and HDMI to DVI-D.
Always use an adapter at the source (that is, at the start of the run), test first before
installing permanently in your system, and restrict your cable lengths as follows:
➔
50-foot maximum HDMI cables driven from a DVI-D source with a DVI-D to
HDMI adapter, or less for 1080p/60 video resolution.
➔
30-foot maximum DVI-D cables driven from HDMI with an HDMI to DVI-D
adapter.
➔
Cable length extenders must be installed per their product instructions and
must be tested before permanent installation.
Display w/Speakers
*For DVI-D applications, use a Key Digital® HDMI to DVI-D Adapter at the Output of the KD-HDMI 2x4
HDMI Output
D
If your display does not support HDMI but has a DVI-D input, you will need an HDMI to DVI-D
Adapter at the output of the KD-HDMI2x4P.
The Key Digital® HDMI to DVI-D Adapter is the perfect choice.
HDMI Output
DVI Cable
DVI-D Input
Display
HDMI2x4P_Manual.indd 14-15
5/15/06 12:34:41 PM
Page 16
Page 17
KD-HDMI2x4P Operating Instructions
KD-HDMI2x4P Operating Instructions
Getting Started (continued)
Getting Started (continued)
4. If you do not plan on using the audio available from your sources over the
HDMI link, then connect your audio sources to the RCA and/or Toslink input
ports of your KD-HDMI2x4P unit. If you are using the audio provided via the
HDMI audio link only, then you may skip Steps 4 and 5 and proceed to Step 6.
Your displays may have the capability to receive audio over the HDMI link, and output the audio
over built-in speakers, for example. However, you may also have separate audio systems, or even a
Surround Sound System. Or, your displays may only accept some other form of audio.
In addition to the audio provided over the HDMI link, you have the following input options to the KDHDMI2x4P for audio sources [see note 1]:
› SPDIF audio outputs from the audio on the HDMI inputs (2 HDMI input connectors):
➔ SPDIF is available at the four distribution amplifier outputs of the KD-HDMI2x4P on 4 white
[left] RCA female jacks
› Toslink optical audio inputs (2 Toslink connectors):
➔ Converted to digital PCM audio outputs
➔ Available at the four distribution amplifier outputs of the KD-HDMI2x4P on 4 white [left] RCA
female jacks
› Digital PCM audio inputs (2 white RCA female jacks):
➔ Available at the four distribution amplifier outputs of the KD-HDMI2x4P on 4 white [left] RCA
female jacks
› Analog stereo left & right audio inputs (2 RCA female jack pairs: [white = left] & [red = right):
➔ Available at the four distribution amplifier outputs of the KD-HDMI2x4P on 4 RCA female jack
pairs
[1] The white [left] RCA female jacks are shared among these signals for each of the four separate output banks, so
only one of these audio formats [HDMI SPDIF, Toslink optical converted to digital PCM, digital PCM, or analog stereo
left & right] is possible at a time.
Possible AUDIO feeds provided by the source for the above example
Source
Video
Over the
HDMI link
SPDIF
extracted
from HDMI
Input 1
HDMI
✔
✔
Input 2
HDMI
✔
✔
Toslink
Digital PCM
✔
Output from
the Toslink
input
Analog Stereo
L&R
✔
5. If you do not plan on using the audio available from your sources over the
HDMI link, then connect your audio systems to the RCA output ports of your
KD-HDMI2x4P unit. If you are using the audio provided via the HDMI audio
link only, then you may skip Steps 4 and 5 and proceed to Step 6.
Later on in this Operating Manual, you will learn how to select the analog stereo audio provided
from the source at Input 1 in our example above, or the Toslink audio provided from the source at
Input 2 in our example above. You could also select the audio provided over the HDMI link, or you
could provide and then select a source of digital PCM audio as well.
OUTPUT 1
OUTPUT 3
Surround Sound
Display w/Speakers
HDMI/HDCP
(or DVI Video*)
Display w/Speakers
HDMI/HDCP
(or DVI Video*)
L&R Audio
L&R Audio
All audio inputs (except HDMI and Toslink) are on color-coded RCA female jacks. For analog stereo
audio, remember to follow and maintain the color code: [white = left] & [red = right].
HDMI/HDCP
(or DVI Video*)
Toslink Optical Audio
L&R Audio
HDMI/HDCP
(or DVI Video*)
L&R Audio
Toslink Optical Audio
L&R Audio
HDMI/HDCP
(or DVI* Video)
L&R Audio
HDMI/HDCP
(or DVI* Video)
OUTPUT 4
OUTPUT 2
Display w/Speakers
Surround Sound
Display w/Speakers
*For DVI-D applications, use a Key Digital® HDMI to DVI-D Adapter at the Output of the KD-HDMI 2x4
*To connect DVI-D Video
use HDMI to DVI adapter
Cable Box
INPUT 1
DVD Player
INPUT 2
In the above example, you are enabling the following audio options for your audio system:
HDMI2x4P_Manual.indd 16-17
All audio outputs (except HDMI) are on color-coded RCA female jacks. If using analog Stereo
audio, please remember to follow and maintain the color code: [white = left] & [red = right]. SPDIF
audio output from the selected HDMI source, Toslink optical audio converted to digital PCM, and
digital PCM audio outputs are available on the white [left] RCA female jack at each output bank.
Only one of these forms of audio may be selected for all output banks at the same time.
5/15/06 12:34:46 PM
Page 18
Page 19
KD-HDMI2x4P Operating Instructions
KD-HDMI2x4P Operating Instructions
Getting Started (continued)
Getting Started (continued)
6. Connect the Control inputs to your KD-HDMI2x4P unit, if desired. If you are
using the on-board pushbutton switches as the only means to control your
KD-HDMI2x4P unit, then you may skip Step 6 and proceed to Step 7.
RS-232 Control
You will learn HOW to control your KD-HDMI2x4P unit later in this Operating Manual. Let’s look at
some of the ways you can control the unit, and some of the required connections and wiring you
may need to complete at this time to achieve proper control of your unit.
On-board Pushbutton Switches
Your KD-HDMI2x4P unit may be controlled using the pushbutton switches provided on the face of
the unit:
› Convenient front-panel pushbuttons for control, and corresponding LEDs for status:
➔ Front- and side-mount LEDs to indicate your selections
➔ HDMI hot-plug detect LEDs provided on the input HDMI connectors
No special wiring or connections are required.
IR remote control
The KD-HDMI2x4P can also be operated using the IR remote control provided with your unit:
› Easy-to-operate IR remote control
➔ Front IR sensor
➔ Front- and side-mount LEDs on the face of the KD-HDMI2x4P unit indicate your selections
Carefully open the battery cover of the IR remote control, install the batteries as indicated
in the hand-held remote control unit, and carefully put back the battery cover. Your IR
remote control is now ready for operation.
IR extender
You may also want to use an IR extender. You’ll need to either mount the IR extender on the side of
the KD-HDMI2x4P unit, or connect a wired serial connector cable if the connector is enabled in your unit:
› Rear panel sensor, perfect for IR extender, such as available by Xantech
› Wired IR serial connector provided, uses a Xantech compliant interface
* Contact Key Digital® with the Serial Number of your unit to verify if your unit has the
wired IR serial connector enabled.
Or, you may want to tie the KD-HDMI2x4P into your Home Theater control system using the
RS-232 port:
› Compatible with all control systems, such as Crestron, Elan, AMX, or Control4:
➔ Front- and side-mounted LEDs on the face of the KD-HDMI2x4P unit indicate your selections
Connect your Home Theater Control System to the KD-HDMI2x4P unit using the RS232 port, following all instructions provided with your Control System.
7. Be sure the Operation Mode Switch is set to the “Normal” position.
Once you have made all the video and audio connections to your KD-HDMI2x4P, set the Operation
Mode Switch located on the side panel of the unit is to the “Normal” position.
The slide switch labeled “Operation” is a Mode Switch that must be
set to “Normal” for proper operation of your unit. Only slide the switch
to the “Mode 1” position if you perform a Firmware Upgrade. Check
our web site at www.keydigital.com for Firmware Upgrade instructions
and notification of any available Firmware Upgrades that you may
want to install in your unit.
Slide the Operation Mode Switch located on the side of your unit
to the “Normal” position for proper operation. Do NOT slide the
switch to the Mode A position and apply power, or you may start an
unwanted Firmware Upgrade of your unit. If you do so, immediately
disconnect power from your unit and contact Key Digital®.
7. Finally, connect the power supply provided with your KD-HDMI2x4P unit.
You MUST use the Power Supply provided with your unit or
you VOID the Key Digital® Warranty and risk damage to your
unit and associated equipment.
With all equipment connected to your KD-HDMI2x4P and the Operation Mode switch in the
“Normal” position, you may now plug in the external 5 VDC @ 5 Amp Power Supply (provided with
your unit) to the jack on the back of the unit. Then connect the power cord from the power supply
into an appropriately rated wall outlet or power strip.
Second IR sensor
Can be used to mount
the IR Extender (like a Xantech)
IR Extender
RS-232
Control
Serial IR Blaster
hard-wired*
Always test for video and audio quality FIRST, before final installation of cables
HDMI2x4P_Manual.indd 18-19
Carefully insert the power supply connector to the
back of your KD-HDMI2x4P unit.
You are now ready to learn how to operate your KD-HDMI2x4P distribution
amplifier and switcher using the front-panel pushbutton switches.
5/15/06 12:34:49 PM
Page 20
Page 21
KD-HDMI2x4P Operating Instructions
KD-HDMI2x4P Operating Instructions
Basic Operation
Basic Operation (continued)
“Learn how to control and operate your KD-HDMI2x4P using the front-panel pushbutton
switches with LEDs for monitoring your selections”
Operating and controlling your KD-HDMI2x4P distribution amplifier and switcher
is simple and intuitive:
The KD-HDMI2x4P let’s you select either input source to be switched for distribution to up to four
displays. The selected source provides video over the HDMI link. As well, the selected input serves
as the audio source, and audio can be distributed in a multitude of ways as described earlier in this
Operating Manual.
b) Select the type of audio you want to send to your speakers or audio system.
This section of the Operating Manual guides you on how to use your KD-HDMI2x4P distribution
amplifier and switcher with the front-panel pushbutton switches. LEDs are provided in two
convenient locations so that you can monitor the status of your selections.
In this section of the Operating Manual, we will cover the following topics:
Toslink Optical Audio
1. First you will learn what you need to control.
2. Then you will learn the location of the various banks of pushbutton switches that control
your unit, and the corresponding LEDs that are provided to monitor the status of your
selections.
3. Finally, you will learn how to make your selections using these pushbuttons, and monitor
the status of your selections with these LEDs.
Toslink Optical Audio
L&R Audio
HDMI/HDCP
(or DVI* Video)
*To connect DVI-D Video
use HDMI to DVI adapter
Cable Box
INPUT 1
1. First you will learn what you need to control.
Your KD-HDMI2x4P distribution amplifier and switcher by Key Digital® is very simple and intuitive
to operate. Since your switcher has two possible input sources for video and audio that may be
switched to your displays and audio systems, you can imagine that you need to make the following
selections:
Source
HDMI
video &
audio
Additional
audio
source
provided
in the
above
example
DISPLAYS
Display
Display
Do I want to watch
a movie from my
DVD player, or do
I want to watch
NASCAR from my
Cable Box?
HDMI2x4P_Manual.indd 20-21
INPUT 2
Possible audio feeds delivered to your display or audio system for the
above example
HDMI
SPDIF
Toslink
converted to
Digital PCM
Out
Digital PCM
Analog
Stereo L&R
HDMI
Connector
White [Left]
RCA female
jacks
White [Left]
RCA female
jacks
White [Left]
RCA female
jacks
White [Left]
and Red
[Right] RCA
female jacks
Display
Input 1
Cable Box
✔
Left & right
analog
stereo
✔
Selected
HDMI
source input
converted to
SPDIF
Input 2
DVD Player
✔
Toslink
optical
✔
Selected
HDMI
source input
converted to
SPDIF
✔
✔
As described earlier in this Operating Manual, the white [left] RCA female jacks are shared.
Therefore, only one of these audio formats is available at a time: HDMI SPDIF, Toslink optical
converted to digital PCM, digital PCM, or analog stereo left & right.
SOURCES
Cable Box
DVD Player
In the above example, the input configuration allows you to drive your speakers or audio
system as follows:
a) S
elect the input source that you want to send to your display and speakers
(or audio system).
Display
L&R Audio
HDMI/HDCP
(or DVI* Video)
DVD Player
5/15/06 12:34:55 PM
Page 22
Page 23
KD-HDMI2x4P Operating Instructions
KD-HDMI2x4P Operating Instructions
Basic Operation (continued)
Basic Operation (continued)
c) Tell the source the preferred display EDID.
Because HDMI is a convenient plug-and-play standard, your source device always knows the
capabilities of your display. Since the KD-HDMI2x4P distribution amplifier and switcher lets you
distribute the selected source to up to four displays, you’ll want to be able to “tell” your selected
source device which display (and hence resolution format) is preferred.
In this example, select this display to send the “EDID” information
to the upstream source device. That way, whichever source you
choose will output no greater than 480p and all displays will be active.
DISPLAYS
Display
Display
1080p
Display
768p
768p
Display
480p
SOURCES
Cable Box
DVD Player
The KD-HDMI2x4P lets you select any one of the four displays to provide the preferred EDID
(that’s the jargon for the format), or you can select the factory default of 480p. The smart EDID
selection capability lets YOU tell the source device which display EDID should be the “master” that
determines the best display resolution. For our example above, you’d probably want to select the
480p display, since it can’t handle 768p or 1080p/60 (the higher-resolution 768p and 1080p/60
displays can handle 480p).
2. Now learn the location of the various banks of pushbutton switches that
control your unit, and the corresponding LEDs that are provided to monitor
the status of your selections.
OUTPUT EDID CONTROL pushbutton
lets you select the preferred display EDID:
› Display resolution connected to Output 1
› Display resolution connected to Output 2
› Display resolution connected to Output 3
› Display resolution connected to Output 4
› Factory default [480p is the default
resolution]
LEDs show your selection.
INPUT SWITCH CONTROL
pushbutton
selects the input Source that
you want to send to your
displays and audio systems.
LEDs show your selection.
DIGITAL AUDIO
SELECT pushbutton
selects the type of
audio you want to
send to your audio
systems.
LEDs show your
selection.
Using the table on the right as a guide, the status LEDs
let you monitor your output audio selection (in addition
to the audio provided over the HDMI link). Digital audio is
output over the white [left] RCA jacks only
LEDs correspond to the selection of
the Input Switch Control
A handy, second set of LEDs allows you
to monitor your input source selection
from the side of the KD-HDMI2x4P.
Each of the two (2) HDMI input connectors has a hot-plug detect LED,
as an indicator that there is an active HDMI source.
HDMI2x4P_Manual.indd 22-23
5/15/06 12:35:01 PM
Page 24
Page 25
KD-HDMI2x4P Operating Instructions
KD-HDMI2x4P Operating Instructions
Basic Operation (continued)
Basic Operation (continued)
2. Finally, you will learn how to make your selections using these pushbuttons,
and monitor the status of your selections with these LEDs.
b) Select the type of audio you want to send to your speakers or audio system.
The pushbutton controls allow you to cycle through until you reach your desired selection. Carefully
depress the pushbutton of choice and release. Monitor your selections with the LEDs.
a) Select the input source that you want to send to your display and speakers
(or audio system).
› Source Input 2
INPUT SWITCH
CONTROL pushbutton
selects the input Source
that you want to send to
your displays and audio
systems.
Monitor your selection with the LEDs
located on the top and side of your unit.
LEDs show your
selection.
Using the INPUT SWITCH CONTROL
pushbutton, cycle through to select:
› Source Input 1
› Auto-select the active source
The INPUT SWITCH CONTROL determines the source of video and audio
The audio output, sourced from either Input 1 or Input 2, is determined by your HDMI input source
selection made using the INPUT SWITCH CONTROL. Remember, HDMI can carry both video and
audio.
You can also select the output FORMAT using AUDIO SELECT CONTROL
As described earlier in this Operating Manual, the KD-HDMI2x4P is feature-rich and supports
a multitude of audio formats. You can separately select the desired audio output format to be
available on the output RCA audio jacks for output to your audio system or simply the speakers
built into your displays.
While SPDIF out is generated from the HDMI audio on the selected input, and Toslink inputs
are converted to wired digital PCM, your KD-HDMI2x4P does NOT perform any audio
processing or further audio conversions. Hence, the various audio output options require
the corresponding form of audio to be input to the unit.
You have a choice of the following digital audio options over the white [left] RCA output
jacks, either:
Top of the Unit
› SPDIF audio outputs from the audio on the HDMI inputs:
➔
› Toslink optical audio inputs converted to digital PCM audio outputs:
A handy, second set of LEDs allows you
to monitor your input source selection
from the side of the KD-HDMI2x4P.
› Digital PCM audio, if you input digital PCM:
Side of the Unit
The Auto-select mode may also be selected to detect and switch to the active HDMI source
input, automatically. In this user-selectable mode, an active source present on Input 1 is
automatically switched to the outputs. If no active input is present on Input 1 then Input 2 is
switched to the outputs
HDMI2x4P_Manual.indd 24-25
Assumes there is audio present on the selected HDMI input
LEDs correspond to the selection of
the Input Switch Control
➔
➔
Assumes you have Toslink audio connected to the selected input
Assumes you have digital PCM audio connected to the selected input
Or, you may choose analog stereo left and right channel audio over the white = left and red
= right jacks (assumes you have analog stereo audio connected to the selected input).
Note that since the white [left] RCA female jacks are shared among these signals for each of the
four separate output banks, only one of these audio formats [HDMI SPDIF, Toslink optical converted
to digital PCM, digital PCM, or analog stereo left & right] is possible at a time.
If you select one of the above outputs on the RCA audio output jacks to drive your audio
system, you may also need or want to turn off the speakers (if available) on your display that
may be simultaneously receiving HDMI audio so they do not interfere with your listening
pleasure.
5/15/06 12:35:03 PM
Page 26
Page 27
KD-HDMI2x4P Operating Instructions
Basic Operation (continued)
KD-HDMI2x4P Operating Instructions
IR Remote Control
Cycle through the various audio options using the AUDIO
SELECT pushbutton to make the desired format available on the
output RCA audio jacks. Digital audio options are available on
the white [left] jacks only. HDMI audio is always available over
the HDMI link, presuming your HDMI input also contains audio.
DIGITAL AUDIO SELECT pushbutton
selects the type of audio you want to
send to your audio systems.
LEDs show your selection.
All the functions of the KD-HDMI2x4P can be remotely accessed using the IR remote control
supplied with your unit. The status-monitoring LEDs on the KD-HDMI2x4P will light to indicate the
selections you make with the IR remote control, just like when you use the front-panel pushbutton
switches.
› The IR remote control unit is based on Infrared technology, so you need a clear line-of-site from
the handheld control to the IR sensors located on the KD-HDMI2x4P. Always point the front of
the remote control directly at the IR sensors located on the KD-HDMI2x4P unit.
› The IR remote control may not operate properly if there are objects placed between it and the IR
sensors located on the your KD-HDMI2x4P.
› Be sure that you have installed the batteries in the handheld remote control unit. Periodically
replace batteries in the handheld unit, as the operational distance of the remote control is
affected by a weakened power source.
Main IR sensor
The status LEDs let you
monitor your audio selection,
following this table as a guide:
c) Tell the source the preferred display EDID.
Using the OUTPUT EDID CONTROL pushbutton, the KD-HDMI2x4P lets you select
any one of the four displays to provide the preferred EDID (that’s the jargon for the
display format), or you can select the factory default of 480p. The smart EDID selection
capability lets YOU tell the source device which display EDID should be the “master”
that determines the best display resolution for your source to provide.
OUTPUT EDID CONTROL pushbutton
lets you select the preferred display EDID:
› Display resolution connected to Output 1
› Display resolution connected to Output 2
› Display resolution connected to Output 3
› Display resolution connected to Output 4
› Factory default [480p is the default resolution]
LEDs show your selection.
Wired
IR Input
RS-232
Be sure the Operation Mode switch
is in the “Normal” position
Second IR sensor
Can be used:
• In conjunction with an IR Extender (like a Xantech)
• To operate the unit with your IR remote control
IR Extender
IR or Wired IR
The handheld IR remote control allows you to quickly and conveniently perform the
same control functions as with the on-board pushbutton switches:
a) Select the input source that you want to send to your display and speakers
(or audio system).
b) Select the type of audio you want to send to your speakers or audio system.
c) Tell the source the preferred display EDID.
HDMI2x4P_Manual.indd 26-27
5/15/06 12:35:06 PM
Page 28
Page 29
KD-HDMI2x4P Operating Instructions
KD-HDMI2x4P Operating Instructions
IR Remote Control (continued)
Firmware Upgrades
The following figure of the IR remote control that is provided with your KD-HDMI2x4P unit indicates
the functions of each pushbutton and hence all of the functions you can remotely control.
From time-to-time, Key Digital® provides the option for you to update the Firmware that operates
and controls your KD-HDMI2x4P, such as to add a new or improved feature. These updates are
optional, and you should only perform upgrades as provided and instructed by Key Digital®.
KD-HDMI2x4P IR Remote Control and Pushbutton Callouts
Check our web site at www.keydigital.com for the latest firmware updates for your unit.
OFF
Turns unit OFF
Should a Firmware Upgrade be available that you are interested in installing, please contact
Key Digital® with the Serial Number of your unit to determine the correct Firmware Upgrade
procedure for your unit. You may then be instructed to go to our web site at www.keydigital.com
for the actual Firmware Upgrade instructions.
EDID Select
Select Display 1, 2, 3, 4, or
Factory Default [D] 480p as the
preferred display resolution EDID
RS-232 Discrete Commands
www.keydigital.com
ON
Turns unit ON
OFF
KD-HDMI2x4
EDID Select
1
D
Default
2
3
4
Reserved for future use
R1
R2
R3
Main IR sensor
Input Select
Select Source Input 1 or 2, or
AUTO mode
Input Select
1
2
Auto
A
Audio Format Select
SPDIF
TOSL
PCM
ALOG
Device Select
Individually address multiple
units, up to 8 in the same
room
You can remotely control HDMI2x4 functions through the rear-panel RS-232C
connector, using a HyperTerminal or other compatible interface.
Set your RS-232C connection to 57600 baud, 8 data bits, no parity, 1 stop bit.
Device Select
1
2
3
4
5
6
7
8
Audio Format Select
Select Output Audio format:
› SPDIF* [from the HDMI link]
› Toslink* [optical converted to
wired PCM]
Wired
IR Input
› PCM*
› Analog stereo left & right
RS-232
*Output on the RCA left [white]
jacks only
Command Name
Description
h
help
s
status
pn
power on
pf
power off
i
select source input
l
lock buttons
IR Extender
u
unlock buttons
IR or Wired IR
a
select audio output
Be sure the Operation Mode switch
is in the “Normal” position
Second IR sensor
IR extender
Can be used:
• In conjunction with an IR Extender (like a Xantech)
• To operate the unit with your IR remote control
The table below lists the Discrete RS-232 Commands that allow you
to control your KD-HDMI2x4P distribution amplifier and switcher unit:
You may also want to use an IR extender, such as available by Xantech:
› A rear panel sensor is provided without directional lens, perfect for Xantech IR extender
› A wired IR serial connector is also provided [contact Key Digital® with the Serial Number of your
unit to verify if your unit has the wired IR serial connector enabled]
You’ll need to either mount the IR extender on the side of the KD-HDMI2x4P unit, or
connect the serial connector cable if the connector is enabled in your unit.
Usage
› i<1~3>
› 3 for auto selection
› a<0> Analog R/L
› a<1> HDMI
› a<2> Toslink
› a<3> PCM
e
EDID control
› e<1~5>
› 5 for default
Contact Key Digital® with the Serial Number of your unit to verify if your unit has the
wired IR serial connector enabled.
HDMI2x4P_Manual.indd 28-29
5/15/06 12:35:10 PM
Page 30
Page 31
KD-HDMI2x4P Operating Instructions
KD-HDMI2x4P Operating Instructions
Technical Specifications
Technical Specifications (continued)
Model #: KD-HDMI2x4P
Distribution Amplifier and Switcher
Video & Audio Formats Supported
› HDMI Video & Audio:
The KD-HDMI2x4P distribution amplifier and switcher maintains pure digital and pristine picture
quality from either of two (2) input sources to up to four (4) displays and audio systems
Handles ALL video frame rates
Handles clock rates up to 165 MHz
➔ Compatible with all video resolutions, including:
» Up to 1080p/60
» ALL frame rates, including the popular 60 Hz, 50 Hz, and 72 Hz refresh rates
» Supports products with HDCP (High-bandwidth Digital Content Protection) copy
protection
› In addition to the audio provided over the HDMI link, supports a multitude of audio formats:
➔ HDMI audio converted to SPDIF outputs
➔ Toslink Optical audio inputs converted to digital PCM audio outputs
➔ Digital PCM audio inputs and outputs
➔ Analog stereo left & right audio inputs and outputs
› All outputs are separate but carry identical video and audio signals:
➔ Performs no video or audio processing
Switches and Distributes Video and Audio
Video & Audio Input Banks
› User selects either Input 1 or Input 2 as the source for video and audio:
› Two (2) HDMI Video/Audio input banks labeled “Input 1” and “Input 2” on the front panel, with the
➔
➔
HDMI2x4
™
Video is distributed to displays over HDMI
➔ Audio is distributed to the audio systems over HDMI, digital PCM, SPDIF, or analog stereo
» Audio systems may be built-into the displays
» Maybe a separate audio or Surround Sound systems
› User separately selects the audio format that is output over the white [left] RCA output jacks for
distribution to the audio systems, either:
➔ SPDIF audio outputs (4 RCA female jacks) [see note 1] from the audio on the HDMI inputs (2
HDMI connectors)
➔ Toslink optical audio inputs (2 Toslink connectors) converted to digital PCM audio outputs (4
RCA female jacks) [see note 1]
➔ Digital PCM audio inputs (2 RCA female jacks) and outputs (4 RCA female jacks) [see note 1]
➔ Analog stereo left & right audio inputs (2 RCA female jack pairs) and outputs (4 RCA female
jack pairs) [see note 1]
› Auto-select mode can be enabled to detect and switch to the active HDMI source input,
automatically:
➔ An active source present on Input 1 is automatically switched to the outputs
➔ If no active input is present on Input 1, then Input 2 is switched to the outputs
› Expandable, can cascade and daisy chain multiple units to accommodate additional HDMI
sources and displays
➔ Up to 8 units in one room are individually addressable
➔
HDMI2x4P_Manual.indd 30-31
following connectors:
➔ HDMI Video & Audio: HDMI Type A 19-pin connectors
» Supports products with HDCP Copy Protection
» To support sources with DVI-D video outputs only, use Key Digital® DVI-D adapters at the
source output
» SPDIF audio outputs provided from the audio on the HDMI inputs
› In addition to the audio provided over the HDMI link, input options for audio sources at each of
the two (2) input banks include:
➔ Toslink optical audio inputs (Toslink connectors)
› Converted to digital PCM audio outputs
➔ Digital PCM audio inputs (white RCA female jacks)
➔ Analog stereo left & right audio inputs (2 RCA female jack pairs: [white = left] & [red = right]
› All audio inputs (except HDMI and Toslink) are on color-coded RCA female jacks
➔ For analog stereo audio: [white = left] & [red = right]
➔ For digital PCM audio, use the [white = left] RCA female jack only
5/15/06 12:35:13 PM
Page 32
Page 33
KD-HDMI2x4P Operating Instructions
KD-HDMI2x4P Operating Instructions
Technical Specifications (continued)
Technical Specifications (continued)
Video & Audio Output Banks
Status and Control
› Four (4) HDMI Video/Audio output banks labeled “Output 1” through “Output 4” are provided on
› User-selectable input video source for distribution to the displays:
the rear panel, with the following connectors:
➔ HDMI Video & Audio: HDMI Type A 19-pin connector
» Supports products with HDCP Copy Protection
» To support displays with DVI-D video inputs only, use Key Digital® HDMI / DVI-D
adapters at the output of the KD-HDMI2x4P and Key Digital® DVI-D cables to connect
to the displays
» SPDIF audio outputs provided from the audio on the HDMI inputs
› In addition to the audio provided over the HDMI link, output options at each of the four (4) output
banks for audio include:
➔ Digital PCM audio outputs (white RCA female jacks) [see note 1], if digital PCM is input from a
source
➔ SPDIF audio outputs provided from the audio on the HDMI inputs (white RCA female jacks)
[see note 1]
➔ Toslink optical audio converted to digital PCM audio outputs (white RCA female jacks) [see
note 1]
➔ Analog stereo left & right audio inputs (2 RCA female jack pairs: [white = left] & [red = right])
[see note 1]
› All audio outputs (except HDMI) are on color-coded RCA female jacks:
➔ For analog stereo audio: [white = left] & [red = right]
➔ For digital PCM audio, use the [white = left] RCA female jack only
Convenient on-board pushbuttons for control, and corresponding LEDs for status
» Pushbuttons provided on the face of the unit
» Front- and side-mount LEDs for switching status
User-selectable input audio source for distribution to the audio systems:
➔ Convenient front-panel pushbuttons for control, and corresponding LEDs for status
» Pushbuttons provided on the face of the unit
» Front-mount LEDs for audio select status
User-selectable or factory default display EDID for upstream source device:
➔ Convenient front-panel pushbuttons for control, and corresponding LEDs for status
» Pushbuttons provided on the face of the unit
» Front-mounted LEDs for EDID selection status
» HDMI hot-plug detect LEDs provided on the input HDMI connectors
Easy-to-operate IR remote control:
➔ Separate front and rear-panel IR sensors provided (rear panel sensor is perfect for use
with an IR extender, such as available from Xantech)
➔ Wired IR serial connector provided [see note 2]
RS-232 port:
➔ Compatible with all control systems, like Crestron, AMX, Elan, Control4
➔ Used for Firmware upgrades [see note 3]
Supports CEC (Consumer Electronics Control)
➔ HDMI protocol that allows HDMI devices to pass control functions along to all devices
within the system
Each unit (up to 8 in one room) is individually addressable using the IR remote control
➔
›
›
›
›
While SPDIF out is generated from the HDMI audio on the selected input, and Toslink
inputs are converted to wired digital PCM, the KD-HDMI2x4P does NOT perform any audio
processing or further audio conversions. Hence, the various audio output options require
the corresponding form of audio to be input to the unit first.
›
Connectors
Mechanical
› Each input and the output is comprised of the following connectors:
› No fan noise
HDMI: HDMI Type A 19-pin connector
➔ Digital Coaxial PCM audio: 1 x RCA female, white = left jack
➔ Optical audio: Toslink connector
➔ Analog stereo left & right audio: RCA female (1 each color-coded left & right)
› RS-232C: D-sub 9-pin
› 5-pin power connector for external AC-DC power supply input
› 3.5 mm jack for serial, wired IR input
› Product Size: 10” (L) x 4.5” (W) x 1.5” (H) (excluding mounting flanges)
➔
›
› Product Weight: 5-7 lbs. (excluding external power supply)
› Enclosure type: Metal
› Input power: E xternal AC-DC power supply included
(5 Volt DC @ 5 Amps, 110-240 VAC, 50-60 Hz)
[1] The white [left] RCA female jacks are shared among these signals for each of the four separate output bank, so only
one of these audio formats [HDMI SPDIF, Toslink optical converted to digital PCM, digital PCM, or analog stereo left &
right] is possible at a time.
[2] Contact Key Digital® with the Serial Number of your unit to verify if your unit has the wired IR serial connector
enabled.
[3] Contact Key Digital® with the Serial Number of your unit to determine the correct Firmware Upgrade procedure for
your unit. See our web site at www.keydigital.com for Firmware Upgrade instructions.
HDMI2x4P_Manual.indd 32-33
5/15/06 12:35:14 PM
Page 34
Page 35
KD-HDMI2x4P Operating Instructions
KD-HDMI2x4P Operating Instructions
How to Contact Key Digital®
Warranty
Repairs and Warranty Service
All Key Digital® products are built to high manufacturing standards and should provide years of
trouble-free operation. They are backed by a limited two-year parts and labor warranty.
› Should your KD-HDMI2x4P distribution amplifier and switcher require warranty service, please
contact Key Digital® to obtain a Returned Materials Authorization (RMA) number
› Please contact us at either:
➔
➔
Phone:
E-mail:
1-914-667-9700
[email protected]
Technical Support
› For technical questions about using our products, please contact us at either:
➔
➔
Phone:
E-mail:
1-914-667-9700 or Toll-free 1-888-258-2028
[email protected]
Customer Support
› For customer support questions about using our products, please contact us at either:
➔
➔
Phone:
E-mail:
HDMI2x4P_Manual.indd 34-35
1-914-667-9700
[email protected]
5/15/06 12:35:15 PM
Page 36
Page 37
KD-HDMI2x4P Operating Instructions
Installation Notes
HDMI2x4P_Manual.indd 36-37
KD-HDMI2x4P Operating Instructions
Installation Notes
5/15/06 12:35:16 PM