1
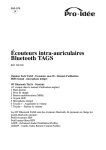
AM335x-TAB User guide
AM335x-TAB
User guide
Version 1.0
AllGo Embedded Systems Pvt. Limited
© COPYRIGHT 2012
Page 1 of 28
AM335x-TAB User guide
Table of Contents
1.Introduction.................................................................................................4
2.Welcome .....................................................................................................4
3.Precautions..................................................................................................5
4.Box Contents ..............................................................................................5
5.Setup............................................................................................................5
5.1 Getting Pre-built Images ...........................................................................................................5
5.2 Flash prebuilt images to MMC/SD Card .................................................................................6
5.3 Device Information....................................................................................................................6
5.4 AM335x-TAB Booting..............................................................................................................8
6.Application Demo........................................................................................8
6.1 Multimedia Experience .............................................................................................................8
6.1.1 View Image .......................................................................................................................8
6.1.2 Play Video .........................................................................................................................9
6.1.3 Play Music .......................................................................................................................10
6.1.4 Control Volume ...............................................................................................................11
6.1.5 Control Brightness ..........................................................................................................11
6.1.6 Record Sound ..................................................................................................................12
6.2 Wireless....................................................................................................................................12
6.2.1Wi-Fi ..............................................................................................................................12
6.2.1.1 Enabling Wi-Fi........................................................................................................12
6.2.1.2 Disabling Wi-Fi........................................................................................................13
6.2.1.3 Wi-Fi Hotspot...........................................................................................................13
6.2.1.4 Wi-Fi Static IP .........................................................................................................15
6.2.2 Bluetooth ........................................................................................................................17
6.2.2.1 Enabling Bluetooth ..................................................................................................17
6.2.2.2 Disabling Bluetooth .................................................................................................18
6.2.2.3 Bluetooth Object Push profile .................................................................................18
Sending files ..................................................................................................18
Receiving files ................................................................................................18
6.2.2.4 Bluetooth A2DP profile ...........................................................................................20
6.2.2.5 Bluetooth AVRCP profile ........................................................................................20
6.3 USB Devices...........................................................................................................................20
6.3.1.1 USB 3G....................................................................................................................20
6.3.1.2 USB Mass storage ...................................................................................................23
6.3.1.3 USB Keyboard and Mouse ......................................................................................24
6.4 Accelerometer Sensor ............................................................................................................24
6.4.1 Auto-rotate screen ...........................................................................................................24
6.5 Power Management ................................................................................................................25
Page 2 of 28
AM335x-TAB User guide
To go in suspend mode....................................................................................................25
To resume from suspend mode........................................................................................25
To set the Screen Timeout to go suspend.........................................................................25
To set set the screen always on preventing suspend........................................................25
To set Screen Brightness .................................................................................................25
Auto brightness Control ..................................................................................................25
To set Alarm in Android .................................................................................................25
6.6 ADB Android Debugger & Downloader ................................................................................25
6.6.1 Connecting Host machine & board through adb .............................................................26
6.6.2 adb over USB ..................................................................................................................26
6.6.3 Operations over ADB ......................................................................................................26
6.6.3.1 Installing (.apk files) application on AM335x-TAB.................................................26
6.6.3.2 Un-installing applications (.apk) using adb .............................................................26
6.6.3.3 Copy any files to and from the board over ADB .....................................................27
6.6.3.4 Log checking............................................................................................................27
7.CTS ............................................................................................................28
8.Write to us .................................................................................................28
Page 3 of 28
AM335x-TAB User guide
1. Introduction
This document is the user guide for the AM335x-TAB reference design kit . The document
contains all the information you need to set up and use AM335x-TAB. It describes all the features of the
AM335x-TAB in an easy-to-read yet thorough manner .
2. Welcome
Thank you for purchasing AM335x-TAB reference design kit from AllGo Embedded Systems.
AM335x-TAB offers you total convenience for your business (logistics, retail, health care, hospitality
and education market segments ..etc) and personal entertainment needs ,
The AM335x-TAB reference design kit (RDK) runs on Texas Instruments AM3354 processor with
high performance ARM Cortex A8 core & PowerVR 3D graphics,AM335x-TAB has a 7” capacitive touch
display and Android 4.0 Ice Cream Sandwich operating system,
Before you start using the AM335x-TAB, please read this User Manual carefully .
AM335x-TAB Features:
Feature
Processor
Memory
TI’s AM3354 ARM Cortex®-A8 microprocessor (up to 1 GHz)
•
•
Micro SD Card - 4GB (Boot + Storage)
DDR 3 Memory - 512MB
Battery
Li-Ion 3400 mAh capacity
Display
7" WVGA TFT LCD
Touch panel
5-Touch Capacitive Touch panel
Power
5V, 2.5A DC Adapter
Operating System
Android ICS 4.0
Wi-Fi
Integrated WLAN 802.11 b/g/n
Bluetooth
Bluetooth 2.1 + EDR
•
USB High Speed Host Port
•
USB OTG - ADB and Debug purpose
Audio
•
•
•
Stereo Headphone
Internal MIC
Internal Mono Speaker
Sensors
•
Accelerometer
Keys or Buttons
•
•
•
•
Single Button for Back and Home screen
Reset Switch
Power On/Off Button
8 Second Hardware Shutdown using Power Button
USB Interfaces
Table.1
AM335x-TAB - features
Page 4 of 28
AM335x-TAB User guide
3. Precautions
•
Kindly Charge the device for 2 to 3 hours before using
•
Do not dismantle the AM335x-TAB by yourself, and do not use alcohol, thinner or benzene to clean
its surface
•
Do not drop the AM335x-TAB or slam it down on a hard surface as this may damage the screen.
•
If AM335x-TAB hangs during any operation then hard power off the device by pressing and holding
power button for 8 seconds , do not use reset button
•
If AM335x-TAB is not powering on , try to remove the SD card form SD slot and reinsert it due to
which device will power on
4. Box Contents
•
AM335x-TAB
Android Tablet
•
Micro-SD Card with Android ICS pre loaded
•
Device charger (DC / 5V – 3000mA)
•
Instruction manual
5. Setup
5.1
Getting Pre-built Images
Prebuilt images can be obtained from
•
AM335x-TAB-Android-ICS-4.0.3-RDK-1.0.tar.gz
Use below commands to untar/uncompress the pre-built image
$ tar -xzvf AM335x-TAB-Android-ICS-4.0.3-RDK-1.0.tar.gz
$ cd AM335x-TAB-Android-ICS-4.0.3-RDK-1.0.tar.gz
tree structure for uncompressed pre-built image directory will look like:
<AM335x-TAB-Android-ICS-4.0.3-RDK-1.0>
|-- Boot_Images
| |-- MLO
| |-- u-boot.img
| |-- uEnv.txt
| |-- uImage
|-- Filesystem
| |-- rootfs.tar.bz2
|-- Media_Clips
| |-- Audio
| |-- Images
| |-- Video
|-- Reports
| |-- CTS
|-- README.txt
|-- mkmmc-android.sh
Page 5 of 28
AM335x-TAB User guide
5.2
Flash prebuilt images to MMC/SD Card
•
Get an SD Card of minimum size 2GBytes (Class4 minimum) and a USB Card reader
•
Insert the USB SD Card reader (with SD Card) in your host Linux PC
•
Prepare the MMC/SD card with pre-built images:
•
$ AM335x-TAB-Android-ICS-4.0.3-RDK-1.0
•
$ chmod 777 mkmmc-android.sh
•
$ sudo ./mkmmc-android.sh /dev/sd<mount-point> u-boot.img uImage uEnv.txt rootfs.tar.bz2
Above step will create a bootable MMC/SD card which can be used to boot up the device.
5.3
Device Information
•
SD card slot
: MMC/SD card with pre-built images can be put in sd card slot to boot the device
from sd card
•
Power button
: Power button can be used to power on ,poweroff or to suspend/wakeup the device
➢ Power On
:Press and hold power button for 2 seconds to Power on the
device
➢ Soft power off : Press power button for 2 second and select OK to power off
the device in the pop up window
➢ Hard power off : Press the power button for 8 second to hard power off the
device
➢ Suspend
: Press power button for 1 second to put the device in to
suspend mode
➢ Wakeup
: Press power button for 2 second when deivce in suspend
state to wakeup the device
•
Back button
: To go to previous opened item use back button
•
Reset button
: To Reset the device
•
Power supply
: DC 5V---3000mA
•
Display
: LCD display with Capacitive Touch screen
Page 6 of 28
AM335x-TAB User guide
Figure.1 AM335x-TAB - front view
Figure.2 AM335x-TAB - Top view
Figure.3 AM335x-TAB - Usb debug access port
Page 7 of 28
AM335x-TAB User guide
5.4
AM335x-TAB Booting
•
•
•
•
Flash the prebuilt images to MMC/SD
Insert the Micro/SD Card into the sd card slot of AM335x-TAB
Press and hold power button for 2 seconds to Power on the device
Wait for 50sec to get Android up on the UI screen
NOTE: For the first time boot the System might take few minutes to boot.
6. Application Demo
6.1
Multimedia Experience
•
Using browser and android applications
Figure.4 AM335x-TAB - Applications screen
•
Swipe across the screen to access more applications and widgets.
•
Image browsing and media playback
6.1.1
View Image
Select "App Launcher" -> "Gallery" -> "Images". Click any thumbnail to view the image.
•
Double click the image to zoom in/out.
•
Slide the image to view next image.
•
Press Delete icon to delete the image
Page 8 of 28
AM335x-TAB User guide
•
Press share button to share the image through Bluetooth to another bluetooth enabled device
Figure.5 AM335x-TAB - View gallery Images
6.1.2
Play Video
Select "App Launcher" -> "Gallery" -> "Video". Click any thumbnail to play the video.
You can use the UI controls to Pause/Play/Seek the video. To stop playback and exit press the back key
button.
Page 9 of 28
AM335x-TAB User guide
Figure.6
6.1.3
AM335x-TAB - Video playback
Play Music
Select "App Launcher" -> "Music" -> "<Artist>" -> "<song-name>" to experience the music.
Figure.7
AM335x-TAB - Music playback
Page 10 of 28
AM335x-TAB User guide
6.1.4
Control Volume
•
Select "App Launcher" -> "Settings" -> "Sound" -> "Volumes"
Figure.8
6.1.5
AM335x-TAB - Volume control
Control Brightness
•
Select "App Launcher" -> "Settings" -> "Display" -> "Brightness" to increase or decrease the
brightness level or Select check box for Automatic brightness control
Figure.9
AM335x-TAB - Brightness control
Page 11 of 28
AM335x-TAB User guide
6.1.6
Record Sound
Select "App Launcher" -> "Sound Recorder". Press Record button to start recording audio. Press Stop button
to stop recording.
Figure.10 AM335x-TAB - Sound recording
Playback the recorded audio by pressing Play button on Sound Recorder GUI.
6.2
Wireless
AM335x-TAB supports Wi-Fi , Bluetooth and USB 3G on Android.
6.2.1 Wi-Fi
6.2.1.1 Enabling Wi-Fi
•
•
To turn on Wi-Fi, browse to "App Launcher" -> "Settings" -> "Wi-Fi".
Enable Wi-Fi by sliding the ON/OFF tab to the ON position and wait for few seconds.
Figure.11 AM335x-TAB - Wi-Fi Enable
Page 12 of 28
AM335x-TAB User guide
•
The device scans for the available APs and displays them.
•
Connect to desired AP by clicking on its name and enter required details (username/key etc) and
click Connect
Figure.12 AM335x-TAB - Wi-Fi Authentication
•
when successfully connected, you will see status as connected under the respective AP name
6.2.1.2 Disabling Wi-Fi
•
To turn off Wi-Fi, browse to "App Launcher" -> "Settings" -> "Wi-Fi".
•
Disable Wi-Fi by sliding the ON/OFF tab to the OFF position.
•
Following message appears on console and the Wi-Fi status is shown as OFF.
6.2.1.3 Wi-Fi Hotspot
•
To turn on Wi-Fi hotspot go to "App Launcher" -> "Settings" -> "More"->”Portable hotspot”.
Figure.13 AM335x-TAB - Wi-Fi hotspot selection
Page 13 of 28
AM335x-TAB User guide
•
Select Configure Wi-Fi hot spot ,and enter below mentioned fields and save the configuration
✔ Network SSID,
✔ Security type to be used (Open,WPA/WPA2),
✔ Password for connection
Figure.14 AM335x-TAB - Wi-Fi hotspot configure
•
To enable portable hot spot, tick on portable WI-FI hotspot option,now the Wi-FI teethering will be
active
Figure.15 AM335x-TAB - Wi-Fi hotspot enable
•
Open the task bar to check the teethering is active or not
Page 14 of 28
AM335x-TAB User guide
Figure.16 AM335x-TAB - Wi-Fi hotspot verification on notification panel
6.2.1.4 Wi-Fi Static IP
•
Connect to one of the wi-fi network available in range
Figure.17 AM335x-TAB - Wi-Fi connected networks
•
Press and hold on the connected network for two seconds , pop up will be displayed ,select
“Modify Network”
Page 15 of 28
AM335x-TAB User guide
Figure.18 AM335x-TAB - Wi-Fi Modify network for static ip
•
Select “Show advanced options” and slide down to view the options available
Figure.19 AM335x-TAB - Wi-Fi static ip selection
•
Select “Static” options in IP settings ,slide down further and enter the IP,Gateway,DNS1,DNS2
details and save to connect to wifi network using static ip
Figure.20 Wi-Fi static ip configure
Page 16 of 28
AM335x-TAB User guide
6.2.2
Bluetooth
6.2.2.1 Enabling Bluetooth
•
To turn on Bluetooth, browse to "App Launcher" -> "Settings" -> "Bluetooth".
•
Enable Bluetoth by sliding the ON/OFF tab to the ON position and wait for few seconds.
•
•
Bluetooth icon appears on taskbar.
When BT is enabled the status shows Turning Bluetooth ON and lists out the available Bluetooth
devices.
Figure.21 AM335x-TAB - Bluetooth enable
•
Select the desired device to pair with.
•
A popup dialog with pin will appear.
Figure.22 AM335x-TAB - Bluetooth pairing
Page 17 of 28
AM335x-TAB User guide
•
Click Pair button to confirm pairing.
•
Verify that the desired device shows the same pin. click OK. And then the device gets listed under
the paired devices category.
Note: When pairing with Bluetooth headset, pin may not be displayed. Android attempts to pair automatically
with Bluetooth headsets. Pin dialog will be shown only if auto-pairing fails.
6.2.2.2 Disabling Bluetooth
•
To turn off Bluetooth, browse to "App Launcher" -> "Settings" -> "Bluetooth".
•
Disable Bluetooth by sliding the ON/OFF tab to the OFF position.
6.2.2.3 Bluetooth Object Push profile
Using Bluetooth, it is possible to send / receive files (pictures, media files etc).
Sending files
Note: 'Share using Bluetooth' is not enabled by default in the Gallery app. You need to install a third party
application like BlueFTP to enable the sharing option. Follow the instructions from
http://www.medieval.it/blueftp-android/menu-id-68.html to download BlueFTP
•
•
•
•
•
•
browse to "App Launcher" -> "Gallery" -> "Images".
Select a picture to share.
Click share icon (top bar), select bluetooth from the options
select paired BT device to send to.
The BT device will prompt to accept. Accept incoming file at the other device.
Once download finishes, check file.
Receiving files
•
•
On paired device (e.g. phone), select send via Bluetooth, select the AM335x-TAB in list.
On AM335x-TAB, notification appears about incoming connection
Figure.23 AM335x-TAB - Bluetooth OPP file recieving
•
Open the task bar and select "Bluetooth share: Incoming file".
Page 18 of 28
AM335x-TAB User guide
Figure.24 AM335x-TAB - Bluetooth OPP file recieving display on notification panel
•
A pop up appears asking for confirmation. On popup click Accept.
•
To see the recieving status open status bar
Figure.25 AM335x-TAB - Bluetooth OPP file recieve confirmation
Figure.26 AM335x-TAB - Bluetooth OPP file recieving status on notification panel
Page 19 of 28
AM335x-TAB User guide
6.2.2.4 Bluetooth A2DP profile
Using Bluetooth A2DP profile you can listen to media audio on paired bluetooth enabled headphone.
•
Pair A2DP capable bluetooth headset with device. Android uses the stereo headset icon to denote
A2DP headset(blue icon on status bar ).
•
After pairing succeeds, the status is updated to 'Connected'
•
Open Music player and play any audio clip.
•
Audio will be heard on the Bluetooth headset.
Figure.27 AM335x-TAB - Bluetooth head phone connection
6.2.2.5 Bluetooth AVRCP profile
Using AVRCP profile you can control Media playback with Media player keys on Bluetooth headset
6.3
•
Pair A2DP and AVRCP capable bluetooth headset with device.
•
Open Music Player ,add multiple files to current playing playlist and start playback .
•
•
•
Press the Play/Pause button on the BT headset - able to play and pause the currently playing track .
Press the Next button on the headset; the next track in the playlist begins to play on the headset.
Press the Prev button on the headset; the currently playing track restarts from the beginning
•
Press the Volume Increment/Decrement button on the headset; volume level changes according to
user input from bluetooth headset
USB Devices
6.3.1.1 USB 3G
Using usb 3G we can access the internet without needing wifi connection on AM335x-TAB
•
Select "App Launcher" -> "Settings"->”More”->“Mobile networks” ->“Access Point Names”
Page 20 of 28
AM335x-TAB User guide
Figure.28 AM335x-TAB - selecting mobile networks for USB 3G
Figure.29 AM335x-TAB - selecting access points for USB 3G
•
Open settings menu present on rigth corner ( 3 vertical dotted line)
Figure.30 AM335x-TAB - USB 3G APN settings menu
•
Select “New APN” to add new entry or select “Reset to default” to remove all entries
Page 21 of 28
AM335x-TAB User guide
Figure.31 AM335x-TAB - Edit APN details for USB 3G
•
For New APN entry enter Name field and APN (eg: airtelgprs.com) and press back button
Figure.32 AM335x-TAB - Set APN for USB 3G
•
Select APN which through which you want to connect to 3G dongle
Figure.33 AM335x-TAB - Select the APN from list for USB 3G
•
Connect 3G dongle to the device ,you can see 3G icon on status bar once connection successful
Page 22 of 28
AM335x-TAB User guide
Figure.34 AM335x-TAB - USB 3G connected notification on status bar
Note : Tested 3G feature only with airtel 3g dongle
6.3.1.2 USB Mass storage
•
Connect the USB mass storage device to USB Host port
•
USB msc and SD card contents can be viewed through File Browser app.
Figure.35 AM335x-TAB Filemanager display SD and USB contents
•
Select “sdcard” to view SD card contents ,Select “usb2” to view USB contents .
•
To copy data between USB and SD card viceversa , select the file that need to be copied/moved
and choose appropriate option in popup window.
Page 23 of 28
AM335x-TAB User guide
Figure.36 AM335x-TAB Filemanager Open files present in SD or USB
6.3.1.3 USB Keyboard and Mouse
•
•
6.4
USB Keybaord can be connected to USB host port
USB Mouse can be connected to USB host port and can control device using mouse
Accelerometer Sensor
•
6.4.1
•
•
•
AM335x-TAB supports the accelerometer sensor
Auto-rotate screen
Browse to the "App Launcher" -> "Settings" -> "Display".
Enable the "Auto-rotate screen" feature. Ensure the Check box gets ticked.
Now hold the device in horizontal or vertical orientation to find the screen getting rotated.
Figure.37 AM335x-TAB Auto
rotation enable
Page 24 of 28
AM335x-TAB User guide
6.5
Power Management
Power management is supported on AM335x-TAB.
Below are the features supported in AM335x-TAB:
To go in suspend mode
•
Press POWER key on the keypad or wait for screen time out.
To resume from suspend mode
•
Hold Power button or back button for 2 seconds
To set the Screen Timeout to go suspend
•
•
Select "App Launcher" -> "Settings" -> "Display" -> "Sleep"
Select one of the options from the list.
To set set the screen always on preventing suspend
•
Select "App Launcher" -> "Settings" -> "Developer options" -> "Stay awake"
To set Screen Brightness
•
Select "App Launcher" -> "Settings" -> "Display" -> "Brightness"
Auto brightness Control
•
Select "App Launcher" -> "Settings" -> "Display" -> "Brightness" > "Automatic brightness"
To set Alarm in Android
•
•
Select "App Launcher" -> "Clock "
Click "Set alarm" -> "Add Alarm". Set the alarm as per requirements.
Device will be woken up from suspend at Alarm Time.
6.6
ADB Android Debugger & Downloader
Android Debug Bridge (adb) is a versatile tool lets you manage the state of the Android-powered device. For
more information about what is possible with adb, see Android Debug Bridge page at
http://developer.android.com/guide/developing/tools/adb.html. The ADB tool can be used to
•
•
•
•
Download an application from a host machine, install & run it on the target board.
Start a remote shell in the target instance.
Debug applications running on the device using the debugging tool DDMS ( Dalvik Debug Monitor
Server) which runs on top of adb connection.
Copy files to and from the board to host machine
Page 25 of 28
AM335x-TAB User guide
Downloading "ADB" & Host setup
The adb tool is a part of Android SDK package located at http://developer.android.com/sdk/index.html. For an
overview of how to install and set up the Android SDK, follow download & setup instructions from
http://developer.android.com/sdk/index.html.
The adb tool is located in paltform-tools/ directory under the Android SDK installation. Export the platformtools and tools directory path as shown below.
$ export PATH=<android_sdk_path>/platform-tools/:<android_sdk_path>/tools/:$PATH
6.6.1
Connecting Host machine & board through adb
This release of AM335x-TAB has been tested for connecting adb over USB
6.6.2
•
•
•
adb over USB
Make sure that the mini-usb cable is connected between the host usb port and the target’s USB OTG
port
Turn on "USB Debugging" on your AM335x-TAB. On the AM335x-TAB (UI screen)• Browse to "App Launcher" -> "Settings" -> "Developer options".
• Enable "USB debugging". Select OK for confirmation. Ensure the Check box gets ticked.
Setup host machine to detect the AM335x-TAB (sdk installation on host machine).
• Verify the adb connectivity between host and AM335x-TAB
$ adb devices
If device is connected, then output on screen should list the device, example:
List of devices attached
20100720 device
6.6.3
Operations over ADB
The Root File System provided in this AM335x-TAB release contain only standard Android components and
applications.
To install and run Android application follow steps mentioned below:
6.6.3.1 Installing (.apk files) application on AM335x-TAB
•
From the host: You can use adb tool for package installation.
$ adb install <package>.apk.
NOTE: Use -s option with the adb tool, to install the package on external storage.
On successful installation adb tool will report SUCCESS on host terminal, and the application would be listed
on the android main menu.
6.6.3.2 Un-installing applications (.apk) using adb
•
To un-install non-default components (that were installed later)
• Method 1: On the host machine execute the following
$ adb shell pm list packages
Page 26 of 28
AM335x-TAB User guide
$ adb uninstall <package name>
• Method 2: On target:
Main menu -> Menu -> Settings -> Applications -> Manage applications -> Find the package Tap on it ->
Uninstall -> OK -> OK
• On successful removal, the application would have been removed from the
android main menu. All the short-cuts to the application also removed.
•
To un-install default components, use the following commands from abd on host machine
$ adb shell
# rm /system/app/app.apk
On successful removal, the application would have been removed from the android main menu.
6.6.3.3 Copy any files to and from the board over ADB
•
•
Using the adb commands "pull" and "push" copy files to and from the board.
Unlike the install command, which only copies an .apk file to a specific location, the pull and push
commands let you copy arbitrary directories and files to any location on the board.
•
To copy a file or directory (recursively) from the board, use
$ adb pull <remote> <local>
•
To copy a file or directory (recursively) to the board, use
$ adb push <local> <remote>
In the commands, <local> and <remote> refer to the paths to the file or directory on your development host
(local) and on the target instance (remote).
Here's an example:
$ adb push foo.txt /sdcard/foo.txt
6.6.3.4 Log checking
•
Using the adb command ”logcat” device log can be verified
$ adb logcat
Page 27 of 28
AM335x-TAB User guide
7. CTS
•
Compatability Test Suite of android has been executed on the device , details are listed below
Android version
4.0.3 Ice Cream Sandwich
CTS version
Android_CTS_4.0.3_r2
Build model
Am335XEVM
Android Platform Version
15
Total test cases
17317
Test Passes
17215
Test Failed
102
CTS Results can be found in “AM335x-TAB-Android-ICS-4.0.3-RDK-1.0/Reports/CTS/”.
For an overview of how to set up device and execute CTS test suite refer to the following link
http://source.android.com/compatibility/cts-intro.html
8. Write to us
For any quiries please mail us at [email protected]
Page 28 of 28
IMPORTANT NOTICE
Texas Instruments Incorporated and its subsidiaries (TI) reserve the right to make corrections, enhancements, improvements and other
changes to its semiconductor products and services per JESD46, latest issue, and to discontinue any product or service per JESD48, latest
issue. Buyers should obtain the latest relevant information before placing orders and should verify that such information is current and
complete. All semiconductor products (also referred to herein as “components”) are sold subject to TI’s terms and conditions of sale
supplied at the time of order acknowledgment.
TI warrants performance of its components to the specifications applicable at the time of sale, in accordance with the warranty in TI’s terms
and conditions of sale of semiconductor products. Testing and other quality control techniques are used to the extent TI deems necessary
to support this warranty. Except where mandated by applicable law, testing of all parameters of each component is not necessarily
performed.
TI assumes no liability for applications assistance or the design of Buyers’ products. Buyers are responsible for their products and
applications using TI components. To minimize the risks associated with Buyers’ products and applications, Buyers should provide
adequate design and operating safeguards.
TI does not warrant or represent that any license, either express or implied, is granted under any patent right, copyright, mask work right, or
other intellectual property right relating to any combination, machine, or process in which TI components or services are used. Information
published by TI regarding third-party products or services does not constitute a license to use such products or services or a warranty or
endorsement thereof. Use of such information may require a license from a third party under the patents or other intellectual property of the
third party, or a license from TI under the patents or other intellectual property of TI.
Reproduction of significant portions of TI information in TI data books or data sheets is permissible only if reproduction is without alteration
and is accompanied by all associated warranties, conditions, limitations, and notices. TI is not responsible or liable for such altered
documentation. Information of third parties may be subject to additional restrictions.
Resale of TI components or services with statements different from or beyond the parameters stated by TI for that component or service
voids all express and any implied warranties for the associated TI component or service and is an unfair and deceptive business practice.
TI is not responsible or liable for any such statements.
Buyer acknowledges and agrees that it is solely responsible for compliance with all legal, regulatory and safety-related requirements
concerning its products, and any use of TI components in its applications, notwithstanding any applications-related information or support
that may be provided by TI. Buyer represents and agrees that it has all the necessary expertise to create and implement safeguards which
anticipate dangerous consequences of failures, monitor failures and their consequences, lessen the likelihood of failures that might cause
harm and take appropriate remedial actions. Buyer will fully indemnify TI and its representatives against any damages arising out of the use
of any TI components in safety-critical applications.
In some cases, TI components may be promoted specifically to facilitate safety-related applications. With such components, TI’s goal is to
help enable customers to design and create their own end-product solutions that meet applicable functional safety standards and
requirements. Nonetheless, such components are subject to these terms.
No TI components are authorized for use in FDA Class III (or similar life-critical medical equipment) unless authorized officers of the parties
have executed a special agreement specifically governing such use.
Only those TI components which TI has specifically designated as military grade or “enhanced plastic” are designed and intended for use in
military/aerospace applications or environments. Buyer acknowledges and agrees that any military or aerospace use of TI components
which have not been so designated is solely at the Buyer's risk, and that Buyer is solely responsible for compliance with all legal and
regulatory requirements in connection with such use.
TI has specifically designated certain components as meeting ISO/TS16949 requirements, mainly for automotive use. In any case of use of
non-designated products, TI will not be responsible for any failure to meet ISO/TS16949.
Products
Applications
Audio
www.ti.com/audio
Automotive and Transportation
www.ti.com/automotive
Amplifiers
amplifier.ti.com
Communications and Telecom
www.ti.com/communications
Data Converters
dataconverter.ti.com
Computers and Peripherals
www.ti.com/computers
DLP® Products
www.dlp.com
Consumer Electronics
www.ti.com/consumer-apps
DSP
dsp.ti.com
Energy and Lighting
www.ti.com/energy
Clocks and Timers
www.ti.com/clocks
Industrial
www.ti.com/industrial
Interface
interface.ti.com
Medical
www.ti.com/medical
Logic
logic.ti.com
Security
www.ti.com/security
Power Mgmt
power.ti.com
Space, Avionics and Defense
www.ti.com/space-avionics-defense
Microcontrollers
microcontroller.ti.com
Video and Imaging
www.ti.com/video
RFID
www.ti-rfid.com
OMAP Applications Processors
www.ti.com/omap
TI E2E Community
e2e.ti.com
Wireless Connectivity
www.ti.com/wirelessconnectivity
Mailing Address: Texas Instruments, Post Office Box 655303, Dallas, Texas 75265
Copyright © 2013, Texas Instruments Incorporated