Download MAGNETIC DOOR CONTACT
Transcript
MAGNETIC DOOR CONTACT EWD1
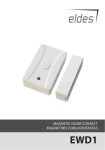
Magnetic door contact with panic button EWD1 is a wireless device with magnetic contact which are used to secure doors, windows
or any other opening parts and operating with ELDES wireless security systems. Users have to bind it to the central device of security system (by sending a corresponding command via SMS message or using software „ELDES Configuration Tool“). When EWD1 is
connected to the system, two wireless zones are added. First wireless zone is used to monitor the magnetic contacts and the second
wireless zone is for managing the panic button. By default panic button zone is configured as Silent zone and in case of violation,
system will cause an alarm to administrator numbers or/and to monitoring station without turning the siren on.
It is possible to connect up to 16 wireless devices to the central security system at a time. Maximum distance for wireless connection
is 150 meters (in open areas).
1. Device Installation
1. Open EWD1 case and insert the battery.
3V
CR2032
+
+
Fig. No. 1
2. Magnetic door contact consists of two parts: a magnet and a sensor. Sensor components are: a mounting part and the sensor.
Magnet components are: a mounting part and the cover.
2.1 Fix the sensor mounting part with two screws on the door or window jamb.
2.2 Fix the magnet mounting part with two screws next to the sensor mounting part on door or window frame. How to fix the
magnetic door contact correctly see Fig. No. 2. The distance between the magnet and the door contact must be no larger
than 20 mm.
MAX 20 mm
Fig. No. 2
2.3 The sensor should be attached to the fixed sensors mounting part. When attaching sensor pay attention to the tamper (micro
switch) - it must be pressed.
2.4 The magnet cover should be attached to the fixed magnet mounting part.
NOTE: it is not recommend to fix the magnetic door contact other ways than with screws, e.g. with duck tape.
The incorrect ways of fixing magnetic door contact see Fig. No. 2.
Fig. No. 3
2
3. Bind the device to central monitoring station. Use a software „ELDES Configuration Tool“ or send corresponding SMS messages.
Please read software Help section or central system installation manual for more information. Software "ELDES Configuration
Tool" and installation manual can be downloaded for free in website www.eldes.lt. The system automatically informs about successful/unsuccessful bound device. If attempt to bind is unsuccessful, try to move the door contact EWD1 closer to central
monitoring station and bind anew.
4. EWD1 magnetic door contact is ready to use.
2. Technical Specifications
Package content
1. EWD1 door contac..........................................qty. 1
2. Magnet.................................................................qty. 1
3. CR2032 3V Lithium battery..........................qty. 1
4. User manual.......................................................qty. 1
5. Screws...................................................................qty. 4
Electrical and Mechanical Characteristics
Battery type
CR2032 3V Lithium
Number of batteries
1
Battery operation time
~18 months*
Radio transmitter-receiver frequency
868 Mhz
Range of Operating Temperatures
-20...+55ºC
Door contact dimensions
60x37x18mm
Magnet dimensions
60x17x16mm
Radio communication range
30 meters in premises; 150 meters in open areas
Compatible with security systems
ELDES Wireless
* This operation time might vary in difference conditions.
Changing the battery
Only CR2032 3V Lithium batteries should be used. Install only new, good quality and not expired batteries. In order to replace old
battery with a new one, remove front cover of the magnetic door contact (see chapter 1), carefully remove the device PCB and remove
old battery. Then insert the new CR2032 3V Lithium battery.
ATTENTION: The battery must be removed if device is not in use.
ATTENTION: In order to avoid fire or explosion hazards, the system must be used only with approved battery. Special care must
be taken when connecting positive and negative battery terminals. Dispose old batteries only into special collection sites. Do not
charge, disassemble, heat or incinerate old batteries.
USER MANUAL EWD1 V1.0
3
MAGNET
FRONT SIDE
BACK SIDE
1.BATTERY
2.LED
3. PANIC button
4. RESET button
5. PINS for firmware updates
+
6.TAMPER
Fig. No. 4
1 2
3
4 5
6
Restoring default parameters
1. Remove the battery.
2. Press and hold RESET button.
3. Add removed battery.
4. Hold RESET button till LED indicator starts fast several times blinking.
3. Configuration using software "ELDES Configuration Tool"
Software “ELDES Configuration Tool” is used to work directly with central device of the security system, which can be connected to
the computer via USB port. This software simplifies system configuration process by allowing to use PC in the process. Using this
software, user can:
1. To bind new magnetic door contacts EWD1 to central monitoring station;
2. To remove or replace old magnetic door contacts with new ones;
3. To configure settings of all added to the system magnetic door contact;
4. To configure security system settings.
Software “ELDES Configuration Tool” is a freeware and can be downloaded from website www.eldes.lt.
4. Configuration command SMS Messages
ATTENTION: send command SMS messages to the number used by the central device of the security system. All SMS messages
should start with the main 4-digit user password (in the examples provided “XXXX” marking is used). Underscore symbol “_” is
used to represent space symbol.
4.1. Binding Modules to the Security System
ATTENTION: before sending SMS message check whether magnetic door contact EWD1 has the battery inserted. If it hasn't,
binding to the central security system will be unsuccessful.
Binding of magnetic door contact EWD1 to the central device of security system station is performed by
indicating module identification numbers:
XXXX_SET:ID1
4
EWD1
1111 set:
07000022
Here “ID1” means magnetic door contact identification number. This identification number can be found on the back of the device.
The system automatically provides two security zones to the connected door contact. The system informs about this via SMS message, for example, “ID1:Z14:ID1Z15” - here instead of “ID1” will be identification number of the module that you want to connect, “Z14
and Z15” – the numbers of free zones provided by the system.
You can bind more than one magnetic door contact at a time. In such a case separate identification numbers by “;” symbol, for example: “ XXXX SET:ID1;ID2; ... ;ID16 ”.
4.2. Settings of Activated Zones
After activating magnetic door contacts EWD1 each of them is automatically given zones numbers and set to the default settings.
4.2.1. Adjusting Alarm Text
Alarm text of a particular zone is adjusted by sending the following SMS message:
XXXX_Z2:TEXT
EWD1
1111 Z5:
Doors
opened
EWD1
1111 Z2:
ON
Here instead of “Text” enter the required alarm text consisting of up to 24 characters and instead of “Z2”
indicate the number of the corresponding zone. You receive this alarm text by SMS message when a
corresponding zone is triggered. To change alarm text of more than one zone separate entries by “;”
symbol, for example: “XXXX Z2:Text2;Z3:Text3”.
4.2.2. Enabling/Disabling Zones
You can choose which zones, after activating the alarm in the whole system, will be enabled or disabled.
By initial factory default parameters all activated zones are enabled.
Any zone can be enabled by sending SMS message with the following format*:
XXXX_Z1:ON;Z2:ON;Z3:ON
Any secured zone can be disabled by sending SMS message with the following format*:
XXXX_Z1:OFF;Z2:OFF;Z3:OFF
* Indicate as many zones as you want to change their statuses separating entries by “;” symbol, as shown in the examples provided.
4.3. Requesting system status information
To find out the alarm texts and statuses of activated zones, send the following SMS message:
XXXX_STATUS
EWD1
1111 STA
TUS
You will receive system response via SMS message, for example: “Z1:ON/OFF:Zone1; Z2:ON/OFF:Zone2;
C1:ON/OFF:Controller1; C2:ON/OFF:Controller2“
This information SMS message indicates all wireless ELDES devices connected to the system and their
current parameters.
ATTENTION: System informs about all active zones. If there are many active zones, the system informs about all of them in several
SMS messages.
4.4. Requesting number of available slots to connect wireless devices
To find out the number of available slots to connect wireless devices to the central device of security system send the following SMS
message:
XXXX_STATUS_FREE
NOTE: maximum number of wireless devices that can be connected to the central device of the security system station is 16 units.
USER MANUAL EWD1 V1.0
5
4.5. Changing magnetic door contact EWD1
To change an old magnetic door contact EWD1 with a new one send the following SMS message:
XXXX_REP:ID<ID5
EWD1
1111 rep:
07000022<
07000033
EWD1
1111 del:
07000022
Here instead of “ID” indicate identification number (ID) of the old magnetic door contact EWD1. Identification number of the new magnetic door contact EWD1 is indicated instead of “ID5” marking. The new
magnetic door contact is provided with the same zone number with all previous settings valid for the
old one.
4.6. Deleting magnetic door contact EWD1
To delete magnetic door contact EWD1 from the security system send the following SMS message:
XXXX_DEL:ID
Here instead of “ID” indicate identification number (ID) of the magnetic door contact EWD1 want to delete. Removed from the system zones can be used to connect other wireless devices.
6
5. Additional Information
Limited Liability
The buyer must agree that the system will reduce the risk of fire, theft, burglary or other dangers but does not guarantee against such
events. “ELDES UAB” will not take any responsibility regarding personal or property or revenue loss while using the system. “ELDES
UAB” liability according to local laws does not exceed value of the purchased system. “ELDES UAB” is not affiliated with any of the
cellular providers therefore is not responsible for the quality of cellular service.
Manufacturer Warranty
The system carries a 24-month warranty by the manufacturer “ELDES UAB”. Warranty period starts from the day the system has been
purchased by the end user. The warranty is valid only if the system has been used as intended, following all guidelines listed in the
manual and within specified operating conditions. Receipt must be kept as a proof of purchase date. The warranty is voided if the
system has been exposed to mechanical impact, chemicals, high humidity, fluids, corrosive and hazardous environment or other
force majeure factors.
Safety instructions
Please read and follow these safety guidelines in order to maintain safety of operators and people around:
• Don’t use the system where it can be interfere with other devices and cause any potential danger.
• Don’t use the system with medical devices.
• Don’t use the system in hazardous environment.
• Don’t expose the system to high humidity, chemical environment or mechanical impacts.
• Don’t attempt to personally repair the system. Any system repairs must be done only by qualified, safety aware personnel.
The WEEE (Waste Electrical and Electronic Equipment) marking on this product (see right) or its documentation indicates that
the product must not be disposed of together with household waste. To prevent possible harm to human health and/or the
environment, the product must be disposed on in an approved and environmentally safe recycling process. For further information on how to dispose of this product correctly, contact the system supplier, or the local authority responsible for waste
disposal in your area.
Copyright © “ELDES UAB”, 2010. All rights reserved
It is not allowed to copy and distribute information in this document or pass to a third party without advanced written authorization by “ELDES UAB” “ELSDES UAB” reserves the right to update or modify this document and/or related products without a warning. Hereby, “ELDES UAB” declares that this EWD1 magnetic door contact is in compliance with the essential requirements and other relevant provisions of Directive 1999/5/EC.
The declaration of conformity may be consulted at www.eldes.lt/ce
USER MANUAL EWD1 V1.0
7


