1
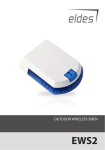
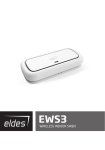
EWS3 WIRELESS INDOOR SIREN User Manual v1.0 Compatible with: • ESIM364 v02.06.09 and up. • EPIR2 v01.01.12 and up. • ESIM264 v7.14.07 and up. Main features: • Audio alarm indication by 2 built-in speakers. • Visual alarm indication by built-in LED indicators: burglary/24-hour/tamper alarm and fire alarm indicated in different colours. • 2 tamper switches: for enclosure opening and device detachment from the wall detection. EWS3 is a wireless indoor device with built-in siren speakers and LED indicators operating with ELDES wireless alarm systems. The de vice is designed to notify the user by audio and visual signals in the event of alarm as well as in event of system arming/disarming (Bell Squawk feature must be enabled). In the event of burglary, 24-hour or tamper alarm, EWS3 will activate the speakers and flash the blue LED indicators, while in case of a fire alarm, the device can flash the red LED indicator (both features require EWS3 Alarm LED and EWS3 Fire Alarm LED parameters to be enabled using ELDES Configuration Tool software or EKB2/EKB3/EKB3W keypad) To start using EWS3, it has to be bind to ELDES alarm system by sending a corresponding SMS message or using software ELDES Configuration Tool. Upon successful EWS3 binding process, the system adds one wireless zone and one wireless PGM output. In case of alarm, the siren provides a sound alarm for one minute. The configuration of this parameter is disabled for EWS3 in order to save the battery power. ESIM264 and EPIR2 alarm systems support up to 16 EWS3 devices, while ESIM364 - up to 32 EWS3 devices. The maximum wireless connection range is 150 meters (in open areas). NOTE: For complete information on device operation with ELDES alarm system, please refer to ELDES alarm system user and installation manuals located at www.eldes.lt/en/download 1.CONTENTS OF PACK 1. EWS3......................................................... qty. 1 2. 1,5V Alkaline AA Type Battery.............. qty. 4 3. User Manual... ......................................... qty. 1 4. Screws... .................................................. qty. 2 2.TECHNICAL SPECIFICATIONS 2.1. Electrical & Mechanical Characteristics Battery type �������������������������������������������������������������������������������������������1,5V Alkaline AA type Number of batteries �����������������������������������������������������������������������������4 Battery operation time ������������������������������������������������������������������������~18 months* Wireless transmitter-receiver frequency �����������������������������������������868 Mhz Range of operating temperatures �����������������������������������������������������-25...+55ºC Humidity �������������������������������������������������������������������������������������������������0-90% RH @ 0... +40 °C (non-condensing) Dimensions ��������������������������������������������������������������������������������������������167 x 80 x 34 mm Wirelesscommunication range �����������������������������������������������������������Up to 30 meters in premises; up to 150 meters in open areas Compatible with alarm systems ���������������������������������������������������������ELDES Wireless * The operation time might vary in different conditions. 2 EN EWS3 – Wireless Indoor Siren 2.2. Main Unit, LED & Connector Functionality + FRONT SIDE of PCB BATTERY - TAMPER + + BATTERY - - BATTERY + 1 TAMPER BUZZER - BATTERY BUZZER BACK SIDE of PCB STATUS ALARM (blue) RESET ALARM (red) ALARM (blue) RESET Button for restoring default parameters +/- Battery slots STATUS LED indicator for data transmission indication ALARM (blue) Blue LED indicators for visual alarm indication ALARM (red) Red LED indicator for visual alarm indication BUZZER Speakers for audio alarm indication TAMPER Tamper switches 2 FRONT SIDE of ENCLOSURE ALARM (blue) ALARM (red) ALARM (blue) LED indication Description ALARM (blue) flashing Burglary, 24-Hour or tamper alarm in progress ALARM (red) flashing Fire alarm in progress EWS3 – Wireless Indoor Siren EN 3 3.INSTALLATION NOTE: Before installing the wireless device, we highly recommend to refer to RADIO SYSTEM INSTALLATION AND SIGNAL PENETRATION manual located at www.eldes.lt/download 1. Open EWS3 enclosure. 3 a. Press and hold b. Pull down 2. Once the enclosure is opened, fix the siren to the wall using the screws. MOUNTING POINT B MOUNTING POINT A + 4 - 5 MOUNTING POINT A Ensure to screw in properly for supervision of the back side by tamper switch + - - + MOUNTING POINT B - + 3. When installing EWS3, follow the recommendations for the installation to achieve the strongest wireless signal: Never install in the following locations: 6 7 • inside the metal cabinet Wireless device • closer than 20 cm from the metal surface and/or power lines Recommended: 5 m to 30 m inside the building 0.5 m to 150 m in open areas Wireless device ELDES alarm system wireless antenna • face the front side of the wireless device towards ELDES alarm system’s wireless antenna • keep the distance: 0.5 m to 30 m inside the building, 0.5 m to 150 m in open areas. Recommended: 8 • face the front side of the wireless device towards the front side of EPIR2 0.5 m to 30 m inside the building 0.5 m to 150 m in open areas Wireless device EPIR2 • keep the distance: 0.5 m to 30 m inside the building, 0.5 m to 150 m in open areas. 4. Remove the plastic tab inserted between one of the battery terminals and battery slot contacts. 9 5. STATUS indicator should start flashing indicating successful data transmission. 4 EN EWS3 – Wireless Indoor Siren 6. Close EWS3 enclosure by putting the cover back (see Fig. No. 3). 7. Bind the device to the alarm system using ELDES Configuration Tool software. Open Wireless Device Management section and enter a 8-digit wireless device ID located on the EWS3 enclosure and press Add button (see Fig. No.10). The device can also be bind by sending a corresponding command via SMS message. For more details, please refer to the software‘s HELP section and ELDES alarm system installation manual. 10 8. Upon the successful binding process, EWS3 device icon becomes visible in Wireless Device Management section as well as Battery Level and Signal Level. If attempt to bind is unsuccessful, try to move EWS3 closer to the alarm system device and bind anew. 9. EWS3 siren is ready for use. ATTENTION: Ensure that EWS3 device is properly fixed to the wall and the Mounting Point A portrayed in Fig. No. 4 and Fig. No. 5 is properly screwed in. Otherwise, the tamper switch will NOT supervise the back side of EWS3 enclosure (see also 4. EWS3 ZONE, PGM OUTPUT AND TAMPER). NOTE: If you are unable to bind the wireless device, please, restore the parameters of the wireless device to default and try again. See chapter 6. RESTORING DEFAULT PARAMETERS for more details. EWS3 – Wireless Indoor Siren EN 5 4.EWS3 ZONE, PGM OUTPUT AND TAMPER Upon successful EWS3 outdoor siren binding process,the system adds 1 wireless Instant zone and 1 wireless Siren PGM output. The wireless zone is intended for EWS3 tamper control and ability to assign a partition (-s), while the wireless PGM output is intended for siren speaker control. In case of tamper violation, the alarm is caused regardless of system being armed or disarmed. There are 2 ways to detect tamper violation on EWS3: • By tamper switch. EWS3 comes equipped with 2 built-in tamper switches intended for enclosure supervision: • one located on the front side of the PCB supervising the front cover in case it is illegally opened (see Fig. No. 1). • the other one located on back of the PCB supervising the back side of the enclosure in case the EWS3 is illegally detached from the wall (see Fig. No. 1). Once the enclosure of EWS3 is tampered, the tamper switch will become triggered. This action will be followed by alarm, resulting in sending an SMS text message and/or phone call to the user. The SMS text message contains the violated tamper number. • By wireless connection loss. The wireless connection loss between EWS3 and ELDES alarm system leads to alarm. The system identifies this event as a tamper violation and sends an alarm by SMS text message and phone call to the user (-s) by default. The SMS message contains the violated tamper number and a star * character indicating wireless connection loss as a tamper alarm cause. ATTENTION: The tamper will not operate if the wireless zone is disabled. 5.BATTERY REPLACEMENT 1. Open EWS3 enclosure. 2. Remove all 4 old batteries from the battery slots. 3. Postition the 4 new 1,5V alkaline AA type batteries according to the appropriate battery slot positive/negative terminals indicated on the PCB (printed-circuit-board) of EWS3 4. Insert the batteries into the battery slots. 5. Batteries replaced. See chapter 3. INSTALLATION for more details. ATTENTION: Only 1,5V Alkaline AA type batteries can be used. Install only new, high quality and unexpired batteries. Do not mix the old batteries with the new ones. ATTENTION: At least 1 battery must be removed if the device is not in use. ATTENTION: In order to avoid fire or explosion hazards, the system must be used only with approved battery. Special care must be taken when connecting positive and negative battery terminals. Dispose old batteries only into special collection sites. Do not charge, disassemble, heat or incinerate old batteries. NOTE: The system sends an SMS message to a preset user phone number as soon as the battery level runs below 5%. NOTE: The battery status can be monitored in real-time using ELDES Configuration Tool software. 6.RESTORING DEFAULT PARAMETERS 1. Remove one battery from EWS3. 2. Press and hold the RESET button. 3. Insert the battery back to EWS3. 4. Hold the RESET button until LED indicator starts blinking. 5. Release the RESET button. 6. Parameters reset to default. 6 EN EWS3 – Wireless Indoor Siren 7.ADDITIONAL INFORMATION Limited Liability The buyer must agree that the system will reduce the risk of fire, theft, burglary or other dangers but does not guarantee against such events.“ELDES UAB” will not take any responsibility regarding personal or property or revenue loss while using the system. “ELDES UAB” liability according to local laws does not exceed value of the purchased system. “ELDES UAB” is not affiliated with any of the Internet providers therefore is not responsible for the quality of Internet service. Manufacturer Warranty This device carries a 24-month warranty by the manufacturer “ELDES UAB”. Warranty period starts from the day the system has been purchased by the end user. The warranty is valid only if the system has been used as intended, following all guidelines listed in the manual and within specified operating conditions. Receipt must be kept as a proof of purchase date. The warranty is voided if the system has been exposed to mechanical impact, chemicals, high humidity, fluids, corrosive and hazardous environment or other force majeure factors. Safety instructions Please read and follow these safety guidelines in order to maintain safety of operators and people around: • DO NOT use the system where it can be interfere with other devices and cause any potential danger. • DO NOT use the system with medical devices. • DO NOT use the system in hazardous environment. • DO NOT expose the system to high humidity, chemical environment or mechanical impacts. • DO NOT attempt to personally repair the system. The WEEE (Waste Electrical and Electronic Equipment) marking on this product (see left) or its documentation indicates that the product must not be disposed of together with household waste. To prevent possible harm to human health and/or the environment, the product must be disposed on in an approved and environmentally safe recycling process. For further information on how to dispose of this product correctly, contact the system supplier, or the local authority responsible for waste disposal in your area. Copyright © “ELDES UAB”, 2013. All rights reserved It is not allowed to copy and distribute information in this document or pass to a third party without advanced written authorization by “ELDES UAB”. “ELSDES UAB” reserves the right to update or modify this document and/or related products without a warning. Hereby, “ELDES UAB” declares that this wireless indoor siren EWS3 is in compliance with the essential requirements and other relevant provisions of Directive 1999/5/EC. The declaration of conformity may be consulted at www.eldes.lt EWS3 – Wireless Indoor Siren EN 7 Made in the European Union www.eldes.lt