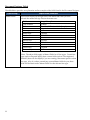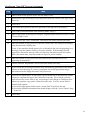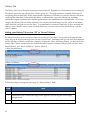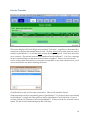
1
Version 6 Learning to Use the Prevail Case Management System © 2012 Practice Technology, Inc. 2311 Mount Vernon St, Orlando, FL 32803 Phone: 407.228.4400 Fax: 407.228.4414 www.prevail.net Table of Contents Chapter One: The Interface ....................................................................................................................... 1 Main Matter Screen ................................................................................................................................ 1 Chapter Two: Initial Setup ........................................................................................................................ 2 Setting Up User Accounts ..................................................................................................................... 2 Deleting User Accounts......................................................................................................................... 4 Adding Your Firm to the Rolodex ....................................................................................................... 5 Adding Other Branch Locations of Your Firm to the Rolodex ........................................................ 6 Chapter Three: Administration Menu ................................................................................................ 7 Security Setup ......................................................................................................................................... 7 Security Setup (continued) ..................................................................................................................... 8 Law Type/Case Type/Rolodex Type Setup ........................................................................................ 8 Law Types ........................................................................................................................................... 8 Case Types ........................................................................................................................................ 10 Rolodex Types .................................................................................................................................. 13 Creating Merge Document Templates in Prevail ............................................................................ 14 Creating a New Merge Document by Cloning an Existing Document .................................... 15 Creating a New Merge Document Template from Scratch ........................................................ 17 Transferring Your Existing Form Letters into Prevail ................................................................ 19 Creating Merge Document Templates from Adobe PDF Files .................................................. 19 Deleting a Merge Document Template ......................................................................................... 21 Document Designer Fields.............................................................................................................. 22 Intake Questionnaire ........................................................................................................................... 29 Creating a New Intake Questionnaire Script ............................................................................... 30 Creating a New Intake Questionnaire Script (continued)............................................................ 31 Intake Questionnaire Example ....................................................................................................... 33 Databank ............................................................................................................................................... 34 Location of User-Definable Lists in Prevail .................................................................................. 35 Modifying Lists in the Databank ................................................................................................... 35 Process Builder ..................................................................................................................................... 36 i Process Builder (continued) ................................................................................................................. 37 Standard vs. Auto-Fill Processes.................................................................................................... 37 Creating a "Standard" Process ........................................................................................................ 38 Creating an "Auto-Fill" Process ...................................................................................................... 40 Ledger Export Wizard ......................................................................................................................... 42 Firm Log ................................................................................................................................................ 43 Chapter Four: Rolodex and Building Matters ............................................................................... 44 Rolodex .................................................................................................................................................. 44 Creating a New Prospect or Matter ................................................................................................... 46 Activating Prospects as Matters ......................................................................................................... 47 Closing or Deleting Prospects or Matters ......................................................................................... 47 Attaching Other Parties to a Matter .................................................................................................. 48 Chapter Five: Calendar ........................................................................................................................ 50 Calendar Navigation ........................................................................................................................... 50 Creating a Task ..................................................................................................................................... 51 Completing a Task ............................................................................................................................... 53 Creating an Appointment ................................................................................................................... 53 Cancelling vs. Deleting an Appointment ......................................................................................... 55 Microsoft Outlook Sync....................................................................................................................... 55 Chapter Six: Matter & Rolodex Searches ......................................................................................... 57 Matter and Rolodex Searches ............................................................................................................. 57 Matter Search .................................................................................................................................... 57 Rolodex Search ................................................................................................................................. 58 Deleting Rolodex Entries .................................................................................................................... 59 Chapter Seven: Tabs & Buttons.......................................................................................................... 60 Home Tab .............................................................................................................................................. 60 Matter Tab ............................................................................................................................................. 61 History Tab ........................................................................................................................................... 62 Setting your History Tab to view “All” or “Recent” History .................................................... 62 Adding History Entries ................................................................................................................... 63 Generating a Merge Document for a Matter .................................................................................... 65 Power Search ........................................................................................................................................ 67 Power Search ........................................................................................................................................ 68 ii Events Tab ............................................................................................................................................. 68 Events Tab (continued) ......................................................................................................................... 69 Medical Tab........................................................................................................................................... 69 Requesting the Initial Set of Records from a Medical Provider ................................................ 71 Requesting an Updated Set of Records from a Medical Provider............................................. 72 Photo Tab .............................................................................................................................................. 73 Notes Tab .............................................................................................................................................. 74 Ledger Tab ............................................................................................................................................ 75 Adding a Ledger Entry.................................................................................................................... 76 Claims/Processes Tab .......................................................................................................................... 77 Creating a New Claim on the Claims Tab .................................................................................... 78 Updating the Status of a Claim on the Claims Tab ..................................................................... 79 Disabilities Tab ..................................................................................................................................... 80 Disabilities Tab (continued).............................................................................................................. 81 Adding Ailments to Disability Information ................................................................................. 81 Employment/Work Tab....................................................................................................................... 82 Adding an Employment/Work Entry ........................................................................................... 83 Negotiation Tab .................................................................................................................................... 85 Adding Demands and Offers ......................................................................................................... 86 Adding Liens .................................................................................................................................... 87 Damages Tab ........................................................................................................................................ 88 Adding Damages Entries ................................................................................................................ 88 Strategy Tab .......................................................................................................................................... 90 Generating an Intake Questionnaire for a New Prospect .............................................................. 90 Chapter Eight: Tools ........................................................................................................................... 92 Sticky Notes .......................................................................................................................................... 92 Attaching a Sticky Note to a Matter .............................................................................................. 92 Adding More Information to an Existing Sticky Note ................................................................ 93 Deleting vs. Closing a Sticky Note ................................................................................................ 93 E-Mail..................................................................................................................................................... 94 Initiating E-mails in Prevail ............................................................................................................ 95 Scanning for Replies to E-mails Initiated in Prevail .................................................................... 96 iii Sending E-mails from the Rolodex ................................................................................................ 97 Chapter Nine: Prevail Briefcase ....................................................................................................... 98 Copying Matters to Your Prevail Briefcase ...................................................................................... 98 Accessing Your Prevail Briefcase When You're Offsite .................................................................. 99 Removing Matters from Your Prevail Briefcase .............................................................................. 99 Chapter Ten: Client Package ............................................................................................................ 101 Creating a Client Package PDF ........................................................................................................ 101 Chapter Eleven: Reports ................................................................................................................... 103 Running Reports ................................................................................................................................ 103 Chapter Twelve: Prevail Control Panel ........................................................................................... 105 Updating Your Version of Prevail ................................................................................................... 105 Repairing Field Name Errors ........................................................................................................... 106 Deleting Unused Rolodex Entries.................................................................................................... 106 Pack & Reindex................................................................................................................................... 107 Web Prospect Import ......................................................................................................................... 108 Rolodex Consolidation ...................................................................................................................... 109 Chapter Thirteen: Extras ................................................................................................................... 110 Grid Layout ..................................................................................................................................... 110 Printing Tabs ................................................................................................................................... 113 Viewing Notes (Detail) .................................................................................................................. 114 Daily Backups of Your Prevail Data ............................................................................................ 114 Chapter Fourteen: Trust Ledger ....................................................................................................... 115 Trust Ledger........................................................................................................................................ 115 Trust Account Ledger Setup............................................................................................................. 115 In the Databank .................................................................................................................................. 116 Trust Ledger Tab ................................................................................................................................ 117 Adding a Trust Ledger Entry ....................................................................................................... 120 Chapter Fifteen: Prevail-Quickbooks Transfer Wizard Quick Start Guide ................................... 121 A Quick Start Guide to QuickBooks Integration with Prevail .................................................... 121 Initial Set Up ....................................................................................................................................... 122 Prevail-QuickBooks Transfer Wizard ............................................................................................. 122 System Defaults .................................................................................................................................. 123 QuickBooks Sync................................................................................................................................ 125 iv QuickBooks Field Lengths ................................................................................................................ 125 Setup Wizards..................................................................................................................................... 126 Vendor Wizard ................................................................................................................................... 127 Customer Wizard ............................................................................................................................... 129 Transfer Wizards ................................................................................................................................ 130 Invoice Transfer .................................................................................................................................. 131 Check Request .................................................................................................................................... 134 Check Printed ..................................................................................................................................... 134 Customer Payments ........................................................................................................................... 135 v Chapter One: The Interface Prevail is known for its simple point and click user interface. Although Prevail Version 6 looks different, the feel and ease of use remain the same. The interface is better organized, and important conformity features, keyboard equivalents, new menus, and new buttons have been added. Main Matter Screen Refer to the diagram below to understand the seven parts of the interface. Please note that some fields on the Matter tab differ, depending on the type of matter (e.g., personal injury, Social Security, workers' compensation) in which you are working. 1. Title Bar 2. Main Menu Bar 3. Tab Header 4. Toolbar 5. Navigation Bar 6. Matter Tree 7. Tabs 1. 2. 3. 4. 5. 6. Title Bar: Displays the Matter (Case) Title Main Menu Bar: Drop-down list of various options, such as Administration, Tools, Reports, etc. Tab Header: Displays the status – “Prospective” or “Matter” and whether they are “Open” or “Closed” Toolbar: Contains the main buttons (Matter Search, Rolodex Search, etc.) Navigation Bar: Status (Opens/Closes Matter or Prospect); Previous and Next Buttons (Moves from one Matter to another in alphabetical order) Matter Tree: Displays all of the parties involved in the matter 1 Chapter Two: Initial Setup The Rolodex is the “Heart” of the Prevail system. Plaintiffs, claimants, defendants, medical providers, insurance companies, government agencies, opposing counsel, referral sources, and any other contacts you can think of all reside in the Rolodex. Each unique party has only one entry in your Rolodex. Then, you can attach each of these parties to as many matters as you like, in whatever role the situation requires. In later chapters, you’ll learn how to add parties to the Rolodex and attach them to the matters, but your first task is setting up your own firm’s Rolodex entry. Setting Up User Accounts *NOTE: Only users with an ‘Administrator’ security setting in Prevail may add, delete, or modify user accounts. *Follow these steps to set up a Prevail user account: Step Task 1 From the Main Menu, click on ‘Administration’ > ‘Employees.’ 2 2 Click 'Add' on the left side of the window. 3 Enter the desired login name for the employee, which will appear in all caps. 4 If desired, enter a password for the account. If you do not want a password for the account, you may leave this field blank. 5 Complete the following fields: Salutation First name Middle name Last name Suffix Initials *NOTE: You may choose to complete the remaining fields in this window (e.g., Nickname, Social Security number, Date of Birth), but many of our clients choose not to include this personal information in the employee setup. 6 Choose an employee type from the "Type" drop-down list. *NOTE: When assigning an employee type, choose either “Attorney/Case Manager” OR “Paralegal/Case Manager” for that employee’s name to be available on the dropdown list on the Matter tab for “Case Manager,” “Lead Attorney,” or “Hearing Attorney.” This designation also allows the employee to have a Statute Warning List on their Home tab. 7 Your firm will be listed in the “Branch Office” field once we have created a Rolodex entry for your firm (See Next Section: “Adding Your Firm to the Rolodex”). 8 Complete the following optional fields: Professional Title Bar Number Rate Date Hired Date Release 9 Address/Phone Information: This information is not that of the actual firm, but that of the employee. If the employee has a company e-mail address, it would be beneficial to enter it in this section. 10 Next, click on the "Preferences" tab at the bottom of the window. On this tab, choose the calendar display preferences, word processor (Microsoft Word or Corel WordPerfect), and color scheme for the user. 11 Click on the "Security" tab at the bottom of the window. The employee's default security settings are determined by the "type" you selected (e.g., Attorney, Paralegal/Case Manager, Associate) for him or her on the "Contact" tab. However, you may override any of the default settings for the employee by modifying them in this section. 3 12 Click on the "Notes" tab at the bottom of the window. If desired, enter any miscellaneous information about the employee. 13 Click on the "Signature" tab at the bottom of the window. Enter a standard e-mail signature for the employee. (See E-Mail for further information.) 14 Click 'Save' at the top of the window. 15 Repeat Steps 1-14 for each additional employee login. Deleting User Accounts Step 4 Task 1 From the Main Menu, click on ‘Administration’ > ‘Employees.’ 2 Click on the employee's name in the list on the left side of the User Preferences window. 5 Click on the red X (Delete) button on the left side of the User Preferences window. 6 Click 'Delete User' to confirm that you want to delete the employee. 7 Select a Lead Attorney, Hearing Attorney, Case Manager to whom you want to assign the former employee's assigned matters; select a user to whom you want to assign the former employee's future appointments and future tasks. 8 Click 'Finish'. Adding Your Firm to the Rolodex The very first Rolodex entry you’ll need to enter is for your own firm. Prevail pulls the information for your merge documents from your firm’s Rolodex entry. *NOTE: If your firm has more than one office, repeat the following steps for each office. *Follow these steps to add your office to your Rolodex if your firm: Step Task 1 From the Toolbar, click the ‘Rolodex Search’ button. 2 Change the ‘Search Type’ to ‘Any Part of Rolodex Name.’ 3 Type ABC in the ‘Search Criteria’ field. A list of matching Rolodex entries appears. 4 Double-click on the Rolodex entry for ‘ABC Law Firm, P.C.’ 5 Select ‘Branch Office’ from the ‘Type’ drop-down list. 6 Enter the name of your firm in the ‘Office/Company/Firm’ field. 7 Tab to the ‘Address’ field, and enter your firm’s address. *Note: If your firm has a suite number, you may enter the suite number on the first address line with the street address, or you may use the second address line for the suite number. Just be sure to set a standard that will be used by everyone in your office. 8 After entering your street address, press the <Tab> key, and you will skip over the city and state fields directly to the zip code field. 9 Enter your five-digit zip code in the zip code field. The city and state fields will automatically populate after you enter your zip code. 5 10 Press the <Tab> key once, and Prevail takes you to the city field. If the city name is correct, press the <Tab> key without making any changes. Prevail moves you to the state field. If the city name is incorrect, type the first letter of the correct city name, and the name of the correct city will appear. Press <Enter> when the correct city name displays. Then, press the <Tab> key to move to the state field. 11 Press the <Tab> key to move from the state field to the phone number field and enter your firm’s phone number, using numbers only (no dashes or other characters are needed). 12 Press the <Tab> key to move to the ‘Fax’ field, and enter your firm’s fax number, using numbers only. 13 Click ‘Save’. Adding Other Branch Locations of Your Firm to the Rolodex Although your firm (like any other party) should only have one entry in your Rolodex, you will need to set up an individual entry for each branch office (physical location) of your firm. If your firm has only one location, you may skip this procedure! Follow these steps to set up individual Rolodex entries for each of your firm’s branch offices. Step 6 Task 1 Click on ‘Rolodex’ on the toolbar. 2 Change the ‘Search Type’ to ‘Any Part of Rolodex Name.’ 3 Type any character string from your firm’s name in the ‘Search Criteria’ field. A list of matching Rolodex entries appears. 4 Double-click on the Rolodex entry for your firm. The Rolodex entry for your firm appears. 5 Click ‘Clone’ at the top of the Rolodex entry window. 6 Delete the word ‘[CLONED]’ from the firm name in the ‘Office/Company/Firm’ field, and give this branch office a unique name (different from the name you gave to your other branch office). For example, you might designate this office as “Downtown Office”. 7 Click ‘Save’. Repeat steps 1 – 7 for each additional Branch Office. Chapter Three: Administration Menu Several features in Prevail are reserved for users with an Administrator security setting. Other users will not see the Administration menu when logged into Prevail. Administrators will use this menu to accomplish a variety of tasks within Prevail, such as creating/modifying merge document templates, creating/modifying Rolodex types, and modifying user-definable lists. Security Setup Prevail's Security Setup feature allows you to define an employee's ability to add, edit, delete, or view various areas of the program, based on the employee's type. *NOTE: Though the employee's default security settings are based on his or her employee "type," you also have the ability to override a specific employee's settings as well. For example, you might normally allow employees who have the type "associate" to create new Rolodex entries, but you could modify a specific "associate's" security settings to not allow him this privilege. 7 Security Setup (continued) *Follow the steps below to define the default security settings for each employee type in your system: Step Task 1 From the Main Menu, click on ‘Administration’ > ‘Security Setup’. 2 Click on the appropriate type in the list on the left side of the window. *Note: You may create additional employee types by clicking 'Add' on the left side of the window. 3 Check the 'Attorney' box if an employee of this type should be an available option in the ‘Lead Attorney’ drop-down list on the Matter tab in Prevail. Likewise, check the 'Case Manager' box if an employee of this type should be an available option in the "Case Manager" drop-down list on the Matter tab in Prevail. *Note: You may check box boxes if necessary. 4 Select a Startup Query at the top of the window if you want to limit the user's access to only those matters matching a specific query (e.g., open Social Security matters). 5 For each of the areas shown, choose one of the following options: No Access View Only Add, Delete, Edit, and View *NOTE: The above choices may vary, depending on the area for which you are setting security. For example, the fields listed under ‘Prevail Security Information’ concern daily use of the listed areas. In contrast, the fields listed under ‘Administrative Security Information’ concern administrative or “set-up” access to the listed areas. 6 Click 'Save' at the top of the window. Law Type/Case Type/Rolodex Type Setup Law Types In Prevail, "law types" refer to the areas of practice in which a firm specializes, such as Social Security, Personal Injury, workers' compensation, bankruptcy, etc. A matter's law type determines the fields that will display on the Matter tab for that particular case. 8 When you click on a specific law type in the list of law types on the left, the right side of the window will display how the Matter tab will appear for a case of that type. You may adjust the settings in the ‘Law Type Settings’ section in the lower left of the window. Law Types (continued) *Follow these steps to modify the settings for a law type: Step Task 1 From the Main Menu, Click on ‘Administration’ > ‘Law Type/Case Type/Rolodex Type Setup’, and click on the ‘Law Types’ tab at the bottom. 2 If the law type is one that your firm practices, check the 'Active' box. Otherwise, leave this box unchecked. 3 If you would like for your client's contact information to display on the Matter tab, check the ‘Display Client’ checkbox. Otherwise, leave this box unchecked. 4 Check off each of the tabs that you would like to have available within a matter of this type. For the ‘Employment’ tab, you may choose to name the tab ‘Employment’ or ‘Work.’ Likewise, for the ‘Process’ tab, you may choose to name the tab ‘Claims’ or ‘Processes.’ 9 Law Types (continued) Step Task 5 If you would like to have a drop-down list on the Matter tab to choose a ‘Hearing Attorney’ (in addition to being able to assign a ‘Lead Attorney’), check the ‘Display Hearing Attorney’ checkbox. Otherwise, leave this box unchecked. 6 Click 'Save' in the ‘Law Type Settings" section of the window. Case Types Prevail allows you to set up an unlimited number of case types within a single law type. For example, under the Personal Injury law type, you may have case types such as motor vehicle accident, slip & fall, wrongful death, etc. 10 Case Types (continued) Additional field used in Workers' Compensation case types only. Use this field to create the secondary statute warning, based on the last compensation date, rather than the original incident date. *Follow these steps to create a new case type: Step Task 1 From the Main Menu, Click on ‘Administration’ > ‘Law Type’/’Case Type’/’Rolodex Type Setup’, and click on the ‘Case Types’ tab at the bottom. 2 Click 'Add'. 3 Enter a name for the case type in the ‘Description’ field. 4 Choose the appropriate Law type from the ‘Law Type’ drop-down list. For example, if you are creating a new case type for workers’ compensation, choose ‘Workers’ Compensation.’ 11 Case Types (continued) Step 5 Task 5 If this type of case has a Statute of Limitations date (for example, two years for a motor vehicle accident case), check the ‘Statute Date’ box, and enter the number of years after the incident date that the SOL date will occur. Then, enter the number of days prior to the SOL date that this type of case should appear in the Lead Attorney's and Case Manager's Statute Warning Lists. If this type of case will not have a Statute of Limitations date, uncheck the ‘Statute Date’ box. For Workers' Compensation case types, also enter the number of years after the Last Compensation Date that the SOL date will occur. Prevail will initially calculate the SOL date based on the incident date; later, each time you populate the Last Compensation Date field on the Matter tab, Prevail will recalculate the SOL date based on the number of years you enter in the ‘Compensation Years’ field in Case Type Setup. Click 'Save.’ *Follow these steps to delete a case type: Step 12 Task 1 From the Main Menu, Click on ‘Administration’ > ‘Law Type/Case Type/Rolodex Type Setup,’ and click on the ‘Case Types’ tab at the bottom. 2 Click once on the case type you want to delete. 3 Click 'Delete'. 4 Confirm the deletion by clicking on 'Delete' again. Rolodex Types Prevail allows you to create an unlimited number of party types to use in your Rolodex and to attach to your matters. *Follow these steps to create a new Rolodex type: Step Task 1 From the Main Menu, click on ‘Administration’ > ‘Law Type/Case Type/Rolodex Type Setup’, and click on the ‘Rolodex Types’ tab at the bottom. 2 Click 'Add'. 3 Enter a name for the new Rolodex type in the ‘Description’ field. 4 Check the ‘Active Type’ checkbox. 5 If you would like for personal information (nickname, Social Security number, gender, date of birth, age, deceased status) to appear for this Rolodex type on the Matter tab, check the ‘Display Personal Information’ checkbox. Otherwise, leave this box unchecked. 6 If this Rolodex type is a client, check the ‘Client’ checkbox, and choose the law type in which this Rolodex type would be the client. Otherwise, leave this box unchecked. 13 Rolodex Types (continued) Step Task 7 If this Rolodex type is your opposition, check the ‘Opposition’ checkbox, and choose from the drop-down list, the law type in which this Rolodex type would be the opposition. Otherwise, leave this box unchecked. 8 Enter a phone number type (e.g., home phone, cell phone, work phone) that you would like to use for this Rolodex type in the ‘Phone #1, #2, #3, and #4 Description’ fields. *Note: You are not required to enter a description in each of these fields. 9 Click 'Save'. *Follow these steps to delete any unnecessary Rolodex types: Step Task 1 From Main Menu, click on ‘Administration’ >’ Law Type/Case Type/Rolodex Type Setup’, and click on the ‘Rolodex Types’ tab at the bottom. 2 Click once on the Rolodex type you want to delete. 3 Click 'Delete'. 4 Confirm the deletion by clicking on 'Delete' again. Creating Merge Document Templates in Prevail One of Prevail’s most powerful time-saving features is its document creation and management capability. Prevail speeds up the document process by doing the data entry work for you. The only thing you have to do is select the letter or form to merge. With a few mouse clicks, you’ll be merging documents, saving time and being more productive than ever before. Prevail 6 is compatible with Microsoft Word 2003 - 2010 and Corel Word Perfect Suites 10-X4 (14). Before you can start merging documents, one of these word processors must be installed on the machine that is running Prevail. This chapter will help guide you through modifying existing forms and letters, creating new forms and letters and merging documents with matters. To create new merge document templates, you may either build one from scratch, or clone an existing template to meet your needs. It’s usually easier to clone an existing template that contains most or all of the fields that you want to include in your new document! 14 Creating a New Merge Document by Cloning an Existing Document The document tree lists all of the available documents to merge. All matters will allow “Generic Documents” to be merged. In addition, you may merge “Social Security Documents” if you have a Social Security matter open, a “Personal Injury Document” if you have a Personal Injury matter open, etc. *Follow these steps to create a new document template by cloning an existing one: Step Task 1 From the Main Menu, click on ‘Administration’, and then click on ‘Document Setup’. The Document Designer window appears. 2 Click ‘Clone’ in the upper-right corner of the Document Designer window. A duplicate copy (with the word “Clone” at the end of the document title) will appear in the list of available documents, just above the original document. 15 Creating a New Merge Document by Cloning an Existing Document (continued) Step Task 3 Enter a new name for the new document in the ‘Document Name’ field. You may also complete the following document property fields as desired: Category – how the document will be classified on the History tab when merged for a matter Time and Time Category – enter the amount of time, in hours, that an employee will spend each time the document is merged for a matter. Prevail will automatically enter a time entry in the ledger for this matter. Cost and Cost Category – enter the cost that your firm will incur each time this document is merged for a matter. Prevail will automatically enter a cost entry in the ledger for this matter. Task Start – Prevail will automatically enter a task on the selected user’s task list each time this document is merged for a matter. For example, if you select 30 for this field, Prevail will begin showing a task on the selected user’s task list 30 days after the merge document is generated for the matter. Task Due – the due date for the task that Prevail will automatically generate when the merge document is generated for a matter. Task Assigned – select a user to have the task assigned to Task Subject – enter instructions for the task that will automatically appear on the selected user’s task list. For example, if you generate a request for medical records, you might make the subject of the subsequent task, “Did we receive requested medical records?” Choose whether the document template has merge fields in headers only, footers only, headers and footers, or neither headers nor footers. *Note: By default, the program assumes that the document does not have field codes in the header or footer. 4 Click ‘Save’. 5 Highlight your new document in the list, and click ‘Open’, or simply double-click on the document to open it. Your document template displays in your word processing program, and the Document Designer displays a list of available merge fields. 16 Creating a New Merge Document by Cloning an Existing Document (continued) Step Task 6 With your word processing document window and Prevail Document Designer window open beside each other, insert merge fields in your document using these steps: a) Position the cursor in the document where you would like to insert the merge field. b) Locate the appropriate merge field in the Document Designer by expanding the categories of possible fields. When you locate the desired field, double-click on it to insert it in your document. *Note: To insert an automatic date field, use the ‘Merge Date’ field code, not the ‘Date’ field code. The ‘Merge Date’ field is located in the ‘Insert Codes’ group in the list of available field codes in the Document Designer. 7 Modify any other text in the document as desired. 8 *IMPORTANT: Click ‘Save’ at the top of the Document Designer window! Do not use the ‘Save’ or ‘Save As’ functions within your word processing program. 9 Close the Document Designer window. Creating a New Merge Document Template from Scratch Step Task 1 From the Main Menu, click on ‘Administration’, and then click on ‘Document Setup’. The Document Designer window appears. 2 Click on the ‘+ New’ button at the top of the Document Designer window. 3 Enter a ‘Document Title’ and choose a ‘Document Category’ for the new document. *Note: If you will need to be able to merge the document within a number of different law types (for example, if the document will be used in both workers' compensation and personal injury matters), choose "Generic" as the 'Document Category'. If you will only use the document within a single law type, choose that law type as the 'Document Category'. 4 Click ‘Finish’. Your document displays in your word processing program, and the Document Designer displays a list of available merge fields. 17 Creating a New Merge Document Template from Scratch (continued) Step Task 5 Complete the following document property fields as desired: Category - how the document will be classified on the History tab when merged for a matter Time and Time Category – enter the amount of time, in hours, that an employee will spend each time the document is merged for a matter. Prevail will automatically enter a time entry in the ledger for this matter. Cost and Cost Category – enter the cost that your firm will incur each time this document is merged for a matter. Prevail will automatically enter a cost entry in the ledger for this matter. Task Start – Prevail will automatically enter a task on the selected user’s task list each time this document is merged for a matter. For example, if you select 30 for this field, Prevail will begin showing a task on the selected user’s task list 30 days after the merge document is generated for the matter. Task Due – the due date for the task that Prevail will automatically generate when the merge document is generated for a matter. Task Assigned – select a default user to assign the task to Task Subject – enter instructions for the task that will automatically appear on the selected user’s task list. For example, if you generate a request for medical records, you might make the subject of the subsequent task, “Follow-up on medical records request.” Choose whether the document template has merge fields in headers only, footers only, headers and footers, or neither headers nor footers. *Note: By default, the program assumes that the document does not have field codes in the header or footer. 6 Type the text of your letter, and, where appropriate, insert merge fields in your document using these steps: a) position the cursor in the document where you would like to insert the merge field. b) locate the appropriate merge field in the Document Designer by expanding the categories of possible fields. When you locate the desired field, double-click on it to insert it into your document. *Note: To insert an automatic date field, use the "Merge Date" field code, not the "Date" field code. The "MergeDate" field is located under the "Insert Codes" group in the Document Designer. 7 *IMPORTANT: Click ‘Save’ at the top of the Document Designer window! Do not use the ‘Save’ or ‘Save As’ functions within your word processing program. 8 Close the Document Designer window. 18 Transferring Your Existing Form Letters into Prevail It's likely that you already have a number of form letters that you've been using before purchasing Prevail. If so, you may transfer these letters into your Prevail document folder, and then insert field codes into them using the steps outlined in the procedure above. Follow these steps to transfer an existing form letter into your Prevail documents folder. Step Task 1 Open your existing form letter in Microsoft Word or WordPerfect. 2 Save the document in the following location: X:\PREVAIL_SERVER\docs\(Law Type for Document), where 'X' represents the drive on which your Prevail server is installed. (Law Type for Document) means choose the law type folder (e.g., Social Security) or the "Generic" folder for the document to be saved in. 3 Close your existing Word or WordPerfect document, and return to Prevail. 4 From the Main Menu, click ‘Administration’ > Document Setup, and complete steps 58 in the Creating a New Merge Document Template from Scratch on page 17. Creating Merge Document Templates from Adobe PDF Files In Prevail 6, if you have Adobe Acrobat 9.0 Standard or Professional or Adobe Acrobat 6.0-8.0 Professional installed on your computer, you'll be able to create Prevail merge document templates directly from Adobe PDF files. This feature is particularly helpful when you obtain forms from a government agency's (e.g., Social Security Administration, state workers' compensation office) website. Such forms are usually only available in PDF format. Follow these steps to create a Prevail merge document template from an Adobe PDF file. Step Task 1 Open the Adobe PDF file that you want to use as a Prevail merge document template. 2 Click on 'Forms', and select 'Add or Edit Fields' from the drop-down list. 19 Creating Merge Document Templates from Adobe PDF Files (continued) Step 20 Task 3 If you see the following screen, click 'No'. 4 Click 'Add New Field' in the upper left area of the Adobe window, and select 'Text Field' from the drop-down list. 5 Use your mouse to drag the new text field into the appropriate position in the form. 6 Double-click on the text field to open the 'Text Field Properties' window. 7 On the General tab within the 'Text Field Properties' window, type the merge field label exactly as it appears in the Prevail Document Designer, including the brackets (e.g., [SS Claimant-First Name]) in the 'Name' field. 8 Click on the Appearance tab within the 'Text Field Properties' window. 9 Select the desired font and font size. 10 If the merged information will occupy multiple lines (for example, if you are inserting a name/address block field), go to the Options tab within the 'Text Field Properties' window, and check the box labeled "Multi-line". 11 Click 'Close'. 12 Repeat steps 4-11 of this procedure for each merge field that you need to add to this form. 13 Click 'Close Form Editing' in the upper right area of the Adobe window. 14 Click 'File', and then choose 'Save As' from the drop-down list. 15 Save the file with your desired filename in the appropriate folder (e.g., Generic, Social Security, Personal Injury) within the Prevail Docs folder (located on your Prevail server drive). 16 Close Adobe Acrobat. 17 Open the folder in which you saved the new PDF merge template. Creating Merge Document Templates from Adobe PDF Files (continued) Step Task 18 Right-click in the white space within the list of folder contents. Then, scroll down to 'New', and left-click on 'Text Document'. A file named 'New Text Document' appears in the list of folder contents. 19 Rename the 'New Text Document' with the same file name that you gave the PDF template (without the .pdf extension). 20 Close the folder contents window. Deleting a Merge Document Template If there is a document template in the Document Designer that you do not need, you may delete it. For example, if a form becomes obsolete and you replace it with an updated version, you may need to delete the old one (if the new one is saved with a different filename). Follow these steps to delete a merge document template from the Document Designer. Step Task 1 Click on ‘Administration’, and then click on ‘Document Setup’. The Document Designer window appears. 2 Highlight the merge document that you want to delete. 3 Click the red ‘X’ button at the top of the document designer window. 4 Click ‘Delete’ to confirm that you want to delete the merge document template. 21 Document Designer Fields The table below provides an explanation and/or examples of the fields listed in the Document Designer. Field Group Matter Fields Explanation/Examples These fields display on the right side of the Matter tab when you have selected the matter title (top line) in the matter tree. Field: Case Number Title Status Case Type Intake Date Incident Date Onset Date Statute Date Date Last Insured Rate Last Review Reviewed By Merged Example: 10-00001 Chandler (William) v. Smith (Joseph) Litigation Auto Accident 1/28/2010 12/20/2009 6/10/2007 8/15/2012 12/29/2011 $250.00 7/15/2009 JOHN *Note: The above fields apply to Matter Fields for all law types. Certain law types (such as Personal Injury) have custom fields (such as "Description of Incident") that will also display if you are creating a document specific to that law type. Also, if we have created any custom Matter fields for you, these fields will be listed under "Matter Fields" for the relevant law type. 22 Document Designer Fields (continued) Field Group Rolodex Type Fields Explanation/Examples These fields contain information (e.g., names, addresses, phone numbers) about the parties you have attached in your matters from the Rolodex. Note that the Rolodex Type Fields refer to the role in which the party is attached to a matter (the "Add As Type"), which is not necessarily the same as that party's "Rolodex Type" you chose when you entered the party in the Rolodex. Field: Merged Example: Full Name Mr. John Thomas Simpson, Jr., Esq. Whole Name John Thomas Simpson Name/Address Block Mr. John Thomas Simpson, Jr., Esq. Simpson & Johnson, PLC 1415 Oaklawn Place, Suite 815 Orlando, FL 32828 Full Address Block 1415 Oaklawn Place, Suite 815 Orlando, FL 32828 Full Address List 1415 Oaklawn Place, Suite 815, Orlando, FL 32828 Pronouns (The "pronouns" field will merge the pronoun appropriate to the party's gender entered in the Rolodex) Office/Company/Firm Simpson & Johnson, PLC Salutation Mr. First Name John Middle Name Thomas Last Name Simpson Suffix Jr. Title Esq. Nickname Johnny Social Security 145-78-8899 Date of Birth 8/15/1937 Age 73 Gender F Professional Title Chief Executive Officer Specialty Rheumatology Language English Deceased True Date of Death 1/16/2004 Address Line One 1415 Oaklawn Place Address Line Two Suite 815 City Orlando State FL Postal Code 32828 E-Mail Address [email protected] Web URL www.simpsonjohnson.com Contact Mary Witherspoon 23 Document Designer Fields (continued) Field Group Rolodex Type Fields (continued) Explanation/Examples Field: Phone 1-4 Merged Example: (Phone number fields will be labeled as you have labeled them for the party type in Rolodex Type Setup. Examples include Home Phone, Office Phone, Work Phone, and Cell Phone.) *Note: The above fields apply to Matter Fields for all law types. Certain law types (such as Personal Injury) have custom fields (such as "Description of Incident") that will also display if you are creating a document specific to that law type. Also, if we have created any custom Matter fields for you, these fields will be listed under "Matter Fields" for the relevant law type. Employee Fields These fields refer to the user (i.e., employee) who is generating the merge document in a specific matter. Prevail finds the information to merge into the fields in the Administration > Employees menu (Employee Setup window). Field: Full Name Whole Name Salutation First Name Middle Name Last Name Suffix Initials Nickname Date of Birth Professional Title Bar Number Social Security E-Mail Address Home Phone Business Phone Business Extension Cell Phone Pager Fax 24 Merged Example: Mr. John Thomas Simpson, Jr., Esq. John Thomas Simpson Mr. John Thomas Simpson Jr. JTS Johnny 8/15/1968 Attorney at Law 013595 445-59-8837 [email protected] (869) 443-8193 (869) 483-4928 4995 (869) 442-3891 (869) 442-3892 (869) 483-4929 Document Designer Fields (continued) Field Group Lead Attorney Fields Explanation/Examples These fields refer to the Lead Attorney assigned to the matter in which the document is being merged. Prevail finds the information to merge into the fields in the Administration > Employees menu (Employee Setup window). Field: Full Name Whole Name Salutation First Name Middle Name Last Name Suffix Initials Nickname Date of Birth Professional Title Bar Number Social Security E-Mail Address Home Phone Business Phone Business Extension Cell Phone Pager Fax Hearing Attorney Fields Merged Example: Mr. John Thomas Simpson, Jr., Esq. John Thomas Simpson Mr. John Thomas Simpson Jr. JTS Johnny 8/15/1968 Attorney at Law 013595 445-59-8837 [email protected] (869) 443-8193 (869) 483-4928 4995 (869) 442-3891 (869) 442-3892 (869) 483-4929 These fields refer to the Lead Attorney assigned to the matter in which the document is being merged. Prevail finds the information to merge into the fields in the Administration > Employees menu (Employee Setup window). Field: Full Name Whole Name Salutation First Name Middle Name Last Name Suffix Initials Nickname Date of Birth Professional Title Bar Number Merged Example: Mr. John Thomas Simpson, Jr., Esq. John Thomas Simpson Mr. John Thomas Simpson Jr. JTS Johnny 8/15/1968 Attorney at Law 013595 25 Document Designer Fields (continued) Field Group Hearing Attorney Fields Case Manager Fields Explanation/Examples Field: Social Security E-Mail Address Home Phone Business Phone Business Extension Cell Phone Pager Fax These fields refer to the Case Manager assigned to the matter in which the document is being merged. Prevail finds the information to merge into the fields in the Administration > Employees menu (Employee Setup window). Field: Full Name Whole Name Salutation First Name Middle Name Last Name Suffix Initials Nickname Date of Birth Professional Title Bar Number Social Security E-Mail Address Home Phone Business Phone Business Extension Cell Phone Pager Fax 26 Merged Example: 445-59-8837 [email protected] (869) 443-8193 (869) 483-4928 4995 (869) 442-3891 (869) 442-3892 (869) 483-4929 Merged Example: Mr. John Thomas Simpson, Jr., Esq. John Thomas Simpson Mr. John Thomas Simpson Jr. JTS Johnny 8/15/1968 Attorney at Law 013595 445-59-8837 [email protected] (869) 443-8193 (869) 483-4928 4995 (869) 442-3891 (869) 442-3892 (869) 483-4929 Document Designer Fields (continued) Field Group Explanation/Examples Appointment Fields Appointment fields are used to merge appointment information from the calendar into a document. When you use an appointment field in a template, replace the phrase "Enter Appointment Type" with the type of appointment that Prevail should search for within that matter (such as Hearing, Pre-Hearing Conference, Meeting, etc.). These appointment types must be in your Databank, and must be assigned appropriately to appointments. When you merge the document in a matter, if there are multiple appointments of that type scheduled within that matter, Prevail will display a grid listing those matching appointments, and you will choose one of the appointments from the list. Field: Field displays as… Change to… (EXAMPLES ONLY) Subject/Enter [Subject/Enter Appointment [Subject/Hearing] Appointment Type Type] Date/Enter [Date/Enter Appointment [Date/Hearing] Appointment Type Type] Time/Enter [Subject/Enter Appointment [Time/Hearing] Appointment Type Type] Location/Enter [Location/Enter Appointment [Location/Hearing] Appointment Type Type] Insert Codes The majority of the Insert Codes allow you to set up a keyboard prompt (i.e., pop-up window) for a piece of information that you need to enter each time you merge the document. For example, in a letter notifying the client of an upcoming hearing, you might want to set up a prompt for you to enter the hearing date as you are merging the document. The insert codes appear as [Insert Currency-DESCRIPTION], [Insert DateDESCRIPTION] in your template. It is important that you change the word "DESCRIPTION" to a reminder of what you need to enter in that place in the document. For example, you would change [Insert Date-DESCRIPTION] to [Insert Date-Hearing date] to create a prompt to enter the hearing date. *Note: The "Merge Date" insert code is the only insert code that does not create a prompt. It will automatically insert the current date each time the letter is merged. 27 Document Designer Fields (continued) Field Group Insert Codes (continued) Explanation/Examples Field: Field displays as… Currency [Insert CurrencyDESCRIPTION] [Insert Date-DESCRIPTION] Date Number Text File * Note: The "Insert File" command is used to link a source document to your template. It is primarily used to insert your letterhead file, so that if you update the source document at any time, it will automatically update all documents that are linked to it. 28 [Insert NumberDESCRIPTION] [Insert Text-DESCRIPTION] [Insert File-FILENAME] Change to… (EXAMPLES ONLY) [Insert Currency-Total costs incurred by firm] [Insert Date-Hearing date] [Insert Number-# of pages in fax] [Insert Text-Time of hearing] [Insert FileC:\Letterhead.doc] Document Designer Fields (continued) Field Group Grid Codes Explanation/Examples These fields merge the grids (i.e., lists) contained in various tabs within Prevail. Field: Explanation: Damages This field inserts a list of all damages listed on the matter's Damages tab. The list includes the provider's name and amount for each damage. It also includes a subtotal for each damage category, and a grand total of all damages. DamageBalance This field inserts a list of all damages listed on the matter's Damages tab. The list includes the provider's name and balance due (i.e., the original damage amount, minus any payments that you have applied against the damage)for each damage. DamagesAddress This field inserts a list of all damages listed on the matter's Damages tab. The list includes the provider's name and address and amount for each damage. It also includes a subtotal for each damage category, and a grand total of all damages. LedgerTime This field inserts a list of all time entries from the matter's Ledger tab. LedgerCost This field inserts a list of all cost entries from the matter's Ledger tab. LedgerFee This field inserts a list of all fee entries from the matter's Ledger tab. Disabilities This field inserts a list of all ailments from the matter's Disabilities tab. Intake Questionnaire The Intake Questionnaire allows you to design a custom flow chart of questions and scripts to use while interviewing a prospective new client. You may create multiple questionnaires, and select the appropriate questionnaire to use based on the law type and case type of the prospect. You may also set the Intake Questionnaire to automatically create new Rolodex entries, a new prospect, or a new matter after completing the interview. After Prevail creates a prospect or matter upon completing a questionnaire, the program also saves the questionnaire in its entirety (all questions and answers) as a text file on the History tab. 29 Creating a New Intake Questionnaire Script Follow these steps to create a new questionnaire template. Step 30 Task 1 From the Main Menu, click ‘Administration’ > Questionnaire Setup. 2 Click on '+ Add' in the upper left area of the window. 3 Select the appropriate law type and case type for which you will use the questionnaire from the drop-down list that appears. *Note: For each law/case type combination (e.g., Social Security All Case Types, Personal Injury Auto Accident), you may only create one questionnaire. For example, once you have created a questionnaire for Social Security SSI cases, you will not have the option to create another Social Security SSI intake questionnaire. Creating a New Intake Questionnaire Script (continued) Step Task 4 Click on 'Add to Tree' in the right side of the window, and select the appropriate question type from the drop-down list that appears. Contact – Use this question type to automatically create a Rolodex entry for the answer to the question. The Rolodex entry will be attached to the matter tree if you set the questionnaire to automatically create a matter or prospect at the conclusion of the questionnaire. For example, you might ask how the prospect found out about your office (Referral Source) or the name of his or her primary care doctor (Medical Provider). Currency – Use this question type to automatically format the response as currency. For example, you might ask a prospective client, "What is your average weekly wage?" Memo – Use this question type to allow for a text entry of unlimited length. For example, you might ask, "Describe your disabilities" or "Describe the property damage." Number – Use this question type to enter a numerical response. For example, you might ask, "How many dependents do you have?" Pick – Use this question type to enter a multiple-choice question. For example, you might ask, "What is your marital status?" as a 'Pick' question with 'Selected' choices including married, widowed, single, and divorced. Script – Use this question type to enter a defined script that you would read to the prospective client. Selected – Use this question type for each choice in a list of options under a 'Pick' question type. For example, underneath the 'Pick' question, "What is your marital status?" you could enter several 'Selected' question types, such as married, widowed, single, and divorced. *Note: The 'Selected' question type is only available for insertion under a 'Pick' question. Text – Use this question type to prompt for a brief text response. For example, you might ask a prospective client, "What is the highest grade you completed in school?" or "What is your mother's maiden name?" 31 Creating a New Intake Questionnaire (continued) Step 4 (cont.) 32 Task Terminate Questionnaire – Use this question type if the questionnaire should be terminated without further processing, based on a certain response. For example, you might want to terminate a questionnaire if a prospective client replied, "Yes," when asked "Have you treated for alcohol and/or drug abuse within the past three years?" Create Prospect/Create Matter – Use this question type to prompt the Intake Questionnaire to automatically create a prospect or matter. You would typically assign one of these two question types to the final question in the Intake Questionnaire. *Note: You must assign one of the following question types to the final question in your questionnaire: Create Prospect Create Matter 5 Enter the question you would like to ask in the 'Prompt' field in the lower-right area of the window. 6 For each question, you may choose to save the response in a pre-determined field on the Matter tab for the case in Prevail. For example, if you ask, "What is the onset date of your disability?", you might choose to save the response to this question in the 'Onset Date' field on the Matter tab. If you wish to save the response to a question in a Matter, Related, or Rolodex field, change the 'Save Type' drop-down list from "Don't Save Results" to "Matter Fields," "Related Fields," or "Rolodex Fields" and Select the appropriate field from the 'Save Field' drop-down list. 7 Click 'Save' in the upper right area of the window when you have finished setting up the Intake Questionnaire. Intake Questionnaire Example Below is a screen shot of an example Social Security Intake Questionnaire. 33 Databank The Prevail Databank is the home of all of the lists that reside in various parts of the program. The Databank is essentially a “list of lists.” For example, the Databank allows you to control the list that contains all of your choices for appointment types (e.g., training, meeting). *Note: Not all lists are user-definable. Some of the lists that reside in Prevail are definable only by our technical support staff. 34 Location of User-Definable Lists in Prevail This table explains where the various user-definable lists are located throughout Prevail. List Where the list is located in Prevail… Ailment Disabilities tab (Social Security matters only) Appointment Calendar (appointment entry window) Case Status Matter tab Cost Ledger tab Damage Damages tab (Personal Injury and Workers' Compensation matters only) Fee Ledger tab History History tab (category selection) Image Calendar (appointment entry window) Language Rolodex entry window Location Calendar (appointment entry window) Prefix Rolodex entry window Subject History and Ledger tabs Suffix Rolodex entry window Task Calendar (task entry window) Time Ledger tab Title Rolodex entry window Modifying Lists in the Databank Follow these steps to modify any of the lists contained in the Prevail Databank. Step Task 1 From the Main Menu, click ‘Administration’ > Databank. 2 Using the tabs at the bottom of the Databank window, choose the list that you want to modify. 3 To add an entry to the selected list, click ‘Add' at the top of the window, and enter a description of the new entry in the "Description" field. Then, click ‘Save’. To delete an entry from the selected list, highlight the entry that you want to delete, and click ‘Delete’ at the top of the window. Confirm the deletion by 35 clicking 'Delete' again. To modify an entry in the selected list, highlight the entry that you want to modify. Then, enter the new description in the ‘Description’ field, and click ‘Save’. Process Builder The Process Builder is a powerful tracking feature which allows you to pre-program an expected sequence of events based on a set of rules which you define. Prevail comes with a pre-defined claims process for Social Security matters, and you may create processes for other law types (e.g., Personal Injury, Workers’ Compensation). The Process Builder not only tracks the steps of a claim on the Claims tab (also known as the Processes tab, when you're working in matters other than Social Security), but also encompasses document generation, history tracking, and automatic calendaring features. Remember, Prevail comes pre-loaded with a Social Security process. Here are some examples of other situations in which you might want to create and implement a process: an administrative process with multiple deadlines and critical dates preceding the actual trial date, each by a fixed number of days. Once you create and define the steps of this process, it would allow you to input the trial date, and back-fill all of the other dates and set automatic reminders for them. a checklist of tasks that always need to be completed in the processing of a particular type of case, where you want Prevail to track specific tasks for different staff members and track when the tasks are completed. 36 Process Builder (continued) The Process Builder is based on the understanding that there are certain repeated patterns that occur in any type of law or administrative process based on pre-determined rules. As you consider the steps and levels that you need to include in a process you’re building, ask yourself these questions: What happens next? Does a document need to be generated as a result of this step? Does an appointment need to be scheduled as a result of this step? Does the step represent a statute or deadline which must be tracked? Do other parts of the data in the matter need to be changed when this step is reached? The Process Builder has the ability to handle all of these things – it just needs to be told what to do each step of the way! Standard vs. Auto-Fill Processes There are two different types of processes in Prevail. A "standard" process is one that allows you to work through a series of steps that do not all revolve around the same date. For example, the Social Security process that ships with Prevail is a "standard" process. The statute dates that apply to each step are calculated based on when the previous step took place. For instance, the SOL date for filing a hearing request will depend on when the request for reconsideration was denied; later, in the same claim, the SOL date for filing an AC appeal depends on the date the hearing was denied. On the other hand, you use an auto-fill process when all of the steps in your process center around one specific date (the "anchor date" in Prevail terminology). For example, you could set up a "hearing preparation" process to use when you learn the hearing date for a matter. (In this example, the hearing date would be the "anchor date".) The process would automatically schedule tasks (such as requesting updated medical records) for the case manager to complete prior to the hearing. 37 Creating a "Standard" Process Follow these steps to create a "standard" process. Step 38 Task 1 From the Main Menu, click ‘Administration’ > Process Builder. 2 Click on 'Add' at the top of the window, and choose "Standard Process". 3 Enter a name for the process in the "Process Subject" field. 4 Select the law type in which you'll use the process from the "Process Law Type" dropdown list. 5 Click 'Save'. 6 Click on the new process in the list of processes in the top half of the window. 7 Click 'Add' in the bottom half of the window (under "Steps"). 8 Enter a description of the step (for example, "Application Sent") in the "Process Subject" field. 9 Enter a name for the level in which the step belongs in the "Level" field. (A "level" is a group of related steps. For example, in Social Security, levels might be application, reconsideration, hearing, etc.) Creating a "Standard" Process (continued) Step Task 10 If appropriate, check the 'Win' or 'Loss' checkbox to indicate whether the step represents a final win or final loss for you. 11 Check the "Default Step Date" box if you want the step entry date to default to the current date when you are adding this step to the Claims/Processes tab. If you want the step entry date to default to blank (forcing the user to make an entry), uncheck the "Default Step Date" box. 12 If there is a follow-up task that should result from this step, a) enter the task subject (e.g., "Check status of application") in the "Set Task Subject" field b) select a default "Responsible" user to receive this task c) enter the number of days after this step is entered that this task should be due in the "Create Task Due" field d) enter the number of days prior to the due date that you want the task to start appearing in the task list e) check the "Display as Statute" box if you want the task to appear in the Statute Warning List section on the Home tab, rather than in the Upcoming Tasks section on the Home tab. 13 14 15 If there is a definite next step that will always take place after this step, choose the "Level" and "Step" in the "Next Step Information" section. If there is a definite next level, but not necessarily the specific next step, choose only the next level in the "Next Step Information" section. If there is not a definite next level, nor next step, do not enter any information in the "Next Step Information" section. If you would like a new appointment window to pop-up when you add this step, check the "Additional Appointment" box, and enter the appointment subject and type. If you would like a new task window to pop-up when you add this step, check the "Additional Task" box, and enter the task subject and type. *Note: This task may be in addition to, or instead of, the statute task set up in the "Task Information" section above. If you would like for a merge document to be automatically generated for the matter when you enter this step, choose the appropriate merge document from the "Merge Document" drop-down list. 39 Creating a "Standard" Process (continued) Step Task 16 You may set certain fields ("Action Fields") on the Matter tab to automatically update when you enter this step on the Claims/Processes tab. (For example, you may want to have the "status" field or the "case manager" field change to a different value when you enter a step on the Claims/Processes tab.) To set an Action Field to automatically update, a) choose the appropriate field from the "Action Field" drop-down list and b) choose the updated information that should display from the "Action Values" dropdown list. 17 Click 'Save'. Creating an "Auto-Fill" Process Follow these steps to create an "auto-fill" process. Step 40 Task 1 Click Administration > Process Builder. 2 Click 'Add' at the top of the window, and choose "Auto-Fill Process". Creating an "Auto-Fill" Process (continued) Step Task 3 Enter a name for the process in the "Process Subject" field. 4 Select the law type in which you'll use the process from the "Process Law Type" dropdown list. 5 Click 'Save'. 6 Click on the new process in the list of processes in the top half of the window. 7 Click 'Add' in the bottom half of the window (under "Steps"). 8 Enter a description of the step (for example, "Request updated medical records") in the "Process Subject" field. 9 You may leave the "Level" field blank. This field is not used in auto-fill processes. 10 Enter the number of days prior to or after the "anchor date" (for example, the hearing date) that this task would be due. *Note: If the reminder should appear prior to the anchor date (as with preparing for a hearing), enter the number of days as a negative number. If the reminder should appear after the anchor date (as with a new file setup checklist in which the anchor date is the intake date), enter the number of days as a positive number. 11 Enter the number of days prior to the due date that you want the task to start appearing in the task list. 12 Choose a default "Responsible" user to receive the task for this step. 13 If you would like for a merge document to be automatically generated for the matter when you check this step (i.e., task) as completed, choose the appropriate merge document from the "Merge Document" drop-down list. 14 You may set certain fields ("Action Fields") on the Matter tab to automatically update when you complete this step on the Claims/Processes tab. (For example, you may want to have the "status" field or the "case manager" field change to a different value when you complete a step on the Claims/Processes tab.) To set an Action Field to automatically update, a) choose the appropriate field from the "Action Field" drop-down list and b) choose the updated information that should display from the "Action Values" dropdown list. 15 Click 'Save'. 41 Ledger Export Wizard The Ledger Export Wizard allows you to export information (cost, fee, and time entry information) from the Ledger tab for all cases to a .csv (comma delimited) file. Follow these steps to use the Ledger Export Wizard. Step 42 Task 1 From the Main Menu, click ‘Administration’ > Ledger Export Wizard. 2 In the Ledger Export Wizard window, a) set the "Start Date" and "End Date" for the export b) choose the types of entries (cost, fee, and/or time) that you want to export and c) select the attorneys whose entries you want to export 3 Click on the icon next to the "Export to Filename" field. Browse on your computer to the location that you want to save the file, and enter a filename. 4 Click 'Save'. Ledger Export Wizard (continued) Step Task 5 Click 'Finish' in the Ledger Export Wizard window. 6 To view the .csv file, browse on your computer to the location that you chose to save the file. Firm Log The Firm Log displays a list of items that users have deleted from your database. This list contains the following information about the deleted item(s): date & time of deletion name of user who deleted the item IP address of computer from which deletion occurred computer name from which deletion occurred category (e.g., deleted appointment, deleted task, deleted History) of deleted item description (e.g., "Subject") of the deleted item matter title, if any, with which the deleted item was associated 43 Chapter Four: Rolodex and Building Matters What’s a matter? In Prevail lingo, it’s a case. It may be a case for a new or existing client, or for a potential client, hereinafter referred to as a Prospect. Matters and Prospects, open or closed, have the same functional capabilities. It contains all of the related parties (attached via the Rolodex), facts, notes, critical dates, documents, and whatever other information you need to store about a SINGLE cause of action (if it’s a litigation matter), a SINGLE work-related accident (if it’s a Workers’ Compensation case), or a SINGLE disabled person (if it’s a Social Security case). Get the picture? The key word here is SINGLE. Prevail can contain as many matters as you want. Some firms have a hundred, some have tens of thousands. When you’re going through your daily routine, you’ll be going from matter to matter as the need arises, working first in one matter, then moving on to the next. Rolodex The Rolodex is the heart of Prevail. All parties who play a role in any of your matters must be entered in the Rolodex in order to be attached to a matter. Each party should be entered into the Rolodex only once. If you need to attach the same party to more than one matter, simply attach the existing entry; do not create a new. The only reason that the same party would be in the Rolodex more than once is if he or she had more than one physical address. 44 Rolodex (continued) Follow these steps to create a new Rolodex entry. Step Task 1 Click ‘Rolodex Search’ on the toolbar. The Rolodex search window appears. 2 Click 'New'. 3 Enter as much information as possible in the new Rolodex entry window. *Note: Either an office/company/firm name or a first and last name are required. A "type" is also required. 4 You may also use these tabs at the bottom of the Rolodex entry window: Alternate Contact – enter contact information for an alternate contact Notes – enter miscellaneous notes about the party 5 Click 'Save' at the top of the Rolodex entry window. 45 Creating a New Prospect or Matter Since matters are basically a collection of parties (e.g., claimant, defendant, medical providers), you create matters through the Rolodex. Follow these steps to create a new prospect or matter. Step 46 Task 1 Click on ‘Rolodex’ on the toolbar. The Rolodex search window appears. 2 Change the ‘Search Type’ drop-down list to ‘Any Part of Rolodex Title’. 3 Enter any character string from your client’s first, middle, or last name in the ‘Search Criteria’ field. 4 Scroll through the list of results to see if your client has an existing Rolodex entry. If your client appears in the list of results, double-click on your client’s Rolodex entry, and then SKIP TO STEP 7 of this procedure. If your client does not appear in the list of results, CONTINUE TO STEP 5 of this procedure. 5 Click 'New' at the top of the Rolodex search window. 6 Enter as much information as you have about your client in the Rolodex entry window. 7 At the bottom of the Rolodex entry window, under “Create Prospect/Matter”, select the Prospect Type (PI Plaintiff, SS Claimant, WC Claimant, etc.) Case Type and Incident Date (if applicable) 8 Click ‘Create Prospect’. A matter window will appear. *Note: If you want to create a matter immediately, rather than creating a prospect to activate later, click on 'Create Matter' instead of 'Create Prospect'. 9 You may add other information on the right side of the matter window, as needed. Activating Prospects as Matters Follow these steps to activate a prospect as a matter. Step Task 1 Click ‘Search' in the Prevail toolbar. The matter search window appears. 2 Change the ‘Search Type’ drop-down list to ‘Any Part of Matter Title’. 3 Make sure that the 'Matter/Prospect' drop-down list is set to "Matters and Prospects" or "Prospects Only" so that prospects will appear in the list of search results. 4 Enter any character string from your client’s first, middle, or last name in the "Search Criteria" field. 5 Double-click on the appropriate name in the list of results to open the Prospect. 6 Click 'Status' (button with four green blocks) and choose "Activate Matter" to activate the Prospect as a Matter. The Tab Header will now identify the case as a matter instead of a prospect (e.g., "Open Social Security Matter Information" instead of "Open Social Security Prospect Information"). Also, a case number is automatically assigned to the newly activated matter. Closing or Deleting Prospects or Matters Closing a prospect or matter does not remove it from your system. It simply changes the Tab Header to say "closed" instead of "open" (e.g., "Closed Social Security Matter Information" instead of "Open Social Security Matter Information"). IMPORTANT: Before you can permanently delete a prospect or matter, you must first close it! To close a prospect, click on the green 'Status' drop-down, and choose "Close Prospect". To close a matter, click on the green 'Status' drop-down, and choose "Close Matter". After you have closed the prospect or matter, you may then delete it by once again clicking on 'Status', and selecting either "Delete Prospect" or "Delete Matter". 47 Attaching Other Parties to a Matter After you have set up a matter, you’ll need to attach additional parties (such as a defendant, SSA office, opposing counsel, employer, etc.) to it. Follow these steps to attach additional parties to a matter. Step Task 1 In the matter tree, click on the matter title (top line) if you want to attach the party directly to the matter, or click on the appropriate party within the matter tree if you want to attach a party to it. Please note that medical providers, employers, and referral sources must be attached to a specific person in the matter tree, rather than to the matter itself. *Important Note about Attaching SSA Offices, ODARs, and/or DDS Offices: You must attach SSA offices, ODARs, and DDS offices to the SS Claimant, not to the matter. The Attach Wizard can learn the zip code association between the SS Claimant and the SSA Office, ODAR, or DDS that you attach to it. For example, if you attach a specific SSA Office to a claimant who lives in zip code 32801, Prevail will automatically attach that same SSA Office to the next client you have who lives in that same zip code! 2 Click ‘Attach’ in the page name area above the matter tree on the left side of the screen. A search wizard appears. 3 Enter a character string from the party’s last, first, or middle name in the "Search Criteria" field. 4 Review the list of matching entries. If an entry appears for the party you want to attach to the matter, SKIP TO STEP 9 of this procedure. If an entry does not appear for the party you want to attach to the matter, CONTINUE TO STEP 5 of this procedure. 5 Click the green ‘+’ button to the right of the ‘Type’ drop-down list in this window. A new Rolodex entry window appears. 6 In the Rolodex entry window, select the Rolodex type first, and then enter any other information you have about the party you want to attach to the matter. 7 Click ‘Save’. 8 You will be returned to the list of matching entries, and the Rolodex entry you just created will now appear in the list of matching entries. 48 Attaching Other Parties to a Matter (continued) Step Task 9 Choose how the party relates to the matter from the ‘Add As Type’ drop-down list. *Note: The ‘Add As Type’ defaults to the Rolodex type that you selected for the party you are attaching, but you can change it as needed. For example, if you set the party up as a “SS Claimant” in their Rolodex entry, but they are the “Referral Source” in this matter, simply change the type in the ‘Add As Type’ drop-down list. This change will not affect the party’s Rolodex type; it only changes how the party is attached to this particular matter. 10 Click ‘Attach’ in the lower right corner of this window. 49 Chapter Five: Calendar Appointments, tasks – what's the difference? Allow us to explain! A task is a "to-do" of sorts. You may have a deadline for completion, but it doesn't involve a specific meeting location or time. Examples of tasks include, "Follow up on medical records request," or "File Request for Reconsideration." Keep in mind that tasks can be automatically added to the task list as a result of entries you make in other areas of the program, such as the Claims tab, History tab, or by generating a merge document. An appointment, on the other hand, involves being at a specific place at a certain time. Examples of appointments include hearings, depositions, and meetings with clients. Calendar Navigation Prevail's calendar component allows you to view multiple users' appointments or tasks side-by-side. This feature is particularly useful if you are trying to coordinate an appointment among numerous staff, or if you need to complete tasks for a staff member who is out of the office for the day. 50 Calendar Navigation (continued) The thumbnail calendar allows you to navigate to the date that you would like to view. The table below explains how to choose whose calendar(s) to view and how to navigate in the thumbnail calendar. Button/Field 'Today' 'Jump To Date' 'Skip Days' 'User Selection' Function Jumps you to the current date. Enter a date or select one from the drop-down calendar to skip to a specific date. Skips you the set number of days from the date that you have selected in the thumbnail calendar (which may or may not be the current date, depending on which date you have selected). Click on this drop-down menu to check off the calendar(s) that you would like to view. Creating a Task As you'll learn over time, certain types of tasks will appear in your task list automatically. For example, case managers will automatically receive statute reminder tasks from the Claims/Processes tab, and users can receive automatic tasks when documents are merged. You may also create tasks directly in the calendar. 51 Creating a Task (continued) Follow these steps to create a task for yourself or another Prevail user. Step 52 Task 1 Click 'Calendar'. 2 Click on the "Task List" tab at the bottom of the window. 3 Click 'Add'. 4 Enter a description of the task (i.e., what needs to be done) in the "Subject" field. 5 Choose a task type from the "Type" drop-down list. 6 If you would Prevail to automatically post a time and/or cost entry to the matter's Ledger tab when you mark the task as complete, enter the time (in hours) in the "Time" field and/or the cost in the "Cost" field. 7 Enter the date that you want the task to begin appearing in the task list in the "Start Date" field. 8 Enter the deadline for completing the task in the "Due Date" field. 9 If you would like a reminder pop-up window to appear on a certain date/time, check the "Reminder" box, and indicate the date/time to be reminded. *Note: You'll need to be logged into Prevail at this date/time in order to see the reminder. 10 Choose the responsible user(s) from the "To" drop-down list. *Note: If a task is assigned to multiple users, when any of the users mark the task as complete, it will be removed from all users' task lists. 11 The calendar assumes that the task should be associated with the matter that you currently have open in Prevail. To change the matter association, click on 'Matters', and search for the correct matter. Double-click on the correct matter when it appears in the search results list. *Note: If the task should not be associated with any of your matters, simply leave the checkbox unfilled. 12 Enter any other notes about the task in the "Detail" field. 13 Click 'Save'. Completing a Task When you finish a task, you'll need to mark it as complete in Prevail. Otherwise, the task will remain on your calendar and in the "Upcoming Tasks" section of your Home tab forever! When you mark a task as complete, the task is removed from the calendar and the Events tab, and a "Task Completed" entry is automatically made on the History tab. There are two ways to mark a task as complete – from the calendar or from the Events tab for the appropriate matter. To mark a task as complete in the calendar, click once on the task in your task list, and then click 'Complete Task' (green check mark) at the top of the task list. Follow these steps to mark a task as complete from the Events tab for the appropriate matter. Step Task 1 Go to your Home tab, the Calendar, or the Events tab for the related matter. 2 Right-click on the task, and choose 'Complete,' or click once on the task and click the 'Complete Task' button. Creating an Appointment 53 Creating an Appointment (continued) Follow these steps to schedule an appointment for yourself or another Prevail user. Step 54 Task 1 Click 'Calendar'. *Note: You may also add appointments from your Home tab, the Events tab for the related matter, or by clicking New > Appointment in the Prevail toolbar at the top of your screen. 2 Click on one of the following tabs at the bottom of the window: Appointment List Day View Week View Month View 3 Click 'Add'. 4 Enter a description of the appointment (e.g., "Hearing with Judge Smith") in the "Subject" field. 5 Choose an appointment type and location from the designated drop-down lists. 6 Enter a room number, if applicable, in the "Room" field. 7 Choose the appointment start/end date and start/end time. 8 If you would like for a reminder pop-up window to appear a certain amount of time prior to the appointment, check the "Remind me" box and select how far in advance you want to be reminded. *Note: You'll need to be logged into Prevail in order to see the reminder. 9 Select the users who should be included in the appointment by checking off their names in the "To Users" drop-down list. 11 The calendar assumes that the appointment should be associated with the matter that you currently have open in Prevail. To change the matter association, click on 'Matters', and search for the correct matter. Double-click on the correct matter when it appears in the search results list. *Note: If the appointment should not be associated with any of your matters, simply leave the checkbox unfilled. 12 Enter any other notes about the appointment in the "Detail" field. 13 Click 'Save'. Cancelling vs. Deleting an Appointment In Prevail, you have the ability to cancel or delete an appointment, and there's a big difference between the two! We recommend that you never delete an appointment, unless it was scheduled in error. Always cancel appointments that were scheduled correctly but were later called off. When you cancel an appointment, the appointment remains on the calendar, but is marked as cancelled. Also, there is an entry made on the History tab noting that the appointment was cancelled, and the appointment is marked with a strikethrough on the Events tab. There are two ways to cancel an appointment in Prevail – from the calendar or from the Events tab for the appropriate matter. Follow these steps to cancel an appointment. Step Task 1 Double-click on the appointment in the calendar (or from your Home tab or the related Events tab) to open it. 2 Click 'Cancel Appointment' at the top of the window. 3 Click 'Yes' to confirm that you want to cancel the appointment. Microsoft Outlook Sync Prevail comes with a utility program that will synchronize appointments and tasks in the Prevail calendar with Microsoft Outlook on any given computer. In order for this process to work, you must have both Microsoft Outlook and Prevail installed on the same computer. Whatever login name was used last to log into Prevail on the computer will be used for the Outlook sync. In other words, if you were logged into Prevail as “Bob,” then all of Bob’s appointments and tasks will be synchronized with Outlook. The synchronization takes place through a separate program called “Outlook Sync.exe” which resides in the C:\Prevail folder on each Prevail workstation. 55 Microsoft Outlook Sync (continued) Follow these steps to set up the Outlook sync. *Note: The Outlook Sync must be configured on each PC on which you wish to synchronize calendars. Step Task 1 Right-click on your Windows desktop, and choose New > Shortcut. 2 Click on 'Browse', and navigate to C:\PREVAIL_CLIENT\Outlook Sync.exe. 3 Click 'Finish'. 4 Double-click on the new Outlook Sync shortcut on your Windows desktop. 5 An Outlook Sync settings window appears. In this window, a) confirm the Prevail user for whom you wish to synchronize appointments and tasks b) check the box that says "Launch at Windows startup" c) check the boxes to synchronize appointments in a two-way direction (Prevail to Outlook and vice-versa) and d) click 'Save' at the top of the Outlook Sync settings window. You should now see an Outlook Sync icon in your Windows system tray (lower right area of your Windows desktop, near the system clock). When the Outlook Sync is sending information from Prevail to Outlook, a green dot will flash, and when it is sending information from Outlook to Prevail, a red dot will flash. If your PC goes into hibernation mode and you do not see either dot flashing for an extended period of time, you may need to restart the Outlook Sync by simply double-clicking on the Outlook Sync shortcut on your desktop. If you ever want to modify the settings for the Outlook Sync on your PC, right-click on the Outlook Sync icon in your Windows system tray, and then click on Settings. Modify the settings as needed, and then click 'Save' at the top of the Outlook Sync settings window. The first time Outlook sync runs, it will take a long time, since it’s copying all appointments and tasks both ways (Prevail to Outlook and vice versa). Once the initial sync is completed, the Outlook sync program will run automatically. It will cycle continuously to see if any new appointments or tasks have been entered into Prevail or Outlook. If so, these appointments and/or tasks will be automatically copied from one location to the other. *Warning: The Outlook Sync is designed to synchronize one Prevail login with one Outlook login. Attempting to synchronize your Prevail calendar with more than one Outlook login may result in appointments being deleted from your Prevail calendar. We are not responsible for any data loss you may incur if you attempt to synchronize your Prevail calendar with more than one Outlook login. 56 Chapter Six: Matter & Rolodex Searches Matter and Rolodex Searches In Prevail, you may search your matters or your Rolodex entries. Matter Search Follow these steps to search for and navigate to a specific matter. Step Task 1 Click 'Matter Search', located near the upper left corner of your screen. 2 Specify the search criteria you would like to apply to the search: Search Type – choose either "Any Part of Matter Title" to enter any character string from the matter title (such as a character string from your client's last name or first name) or "Matter List" (which will display a list of all matters) Law Type – you may search all law types, or specify a certain one (e.g., Social Security, Personal Injury) Matter/Prospect – you may search both matters and prospects, matters only, or prospects only Open/Closed – you may search open and closed matters/prospects, open matters/prospects only, or closed matters/prospects only 57 Matter and Rolodex Searches (continued) Step Task 3 If you chose "Any Part of Matter Title" as your Search Type, enter any character string from the matter title in the 'Search Criteria' field. If you chose "Matter List" as your Search Type, scroll through the list of matters to find the correct one. 4 After you have located the correct matter, double-click on it to navigate to that matter. Rolodex Search A matter search allows you to search through your matters (cases), while a Rolodex search allows you to search all Rolodex entries (clients, opposing counsel, medical providers, etc.). Follow these steps to perform a Rolodex search. Step 58 Task 1 Click 'Rolodex Search', located near the upper left corner of your screen. 2 Specify the search criteria you would like to apply to the search: Search Type – choose either "Any Part of Rolodex Title" to enter any character string from the party's first name, last name, or office/company/firm name or "Rolodex List" (which will display a list of all Rolodex entries) Rolodex Type – you may search all Rolodex types, or specify a certain type (e.g., SS Claimant, Medical Provider) Rolodex Search (continued) Step Task 3 If you chose "Any Part of Rolodex Title" as your Search Type, enter any character string from the party's first name, last name, or office/company/firm name in the 'Search Criteria' field. If you chose "Rolodex List" as your Search Type, scroll through the list of Rolodex entries to find the correct one. 4 After you have located the correct matter, you may double-click on the Rolodex entry to open the Rolodex entry window for the party. *Note: If the party you are searching for is a Client or Opposition in any of your Matters, Prevail will display any Matters they are attached to, at the bottom of the Rolodex Search window. This acts as “Conflict of Interest Check” for your firm. Deleting Rolodex Entries In order to delete a Rolodex entry, you must first detach that entry from any matters to which it is attached. Follow these steps to delete a Rolodex entry. Step Task 1 Click on 'Rolodex Search'. 2 Search for the appropriate entry, and click on the matching result. Then, in the lower half of the Rolodex search window, you'll see a list of all matters to which this party is attached. 3 Double-click on the first matter in the list of attached matters. 4 Click once in the party's name in the matter tree on the Matter tab. 5 Click 'Detach', just above the matter tree (a paper clip icon with a red 'X'). 6 Click on 'Detach' to confirm that you want to detach the party from the matter. 7 Return to the Rolodex entry, and repeat steps 3-6 for each matter shown in the list of attached matters. 8 After you have detached the party from all matters, return to the Rolodex entry for a final time, and click on 'Delete' at the top of the Rolodex entry window. 59 Chapter Seven: Tabs & Buttons After you create your first matter, you will see several tabs at the bottom of the matter main screen. Most of these tabs are "matter-specific" (e.g., the information they contain pertains to the specific matter in which you are working); the Home tab, however, is "user-specific" (e.g., the information pertains to the specific user who is logged into Prevail). Some of the matter-specific tabs (such as Medical and Events) appear regardless of the law type, while others vary depending on whether the matter is a personal injury, Social Security, or workers’ compensation matter. This chapter provides an explanation of the information displayed on and the tasks you can perform from each tab. Home Tab Statute of Limitations within the next 60 days (displayed for Lead Attorney and Case Manager) My Messages My Upcoming Appointments My Upcoming Tasks The Home tab is the first tab you'll see when you log into Prevail. It is not matter-specific, but is user-specific. It will help you plan your day when you first log into Prevail! 60 Home Tab (continued) This tab is divided into four sections: My Statute List – a list of matters (for which you are the assigned Lead Attorney or Case Manager) with Statute of Limitations (SOL) dates upcoming within the next sixty days. *Note: Since Social Security and Veterans' Administration matters do not have a specific "incident date" on which a SOL is based, Social Security matters do not appear in "My Statute List". Instead, statutes that occur within the life cycle of a Social Security or Veterans' Administration matter will appear on your Prevail calendar in your task list. My Messages – a complete list of messages that other Prevail users have sent to you (inbox) and message that you have sent to other users (sent items) My Upcoming Appointments – a list of your appointments upcoming in the next seven days My Upcoming Tasks – a list of your tasks upcoming in the next seven days Matter Tab Here is a display of the Matter tab. Matter Tree The Matter tab is the first tab you'll see when you navigate to a specific matter. On the left side of this tab, you’ll see the matter tree, which is a list of all of the parties attached to a matter. The first line of the matter tree is the matter title (i.e., case title). Underneath the matter title, you'll see a list of all parties involved in the case in any role (e.g., claimant, defendant, plaintiff, insurance company, medical provider, SSA office). On the right side of the screen, you’ll see detailed information about the matter itself or the party that you have highlighted in the matter tree. If you need to update any information about any of the parties listed in the matter tree, you don't need to return to the Rolodex to do so. You may simply make the change(s) in the necessary field(s) on the Matter tab, and click 'Save' in the upper-right corner. Prevail will update the information in this matter, as well as in any other matters to which the party is attached and in the Rolodex! 61 History Tab The History tab is one of the most important screens in Prevail. Regardless of what matter you’re working on, this tab can answer the age-old question, “What’s going on?” This page contains a complete chronology of everything that has taken place in the current matter, regardless of who did it, or where in Prevail it was done. Anything that takes place in Prevail has the ability to automatically copy to the History tab, including documents merged, scheduled and cancelled appointments, and scheduled and completed tasks. As you can imagine, the History Tab can contain upwards of two to three hundred entries over the course of one Matter, and to that end, can span over several years. To compensate for our broad Client base, we have included the ability to view “Recent” history items, and hide older ones. You may also view the entire history, with the click of a button. Setting your History Tab to view “All” or “Recent” History By default, Prevail is set to view History Items for the last year (365 days). If you prefer to change this date range, this can be achieved through your ‘Prevail Control Panel’. Remember that you can view more than just the last 365 days of History, at any time, simply by clicking the “Show All History Button” (on the top of your History Tab). See the images below for a before and after example of a Matter’s History Tab with the “Show Recent History” and “Show All History” options selected. 1) Show Recent History 2) Show All History Follow these Steps to change the date range for “Recent History” Items. Step 62 Task 1 On your Windows desktop, click on Start > All Programs > Prevail > Control Panel. 2 When the Prevail Control Panel login screen appears, use your regular Prevail login and password. 3 Once the Control Panel opens, click on Tools>Set History Cutoff 4 From this screen, Enter the amount of days you would like the History Tab to display by default. *Note: This is a firm-wide setting, making a change will affect every Prevail User 5 Click “Set History Cutoff”, and your changes will be saved. Finally, exit the Control Panel, and log into Prevail as normal. While the system makes many entries automatically, you can also make History entries manually. For example, you may use the History tab to record notes from phone calls, e-mails, copy files saved outside of Prevail (which may include documents, photos, videos, etc.), copy e-mails from Microsoft Outlook, or to scan documents (such as medical records) directly into Prevail. (In order to scan directly to Prevail, your scanner must be TWAIN-compatible and connected locally to your computer.) Adding History Entries Prevail generates many History entries automatically, including new appointments or tasks, merged documents, etc. You also have the ability to manually create History entries. Follow these steps to add a History entry. Step Task 1 Click on ‘Add’ in the upper-right area of the screen. A "New History Entry" window appears. 2 Enter a subject for the entry. *Note: Enter a subject that is fairly detailed, to make searching in History more powerful. 3 If desired, change the "Entry Date" and "Entry Time" of the entry. *Note: The "Entry Date" and "Entry Time" default to the current date and time. 4 If desired, enter the amount of time you spent on the activity in the ‘Time’ field, and choose a time category for the Ledger entry. (For example, if the entry is for time spent on a phone call with an insurance company adjuster, you may choose to enter the amount of time you spent on the phone call.) *Note: If you make a time entry, Prevail automatically creates a corresponding time entry in the matter’s ledger. 63 5 If desired, you can choose and apply a User’s “billable rate” to any ‘time entry’ you have entered into the History Entry. This will not only send a corresponding time entry in the Matter’s Ledger, but will also send a “billable amount” as well. *Note: In order to ensure that a billable time entry is sent to the Matter’s Ledger, you must: 1) Choose a billable person from your firm in the drop-down list, and 2) Make sure the ‘Calculate’ check box has been “checked”. 1 2 *Note: If a User has a “Rate” listed on their Employee Setup, their rate will automatically be applied to the entry. If a User does not have a “Rate”, the billable party defaults to the Lead Attorney. Step 64 Task 6 If desired, enter a cost associated with the entry in the ‘Cost’ field, and choose a cost category for the Ledger entry. (For example, you may want to enter the long distance charge that you incurred for a phone call related to a matter.) *Note: If you make a cost entry, Prevail automatically creates a corresponding cost entry in the matter’s ledger. 7 If desired, you may create a follow-up task for a user by entering a date in the "Due Date" field and selecting a recipient for the task from the "To" drop-down list *Note: The Start Date for the task is the current date. 8 Enter notes about the History entry in the "Detail" field. *Note: Be as specific as possible in your description, since you want other users to be able to quickly ascertain what’s happening in the case. 9 If desired, you may attach a file from an outside source using the ‘File’ field. a) To attach a file i. click on the paper clip to the right of the ‘File’ field ii. navigate to the file’s location on your computer and iii.double-click on the file to attach it to the History entry. b) To attach an entire folder of files i. click on the file folder button to the right of the ‘File’ field ii. choose the drive on which the folder is located iii.navigate through the folders in the "Directories" list until you find the folder you are searching for iv. double-click on the file folder and v. click ' OK'. c) To attach an email (when you use the full version of Microsoft Outlook for your email program) i. click on the envelope button to the right of the ‘File’ field i. highlight the appropriate email in your email folders that are displayed and ii. click ‘Attach to History’. d) To attach a scanned document (when your computer is connected to a TWAINcompliant scanner) i. click on the scanner button to the far right of the ‘File’ field ii. highlight the desired scanner and click ‘Select’ and iii. scan the document using the on-screen prompts e) To capture a photograph using an attached web camera i. click on the web camera button to the far right of the 'File' field ii. position your camera, and when you're ready to capture the photo, click 'Grab Frame'. 10 Click ‘Save’ in the New History Entry window to save your new entry to the History tab. Generating a Merge Document for a Matter After a Prevail user in your office with Administrator security rights has created templates (for more information on template creation, see Creating Merge Document Templates in Prevail on page 14) other Prevail users in your office will be able to quickly and easily generate merge documents for matters. 65 Follow these steps to generate a merge document for a matter. Step 66 Task 1 Click ‘Merge Document’ on the Prevail toolbar. 2 The ‘Document Merge Wizard’ appears, displaying a complete list of all available merge documents. *Note: The Wizard will display generic documents, as well as documents that are specific to the type of matter you are working in. For example, if you are working in a Social Security matter, the Wizard will allow you to select from Generic & Social Security, Generic Only, or Social Security Only merge documents. 3 To narrow the list of available documents, enter any character string from the Document Title in the ‘Document Search’ field. 4 Highlight your desired document in the list of results, and click ‘Next’. After Prevail builds the merge document information, a new window will appear. 5 Typically, you will leave the 'Merge Across Related' box unchecked. However, if your letter refers to a Rolodex type that is attached more than once to the matter (e.g., if the letter refers to a Medical Provider, and there is more than one Medical Provider attached to the client), you'll want to check the 'Merge Across Related' box. This feature allows you to choose multiple parties to merge the document for on the following screen. 6 Click ‘Next’. If you did not check 'Merge Across Related' on the previous screen, Prevail will build the document and display it in your word processing program upon completion of the merge. If you did check 'Merge Across Related' on the previous screen, you will see a list of possible choices for whom to merge the letter. Click on one of the entries to select only one, or hold the <Ctrl> key down on your keyboard while clicking on multiple entries, if needed. Then, click 'Next'. After Prevail builds the document, it will display in your word processing program upon completion of the merge. 7 Make any necessary adjustments to the merge document, and then print it as you would normally print a document in your word processing program. 8 Close the word processing program window. If you made any post-merge changes to the document, you will be prompted to save the changes you made. Click 'Yes'. *Note: The merged document will automatically be saved (with any changes you made after the merge) on the matter's History tab. Also, if there are time, cost, and/or task entries associated with the document in the Document Designer, Prevail will automatically record the appropriate entries on the matter’s Ledger tab or calendar, as appropriate. Power Search Have you ever recalled doing something in a case (such as making note of an ailment on the Disabilities tab or recording an important fact on a Sticky Note), but you can't remember in which matter you made this notation? If so, you'll love Prevail's Power Search feature! It allows you to search for a character string within any of the tabs on Prevail, as well as within appointments, tasks, Rolodex entries, and Sticky Notes. Prevail's Power Search provides the ability to search for a character string within any of the tabs, and also within appointments, tasks, Rolodex entries, and Sticky Notes. It searches both the "subject" line of your entries, as well as any details that you entered within the entry. Follow these steps to use Prevail's Power Search. Step Task 1 Click on 'Power Search' in the Prevail Toolbar. 2 If necessary, change the date range for the search. Do not leave the Start Date or End Date fields blank. The search defaults to searching ninety days in the past through the present date; the date range only applies to the appointments, tasks, History, and Ledger entries that the Power Search locates. 67 Power Search Step Task 3 If you would like to search within only the matter in which you are currently working, check the "This Matter Only" box. Otherwise, leave this box unchecked. 4 Enter any character string in the "Search Criteria" field , and press <Enter>. 5 Prevail displays all matching results, according to which tab they are located on. Events Tab The Events tab is like a "calendar within a calendar." As you know, your full Prevail calendar lists all appointments and tasks, related to all matters (or no matter at all, in the case of a personal appointment or task). The Events tab, on the other hand, displays only those appointments and tasks related to the specific matter in which you are working. On this tab, you may view, create, delete, cancel, or complete appointments or tasks just as if you were working in your full Prevail calendar. The top half of the ‘Events’ screen displays appointments related to the matter, whether they have already taken place or are scheduled to take place in the future. The bottom half of the screen displays pending (i.e., incomplete) tasks related to the matter. List of all appointments related to the matter (regardless of user) List of all pending (i.e., incomplete) tasks related to the matter (regardless of user) 68 Events Tab (continued) This table explains the purpose of each of the buttons located in the Appointments and Tasks sections of the ‘Events’ screen. Button Add Delete View Purpose Click this button to add a new appointment (or task) to the matter. The new appointment (or task) will also automatically appear on your calendar. After highlighting the entry in the appointment list you want to delete, click this button to delete the appointment (or task). The appointment (or task) will also automatically be removed from your calendar. After highlighting a specific entry in the list of appointments (or tasks), click this button to view the Appointment or Task window for the entry. Medical Tab The Medical tab contains a list of all medical providers attached to a matter, as well as detailed treatment information, including reason for treatment, dates of service, dates medical records copies were requested and received, and payment information (recorded as a cost or damage entry). When you attach a medical provider to a client on the Matter tab, Prevail automatically creates an entry for that provider on the Medical tab, as well. Here is a display of the Medical tab. The lower part of this tab displays a complete list of all medical records that have been entered in the system for the matter. ‘Medical’ Tab buttons List of medical record entries 69 Medical Tab (continued) There are several buttons located in the top right portion of this tab. The table below describes the purpose of each of these buttons. When you click on this button… You will… Export export data to a comma-delimited (.csv) file. Add see a new medical record entry window. See Adding a Medical Record below for more details about adding a new record. Delete delete the medical record that is currently highlighted in the list. View open the medical record entry window for the record that is currently highlighted in the list. From this window, you can make additions or deletions to the record or delete the record entirely. *Note: You can also view the medical record by highlighting and double-clicking on it from the list of medical records. 70 Requesting the Initial Set of Records from a Medical Provider As previously mentioned in this section, when you attach a medical provider to a client on the Matter tab, the medical provider will also appear on the Medical tab. As you're attaching the medical provider, you will see a window prompting you to input the reason for treatment ("subject"), dates of service ("from" and "to" dates), and records requested/received dates. At that point, you will probably only be able to complete the reason for treatment and dates of service. When the time comes to request an initial set of records from a provider, follow the steps below to update that provider's entry on the Medical tab. Step Task 1 Double-click on the appropriate provider's entry on the Medical tab. Make sure that the "subject" and "from" and "to" dates are completed. *Note: If treatment is ongoing, you may simply type "present" or "ongoing" in the "to" date field. 2 Enter the date that you are requesting records in the 'Records Requested' field. 3 Click 'Save'. 4 When you receive the initial set of records, follow these steps to input the appropriate information: enter the 'Records Received' date if necessary, update the "from" date. For example, if you originally entered the word "present" or "ongoing," you'll want to look through the records and determine the last date of service referenced in that particular set of records. if you had to pay for the copies of the records, enter the amount you paid in the 'Bill' field, check the 'Add to Costs' box, and choose a Cost Category; alternatively, if your client had to pay any amount to this provider, you may enter that amount in the 'Bill' field, check the 'Add to Damages' box, and choose a Damages Category. Cost entries will automatically transfer to the Ledger, and Damages entries will automatically transfer to the Damages tab (in personal injury and workers' compensation matters). enter a summary of the records in the 'Detail' area. if you have a TWAIN-compatible scanner, you may scan the records into Prevail by clicking on the scanner button in the upper-right area of the window. Upon completion of the scan, the scanned image will be saved on the matter's History tab. 5 Click 'Save'. 71 Requesting an Updated Set of Records from a Medical Provider If you need to request a later set of records from a provider who is already listed on the Medical tab, you'll need to create a new entry for that medical provider on the Medical tab. (In other words, don't attach the medical provider again on the Matter tab, and don't modify the provider's existing entry on the Medical tab!) Follow these steps to add a new entry for a medical provider on the Medical tab (when you're preparing to request an updated set of records). Step Task 1 Click on the appropriate Medical Provider's name in the matter tree on the Matter tab. 2 In the lower-right area of the screen (Medical History), click 'Add'. 3 Enter the reason for treatment with this medical provider (e.g., spinal adjustment) in the ‘Subject’ field. 4 Refer back to the records that you already have in your possession from this medical provider to determine the new 'From' date. For example, if the 'To' (ending) date on the prior set of records was 11/1/2008, you'll want to make the 'From' date on this new entry 11/2/2008, so that you don't have overlapping dates. 5 Enter the date that your client stopped treating with this medical provider in the ‘To’ field. *Note: If treatment is ongoing, you can enter "present" or "ongoing" in the ‘To’ field. 6 Choose the date that you requested records from this medical provider in the ‘Records Requested’ field. 7 Click ‘Save’. 8 After you receive records from this provider at a later date, follow steps 4-5 from the Requesting the Initial Set of Records from a Medical Provider procedure on page 71 to enter the necessary information. 72 Photo Tab The Photo tab in Prevail allows you to easily organize photographs related to a matter (such as pictures of a client or vehicle accident). Pictures added to the Photo tab will also automatically be added on the History tab, and vice versa. Follow these steps to add a photo on either the Photos tab or the History tab. Step Task 1 Click 'Add'. 2 In the "New History Entry" window, a) enter a brief description of the photo in the "Subject" field b) select a "Category" from the drop-down list (*Note: Any categories that you create for the History tab in the Databank are also available on the Photos tab) c) enter any additional notes regarding the photo in the "Detail" field and d) if you would like to create an automatic time or cost entry on the Ledger, or a follow-up task, enter this information in the designated fields. 3 You may attach a photo that is already saved on your computer or you may capture a photo "on the spot" if you have a web camera attached to your computer. To attach a photo already saved on your computer, click on the paper clip at the bottom of the window (to the right of the 'File' field), and navigate to the picture stored on your computer that you want to copy into Prevail. *Note: The file that you choose to attach must be in a picture format (for example, a .jpg file). To capture a photo using an attached web camera, click on the web camera button (far right bottom corner), position your camera, and click 'Grab Frame'. 4 Click 'Save' at the top of the window. 73 Notes Tab The Notes tab displays a list of all notes that you enter about a matter, such as details you record about a phone call with anyone involved in a matter. Entries on the Notes tab are also automatically added to the History tab; likewise, entries made on the History tab with the type "Note" also automatically display on the Notes tab. Follow these steps to add a note to the Notes tab or History tab. Step 74 Task 1 Click 'Add'. 2 In the "New History Entry" window, a) enter a brief description of the note (such as "T/C to client re: upcoming hearing") in the "Subject" field b) select a "Category" from the drop-down list (*Note: Any categories that you create for the History tab in the Databank are also available on the Notes tab) c) enter the details of the note in the "Detail" field and d) if you would like to create an automatic time or cost entry on the Ledger, or a follow-up task, enter this information in the designated fields. 3 Click 'Save' at the top of the window. Ledger Tab Since you have invested countless hours and incurred various costs in a matter, you'll obviously want to track your time, costs, and/or fees on Prevail's Ledger tab. When used properly, this tab can help you generate several useful accounting reports – such as reports of outstanding monies due and invoices that you can print and send to clients. Entries can automatically be sent to the Ledger from various screens within Prevail, such as merge documents (see Creating Merge Document Templates in Prevail on page 14 for details), the Medical tab (see page 69), and the History tab (see page 62). ‘Ledger’ tab buttons List of Ledger entries (time, cost, and fee) Ledger Tab (continued) You’ll keep track of all time, cost, and fee entries with the Ledger tab. This table explains the purpose of each of the buttons located on the Ledger. Button Export Add Delete View Add Cost Add Fee Add Time Purpose Click this button to export the data on the Ledger to an Excel commadelimited (.csv) spreadsheet in which you may enter data to be exported to an alternate accounting program that accepts .csv files. The resulting .csv file will automatically be saved on the matter's History tab. Click this button to add a new time, cost, or fee entry to the matter. After highlighting the entry in the list to delete, click this button to delete the ledger entry. After highlighting a specific entry in the list of ledger entries, click this button to view the detailed time, cost, or fee entry window. Alternatively, you may double-click on a Ledger entry to open it. Click this button to add a new cost entry to the Ledger. Click this button to add a new fee entry to the Ledger. Click this button to add a new time entry to the Ledger. 75 Adding a Ledger Entry Follow these steps to create a new Ledger entry. Step 76 Task 1 Click on 'Add Cost', 'Add Fee', or 'Add Time'. A "New Ledger Entry" window appears. 2 Click on the "Category" drop-down list, and select a category for the new entry. 3 Enter a description of the new entry in the ‘Subject’ field. 4 Click on the "Attorney" drop-down list to select the appropriate attorney for the entry. 5 6 Enter the date you billed the client for reimbursement in the "Billed On" field. 7 Enter the invoice # on the bill that you sent to your client in the "Invoice #" field. If entering a cost, enter the amount of the cost in the "Amount" field. If entering time, enter the attorney's hourly rate in the "Rate" field and the number of hours in the "Hours" field. The "Amount" will calculate automatically. Adding a Ledger Entry (continued) Step Task 8 If you are entering a cost, enter the name of the party you paid in the "Pay to the Order of" field by clicking on the paper clip icon to the right of the field to open a Rolodex search window. Then, search for the party in the Rolodex, and double-click on the appropriate name in the result list to attach to the Ledger entry. If the party doesn't yet exist in your Rolodex, click 'New' at the top of the Rolodex search window to create a new Rolodex entry. 9 If you are entering a cost, enter your firm’s check # used to pay the cost in the ‘Check #’ field. 10 If desired, enter any notes relevant to the entry in the text field at the bottom of the window. 11 Click ‘Save'. 12 When you receive payment against a particular ledger entry in the future, double-click on the entry in the Ledger tab. Then, click in the ‘Reconciled On’ checkbox, and enter the date you received payment, or click on the drop-down arrow to display a calendar from which you may choose the payment date. *Note: When you receive a payment, in addition to reconciling the original entry, you may choose to create a negative entry on the Ledger tab, in order to have an accurate balance due displayed at the bottom of the Ledger tab. To create a payment entry, follow steps 1-11 above, as appropriate, and simply make the 'Amount' negative by typing a "-" sign in front of it. Claims/Processes Tab *Note: This tab is labeled "Claims" when you’re working in a Social Security matter, and it’s labeled "Processes" when you’re working in any other type of matter. Since Social Security matters follow essentially the same path regardless of jurisdiction, Prevail has a built-in process for Social Security matters. For all other matters (e.g., Personal Injury, Workers’ Compensation), you’ll need to build the steps using the Process Builder. For more information on creating and modifying processes using the Process Builder, see Process Builder on page 36. For the purposes of this section, we’ll limit our discussion to the built-in Social Security process that you’ll see when you’re working in a Social Security matter. 77 Claims/Processes Tab (continued) List of open claims for this client List of claims steps completed or in process for this claim You can track an unlimited number of claims simultaneously on the Claims tab. It’s not uncommon to have one claim at the Appeals Council level, and then re-file at the initial level. Prevail can track both claims simultaneously. The claim descriptions of the claims will appear in the narrow window on the left side of the screen. When you click on a claim description in that window, the corresponding history for that claim will be displayed on the right side of the screen. Creating a New Claim on the Claims Tab Follow these steps to create a new claim on the Claims tab. Step 78 Task 1 Click ‘Add’ on the left side of the screen. A "New Process for Matter" window appears. 2 Enter a description of the claim in the Subject field. *Note: You may simply enter “Claim 1,” “Claim 2,” etc., or you may enter a more specific description of the claim (e.g., “SSD Claim Filed on 7/22/2008”. 3 Choose the appropriate process from the Process drop-down list. 4 Click ‘Save'. The new claim now appears in the list of claims on the left side of the screen. Updating the Status of a Claim on the Claims Tab Follow these steps to update the status of a claim on the Claims tab. Step Task 1 Click on the appropriate claim in the list of claims on the left side of the screen. 2 Click ‘Add’ on the right side of the screen. 3 Choose the appropriate level (e.g., Initial Application, Appeals Council) from the "Level" drop down-list in the middle of the window. *Note: By choosing the appropriate level, your list of choices for the next step will be filtered to include only those steps that belong at the chosen level. 4 Click on the appropriate step from the list of steps at the bottom of the window. 5 Click 'Next'. 6 In the next window, edit the date, as necessary, to reflect the date that the step actually took place. You may also change the "Responsible" party from the default case manager's name, if necessary, and enter any additional notes in the "Detail Information" field. *Important Note: It is extremely important to enter the date printed on the actual notice from the SSA, particularly in the case of a denial notice, since Prevail will automatically calculate your Statute of Limitations (SOL) date based on this entry date. Prevail will schedule statute warning tasks on your task list accordingly. 7 Click ‘Finish'. *Note: It is possible to set fields on the Matter tab (e.g., 'Case Status') to automatically update when a step is entered on the Claims tab. Please call our training department for instructions on how to establish this link between the Claims tab and the Matter tab. 79 Disabilities Tab *Note: By default, the Disabilities tab only appears when you're working in a Social Security matter. You won’t see this tab if you’re working in any other type of matter. ‘Disabilities’ tab buttons List of Disability Informatio n List of Claimant’s Descriptio n of Disabilities You’ll record information about the claimant’s disabilities and the client’s description of his or her disabilities on the Disabilities tab. Record objective information (facts and details backed up by medical evidence) in the “Disability Information” section (top half) of the screen, and record subjective information (a description of the claimant’s disabilities in his or her own words) in the “Claimant’s Description of Disabilities” section (bottom half) of the screen. 80 Disabilities Tab (continued) The table below explains the buttons on the Disabilities tab. Button Add Delete View Save Cancel Purpose Click this button to add an entry to the Disability Information list to the matter. After highlighting an entry in the Disability Information list, click this button to delete the entry. After highlighting an entry in the Disability Information list (top half of the screen), click this button to view the disability entry window for the entry. *Note: Alternatively, you may open the disability entry window by double-clicking on the item in the Disability Information list. Click this button to save any changes you make to the Claimant’s Description of Disabilities section (lower half of the screen). Click this button to cancel any changes you make to the Claimant’s Description of Disabilities section (lower half of the screen). Adding Ailments to Disability Information The top half of the Disabilities tab is reserved for ailments specifically diagnosed by a medical provider. To insert an ailment in this section, click on 'Add' at the top of the Disabilities window. Then, complete the fields in the Disability window with the following information. 81 Adding Ailments to Disability Information (continued) Field Ailment Severity Duration Work Load Treatment Detail Description Choose the appropriate ailment from the drop-down list. (Our pre-loaded list of ailments contains approximately 180 ailments. If you would like to add other options to the list, follow the steps outlined in Modifying Lists in the Databank on page 35. Your office should choose how you would like to classify the severity of an ailment. Many offices choose to use a scale of 1-5 (with 5 being most severe). By using a numerical scale, you'll be able to sort and filter the information in this section in a meaningful way. (For more information on sorting and filtering, see Grid Layout on page 110.) Whatever method you choose, make sure your users are consistent! Enter the length of time your client has suffered from this ailment. Your Office should choose how to describe work load. Many offices use terms such as "sedentary," "light duty," etc. Again, regardless of the method you use, just be consistent! Describe the treatment that the medical provider is rendering for this specific ailment. Add any other details not already explained in the other fields in the Disability window. Employment/Work Tab *Note: By default, this tab appears only when you're working in a Workers' Compensation matter. ‘Employment’ or ‘Work’ Tab buttons List of Claimant’s employment/ work history 82 Employment/Work Tab (continued) In a workers' compensation matter, it is vital to keep track of your client's work history, so that you'll have easy access to information regarding salary, job duties, dates of employment, and work load. This data will undoubtedly help you as you build your case to win benefits for an injured employee. Adding an Employment/Work Entry When you attach an employer to the workers' compensation claimant in the matter tree on the Matter tab, Prevail also automatically enters that employer's information on the Employment/Work tab. During the attachment procedure, you have the opportunity to input employment information (such as dates of employment), or you can simply attach the employer, and return to the Employment/Work tab later to add other details. Follow these steps to manually add entries to the claimant’s employment history. Step Task 1 Click ‘Add’ on the right side of the screen. A ‘New Employment History’ window appears. 2 Click on the paper clip button, which is located to the right of the ‘Employer’ field. A Rolodex search window appears. 83 Adding an Employment/Work Entry (continued) Step Task 3 Enter any character string from the employer’s name in the ‘Search Criteria’ field. *Note: Sometimes, you may not know the specific employer's name. You may simply know the occupation that your client has held at "various" places over the years. If this situation applies, you'll still need to attach an employer to the client. Simply use Step 4 below to create or use an existing Rolodex entry for an employer with the name "Unknown Employer". 4 84 If the employer appears in the list of results, double-click on the employer’s entry to attach the employer to the matter. If the employer does not appear in the list of results, then a) click ‘New’ at the top of the window. A "Rolodex Entry" window appears. b) enter the employer’s information in the "Rolodex Entry" window, and click ‘Save’. You’ll return to the Rolodex search window, and the employer will now display in the list of results. c) double-click on the employer’s name in the list of results. 5 If desired, enter the appropriate information in the remaining fields in the "New Employment History" window: Occupation – the type of work the client performed Title – the official title the client held Start Date – beginning date of employment End Date – ending date of employment (if not currently working for this employer) Current Employer – click in the checkbox if the employer is the claimant’s current employer. Salary – may be entered as an hourly, weekly, or annual rate Work Load – choose no work, light duty, full duty, or other Classification – choose part-time, full-time, seasonal, or other Duties – enter a brief description of the client's duties at this occupation. Detail – enter more detailed information about the claimant's position with this particular employer. 6 Click ‘Save’. Negotiation Tab *Note: By default, the Negotiation tab appears only when you're working in a Personal Injury or a Workers’ Compensation matter. ‘Negotiations’ tab buttons Negotiation Information Lien Information You'll use the Negotiation tab to record offers and demands that are made as you attempt to settle a case out of court. You'll also use this tab to track any liens that are held against a potential settlement. 85 Adding Demands and Offers Follow these steps to add a demand or offer entry to the Negotiation tab. Step 86 Task 1 Click 'Add Demand' or 'Add Offer'. 2 Choose the date the demand or offer was made from the ‘Date’ drop-down list by manually entering the date or clicking on the drop-down arrow and selecting the for the entry. 3 Enter a brief description of the entry in the ‘Subject’ field. *Note: Many clients choose to enter the amount of the demand or offer as part of the 'Subject' line so that it is easily visible on the Negotiation tab. 4 If the demand or offer is final, click in the checkbox for ‘Final’. 5 If desired, enter detailed information about the entry in the text field at the bottom of the window. Adding Liens Follow these steps to add a lien entry on the Negotiation tab. Step Task 1 Click 'Add' in the Lien section of the tab (lower half of the screen). 2 In the lien entry window, enter a brief description of the lien in the 'Subject' field. 3 Enter the date of the lien in the 'Date' field (either by typing the date or choosing it from the drop-down calendar). 4 Attach the lienholder in the 'Provider' field: a) click on the paper clip to the right of the 'Provider' field b) search for the provider's name in the Rolodex c) if the provider's name appears in the list of search results, double-click on it to attach it to the lien entry, or if the provider's name does not appear in the list of search results, click 'New' at the top of the Rolodex search window to add the provider to your Rolodex, and then double-click on it to attach it to the lien entry. 5 Enter a policy number, insured amount, and lien amount in the appropriate fields. 6 If a lien notice has been received, check the 'Received notice' box. 7 Enter any additional details, as desired, in the memo field in the lower half of the lien entry window. 8 Click 'Save'. 87 Damages Tab *Note: By default, this tab appears only if you're working in a Personal Injury or Workers' Compensation matter. ‘Damages’ tab buttons List of Damages entries You'll use the Damages tab to record special damages (such as medical bills, lost wages, pain & suffering, and property damage), as well as payment history against any of those damages. As you proceed through negotiation and a possible trial, you'll want to ensure that your settlement is sufficient to cover the damages that your client has incurred. Adding Damages Entries 88 Adding Damages Entries (continued) Follow these steps to add a damage entry or payment against a damage entry. Step Task 1 Click ‘Add’. A ‘New Damages Entry’ window appears. 2 Attach the provider in the 'Provider' field: a) click on the paper clip to the right of the 'Provider' field b) search for the provider's name in the Rolodex c) if the provider's name appears in the list of search results, double-click on it to attach it to the damage entry, or if the provider's name does not appear in the list of search results, click 'New' at the top of the Rolodex search window to add the provider to your Rolodex, and then double-click on it to attach it to the damage entry. 3 Enter the account number for the provider in the ‘Account #’ field. 4 Enter a brief description of the bill/damage in the ‘Subject’ field. 5 Select a damage type from the ‘Type’ drop-down list. 6 Enter the starting date of service for the provider in the ‘From’ field and the ending date of service in the ‘To’ field. 7 Enter the due date of the bill in the ‘Due Date’ field by manually entering the date or clicking on the drop-down arrow next to the ‘Due Date’ field and selecting the date from the calendar display. 8 Enter the amount of the bill/damage in the ‘Bill’ field. 9 10 If you don’t have a payment to apply to the new damage entry, click ‘Save’. You have finished setting up the new damage entry. If you have a payment entry to apply to the new damage entry, click ‘Add’ in the ‘Damage Payments’ section at the lower half of the ‘New Damage Entry’ window. A ‘New Payment Entry’ window appears. Continue to step 10 of this procedure. Attach the payer in the 'Provider' field: a) click on the paper clip to the right of the 'Provider' field b) search for the payer's name in the Rolodex c) if the payer's name appears in the list of search results, double-click on it to attach it to the damage entry, or if the payer's name does not appear in the list of search results, click 'New' at the top of the Rolodex search window to add the payer to your Rolodex, and then double-click on it to attach it to the damage entry. 89 Adding Damages Entries (continued) Step Task 11 Enter the payer’s account number in the ‘Account #’ field. 12 Enter a brief description of the payment entry in the ‘Subject’ field. 13 Enter the payment date in the ‘Payment’ field by manually entering the date or clicking on the drop-down arrow next to the ‘Payment Date’ field and selecting the date from the calendar display. 14 Enter the amount of the payment in the ‘Bill’ field. 15 If desired, enter detailed notes about the payment in the text field at the bottom of the ‘New Payment Entry’ window. 16 Click ‘Save’. *Note: You may return to an existing damage entry at any time to apply a payment. Simply double-click on the damage entry on the Damages tab, and follow steps 9-16 in the Adding Damages Entries procedure. Strategy Tab During the course of a case, attorneys obtain information that may be useful in the future as they prepare their overall strategy for winning. The Strategy tab is a useful tab for recording notes about this strategy. To enter strategy notes on this tab, simply start typing. You'll notice that the window turns yellow when you start making changes. When you're finished, either click 'Save' to save the updated information, or click 'Cancel' if you don't want to save your changes. Generating an Intake Questionnaire for a New Prospect The Intake Questionnaire allows you to follow a user-defined script of questions (see Creating a New Intake Questionnaire Script on page 30 for the steps that Administrators in Prevail should follow to create a questionnaire template) as you take a call from a prospective new client. When you complete the questionnaire, Prevail will automatically create either a prospect or a matter (depending on how your Administrator sets up the Intake Questionnaire script), and certain parties (e.g., referral source, medical providers) may already be attached to the prospect/matter, saving you the time of attaching these parties after the prospect/matter is created! Also, fields on the Matter tab (e.g., education or military information) may already be populated for you, depending on the script. Prevail saves the full text of the completed Intake Questionnaire on the History tab for the new prospect/matter. 90 Generating an Intake Questionnaire for a New Prospect (continued) Follow these steps to generate an Intake Questionnaire when you receive a call from a prospective client. Step Task 1 Click 'Questionnaires' in the Prevail toolbar. 2 3 Enter the information in the questionnaire as prompted. 4 Before Prevail automatically creates a prospect or matter, it will prompt you to either confirm which existing Rolodex entry to attach or create a new one (for the prospect and for any 'Contact' question types that you created). Double-click on the contact's name in the Questionnaire window to open the Rolodex search window. If a matching entry already exists in the Rolodex, double-click on it to attach it to the newly created prospect or matter. If a matching entry does not already exist in the Rolodex, click on 'New', and Prevail will automatically create a new Rolodex entry. 5 Click 'Finish'. The new prospect or matter appears. Click on '+New' to start a new questionnaire for a prospective client, or previous questionnaires that have not been completed will appear in the list of results in the lower half of the window. Double-click on any of these entries to open the saved questionnaire, and pick up where you left off. 91 Chapter Eight: Tools Sticky Notes Although there are a number of places in Prevail to track notes, there are occasions when a particular piece of information is so important in a particular matter that you don’t want anyone in your firm to do anything in that case without knowing and acknowledging that piece of information. If a piece of information is that important, you certainly don’t want it buried three pages deep in notes or over on the History tab, which the user may or may not be looking at when he or she pulls up the matter. This is the time to use a Sticky Note in the matter! When you pull up a matter that has a Sticky Note attached, the Sticky Note window will pop up in front of the page, and you won’t be able to view what’s underneath it without first clicking the ‘Save' button. Attaching a Sticky Note to a Matter Follow these steps to attach a Sticky Note to a matter. Step 92 Task 1 Open the matter to which you'd like to attach a Sticky Note. *Note: See Matter Search on page 57 for instructions on how to navigate to a specific matter. 2 Click on ‘Tools’ from the Prevail main menu, and then click on ‘Sticky Note’. 3 Click ‘Add Sticky Note’. A ‘New Sticky Note for Matter’ window appears. Attaching a Sticky Note to a Matter (continued) Step Task 4 Enter the message for the Sticky Note in the window. *Note: It’s a good idea to put your login name or initials and the current date on any Sticky Note you create. This way, other users will know how recent the information is and who put it there. 5 Click ‘Save’. Adding More Information to an Existing Sticky Note Follow these steps to add information to an existing sticky note, rather than create a new one. Step Task 1 Open the matter to which you'd like to attach a Sticky Note. *Note: See Matter Search on page 57 for instructions on how to navigate to a specific matter. 2 Click on ‘Tools’ from the Prevail main menu, and then click on ‘Sticky Note’. 3 Click 'Cancel', and the existing Sticky Note will appear. 4 Add the necessary information to the existing Sticky Note. 5 Click 'Save'. Deleting vs. Closing a Sticky Note After a user has created a Sticky Note for a matter, the Sticky Note will continue to appear until someone deletes it. If a user simply closes a Sticky Note, the Sticky Note will re-appear the next time a user navigates to that matter. To close a Sticky Note, click on the red 'X' in the upper-right corner of the Sticky Note window. To delete a Sticky Note permanently, click on 'Delete' at the top of the Sticky Note window. 93 E-Mail The e-mail tool in Prevail allows you to initiate an e-mail to any other user in your firm who has an e-mail address entered in the Employee Setup, or to any contact attached to a prospect or matter who has an e-mail address entered in his or her Rolodex "E-Mail" field. The e-mail feature also allows you to scan for replies to e-mails you previously generated through Prevail. If any replies are found, Prevail can automatically attach them to the History tab for the matter to which they are related. 94 E-Mail (continued) Initiating E-mails in Prevail Follow these steps to initiate an e-mail in Prevail. Step Task 1 Click the 'Email' button at the top of your screen. 2 Choose "Send Email". 3 In the Email window, choose the person(s) to whom you want to send your message, as well any person(s) you would like to copy the message to, by placing a check mark by the appropriate names. When you are on the Home tab, you may send your e-mail to any other users in your office who have an e-mail address entered in the Employee Setup window (Administration > Employees). When you are on any other tab, you may send your e-mail to any other users in your office who have an e-mail address entered in the Employee Setup window (Administration > Employees), or any contacts attached from the Rolodex to the prospect/matter in which you are working. (The contact must have an e-mail address entered in his or her Rolodex entry.) 4 Enter a "Subject" for your e-mail. 5 If you would like to attach a file to your e-mail, click the 'Attach File' button, and browse out to the file you want to attach. 6 Type your message in the "Message" window. 7 Optionally, you may type notes in the "Detail Information" field. Any notes that you enter here will appear in the "Detail" area of the History entry that Prevail creates in the matter when you send the e-mail. The notes will not appear in the e-mail message itself. 8 Click 'Send'. If you were in a matter (rather than being on the Home tab) when you sent the e-mail, Prevail will automatically save the message, as well as any file attachments it contained, in one History entry. 95 Scanning for Replies to E-mails Initiated in Prevail Follow these steps to scan for replies to e-mails you previously sent through Prevail. Step 96 Task 1 Click the 'Email' button at the top of your screen. 2 Choose "Scan for Replies to Email Sent from Prevail". 3 A "New Scan Email" window will display, listing any replies that you received to emails you initiated in Prevail. 4 Click in the far-left column of the e-mail grid to check or uncheck the e-mail. If there is a green checkmark beside the e-mail, Prevail will save it as a History entry in the appropriate matter. If there is not a green checkmark beside the e-mail, Prevail will not create a History entry for the e-mail. 5 Click 'Attach to History' to attach the e-mails, as selected, and to close the "New Scan Email" window. Sending E-mails from the Rolodex You may also send e-mails directly from the Rolodex. E-mails sent from the Rolodex will not be attached to the History of any matter. Follow these steps to e-mail a contact directly from your Rolodex. Step Task 1 Click the 'Rolodex Search' button at the top of your screen. 2 Locate the contact in your Rolodex, and click once on his or her name. 3 If you have entered an e-mail address for this contact in his or her Rolodex entry, the 'Mail' button at the top of the Rolodex Search window will be active. 4 Click the 'Mail' button, and a new e-mail entry will open, addressed to this contact. 5 Enter the subject, message, and any attached files, and click 'Send'. 97 Chapter Nine: Prevail Briefcase The Prevail Briefcase allows you to select matters to copy from your Prevail server to a laptop, so that you can access these matters offsite, such as at a hearing, mediation, or deposition. **Note: Due to the sometimes insurmountable obstacles associated with Network Administration, proper permissions and setup, the Prevail Briefcase (although still accessible) is no longer the preferred method of data transport. Our new ‘Client Package’ feature officially holds this title. See the ‘Client Package’ section of the manual for details. The Prevail Briefcase has the same interface as your "regular" Prevail, but the color scheme is grey. In the Briefcase, you are also able to enter data, and merge documents, just as if you were working at your office! However, please note that any data entry that you make or documents that you create in the Briefcase will NOT transfer to your "regular" Prevail when you reconnect to your server at your office. You must log out of Prevail before logging into the Briefcase. Copying Matters to Your Prevail Briefcase Follow these steps to copy a matter to your Prevail Briefcase. Step Task 1 On your laptop, from your Windows desktop, click on Start > All Programs > Prevail > Prevail Briefcase. 2 Log in to your Prevail Briefcase with your usual Prevail user name and password. 98 Copying Matters to Your Prevail Briefcase (continued) Step Task 3 On the left side of the screen, search for the matter you want to copy. Then, click once on the matter that you want to copy. *Note: You may select multiple matters by pressing the <Ctrl> key on your keyboard while clicking on these matters. 4 After selecting the matters to copy, click on 'Copy Selected Matters' at the top of the window. 5 The copied matters will appear in the list on the right side of the window. 6 Close the Prevail Briefcase by clicking on the red 'X' in the upper-right corner of the window. Accessing Your Prevail Briefcase When You're Offsite Follow these steps to access your Prevail Briefcase when you're offsite (e.g., at a hearing, mediation, or deposition). Step Task 1 On your laptop, from your Windows desktop, click on Start > All Programs > Prevail > Prevail Briefcase. 2 Log in to the Prevail Briefcase with your usual Prevail user name and password. 3 The Briefcase interface is identical to your "regular" Prevail, except the color scheme is grey. Removing Matters from Your Prevail Briefcase You may remove matters from your Prevail Briefcase when you return to your office and are reconnected to your Prevail server. Follow these steps to remove matters from your Briefcase. Step Task 1 Make sure you are reconnected to your Prevail server. 2 On your Windows desktop, click on Start > All Programs > Prevail > Prevail Briefcase. 99 Removing Matters from Your Prevail Briefcase (continued) Step Task 3 On the right side of the window, select the matter(s) you want to remove, and click 'Remove Selected Matters'. *Note: You may remove multiple matters at the same time by pressing the <Ctrl> key on your keyboard while clicking on these matters. 4 Close the Prevail Briefcase by clicking on the red 'X' in the upper-right corner. 100 Chapter Ten: Client Package The Prevail Client Package is a feature that was developed to allow you to create PDF’s of one (or several) Matters within Prevail. With Client Package PDF’s, there is no internet connection needed, or the need to have Prevail installed to be able to view a Client’s Matter. In reality, someone need only have Adobe (or a PDF reader) installed on their computer, to view this information. Once a Client’s Matter has been created into PDF, you gain all of the access and freedom that comes with having this format. Save the PDF to a portable storage device, and take it with you to a hearing. Email the PDF to a consulting expert or attorney for quick correspondence, or quick comparisons; the choice is yours! *Note: Once a Client Package PDF has been created, none of Prevail’s Security Settings will apply to this PDF. Your firm is solely responsible for implementing the proper security protocols to protect this information. Creating a Client Package PDF Step Task 1 Click the ‘Client Package' button at the top of your screen. 2 Enter the Matter (or Client Name) into the Search Criteria Field, and double-click on their Matter Title to add them to your list of Client Packages. If you are currently working in a Matter, that Client will automatically be included in you Client Package. To remove a Client’s Matter from the list of ‘Selected Matters’, double-click on their Matter Title. 3 Using the Check Boxes under “Select Contact Types” and “Select Tabs”; choose the areas that you would like included in your Client Package(s) 4 Click the ‘Create Package’ button at the top the Client Package Window. 101 Creating a Client Package PDF (continued) 5 Choose the location where your new Client Package should be saved. You must 1)Choose a Drive, and 2) Choose a Directory Folder 2 1 6 102 To preview your newly created Client PDF, Click the “View Folder” button. Chapter Eleven: Reports After you get your office up and running with Prevail, and you're inputting lots of valuable information into the program, you'll want to be able to analyze this data in a meaningful way. For example, you may want information readily available regarding monies due, lists of open matters, case status reports, etc. You'll use the Prevail Reporter to gather such information from your Prevail database. Numerous reports are built into the software, but if you need a report that doesn't already exist, customized reports are available by contacting Tech Support at [email protected]. Running Reports Follow these steps to run a Prevail report. Step Task 1 Click on ‘Reports’ on the Prevail main menu, and go to the appropriate folder and report that you would like to generate. 2 Depending on which report you choose to generate, you may see a window prompting you to enter information (such as a name or case number) to limit the results that the report will display. If you do not want to limit the results to a specific case number, date range, employee login, client name, etc., simply click on 'OK' in the window, without entering information in any of the fields. If you want to limit the results that will display in the report, enter the appropriate case number, date range, employee login, client name, etc., in the fields provided, and then click 'OK'. **IMPORTANT NOTE: If you specify a name for which to run the report, you must capitalize the first letter of the name (just as the name appears in that person's Rolodex entry). If you specify a certain employee login, you must enter that employee login in ALL CAPS, just as it appears on the Prevail login screen. 103 Running Reports (continued) Step Task 3 You may choose to Save, E-mail, or Print a report after it is generated. To save a report, click on 'Save' at the top of the report window. Then, browse to the appropriate location to save the file. The folder will be saved as a PDF document. To e-mail a report to another user in your office, click on the 'E-mail' drop-down list at the top of the report window, and choose the appropriate user to receive the report. *Note: In order for a user's e-mail address to appear in the drop-down list, you must have an e-mail address entered for that user in their employee setup (located under the Administration > Employees menu in Prevail). To print a report, click on 'Print' at the top of the report window. 104 Chapter Twelve: Prevail Control Panel You'll want to always ensure that your Prevail 6 is running the latest update to the program. Otherwise, you may miss out on new features that are constantly being added. This is where the Prevail Control Panel comes into play! You'll also use the Control Panel to maintain your database files. The first time that you use the Prevail Control Panel, you’ll be prompted for a Security Key before being allowed access. This Security Key is printed on a sticker affixed to the back of your Prevail CD envelope. Be very careful when entering your Security Key, as it is case-sensitive and must be input correctly in order to proceed. A typical Security Key consists of ten alphanumeric characters. *Note: Some features in the Prevail Control Panel (such as downloading updates) require that all Prevail users in your firm be logged out of Prevail. Updating Your Version of Prevail When a Prevail update is available, you'll see a message on the Prevail login screen stating, "A Prevail 6 update is available." If you see this message, make sure all users (including yourself!) are logged out of Prevail. Then, follow these steps to download the update. Follow these steps to download Prevail updates. *Note: You may download Prevail updates from any workstation; you do not have to run the update from your Prevail server. The update will apply to all workstations, regardless of which PC you use to download the update. Step Task 1 On your Windows desktop, click on Start > All Programs > Prevail > Control Panel. 2 When the Prevail Control Panel login screen appears, use your regular Prevail login and password. 3 A message will confirm that all users are logged out of Prevail, or will indicate which users are still logged in (and need to log out before moving forward with the update). 4 Click once on 'Update' at the top of the Control Panel window. The download will start automatically. 105 Updating Your Version of Prevail (continued) Step Task 5 When the download is complete, you will see a message at the bottom of the Control Panel window indicating that your Prevail database is locked. At this point, click on 'Unlock Database' at the top of the Control Panel window. 6 Close the Prevail Control Panel window. All users may now log into Prevail. Repairing Field Name Errors When you run the operation to repair field name errors, Prevail rebuilds the full name Rolodex fields. This process should repair any full name field that may be incorrect. Follow these steps to repair field name errors. *Note: Users may continue to work in Prevail while this utility is running. Step Task 1 On your Windows desktop, click on Start > All Programs > Prevail > Control Panel. 2 When the Prevail Control Panel login screen appears, use your regular Prevail login and password. 3 At the top of the Prevail Control Panel window, click on Tools > Rebuild Full Names. 4 When the rebuilding is complete, close the Prevail Control Panel window. Deleting Unused Rolodex Entries In order to delete a Rolodex entry in Prevail, you must detach that entry from any of your matters to which it is attached. (See Deleting Rolodex Entries on page 59 for more details.) Then, you may delete those Rolodex entries one at a time. Alternatively, if you would like to delete multiple Rolodex entries at once, you may use the "Delete Unused Rolodex Entries" utility in the Prevail Control Panel (after you have detached these entries from all matters in Prevail). 106 Deleting Unused Rolodex Entries (continued) Follow these steps to delete unused Rolodex entries. *Note: Users may continue working in Prevail while this utility is running. Step Task 1 On your Windows desktop, click on Start > All Programs > Prevail > Control Panel. 2 When the Prevail Control Panel login screen appears, use your regular Prevail login and password. 3 Click on ‘Tools’ at the top of the window, and then click on ‘Delete Unused Rolodex Entries’. A ‘Delete Rolodex Wizard’ window appears. 4 Click on each unused Rolodex entry that you want to delete. *Note: You may select multiple unused Rolodex entries simultaneously by holding down the <Ctrl> key on your keyboard while clicking on individual entries. 5 After you have selected all unused Rolodex entries that you want to delete, click ‘Delete’ at the bottom of the window. *Note: If you decide not to delete any unused Rolodex entries, click ‘Cancel’ at the bottom of the window. 6 Close the Prevail Control Panel window. Pack & Reindex All databases keep records in order (e.g., alphabetical or numerical) by creating index files that indicate the next sequential record for a given arrangement scheme. This eliminates the need for the database engine to physically rearrange large numbers of records. Instead, the database keeps a “roadmap” of which records go in which order. Prevail contains dozens of these index files. If a workstation is turned off or rebooted during a disk write operation, a power fluctuation causes a brownout, or a hardware failure of any sort causes a network error during a disk write operation, one or more of these indexes may become corrupted. If a corruption occurs, you’ll typically receive an error message when trying to write or save information into one of the Prevail screens. The Reindex operation on the Prevail Control Panel generally fixes this sort of problem, in most cases eliminating the need to even call Tech Support. 107 Pack & Reindex (continued) Follow these steps to reindex your files. *Note: The Pack & Reindex utility may take a while (in some cases as long as 20 minutes for a large database), and all users must be logged out of Prevail while this utility is running. Step Task 1 On your Windows desktop, click on Start > All Programs > Prevail > Control Panel. 2 When the Prevail Control Panel login screen appears, use your regular Prevail login and password. 3 A message will confirm that all users are logged out of Prevail, or will indicate which users are still logged in (and need to log out before moving forward with this procedure). 4 Click on ‘Pack & Reindex’ at the top of the window. 5 When the 'Pack & Reindex' utility completes, close the Prevail Control Panel window. Web Prospect Import Prevail has partnered with several web-based lead generation companies for the purposes of directly importing your leads from the web, into Prevail as Prospective Clients. For a complete list of our partners, visit our website www.prevail.net , and click on the ‘Partners’ button. Once you are on-board with one these companies, inform them that you are a Prevail Client and want to begin having your leads imported into our software. They will contact us, and we will take it from there. 108 Rolodex Consolidation Should the need ever arise; we have included a tool that can help consolidate two (or more) identical Rolodex entries into one. Often times, we will find that a person (or party) has been entered into your Rolodex more than one time. It is also common, for these people or parties to have more than one Matter associated with them. This tool will search through your Rolodex for these duplicates, and compare specific Rolodex information fields between the two. It will than pick the first entry it finds, and remove the other matching Rolodex entries. Any Matters that were associated with the other Rolodex entries will now be associated with just the one solo entry. The following is a list of the fields that are compared between similar Rolodex entries: Office/Company/Firm Name First and Last Name Address City, State, Zip Code Date of Birth Social Security Number *Note: It is also important to understand that Prevail has no control over which Rolodex Entry is removed. Using the list of fields above; be sure to document any other important Rolodex information elsewhere, prior to running the Rolodex Consolidation Tool. 109 Chapter Thirteen: Extras As you'll soon discover, there are numerous extra features that you'll enjoy as work more in Prevail. This chapter provides an overview of those features. Grid Layout Throughout Prevail, many screens have a "grid" layout (i.e., the screen layout appears as a table, with columns and rows of information). This layout is a useful feature, as it allows you to filter, sort, and/or group the entries on the page. For example, if you are working through your task list and want to filter your view to display only "High Priority" tasks, you can do so by applying a filter. Or, if you're working on the History tab and want to quickly find a particular document entry, you can use a filter to make your search much faster! The grid layout exists in the following key areas of Prevail: History Calendar (Task List and Appointment List views) Home tab – My Statute List, Messages, Upcoming Appointments, Upcoming Tasks Events Ledger Negotiation (where applicable) Damages (where applicable) Medical Disabilities (where applicable) Employment (where applicable) *Note: You may apply multiple grid settings at the same time. For example, you may choose to first filter on a particular column and then sort in date order. 110 Grid Layout (continued) Filtering Grid Entries Filter indicator When you are in any area of Prevail that contains a grid layout, you will see a drop-down arrow for each column header when you hover over it. To apply a filter, simply click on the dropdown arrow for the column you wish to filter by, and choose the appropriate selection. The filtered view will display. To clear a filter and return to the full display, click on the 'X' in the lower left of the window, or click on the drop-down arrow for the column header again, and choose "All". Sorting Grid Entries You may also sort entries within a grid layout. To apply a sort based on a particular column (e.g., date) click on the column header label (the word itself, not the drop-down arrow). Each time that you click on the column header label, the entries will reverse their sort order, based on that column. 111 Grid Layout (continued) Grouping Grid Entries Grouping Zone You may group entries within a grid layout, as well. For example, you may group the entries on the History tab according to their type, rather than having all of the entries displayed in order of their entry. To apply a grouping within a grid, click on the appropriate column header, and hold your left mouse button down while dragging the column header up to the shaded area just above the grid. (Green arrows will appear to help guide you.) Release your left mouse button, and the entries in the grid will then be classified in groups. Click on the '+' sign next to any of the group names to expand the group and show all entries in that particular category. To remove a group setting, and return to the normal view, drag the column header back to its original position. 112 Grid Layout (continued) Saved Filters in History and Ledger If you have a particular grid setting that you use often on the History or Ledger tabs, you may choose to save that particular view. That way, you don't have to repeatedly apply the same settings each time that you visit Follow the procedures above for filtering, sorting, and grouping grid entries to configure the display as desired. Then, click 'Filter' in the upper right area of the grid. Click 'Create Filter from Current View'. Enter a name in the "Filter Name" field, and click 'Save'. The next time you need to quickly apply the current display settings, click 'Filter', and then click on the name of the appropriate filter. To return to the regular grid view, click on 'Filter', and choose to remove the filter. Printing Tabs Use this button to print the entire screen Use this button to print this particular section of the tab Prevail allows you to print entire tabs or particular sections of tabs. On each tab within the program, you'll see a 'Print Screen' button in the Prevail toolbar at the top of the screen. Click on this button to print a screenshot of your entire view. Alternatively, you may print individual sections of a tab. On each tab section, you'll notice a 'Print' button. Click on this button to print only that specific section of the tab. 113 Viewing Notes (Detail) 'Options' button By default, tabs in Prevail do not display the notes (or detail) that you input within a particular entry. In order to see these notes, you must double-click on the entry to open it and see all notes. However, you may choose to display the notes/detail as part of the regular grid view. In order to display notes in the grid, click on the 'Options' button in the upper right area of the grid, and make sure that "Notes" is checked. Daily Backups of Your Prevail Data It is extremely important that you backup your Prevail data daily! In order to do this, you'll need to save a copy of your PREVAIL_SERVER folder to an external device, such as a USB external hard drive. The size of your database will determine the capacity that you will need for your backup device. To backup your data, browse to your 'X:\PREVAIL_SERVER' folder (where 'X' represents the drive on which your Prevail server is installed). Right-click on the folder, and click on "Send To". Choose the appropriate device for backing up your Prevail data. 114 Chapter Fourteen: Trust Ledger Trust Ledger Prevail recognizes that attorneys must maintain a “special” type of account, usually a checking account or its equivalent, for client money and other escrow funds that a lawyer holds in the practice of law. Therefore, we recently added a great new feature called the “Trust Ledger.” It works much like the Claims/Processes Tab, in that you can track an unlimited number of deposits and payments simultaneously on the Trust Ledger tab. Trust Account Ledger Setup *Follow these steps to modify the settings for a Trust Ledger: Step Task 1 From the Main Menu, Click on ‘Administration’ > ‘Trust Account Setup’. 2 On the left-hand side, under ‘Account List’, you can add your trust account(s) by simply clicking the button. 3 Next enter the account number associated with this account (or the last four digits of the account number in the “Account Number” field (*Required Field). 4 If you would like to add any notes, you may do so in the “Details” fields. 115 Trust Account Ledger Setup (continued) 5 Repeat Steps 2-4 when adding multiple trust accounts. 6 Click 'Save' in the ‘Account Settings" section of the window. In the Databank With the added ‘Trust Ledger’ feature, there are now two additional tabs in the Databank you can modify: 1-Trust Deposit and 2-Trust Payment *Follow these steps to modify these tabs in the Databank: Step 1 2 3 4 116 Task From the Main Menu, Click on ‘Administration’ > ‘Databank’. Click on the ‘Trust Deposit’ tab and click the Click on the ‘Trust Payment’ tab and click the payment. Click ‘Save’ and exit out of the Databank. button to add a new trust deposit. button to add a new trust Trust Ledger Tab In addition to the Ledger tab, Prevail has included a new tab, called the “Trust Ledger” tab. *Follow these steps to view the ‘Trust Ledger’ tab within a Matter for a law type: Step Task 1 From the Main Menu, Click on ‘Administration’ > ‘Law Type/Case Type/Rolodex Type Setup’, and click on the ‘Law Types’ tab at the bottom. 2 Choose the law type that your firm practices. 3 Then check off the box beside ‘Trust Ledger Tab.’ 4 Click 'Save' in the ‘Law Type Settings" section of the window. 117 Trust Ledger Tab (continued) Trust Account(s) Listing (Add, Edit, Delete and View) List of Trust Ledger entries (Payments & Deposits) *Payment Entry Example 118 Trust Ledger Tab (continued) *Deposit Entry Example This table explains the purpose of each of the buttons located on the Trust Ledger. Button Add Delete View Add Payment Add Deposit Purpose Click this button to add a new time, cost, or fee entry to the matter. After highlighting the entry in the list to delete, click this button to delete the ledger entry. After highlighting a specific entry in the list of ledger entries, click this button to view the detailed time, cost, or fee entry window. Alternatively, you may double-click on a Ledger entry to open it. Click this button to add a new payment entry to the Trust Ledger. Click this button to add a new deposit entry to the Trust Ledger. 119 Adding a Trust Ledger Entry Follow these steps to create a new Trust entry: Step Task 1 Click on 'Add Deposit' or 'Add Payment'. A “New Trust Entry" window appears. 2 Click on the "Category" drop-down list, and select a category for the new entry. 3 Enter a description of the new entry in the ‘Subject’ field. 4 Click on the "Attorney" drop-down list to select the appropriate attorney for the entry. 5 Enter the ‘deposit’ or ‘payment’ amount of the entry in the "Amount" field. 7 Enter the name of the party you paid, or that paid you in the "Payer" field by clicking on the paper clip icon to the right of the field to open a Rolodex search window. Then, search for the party in the Rolodex, and double-click on the appropriate name in the result list to attach to the Trust entry. If the party doesn't yet exist in your Rolodex, click 'New' at the top of the Rolodex search window to create a new Rolodex entry. 9 Enter your firm’s check # used to pay the payment, or the check # of the person paying you in the “Check #” field. 10 If desired, enter any details relevant to the entry in the “Details” field at the bottom of the window. 11 Click ‘Save'. 120 Chapter Fifteen: Prevail-Quickbooks Transfer Wizard Quick Start Guide *Note: Should you wish to incorporate QuickBooks Integration in your Prevail System, there is a one-time purchase necessary. This is a firm wide purchase, and as such, you will not pay per end-user or workstation. You will also need to make sure that you have purchased and installed QuickBooks™ Pro or Premier 2008 or newer, or QuickBooks™ Enterprise 8 or higher (not recommended) for all workstations that need to run the QuickBooks™ integration. Simply call our tech support at (407) 228-4400, option 3, to get started. A Quick Start Guide to QuickBooks Integration with Prevail You’ll be able to run the Prevail Control Panel and see the QuickBooks Integration Setup under the Tools menu. The QuickBooks Integration Setup can only be run when no one is logged into Prevail. 121 Initial Set Up When you select the QuickBooks Integration Setup from the Tools menu, you see the following window: When you click Continue, you will see a progress bar as the new fields are added to the tables. When the progress bar goes away and you’re back on the main screen, you can close the Prevail Control Panel and launch Prevail and login. Once the QuickBooks Integration Setup has been completed, each Prevail user who is also running QuickBooks™ on their machine, and only those users, will have access to the PrevailQuickBooks Transfer Wizard on the Prevail Administration menu. Prevail-QuickBooks Transfer Wizard In order to run the QuickBooks Transfer Wizard, QuickBooks™ must be running. In the initial setup, a QuickBooks™ administrator must allow Prevail to access the QuickBooks™ data. This permission only needs to be granted during the initial setup. After that, QuickBooks™ won’t ask again. 122 Prevail users, also running QuickBooks, can open the QuickBooks Transfer wizard by going to Administration| Prevail-QuickBooks Transfer Wizard. On the first screen of the wizard you will see the following: System Defaults Start by clicking the System Defaults button. You’ll see the screen below. Click the Edit button (bottom right side of the screen) and select your preferred naming convention. You may also select the Prevail Rolodex fields, and their order, to configure how your Prevail data will populate the 5-line Customer address block in QuickBooks™. Then click Save. Next you should go through the same process on the Vendor Wizard tab in the System Defaults. 123 Now click on the Invoice & Bill Transfers tab and you’ll see this screen: Here you can set a default category for each of the listed items. This will allow ledger entries from Prevail that did not have a category assigned to be transferred to QuickBooks™ without interruption using the default setting you have selected. If no default value is set, items with no category will have to have a category assigned before they can be transferred. On the Check Requests tab, you’ll see the following: Once again, click the edit button, set the default values you prefer and click the save button. 124 QuickBooks Sync This allows you to sync Customers, Vendors, and Items between Prevail and QuickBooks™ if you wish to do so. It only works for those Customers, Vendors, and Items that have already been matched using their respective wizards. To conserve system resources, the QuickBooks Sync only runs when you initiate it. Please note, this process may take several minutes. QuickBooks Field Lengths Important note: The QuickBooks Field Lengths screen is for informational purposes only. Because several of the fields in QuickBooks™ are shorter than their corresponding fields in the Prevail rolodex, you may sometimes receive a message warning that if you transfer the selected items some data may be truncated. There is no way to avoid this as it is a limitation within QuickBooks™. You can still transfer the information. You’ll just have to review the data in QuickBooks™ and edit it, if necessary, to best suit the field lengths in QuickBooks™. 125 Setup Wizards The Setup Wizards are: Item Wizard, Vendor Wizard, and Customer Wizard. Item Wizard The Item Wizard allows you to get a list of your QuickBooks™ items and accounts and match them to your Cost, Fee, Time, and Damage items in Prevail. You can also add items from QuickBooks™ into Prevail. You cannot import Cost, Fee, Time and Damage items from Prevail into QuickBooks™. That’s because items in QuickBooks™ must be assigned to an account in your Chart of Accounts in QuickBooks™. *Only users with full access in QuickBooks™ can run the Item Wizard because of its need to access your QuickBooks™ Chart of Accounts. In Step 1 of the Item Wizard, click the Get From QuickBooks button. Once the wizard gets your items from QuickBooks™, click Next to go to Step 2 of the Item Wizard. You’ll see a screen that looks like this: On the left, you’ll see your Prevail items listed by type, such as Cost, Damage, Fee, and Time. On the right, you’ll have a dropdown list of your QuickBooks™ items and a list of your QuickBooks™ Expense accounts. You can match each of the Prevail items with their corresponding QuickBooks™ item or account. Depending on how your QuickBooks™ items are setup, you may have more than one Prevail item that matches the same QuickBooks™ item. That is acceptable. 126 You don’t have to match all the items at once. You can handle them on a transactional basis if you wish. That is, only match the items for which you have transactions to pass to QuickBooks™. Select the QuickBooks™ matching item for each of the Prevail items you wish to match and click “Next”. The selected items will be matched with their QuickBooks™ counterparts. Step 3 of the Item Wizard allows you to import items from QuickBooks™ into Prevail. This is most often used for new Prevail clients who have not yet used the Prevail Databank to customize their item lists in Prevail. On the left you’ll see a list of your QuickBooks™ items. To import QuickBooks™ items into Prevail, click the Type dropdown next to the item and select the appropriate type match for Prevail: Cost, Damage, Fee, or Time. Check the Add box to the right for each item you want to import into Prevail. Note, if you check the Select All box, only those items with a Type selected will be added to Prevail. Vendor Wizard Step 1: Import Vendors From QuickBooks™. Begin by clicking the Get From QuickBooks button. When you see the Completed Successfully message, click Next. In Step 2 you’ll see a list with all the parties in your Prevail Rolodex on the left, and a dropdown list on the right next to each of them so you can match your QuickBooks™ Vendors with their corresponding party in Prevail. 127 You’ll also have an option to add parties from Prevail to you Vendor’s list in QuickBooks™. And you can add vendors from QuickBooks™ into your Prevail Rolodex. You’ll need to assign them a Rolodex type from the drop down list. NOTE: Remember the field lengths issue we discussed earlier. You may encounter an error when adding a rolodex entry from Prevail into QuickBooks™ if the number of characters in the Office + Firstname + Lastname fields is greater than the number of characters allowed in the Vendor Name field in QuickBooks™. The vendor will be added but the Vendor Name will be truncated to fit QB. 128 As a cross-reference, double-clicking a rolodex entry in the Vendor Wizard will open a window that shows a list of all the Prevail Matters where that party is attached. Customer Wizard Step 1: Import Customers From QuickBooks™. Begin by clicking the Get From QuickBooks button. When you see the Completed Successfully message, click Next. In Step 2 you’ll see a list with all the parties in your Prevail Rolodex on the left, and a dropdown list on the right next to each of them so you can match your QuickBooks™ Customers with their corresponding party in Prevail. 129 As with Items and Vendors, you can add Parties from your Prevail Rolodex to your Customer list in QB. NOTE: Remember the field lengths issue we discussed earlier. You may encounter an error when adding a rolodex entry from Prevail into QuickBooks™ if the number of characters in the Office + Firstname + Lastname fields is greater than the number of characters allowed in the Customer Name field in QuickBooks™. The customer will be added but the Customer Name will be truncated to fit QB. Initiating QuickBooks™ Transactions From Prevail Note: Only transaction items initiated in Prevail can receive information back from QuickBooks™. All users who have access to the Prevail Ledger tab will see the following buttons: All users who have access to the Prevail Trust Ledger tab will see the following button: Let’s start with a Check Request transaction. Go to the appropriate Ledger tab in the matter where you want to initiate a check request. Click the QuickBooks Check Request button. Select the item(s) for the check request. *Note: the only items that will show up here are those that have a party attached in the “Pay to the Order” field. Click the Set Batch drop down and select “Set the selected items to “Check Req”. All check request items will appear in the Check Request Transfer Wizard the next time it is run. Each of the items selected for transfer will get passed over to QuickBooks™ as a bill to be paid, or a check to be printed, based on your previously set system defaults. When a transferred item is paid in QuickBooks™, the Pay Date and Check Number are passed back to the Checks Paid wizard and can be transferred back to Prevail and mark the item as Paid in the ledger. Transfer Wizards The Transfer Wizards are: Invoice Transfer, Check Request, Customer Payments, and Check Printed. 130 Invoice Transfer This screen displays all Prevail ledger items marked “To Invoice”, regardless of the matter they came from or the user that marked them as such. Click the Select box for each item you want to transfer to QuickBooks™, or click the Select column heading to select all. Click Next, then click yes to continue. The selected items will be transferred into QuickBooks™. You’ll see a message on the screen notifying you that the transfer has been completed. If there were any transfer errors, such as items not matched, or customers not matched, or any other transfer errors, you’ll see a screen like the one below detailing the issues. Click Match Now and you’ll see the screen below. Here you’ll match the Prevail client/customer(s) to the corresponding party in QuickBooks™. If you know they’re not already in QuickBooks™, simply select the option to Add to QuickBooks™ and click Done. If you’re not sure click the Get Customer List From QuickBooks™. If they’re on the list, select the correct match. Do this for each unmatched party and click Done. 131 Next you see a message screen letting you know how many clients you’re about to add to QuickBooks™. Click Yes to continue. Then you’ll see the confirmation that they’ve been added. The steps above are virtually the same for a Check Request where the Vendor has not been matched to QuickBooks™. If you try to initiate an Invoice Transfer or Check Request in the Transfer Wizards and you have any unmatched parties or items, you’ll see a message like the one below. 132 Just click Match Now and you’ll see a screen like this, where you can match or add the appropriate items and or parties. Then you’ll see the item(s) available for transfer and you can complete the transfer process. 133 Check Request In the Check Request screen you have a separate selection to process check requests from the Ledger, or the Trust Ledger. They work the same way. Pick the one you want to work with and click “Next”. Using the same method as with the Invoice Transfer, click the Select box next to the items you want to send to QuickBooks™, and click “Next”. The items will be transferred to QuickBooks™. Check Printed This wizard allows you to select the Ledger, or Trust. It will then import the check # and date from QuickBooks™ for all the checks written to pay the Prevail check requests. You’ll see the following screens: 134 It will update each corresponding ledger record with the payment information and mark the item Paid. Anyone with access to the Ledger can see which items were paid and when. As of this writing, Prevail does not have a Date Paid field in the Ledger. Therefore only the check number from QuickBooks™ is imported into Ledger items marked Paid from the transfer wizard. Customer Payments This wizard lets you transfer payment information from QuickBooks™ to Prevail, for payments made against invoices created from Prevail. It will create a Payment record in the ledger for each payment made against an Invoice created from Prevail. When an Invoice created from Prevail is paid in full in QuickBooks™ it will add the payment type or check number to each ledger item in Prevail that was paid, and the item will be marked as Paid. Here are some typical error messages you might encounter during the Customer Payments transfer process. The first was an invoice that was transferred from Prevail and then deleted in QuickBooks™. The others are all due to having a dialog box open in QuickBooks™, which interfered with the transfer process. 135 Index adding users, 2 appointments cancelling, 55 creating, 53 deleting, 55 attaching parties to matters or prospects, 48, 49 SSA Office/ODAR/DDS Attach Wizard, 48 backing up your data, 114 Briefcase accessing matters offsite, 99 copying matters to, 98 removing matters from, 99 calendar appointments, 53 Events tab, 68, 69 navigation, 50 Outlook Sync, 55 tasks, 51 case type setup, 10 Claims tab, 77 Control Panel downloading updates, 105 pack & reindex, 107 repairing field name errors, 106 Damages tab, 88 Databank, 34 deleting users, 4 Disabilities tab, 80 e-mail scanning for replies, 96 sending, 95 Employment tab, 82, 83 Events tab, 68, 69 filtering entries on tabs, 111 Firm Log, 43 grid controls filtering, 111 grouping, 112 sorting, 111 History tab, 62 copying directories (folders) to, 64 copying e-mails to, 64 copying files to, 64 scanning documents to, 64 web camera, 64 Home tab, 60 intake questionnaire example, 33 setup, 30 taking a new call, 90 law type setup, 8 Ledger Export Wizard, 42, 43 Ledger tab, 75, 118, 119 Matter tab, 1, 61 matters activating, 47 attaching parties, 48, 49 closing, 47 creating, 46 deleting, 47 searching, 57 Medical tab, 69 requesting records from medical providers, 71 scanning medical records to, 71 merge documents cloning templates, 15 creating new templates, 17, 19 creating PDF templates, 19 deleting templates, 21 generating, 65 Negotiation tab, 85 Notes tab, 74 Outlook Sync, 55 pack & reindex, 107 Photos tab, 73 Power Search, 67, 68 printing tabs, 113 Process Builder creating a "standard" process, 38 creating an "auto-fill" process, 40 description, 36 Processes tab, 77 prospects closing, 47 creating, 46 deleting, 47 repairing field name errors, 106 reports, 103 Rolodex adding entries to, 44 adding your office, 5 deleting entries, 59, 106, 109 searching, 58 types, 13 i security setup, 7 Security Setup, 7 SSA Office/ODAR/DDS Attach Wizard, 48 Sticky Notes, 92 Strategy tab, 90 tabs Claims, 77 Damages, 88 Disabilities, 80 Employment, 82, 83 Events, 68, 69 History, 62 Home, 60 Ledger, 75, 118, 119 Matter, 1, 61 Medical, 69 ii Negotiation, 85 Notes, 74 Photos, 73 printing, 113 Processes, 77 Strategy, 90 Work, 82, 83 tasks completing, 53 creating, 51 updates, 105 users deleting, 4 security, 7 Work tab, 82, 83