1
Z17160
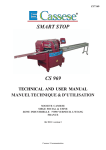
CS 969
QUICK / SMART STOP
TECHNICAL AND USER MANUAL
MANUEL D’UTILISATION & TECHNIQUE
MANUAL DE UTILIZACION Y TECNICO
CASSESE SA
ZONE INDUSTRIELLE 77390 VERNEUIL L’ETANG FRANCE
04 / 2006
Cassese / Communication
CS 969
QUICK / SMART STOP
TECHNICAL DATA
1
DIAGRAM PROGRAM
1
UNPACKING, ASSEMBLY, ADJUSTEMENT, CONNECTING
2, 3, 4
USING THE 969 QUICK/SMART STOP :
- THE TOUCH SCREEN
5
- SMART STOP : REBATE BOTTOM THICKNESS MEASURER
6
- CREATING / MODIFYING / DELETING A FILE
7
EXECUTING A FILE
8
STANDARD FRAMES
9
MENU MAINTENANCE PARAMETERS
9
Cassese / Communication
04/ 2006
TECHNICAL DATA
Dimensions: length 2390 mm / width 512 m / height 1130 mm
Power supply: 380 V / 220 V distributed from the 45° or multi-angle saw 969
Automatic stop measuring function: See diagram below.
Thickness measurement without rebate: Max. moulding thickness check 150 mm.
Options: Length measurement greater than 1860 mm on request / Bar code scanning/
PC connection.
MOULDING WIDTH MINI 10 INTER
2160 maxi
10 inter
100 int min. with moulding 10
MOULDING CUTTING PLANE
MOULDING WIDTH MAXI 150 INTER
1860 max with moulding 150
150 inter
100 mini with moulding 150
MOULDING CUTTING PLANE
PROGRAM OF QUICK / SMART STOP CS 969
CHOICE OF LANGUAGE
START UP SCREEN STANDARD PLAY
STOP OFFSET
LOCK EXT. DIMENSION
MAIN MENU
MAINTENANCE
STANDARD SIZES
ARTICLES FILE
EXECUTE
INCREASE PLAY
CREATE
MODIFY
ERASE
ARTICLES LIST
ARTICLE TO CREATE
ARTICLE’S SPECIFICATION
DIMENSIONS :
MOULDING WIDTH
FRAME WIDTH
FRAME LENGTH
MARIE LOUISE FUNCTION
1
UNPACKING THE NUMERIC STOP (NS)
1
3
2
V1
V2
P1
P2
Open the crate and put the NS foot stand into an upright position.
With a 4mm hex head key, unscrew the 4 screws of the 2 foot stand locking
plates: P1 and P2 . Push P1 and P2 right back with a mallet, then slide them down
to the bottom of each foot. Retighten the 4 screws of plates P1 and P2.
With a 5mm hex head key, unscrew V1 and V2 and put the NS feet in the outside
position as shown in figures 3 and 4.
4
ASSEMBLY OF THE NUMERIC STOP (NS)
The NS can only be assembled after the CS 969 has been made level on the ground. The right-hand
extension and its support bracket have been dismantled and the 2 frame fastening screws are used.
THE FOLLOWING PROCEDURE REQUIRES AT LEAST TWO PEOPLE TO CARRY IT OUT
CUTTING
TABLE
CUTTING
TABLE
E
E
Take the NS out of the crate and turn it over. Place the bed of the NS on bracket E, and screw them together
(10mm long tubular socket wrench + 5mm hex head key) without tightening, with the 2 screws, 2 washers and
2 nuts provided.
T3
T3
3
R1
2
1
R2
GB
Z
V1
Unlock locking screw Z and slide the guide GB of the NS
along screws 1-2-3 of the right-hand table and the nuts of
the 2 ruler supports R1 and R2. Screw 3 should be visible
in hole T3. Tighten screws 1, 2, 3 and V1 and V2 of ruler
supports R1 and R2 with a 4mm hex head key.
V2
R2
1
2
ADJUSTMENT OF THE NUMERIC STOP (NS)
GA
Z
Slide the NS head towards the cutting table and position plate
GA right next to screw VB1 (see fig 4: PR= reference position).
Tighten screw VB1 with a 4mm hex head key.
Repeat for the following screw (VB2), and so on for the other
screws up to the end of the NS.
TB
GB
VB1Fig 2
GA
TB
VB2
VB1
TB V2
PR
VB1
Lining up the stops:
Pass the thread under the head of the NS against the inner face of the guide
GB. Put in one screw and two nuts at one end of the thread (looped) and
hook to the left tip of the left extension stop.
Repeat for the other end of the thread. Adjust the length of the thread so as
to create tension when it is hooked to the right tip of the NS guide. Increase
the tension in the thread by tightening the nuts with a 10mm open end
wrench.
GB
PR
Left hand
extension
NS
Proper adjustment:
1) The thread is stretched uniformly on the right and left stops.
2) There is no gap in the STOP/MACHINE joint (J).
If this is not the case, move the NS sideways until the thread is
fully stretched on the two stops and the gap in joint J disappears.
STOP
CS 969
Perpendicular level (base)
fig 5
J
Table
3
Stop
Horizontal
level
Levelling:
With a 19mm open-end wrench, adjust the NS levels in relation to
the machine table by screwing and unscrewing nut EH of the NS
feet. Check the levels with a ruler.
EH
After adjusting level alignment, tighten the nuts of bracket E
permanently (10mm tubular socket wrench + 5mm hex head
key). Remove the alignment thread.
2
Insert the plug at the end of the section.
CONNECTING THE NUMERIC STOP
The NS has 3 DIN plugs to be connected to the machine, above the
front right-hand foot.
1
2
3
1
MALE
5P DIN
2
FEMALE
4P DIN
3
FEMALE
5P DIN
4
USING THE 969 QUICK/SMART STOP
The operation of the stop has almost no effect on saw operation.
The only signals exchanged are:
- Disabling stop movement if the blades are moving forward.
- Rebate bottom measurement pushbutton (Smart Stop).
- Rebate bottom measurement coder value (Smart Stop).
The 969 Quick Stop/Smart Stop can store 800 files comprising:
- An 8-digit reference.
- Moulding rebate bottom thickness (accuracy: 1/10th mm).
- Frame width (accuracy 1/10th mm).
- Frame length (accuracy 1/10th mm).
- Dimension position: Internal or external.
The 969 Quick Stop/Smart Stop can also store 80 standard frames identified only by their
length and width dimensions.
Using the touch screen:
The 969 Quick Stop/Smart Stop is equipped with an intuitive touch screen for man/machine
dialogue. The operating principle is the same as for the other machines in the range (4095/3099/
2095).
The screen only displays the information required and the keys represent the only possible
choices. This makes it much simpler to use as the user is guided.
When the numeric keypad appears, any values changed must be validated.
If the terminal detects a problem, the corresponding message is displayed until the problem is
remedied (e.g. “STOP OFF” etc.).
At start-up, the “initialisation” screen appears (programme version, screen version, number of
cuts, distance travelled and choice of available languages).
When the screen is touched, the main menu appears.
SMART STOP: REBATE BOTTOM THICKNESS MEASURER
Switch the machine on by setting the main switch to ON.
G
0
If you are using the SMART STOP, the following warning message appears if the measurer
button is pressed:
-> In this case, you will need to remove any moulding and let the measurer position itself
against the fixed rule G. Now, still keeping the measurer button pressed down, touch the RESET
MEASURER screen key.
-> If you make a mistake (e.g. a moulding was still in place!), you can start the procedure again
via the MAINTENANCE menu.
Once the measurer origin is set, the execute screen will appear when the measurer button is
touched:
The moulding measurement will be displayed in the MEASUREMENT key (032.1 for example).
The measurement is validated by touching the MEASUREMENT key and it will be used to compute the required position.
CREATING / MODIFYING / DELETING A FILE
Starting from the main menu, press the FILES menu. The files sub-menu appears.
- Create
- Modify
- Erase
- Free memory: xxx/800
All the submenus of CREATE/MODIFY/DELETE contain a FILE LIST key which will provide
a list of files already saved.
Touch CREATE, then type the reference of your file (8 digits max.) using the numeric key pad.
Touch the validation key
. The message ‘PLEASE WAIT’ appears for about 1/2 second
then the file data screen appears. You can modify any of the values using the numeric keypad.
All the values entered must be validated immediately by touching the
key. Use the
key
to move from one value to another.
The meaning of the values displayed is as follows:
mould.th.: Moulding thickness at the bottom of the rebate.
pos
: Dimension position: Internal or external.
EXTERNAL DIMENSION
wd : Frame width
lgn : Frame length
INTERNAL DIMENSION
Once the values have been entered, you can use the OK key to validate the file or choose not to
validate it and return to the file menu using the RET key.
Likewise, from the file menu screen, you can modify an existing file, delete a file or view the
file list. The files are not necessarily arranged in chronological entry order. A deleted file is in
fact a file with values set to 0000 (this programme function is also found on models CS4095 /
CS2095).
EXECUTING A FILE
In the main menu, touch EXECUTE.
If the stop is not yet initialised, it will return to its origin point (stop offset). This will be the one
and only time that automatic initialisation occurs after switching on; after this the position is set
automatically. The first execution screen is then displayed.
The file parameters displayed in this screen
are the last parameters created, modified,
listed or executed. This means that after a
machine power failure, you do not need to
re-enter a reference before resuming work.
Also, you can list the file that you are interested in and then execute it without having
to call up its reference.
You can call up a reference for execution via the FILE key. You can modify the execution parameters by touching GIVE SIZES or STD SIZES.
This does not alter the saved parameters, but only those that are executed. In every case:
The dimension depends on the moulding thickness and the dimension position: Internal or External.
- If the dimension is INTERNAL, the standard play (allowance) is automatically added (see
how to set this play in Parameters section). The play for the cut to be made can be modified by
pressing the ADD PLAY key on the screen.
- The minimum and maximum measure capacities depend on the moulding thickness and the
dimension position (internal / external).
- Use the dimension keys that are shown next to the length and width of the frame to switch
from short to long dimension.
- Use INTER. / EXTER. to switch your choice between internal (rebate) and external (outside
of frame) measures (unless the external dimension is locked – see Parameters section).
- The machine features a cut counter which is incremented each time the blades START a cut.
To reset to 0000, touch the CUT key. This does not reset the general counter to 00000000 (displayed on the first screen at start-up).
- If STOP OFF is pressed (red rotating-locking «mushroom» button) the stop returns to its point
of origin after unlocking. Any mouldings present must be removed.
- If a dimension beyond the stop limits is entered, it is automatically reset to the limit position.
STANDARD SIZES:
The 969 Quick Stop/Smart Stop can also
store 80 standard frames identified only by
their length and width dimensions.
The standard frame menu is accessed either
via the Main menu or via the Execution menu.
There are 10 pages of 8 standard sizes. All the
dimensions can be reprogrammed using the
numeric keypad.
A frame is executed by touching its key: the execution screen will appear, allowing only the
length and width values of the standard frame to be adjusted.
This allows standard frames to be combined with the SMART STOP measuring function or a
stored file.
MENU MAINTENANCE
PARAMETERS
In the main menu, touch
MAINTENANCE to access the parameters
page.
All the values can be modified. There is no need to switch off the power for the new values to
be acknowledged.
RESET MEASURER : Press the measurer button and this key simultaneously to reset the measurer origin, if it is incorrectly set.
STANDARD PLAY: Type the play value allowance you wish to add automatically for internal
dimension positioning, e.g. 1.5 mm.
Stop mechanical offset: Dimension at which the automatic stop is initialised each time the
power is switched on and the EXECUTE key is touched for the first time. This dimension can
be checked by cutting a moulding at 45° and measuring its thickness without rebate. If
necessary this dimension can be adjusted each time a stop or coder is removed. In this case,
check that the stop initialises approximately 2-3 cm beyond the proximity detector of the origin
take-up area.
LOCK EXT. SIZE : Type the value ‘1’ if you do not wish the operator to be able to work with
external dimensions (the INTER/EXTER keys will be disabled).
To release, type the value ‘0’.
Pin code: Reserved for maintenance.