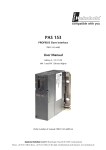
1
Preface, Contents Fault-Tolerant Programmable Logic Controllers S7-400H Installation Options SIMATIC Getting Started Installation of a CPU 41x-H Automation System S7-400H Fault-tolerant Systems System and Operating Modes of the S7-400H Linking and Synchronizing Manual Using I/O on the S7-400H Communication Functions Configuring with STEP 7 Failure and Replacement of Components During Operation Modifying the System During Operation Synchronization module Technical Specifications 1 2 3 4 5 6 7 8 9 10 11 12 13 Appendices This manual has the order number: 6ES7988-8HA10-8BA0 Characteristic Values of Redundant Programmable Logic Controllers A Single Operation B Converting from S5-H to S7-400H C Differences Between Fault-Tolerant Systems and Standard Systems D Function Modules and Communication Processors Used on the S7-400H E Connection Examples for Redundant I/O F Glossary, Index Edition 07/2003 A5E00068197-07 Safety Guidelines This manual contains notices intended to ensure personal safety, as well as to protect the products and connected equipment against damage. These notices are highlighted by the symbols shown below and graded according to severity by the following texts: ! ! ! Danger indicates that death, severe personal injury or substantial property damage will result if proper precautions are not taken. Warning indicates that death, severe personal injury or substantial property damage can result if proper precautions are not taken. Caution indicates that minor personal injury can result if proper precautions are not taken. Caution indicates that property damage can result if proper precautions are not taken. Notice draws your attention to particularly important information on the product, handling the product, or to a particular part of the documentation. Qualified Personnel Only qualified personnel should be allowed to install and work on this equipment. Qualified persons are defined as persons who are authorized to commission, to ground and to tag circuits, equipment, and systems in accordance with established safety practices and standards. Correct Usage Note the following: ! Warning This device and its components may only be used for the applications described in the catalog or the technical description, and only in connection with devices or components from other manufacturers which have been approved or recommended by Siemens. This product can only function correctly and safely if it is transported, stored, set up, and installed correctly, and operated and maintained as recommended. Trademarks SIMATIC, SIMATIC HMI and SIMATIC NET are registered trademarks of SIEMENS AG. Third parties using for their own purposes any other names in this document which refer to trademarks might infringe upon the rights of the trademark owners. Copyright W Siemens AG 1998-2003 All rights reserved Disclaim of Liability The reproduction, transmission or use of this document or its contents is not permitted without express written authority. Offenders will be liable for damages. All rights, including rights created by patent grant or registration of a utility model or design, are reserved. We have checked the contents of this manual for agreement with the hardware and software described. Since deviations cannot be precluded entirely, we cannot guarantee full agreement. However, the data in this manual are reviewed regularly and any necessary corrections included in subsequent editions. Suggestions for improvement are welcomed. Siemens AG Bereich Automation and Drives Geschaeftsgebiet Industrial Automation Systems Postfach 4848, D- 90327 Nuernberg Index-2Aktiengesellschaft Siemens Siemens AG 1998-2003 Technical data subject to change. Automation System S7-400HTitel 2 A5E00068197-07 6ES7988-8HA10-8BA0 Preface Purpose of the manual The present manual is intended for persons involved in the areas of configuration, commissioning and servicing of programmable logic control systems. To help you get familiar with the product, we recommend that you start with the example in Chapter 3. It shows you an easy method of getting started on the subject of fault-tolerant systems. Basic knowledge required In order to understand the manual, you will need to be familiar with the general principles of automation technology. Knowledge of S7 programs is also a prerequisite; you can read more about S7 programs in the Programming with STEP 7 manual. As you need the STEP 7 standard software while you are configuring, you should also be familiar with running the standard software, as explained in the STEP 7 User Manual. Target Group This manual is aimed at people with the required qualifications to commission, operate and maintain the products described. Validity of the manual The manual is relevant to the following components: • CPU 414-4H as of firmware version V3.1 • CPU 417-4H as of firmware version V3.1 • Optional package “S7 H Systems” beginning with Version 5.2 Automation System S7-400H Fault-tolerant Systems A5E00068197-07 iii Preface Changes compared to the previous version The current version of the ”Redundant Systems” manual contains the following changes compared with the previous version: • We have expanded the spectrum of redundant I/O modules. Note: You can identify the previous version of the ”Redundant Systems” manual by the number on the footer: A5E00068197-06. The current number is : A5E00068197-07. Certification The SIMATIC S7-400 product range has the following certificates: • Underwriters Laboratories, Inc.: UL 508 (Industrial Control Equipment) • Canadian Standards Association: CSA C22.2 Number 142 (Process Control Equipment) • Factory Mutual Research: Approval Standard Class Number 3611. Detailed information about the certifications and standards is available in the reference manual “Automation System S7-400, Module Specifications” in Chapter 1.1, Standards and Certifications. CE Labeling The SIMATIC S7-400 product range complies with the requirements and protection objectives of the following EU directives: • EC low voltage directive 73/23/EEC • EC electromagnetic compatibility directive 89/336/EEC C-Tick Mark The SIMATIC S7-400 product range complies with the requirements of the AS/NZS 2064 standard (Australia and New Zealand). Standards The SIMATIC S7-400 product range complies with the requirements and criteria of the IEC 61131-2. Place of this documentation in the information environment This manual can be order separately under the order number 6ES7988-8HA10-8BA0. It is also available in electronic version on the product CD “H Options Package”. iv Automation System S7-400H Fault-tolerant Systems A5E00068197-07 Preface Online Help In addition to the manual, detailed support on how to use the software is provided by the online Help system integrated in the software. The Help system can be accessed using a number of interfaces: • The Help menu contains a number of commands: Contents opens the Help index. You will find help on fault-tolerant systems at Call Help on options packages, configuring fault-tolerant systems. • How to Use Help provides detailed instructions on how to use the online help system. • Context-sensitive Help provides information on the current context - for example, on an open dialog box or an active window. It is accessed by means of the “Help” button or F1. • Another form of context-sensitive Help is the status bar. A brief explanation of each menu command is displayed here when you place the mouse pointer on a command. • A brief explanation of the toolbar buttons is also shown when the mouse pointer comes to rest for a short time on the buttons. If you would like to read information from online Help in printed form, you can print individual topics, books or the entire Help. Finding Your Way To help you find special information quickly, the manual contains the following access aids: • At the start of the manual you will find a complete table of contents and a list of the diagrams and tables that appear in the manual. • An overview of the contents of each section is provided in the left column on each page of each chapter. • You will find a glossary in the appendix at the end of the manual. The glossary contains definitions of the main technical terms used in the manual. • At the end of the manual you will find a comprehensive index which gives you rapid access to the information you need. Automation System S7-400H Fault-tolerant Systems A5E00068197-07 v Preface Note You require the following manuals and manual packages in order to program and commission an S7-400: Manual/ Manual Package Standard Software for S7 and M7 Contents • Installing and starting up STEP 7 on a programming device / PC • Working with STEP 7 with the following contents: STEP 7 Basic Information Managing projects and files Configuring and assigning parameters to the S7-400 configuration Assigning symbolic names for user programs Creating and testing a user program in STL/LAD Creating data blocks Configuring the communication between two or more CPUs Loading, storing and deleting user programs in the CPU / programming device Monitoring and controlling user programs Monitoring and controlling the CPU • Guide for efficiently implementing the programming task with the programming device / PC and STEP 7 • How the CPUs work (for example, memory concept, access to inputs and outputs, addressing, blocks, data management) • • • • • Description of STEP 7 data management Using data types of STEP 7 Using linear and structured programming Using block call instructions Using the debug and diagnostics functions of the CPUs in the user program (for example, error OBs, status word) STEP 7 Reference Information • Basic procedure for working with STL, LAD, or FBD (for example, structure of Statement List (STL) for S7-300 and S7-400 • • • • • • Ladder Logic (LAD) for S7-300 and S7-400 Function Block Diagram (FBD) for S7-300 and S7-400 STL, LAD, or FBD, number formats, syntax) Description of all instructions in STEP 7 (with program examples) Description of the various addressing methods in STEP 7 (with examples) Description of all functions integrated in the CPUs Description of the internal registers in the CPU Description of all system functions integrated in the CPUs Description of all organization blocks integrated in the CPUs System and Standard Functions Manual PG 7xx vi • Description of the programming device hardware • Connecting a programming device to various devices • Starting up a programming device Automation System S7-400H Fault-tolerant Systems A5E00068197-07 Preface Recycling and Disposal The S7-400 H can be recycled due to the use of non-toxic materials in its construction. For environmentally compatible recycling and disposal of your old device in accordance with the current state of the art, please contact a certified recycling company for electronic component waste. Further Support If you have any technical questions, please get in touch with your Siemens representative or agent responsible. http://www.ad.siemens.com/automation/partner H/F Competence Center The HF Competence Center in Nuremberg offers a special workshop on the subject redundant automation system SIMATIC S7. In addition, the H/F Competence Center offers you on-site assistance during configuration, commissioning or in the event of problems. Phone: +49 (911) 895-4759 Fax: +49 (911) 895-4519 Training Centers We offer a number of courses to help you become familiar with the SIMATIC S7 programmable logic controller. Please contact your regional training center or our central training center in D 90327 Nuremberg, Germany for details: Phone: +49 (911) 895-3200. Internet: http://www.sitrain.com Automation System S7-400H Fault-tolerant Systems A5E00068197-07 vii Preface A&D Technical Support Worldwide, available 24 hours a day: Nuernberg Johnson City Beijing Technical Support Worldwide (Nuernberg) Technical Support 24 hours a day, 365 days a year Phone: +49 (0) 180 5050-222 Fax: +49 (0) 180 5050-223 E-Mail: adsupport@ siemens.com GMT: +1:00 Europe / Africa (Nuernberg) United States (Johnson City) Asia / Australia (Beijing) Authorization Technical Support and Authorization Technical Support and Authorization Local time: Mon.-Fri. 7:00 to 17:00 Local time: Mon.-Fri. 8:00 to 17:00 Local time: Mon.-Fri. 8:30 to 17:30 Phone: Fax: +49 (0) 180 5050–222 +49 (0) 180 5050-223 Phone: +1 (0) 423 262 2522 Phone: +86 10 64 75 75 75 Fax: +1 (0) 423 262 2289 Fax: +86 10 64 74 74 74 E-Mail: adautorisierung@ siemens.com +1:00 E-Mail: simatic.hotline@ sea.siemens.com E-Mail: GMT: –5:00 GMT: adsupport.asia@ siemens.com +8:00 GMT: The languages of the SIMATIC Hotlines and the authorization hotline are generally German and English. viii Automation System S7-400H Fault-tolerant Systems A5E00068197-07 Preface Service & Support on the Internet In addition to our documentation, we offer our Know-how online on the internet at: http://www.siemens.com/automation/service&support where you will find the following: • The newsletter, which constantly provides you with up–to–date information on your products. • The right documents via our Search function in Service & Support. • A forum, where users and experts from all over the world exchange their experiences. • Your local representative for Automation & Drives via our representatives database. • Information on field service, repairs, spare parts and more under “Services”. Automation System S7-400H Fault-tolerant Systems A5E00068197-07 ix Preface x Automation System S7-400H Fault-tolerant Systems A5E00068197-07 Contents 1 2 3 4 Fault-Tolerant Programmable Logic Controllers . . . . . . . . . . . . . . . . . . . . . . . . . . 1-1 1.1 Redundant Programmable Logic Controllers in the SIMATIC Series . . . . 1-2 1.2 Increasing System Availability . . . . . . . . . . . . . . . . . . . . . . . . . . . . . . . . . . . . . 1-4 S7-400H Installation Options . . . . . . . . . . . . . . . . . . . . . . . . . . . . . . . . . . . . . . . . . . . . 2-1 2.1 Base System of the S7-400H . . . . . . . . . . . . . . . . . . . . . . . . . . . . . . . . . . . . . 2-3 2.2 I/O Modules for S7-400H . . . . . . . . . . . . . . . . . . . . . . . . . . . . . . . . . . . . . . . . . 2-5 2.3 Communication . . . . . . . . . . . . . . . . . . . . . . . . . . . . . . . . . . . . . . . . . . . . . . . . . 2-6 2.4 Tools for Configuration and Programming . . . . . . . . . . . . . . . . . . . . . . . . . . . 2-7 2.5 The User Program . . . . . . . . . . . . . . . . . . . . . . . . . . . . . . . . . . . . . . . . . . . . . . . 2-7 2.6 Documentation . . . . . . . . . . . . . . . . . . . . . . . . . . . . . . . . . . . . . . . . . . . . . . . . . . 2-9 Getting Started . . . . . . . . . . . . . . . . . . . . . . . . . . . . . . . . . . . . . . . . . . . . . . . . . . . . . . . . . 3-1 3.1 Requirements . . . . . . . . . . . . . . . . . . . . . . . . . . . . . . . . . . . . . . . . . . . . . . . . . . . 3-2 3.2 Configuring Hardware and Starting Up the S7-400H . . . . . . . . . . . . . . . . . . 3-3 3.3 Examples of Fault-Tolerant System Response to Faults . . . . . . . . . . . . . . 3-5 Installation of a CPU 41x-H . . . . . . . . . . . . . . . . . . . . . . . . . . . . . . . . . . . . . . . . . . . . . . 4-1 4.1 Controls and Indicators of the CPUs . . . . . . . . . . . . . . . . . . . . . . . . . . . . . . . 4-2 4.2 Monitoring Functions of the CPU . . . . . . . . . . . . . . . . . . . . . . . . . . . . . . . . . . 4-6 4.3 Status and Error LEDs . . . . . . . . . . . . . . . . . . . . . . . . . . . . . . . . . . . . . . . . . . . 4-8 4.4 Mode Selector . . . . . . . . . . . . . . . . . . . . . . . . . . . . . . . . . . . . . . . . . . . . . . . . . . 4-11 4.5 4.5.1 4.5.2 Expanded Memory . . . . . . . . . . . . . . . . . . . . . . . . . . . . . . . . . . . . . . . . . . . . . . Expanding Load Memory with Memory Cards . . . . . . . . . . . . . . . . . . . . . . . Expanding the Working Memory of the CPU 417-4 H with Memory Modules . . . . . . . . . . . . . . . . . . . . . . . . . . . . . . . . . . . . . . . . . . . . 4-15 4-17 4.6 Multipoint Interface (MPI) . . . . . . . . . . . . . . . . . . . . . . . . . . . . . . . . . . . . . . . . . 4-24 4.7 PROFIBUS DP Interface . . . . . . . . . . . . . . . . . . . . . . . . . . . . . . . . . . . . . . . . . 4-25 4.8 Overview of the Parameters for the S7-400 CPUs . . . . . . . . . . . . . . . . . . . 4-26 4.9 4.9.1 4.9.2 4.9.3 CPU 41x-H as Profibus DP Master . . . . . . . . . . . . . . . . . . . . . . . . . . . . . . . . DP Address Areas of the CPUs 41x . . . . . . . . . . . . . . . . . . . . . . . . . . . . . . . CPU 41x as DP Master . . . . . . . . . . . . . . . . . . . . . . . . . . . . . . . . . . . . . . . . . . Diagnostics of the CPU 41x as DP Master . . . . . . . . . . . . . . . . . . . . . . . . . . 4-29 4-30 4-30 4-35 Automation System S7-400H Fault-tolerant Systems A5E00068197-07 4-22 xi Contents 4.10 4.10.1 4.10.2 4.10.3 4.10.4 Consistent Data . . . . . . . . . . . . . . . . . . . . . . . . . . . . . . . . . . . . . . . . . . . . . . . . . Consistency for Communication Blocks and Functions . . . . . . . . . . . . . . . Access to the Working Memory of the CPU . . . . . . . . . . . . . . . . . . . . . . . . . Consistency Rules for SFB 14 “GET” and Reading Tags . . . . . . . . . . . . . . Reading Data consistently from a DP Standard Slave and Writing Consistently to a DP Standard Slave . . . . . . . . . . . . . . . . . . . . Consistent Data Access without the Use of SFC 14 or SFC 15 . . . . . . . . 4-40 4-41 4-42 4-43 System and Operating Modes of the S7-400H . . . . . . . . . . . . . . . . . . . . . . . . . . . . . 5-1 5.1 Introduction . . . . . . . . . . . . . . . . . . . . . . . . . . . . . . . . . . . . . . . . . . . . . . . . . . . . . 5-2 5.2 System Modes of the S7-400H . . . . . . . . . . . . . . . . . . . . . . . . . . . . . . . . . . . . 5-4 5.3 5.3.1 5.3.2 5.3.3 5.3.4 5.3.5 5.3.6 Operating Modes of the CPUs . . . . . . . . . . . . . . . . . . . . . . . . . . . . . . . . . . . . STOP Operating Mode . . . . . . . . . . . . . . . . . . . . . . . . . . . . . . . . . . . . . . . . . . . STARTUP Operating Mode . . . . . . . . . . . . . . . . . . . . . . . . . . . . . . . . . . . . . . . Operating States LINK–UP and UPDATE . . . . . . . . . . . . . . . . . . . . . . . . . . . Operating State RUN . . . . . . . . . . . . . . . . . . . . . . . . . . . . . . . . . . . . . . . . . . . . Operating States HOLD . . . . . . . . . . . . . . . . . . . . . . . . . . . . . . . . . . . . . . . . . . TROUBLESHOOTING Operating State . . . . . . . . . . . . . . . . . . . . . . . . . . . . 5-5 5-6 5-7 5-7 5-8 5-9 5-10 5.4 Self-Test . . . . . . . . . . . . . . . . . . . . . . . . . . . . . . . . . . . . . . . . . . . . . . . . . . . . . . . 5-11 5.5 Time Response . . . . . . . . . . . . . . . . . . . . . . . . . . . . . . . . . . . . . . . . . . . . . . . . . 5-14 5.6 Evaluation of Process Interrupts in the S7-400H System . . . . . . . . . . . . . . 5-14 Linking and Synchronizing . . . . . . . . . . . . . . . . . . . . . . . . . . . . . . . . . . . . . . . . . . . . . . 6-1 6.1 Effects of Link-up and Update . . . . . . . . . . . . . . . . . . . . . . . . . . . . . . . . . . . . . 6-2 6.2 6.2.1 6.2.2 6.2.3 6.2.4 Functional Sequence of Link-up and Update . . . . . . . . . . . . . . . . . . . . . . . . Process of Link-up . . . . . . . . . . . . . . . . . . . . . . . . . . . . . . . . . . . . . . . . . . . . . . Updating Procedure . . . . . . . . . . . . . . . . . . . . . . . . . . . . . . . . . . . . . . . . . . . . . Switch to CPU with modified configuration . . . . . . . . . . . . . . . . . . . . . . . . . . Block Link-up and Update . . . . . . . . . . . . . . . . . . . . . . . . . . . . . . . . . . . . . . . . 6-3 6-7 6-9 6-12 6-13 6.3 6.3.1 6.3.2 6.3.3 6.3.4 Time Monitoring . . . . . . . . . . . . . . . . . . . . . . . . . . . . . . . . . . . . . . . . . . . . . . . . . Time Response . . . . . . . . . . . . . . . . . . . . . . . . . . . . . . . . . . . . . . . . . . . . . . . . . Determination of the Monitoring Times . . . . . . . . . . . . . . . . . . . . . . . . . . . . . Influences on the Time Response . . . . . . . . . . . . . . . . . . . . . . . . . . . . . . . . . Performance Values for Link–up and Update . . . . . . . . . . . . . . . . . . . . . . . . 6-14 6-16 6-17 6-24 6-25 6.4 Peculiarities during Link-up and Update . . . . . . . . . . . . . . . . . . . . . . . . . . . . 6-27 Using I/O on the S7-400H . . . . . . . . . . . . . . . . . . . . . . . . . . . . . . . . . . . . . . . . . . . . . . . . 7-1 7.1 Introduction . . . . . . . . . . . . . . . . . . . . . . . . . . . . . . . . . . . . . . . . . . . . . . . . . . . . . 7-2 7.2 Using Single-Channel, One-Sided I/O . . . . . . . . . . . . . . . . . . . . . . . . . . . . . . 7-3 7.3 Using Single-Channel, Switched I/O . . . . . . . . . . . . . . . . . . . . . . . . . . . . . . . 7-5 7.4 7.4.1 Connecting Redundant I/O . . . . . . . . . . . . . . . . . . . . . . . . . . . . . . . . . . . . . . . Determining the status of the passivation . . . . . . . . . . . . . . . . . . . . . . . . . . . 7-10 7-33 7.5 Other possibilities for connecting redundant I/O . . . . . . . . . . . . . . . . . . . . . 7-35 4.10.5 5 6 7 xii 4-45 4-47 Automation System S7-400H Fault-tolerant Systems A5E00068197-07 Contents 8 9 10 Communication Functions . . . . . . . . . . . . . . . . . . . . . . . . . . . . . . . . . . . . . . . . . . . . . . 8-1 8.1 Fundamentals and Basic Concepts . . . . . . . . . . . . . . . . . . . . . . . . . . . . . . . . 8-2 8.2 8.2.1 8.2.2 Suitable Networks . . . . . . . . . . . . . . . . . . . . . . . . . . . . . . . . . . . . . . . . . . . . . . . Industrial Ethernet . . . . . . . . . . . . . . . . . . . . . . . . . . . . . . . . . . . . . . . . . . . . . . . PROFIBUS . . . . . . . . . . . . . . . . . . . . . . . . . . . . . . . . . . . . . . . . . . . . . . . . . . . . . 8-5 8-5 8-6 8.3 Supported Communication Services . . . . . . . . . . . . . . . . . . . . . . . . . . . . . . . 8-8 8.4 8.4.1 8.4.2 8-8 8-10 8.4.3 Communications via Fault-tolerant S7 Connections . . . . . . . . . . . . . . . . . . Communications between Fault-Tolerant Systems . . . . . . . . . . . . . . . . . . . Communications between Fault-Tolerant Systems and a Fault-Tolerant CPU . . . . . . . . . . . . . . . . . . . . . . . . . . . . . . . . . . . . . . . . . Communications between Fault-Tolerant Systems and PCs . . . . . . . . . . . 8-12 8-14 8.5 8.5.1 8.5.2 8.5.3 8.5.4 Communications via S7 Connections . . . . . . . . . . . . . . . . . . . . . . . . . . . . . . . Communications via S7 Connections – One-Sided Mode . . . . . . . . . . . . . Communications over Redundant S7 Connections . . . . . . . . . . . . . . . . . . . Communications via a Point-to-Point CP on the ET 200M . . . . . . . . . . . . . Random Connection with Single-channel Systems . . . . . . . . . . . . . . . . . . . 8-15 8-16 8-18 8-19 8-20 8.6 Communication Performance . . . . . . . . . . . . . . . . . . . . . . . . . . . . . . . . . . . . . 8-21 Configuring with STEP 7 . . . . . . . . . . . . . . . . . . . . . . . . . . . . . . . . . . . . . . . . . . . . . . . 9-1 9.1 Installation of the Options Package . . . . . . . . . . . . . . . . . . . . . . . . . . . . . . . . 9-2 9.2 9.2.1 9.2.2 9.2.3 9.2.4 9.2.5 Configuring with STEP 7 . . . . . . . . . . . . . . . . . . . . . . . . . . . . . . . . . . . . . . . . . Rules for Fitting a Fault-Tolerant Station . . . . . . . . . . . . . . . . . . . . . . . . . . . . Configuring Hardware . . . . . . . . . . . . . . . . . . . . . . . . . . . . . . . . . . . . . . . . . . . . Assigning Parameters to Modules in a Fault-Tolerant Station . . . . . . . . . . Recommendations for Setting the CPU Parameters . . . . . . . . . . . . . . . . . . Configuring Networks . . . . . . . . . . . . . . . . . . . . . . . . . . . . . . . . . . . . . . . . . . . . 9-3 9-3 9-4 9-5 9-5 9-7 9.3 Programming Device Functions in STEP 7 . . . . . . . . . . . . . . . . . . . . . . . . . . 9-8 Failure and Replacement of Components During Operation . . . . . . . . . . . . . . . 10-1 10.1 10.1.1 10.1.2 10.1.3 10.1.4 10.1.5 10.1.6 10.2 10.2.1 10.2.2 10.2.3 10.2.4 Failure and Replacement of Components in Central Racks and Expansion Racks . . . . . . . . . . . . . . . . . . . . . . . . . . . . . . . . . . . . . . . . . . . . 10-2 Failure and Replacement of a Central Processing Unit (Fault-Tolerant CPU) . . . . . . . . . . . . . . . . . . . . . . . . . . . . . . . . . . . . . . . . . . . . . 10-3 Failure and Replacement of a Power Supply Module . . . . . . . . . . . . . . . . . 10-5 Failure and Replacement of an Input/Output or Function Module . . . . . . . 10-6 Failure and Replacement of a Communication Processor . . . . . . . . . . . . . 10-7 Failure and Replacement of a Synchronization Submodule or Fiber-Optic Cable . . . . . . . . . . . . . . . . . . . . . . . . . . . . . . . . . . . . . . . . . . . . . 10-8 Failure and Replacement of an IM 460 and IM 461 Interface Module . . . 10-11 Failure and Replacement of Components of the Distributed I/O . . . . . . . . Failure and Replacement of a PROFIBUS-DP Master . . . . . . . . . . . . . . . . Failure and Replacement of a Redundant PROFIBUS-DP Interface Module . . . . . . . . . . . . . . . . . . . . . . . . . . . . . . . . . . . . . . . . . . . . . . . . Failure and Replacement of a PROFIBUS-DP Slave . . . . . . . . . . . . . . . . . Failure and Replacement of PROFIBUS-DP Cables . . . . . . . . . . . . . . . . . . Automation System S7-400H Fault-tolerant Systems A5E00068197-07 10-12 10-13 10-14 10-15 10-16 xiii Contents 11 Modifying the System During Operation . . . . . . . . . . . . . . . . . . . . . . . . . . . . . . . . . . 11-1 11.1 Possible Hardware Modifications . . . . . . . . . . . . . . . . . . . . . . . . . . . . . . . . . . 11-2 11.2 11.2.1 11.2.2 11.2.3 11.2.4 Adding Components in PCS 7 . . . . . . . . . . . . . . . . . . . . . . . . . . . . . . . . . . . . . PCS 7, Step 1: Modification of Hardware . . . . . . . . . . . . . . . . . . . . . . . . . . . PCS 7, Step 2: Offline Modification of the Hardware Configuration . . . . . PCS 7, Step 3: Stopping the Standby CPU . . . . . . . . . . . . . . . . . . . . . . . . . PCS 7, Step 4: Loading New Hardware Configuration in the Standby CPU . . . . . . . . . . . . . . . . . . . . . . . . . . . . . . . . . . . . . . . . . . . . . PCS 7, Step 5: Switch to CPU with Modified Configuration . . . . . . . . . . . . PCS 7, Step 6: Transition to Redundant System Mode . . . . . . . . . . . . . . . PCS 7, Step 7: Changing and Loading User Program . . . . . . . . . . . . . . . . Adding Interface Modules in PCS 7 . . . . . . . . . . . . . . . . . . . . . . . . . . . . . . . . 11-6 11-7 11-8 11-9 11.2.5 11.2.6 11.2.7 11.2.8 11.3 11.3.1 11.3.2 11.3.3 11.3.4 11.3.5 11.3.6 11.3.7 11.3.8 11.4 11.4.1 11.4.2 11.4.3 11.4.4 11.4.5 11.4.6 11.4.7 11.4.8 11.4.9 11.5 11.5.1 11.5.2 11.5.3 11.5.4 11.5.5 11.5.6 11.5.7 11.5.8 11.5.9 xiv 11-10 11-11 11-12 11-13 11-14 Removing Components in PCS 7 . . . . . . . . . . . . . . . . . . . . . . . . . . . . . . . . . . PCS 7, Step I: Offline Modification of the Hardware Configuration . . . . . . PCS 7, Step II: Changing and Loading User Program . . . . . . . . . . . . . . . . PCS 7, Step III: Stopping the Standby CPU . . . . . . . . . . . . . . . . . . . . . . . . . PCS 7, Step IV: Loading New Hardware Configuration in the Standby CPU . . . . . . . . . . . . . . . . . . . . . . . . . . . . . . . . . . . . . . . . . . . . . PCS 7, Step V: Switch to CPU with Modified Configuration . . . . . . . . . . . . PCS 7, Step VI: Transition to Redundant System Mode . . . . . . . . . . . . . . PCS 7, Step VII: Modification of Hardware . . . . . . . . . . . . . . . . . . . . . . . . . . Removing Interface Modules in PCS 7 . . . . . . . . . . . . . . . . . . . . . . . . . . . . . 11-16 11-17 11-18 11-19 Adding Components in STEP 7 . . . . . . . . . . . . . . . . . . . . . . . . . . . . . . . . . . . STEP 7, Step 1: Modification of Hardware . . . . . . . . . . . . . . . . . . . . . . . . . . STEP 7, Step 2: Offline Modification of the Hardware Configuration . . . . STEP 7, Step 3: Expanding and Loading Organization Blocks . . . . . . . . . STEP 7, Step 4: Stopping the Standby CPU . . . . . . . . . . . . . . . . . . . . . . . . STEP 7, Step 5: Loading New Hardware Configuration in the Standby CPU . . . . . . . . . . . . . . . . . . . . . . . . . . . . . . . . . . . . . . . . . . . . . STEP 7, Step 6: Switch to CPU with Modified Configuration . . . . . . . . . . . STEP 7, Step 7: Transition to Redundant System Mode . . . . . . . . . . . . . . STEP 7, Step 8: Changing and Loading User Program . . . . . . . . . . . . . . . Adding Interface Modules in STEP 7 . . . . . . . . . . . . . . . . . . . . . . . . . . . . . . . 11-24 11-25 11-26 11-26 11-27 Removing Components in STEP 7 . . . . . . . . . . . . . . . . . . . . . . . . . . . . . . . . . STEP 7, Step I: Offline Modification of the Hardware Configuration . . . . . STEP 7, Step II: Changing and Loading User Program . . . . . . . . . . . . . . . STEP 7, Step III: Stopping the Standby CPU . . . . . . . . . . . . . . . . . . . . . . . . STEP 7, Step IV: Loading New Hardware Configuration in the Standby CPU . . . . . . . . . . . . . . . . . . . . . . . . . . . . . . . . . . . . . . . . . . . . . STEP 7, Step V: Switch to CPU with Modified Configuration . . . . . . . . . . . STEP 7, Step VI: Transition to Redundant System Mode . . . . . . . . . . . . . STEP 7, Step VII: Modification of Hardware . . . . . . . . . . . . . . . . . . . . . . . . . STEP 7, Step VIII: Modifying and Loading Organization Blocks . . . . . . . . Removing Interface Modules in STEP 7 . . . . . . . . . . . . . . . . . . . . . . . . . . . . 11-32 11-33 11-34 11-35 11-19 11-20 11-21 11-22 11-23 11-27 11-28 11-29 11-30 11-31 11-35 11-36 11-37 11-38 11-39 11-40 Automation System S7-400H Fault-tolerant Systems A5E00068197-07 Contents 12 13 A 11.6 11.6.1 11.6.2 11.6.3 11.6.4 11.6.5 Changing the CPU Parameters . . . . . . . . . . . . . . . . . . . . . . . . . . . . . . . . . . . . Step A: Changing the CPU Parameters Offline . . . . . . . . . . . . . . . . . . . . . . Step B: Stopping the Standby CPU . . . . . . . . . . . . . . . . . . . . . . . . . . . . . . . . Step C: Loading Modified CPU Parameters in the Standby CPU . . . . . . . Step D: Switch to CPU with Modified Configuration . . . . . . . . . . . . . . . . . . Step E: Transition to Redundant System Mode . . . . . . . . . . . . . . . . . . . . . . 11-41 11-43 11-43 11-44 11-45 11-46 11.7 11.7.1 11.7.2 Changing the Memory Components of the CPU . . . . . . . . . . . . . . . . . . . . . 11-47 Expanding the Main and/or Load Memory . . . . . . . . . . . . . . . . . . . . . . . . . . . 11-47 Changing the Type of Load Memory . . . . . . . . . . . . . . . . . . . . . . . . . . . . . . . 11-49 Synchronization Module . . . . . . . . . . . . . . . . . . . . . . . . . . . . . . . . . . . . . . . . . . . . . . . . 12-1 12.1 Synchronization Module for S7-400H . . . . . . . . . . . . . . . . . . . . . . . . . . . . . . . 12-2 12.2 Routing Cables Using Fiber Optics . . . . . . . . . . . . . . . . . . . . . . . . . . . . . . . . 12-6 Technical Specifications . . . . . . . . . . . . . . . . . . . . . . . . . . . . . . . . . . . . . . . . . . . . . . . . 13-1 13.1 Technical Specifications of the CPU 414-4H; (6ES7 414-4HJ00-0AB0) . 13-2 13.2 Technical Specifications of the CPU 417-4H; (6ES7 417-4HL01-0AB0) . 13-6 13.3 Run Times of the FCs and FBs for Redundant I/O . . . . . . . . . . . . . . . . . . . 13-10 Characteristic Values of Redundant Programmable Logic Controllers . . . . . . A-1 A.1 Basic Concepts . . . . . . . . . . . . . . . . . . . . . . . . . . . . . . . . . . . . . . . . . . . . . . . . . A-2 A.2 Comparison of MTBFs for Selected Configurations . . . . . . . . . . . . . . . . . . A-4 A.2.1 System Configurations With Central I/O . . . . . . . . . . . . . . . . . . . . . . . . . . . . A-4 A.2.2 System Configurations With Distributed I/O . . . . . . . . . . . . . . . . . . . . . . . . . A-6 A.2.3 Comparison of System Configurations With Standard and Fault-Tolerant Communications . . . . . . . . . . . . . . . . . . . . . . . . . . . . . . . . A-9 B Single Operation . . . . . . . . . . . . . . . . . . . . . . . . . . . . . . . . . . . . . . . . . . . . . . . . . . . . . . . B-1 C Converting from S5-H to S7-400H . . . . . . . . . . . . . . . . . . . . . . . . . . . . . . . . . . . . . . . . C-1 C.1 General Information . . . . . . . . . . . . . . . . . . . . . . . . . . . . . . . . . . . . . . . . . . . . . C-1 C.2 Configuration, Programming and Diagnostics . . . . . . . . . . . . . . . . . . . . . . . C-2 D Differences Between Fault-Tolerant Systems and Standard Systems . . . . . . . D-1 E Function Modules and Communication Processors Used on the S7-400H . . E-1 F Connection Examples for Redundant I/O . . . . . . . . . . . . . . . . . . . . . . . . . . . . . . . . . F-1 F.1 SM 321; DI 8 x AC 120/230 V, 6ES7 321-1FF01-0AA0 . . . . . . . . . . . . . . . F-2 F.2 SM 322; DO 8 x AC 230 V/2 A, 6ES7 322-1FF01-0AA0 . . . . . . . . . . . . . . F-3 F.3 SM 321; DI 16 x AC 120/230 V, 6ES7 321-1FF00-0AA0 . . . . . . . . . . . . . . F-4 F.4 SM 331; AI 8 x 16 Bit; 6ES7331-7NF00-0AB0 . . . . . . . . . . . . . . . . . . . . . . . F-5 F.5 SM 332; AO 4 x 12 Bit; 6ES7 332-5HD01-0AB0 . . . . . . . . . . . . . . . . . . . . . F-6 F.6 SM 421; DI 32 x UC 120 V, 6ES7 421-1EL00-0AA0 . . . . . . . . . . . . . . . . . . F-7 F.7 SM 422; DO 16 x AC 120/230 V/2 A, 6ES7 422-1FH00-0AA0 . . . . . . . . . F-8 F.8 SM 321; DI 16 DC 24 V, 6ES7 321-7BH00-0AB0 . . . . . . . . . . . . . . . . . . . . F-9 F.9 SM 322; DO 32 DC 24 V/0.5 A, 6ES7 322-1BL00-0AA0 . . . . . . . . . . . . . . F-10 F.10 SM 331; AI 8 12 Bit, 6ES7 331-7KF02-0AB0 . . . . . . . . . . . . . . . . . . . . . . . . F-11 Glossary . . . . . . . . . . . . . . . . . . . . . . . . . . . . . . . . . . . . . . . . . . . . . . . . . . . . Glossary-1 Index . . . . . . . . . . . . . . . . . . . . . . . . . . . . . . . . . . . . . . . . . . . . . . . . . . . . . . . Index-1 Automation System S7-400H Fault-tolerant Systems A5E00068197-07 xv Contents Figures 1-1 1-2 1-3 1-4 1-5 2-1 2-2 2-3 3-1 4-1 4-2 4-3 4-4 4-5 4-6 4-7 4-8 4-9 4-10 5-1 5-2 6-1 6-2 6-3 6-4 6-5 7-1 7-2 7-3 7-4 7-5 7-6 7-7 7-8 7-9 7-10 7-11 7-12 7-13 7-14 xvi Operating objectives of redundant programmable logic controllers . . . . . Universal automation solutions with SIMATIC . . . . . . . . . . . . . . . . . . . . . . . Example of redundancy in a network without malfunction . . . . . . . . . . . . . Example of redundancy in a 2-out-of-2 system with malfunction . . . . . . . Example of redundancy in a 2-out-of-2 system with total failure . . . . . . . . Overview . . . . . . . . . . . . . . . . . . . . . . . . . . . . . . . . . . . . . . . . . . . . . . . . . . . . . . . Hardware of the S7-400H base system . . . . . . . . . . . . . . . . . . . . . . . . . . . . . User documentation for fault-tolerant systems . . . . . . . . . . . . . . . . . . . . . . . Hardware configuration . . . . . . . . . . . . . . . . . . . . . . . . . . . . . . . . . . . . . . . . . . Layout of the controls and indicators of the CPU 414-4H/417-4H . . . . . . . Positions of the mode selector . . . . . . . . . . . . . . . . . . . . . . . . . . . . . . . . . . . . Design of the memory card . . . . . . . . . . . . . . . . . . . . . . . . . . . . . . . . . . . . . . . Fitting memory cards in the CPUs . . . . . . . . . . . . . . . . . . . . . . . . . . . . . . . . . Memory card . . . . . . . . . . . . . . . . . . . . . . . . . . . . . . . . . . . . . . . . . . . . . . . . . . . Overview: system configuration for modification of the system during operation . . . . . . . . . . . . . . . . . . . . . . . . . . . . . . . . . . . . Diagnostics with CPU 41x . . . . . . . . . . . . . . . . . . . . . . . . . . . . . . . . . . . . . . . . Diagnostics addresses for the DP master and DP slave . . . . . . . . . . . . . . Data transmission without data consistency . . . . . . . . . . . . . . . . . . . . . . . . . Data transmission without data consistency . . . . . . . . . . . . . . . . . . . . . . . . . Synchronizing the subsystems . . . . . . . . . . . . . . . . . . . . . . . . . . . . . . . . . . . . System and operating modes of the fault-tolerant system . . . . . . . . . . . . . Functional sequence of link-up and update . . . . . . . . . . . . . . . . . . . . . . . . . . Process for update . . . . . . . . . . . . . . . . . . . . . . . . . . . . . . . . . . . . . . . . . . . . . . ............................................................... Significance of the times relevant during the update . . . . . . . . . . . . . . . . . . Relationship between the minimum I/O retention time and the maximum blocking time for priority classes > 15 . . . . . . . . . . . . . . Single-channel, one-way I/O configuration . . . . . . . . . . . . . . . . . . . . . . . . . . Single-channel, switched ET 200M distributed I/O . . . . . . . . . . . . . . . . . . . Redundant I/O in central- and expansion devices . . . . . . . . . . . . . . . . . . . . Redundant I/O in the one-way DP slave . . . . . . . . . . . . . . . . . . . . . . . . . . . . Redundant I/O in the switched DP slave . . . . . . . . . . . . . . . . . . . . . . . . . . . . Redundant I/O in single mode . . . . . . . . . . . . . . . . . . . . . . . . . . . . . . . . . . . . . Fault-tolerant digital input module in a 1-out-of-2 configuration with one sensor . . . . . . . . . . . . . . . . . . . . . . . . . . . . . . . . . . . . . . . . . . . . . . . . . Fault-tolerant digital input modules in a 1-out-of-2 configuration with 2 sensors . . . . . . . . . . . . . . . . . . . . . . . . . . . . . . . . . . . . . . . . . . . . . . . . . . Fault-tolerant digital output module in a 1-of-2 configuration . . . . . . . . . . . Fault-tolerant analog input modules in a 1-out-of-2 configuration with one sensor . . . . . . . . . . . . . . . . . . . . . . . . . . . . . . . . . . . . . . . . . . . . . . . . . Fault-tolerant analog input modules in a 1-out-of-2 configuration with two sensors . . . . . . . . . . . . . . . . . . . . . . . . . . . . . . . . . . . . . . . . . . . . . . . . Redundant analog output modules in a 1-of-2 structure . . . . . . . . . . . . . . . Redundant one-way and switched I/Os . . . . . . . . . . . . . . . . . . . . . . . . . . . . . Flowchart for OB1 . . . . . . . . . . . . . . . . . . . . . . . . . . . . . . . . . . . . . . . . . . . . . . . 1-2 1-4 1-5 1-5 1-5 2-2 2-3 2-9 3-3 4-2 4-11 4-17 4-23 4-23 4-33 4-37 4-38 4-43 4-44 5-3 5-5 6-4 6-6 6-6 6-15 6-20 7-3 7-6 7-10 7-11 7-12 7-13 7-18 7-20 7-21 7-24 7-30 7-32 7-35 7-38 Automation System S7-400H Fault-tolerant Systems A5E00068197-07 Contents 8-1 8-2 8-3 8-4 8-5 8-6 8-7 8-8 8-9 8-10 8-11 8-12 8-13 8-14 8-15 F-1 F-2 F-3 F-4 F-5 F-6 F-7 F-8 F-9 F-10 Example of an S7 connection . . . . . . . . . . . . . . . . . . . . . . . . . . . . . . . . . . . . . Example of the number of resulting partial connections being dependent on the configuration . . . . . . . . . . . . . . . . . . . . . . . . . . . . . . . . . . . . . . . . . . . . . . Example of redundancy with fault-tolerant system and redundant ring . . Example of redundancy with fault-tolerant system and redundant bus system . . . . . . . . . . . . . . . . . . . . . . . . . . . . . . . . . . . . . . . . Example of a fault-tolerant system with additional CP redundancy . . . . . Example of redundancy with fault-tolerant system and fault-tolerant CPU Example of redundancy with fault-tolerant system and redundant bus system . . . . . . . . . . . . . . . . . . . . . . . . . . . . . . . . . . . . . . . . Example of redundancy with a fault-tolerant system, redundant bus system and CP redundancy in the PC . . . . . . . . . . . . . . . . . Example of interconnected standard and fault-tolerant systems on a redundant ring . . . . . . . . . . . . . . . . . . . . . . . . . . . . . . . . . . . . . . . . . . . . . . Example of interconnected standard and fault-tolerant systems on a redundant bus system . . . . . . . . . . . . . . . . . . . . . . . . . . . . . . . . . . . . . . . Example of redundancy with fault-tolerant systems and redundant bus system with redundant standard connections . . . . . . . . . . . . . . . . . . . . Example of interconnection of a fault-tolerant system and a single-channel third-party system . . . . . . . . . . . . . . . . . . . . . . . . . . . . Example of interconnection of a fault-tolerant system and a single-channel third-party system . . . . . . . . . . . . . . . . . . . . . . . . . . . . Data throughput via communication load (basic trend) . . . . . . . . . . . . . . . . Response time via communication load (basic trend) . . . . . . . . . . . . . . . . . Connection example SM 321; DI 8 x AC 120/230 V . . . . . . . . . . . . . . . . . . Connection example SM 322; DO 8 x AC 230 V/2 A . . . . . . . . . . . . . . . . . Connection example SM 321; DI 16 x AC 120/230 V . . . . . . . . . . . . . . . . . Connection example SM 331; AI 18 x 16 Bit . . . . . . . . . . . . . . . . . . . . . . . . Connection example SM 332, AO 4 x 12 Bit . . . . . . . . . . . . . . . . . . . . . . . . . Connection example SM 421; DI 32 x UC 120 V . . . . . . . . . . . . . . . . . . . . . Connection example SM 422; DO 16 x AC 120/230 V/2 A . . . . . . . . . . . . Connection example SM 321; DI 16 x DC 24V . . . . . . . . . . . . . . . . . . . . . . Connection example SM 322; DO 32 x DC 24 V/0.5 A . . . . . . . . . . . . . . . . Connection example SM 331; AI 8 x 12 Bit . . . . . . . . . . . . . . . . . . . . . . . . . . Automation System S7-400H Fault-tolerant Systems A5E00068197-07 8-3 8-4 8-11 8-11 8-11 8-13 8-14 8-15 8-17 8-17 8-18 8-19 8-20 8-22 8-22 F-2 F-3 F-4 F-5 F-6 F-7 F-8 F-9 F-10 F-11 xvii Contents Tables 4-1 4-2 4-3 4-4 4-5 4-6 4-7 4-8 5-1 5-2 5-3 5-4 5-5 5-6 6-1 6-2 6-3 7-1 7-2 7-3 7-4 7-5 7-6 7-7 11-1 13-1 A-1 B-1 xviii LEDs of the CPUs . . . . . . . . . . . . . . . . . . . . . . . . . . . . . . . . . . . . . . . . . . . . . . . 4-3 Positions of the mode selector . . . . . . . . . . . . . . . . . . . . . . . . . . . . . . . . . . . . 4-12 Protection levels of a S7-400 CPU . . . . . . . . . . . . . . . . . . . . . . . . . . . . . . . . 4-13 Types of memory cards . . . . . . . . . . . . . . . . . . . . . . . . . . . . . . . . . . . . . . . . . . 4-18 CPUs 41x (MPI/DP Interface as Profibus DP) . . . . . . . . . . . . . . . . . . . . . . 4-30 Meaning of the BUSF LEDs of the CPU 41x as DP master . . . . . . . . . . . . 4-35 Reading out the diagnostics information with STEP 7 . . . . . . . . . . . . . . . . 4-36 Event detection of the CPUs 41x as DP master . . . . . . . . . . . . . . . . . . . . . 4-39 Overview of the S7-400H system modes . . . . . . . . . . . . . . . . . . . . . . . . . . . 5-4 Explanations relating to figure 5-2 System and Operating Modes of the Fault-Tolerant System . . . . . . . . . . . . . . . . . . . . . . . . . . . . . . . . . . . . . . . . . . . . 5-6 Causes of Error Leading to the Termination of Redundant System Mode 5-8 Response to errors during the self-test . . . . . . . . . . . . . . . . . . . . . . . . . . . . . 5-11 Response to a recurring comparison error . . . . . . . . . . . . . . . . . . . . . . . . . . 5-12 Response to checksum errors . . . . . . . . . . . . . . . . . . . . . . . . . . . . . . . . . . . . 5-12 Properties of link-up and update . . . . . . . . . . . . . . . . . . . . . . . . . . . . . . . . . . . 6-2 Premium for the monitoring times of redundant I/O . . . . . . . . . . . . . . . . . . . 6-19 Typical values for the user program share TP15_AWP of the max. blocking time for priority classes > 15 . . . . . . . . . . . . . . . . . . . . . . . . . 6-25 Signal modules for redundancy . . . . . . . . . . . . . . . . . . . . . . . . . . . . . . . . . . . 7-15 Digital output module connected through/without diodes . . . . . . . . . . . . . . 7-21 Analog input modules and sensors . . . . . . . . . . . . . . . . . . . . . . . . . . . . . . . . 7-31 Assignment of the status byte . . . . . . . . . . . . . . . . . . . . . . . . . . . . . . . . . . . . 7-33 Assignment of the status bytes . . . . . . . . . . . . . . . . . . . . . . . . . . . . . . . . . . . 7-34 OB 1 . . . . . . . . . . . . . . . . . . . . . . . . . . . . . . . . . . . . . . . . . . . . . . . . . . . . . . . . . . 7-39 OB 122 . . . . . . . . . . . . . . . . . . . . . . . . . . . . . . . . . . . . . . . . . . . . . . . . . . . . . . . 7-40 Modifiable CPU parameters . . . . . . . . . . . . . . . . . . . . . . . . . . . . . . . . . . . . . . 11-41 Run times of the blocks for redundant I/O . . . . . . . . . . . . . . . . . . . . . . . . . . 13-11 MTBF factor for redundant I/O . . . . . . . . . . . . . . . . . . . . . . . . . . . . . . . . . . . . A-8 Differences between S7-400 and S7-400H . . . . . . . . . . . . . . . . . . . . . . . . . B-2 Automation System S7-400H Fault-tolerant Systems A5E00068197-07 Fault-Tolerant Programmable Logic Controllers 1 This chapter contains an introduction to redundant and fault-tolerant programmable logic controllers. In Section Description On Page 1.1 Redundant Programmable Logic Controllers in the SIMATIC Series 1-2 1.2 Increasing System Availability 1-4 Automation System S7-400H Fault-tolerant Systems A5E00068197-07 1-1 Fault-Tolerant Programmable Logic Controllers 1.1 Redundant Programmable Logic Controllers in the SIMATIC Series Economic, and thus resource-sparing and low-pollution production can be achieved nowadays in all branches of industry only by employing a high degree of automation. At the same time there is a demand for fail-safe programmable logic controllers with the greatest degree of distribution possible. Redundant programmable logic controllers from Siemens have proved themselves in operation and thousands are in service. Perhaps you are already familiar with one of the fault-tolerant systems such as the SIMATIC S5-115H and S5-155H, or the fail-safe S5-95F and S5-115F systems. The S7-400H is the latest fault-tolerant PLC and we will be presenting it on the pages that follow. It is a member of the SIMATIC S7 system family, meaning that you can fully avail yourself of all the advantages of the SIMATIC S7. Operating objectives of redundant PLCs Redundant programmable logic controllers are used in practice with the aim of achieving a higher degree of availability or fault tolerance. Redundant automation systems, e.g Fault-tolerant 1-out-of-2 systems Fail-safe 1-out-of-2 systems Objective: Objective: Reduce the probability of production losses by switching to a standby system Protect life, the environment and investments by safely disconnecting to a secure “off” position Figure 1-1 Operating objectives of redundant programmable logic controllers Note the difference between fault-tolerant systems and fail-safe systems. The S7-400H is a fault-tolerant programmable logic controller that can be used only with additional means for controlling processes relevant to safety. 1-2 Automation System S7-400H Fault-tolerant Systems A5E00068197-07 Fault-Tolerant Programmable Logic Controllers Why do we have fault-tolerant programmable logic controllers? The objective of using high-availabilty programmable logic controllers is a reduction of production losses. It does not matter whether the losses are caused by an error or as a result of maintenance work. The higher the costs of a stoppage, the more worthwhile it is to use a fault-tolerant system. The generally higher investment costs of fault-tolerant systems are quickly compensated by avoiding production losses. Software redundancy In a large number of applications, requirements for the quality of redundancy or the number of system sections that necessitate redundant PLCs are not high enough to warrant the use of a specific fault-tolerant system. Frequently, simple software mechanisms are sufficient to allow continuation of a failed control task on a substitute system in the event of an error. The “SIMATIC S7 Software Redundancy” options software can run on S7-300 and S7-400 standard systems to control processes that tolerate transfer times to a substitute system within seconds, such as water works, water treatment systems or traffic flows. Automation System S7-400H Fault-tolerant Systems A5E00068197-07 1-3 Fault-Tolerant Programmable Logic Controllers 1.2 Increasing System Availability The S7-400H programmable logic controller meets these high requirements for availability, intelligence and distribution that are required of state-of-the-art programmable logic controllers. Further, it features all the functions for acquiring and preparing process data and for controlling, regulating and monitoring units and systems. System-wide universality The S7-400H programmable logic controller and all other SIMATIC components, such as the SIMATIC PCS7 control system, are harmonized. Total system universality, from the control console to the sensors and actuators, is a matter of course and guarantees maximum system performance. Server Single-user Server Engineering OS Client Report printer Client System Control console LAN (redundant) S7-400 S7-400H S7-400 with system fault-tolerant S7-300 CPU PLCs PROFIBUS DP (redundant) ET 200M ET 200B ET 200L DP/PA bus coupler ET 200X Distributed I/O Sensors/actuators Figure 1-2 Universal automation solutions with SIMATIC Graduated availability by duplicating components The S7-400H is designed with redundancy so that it remains available at all events. This means that all major components are duplicated. The components that are duplicated as a matter of policy are the central processing unit (CPU), the power supply and the hardware for interconnecting the two central processing units. You can decide for yourself whether you wish to duplicate more components for the process you are going to automate and thus enhance their availability. 1-4 Automation System S7-400H Fault-tolerant Systems A5E00068197-07 Fault-Tolerant Programmable Logic Controllers Redundant nodes Redundant nodes represent the fault tolerance of systems with redundant components. The independence of a redundant node is given when the failure of a component within the node does not result in reliability constraints in other nodes or in the entire system. The availability of the entire system can be illustrated in a simple manner by means of a block diagram. With a 2-out-of-2 system, one component of the redundant node may fail without impairing the operability of the overall system. The weakest link in the chain of redundant nodes determines the availability of the overall system. Without malfunction (Figure 1-3). PS CPU Bus IM 153-2 PS CPU Bus IM 153-2 SM Redundant nodes with 2-out-of-2 redundancy Figure 1-3 Example of redundancy in a network without malfunction With malfunction In Figure 1-4, one component may fail per redundant node without the functionality of the overall system being impaired. Figure 1-4 CPU CP Bus CP CPU CPU CP Bus CP CPU Example of redundancy in a 2-out-of-2 system with malfunction Failure of a redundant node (total failure) In Figure 1-5, the entire system is no longer operable since both subcomponents have failed in a 1-out-of-2 redundant node (total failure). PS CPU Bus IM 153-2 PS CPU Bus IM 153-2 SM Redundant nodes with 2-out-of-2 redundancy Figure 1-5 Example of redundancy in a 2-out-of-2 system with total failure Automation System S7-400H Fault-tolerant Systems A5E00068197-07 1-5 Fault-Tolerant Programmable Logic Controllers 1-6 Automation System S7-400H Fault-tolerant Systems A5E00068197-07 S7-400H Installation Options 2 The first part of the description starts with the basic configuration of the fault-tolerant S7-400H programmable controller and the components making up the S7-400H base system. We then describe the hardware components with which you can expand this base system. The second part describes the software applications with which you can configure and program the S7-400H. In addition, a description is given of the additions and extensions, compared to the S7-400 standard system, that you will require for programming your user program in order to be able to react specifically to the properties of the S7-400H that enhance availability. In Section Description On Page 2.1 Base System of the S7-400H 2-3 2.2 I/O for the S7-400H 2-5 2.3 Communications 2-6 2.4 Configuration and Programming Applications 2-7 2.5 User Program 2-7 2.6 Documentation 2-9 Automation System S7-400H Fault-tolerant Systems A5E00068197-07 2-1 S7-400H Installation Options Figure 2-1 shows an example of the configuration of an S7-400H with common distributed I/O and a connection to a redundant system bus. On the next few pages we will describe step by step the hardware and software components necessary for configuring and operating the S7-400H. Operator station (system visualization) Redundant system bus (Ethernet) S7-400H PLC ET 200M distributed I/O ET 200M distributed I/O Redundant PROFIBUS-DP Figure 2-1 Overview Further information The components of the S7-400 standard system are also used in the fault-tolerant S7-400H programmable logic controller. A detailed description of all hardware components for S7-400 is available in the reference manual Automation System S7-400, M7-400, Module Data. The same rules as for a standard S7-400 system apply to designing the user program and the usage of blocks for the fault-tolerant S7-400H programmable logic controller. Please take note of the descriptions in the Programming with STEP 7 manual and in the System Software for S7-300/400, System and Standard Functions Reference Manual. 2-2 Automation System S7-400H Fault-tolerant Systems A5E00068197-07 S7-400H Installation Options 2.1 Base System of the S7-400H Hardware of the base system By base system of the S7-400H we mean the minimum configuration of the S7-400H. The base system consists of all the requisite hardware components that make up the fault-tolerant control system. Figure 2-2 shows the components in the installation. You can upgrade the base system by means of standard modules from the S7-400. There are restrictions in the case of the function and communication processors (see Appendix E). S7-400H base system Rack UR2H Rack 0 2 PS Figure 2-2 Rack 1 2 CPUs 4 synchro- 2 fiber-optic cables nization submodules Hardware of the S7-400H base system Central processing units At the heart of the S7-400H are the two central processing units. Setting of the synchronization submodules, which have to be plugged into the CPU, defines the rack numbers. In the following we will refer to the CPU in rack 0 as CPU 0,and to the CPU in rack 1 as CPU 1. Automation System S7-400H Fault-tolerant Systems A5E00068197-07 2-3 S7-400H Installation Options Mounting rack for S7-400H We recommend you the UR2-H mounting rack for the S7-400H. The mounting rack makes it possible to configure two separate subsystems, each containing nine slots, and is suitable for installation in 19” cabinets. Alternatively, you can also configure the S7-400H on two separate mounting racks. Two mounting racks, the UR1 and UR2, are available for this purpose. Power supply As a power supply, you will require for each fault-tolerant CPU – or, to be more precise, for each of the two subsystems of the S7-400H – a power supply module from the standard range of the S7-400. Power supply modules for rated input voltages of 24 VDC and 120/230 VAC are available with 10 and 20 A output current. To enhance the availability of the power supply, you can also use two redundant power supplies in each subsystem. In this case you should use the PS 407 10 A R power supply module for rated voltages of 120/230 VAC with an output power of 10 A. Synchronization submodules The synchronization submodules are used to connect the two central processing units. They are installed in the central processing units and interconnected by means of fiber-optic cables. Two synchronization submodules have to be inserted in each CPU. Fiber-optic cables The fiber-optic cables are inserted into the synchronization submodules and form the physical connection (redundant link) between the two central processing units. 2-4 Automation System S7-400H Fault-tolerant Systems A5E00068197-07 S7-400H Installation Options 2.2 I/O Modules for S7-400H For the S7-400H you can use virtually any of the input/output modules featured in the SIMATIC S7 system range. The I/O can be used in • central controllers • expansion units • distributed over PROFIBUS DP. The function modules (FMs) and communication processors (CPs) that can be used in the S7-400H will be found in Appendix E. I/O configuration versions In addition to the power supplies and central processing units that are always used as redundant modules, there are the following configuration versions for the input/output modules: • Single-channel, one-way configuration with normal availability With the single-channel, one-way configuration single input/output modules are present (single-channel). The input/output modules are located in just one of the subsystems and are only addressed by that subsystem. • Single-channel, switched configuration with enhanced availability With the single-channel switched (distributed) configuration single input/output modules are present (single-channel) but can be addressed by either subsystem. • Dual Channel Redundant Configuration with Fault Tolerance There are double the number of I/O modules in a dual–channel redundant configuration and these can be addresses by both subsystems. Further information You will find detailed information on the usage of I/O in Chapter 7. Automation System S7-400H Fault-tolerant Systems A5E00068197-07 2-5 S7-400H Installation Options 2.3 Communication For communication tasks on the S7-400H you can use almost any communications components offered in the SIMATIC system range. This applies to communication components used either with central I/O or distributed I/O such as • system busses (Industrial Ethernet) • point-to-point connection Communication availability You can vary the availability of communications with the S7-400H. There are different solutions for the S7-400H in keeping with your communication requirements. They range from a simple linear network structure to a redundant optical two-fiber loop. Fault-tolerant communication over PROFIBUS or Industrial Ethernet is supported entirely with S7 communication functions. Programming and configuration Apart from the use of additional hardware components, there are basically no differences with regard to configuration and programming compared to standard systems. Fault-tolerant connections have to be configured only; specific programming is not necessary. All communication functions required for operating fault-tolerant communications have been integrated in the operating system of the fault-tolerant CPU and run automatically and in the background – for example, monitoring of the communication connection or automatic switching to a redundant connection in the event of a malfunction. Further information You will find detailed information on the subject of communications with the S7-400H in Chapter 8. 2-6 Automation System S7-400H Fault-tolerant Systems A5E00068197-07 S7-400H Installation Options 2.4 Tools for Configuration and Programming Similar to the S7-400, the S7-400H is also configured and programmed with STEP 7. After configuration with STEP 7, you treat the S7-400H as a normal S7-400 system. For you this means that you can use your full knowledge of the SIMATIC S7 and, for example, only have to take minor constraints into account when writing your user program. However, there are also fault tolerant-specific additions to the configuration. Redundant components are monitored by the operating system, which independently performs switching in the event of a fault. You have already configured the information required for this in STEP 7 and it is known to the system. You will find detailed information on this subject in online Help and in Chapter 9. Required Software The optional H package is required for configuration and programming. Optional Software All standard tools, engineering tools and runtime software that can be used on the S7-400 can, of course, also be used on the S7-400H. 2.5 The User Program The rules applicable to the design and programming of the standard S7-400 system apply similarly to the S7-400H. The user programs are stored in an identical form in the two central processing units and are executed simultaneously (event-synchronous). From the viewpoint of user program execution, the S7-400H behaves in exactly the same manner as a standard system. The synchronization functions are integrated in the operating system and run automatically and totally in the background. There is no need to take these functions into account in the user program. In order to be able to react to the lengthening of the cycle time due to updating, for example, a few specific blocks allow you to optimize your user program in this respect. Automation System S7-400H Fault-tolerant Systems A5E00068197-07 2-7 S7-400H Installation Options Specific Blocks for S7-400H Apart from the blocks that can be used on both the S7-400 and the S7-400H, there are further additional blocks for the S7-400H with which you can influence the redundancy functions. You can react to redundancy errors of the S7-400H with the following organization blocks: • OB 70, I/O redundancy errors • OB 72, CPU redundancy errors Using the system function SFC 90 “H_CTRL” you can disable and re-enable link-up and updating of the fault-tolerant CPUs. You can also affect the scope and routine of the cyclic self–test. Notice With a fail-safe system, the periodic self-tests must not be inhibited and then enabled again. For more details refer to the manual S7-400F and S7-400FH Programmable Controllers. Further information You will find detailed information on the programming of the above-mentioned blocks in the manual called Programming with STEP 7 and in the Reference Manual called System Software for S7-300/400, System and Standard Functions. 2-8 Automation System S7-400H Fault-tolerant Systems A5E00068197-07 S7-400H Installation Options 2.6 Documentation The following illustration provides an overview of the documentation for the various components and applications of the S7-400H automation system. Subject Documentation Hardware: Redundancy–capable power supply Module rack UR2-H S7/M7-400 standard documentation Installation Module Specifications Instruction List IM 153-2 ET 200M Distributed I/O Fault tolerant-specific programming: S7-400H-specific OBs, SFC S7-400H-specific expansion of the SSL, events and help on error STEP 7 documentation Specifically for fault-tolerant systems: Fault-tolerant Systems Configuration Options for S7-400H Getting Started System Modes for S7-400H Link-up and Update I/O, Communications Configuration with the STEP 7 Option Pack Failure and Replacement, System Modification S7-400H PLC Fault-Tolerant Systems (manual and online Help) Figure 2-3 Programming with STEP 7 V5.2 System and Standard Functions (manual and online Help) User documentation for fault-tolerant systems Note You will find the manuals listed in Figure 2-3 on the S7-400H product CD. Automation System S7-400H Fault-tolerant Systems A5E00068197-07 2-9 S7-400H Installation Options 2-10 Automation System S7-400H Fault-tolerant Systems A5E00068197-07 3 Getting Started This guide walks you through the steps that have to be performed to commission the system by means of a specific example and results in a working application. You will learn how an S7-400H programmable logic controller operates and become familiar with its response to a fault. It takes about one to two hours to work through this example, depending on your previous experience. In Section Description On Page 3.1 Requirements 3-2 3.2 Configuring Hardware and Starting Up the S7-400H 3-3 3.3 Examples of Fault-Tolerant System Response to Faults 3-5 Automation System S7-400H Fault-tolerant Systems A5E00068197-07 3-1 Getting Started 3.1 Requirements The following requirements must be met: A permitted version of the STEP 7 standard software and the “S7 Fault-Tolerant System” option pack are correctly installed on your programming device (refer to Section 9.1). You must have the modules required for the hardware configuration: • an S7-400H PLC consisting of: – 1 mounting rack, UR2-H – 2 power supplies, PS 407 10A – 2 fault-tolerant CPUs (CPU 414-4H and CPU 417-4H) – 4 synchronization submodules – 2 fiber-optic cables • an ET 200M distributed I/O device with an active backplane bus and – 2 IM 153-2 – 1 digital input module, SM321 DI 16 x DC24V – 1 digital output module, SM322 DO 16 x DC24V • the necessary accessories such as PROFIBUS shielded cables, etc. 3-2 Automation System S7-400H Fault-tolerant Systems A5E00068197-07 Getting Started 3.2 Configuring Hardware and Starting Up the S7-400H Installing Hardware To configure the S7-400H as illustrated in Figure 3-1, perform the following steps: Rack 0 Rack 1 S7-400H PLC ET 200M distributed I/O Figure 3-1 Hardware configuration 1. Configure the two subunits of the S7-400H PLC as described in the S7-400, M7-400 Programmable Controllers, Hardware and Installation/Module Specifications manuals. In addition, you must: – Set the mounting rack number by means of the switches on the synchronization submodules. The setting is applied by the CPU after POWER ON and a subsequent memory reset by means of the mode selector. If the mounting rack number is not set correctly you will not have online access and the CPU will not run in certain circumstances. – Insert the synchronization submodules into the CPUs. Then screw up the additional front bezels to activate them (refer to S7-400, M7-400 Programmable Controllers, Hardware and Installation). – Connect the fiber-optic cables (always connect the two upper synchronization submodules and the two lower synchronization submodules of the CPUs). Lay the fiber-optic cable so that it is protected from any damage. Make sure with the route wires in addition that the two fiber-optic cables are always laid so that they are isolated from each other. Laying them separately enhances their availability and protects then from potential dual faults in the event, say, of simultaneous interruption of the fiber-optic cables. In addition, make sure that the fiber-optic cables are plugged into the two CPUs before turning on the power supply or turning on the system. If they are not, the two CPUs might both process the user program as master CPUs. 2. Configure the distributed I/O as described in the ET 200M Distributed I/O Device manual. Automation System S7-400H Fault-tolerant Systems A5E00068197-07 3-3 Getting Started 3. Connect the programming device to the first fault-tolerant CPU (CPU0). This CPU should be the master CPU of the S7-400H. 4. A high-quality RAM test is performed after power on. It requires approximately 8 seconds per megabyte of RAM. During this time the CPU cannot be addressed via the multipoint interface and the STOP LED flashes. If there is a backup battery, the test will not be performed on further POWER ONs. 5. Perform a memory reset for both CPUs using the mode selector. This applies the set mounting rack numbers of the synchronization modules to the operating system of the CPU. 6. Perform commissioning individually for each CPU as described in the S7-400, M7-400 Programmable Controllers, Hardware and Installation manual. After loading the program carry out a warm restart: first for the CPU you want as the master CPU, and then for the standby CPU. 7. Switch the two CPUs of the S7-400H to STOP. Starting up the S7-400H To start up the S7-400H, perform the following steps: 1. Open the “H Project” in SIMATIC Manager. The configuration is the same as the hardware configuration described in “Requirements”. 2. Open the hardware configuration of the project by selecting the “Hardware” object and clicking the right mouse key and then selecting the context menu command Object Open . When you have an identical configuration, you can proceed with step 6. 3. If your hardware configuration is different from that of the project – for example, the module types, MPI addresses or DP address – you must adjust and save the project accordingly. You will find descriptions in the basic help for SIMATIC Manager. 4. Open the user program in the “S7 program” folder. The “S7 program” folder is assigned only to CPU0 in the offline view. The user program can run on the hardware configuration described. It makes the LEDs on the digital output module light up in the form of a running light. 5. If necessary, modify the user program – to adapt it to your hardware configuration, for example – and save it. 6. Load the user program into CPU0 with the command PLC Download. 7. Start the S7-400H PLC by switching the mode selector, first for CPU0 and then for CPU1, to RUN-P. Result: CPU0 starts up as the master CPU and CPU1 as the standby CPU. After the link-up and update of the standby CPU the S7-400H switches to redundant system mode and executes the user program (run light on digital output module). 3-4 Automation System S7-400H Fault-tolerant Systems A5E00068197-07 Getting Started Note You can start and stop the S7-400H programmable logic controller using the programming device too. You will find more information on this in online Help of the S7-400H options package. 3.3 Examples of Fault-Tolerant System Response to Faults Example 1: Failure of a central processing unit or power supply Initial situation: The S7-400H is in redundant system mode. 1. Cause CPU0 to fail by turning off the power supply. Result: The LEDs REDF, IFM1F and IFM2F light on CPU1. CPU1 goes into solo mode, and the user program continues to run. 2. Turn the power supply back on. Result: – CPU0 performs an automatic LINK-UP and UPDATE. – CPU0 changes to RUN and now operates as the standby CPU. – The S7-400H is now in redundant system mode. Example 2: Failure of a fiber-optic cable Initial situation: The S7-400H is in redundant system mode. The mode selector of each CPU is at the RUN or RUN-P position. 1. Disconnect one of the fiber-optic cables. Result: The LEDs REDF and IFM1F or IFM2F (depending on which fiber-optic cable was disconnected) now light on the two CPUs. The original master CPU (CPU0) changes to single mode and the user program continues to run. 2. Reconnect the fiber-optic cable that you disconnected earlier. 3. Restart the original standby CPU (CPU1), which is now at STOP, by means of STEP7 “operating status”, for example. Result: – CPU1 performs an automatic LINK-UP and UPDATE. – The S7-400H reverts to redundant system mode. Automation System S7-400H Fault-tolerant Systems A5E00068197-07 3-5 Getting Started 3-6 Automation System S7-400H Fault-tolerant Systems A5E00068197-07 Installation of a CPU 41x-H 4 Chapter Overview In Section Description On Page 4.1 Controls and Indicators of the CPUs 4-2 4.2 Monitoring Functions of the CPU 4-6 4.3 Status and Error LEDs 4-8 4.4 Mode selector 4-11 4.5 Memory Expansion 4-15 4.6 Multipoint Interface (MPI) 4-24 4.7 PROFIBUS DP interface 4-25 4.8 Overview of the Parameters for the S7-400 CPUs 4-26 4.9 CPU 41x as DP Master 4-29 4.10 Consistent data 4-40 Automation System S7-400H Fault-tolerant Systems A5E00068197-07 4-1 Installation of a CPU 41x-H 4.1 Controls and Indicators of the CPUs Operation and Display Elements of the CPU 414-4H/417-4H Module designation, version, abbreviated order number and firmware version V3.0.0 INTF, EXTF, BUS1F, BUS2F, FRCE, RUN, STOP LEDs BUS1F BUS2F IFM1F IFM2F REDF, IFM1F, IFM2F, MSTR, RACK0, RACK1 LEDs RACK0 Slot for the memory card RACK1 Mode selector Under cover Under cover MPI/PROFIBUS DP interface Memory card slot for synchronization submodule 1 PROFIBUS DP interface Memory card slot for synchronization submodule 2 Incoming supply of external backup voltage Under the metal lid on the left-hand side Interface for memory expansion* * Only in CPU 417-4H Figure 4-1 Layout of the controls and indicators of the CPU 414-4H/417-4H LEDs Table 4-1 gives you an overview of the LEDs on the individual CPUs. Section 4.2 describes the statuses and errors indicated by these LEDs. 4-2 Automation System S7-400H Fault-tolerant Systems A5E00068197-07 Installation of a CPU 41x-H Table 4-1 LEDs of the CPUs LED Color Meaning INTF red Internal fault EXTF red External fault FRCE yellow Active force request RUN green RUN mode STOP yellow STOP mode BUS1F red Bus fault at MPI/PROFIBUS DP interface 1 BUS2F red Bus fault at PROFIBUS DP interface 2 MSTR yellow CPU leads the process REDF red Loss of redundancy/redundancy error RACK0 yellow CPU in rack 0 RACK1 yellow CPU in rack 1 IFM1F red Error at interface submodule 1 IFM2F red Error at interface submodule 2 Operating Mode Selector You can use the mode selector to select the current operating mode of the CPU. The mode selector is a key switch with four switching positions. You can use different protection levels and limit any program changes or startup options (STOP to RUN transition) to a certain group of people. Section 4.4 describes the functions of the mode selector and the protection levels of the CPUs. Slot for Memory Cards You can insert a memory card in this slot. There are two types of memory card: • RAM cards You can expand the load memory of a CPU with the RAM card. • FLASH cards You can use the FLASH card to store your user program and your data so that they are failproof (even without a backup battery). You can either program the FLASH card on the programming device or in the CPU. The FLASH card also expands the load memory of the CPU. A detailed description of memory cards is available in Chapter 4.5.1. Automation System S7-400H Fault-tolerant Systems A5E00068197-07 4-3 Installation of a CPU 41x-H Interface for Expanded Memory CPU 417-4H provides an additional interface for expanded memory. This make it possible to expand the working memory. (See Chapter 4.5 ) Slot for Interface Modules The H synchronization module can be inserted into this slot. MPI/DP Interface You can connect the following devices to the MPI of the CPU, for example: • Programming devices • Operation and monitoring devices • Additional S7-400 or S7-300 controllers (see Section 4.6). Use the bus connector with an angular outgoing cable (see the Installation manual, Chapter 7) You can also configure the MPI interface as a DP master and use it as a PROFIBUS DP interface with up to 32 DP slaves. Profibus-DP Interface You can connect the distributed I/O, programming devices/OPs and additional DP master stations to the PROFIBUS DP interface. 4-4 Automation System S7-400H Fault-tolerant Systems A5E00068197-07 Installation of a CPU 41x-H Connecting External Backup Current to the “EXT. BATT.” Socket You can use one or two backup batteries – depending on the module type – in the power supply modules of the S7-400 to do the following: • Provide backup power for the user program you have stored in RAM. • Ensure memory markers, timers, counters, system data and data in tag data blocks remain retentive. • Provide backup power for the internal clock. You can achieve the same backup if you apply DC voltage between 5 V and 15 V at the “EXT. BATT.” socket of the CPU. The “EXT. BATT.” input has the following features: • Reverse polarity protection • A short-circuit current limit of 20 mA To connect external power to the “EXT. BATT” socket, you need a cable with a 2.5 mm ∅ jack, as illustrated in the following figure. Note the polarity of the jack. Plus pole Minus pole 2.5 mm jack ∅ Note You will require the external incoming supply at the “EXT. BATT.” socket if you replace a power supply module and want to provide a backup supply for the user program stored in RAM and the data mentioned above while the module is being replaced. Automation System S7-400H Fault-tolerant Systems A5E00068197-07 4-5 Installation of a CPU 41x-H 4.2 Monitoring Functions of the CPU Monitoring and Error Messages The CPU hardware and the operating system have monitoring functions that ensure that the system functions correctly and that there is a defined response to an error. A number of errors will also produce a response from the user program. The following table gives you an overview of possible errors, their causes and the responses of the CPU. There are also test and information functions available in each CPU that you can call up with STEP 7. Type of Fault/Error Cause of Error Response of the Operating System Error LED Clock pulse failure Monitoring of the failure of the processor clock pulse System standstill Disabling of the digital outputs by issuing the “OD” (Output Disable) signal – Access error Module failure (SM, FM, CP) “EXTF” LED lights up until the fault is acknowledged. In SMs: • OB 122 call • Entry in the diagnostics buffer • In the case of input modules: Entry of null for the date in the accumulator or the process image In the case of other modules: • OB 122 call EXTF Timing error • • • • The runtime of the user program (OB1 and all the interrupts and error OBs) exceeds the specified maximum cycle time. OB request error Overrun of the start information buffer Time error interrupt “INTF” LED lights up until the fault is acknowledged. OB 80 call If the OB is not loaded: The CPU goes into STOP mode. Power supply module error (not power failure) In the central or distributed I/O rack: • At least one backup battery in the power supply module is empty. • The backup voltage is missing. • The 24 V supply to the power supply module has failed. OB 81 call If the OB is not loaded: The CPU continues to run. Diagnostics Interrupt An I/O module with interrupt capability reports a diagnostics interrupt. OB 82 call If the OB is not loaded: The CPU goes into STOP mode. Remove/insert interrupt Removal or insertion of an SM and insertion of an incorrect module type. If the only inserted SM is removed during STOP mode of the CPU with default parameter assignment, the EXTF LED will not light up. If the SM is inserted again, the LED lights up briefly. OB 83 call If the OB is not loaded: The CPU goes into STOP mode. 4-6 INTF EXTF EXTF EXTF Automation System S7-400H Fault-tolerant Systems A5E00068197-07 Installation of a CPU 41x-H Type of Fault/Error Priority class error Cause of Error • • • Failure of a rack/station Communication error Cancel processing • • • • • • • • Priority class is called, but the corresponding OB is not available. In the case of an SFB call: The instance DB is missing or defective. Response of the Operating System OB 85 call If the OB is not loaded: The CPU goes into STOP mode. Error during the updating of the process image INTF EXTF Power failure in an expansion rack Failure of a DP line Failure of a coupling line: missing or defective IM, interrupted line) OB 86 call If the OB is not loaded: The CPU goes into STOP mode. Status information cannot be entered in DB Incorrect frame identifier Frame length error Impermissible global identifier number DB access error OB 87 call If the OB is not loaded: The CPU goes into STOP mode. The processing of a program block is cancelled. Possible reasons for the cancellation are: Error LED EXTF INTF OB 88 call If the OB is not loaded: The CPU goes into STOP mode. • Too much nesting depth of a bracket level • Too much nesting depth of a master control relay • Too much nesting depth for synchronization errors INTF • Too much nesting depth from block calls (i stack) • Too much nesting depth from block calls (b stack) • Error allocating local data • Unknown instruction • Branch instruction with destination outside of the block Programming error MC7 code error Error in the machine code or in the user program: • BCD conversion error • Range length error • Range error • Alignment error • Write error • Timer number error • Counter number error • Block number error • Block not loaded OB 121 call If the OB is not loaded: The CPU goes into STOP mode. Error in the compiled user program (e.g. impermissible OP code or jump over the end of the block) The CPU goes into STOP mode. Reboot or memory reset required. Automation System S7-400H Fault-tolerant Systems A5E00068197-07 INTF INTF 4-7 Installation of a CPU 41x-H 4.3 Status and Error LEDs LEDs RUN and STOP The RUN and STOP LEDs provide information about the currently active CPU operating status. LED RUN Meaning STOP H D CPU is in RUN mode. D H CPU is in STOP mode. The user program is not processed. Restart and warm restart/reboot is possible. If the STOP status was triggered by an error, the error indication (INTF or EXTF) is also set. B B 2 Hz 2 Hz CPU has the status DEFECT. The INTF, EXTF and FRCE LEDs also flash. B H HALT status has been triggered by a test function. H A warm restart/reboot/restart has been triggered. It can take a minute or longer to execute the warm restart/reboot/restart depending on the length of the OB called. If the CPU still does not go into RUN, there might be an error in the system configuration. Self–test running for unbuffered POWER ON. 0.5 Hz B 2 Hz B B 2 Hz 2 Hz x B Memory reset is requested by the CPU. 0.5 Hz x B Memory reset is running. 2 Hz D = LED is dark; H = LED lights up; B = LED flashes with the specified frequency; x = LED status is irrelevant LEDs MSTR, RACK0 and RACK1 The three LEDs, MSTR, RACK0 and RACK1, provide information about the mounting rack number configured in the synchronization module and which CPU has process control of the switched I/O modules. LED MSTR Meaning RACK0 RACK1 H x x CPU has the process control for the switched I/O x H D CPU on rack number 0 x D H CPU on rack number 1 D = LED is dark; H = LED lights up; x = LED status is irrelevant 4-8 Automation System S7-400H Fault-tolerant Systems A5E00068197-07 Installation of a CPU 41x-H LEDs INTF, EXTF and FRCE The three LEDs, INTF, EXTF and FRCE, provide information about the errors and special events during running of the user program. LED Meaning INTF EXTF FRCE H x x An internal error has been detected (programming or parameter assignment error). x H x An external error has been detected (in other words, the cause of the error cannot be traced back to the CPU module). x x H A force request is active. H = LED lights up; x = LED status is irrelevant LEDs BUSF1 and BUSF2 The LEDs BUSF1 and BUSF2 indicate errors in connection with the MPI/DP interface and the PROFIBUS DP interface. LED Meaning BUS1F BUS2F H x An error has been detected at the MPI/DP interface. x H An error has been detected at the PROFIBUS DP interface. B x DP master: DP slave: x B DP master: DP slave: One or more slaves at PROFIBUS DP interface 1 are not replying. not addressed by the DP master One or more slaves at PROFIBUS DP interface 2 are not replying. not addressed by the DP master H = LED lights up; B = LED flashes; x = LED status is irrelevant Automation System S7-400H Fault-tolerant Systems A5E00068197-07 4-9 Installation of a CPU 41x-H LEDs IFM1F and IFM2F The LEDs IFM1F and IFM2F indicate errors that occur in the first and second module interfaces. LED Meaning IFM1F IFM2F H x An error has been detected at module interface 1. x H An error has been detected at module interface 2. H = LED lights up; x = LED status is irrelevant LED REDF The LED REDF indicates specific system states and redundancy errors. REDF LED System Status Boundary Conditions Flashes at 0.5 Hz Linking – Flashes at 2 Hz Update – Off Redundant (CPUs are redundant) No redundancy error Lights Redundant (CPUs are redundant) There is an I/O redundancy error: • Failure of a DP master or partial or complete failure of a DP master system • Loss of redundancy on the DP slave All the system states apart from redundant, linking, updating – Diagnostics Buffer You can read out the exact cause of an error in STEP 7 (PLC –> Module Information) from the diagnostics buffer. 4-10 Automation System S7-400H Fault-tolerant Systems A5E00068197-07 Installation of a CPU 41x-H 4.4 Mode Selector Function of the Mode Selector Using the mode selector, you can put the CPU in RUN/RUN-P or STOP mode or reset the memory of the CPU. STEP 7 offers further options for changing the mode. Positions The mode selector switch is designed as a keyswitch. Figure 4-2 illustrates the possible positions of the mode selector. RUN-P RUN STOP MRES Figure 4-2 Positions of the mode selector Table 4-2 explains the positions of the mode selector. In the event of a fault or if there are startup problems, the CPU will go into or remain in STOP mode irrespective of the position of the mode selector. Automation System S7-400H Fault-tolerant Systems A5E00068197-07 4-11 Installation of a CPU 41x-H Table 4-2 Positions of the mode selector Explanation Position RUN-P If there are no startup problems or errors and the CPU was able to go into RUN, the CPU executes the user program or runs with no load. It is possible to access the I/O. The key cannot be removed in this position. Programs can: • Be read out with the programming device from the CPU (CPU programming device) • Be transferred to the CPU (programming device CPU). RUN If there are no startup problems or errors and the CPU was able to go into RUN, the CPU executes the user program or runs with no load. It is possible to access the I/O. The key can be removed in this position to ensure that the mode cannot be changed without authorization. Programs in the CPU can be read out with the programming device (CPU % programming device). The program in the CPU cannot be changed when the switch is in the RUN position. (See STEP 7.) The protection level can be bypassed using a password set in STEP 7/HWCONFIG (STEP 7 V4.02 and above). In other words, if you use this password, the program can also be changed when the switch is in the RUN position. STOP The CPU does not process the user program. The digital signal modules are disabled. The key can be removed in this position to ensure that the operating mode cannot be changed without authorization. Programs can: • Be read out with the programming device from the CPU (CPU programming device) • Be transferred to the CPU (programming device CPU). MRES (Master Reset) Momentary-contact position of the key switch for the master reset of the CPU and for cold restart (see the following pages). Protection Levels A protection level can be defined in the CPUs of the S7-400 that can be used to protect the programs in the CPU from unauthorized access. You can determine with the protection level which programming device functions a user can execute on the CPU in question without particular authorization (password). You can execute all the programming device function using a password. Setting the Protection Levels You can set the protection levels (1 to 3) for a CPU under STEP 7/Configuring Hardware. You can remove the protection level set under STEP 7/Configuring Hardware using a manual reset with the mode selector. You can also set protection levels 1 and 2 using the mode selector. Table 4-3 lists the protection levels of a CPU of the S7-400. 4-12 Automation System S7-400H Fault-tolerant Systems A5E00068197-07 Installation of a CPU 41x-H Table 4-3 Protection levels of a S7-400 CPU Function Protection Level 1 • All programming device functions are permitted Switch Position RUN-P/STOP (default setting). 2 • It is permissible to load objects from the CPU into RUN programming device. In other words, only read programming device functions are permitted. • Functions for process control, process monitoring and process communication are permitted. 3 • All information functions are permitted. • Functions for process control, process monitoring – and process communication are permitted. • All information functions are permitted. If different protection levels are set with the mode selector and with STEP 7, the higher protection level applies (3 before 2, 2 before 1). Operating Sequence for Memory Reset Case A: You want to download a complete, new user program to the CPU. 1. Turn the switch to the STOP setting. Result: The STOP LED lights up. 2. Turn the switch to MRES, and keep it in this position. Result: The STOP LED is dark for a second, light for a second, dark for a second and then remains on. 3. Turn the switch back to STOP, and then within the next 3 seconds turn it back to MRES and then back to STOP. Result: The STOP LED flashes for at least 3 seconds at 2 Hz (memory reset is executed) and then lights up continuously Case B: When the STOP LED flashes slowly at 0.5 Hz, the CPU is requesting a memory reset (system memory reset request, after a memory card has been removed or inserted, for example). Turn the switch to MRES and back to the STOP position. Result: The STOP LED flashes for at least 3 seconds at 2 Hz (a memory reset is executed) and then lights up continuously. You can find the complete description of what happens during a memory reset in the: S7-400, M7-400 Programmable Controllers Installation Manual, Chapter 6. Cold Restart Following a cold restart, the user program starts from the beginning again. All the data, including the retentive data, are deleted. Automation System S7-400H Fault-tolerant Systems A5E00068197-07 4-13 Installation of a CPU 41x-H Reboot (Warm Restart) Following a reboot, the user program is restarted from the beginning. The retentive data and the contents of the data blocks are retained. Operation Sequence for Reboot/Warm Start 1. Turn the switch to the STOP setting. Result: The STOP LED lights up. 2. Turn the switch to the RUN/RUNP position. Operating Sequence at Cold Restart 1. Turn the switch to the STOP setting. Result: The STOP LED lights up. 2. Turn the switch to MRES, and keep it in this position. Result: The STOP LED is dark for a second, light for a second, dark for a second and then remains on. 3. Turn the switch to the RUN/RUNP position. 4-14 Automation System S7-400H Fault-tolerant Systems A5E00068197-07 Installation of a CPU 41x-H 4.5 Expanded Memory Determining Memory Requirements with the SIMATIC Manager You can have the block length displayed offline in the dialog field “Properties Block folder offline” (Blocks –> Object Properties –> Blocks tab). The following lengths are shown in the offline view: • Size (sum of all blocks without system data) in the load memory of the PLC • Size (sum of all blocks without system data) in the working memory of the PLC Block lengths from the programming device (PG/PC) are not shown in the properties of the block container. Block lengths are shown in “byte” units. The following values are shown in the properties of the block: • Required number of local data: size of the local data in bytes • MC7: size of the MC7 code in bytes, or size of the DB user data • Size of the load memory in the programmable controller • Size of the working memory in the programmable controller: only displayed if hardware assignment is recognized.) For display purposes, it does not matter whether the block is located in the window of an online view or an offline view.. When a block container is opened and “View Details” is set, the RAM requirements are shown in the project window regardless whether the block container in the window is an online or offline view. You can sum the block lengths by marking all of the relevant blocks. In this case the sum of the marked blocks will be shown in the status line of the SIMATIC Manager. No lengths are shown for blocks (e.g. VATs) that cannot be loaded in the PLC. Block lengths on the programming system (PG/PC) are not shown in the view details. Automation System S7-400H Fault-tolerant Systems A5E00068197-07 4-15 Installation of a CPU 41x-H Generating block–specific messages Memory requirements of SFBs for generating block–specific messages, in contrast to the specifications in the Online Help and electronic manual: SFBs for generating block–specific messages generally require a communication buffer in the CPU work memory (code area), the size of which is also dependent on the length of the associated values. Please see the table below for corresponding information. Block Type CPU work memory requirements in [byte] NOTIFY, NOTIFY_8P, ALARM, ALARM_8P 200 + 2 * the length of associated values specified to SD_1,...SD_10 during the initial call ALARM_8 100 AR_SEND 54 4-16 Automation System S7-400H Fault-tolerant Systems A5E00068197-07 Installation of a CPU 41x-H 4.5.1 Expanding Load Memory with Memory Cards Order Numbers The order numbers for memory cards are listed at the end of this chapter with the technical specifications. Installation The memory card is slightly larger than a credit card and protected by a strong metal casing. It is plugged into a receptacle at the front of the CPU; the end to be inserted is obvious from the design of the memory card. Name of the memory Card Order number Front elevation Side elevation Type plate Grip Figure 4-3 Design of the memory card Function of the Memory Card The memory card and an integrated memory area on the CPU together form the load memory of the CPU. In operation the load memory contains the complete user program including comments, symbols, special additional information that permits decompiling of the user program, and all the module parameters. Automation System S7-400H Fault-tolerant Systems A5E00068197-07 4-17 Installation of a CPU 41x-H What the Memory Card Contains The following data can be stored in the memory card: • User program, i.e. blocks (OBs, FBs, FCs, DBs) and system data • Parameters that determine the behavior of the CPU • Parameters that determine the behavior of the I/O modules. • As of STEP 7 V5.1 the complete project files on suitable memory cards. Types of Memory Cards for the S7-400 Two types of memory card are used in the S7-400: • RAM cards • Flash cards (FEPROM cards) Note Third-party memory cards cannot be used in the S7-400. Which Type of Memory Card to Use Whether you use a RAM card or a Flash card depends on how you intend to use the memory card. Table 4-4 Types of memory cards ...Then If You ... 4-18 want to store the data in RAM and you want to modify your program during RUN or RUN-P mode, use a RAM card want to store your user program long-term on memory card also when the power is switched off (without backup or outside the CPU), use a Flash card Automation System S7-400H Fault-tolerant Systems A5E00068197-07 Installation of a CPU 41x-H RAM Card When you use a RAM card, you have to plug this into the CPU to load the user program. The user program is loaded with the help of the programming device (PG). You can load the entire user program or the individual parts such as FBs, FCs, OBs, DBs, or SDBs into the load memory in STOP mode or in RUN-P mode. If you remove the RAM card from the CPU, the information stored on it is lost. The RAM card does not have a built-in backup battery. When the power supply includes a functioning backup battery or when the CPU is supplied by an external backup current connected to the “EXT. BATT.” socket, the memory contents of the RAM Card are maintained when the power supply is switched off as long as the RAM card is inserted in the CPU and the CPU is inserted in the module rack. FLASH Card If you use a Flash card, there are two ways of loading the user program: • Set the CPU to STOP with the mode selector, plug the Flash card into the CPU, and load the user program into the load memory with the help of the programming device (PG). • Load the user program into the Flash card in offline mode at the programming device and then insert the Flash card into the CPU. You can only load your complete user program with the Flash card. You can load smaller program sections into the integrated load memory on the CPU using the programming device. In the case of larger program changes, you must always reload the Flash card with the complete user program. The FLASH card does not require power to store its contents, in other words, the data it contains is maintained when the FLASH card is removed from the CPU or your S7-400 is being operated without power backup (without a backup battery in the power supply module or without an external backup current connected to the “EXT. BATT.” socket of the CPU). Which Memory Card Capacity to Use The capacity of the memory card you use depends on the size of the user program and the additional memory requirement resulting from the use of function modules or communications modules. See the manuals of these modules for details of their memory requirements. Automation System S7-400H Fault-tolerant Systems A5E00068197-07 4-19 Installation of a CPU 41x-H Changing Memory Cards To change the memory card, follow the steps outlined below: 1. Set the CPU to STOP. Note If the memory card is not removed in the STOP mode, the CPU goes to the STOP state and the STOP indicator flashes every 3 seconds to prompt you to carry out a memory reset. This procedure cannot be influenced by error OBs. 2. Remove the plugged in memory card. 3. Insert a “new” memory card. 4. Perform a memory reset on the CPU. 4-20 Automation System S7-400H Fault-tolerant Systems A5E00068197-07 Installation of a CPU 41x-H Technical Specifications Name Order Number Current Consumption at 5 V BackupCurrents MC 952 / 256 Kbytes / RAM 6ES7 952-1AH00-0AA0 typ. 35 mA max. 80 mA typ. max. 40 A MC 952 / 1 Mbyte / RAM 6ES7 952-1AK00-0AA0 typ. 40 mA Max. 90 mA typ. 3 A max. 50 A MC 952 / 2 Mbytes / RAM 6ES7 952-1AL00-0AA0 typ. 45 mA max. 100 mA typ. 5 A max. 60 A MC 952 / 4 MB / RAM 6ES7 952-1AM00-0AA0 typ. 45 mA max. 100 mA typ. 5 A max. 60 A MC 952 / 8 MB / RAM 6ES7 952-1AP00-0AA0 typ. 45 mA max. 100 mA typ. 5 A max. 60 A MC 952 / 16 MB / RAM 6ES7 952-1AS00-0AA0 typ. 45 mA max. 100 mA typ. 5 A max. 60 A MC 952 / 1 Mbyte / 5V Flash 6ES7 952-1KK00-0AA0 typ. 40 mA Max. 90 mA – MC 952 / 2 Mbytes / 5V Flash 6ES7 952-1KL00-0AA0 typ. 50 mA max. 100 mA – MC 952 / 4 Mbytes / 5V Flash 6ES7 952-1KM00-0AA0 typ. 40 mA Max. 90 mA – MC 952 / 8 Mbytes / 5V Flash 6ES7 952-1KP00-0AA0 typ. 50 mA max. 100 mA – MC 952 / 16 Mbytes / 5V Flash 6ES7 952-1KS00-0AA0 typ. 55 mA max. 110 mA – MC 952 / 32 Mbytes / 5V Flash 6ES7 952-1KT00-0AA0 typ. 55 mA max. 110 mA – MC 952 / 64 Mbytes / 5V Flash 6ES7 952-1KY00-0AA0 typ. 55 mA max. 110 mA – Dimensions W x H x D WHD (in mm) 7,5 57 87 Weight max. 35 g EMC protection Provided by construction Automation System S7-400H Fault-tolerant Systems A5E00068197-07 4-21 Installation of a CPU 41x-H 4.5.2 Expanding the Working Memory of the CPU 417-4 H with Memory Modules Memory Expansion The working memory of the CPU 417-4 H can be expanded with memory modules. The following points are important: 1. When only one module is used it has to be inserted in slot 1. 2. You may only insert a second submodule if a 4 Mbyte-submodule is inserted in slot 1. The following combinations are then possible: Combination Slot 1 Slot 2 1 2 Mbytes – 2 4 Mbytes – 3 4 Mbytes 2 Mbytes 4 4 Mbytes 4 Mbytes Note Only use memory modules designed for the CPU. ! Warning The modules can be damaged. Failure to observe ESD guidelines can result in damage to both the CPU and memory cards. Observe the ESD guidelines when fitting memory cards. Fitting Memory Cards in the CPU Proceed as follows: 1. Remove the cover from the left side of the CPU by loosening the three screws. 2. Push the first memory card down through an angle of approximately 45o into slot 1 (see Figure 4-4). Note the cutout at the front of the card (polarity reversal protection). 3. Push the memory card down until the tabs in the slot slide into the corresponding cutouts on the side of the card. Make sure that the metal flag at the end of the card lies on the metal edge of the module. 4. If necessary, insert the second memory card in slot 2 in the same way (see Figure 4-4). 5. Fit the cover on the upper left side of the CPU by securing it with three screws. 4-22 Automation System S7-400H Fault-tolerant Systems A5E00068197-07 Installation of a CPU 41x-H Note The connectors to accept the memory cards are coded (see Figure 4-5). Do not apply force when fitting the memory cards. Lightly press the guide supports out to remove the memory cards (see Figure 4-5). Slot 1 Slot 2 Figure 4-4 Fitting memory cards in the CPUs Copper flag Memory card Cutout Cutout Guide support Reverse polarity protection Guide support Slots 1 and 2 Figure 4-5 Memory card Automation System S7-400H Fault-tolerant Systems A5E00068197-07 4-23 Installation of a CPU 41x-H 4.6 Multipoint Interface (MPI) Connectable Devices You can, for example, connect the following nodes to the MPI: • Programming devices (PG/PC) • Operation and monitoring devices (OPs and TDs) • Additional SIMATIC S7 programmable controllers Some connectable devices take the 24 V supply from the interface. This voltage is available there in a non-isolated form. PG/OP-CPU Communication A CPU can maintain several simultaneous online connections during communication with programming devices/OPs. By default, one of these connections is for a programming device and one is for an OP/operation and monitoring unit. Communication and Interrupt Response Times Notice The interrupt reaction times can be delayed by read and write jobs having a maximum aggregate (approx. 460 byte). CPU-CPU Communication The option “Data exchange via S7 communication” is provided for the CPU-CPU communication. You can find additional information on this in the “Programming with STEP 7” manual. Connectors Only use bus connectors with an angular outgoing cable for PROFIBUS DP and programming device cables to connect devices to the MPI (see Installation Manual, Chapter 7). Multipoint Interface as DP Interface You can also configure the MPI interface as a DP interface. To do this, you can reconfigure the MPI interface under STEP 7 in SIMATIC Manager. You can use this to set up a DP line with a maximum of 32 slaves. 4-24 Automation System S7-400H Fault-tolerant Systems A5E00068197-07 Installation of a CPU 41x-H 4.7 PROFIBUS DP Interface Connectable Devices All standard DP slaves can be connected to the Profibus DP interface. The CPU is the DP master and is connected to the passive slave stations or other DP masters through the PROFIBUS-DP field bus. Some connectable devices take the 24 V supply from the interface. This voltage is available there in a non-isolated form. Connectors Only use bus connectors for PROFIBUS DP and PROFIBUS cables to connect devices to the PROFIBUS DP interface (see Installation Manual, Chapter 5). Automation System S7-400H Fault-tolerant Systems A5E00068197-07 4-25 Installation of a CPU 41x-H 4.8 Overview of the Parameters for the S7-400 CPUs Default Values All the parameters have default settings at delivery. These defaults, which are suitable for a whole range of standard applications, mean that the S7-400 can be used immediately without the need for further settings. You can find the CPU-specific default values using “Configuring Hardware” in STEP 7. Parameter Blocks The activity and properties of the CPU are defined by parameters. The CPUs have a defined default setting. You can change this default setting by modifying the parameters. The following list gives you an overview of the system properties available in the CPUs that can be configured. • General properties (e.g. MPI node no.) • Startup (e.g. startup with POWER ON) • Cycle/clock memory (e.g. cycle monitoring time) • Retentivity (number of memory markers, timers and counters that are kept retentive) • Memory (e.g. local data) Note: If, for example, you set greater or smaller values than the default values for the process image, the number of diagnostics buffer entries and the maximum number of ALARM-8 blocks and blocks for S7 communication, the working memory available for the program code and for data blocks will be reduced or increased by this amount. • Assignment of interrupts (process interrupts, delay interrupts, asynchronous error interrupts) to the priority classes • Time-of-day interrupts (e.g. start, interval duration, priority) • Watchdog interrupts (e.g. priority, interval duration) • Diagnostics/clock (e.g. time synchronization) • Protection levels • H-specific parameters Note 16 memory bytes and 8 counters are kept retentive in the default setting. In other words, they are not deleted even when the CPU is rebooted. 4-26 Automation System S7-400H Fault-tolerant Systems A5E00068197-07 Installation of a CPU 41x-H Parameter Assignment Tool You can set the individual CPU parameters using “Configuring Hardware” in STEP 7. Note If you make changes to the existing settings of the following parameters, the operating system carries out initializations like those during cold restart. • Size of the process image of the inputs • Size of the process image of the inputs • Size of the local data • Number of diagnostics buffer inputs • Communication resources These initializations are: – Data blocks are initialized with the load values – M, C, T, I, Q are deleted irrespective of the retentivity setting (0) – DBs generated via SFC are deleted – Hard-coded, dynamic connections are cleared down, as are the unconfigured connections of the X/I blocks from the active side of the connection – All the priority classes start from the beginning again Specially Saved Parameters The following parameters are specially saved in an H CPU. • The module rack number of an H CPU (0 or 1) • The operating mode of an H CPU (single or redundant mode) These parameters are not deleted when a memory reset is performed and you cannot change them in HW Config. The following describes how these parameters can be changed. Changing the Rack Number of an H CPU To change the rack number of an H CPU, carry out the following steps: 1. Change the rack number on the synchronization module 2. Perform a power on without backup. 3. Perform a manual memory reset. Automation System S7-400H Fault-tolerant Systems A5E00068197-07 4-27 Installation of a CPU 41x-H Changing the Operating Mode of an H CPU To change the operating mode of an H CPU, carry out one of following procedures depending on the operating mode you wish to change to and the module rack number of the CPU: Changing from Redundant to Single Mode 1. Remove the interface module. 2. Perform a power on without backup e.g., by removing and inserting the CPU. 3. Load a project into the CPU in which it is configured for single mode. Changing from Single to Redundant Mode, Module Rack Number 0 1. Connect the synchronization modules set for rack number 0. 2. Perform a power on without backup e.g., by removing and inserting the CPU. 3. Load a project into the CPU in which it is configured for redundant mode. Changing from Single to Redundant Mode, Module Rack Number 1 1. Connect the synchronization modules set for rack number 1. 2. Perform a power on without backup e.g., by removing and inserting the CPU. 3. Load a project into the CPU in which it is configured for redundant mode. 4-28 Automation System S7-400H Fault-tolerant Systems A5E00068197-07 Installation of a CPU 41x-H 4.9 CPU 41x-H as Profibus DP Master Introduction This chapter details the properties and technical specifications you need when you wish to use the CPU as a DP master and configure it for direct data communication. Note This description applies to CPUs as of V 3.0.0. Chapter Overview In Section Description On Page 4.9.1 DP Address Areas of the CPUs 41x 4-30 4.9.2 CPU 41x as DP Master 4-30 4.9.3 Diagnostics of the CPU 41x as DP Master 4-35 Further References You can find descriptions of and information on configuration as a whole, the configuration of a PROFIBUS subnetwork and diagnostics in the PROFIBUS subnetwork in the STEP 7 online help system. Further information You can find descriptions and information on changing from PROFIBUS DP to PROFIBUS DPV1 on the Internet at the following address: http://www.ad.siemens.de/simatic-cs Under the item number 7027576 Automation System S7-400H Fault-tolerant Systems A5E00068197-07 4-29 Installation of a CPU 41x-H 4.9.1 DP Address Areas of the CPUs 41x Address Areas of the CPUs 41x Table 4-5 CPUs 41x (MPI/DP Interface as Profibus DP) 414-4H 417-4H MPI interface as PROFIBUS DP, inputs and outputs (bytes) in each case 2048 2048 DP interface as PROFIBUS DP, inputs and outputs (bytes) in each case 6144 8192 8192 16384 Address Area In the process image, inputs and outputs in each case Can be set up to x bytes DP diagnostics addresses occupy at least one byte for the DP master and each DP slave in the address area. The DP standard diagnosis for each node can be called at these addresses, for example (LADDR parameter of SFC 13). You specify the DP diagnostics addresses at configuration. If you do not specify any DP diagnostics addresses, STEP 7 assigns the addresses from the highest byte address downwards as DP diagnostics addresses. In DPV1 mode of the master, the slaves generally have two diagnostics addresses. 4.9.2 CPU 41x as DP Master Introduction This chapter details the properties and technical specifications you need when you wish to operate the CPU as a Profibus DP master. Prerequisite Before commissioning, you must configure the CPU as a DP master. That means that you must do the following in STEP 7 • Configure the CPU as DP master • Assign a PROFIBUS address • Select an operating mode (S7-compatible or DPV1) • Assign a diagnostics address • Connect DP slaves to the DP master system 4-30 Automation System S7-400H Fault-tolerant Systems A5E00068197-07 Installation of a CPU 41x-H Note Is one of the PROFIBUS DP slaves a CPU 31x or a CPU 41x? If it is, you will find it in the PROFIBUS DP catalog as a preconfigured station. Assign this DP slave CPU a slave diagnostics address in the DP master. You must link the DP master to the DP slave CPU and specify the address areas for the transfer of data to the DP slave CPU. Monitor/Modify, Programming via PROFIBUS As an alternative to the MPI interface, you can use the PROFIBUS DP interface to program the CPU or execute the Monitor/Modify programming device functions via the PROFIBUS DP interface. Note The Programming and Monitor/Modify applications via the PROFIBUS DP interface extend the DP cycle. Power-Up of the DP Master System Use the following parameters to set power-up monitoring of the DP master: • Transfer of the Parameters to Modules • “Finished” Message by Means of Modules In other words, the DP slaves must power up and be configured by the CPU (as DP master) in the set time. PROFIBUS Address of the DP Master All PROFIBUS addresses are permissible. From EN 50170 to DPV1 The EN 50170 standard for distributed I/O has been further developed. The development results are included in IEC 61158 / IEC 61784-1:2002 Ed1 CP 3/1. In the SIMATIC documentation we refer to this as DPV1. The new version features a few additions and simplifications. Some SIEMENS automation components already feature DPV1 functions. To be able to use these new features you first have to perform a few small modifications to your system. A detailed description of the conversion from EN 50170 to DPV1 is available as FAQ with the title “Changing from EN 50170 to DPV1”, FAQ contribution ID 7027576 at the Customer Support Internet site. Automation System S7-400H Fault-tolerant Systems A5E00068197-07 4-31 Installation of a CPU 41x-H Components Supporting Profibus DPV1 Features DPV1 Master • The S7-400 CPUs with integrated DP interface beginning with firmware version 3.0. • CP 443-5, order number 6GK7 443-5DX03-0XE0, if it to be used with one of the above–mentioned S7-400 CPUs. DPV1 Slaves • DP slaves from the hardware catalog of STEP 7 and listed under their family names can be recognized in the information text as DPV1 slaves. • DP slaves integrated in STEP 7 through GSD files, beginning with GSD Revision 3. STEP 7 Beginning with STEP 7 V5.1, Service Pack 2. What are the Operating Modes for DPV1 Components? • S7 Compatible Mode In this mode the components are compatible to EN 50170. However, you cannot fully use the DPV1 features. • DPV1 Mode In this mode you have full access to the DPV1 features. The automation components in the station that do not support DPV1 can continued be used as before. Compatibility between DPV1 and EN 50170? You continue to use all the previous slaves after conversion to DPV1. However, your previous slaves do not support the additional functions of DPV1.. You can you use DPV1 slaves even without the conversion to DPV1. The DPV1 slaves then behave like conventional slaves.. DPV1 slaves from SIEMENS can be used in the S7–compatible mode. For DPV1 slaves from other manufacturers you need a GSD file to EN50170 earlier than Revision 3. 4-32 Automation System S7-400H Fault-tolerant Systems A5E00068197-07 Installation of a CPU 41x-H Determining the Bus Topology in a DP Master System with the SFC 103 “DP_TOPOL” The diagnostics repeater is provided to improve the ability of locating disrupted modules or an interruption on the DP cables when failures occur in ongoing operation. This module is a slave that determines the topology of a DP strand and records any faults originating from it. You can use SFC 103 “DP_TOPOL” to trigger the analysis of the bus topology of a DP master systems by the diagnostics repeater. SFC 103 is documented in the corresponding online help and in the manual “System and Standard Functions”. The diagnostics repeater is documented in the manual “Diagnostics Repeater for PROFIBUS DP”, order number 6ES7972-0AB00-8BA0. System Modifications During Ongoing Operation Some system configuration modifications can be made in the RUN state even when an H CPU is being operated in single mode. Processing is halted for a maximum of 2.5 seconds (configurable). The process outputs maintain their current value during this time. This has practically no effect on the process especially in processing engineering systems. See also the manual “Modifications to the System During Operation Using CiR” System modification during ongoing operation can only be made for distributed I/O. It requires the type of configuration shown in the following illustration. To simplify the representation only one DP master system and only one PA master system are shown. MPI/DP interface of a CPU 41x or DP interface of a CPU 41x-2 or external DP interface module CP 443-5 ext. ÉÉÉÉÉÉÉÉÉÉÉÉÉÉÉ ÉÉÉÉÉÉÉÉÉÉÉ PROFIBUS: DP master system DP Master IM 157+ DP/PA coupler Modular DP slave ET200M, ET200S or ET200iS PA link Compact DP slave Figure 4-6 SUBNETWORK: PA master system PA slave (field device) PA slave (field device) Overview: system configuration for modification of the system during operation Automation System S7-400H Fault-tolerant Systems A5E00068197-07 4-33 Installation of a CPU 41x-H Hardware Requirements for System Modification During Operation The following hardware requirements must be met in the commissioning phase to enable system modifications during ongoing operation: • Use of an S7 400-CPU, firmware V3.1.0 or later • S7 400 H-CPU only in single mode • If you are using an extended CP 443-5, it has to be firmware V5.0 or later. • If you want to add modules for the ET 200M: Use the IM153-2 as of MLFB 6ES7 153-2BA00-0XB0 or IM153-2FO as of version MLFB 6ES7 153-2BB00-0XB0. You will also need to install the ET 200M with an active backplane bus with enough free space for the planned expansion. The ET 200M has to be integrated in such a way that it conforms to IEC 61158. • If you wish to add entire stations: be sure to include the required connectors, repeaters, etc. • If you wish to add PA slaves (field devices): use IM157 version MLFB 6ES7 157-0AA82-0XA00 or later in the corresponding DP/PA Link. Note You can freely mix components that are cable of system modification during operation and those that are not. Depending on the chosen configuration, there may be restrictions to the components that can be modified during operation. Software Requirements for System Modification During Operation You require STEP7 V5.2. to be able to perform system modifications during ongoing operation the user program must be written in such a way that such events as station failures or module faults do not result in a CPU STOP. Permitted System Modifications: Overview The following modifications can be made to the system during operation: • Addition of modules for modular DP slaves ET 200M, ET 200S, ET 200iS, if they respond in accordance with IEC 61158 • Use of a free channel on an existing module for the modular slaves ET 200M, ET 200S, ET 200iS • Addition of DP slaves to an existing DP master system • Addition of PA slaves (field devices) to an existing PA master system • Addition of DP/PA couplers behind an IM157 • Addition of PA links (including PA master systems) to an existing DP master system • Assignment of modules to a process image partition 4-34 Automation System S7-400H Fault-tolerant Systems A5E00068197-07 Installation of a CPU 41x-H • Reconfiguration of I/O modules, e.g. selection of other interrupt limits • Reversal of modifications: added modules, DP slaves and PA slaves (field devices) can be removed. 4.9.3 Diagnostics of the CPU 41x as DP Master Diagnostics Using LEDs Table 4-6 explains the meaning of the BUSF LED. The BUSF LED assigned to the interface configured as the PROFIBUS DP interface will always light up or flash. Table 4-6 BUSF Off Meaning of the BUSF LEDs of the CPU 41x as DP master Meaning Configuration correct What to Do – All the configured slaves are addressable Lights • Bus fault (hardware fault) • Check the bus cable for a short circuit or interruption. • DP interface fault • Different transmission rates in • Evaluate the diagnosis. Reconfigure or correct the configuration. multi–DP master operation (only in single mode) Flashes • Station failure • Check whether the bus cable is connected to the CPU 41x or whether the bus is interrupted. • At least one of the assigned slaves is not addressable Automation System S7-400H Fault-tolerant Systems A5E00068197-07 • Wait until the CPU 41x has powered up. If the LED does not stop flashing, check the DP slaves or evaluate the diagnosis of the DP slaves. 4-35 Installation of a CPU 41x-H Reading Out the Diagnostics Information with STEP 7 Table 4-7 Reading out the diagnostics information with STEP 7 DP Master CPU 41x Block or Tab in STEP 7 Application Refer To... DP slave diagnostics tab To display the slave diagnosis as plain text at the STEP 7 user interface See the section on hardware diagnostics in the STEP 7 online help system and the STEP 7 user guide STEP 7-STEP 7 SFC 13 “DPNRM_DG” To read out the slave diagnosis (store in the data area of the user program)) Configuration for CPU 41x, see CPU manual; SFC see Reference Manual System and Standard Functions, configuration for other slaves, see respective documentation. SFC 59 “RD_REC” To read out data records of the S7 diagnosis (store in the data area of the user program)) SFC 51 “RDSYSST” To read out SSL sublists. Call SFC 51 in the diagnostics interrupt using the SSL ID W#16#00B3 and read out the SSL of the slave CPU. SFB 52 “RDREC” For DPV1 slaves: To read out data records of the S7 diagnosis (store in the data area of the user program)) SFB 54 “RALRM” See the System and Standard Functions Reference Manual For DPV1 slaves: To read out interrupt information within the associated interrupt OB 4-36 Automation System S7-400H Fault-tolerant Systems A5E00068197-07 Installation of a CPU 41x-H Evaluating the Diagnosis in the User Program The following figure shows you how to evaluate the diagnosis in the user program. CPU 41x Diagnostics event OB82 is called Read out OB82_MDL_ADDR For the diagnosis of the relevant and components: Read out OB82_IO_FLAG (= input/output module identifier) Call SFB 54 (in DPV1 environment) ± MODE= set 1 Enter bit 0 of the OB82_IO_Flag as bit 15 in OB82_MDL_ADDR Result: Diagnostics address “OB82_MDL_ADDR*” Diagnostics data are entered in the TINFO and AINFO parameters. For the diagnosis of the whole DP slave: For the diagnosis of the relevant modules: Call SFC 13 Call SFC 51 ± Enter the diagnostics address OB82_MDL_ADDR* in the LADDR parameter ± Enter the diagnostics address OB82_MDL_ADDR* in the INDEX parameter Enter the ID W#16#00B3 in the SZL_ID parameter (= diagnostics data of a module) Figure 4-7 Diagnostics with CPU 41x Automation System S7-400H Fault-tolerant Systems A5E00068197-07 4-37 Installation of a CPU 41x-H Diagnostics Addresses in Connection with DP Slave Functionality You assign diagnostics addresses for the PROFIBUS DP in the CPU 41x. Ensure during configuration that DP diagnostics addresses are assigned once to the DP master and once to the DP slave. S7-CPU as DP master DP-Slave PROFIBUS You specify two diagnostics addresses during configuration: Diagnostics address During the configuration of the DP master, you specify (in the associated project of the DP master) a diagnostics address for the DP slave. In the following, this diagnostics address is described as being assigned to the DP master. During the configuration of the DP slave, you also specify (in the associated project of the DP slave) a diagnostics address that is assigned to the DP slave. In the following, this diagnostics address is described as being assigned to the DP slave. By means of this diagnostics address the DP master receives information on the status of the DP slave or a bus interruption (see also Table 4-8). By means of this diagnostics address the DP slave receives information on the status of the DP master or a bus interruption. Figure 4-8 4-38 Diagnostics address Diagnostics addresses for the DP master and DP slave Automation System S7-400H Fault-tolerant Systems A5E00068197-07 Installation of a CPU 41x-H Event Detection Table 4-8 shows how the CPU 41x acting as a DP master detects any changes in the operating mode of a CPU as DP slave or interruptions in data transfer. Table 4-8 Event detection of the CPUs 41x as DP master What Happens in the DP Master Event Bus interruption (short circuit, plug removed) DP slave: RUN → STOP DP slave: STOP → RUN • OB 86 called with the message Station failure (incoming event; diagnostics address of the DP slave that is assigned to the DP master) • In the case of I/O access: Call of OB 122 (I/O access error) • OB 82 is called with the message Faulty module (incoming event; diagnostics address of the DP slave that is assigned to the DP master; tag OB82_MDL_STOP=1) • OB 82 is called with the message Module ok. (outgoing event; diagnostic address of the DP slave that is assigned to the DP master; Variable OB82_MDL_STOP=0) Evaluation in the User Program The following table shows you how, for example, you can evaluate RUN-STOP transitions of the DP slave in the DP master (see also Table 4-8). In the DP Master In the DP Slave (CPU 41x) Diagnostics addresses: (example) Master diagnostics address=1023 Slave diagnostics address in the master system=1022 Diagnostics addresses: (example) Slave diagnostics address=422 Master diagnostics address=not relevant The CPU calls OB 82 with the following information, amongst other things: CPU: RUN → STOP • OB 82_MDL_ADDR:=1022 • OB82_EV_CLASS:=B#16#39 CPU generates a DP slave diagnostics frame. (incoming event) • OB82_MDL_DEFECT:=module malfunction Tip: This information is also in the diagnostics buffer of the CPU You should also program the SFC 13 “DPNRM_DG” in the user program to read out the DP slave diagnostics data. We recommend you use SFB 54 in the DPV1 environment. It outputs the interrupt information in its entirety. Automation System S7-400H Fault-tolerant Systems A5E00068197-07 4-39 Installation of a CPU 41x-H 4.10 Consistent Data Data that belongs together in terms of its content and a process state written at a specific point in time is known as consistent data.. To maintain consistency, the data should not be changed or updated during processing or transmission. Example 1: To ensure that the CPU has a consistent image of the process signals for the duration of cyclic program scanning, the process signals are read from the process image inputs prior to program scanning and written to the process image outputs after the program scanning. Subsequently, during program scanning when the address area “inputs” (I) and “outputs” (O) are addressed, the user program addresses the internal memory area of the CPU on which the image of the inputs and outputs is located instead of directly accessing the signal modules. Example 2: Inconsistency can arise if a communication block (e.g. SFB 14 “GET”, SFB 15 “PUT”) is interrupted by a process interrupt OB with a higher priority. If the user program in this process interrupt OB now changes the data which have already been processed in part by the communication block, the transferred data originate in part before and in part after the time the process interrupt was processed. This means that these data are inconsistent (not coherent). 4-40 Automation System S7-400H Fault-tolerant Systems A5E00068197-07 Installation of a CPU 41x-H SFC 81 “UBLKMOV” With SFC 81 “UBLKMOV” (uninterruptible block move), you can copy the contents of a memory area (= source area) consistently to a different memory area (= destination area). The copy operation cannot be interrupted by other operating system activities. SFC 81 “UBLKMOV” enables you to copy the following memory areas: • Memory markers • DB contents • Process image of the inputs • Process image of outputs The maximum amount of data you can copy is 512 bytes. Take into consideration the restrictions for the specific CPU, which are documented in the operations list, for example. Since copying cannot be interrupted, the interrupt reaction times of your CPU may increase when using SFC 81 “UBLKMOV”. The source and destination areas must not overlap. If the specified destination area is larger than the source area, the function only copies as much data to the destination area as that contained in the source area. If the specified destination area is smaller than the source area, the function only copies as much data as can be written to the destination area. 4.10.1 Consistency for Communication Blocks and Functions Using S7–400 the communication data is not processed in the scan cycle checkpoint; instead, this data is processed in fixed time slices during the program cycle. On the system side only the commands byte, word and double word can be processed in an intrinsically consistent way, in other words they cannot be interrupted by communication functions. When communications blocks, which are only used in pairs (such as SFB 12 “BSEND” and SFB 13 “BRCV”), are invoked in the user program and access shared data, access to this data area can be coordinated by means of the “DONE” parameter, for example. Data consistency of the communication areas transmitted locally with a communication block can thus be ensured in the user program. S7 communication functions such as SFB 14 “GET”, SFB 15 “PUT” react differently because no block is needed in the user program of the destination device. In this case the size of data consistency has to be taken into account beforehand during the programming phase. Automation System S7-400H Fault-tolerant Systems A5E00068197-07 4-41 Installation of a CPU 41x-H 4.10.2 Access to the Working Memory of the CPU The communication functions of the operating system access the working memory of the CPU in fixed block lengths. The block length depends on the CPU; for S7-400 CPUs it is 32 bytes. This ensures that the interrupt reaction time is not increased when communication functions are used. Since this access is perform asynchronous to the user program, you cannot transmit an unlimited number bytes of consistent data. The following explains the rules that you should keep to guarantee data consistency. 4-42 Automation System S7-400H Fault-tolerant Systems A5E00068197-07 Installation of a CPU 41x-H 4.10.3 Consistency Rules for SFB 14 “GET” and Reading Tags Using SFB 14 “GET” data are transmitted consistently if you adhere to the following consistency rules: • Active CPU (data receiver): Read the receive area in the OB by calling SFB 14 or – if this is not possible – read the receive area when the processing of SFB 14 is completed. • Passive CPU (data sender): Write only as much data to the send area as the block size of the passive CPU (data sender) specifies. • Passive CPU (data sender): Write the data to be sent to the send area using an interrupt block. The following is an example of a situation in which consistent data transmission cannot be ensured because it violates the second consistency rule: 32 bytes are sent although the block size of the passive CPU (data sender) is only 8 bytes. Passive CPU (data sender) Active CPU with SFB GET or read tag (data receiver) 32 bytes Receive Range 32 bytes 1 2 3 4 User data 1 2 3 1 Byte 8 2 Byte 8 3 4 Byte 8 Byte 8 Send Range 4 User data Data transmission Figure 4-9 Data transmission without data consistency Automation System S7-400H Fault-tolerant Systems A5E00068197-07 4-43 Installation of a CPU 41x-H Consistency Rules for SFB 15 “PUT” or Write Tag Using SFB 15 “PUT” data are transmitted consistently if you adhere to the following consistency rules: • Active CPU (data sender): Write the receive area in the OB by calling SFB 15 or – if this is not possible – write the send area when the processing of SFB 15 is completed. • Active CPU (data sender): Write only as much data to the send area as the block size of the passive CPU (data receiver) specifies. • Passive CPU (data receiver): Read the received data from the receive area using an interrupt block. The following is an example of a situation in which consistent data transmission cannot be ensured because it violates the second consistency rule: 64 bytes are sent although the block size of the passive CPU (data receiver) is only 32 bytes. Active CPU with SFB PUT or write tag (data sender) Send Range 1 16 Byte 2 16 Byte 3 16 Byte 4 16 Byte Passive CPU (data receiver) 32 bytes 32 bytes 4 3 2 4 3 1 User data Receive Range 2 1 User data Data transmission Figure 4-10 Data transmission without data consistency Consistent transfer of larger data blocks spanning several tags can be ensured in the user program of the S7-400 using SFC 81 “UBLKMOV” (uninteruptable block move). These data can be consistently accessed using SFB 14 “GET”, SFB 15 “PUT or reading/writing the tag, for example. 4-44 Automation System S7-400H Fault-tolerant Systems A5E00068197-07 Installation of a CPU 41x-H 4.10.4 Reading Data consistently from a DP Standard Slave and Writing Consistently to a DP Standard Slave Reading Data Consistently from a DP Standard Slave Using SFC 14 “DPRD_DAT” Using SFC 14 “DPRD_DAT” (read consistent data of a DP standard slave) you can consistently read the data of a DP standard slave. The data read is entered into the destination range defined by RECORD if no error occurs during the data transmission. The destination range must have the same length as the one you have configured for the selected module with STEP 7. By invoking SFC 14 you can only access the data of one module / DP ID at the configured start address. Writing Data Consistently to a DP Standard Slave Using SFC 15 “DPWR_DAT” Using SFC 15 “DPWR_DAT” (write consistent data to a DP standard slave) you can consistently write data to the DP standard slave addressed in the RECORD. The source range must have the same length as the one you have configured for the selected module with STEP 7. Note The Profibus DP standard defines the upper limit for the transmission of consistent user data (see following section). Typical DP standard slaves adhere to this upper limit. In older CPUs (<1999) there are restrictions in the transmission of consistent user data depending on the CPU. For these CPUs you can determine the maximum length of the data which the CPU can consistently read and write to and from the DP standard in the respective technical specifications under the index entry “DP Master – User data per DP slave”. Newer CPUs are capable of exceeding the value for the amount of data that a DP standard slave can send and receive. Automation System S7-400H Fault-tolerant Systems A5E00068197-07 4-45 Installation of a CPU 41x-H Upper Limit for the Transmission of Consistent User Data on a DP Slave The Profibus DP standard defines the upper limit for the transmission of consistent user data to a DP slave. For this reason a maximum of 64 words = 128 bytes of user data can be consistently transferred in a block to the DP slave. During the configuration you can determine the size of the consistent area. You can set a maximum length of consistent data at 64 words = 128 bytes in the special identification format (SKF) (128 bytes for inputs and 128 bytes for outputs); the data block size cannot exceed this. This upper limit only applies to pure user data. Diagnostics and parameter data are regrouped into full records and therefore always transferred consistently. In the general identification format (AKF) the maximum length of consistent data can be set at 16 words = 32 bytes (32 bytes for inputs and 32 bytes for outputs); the data block size cannot exceed this. Note in this context that a CPU 41x in a general environment acting as a DP slave on a third–party master (connection defined by GSD) has to be configured with the general identification format. The transfer memory of a CPU 41x acting as a DP slave to the PROFIBUS DP can therefore be a maximum of 16 words = 32 bytes. 4-46 Automation System S7-400H Fault-tolerant Systems A5E00068197-07 Installation of a CPU 41x-H 4.10.5 Consistent Data Access without the Use of SFC 14 or SFC 15 Consistent data access of > 4 bytes without using SFC 14 or SFC 15 is possible for the CPUs listed below. The data area of a DP slave that should transfer consistently is transferred to a process image partition. The information in this area are therefore always consistent. You can subsequently access the process image partition using the load / transfer command (e.g. L EW 1). This is an especially convenient and efficient (low runtime load) way to access consistent data. It enables efficient connection and configuration of such devices as drives or other DP slaves. This applies to CPUs 41x-H with firmware version 3.0 or later: No I/O access errors occur with direct access (e.g. L PEW or T PAW). The following is important for converting from the SFC14/15 method to the process image method: • When converting from the SFC14/15 method to the process image method, it is not recommended to use the system functions and the process image at the same time. Although the process image is updated when writing with the system function SFC15, this is not the case when reading. In other words, the consistency between the process image values and the values of the system function SFC14 is not ensured. • SFC 50 “RD_LGADR” outputs another address area with the SFC 14/15 method as with the process image method. • If you are using a CP 443-5 ext the simultaneous use of system functions and the process image results in the following errors: You cannot read/write into the process image and/or you can no longer read/write with SFC 14/15. Example: The following example (of the process image partition 3 “TPA 3”) shows such a configuration in HW Config: • TPA 3 at output: These 50 bytes are stored consistent in the process image partition 3 (pull–down list “Consistent over –> entire length”) and can therefore be read through the normal “load input xy” commands. • Selecting “Process Image Partition –> –––” under input in the pull–down menu means: do not store in a process image. Then the handling can only be performed using the system functions SFC14/15. Automation System S7-400H Fault-tolerant Systems A5E00068197-07 4-47 Installation of a CPU 41x-H 4-48 Automation System S7-400H Fault-tolerant Systems A5E00068197-07 System and Operating Modes of the S7-400H 5 This chapter features an introduction to the subject of S7-400H fault-tolerant systems. You will learn the basic concepts that are used in describing how fault-tolerant systems operate. Following that, you will receive information on fault-tolerant system modes. These modes depend on the operating modes of the different fault-tolerant CPUs, which will be described in the section that follows after that one. In describing these operating modes, this section concentrates on the behavior that differs from a standard CPU. You will find a description of the normal behavior of a CPU in the corresponding operating mode in the Programming with STEP 7 manual. The final section provides details on the modified time response of fault-tolerant CPUs. In Section Description On Page 5.1 Introduction 5-2 5.2 System Modes of the S7-400H 5-4 5.3 Operating Modes of the CPUs 5-5 5.4 Self-test 5-11 5.5 Time Response 5-14 5.6 Evaluation of Process Interrupts in the S7-400H System 5-14 Automation System S7-400H Fault-tolerant Systems A5E00068197-07 5-1 System and Operating Modes of the S7-400H 5.1 Introduction The S7-400H consists of two redundant configured subsystems that are synchronized via fiber-optic cables. The two subsystems create a fault-tolerant programmable logic controller operating with a two-channel (1-out-of-2) structure on the “active redundancy” principle. What does active redundancy mean? Active redundancy, frequently referred to as functional redundancy too, means that all redundant resources are constantly in operation and are simultaneously involved in the execution of the control task. This means for the S7-400H that the user program in the two CPUs is completely identical and is executed simultaneously (synchronously) by the two CPUs. Declaration To identify the two subsystems, we use the traditional expressions of “master” and “standby” for two-channel fault-tolerant systems in this description. The standby always operates so that it is synchronized with the events on the master, meaning that it does not wait for an error instance. A distinction between the master CPU and the standby CPU is primarily important for ensuring reproducible error reactions. Thus, for example, the standby CPU switches to STOP mode in the event of the redundant link failing, whereas the master CPU remains in RUN mode. Master/standby assignment When the S7-400H is turned on for the first time, the first CPU to be stated up becomes the master CPU; the other CPU becomes the standby CPU. Once the master/standby assignment has been established, it remains like that upon simultaneous POWER ON. The master/standby assignment is modified by: 1. The standby CPU starting before the master CPU (interval of at least 3 s) 2. Failure or STOP of the master CPU in redundant system mode 3. No fault was found in TROUBLESHOOTING mode (refer also to Section 5.3.6) 5-2 Automation System S7-400H Fault-tolerant Systems A5E00068197-07 System and Operating Modes of the S7-400H Synchronizing the subsystems The master and standby CPUs are linked by means of fiber-optic cables. The two CPUs maintain event-driven synchronous program scanning over this link. Subsystem (CPU0) Figure 5-1 Subsystem Synchronization (CPU1) Synchronizing the subsystems Synchronization is performed automatically by the operating system and has no effect on the user program. You create your program in the manner in which you are accustomed for standard CPUs on the S7-400. Event-driven synchronization procedure The “event-driven synchronization” procedure patented by Siemens has been used on the S7-400H. This procedure has proved itself in practice and has already been used for the S5-115H and S5-155H PLCs. Event-driven synchronization means that data synchronization between the master and the standby is performed for any event which may result in a different internal mode of the subsystems. The master and standby CPUs are synchronized upon: • direct access to the I/O • interrupts • updating of user times – for example, S7 timers • modification of data by communication functions Continued operation – free from discontinuities – even in the event of loss of redundancy of a CPU The event-driven synchronization procedure ensures continued operation at all times, and free from discontinuities, by the standby CPU even in the event of a master CPU failure. Automation System S7-400H Fault-tolerant Systems A5E00068197-07 5-3 System and Operating Modes of the S7-400H Self-Test Malfunctions have to be detected, isolated and reported as quickly as possible. Consequently, wide-ranging self-test functions have been implemented in the S7-400H that run automatically and entirely in the background. The following components and functions are tested: • interconnection of the central controllers • processor • Memory • I/O bus If the self-test detects an error, the fault-tolerant system tries to eliminate it or to suppress its effects. 5.2 System Modes of the S7-400H The system modes of the S7-400H result from the operating modes of the two CPUs. The term “system mode” is used to obtain a simplified expression which identifies the concurrent operating modes of the two CPUs. Example: Instead of “the master CPU is at RUN and the standby CPU is in the LINK-UP mode” we use “the S7-400H is in the Link-Up system mode”. Overview of the system modes The following table shows the system modes that are possible with the S7-400H. Table 5-1 Overview of the S7-400H system modes System Modes of the S7-400H 5-4 Operating Modes of the Two CPUs Master Standby Stop STOP STOP, deenergized, DEFECTIVE Startup STARTUP STOP, deenergized, DEFECTIVE, no synchronization Single Mode RUN STOP, TROUBLESHOOTING, deenergized, DEFECTIVE, no synchronization Linking RUN STARTUP, LINK-UP Update RUN UPDATE Redundant mode RUN RUN Hold HOLD STOP, deenergized, DEFECTIVE Automation System S7-400H Fault-tolerant Systems A5E00068197-07 System and Operating Modes of the S7-400H 5.3 Operating Modes of the CPUs Operating modes describe the behavior of the CPUs at any given point of time. Knowledge of the operating modes of the CPUs is useful for programming startup, the test and the error diagnostics. Operating modes from POWER ON to redundant system mode Generally speaking, the two CPUs enjoy equal rights so that either CPU can be the master or the standby CPU. For reasons of legibility, the illustration presupposes that the master CPU (CPU 0) is energized prior to the standby CPU (CPU 1) being energized. Figure 5-2 deals with the operating modes of the two CPUs from POWER ON up to redundant system mode. HOLD mode (refer to Section 5.3.5) and ERROR-SEARCH (refer to Section 5.3.6) are not listed since they are a special case. POWER ON at CPU 0 POWER ON at CPU 1 Master CPU Standby CPU System mode 1. Stop 2. Startup 3. STOP STOP STARTUP STOP Single Mode RUN STOP 4. Linking RUN Updating the user program 5. Update RUN Updating of dynamic data 6. Redundant mode RUN Figure 5-2 STARTUP/ LINK-UP UPDATE RUN System and operating modes of the fault-tolerant system Automation System S7-400H Fault-tolerant Systems A5E00068197-07 5-5 System and Operating Modes of the S7-400H Explanations relating to Figure 5-2 Table 5-2 Explanations relating to figure 5-2 System and Operating Modes of the Fault-Tolerant System Description Item 1. Once the power supply has been turned on, the two CPUs (CPU 0 and CPU 1) are in the STOP mode. 2. CPU 0 goes to STARTUP mode and processes OB 100 or OB 102, depending on the type of startup. (Refer to Section 5.3.2) 3. If startup has been successful, the master CPU (CPU 0) changes to single mode (the master CPU processes the user program on its own). 4. If the standby CPU (CPU 1) requests LINK-UP, the master and standby CPUs compare their user programs. If they establish differences, the master CPU updates the user program of the standby CPU. (Refer to Section 5.3.3) 5. After a successful link-up the update starts (see Section 6.2.2). In this instance the master CPU updates the dynamic data of the standby CPU (dynamic data are inputs, outputs, timers, counters, memory markers and data blocks). The contents of the memories of both the CPUs are identical following updating. (Refer to Section 5.3.3) 6. The master and standby CPUs are at RUN following updating. The two CPUs process the user program in synchronism. Exception: in the case of master/standby switch-over for configuration/program modifications. Redundant system mode is only possible if both CPUs are of the same release and the same firmware version. 5.3.1 STOP Operating Mode Except for the additions described below, the CPUs of the S7-400H behave in exactly the same way in STOP mode as the standard CPUs on the S7-400 do. When both CPUs are in STOP mode and you want to load a configuration, you must make sure you load it into the master CPU. Only then are the system data blocks transferred to the I/O modules. Memory Reset Memory Reset always affects only that CPU to whose function it is applied. If you want to reset both CPUs, you must do so first for one and then for the other. 5-6 Automation System S7-400H Fault-tolerant Systems A5E00068197-07 System and Operating Modes of the S7-400H 5.3.2 STARTUP Operating Mode Except for the additions described below, the CPUs of the S7-400H behave in exactly the same way in STARTUP mode as the standard CPUs on the S7-400 do. Startup The fault-tolerant CPUs distinguish between a cold restart and a reboot (warm restart). The restart is not supported by fault-tolerant CPUs. Startup processing by the master CPU The startup system mode of an S7-400H is processed entirely by the master CPU; the standby CPU plays no part in startup. At STARTUP the master CPU compares the existing I/O configuration with the hardware configuration that you created with STEP 7. If there are differences, the master CPU reacts in the same way a standard CPU would on the S7-400. The master CPU checks and assigns parameters to the 1. switched I/O 2. one-way, single-channel I/O. Further information You will find detailed information on STARTUP mode in the Programming with STEP 7 manual. 5.3.3 Operating States LINK–UP and UPDATE Before the fault-tolerant system accepts redundant system mode the master CPU checks and updates the memory contents of the standby CPU. (Exception: in the case of link-up and update with subsequent switch-over to CPU with modified configuration). Checking and updating of the memory contents are performed in two phases which run consecutively and will be referred to in the following as “link-up” and “update”. During link-up and update the master CPU is always at RUN and the standby CPU is in LINK-UP or UPDATE mode. When executing a link-up and update a distinction is made between whether redundant system mode or a master/standby switch-over is to be achieved (for master/standby switch-over for configuration modifications). Detailed information on the link-up and update process can be found in Section 6.2 Automation System S7-400H Fault-tolerant Systems A5E00068197-07 5-7 System and Operating Modes of the S7-400H 5.3.4 Operating State RUN Except for the additions described below, the CPUs of the S7-400H behave in exactly the same way in the RUN mode as the standard CPUs on the S7-400 do. The user program is executed by at least one of the two CPUs in the following system modes: • Single Mode • Link-up, Update • Redundant mode Single Mode, Link–up, Update In the above-named system modes the master CPU is at RUN and executes the user program on its own. Redundant System Mode The master CPU and the standby CPU are at RUN in redundant system mode. The two CPUs execute the user program in synchronism and perform mutual checks. In redundant system mode it is not possible to test the user program with breakpoints. Redundant system mode is only possible if both CPUs are of the same release and the same firmware version. It is quit upon the causes of error listed in Table 5-3. Table 5-3 Causes of Error Leading to the Termination of Redundant System Mode Reaction Cause of Error Failure of one CPU Refer to Section 10.1.1 Failure of the redundant link (synchronization submodule or fiber-optic cable) Refer to Section 10.1.5 Error upon comparison of RAM (comparison error) Refer to Section 5.3.6 Redundant modules The following rule applies in Redundant system mode: Redundantly used modules (for example, DP slave interface module IM 153-2) must be identical – in other words, they must have the same order number, the same version, and the same firmware version. 5-8 Automation System S7-400H Fault-tolerant Systems A5E00068197-07 System and Operating Modes of the S7-400H 5.3.5 Operating States HOLD Except for the additions described below, the S7-400H behaves in exactly the same way in HOLD mode as an S7-400 standard CPU. HOLD mode is a special case. It is only used for test purposes. When is HOLD mode possible? HOLD mode can be reached only from STARTUP mode and from RUN submode of single mode. Characteristics • While the fault-tolerant CPU is in HOLD mode, link-up and update are not possible; the standby CPU remains in STOP mode with a diagnostics message. • If the fault-tolerant system remains in redundant system mode, no hold positions can be set. Automation System S7-400H Fault-tolerant Systems A5E00068197-07 5-9 System and Operating Modes of the S7-400H 5.3.6 TROUBLESHOOTING Operating State During the self-test, the master and standby CPUs are compared. If the test discovers a difference, an error is reported. Possible errors are hardware faults, checksum errors and RAM/PIQ comparison errors. The following events will trigger TROUBLESHOOTING mode: 1. If, in redundant mode, there is a one-way call of OB 121 (only on one CPU), a hardware fault is assumed and this CPU goes into TROUBLESHOOTING mode. The other CPU becomes the master, if necessary, and continues in single mode. 2. If, in redundant mode, a checksum error occurs on only one CPU, this CPU goes into TROUBLESHOOTING mode. The other CPU becomes the master, if necessary, and continues in single mode. 3. If, in redundant mode, a RAM/PIQ comparison error occurs, the standby CPU goes into TROUBLESHOOTING mode (default reaction) and the master CPU continues in single mode. The response to a RAM/PIQ comparison error can be changed by means of configuration (e.g. the standby CPU goes into STOP). The purpose of TROUBLESHOOTING mode is to detect and localize a faulty CPU. During the search for errors the standby CPU executes the entire self-test; the master CPU remains in RUN mode. If an error is detected, the CPU goes into DEFECTIVE mode. If no error is detected, the CPU links up again. The fault-tolerant system goes into redundant system mode again. An automatic master-reserve swtichover then takes place. This ensures that when the next error is detected in TROUBLESHOOTING mode the hardware of the previous master CPU is tested. No communication is possible in TROUBLESHOOTING mode. For further information on the self-test, see Section 5.4. 5-10 Automation System S7-400H Fault-tolerant Systems A5E00068197-07 System and Operating Modes of the S7-400H 5.4 Self-Test Processing self-tests Following unbuffered POWER ON (e.g. POWER ON after plugging in the CPU for the first time or POWER ON without a back-up battery) and in TROUBLESHOOTING mode, the CPU executes the complete self-test program. The processing time of the full self-test depends on the configuration of the S7-400H and lasts approximately 90 to 220 sec. At RUN the operating system divides the self-test into small program sections (test slices) that are processed consecutively over a whole number of cycles. The cyclic self-test is organized so that it runs once to the end within a certain time. The default time is 90 minutes and can be changed in the configuration. Response to errors during the self-test If an error is detected as a result of the self-test, the following happens: Table 5-4 Response to errors during the self-test System Response Type of Error Hardware fault (without one-way OB 121 call) Faulty CPU goes into DEFECTIVE mode. The fault-tolerant system goes into single mode. The cause of the error is entered in the diagnostics buffer. Hardware fault with one-way OB 121 call The CPU with the one-way OB 121 goes into TROUBLESHOOTING mode. The fault-tolerant system goes into single mode (see below). RAM/PIQ comparison error The cause of the error is entered in the diagnostics buffer. The configured system or operating mode is assumed (see below). Checksum error The response depends on the situation in which the error was detected (see below). Hardware fault with one-way OB 121 call If a hardware fault occurs with a one-way OB 121 call for the first time since the previous unbuffered POWER ON, the faulty CPU goes into TROUBLESHOOTING mode. The fault-tolerant system goes into single mode The cause of the error is entered in the diagnostics buffer. If a hardware fault occurs with a one-way OB 121 call again within seven days, the faulty CPU goes into DEFECTIVE mode. The fault-tolerant system goes into single mode Automation System S7-400H Fault-tolerant Systems A5E00068197-07 5-11 System and Operating Modes of the S7-400H RAM/PAA comparison error If the self-test detects a RAM/PIQ comparison error, the fault-tolerant system quits redundant mode and the standby CPU goes into TROUBLESHOOTING mode (default configuration). The cause of the error is entered in the diagnostics buffer. The response to a recurring RAM/PIQ comparison error depends on whether the error occurs in the subsequent self-test cycle or not until later. Table 5-5 Response to a recurring comparison error Reaction Comparison Error Occurs Again ... In the first self-test cycle subsequent to error The standby CPU goes into search TROUBLESHOOTING mode and then into STOP mode. The fault-tolerant system goes into single mode. After two or more self-test cycles subsequent to error search Standby CPU goes into TROUBLESHOOTING. The fault-tolerant system goes into single mode. Checksum errors If a checksum error occurs for the first time since the last unbuffered POWER ON, the system responds as follows: Table 5-6 Response to checksum errors Detection Time System Response During the power-up test after POWER ON Faulty CPU goes into DEFECTIVE mode. In the cyclic self-test (STOP or single mode) The error is corrected. The CPU remains in STOP or in single mode. In the cyclic self-test (redundant system mode) The error is corrected. Faulty CPU goes into TROUBLESHOOTING mode. The fault-tolerant system goes into single mode. The fault-tolerant system goes into single mode. In TROUBLESHOOTING mode Faulty CPU goes into DEFECTIVE mode. The fault-tolerant system goes into single mode. The cause of the error is entered in the diagnostics buffer. If a checksum error reoccurs within 7 days, the faulty CPU goes into DEFECTIVE mode and the fault-tolerant system goes into single mode. In an F system, the F program is informed that the self-test has detected an error the first time a checksum error occurs in STOP or single mode. The reaction of the F program to this is described in the manual Automation Systems S7-400F and S7-400FH. 5-12 Automation System S7-400H Fault-tolerant Systems A5E00068197-07 System and Operating Modes of the S7-400H Influencing the cyclical self-test With the SFC 90 H_CTRL you can also affect the scope and execution of the cyclical self-test. For example, you can remove and replace individual components of the test. In addition, certain test components can be explicitly called and started for execution. You will find detailed information on the SFC 90 H_CTRL in the manual on System Software for S7-300/400, System and Standard Functions. Notice With a fail-safe system, the periodic self-tests must not be inhibited and then enabled again. For more details refer to the S7-400F and S7-400FH Programmable Controllers manual. Automation System S7-400H Fault-tolerant Systems A5E00068197-07 5-13 System and Operating Modes of the S7-400H 5.5 Time Response Instruction run times The run times of the STEP 7 instructions will be found in the instruction list for the S7-400 CPUs. Processing I/O direct access Please note that every I/O access necessitates synchronization of the two subsystems, thus resulting in a longer scan time. You should therefore avoid I/O direct accesses in your user program and instead use access via process images (or process image sections – for example, for cyclic interrupts). This produces higher performance since a whole set of values have to be synchronized simultaneously in the case of process images. Reaction time Detailed information about calculating the response time is available in the reference manual Automation System S7-400, CPU Data. Note that updating the standby CPU extends the interrupt reaction time (see also Section 6.3.1). The interrupt reaction time depends on the priority class since a graduated delay of the interrupts is performed during updating. 5.6 Evaluation of Process Interrupts in the S7-400H System When you use a module that creates process interrupts in the S7-400H system, it may be the case that the process values that can be read in the process interrupt OB by direct access do not correspond to the process values at the time of the interrupt. Evaluate instead the temporary variables (start information) in the process interrupt OB. When you use the SM 321-7BH00 module, which creates process interrupts, it is therefore not advisable to have different responses to rising and falling edges on one and the same input, because this would require direct access to the I/O. If you want to respond differently to the two edge changes in your user program, apply the signal to two inputs from different channel groups and parameterize one input for a rising edge and the other input for a falling edge. 5-14 Automation System S7-400H Fault-tolerant Systems A5E00068197-07 Linking and Synchronizing In Section Description 6 On Page 6.1 Effects of Link-up and Update 6-2 6.2 Functional Sequence of Link-up and Update 6-3 6.3 Time Monitoring 6-14 6.4 Peculiarities during Link-up and Update 6-27 Automation System S7-400H Fault-tolerant Systems A5E00068197-07 6-1 Linking and Synchronizing 6.1 Effects of Link-up and Update Link-up and update are indicated by the REDF LEDs on the two CPUs. On link-up these LEDs flash with a frequency of 0.5 Hz, and on update with a frequency of 2 Hz. Link-up and update have various effects on the execution of the user program and the communication functions. Table 6-1 Properties of link-up and update Process Execution of the user program Linking Update All priority classes (OBs) are executed. Execution of the priority classes is delayed by sections. All the requirements are caught up with after the update. You will find the details in the sections which follow. Deletion, loading, generation and compression of blocks Blocks cannot be deleted, loaded, generated or compressed. Blocks cannot be deleted, loaded, generated or compressed. If these actions are being executed, link-up and update will not be possible. Execution of communication functions, PG operation Communication functions are being executed. Execution of the functions is restricted and delayed by sections. All the delayed functions are caught up with after the update. You will find the details in the chapters which follow. 6-2 CPU self-test Will not be performed Will not be performed Test and commissioning functions, such as “Monitor and Control Tag”, “Monitor (On/Off)” No test and commissioning functions are possible. No test and commissioning functions are possible. Processing of the connections to the master CPU All the connections remain; no new connections can be made. All the connections remain; no new connections can be made. Processing of the connections to the standby CPU All the connections are broken; no new connections can be made. All the connections are already broken. They are aborted on link-up. If these actions are being executed, link-up and update will not be possible. Broken connections will only be re-made after the update Automation System S7-400H Fault-tolerant Systems A5E00068197-07 Linking and Synchronizing 6.2 Functional Sequence of Link-up and Update There are two types of link-up and update: • In a “normal” link-up and update the fault-tolerant system should change from single mode to redundant system mode. The two CPUs then process the same program in synchronism. • In the case of a link-up and update with master/standby switch-over, the second CPU with modified components may take over process control. Either the hardware configuration or the memory configuration or the operating system may be modified. In order to return to redundant system mode a “normal“ link-up and update must be performed subsequently. How to start link-up and update Initial situation: Single mode, i.e. only one of the CPUs of a fault-tolerant system connected via fiber-optic cables is in RUN mode. Link-up and update to achieve redundant system mode can be initiated as follows: • change the position of the mode selector on the standby from STOP to RUN or RUN-P • POWER ON at the standby (mode selector position RUN or RUN-P), if prior to POWER DOWN the CPU was not in STOP mode • operator control at the PG/ES. You can only start link-up and update with master/standby switch-over through operator control at the PG/ES. Notice If link-up and update on the standby CPU is interrupted (for example, POWER DOWN, STOP) inconsistent data may result in a Reset request on this CPU. After the standby is reset link-up and update will be possible again. Automation System S7-400H Fault-tolerant Systems A5E00068197-07 6-3 Linking and Synchronizing Process diagram for link-up and update The following illustration outlines the functional sequence of link-up and update in general terms. The starting point is with the master in single mode. In the illustration CPU 0 is assumed to be the master CPU. Master CPU (CPU 0) Standby CPU (CPU 1)) Link-up (REDF LEDs flash at 0.5 Hz) RUN STOP Standby requests LINK-UP Deletion, loading, generation and compression of blocks are no longer possible. Test and commissioning functions are no longer possible. Deletion, loading, generation and compression of blocks are no longer possible. Test and commissioning functions are no longer possible. Comparison of memory configuration, operating system version and FEPROM content Copy load memory content *) Copy user program blocks of main memory *) All connections are broken Resumption of the DP slaves Assumption of the connections Update see Figure 6-2 Lift restrictions; catch up delayed execution Lift restrictions; catch up delayed execution Redundant system mode or master/standby switchover with new standby put into STOP mode *) If the option “Switch to CPU with Modified Configuration” is active, no load memory content will be copied; you can see what is copied from the user program blocks of the main memory (OBs, FCs, FBs, DBs, SDBs) of the master CPU in Section 6.2.3. Figure 6-1 6-4 Functional sequence of link-up and update Automation System S7-400H Fault-tolerant Systems A5E00068197-07 Linking and Synchronizing Standby CPU (CPU 1)) Master CPU (CPU 0) Update(REDF LEDs flash at 2 Hz) RUN STOP Status message “Synchronize” to all partners logged on Asynchronous SFCs for data records <given negative acknowledgement *) Messages delayed All OBs up to priority class 15 (incl. OB 1) delayed Start of monitoring for max.<scan-cycle time extension Master copies contents of the modified data blocks Current comm. jobs <delayed or new ones rejected Start of monitoring for max. communication delay OBs of priority classes > 15 are delayed with the exception of the watchdog interrupt OB with special treatment If appropriate, execution of watchdog interrupt OB with special treatment Start of monitoring for max. blockage time for priority classes > 15 Master copies outputs Start of min. I/O retention time Master copies the contents of the data blocks <that have been modified since they were last copied Master copies timers, counters, markers,<inputs and the diagnostics buffer *) Master role change A detailed description of the SFCs, SFBs and communication functions concerned can be found in the sections below Figure 6-2 Process for update Automation System S7-400H Fault-tolerant Systems A5E00068197-07 6-5 Linking and Synchronizing Minimum signal duration of input signals during the update During the update, program scanning is stopped for a certain time (we will discuss this subject in greater detail later). So that the change of an input signal can be reliably detected by the CPU even during the update, the following condition must be satisfied: Min. signal duration > 2 ×× time required for I/O update (for DP only) + call interval of the priority class + processing time for the program of the priority class + time for the update + processing time for programs of high-priority priority classes Example: Minimum signal duration of an input signal that is evaluated in a priority class > 15 (for example, OB 40). For DP only: Time for updating the I/O (worst case 2x) Call interval of the priority class – for example, OB 40 Processing time for the program of the priority class – for example, run time OB 40 Time for updating (75 ms + 0.7 ms per KB for modified data blocks) Processing time of high-priority priority classes Minimum signal duration Figure 6-3 6-6 Example of minimum signal duration of an input signal during updating Automation System S7-400H Fault-tolerant Systems A5E00068197-07 Linking and Synchronizing 6.2.1 Process of Link-up In the link-up process a distinction is made between whether redundant system mode or a master/standby switch-over is to be achieved. Link-up to achieve redundant system mode In order to preclude differences in the two subsystems, the master CPU and the standby CPU perform the following comparisons. The following are checked: 1. the identity of the memory configuration 2. the identity of the operating system version 3. the identity of the content of the load memory (FEPROM card) 4. the identity of the content of the load memory (integrated SRAM and RAM card) If 1., 2. or 3. are not identical, the standby CPU switches to STOP mode with an error message. In the case of non-identity of 4. the master CPU copies the user program in the load memory of its RAM to the standby CPU. The user program in the load memory of the FEPROM is not copied. It must be identical before link-up. Link-up with master/standby switch-over In STEP 7 you can choose one of the following options and thus release the following: • ”Switch to CPU with modified configuration” • ”Switch to CPU with expanded memory configuration” The “Switch to CPU with modified operating system” option cannot be used with the present operating system versions. Switch to CPU with modified configuration You may have made the following memory modifications on the standby CPU: • the hardware configuration • the type of load memory (e.g. you have replaced a RAM card with a FLASH card); the new load memory may be larger or smaller than the old one. On link-up no blocks are copied from the master to the standby (the exact circumstances are described in Section 6.2.3.). The steps to be performed in the above-mentioned scenarios (modification of hardware configuration, change of type of load memory) are described in Chapter 11. Automation System S7-400H Fault-tolerant Systems A5E00068197-07 6-7 Linking and Synchronizing Note If you have not changed either the hardware configuration or the type of load memory on the standby CPU a master/standby switch-over is still carried out and the previous master CPU switches to STOP mode. Switch to CPU with expanded memory configuration You may have made the following memory modifications on the standby CPU: • expansion of the main memory and/or • expansion of the load memory – in so doing you must have load memory module of the same type, i.e. either RAM cards or FLASH cards; in the case of FLASH cards the content must agree. On link-up the user program blocks (OBs, FCs, FBs, DBs, SDBs) of the master are copied from the load memory and the main memory to the standby (exception: if the load memory modules are FLASH cards only the blocks from the main memory are copied). The steps to be performed in the above-mentioned scenarios (expansion of the main memory, expansion of the load memory) are described in Chapter 11. Notice If you have changed the type of load memory or the operating system on the standby CPU this will not switch to RUN mode but instead will relapse into STOP mode with a corresponding diagnostics buffer entry. If you have expanded neither the main memory nor the load memory on the standby CPU this will not switch to RUN mode but instead will relapse into STOP mode with a corresponding diagnostics buffer entry. No master/standby switch-over will take place and the CPU that has been the master CPU up to that point will remain in RUN mode. 6-8 Automation System S7-400H Fault-tolerant Systems A5E00068197-07 Linking and Synchronizing 6.2.2 Updating Procedure What happens during update? On update the execution of the communication functions and of the OBs is restricted by section. Similarly, all the dynamic data (content of the data blocks, timers, counters and memory markers) are transferred to the standby CPU. The update procedure is as follows: 1. All asynchronous SFCs that have recourse to data records of I/O modules (SFC 13, 51, 55 to 59) are given a “negative” acknowledgement until the end of the update: – A current job returns BUSY = TRUE. It will be fully executed after the update is complete. – A job interrupted during the update will return the value W#16#80C3 (SFCs 13, 55 to 59) or W#16#8085 (SFC 51) once the update is complete. With these return values the jobs should be repeated by the user program. – A job that you want to start during the update will be rejected with the return value W#16#80C3 (SFCs 13, 55 to 59) or W#16#8085 (SFC 51). With these return values the jobs should be repeated by the user program once the update is complete. 2. Notification functions are delayed until the end of the update (see list below). 3. The execution of the OB 1 and of all OBs up to and including priority class 15 is delayed. With watchdog interrupts, the generation of new OB requests is inhibited so that no new watchdog interrupts are stored and, consequently, no new request errors occur. Not until the end of the update is a maximum of one request generated and processed for each watchdog interrupt OB. The time stamp of the watchdog interrupts that are generated after a delay cannot be evaluated. 4. Transfer of all the data block contents that have been modified the since link-up. 5. Communication jobs from which the CPU itself derives jobs for other modules (e.g. I/O) are given a negative acknowledgement (see list below). 6. Initial calls (in other words, calls resulting in manipulation of the work memory, refer also to System Software for S7-300/400 System and Standard Functions) of communication functions receive a negative acknowledgement. All the remaining communication functions are delayed and caught up on once the update is complete. Automation System S7-400H Fault-tolerant Systems A5E00068197-07 6-9 Linking and Synchronizing 7. The generation of new OB request for all OBs (in other words, also for those having a priority class > 15) is inhibited so that no new interrupts are stored and, consequently, no request errors occur. Not until the end of the update are the queued interrupts requested again and processed. The time stamp of the interrupts that are generated after a delay cannot be evaluated. The user program is not executed any more and there are no more I/O updates. 8. Generation of the start event for the watchdog interrupt OB with special handling if its priority class > 15 and execution of this OB, as necessary. Note The watchdog interrupt OB with special treatment is of particular significance if it must respond within a particular time to modules or program segments. This is typically the case for fail-safe systems. For more details see the manuals S7-400F and S7-400FH Programmable Controllers and S7-300 Programmable Controllers; Fail-Safe Signal Modules. 9. Transfer the outputs and the entire data block contents that have been modified. Transfer the timers, counters, memory markers and inputs. Transfer the diagnostics buffer During this data synchronization, the clock pulse for watchdog interrupts, delay interrupts and S7 timers is stopped. This results in any synchronism that might have existed between watchdog interrupts and time-of-day interrupts being lost. 10.Lift all restrictions. Delayed interrupts and communication functions will be caught up. All OBs continue to be executed. Equidistance from the previous calls can no longer be guaranteed for delayed watchdog interrupt OBs. Notice Process interrupts and diagnostics interrupts are stored by the I/O. If such interrupts were set by modules of the remote input/output station they will be caught up when the block is lifted. If they were set by modules of the central I/O they can then only all be caught up if the particular interrupt request did not occur again during the block. If the PG/ES requested a master/standby switch-over then on conclusion of the update the previous standby CPU becomes the master and the previous master CPU switches to STOP mode. Otherwise the two CPUs go to RUN (Redundant mode) and execute the user program in synchronism. 6-10 Automation System S7-400H Fault-tolerant Systems A5E00068197-07 Linking and Synchronizing If a master/standby switch-over has been performed then in the next cycle after the update OB 1 has its own identifier (see Reference Manual System Software for S7-300/400, System and Standard Functions). For other peculiarities when the configuration is changed see Section 6.2.3. Delayed notification functions The SFCs, SFBs and operating system services listed trigger messages to all the parameters logged on in each case. These functions are delayed after the start of the update. • SFC 17 “ALARM_SQ”, SFC 18 “ALARM_S”, SFC 107 “ALARM_DQ”, SFC 108 “ALARM_D” • SFC 52 “WR_USMSG” • SFB 31 “NOTIFY_8P”, SFB 33 “ALARM”, SFB 34 “ALARM_8”, SFB 35 “ALARM_8P”, SFB 36 “NOTIFY”, SFB 37 “AR_SEND” • Statuses • System diagnostics messages From this time on instructions to block and release events via the SFC 9 “EN_MSG” and the SFC 10 “DIS_MSG” will be rejected with a negative return value. Communication functions with derived jobs If a CPU receives one of the jobs listed below it must in turn generate communication jobs from this and send these to other modules. This could be, for example, instructions to read or write parameter data records from/to modules of the remote input/output station. These jobs will be rejected until the update is complete. • Read/write data records via O & M functions • Read data records via SSL information • Block and release messages • Log on and off for messages • Acknowledge messages Note The last 3 functions are recorded by a WinCC system and automatically repeated when the update is complete. Automation System S7-400H Fault-tolerant Systems A5E00068197-07 6-11 Linking and Synchronizing 6.2.3 Switch to CPU with modified configuration If link-up and update was triggered from STEP 7 using the option “Switch to CPU with modified configuration” the behavior will be different as regards processing of the memory content. Load memory The content of the load memory is not copied from the master CPU to the standby CPU. Working memory The following components are transferred from the main memory of the master CPU to the standby CPU: • Contents of all the data blocks having the same interface time stamp in the two load memories and with the attributes “Read Only” and “unlinked” not set. • Data blocks generated in the master CPU by SFC. The DBs generated in the standby CPU by SFC are reset. If a data block with the same number is also contained in the load memory of the standby CPU link-up will be interrupted with an entry in the diagnostics buffer. • Process images, timers, counters and memory markers • Diagnostics buffer If the diagnostics buffer in the standby CPU is configured smaller than in the master CPU only the number of entries for which the standby CPU is configured will be transferred. The most current entries will be selected from the master CPU. If there is insufficient memory the link-up will be interrupted with an entry in the diagnostics buffer. If data blocks that contain instances of SFBs of the S7 communication information have been modified then these instances will be returned to the state they were in before first being called. Note When switching to a CPU with a modified configuration the load memories of the master and standby may be of different sizes. 6-12 Automation System S7-400H Fault-tolerant Systems A5E00068197-07 Linking and Synchronizing 6.2.4 Block Link-up and Update Link-up and update is associated with a scan-cycle time extension. Within this there is a margin of time in which no I/O updating is performed (see Section 6.3 “Time Monitoring”). This must be particularly observed if using distributed I/O and a master/standby switch-over takes place after the update (i.e. in the event of a configuration modification whilst in operation). ! Caution Only perform link-up and update in non-critical process states. To specify the start time of the link-up and update yourself, the function SFC 90 “H_CTRL” is available. You will find a detailed description of this SFC in the manual on System Software for S7-300/400, System and Standard Functions). Notice If the process tolerates a longer scan-cycle time extension at any point of time, there is no need to call the 90 “H_CTRL” SFC. The CPU self-test is not performed during link-up and updating. In the case of a fail-safe system, therefore, make sure that you do not delay the update over too long a period. For more details refer to the S7-400F and S7-400FH Programmable Controllers manual. Example of a time-critical process A slide block with a 50 mm long cam moves on an axis at a constant velocity v = 10 km/h = 2.78 m/s = 2.78 mm/ms. A push button is located on the axis. The push button is thus activated by the cam during a period of ∆t = 18 ms. In order for the activation of the push button to be recognized by the CPU the blocking time for priority classes > 15 (see below for definition) must be clearly below 18 ms. Since in STEP 7 you are able to set the maximum blocking time for priority classes > 15 only to 0 ms or a value of between 100 and 60000 ms, you need to remedy the situation with one of the following measures: • Move the start of link-up and update to a time at which the process state is not critical. To do this, use SFC 90 “H_CTRL” (see above). • Use a substantially longer cam and / or clearly reduce the velocity of the slide block before it reaches the push button. Automation System S7-400H Fault-tolerant Systems A5E00068197-07 6-13 Linking and Synchronizing 6.3 Time Monitoring During the update program scanning is stopped for a particular duration. Section 6.3 will be relevant to you if this duration is critical for your process. If so, configure one or more of the monitoring times described below. During the update the fault-tolerant system will monitor to check that the scan-cycle time extension, the communication delay and the blocking time for priority classes > 15 do not exceed the maximum values configured for them; at the same time it ensures that the minimal I/O retention time configured is maintained. Notice If you have not specified a value for any of the monitoring times then you must take the update into account in the cycle monitoring time. If the update is interrupted in this case, the fault-tolerant system will switch to single mode: The CPU that has been the master CPU up to that point will remain in RUN mode and the standby CPU will go to STOP mode. You can either configure all the monitoring times or none. You took the technological requirements into consideration in the monitoring times configured. The monitoring times are explained in more detail below. • Max. scan-cycle time extension – Scan-cycle time extension the time margin during the update in which there is no execution of OB 1 (and no execution of any other OBs up to priority class 15). During this margin of time the “normal” cycle time monitoring is ineffective. – Max. scan-cycle time extension the maximum permissible scan-cycle time extension that you have configured. • Max. communication delay – Communication delay: the margin of time during the update during which no communication functions are executed. (Note: The existing communication links of the master CPU are maintained.) – Maximum communication delay: the maximum permissible communication delay that you have configured. • Max. blocking time for priority classes > 15 – Blocking time for priority classes > 15: the margin of time during the update during which no OB (and thus no user program) is executed and no more I/O updates are performed. – Max. blocking time for priority classes > 15: the max. permissible blocking time that you have configured for priority classes > 15. 6-14 Automation System S7-400H Fault-tolerant Systems A5E00068197-07 Linking and Synchronizing • Minimum I/O retention time: This is the period of time between copying of the outputs from the master CPU to the standby CPU and the time of transition to redundant system mode or master/standby switch-over (time at which the former master CPU switches to STOP mode and the new master CPU switches to RUN mode). During this time the outputs of both CPUs are activated. This prevents ramping of the I/O even in the event of an update with master/standby switch-over. The minimum I/O retention time is especially important for updating with the master/standby switch–over. If you set a value of 0 for the minimum I/O retention time, the outputs may drop off when you make a system modification during ongoing operation. The start times of the monitoring timers are shown in Figure 6-2 (underlaid boxes). In each case the times end when redundant system mode occurs or on master/standby switch-over (i.e. when the new master switches to RUN mode) at the end of the update. The times relevant to the update are summarized in the figure below. Update t1 t2 t3 t4 t5 t min. I/O retention time blocking time for priority classes > 15 communication delay scan-cycle time extension t1: end of current OBs up to priority class 15 t2: stop of all communication functions t3: end of watchdog interrupt OB with special treatment t4: end of copying of outputs to standby CPU t5: Figure 6-4 Redundant system mode or master/standby switch-over Significance of the times relevant during the update Automation System S7-400H Fault-tolerant Systems A5E00068197-07 6-15 Linking and Synchronizing Response to time-out If one of the times monitored exceeds the maximum value configured then the following process is started: 1. Update aborted 2. Fault-tolerant system remains in single mode with existing master CPU in RUN mode 3. Reason for aborting entered in the diagnostics buffer 4. OB 72 called (with corresponding start information) The standby CPU then re-evaluates its system data blocks. Afterwards – but at least one minute later – there is a new attempt at link-up and update. If unsuccessful after 10 attempts no further attempts will be made. You must then initiate link-up and update again. Reasons for expiration of the monitoring times may include: • high interrupt load (i.e. of I/O modules) • high communication load, so that execution of current functions takes longer • in the final phase of the update large volumes of data have to be copied to the standby CPU. 6.3.1 Time Response Time response during link-up During link-up, the controller in your system should be influenced as little as possible. Therefore the duration of link-up increases with the rise in the current loading of your programmable logic controller. Link-up duration depends primarily on the • communication load • scan cycle time The following applies to non-loaded programmable logic controllers: Link–up run time = size of the load and working memories in MB × 1 s + basic load The basic load is a few seconds. When your programmable logic controller is subjected to a high load, the memory-dependent share can rise to 1 minute per MB. 6-16 Automation System S7-400H Fault-tolerant Systems A5E00068197-07 Linking and Synchronizing Time response during the update The transfer time during updating depends on the number and overall length of the modified data blocks; it does not depend on the modified volume of data within a block. It is also dependent on the current process state and on the communication load. In a simplified view, the max. blocking time to be configured for priority classes > 15 can be seen as a function of the volume of data in the main memory. The volume of code in the main memory is irrelevant. 6.3.2 Determination of the Monitoring Times Determination with STEP7 or formulas The monitoring times listed below are automatically calculation by STEP 7 in version 5.2 or later for each new configuration. You can also calculate them using the formulas and procedures described below. They are equivalent to the formulas used in STEP7. • Maximum scan-cycle time extension • Maximum communication delay • Maximum retention time for priority classes • minimum I/O retention time You can also automatically calculate the monitoring times in HW Config in the dialog Properties CPU –> Trigger H Parameters. Automation System S7-400H Fault-tolerant Systems A5E00068197-07 6-17 Linking and Synchronizing Monitoring time accuracy Note The monitoring times determined by STEP7 or by using the formulas merely represent a recommendation. They are based on a fault-tolerant system with two communication peers and an average communication load. Since your system profile may vary sharply from this assumption, you must take note of the following rules. • The rise in scan cycle time can increase sharply at a high communication load. • If you perform changes to your system while it is operating, the rise in scan cycle time can increase appreciably as a result. • The more program scanning (especially processing of communication blocks) you perform in priority classes > 15, the higher the communication delay and scan cycle time delay might grow. • You can even undercut the calculated monitoring times in small systems with high performance requirements. Use of redundant input and output modules Notice If you have redundant I/O modules and have taken this into account in your program accordingly, you might have to add a premium to the calculated monitoring times, so that surging does not occur at the output modules. A premium is required only if you operate modules redundantly from the following table. 6-18 Automation System S7-400H Fault-tolerant Systems A5E00068197-07 Linking and Synchronizing Table 6-2 Premium for the monitoring times of redundant I/O Module type Premium in ms ET200M: standard output modules 2 ET200M: HART output modules 10 ET200M: fail-safe output modules 50 ET200L-SC with analog output modules ≤ 80 ET200S with analog output modules or technology modules ≤ 20 Perform the following steps: • Determine the premium form the table. If several module types in the table are used in Redundant mode, take the highest premium. • Add it to the monitoring times already determined. Configuration of the monitoring times When configuring the monitoring times you must note the following dependencies; conformity will be checked by STEP 7: max. scan–cycle time extension > max. communication delay > (max. blocking time for priority classes > 15) > min. I/O retention time If, in the case of link-up and update with master/standby switch-over, the CPUs have been configured with different values for a monitoring function then the higher of the two values will be used. Calculating the minimum I/O retention time (TPH) The following applies to the calculation of the minimum I/O retention time: • with central I/O: TPH = 30 ms • with distributed I/O: TPH = 3 × TTRmax where TTRmax = maximum target rotation time of all DP master systems of the fault-tolerant station With the use of central and distributed I/O the resulting minimum I/O retention time is: TPH = MAX (30 ms, 3 × TTRmax) Automation System S7-400H Fault-tolerant Systems A5E00068197-07 6-19 Linking and Synchronizing Figure 6-5 shows the relationship between the minimum I/O retention time and the maximum blocking time for priority classes > 15. master copies outputs 50 ms min. I/O retention time Figure 6-5 max. blocking time for priority classes > 15 Relationship between the minimum I/O retention time and the maximum blocking time for priority classes > 15 Note that 50 ms + min. I/O retention time ≤ (max. blocking time for priority classes > 15) must apply. As a result, a large minimum I/O retention time may determine the maximum blocking time for priority classes > 15. Calculating the maximum blocking time for priority classes > 15 (TP15) The maximum blocking time for priority classes > 15 is determined by 4 factors: • As shown in Figure 6-2, at the end of the update all the contents of data blocks that have been modified since the last copy to the standby CPU are transferred to the standby CPU again. The number and structure of the data blocks that you describe in the high-priority classes determine the duration of this process and thus the maximum blocking time for priority classes > 15. A note is given for the remedies specified below. • In the final phase of the update all the OBs are delayed or blocked. To avoid the max. blocking time for priority classes > 15 being unnecessarily extended as a result of unfavorable programming, modify the time-critical I/O components in a selected watchdog interrupt. This is particularly relevant in the case of fail-safe user programs. You can specify this watchdog interrupt in the configuration; it will then be executed immediately after the start of the maximum blocking time for priority classes > 15, but only if you have assigned it a priorityclass > 15. • On link-up and update with master/standby switch-over (see Section 6.2.1) then on conclusion of the update the active communication channel in the switched DP slaves must be switched over. This extends the time for which no valid values can be read or output. The duration of this process is determined by your hardware configuration. • The process-related circumstances give rise to requirements in respect of how long the I/O update can be deferred. This is particularly important in the case of time-monitored processes in fail-safe systems. 6-20 Automation System S7-400H Fault-tolerant Systems A5E00068197-07 Linking and Synchronizing Note Other factors to note when using fail-safe modules are described in the following manuals: S7-400 F and S7-400 FH Programmable Controllers and S7-300 Programmable Controllers; Fail-Safe Signal Modules. This applies in particular to module-internal run times in fail-safe modules. 1. For each DP master system determine from the bus parameters in STEP 7 – TTR for the DP master system – DP switch-over time (referred to below as TDP_UM) 2. For each DP master system determine from the Technical Data for the switched DP slaves – the maximum switch-over time for the active communication channel (referred to below as TSLAVE_UM). 3. From the technological specifications for your system determine – the maximum permissible time period for which your I/O modules are not updated (referred to below as TPTO). 4. From your user program determine – the scan time of the highest priority or selected (see above) watchdog interrupt (TWA) – the run time of your program in this watchdog interrupt (TPROG) 5. For each DP master system this gives rise to TP15 (DP master system) = TPTO – (2 × TTR + TWA + TPROG + TDP_UM + TSLAVE_UM) [1] Note If TP15(DP master system) < 0 the calculation is to be stopped here. Possible remedies are listed after the following example calculation. Make the appropriate modifications and start the calculation from 1 again. 6. Select the minimum of all the TP15 (DP master system) values. This time is then known as TP15_HW. 7. Determine the share of the maximum blocking time for I/O classes > 15 determined by the minimum I/O retention time (TP15_OD): TP15_OD = 50 ms + min. I/O retention time [2] Note If TP15_OD > TP15_HW the calculation is to be stopped here. Possible remedies are listed after the following example calculation. Make the appropriate modifications and start the calculation from 1 again. Automation System S7-400H Fault-tolerant Systems A5E00068197-07 6-21 Linking and Synchronizing 8. From Section 6.3.4 determine the share of the maximum blocking time for priority classes > 15, which is dependent on the user program (TP15_AWP). Note If TP15_AWP > TP15_HW the calculation is to be stopped here. Possible remedies are listed after the following example calculation. Make the appropriate modifications and start the calculation from 1 again. 9. The recommended value for the max. blocking time for priority classes > 15 now results from: TP15 = MAX (TP15_AWP, TP15_OD) [3] Example of the Calculation of TP15 In the following the maximum permissible period of time on update during which the operating system performs no program scanning and no I/O updates is determined for a given system configuration. There are two DP master systems: DP master system_1 is “connected” to the CPU via the MPI/DP interface of the CPU and DP master system_2 via an external DP master interface module. 1. From the bus parameters in STEP 7: TTR_1 = 25 ms TTR_2 = 30 ms TDP_UM_1 = 100 ms TDP_UM_2 = 80 ms 2. From the Technical Data for the DP slaves used: TSLAVE_UM_1 = 30 ms TSLAVE_UM_2 = 50 ms 3. From the technological specifications for your system: TPTO_1 = 1250 ms TPTO_2 = 1200 ms 4. From the user program: TWA = 300 ms TPROG = 50 ms 6-22 Automation System S7-400H Fault-tolerant Systems A5E00068197-07 Linking and Synchronizing 5. From formula [1]: TP15 (DP master system_1) = 1250 ms – (2 × 25 ms + 300 ms + 50 ms + 100 ms + 30 ms) = 720 ms TP15 (DP master system_2) = 1200 ms – (2 × 30 ms + 300 ms + 50 ms + 80 ms + 50 ms) = 660 ms Check: if TP15 > 0, continue with 6. TP15_HW = MIN (720 ms, 660 ms) = 660 ms 7. From formula [2]: TP15_OD = 50 ms + TPH = 50 ms + 90 ms = 140 ms Check: if TP15_OD = 140 ms < TP15_HW = 660 ms, continue with 8. From Section 6.3.4 for 170 Kbytes user program data: TP15_AWP = 194 ms Check: if TP15_AWP = 194 ms < TP15_HW = 660 ms, continue with 9. Formula [3] now provides the recomm. max. blocking time for priority classes > 15: TP15 = MAX (194 ms, 140 ms) TP15 = 194 ms Entering 194 ms for the maximum blocking time for priority class > 15 in STEP 7 ensures that a signal change during the update will always be recognized when the signal lasts 1250 ms or 1200 ms. Remedies if it is not possible to calculate TP15 If no recommendation results from the calculation of the maximum blocking time for priority classes > 15, you can remedy this by various measures: • Reduce the watchdog interrupt cycle of the watchdog interrupt configured. • For particularly high TTR times, divide the slaves into several DP master systems. • Increase the transmission rate on DP master systems affected. • Configure the DP/PA links and Y links in separate DP master systems. • If the DP slaves have very different switch-over times and thus (generally) great variations in TPTO, distribute these slaves among a number of DP master systems. • If only a small load due to interrupts or parameter assignment is to be expected in the individual DP master systems you can also reduce the TTR times calculated by approx. 20–30%. This will increase the risk of a station failure occurring in the distributed I/O. Automation System S7-400H Fault-tolerant Systems A5E00068197-07 6-23 Linking and Synchronizing • The time TP15_AWP indicates a guide value; this depends on your program structure. You can reduce it by using the following measures, for example: – Store data that is frequently modified in different DBs to data that is modified less often. – Specify a smaller amount of working memory for the DBs. If you reduce the time TP15_AWP without taking the measures stated, this increases the risk of the update being aborted due to expiration of the monitoring times. Calculation of the max. communication delay We recommend using the following formula: Maximum communication delay = 4 × (maximum blocking time for priority classes > 15) The final time is determined by the process state and the communication load on your system. This has to be taken to mean both the absolute load and also the load in relation to the size of your user program. You may have to correct the time if necessary. Calculation of the max. scan-cycle time extension We recommend using the following formula: Maximum communication delay = 10 × (max. blocking time for priority classes > 15) The final time is determined by the process state and the communication load on your system. This has to be taken to mean both the absolute load and also the load in relation to the size of your user program. You may have to correct the time if necessary. 6.3.3 Influences on the Time Response The period during which no I/O updates take place is primarily determined by the following influencing factors: • number and size of data blocks modified during the update • number of instances of SFBs in the S7 communication information and SFBs for generating block-related messages • Modifications to the System During Operation • settings via dynamic volume frameworks • expansion of distributed I/O (with falling transmission rate and increasing number of slaves the time required for I/O updates increases.) 6-24 Automation System S7-400H Fault-tolerant Systems A5E00068197-07 Linking and Synchronizing In the least favorable cases this period is extended by the following amounts: • maximum watchdog interrupt cycle used • duration of all watchdog interrupt OBs • duration of high-priority interrupt OBs running up until delay of the interrupts Deliberate delaying of the update Delay the update via SFC 90 “H_CTRL” and do not release it again until a state of lesser communication or interrupt load occurs. ! 6.3.4 Caution Delaying the update will increase the time during which the fault-tolerant system is in single mode. Performance Values for Link–up and Update User program share TP15_AWP of the max. blocking time for priority classes > 15 The user program share TP15_AWP of the max. blocking time for priority classes > 15 can be calculated using the following formula: TP15_AWP in ms = 0,7 × size of the DBs in working memory in Kbyte + 75 The following table provides the resulting times for some typical values for the main memory data. Table 6-3 Typical values for the user program share TP15_AWP of the max. blocking time for priority classes > 15 Main memory data TP15_AWP 500 Kbyte 430 ms 1 Mbyte 800 ms 2 Mbyte 1.51 s Automation System S7-400H Fault-tolerant Systems A5E00068197-07 6-25 Linking and Synchronizing Table 6-3 Typical values for the user program share TP15_AWP of the max. blocking time for priority classes > 15 Main memory data TP15_AWP 5 Mbyte 3.66 s 10 Mbyte 7.24 s The following assumptions were made for this formula: • 80% of the data blocks are modified prior to delaying the interrupts of priority classes > 15. This value must be determined more accurately for fail-safe systems in particular in order to avoid a time-out of the driver blocks (see Section 6.3.2). • Approximately 100 ms of update time are allowed for each megabyte of working memory assigned by data blocks for currently running or held-back communication functions. Depending on the communication load of your programmable logic controller, you have to add to or deduct from the setting of TP15_AWP. 6-26 Automation System S7-400H Fault-tolerant Systems A5E00068197-07 Linking and Synchronizing 6.4 Peculiarities during Link-up and Update Requirement of input signals during the update During the update the process signals read in previously are retained and are not updated. Modification of a process signal during the update will only be recognized by the CPU if the modified signal state remains at the end of the update. Pulses (signal change “0 → 1 → 0” or “1 → 0 → 1”) occurring during the update will not be recognized by the CPU. Make sure, therefore, that the time between two signal changes (pulse duration) is always greater than the time required for the update. Communication links and functions In contrast to earlier firmware versions, links to the master CPU are no longer broken. However, associated communication jobs are not executed during the update. They are stored and caught up on when one of the following cases occurs: • the update is complete and the system is in Redundant mode • the update and master/standby switch-over are complete, the system is in single mode • the update was aborted (e.g. due to a time-out) and the system is back in single mode. It is not possible for the communication blocks to make an initial call during the update. Reset instruction on aborting link-up If the link-up is aborted whilst the contents of the load memory are being copied from the master CPU to the standby CPU then the standby CPU will given a Reset instruction. This is signaled by an entry in the diagnostics buffer with the event ID W#16#6523. Automation System S7-400H Fault-tolerant Systems A5E00068197-07 6-27 Linking and Synchronizing 6-28 Automation System S7-400H Fault-tolerant Systems A5E00068197-07 7 Using I/O on the S7-400H This chapter provides an overview of the different I/O configurations on the S7-400H programmable logic controller and its availability. Further, it provides information on configuration and programming of the selected I/O installation. For the S7-400H you can use virtually any of the input/output modules featured in the SIMATIC S7 system range. This applies to the input/output modules of the S7-400 standard system and to the PROFIBUS-DP components. The function modules (FMs) and communication processors (CPs) that can be used in the S7-400H will be found in Appendix E. In Section Description On Page 7.1 Introduction 7-2 7.2 Using Single-Channel, One-Sided I/O 7-3 7.3 Using Single-Channel, Switched I/O 7-5 7.4 Connecting Redundant I/O 7-10 7.5 Other Ways of Connecting Redundant I/O 7-35 Automation System S7-400H Fault-tolerant Systems A5E00068197-07 7-1 Using I/O on the S7-400H 7.1 Introduction I/O configuration types In addition to the power supplies and central processing units, which are always redundant, there are the following configuration types for the I/O, which are supported by the operating system: I/O Type Configuration Availability Digital input Single channel one-way Single channel switched Dual channel redundant normal increased high Digital output Single channel one-way Single channel switched Dual channel redundant normal increased high Analog input Single channel one-way Single channel switched Dual channel redundant normal increased high Analog output Single channel one-way Single channel switched normal increased A two-channel redundant configuration on the user level is similarly possible. However, you have to implement the high degree of availability in the user program (refer to Section 7.4). Addressing No matter whether you are using a single-channel, one-way or switched I/O, you always specify the same address for the I/O. Limits of I/O configuration If there are insufficient slots in the central controllers, you can add up to 20 expansion units to the configuration of the S7-400H. You can assign even-numbered mounting racks only to central controller 0, whereas odd-numbered mounting racks can be assigned only to central controller 1. For using distributed I/O you can connect up to 12 DP master systems in each of the subsystems (2 DP master systems to the integrated interfaces of the CPU and 10 more via external DP master systems). You can operate up to 32 slaves on the integrated MPI/DP interface. You can connect up to 125 distributed I/O devices to the integrated DP master interface and the external DP master systems. 7-2 Automation System S7-400H Fault-tolerant Systems A5E00068197-07 Using I/O on the S7-400H 7.2 Using Single-Channel, One-Sided I/O What is single-channel, one-way I/O? With the single-channel, one-way configuration single input/output modules are present (single-channel). The input/output modules are located in just one of the subsystems and are only addressed by that subsystem. A single-channel, one-way I/O configuration is possible in • central controllers and expansion units • distributed I/Os The single-channel, one-way I/O configuration is to be recommended for individual input/output channels for which normal availability of the I/O is sufficient. Rack 0 Rack 1 Single-channel, one-way I/O modules in the central controller Single-channel, one-way distributed I/O, say ET 200B Figure 7-1 Single-channel, one-way I/O configuration Automation System S7-400H Fault-tolerant Systems A5E00068197-07 7-3 Using I/O on the S7-400H Single-channel, one-way I/Os and user program Information read in on one side – for example, from digital inputs – is transferred automatically to the second subsystem via the synchronization link in redundant system mode. After the information has been transferred, both subsystems have the data from the single-channel, one-way I/O and evaluate them in the two identical user programs that are present. It is therefore not decisive whether the I/O is connected to the master CPU or to the standby CPU as far as processing of the information in redundant system mode is concerned. In single mode, the one-way I/O assigned to the cooperating subsystem cannot be accessed. This has to be taken into account in your programming as follows: you have to assign functions to the single-channel, one-way I/O that can only be performed conditionally. In this way you make sure that certain functions for I/O accesses are triggered only in redundant system mode and in single mode of the subsystem concerned. Notice The user program has to update the process image for single-channel, one-way output modules in single mode too (e.g. direct accesses). If subprocess images are used, the user program must update the subprocess images in OB 72 (redundancy return) accordingly (SFC 27 “UPDAT_PO”). If it did not, old values would initially be read out to the single-channel, one-way output modules of the standby CPU following transition to redundant system mode. Failure of the single-channel, one-way I/O In the event of a malfunction the S7-400H with a single-channel, one-way I/O behaves like a standard S7-400 system, in other words: • When the I/O fails, the defective I/O is no longer available. • When a subsystem fails, the entire process I/O of that subsystem is not available any more. 7-4 Automation System S7-400H Fault-tolerant Systems A5E00068197-07 Using I/O on the S7-400H 7.3 Using Single-Channel, Switched I/O What is single-channel, switched I/O? With the single-channel, switched configuration single input/output modules are present (single-channel). In Redundant mode they may be addressed by both subsystems. In single mode, the master subsystem can always address all switched I/O (as opposed to one-way I/O). The single-channel, switched I/O configuration is possible with the ET 200M distributed I/O device equipped with an active backplane bus and a redundant PROFIBUS-DP slave interface module IM 153-2 or IM 153-2FO (permissible IM 153-2: 6ES7 153-2AA02-0XB0 version 7 or later; permissible IM 153-2FO: 6ES7 153-2AB01-0XB0 version 6 or later). Each subsystem of the S7-400H is connected to one of the two DP slave interfaces of the ET 200M (via a DP master interface). PROFIBUS PA can be connected to a redundant system using DP/PA-Link (permissible IM 157: 6ES7 157-0AA82-0XA0). A single-channel DP master system can be connected to a redundant system using a Y-coupler. The following combinations of IM 157 and Y-couplers are permissible: IM 157 6ES7 157-0AA82-0XA0 Y-coupler 6ES7 197-1LB00-0XA0 The single-channel, switched I/O configuration is recommended for devices that tolerate the failure of individual modules within the ET 200M. Automation System S7-400H Fault-tolerant Systems A5E00068197-07 7-5 Using I/O on the S7-400H Switched ET 200M distributed I/O DP/PA link or Y link Figure 7-2 Single-channel, switched ET 200M distributed I/O Rule When you use a single-channel, switched I/O, the configuration must always be symmetrical, in other words: • The fault-tolerant CPU and other DP masters must be located in identical slots n both subsystems (e.g. in slot 4 on both subsystems) or • the DP masters must be connected on both subsystems to the same integrated interface (e.g. to the PROFIBUS-DP interfaces of the two fault-tolerant CPUs). 7-6 Automation System S7-400H Fault-tolerant Systems A5E00068197-07 Using I/O on the S7-400H Single-channel, switched I/O and user program In Redundant mode, in principle each subsystem may access single-channel switched I/O. The information is automatically transferred over the synchronization link and compared. An identical value is available to the two subsystems at all times owing to the synchronized access. The S7-400H only ever uses one of the interfaces at any given time. The active interface is indicated by the ACT LED on the corresponding IM 153-2 or IM 157. The path via the currently active interface (IM 153-2 or IM 157) is described as the active channel and the path via the other interface as the passive channel. The DP cycle always runs via both channels. However, only the input and output values of the active channel are processed in the user program or output to the I/O. The same applies to asynchronous activities such as interrupt processing and the exchange of data records. Failure of the single-channel, switched I/O In the event of a malfunction the S7-400H with a single-channel, switched I/O behaves as follows: • When the I/O fails, the defective I/O is no longer available. • In certain failure situations, e.g. failure of a subsystem, a DP master system or a DP slave IM153-2 or IM 157 interface module (refer to Chapter 8), the single-channel, switched I/O continues to be available to the process. This is achieved by switch-over between the active and slave channel. This switch-over takes place separately for each DP station. On a failure a distinction is made between – failures affecting one station only (failure of the DP slave interface module of the currently active channel) – failures affecting all the stations of a DP master system. These include unplugging the DP master interface module, shutdown of the DP master system (e.g. on RUN-STOP transition on a CP 443-5) and a short circuit in the cable loom of a DP master system. The following applies to each station affected by a failure: if both DP slave interface modules are currently functional and the active channel fails, the previous slave channel automatically becomes the active channel. A redundancy loss is reported to the user program via the start of OB 70 (event W#16#73A3). Once the fault has been remedied the redundancy is restored. This again results in the start of OB 70 (event W#16#72A3). In this instance there is no switch-over between the active and slave channel. If one channel has already failed and the remaining (active) channel also fails, then there is a complete station failure. This results in the start of OB 86 (event W#16#39C4). Automation System S7-400H Fault-tolerant Systems A5E00068197-07 7-7 Using I/O on the S7-400H Note If the DP master interface module can detect failure of the complete DP master system (e.g. in the case of a short-circuit), only this event is reported (“Master system failure coming” W#16#39C3). The operating system then no longer reports individual station failures. This allows the switch-over process between the active and slave channel to be accelerated. Duration of switch-over of the active channel The maximum switch-over time is DP error detection time + DP switch-over time + switch-over time of DP slave interface module You can determine the first two addends from the bus parameters of your DP master system in STEP 7. You define the last addend from the manuals of the DP slave interface modules concerned (Distributed I/O ET 200M and DP/PA bus connection). Notice If you are using F modules, you have to set the monitoring time of each F module larger than the failover time of the active channel in the H system. If you do not adhere to this, F modules may fail when a failover of the active channel occurs. Notice The above calculation also includes the processing time in OB 70 or OB 86. Note that the processing for a DP station must take no more than 1 ms. If more extensive processing is required, disconnect this from the direct processing of the OBs mentioned. Note that a change of signal can only be detected by the CPU if the signal duration is greater than the specified switch-over time. With a switch-over of the complete DP master system, the switch-over time of the slowest component applies to all DP components. A DP/PA link or Y link normally determines the transfer time and the associated minimum signal duration. We therefore recommend you to connect DP/PA and Y links to a separate DP master system. If you are using F modules, you have to set the monitoring time of each F module larger than the failover time of the active channel in the H system. If you do not adhere to this, F modules may fail when a failover of the active channel occurs. 7-8 Automation System S7-400H Fault-tolerant Systems A5E00068197-07 Using I/O on the S7-400H Switch-over of the active channel on link-up and update On link-up and update with master/standby switch-over (see Section 6.2.1) the active and slave channels are switched over in all the stations of the switched I/O. OB 72 is invoked here. No pulses during switch-over of the active channel To prevent temporary failure of the I/O or output of substitute values during switch-over between the active and slave channel the DP stations of the switched I/O maintain their outputs until switch-over is complete and the new active channel has taken over processing. To ensure that total failures of a DP station occurring during failover are also recognized, the failover process is monitored by both the individual DP stations and by the DP master system. When the minimum I/O retention time is set correctly (see Section 6.3), no interrupts or records are lost during the failover. Automatic repetition takes place if necessary. System configuration and design You should sort switched I/O with different transfer times into separate looms. This simplifies calculation of the monitoring times, among other things. Automation System S7-400H Fault-tolerant Systems A5E00068197-07 7-9 Using I/O on the S7-400H 7.4 Connecting Redundant I/O Was is redundant I/O? I/O modules are considered redundant when there are two of each and are configured and operated as redundant pairs. The use of redundant I/O provides the highest degree of availability since it means that failure of a CPU failure and failure of a signal module are both tolerated. Configurations The following configurations with redundant I/O are possible: 1. Redundant signal modules in the central and expansion devices The signal modules are installed in pairs in the subsystems of CPU 0 and CPU 1. Redundant module pair Central controller expansion unit Central controller expansion unit Redundant module pair Figure 7-3 7-10 Redundant I/O in central- and expansion devices Automation System S7-400H Fault-tolerant Systems A5E00068197-07 Using I/O on the S7-400H 2. Redundant I/O in the one-way DP slave The signal modules are installed in pairs in the distributed I/O device ET 200M with active backplane bus. Redundant module pair Figure 7-4 Redundant I/O in the one-way DP slave Automation System S7-400H Fault-tolerant Systems A5E00068197-07 7-11 Using I/O on the S7-400H 3. Redundant I/O in the switched DP slave The signal modules are installed in pairs in the distributed I/O device ET 200M with active backplane bus. Redundant module pair Figure 7-5 7-12 Redundant I/O in the switched DP slave Automation System S7-400H Fault-tolerant Systems A5E00068197-07 Using I/O on the S7-400H 4. Redundant I/O on an H CPU in single mode Redundant module pair Figure 7-6 Redundant I/O in single mode Block library “Functional I/O Redundancy” The “Functional I/O Redundancy” block library, which is supplied with the optional H package and offers support for redundant I/O, contains the following blocks: • FC 450 “RED_INIT”: Initialization function • FC 451 “RED_DEPA”: Trigger depassivation • FB 450 “RED_IN”: Function block for reading redundant inputs • FB 451 “RED_OUT”: Function block for controlling redundant outputs • FB 452 “RED_DIAG”: Function block for diagnostics of redundant I/O • FB 453 “RED_STATUS”: Function block for redundancy status information After installation of the H option package the block is located in the library “Redundant IO(V1)” under STEP 7\S7_LIBS\RED_IO. The functionality and use of the blocks are described in the corresponding online help. Automation System S7-400H Fault-tolerant Systems A5E00068197-07 7-13 Using I/O on the S7-400H Hardware installation and configuration of the redundant I/O If you wish to use a redundant I/O, we would recommend you the following strategy: 1. Insert all of the modules that you wish to use redundantly. Pay attention to the following default rules for the configuration. 2. Configure the module redundancy using HW Config in the object properties for the respective module. 3. Either look for a partner module for each module or use the default settings In a centralized configuration: Insert the module in an even rack in slot X, the redundant module in the next odd rack is inserted in the same slot. If the module in the odd rack is inserted in slot X, the same slot in the preceding even rack is suggested for the module. Distributed in the one-way DP slave: If the module in the slave is inserted in slot X, provided that the DP master system is redundant, the same PROFIBUS address in the same DP subsystem is suggested for the module in the partner DP subsystem in the slave. Distributed in the switched DP slave, single mode: If the module in the slave is inserted with a DP address in slot X, the module in the slave with the next PROFIBUS address at slot X is suggested. 4. Enter the remaining redundancy parameters for the input modules. Caution Always switch off the station or the rack before you remove a module, otherwise you may disable the wrong module. The valid value that can be processed by the user program are always at the lower address of both redundant modules. This way only the lower address can be used by the application; the values of the higher address are not relevant for the application. 7-14 Automation System S7-400H Fault-tolerant Systems A5E00068197-07 Using I/O on the S7-400H Signal modules for redundancy The signal modules listed below can be used as redundant I/O. Pay attention to the latest information about the use of modules available in the readme files and in the SIMATIC FAQs at http://www.siemens.com/automation/service&support under the keyword “Redundant I/O”. Table 7-1 Signal modules for redundancy Order Number Modules Remark Local: Redundant dual-channel DI DI 16 x 24 V DC Alarm 6ES7 421-7BH00-0AB0 DI 32 x 24 V DC 6ES7 421-1BL0x-0AA0 DI 32 x 120 V AC 6ES7 421-1EL00-0AA0 Distributed: Redundant dual-channel DI DI 24 x 24 V DC 6ES7 326-1BK00-0AB0 F module in standard operating mode DI 8 x NAMUR [EEx ib] 6ES7 326-1RF00-0AB0 F module in standard operating mode DI 16 x 24 V DC, Alarm 6ES7 321-7BH00-0AB0 DI 16 x 24 V DC 6ES7 321-1BH02-0AA0 DI 32 x 24 V DC 6ES7 321-7BL00-0AA0 DI 32 x 24 V DC 6ES7 321-7BH01-0AB0 DI 8 x 230 V AC 6ES7 321-1FF01-0AA0 DI 16 x Namur 6ES7 321-7TH00-0AB0 DI 4 x Namur 6ES7 321-7RD00-0AB0 Local: Redundant dual-channel AI AI 6x16Bit 6ES7 431-7QH00-0AB0 Distributed: Redundant dual-channel AI AI 6 x 13 bits 6ES7 336-1HE00-0AB0 AI 8 x 12 bits 6ES7 331-7KF02-0AB0 AI 8 x 16 bits 6ES7 331-7NF00-0AB0 AI 4 x 15 bits 6ES7 331-7RD00-0AB0 F module in standard operating mode Local: Redundant dual-channel DO DO 32 x 24V DC / 0.5A 6ES7 422-7BL00-0AB0 DO 16 x 120 / 230V AC / 2A 6ES7 422-1FH00-0AA0 Automation System S7-400H Fault-tolerant Systems A5E00068197-07 7-15 Using I/O on the S7-400H Table 7-1 Signal modules for redundancy, continued Modules Order Number Remark Distributed: Redundant dual-channel DO DO 10 x 24 V DC / 2 A 6ES7 326-2BF00-0AB0 DO 32 x 24 V DC / 0.5 A 6ES7 322-1BL00-0AA0 DO 8 x 24 V DC / 2 A 6ES7 322-1BF01-0AA0 DO 8 x 24 V DC / 0.5 A 6ES7 322-8BF00-0AB0 DO 8 x 230 V AC / 2 A 6ES7 322-1FF01-0AA0 DO 16 x 24 V DC / 0.5 A 6ES7 322-8BH00-0AB0 DO 16 x 24 V / 10 nA (Ex) 6ES7 322-5SD00-0AB0 F module in standard operating mode Distributed: Redundant dual-channel AO AO 4 x 12 bits 6ES7 332-5HD01-0AB0 AO 8 x 12 Bit 6ES7 332-5HF00-0AB0 AO 4 x 15 Bit 6ES7 332-5RD00-0AB0 AO 8 x 12bit 6ES7 332-5HF00-0AB0 Notice You need to install the F Configuration Pack V5.3 for F-modules. The F Configuration Pack can be downloaded free of charge from the Internet. You can find it at Customer Support under http://www.siemens.com/automation/service&support. Which faults can be overcome using redundant I/O? There are 3 quality levels for the reliable operation of a redundant configuration of signal modules: • Highest quality with fail-safe signal modules (but without F functionality) • Medium quality with signal modules capable of diagnostics • Simple quality with signal modules without diagnostics 7-16 Automation System S7-400H Fault-tolerant Systems A5E00068197-07 Using I/O on the S7-400H Using digital input modules as redundant I/O The following parameters are set to configure digital input modules for redundant operation: • Discrepancy time (maximum allowed time in which the redundant input signals can differ). When there is still a discrepancy in the input values after the configured discrepancy time has expired, a fault has occurred. • Reaction of the H system to discrepancy in the input values First, the input signals of the paired redundant modules are checked to see if they match. If the values match the uniform value is written to the lower data memory area of the input’s process image. If there is a discrepancy and it is the first discrepancy, it is marked and the discrepancy time is started. During the discrepancy time the most recent matching (non-discrepant) value is written to the process image of the module with the lower address. This procedure is repeated until the values once again match within the discrepancy time or until the discrepancy time of a bit has expired. If the discrepancy continues past the expiration of the configured discrepancy time, a fault has occurred. The localization of the defective page is performed according to the following strategy: 1. During the discrepancy time the most recent matching value is retained as a result. 2. Once the discrepancy time has expired the following error message is displayed: Error code 7960: “Redundant I/O: discrepancy time at digital input expired, error not yet localized”. Passivation is not performed and no entry is made in the static error image. Until the next signal transition occurs, the configured reaction is performed after the discrepancy time expires. 3. If another signal transition occurs, the module in which the transition takes place is the intact module and the other module is passivated. If both paired modules are completely passivated, “zeroes” are entered at the passivated memory location of the process image. Notice The time that the system actually needs to determine a discrepancy depends on several factors: bus operating times, cycle and call-up time of the user program, conversion time, etc. Redundant input signals may therefore be different longer than the discrepancy time. Automation System S7-400H Fault-tolerant Systems A5E00068197-07 7-17 Using I/O on the S7-400H Using digital input modules with non-redundant sensor You install digital input modules with non-redundant sensors in a 1-out-of-2 configuration: Digital input modules Figure 7-7 Fault-tolerant digital input module in a 1-out-of-2 configuration with one sensor The use of redundant digital input modules increases their availability. Discrepancy analysis detects “Continuous 1” and “Continuous 0” errors of the digital input modules. A continuous 1 error means the value 1 is continuous at the input, a continuous 0 error means that the input is continuously dead. This may be caused a short-circuit after L+ or after M, for example. Potential flow across the connection between the encoder and chassis ground of the modules should be avoided as far as possible. When connecting a sensor to several digital input modules, the redundant modules have to have the same reference potential. Connection examples are available in Appendix F and in the SIMATIC FAQs at http://www.siemens.com/automation/service&support under the keyword “Redundant I/O”. Note Note that proximity switches (Beros) have to deliver double the current listed for single modules in the technical specifications. 7-18 Automation System S7-400H Fault-tolerant Systems A5E00068197-07 Using I/O on the S7-400H Additional marginal conditions for various modules DI 16 x 24 V DC Alarm 6ES7 321-7BH01-0AB0 DI 16 x 24 V DC Alarm 6ES7 421-7BH00-0AB0 DI 16 x 24 V DC Alarm 6ES7 421-7BH01-0AB0 • These modules are equipped with a “wire break” diagnostic function. In order to use this detection, you must ensure a cumulative quiescent current (= signal status “0”) between 2.4 mA und 4.9 mA at one or two inputs. To do so, switch a resistance by means of an encoder signal. The resistance depends on the switch used and lies between 6800 and 8200 Ohm for contacts. Formula for calculating the resistor for Beros: (30V / (4.9mA – I_R_Bero) < R < (20V / (2.4mA – I_R_Bero) DI 16 x UC24/60V 6ES7 421-7DH00-0AB0 • This circuitry does not support the “wire break” diagnostic function. DI 16 x NAMUR 6ES7 321-7TH00-0AB0 • Equipotential bonding of the encoder circuit should always be referenced to one point ( usually encoder minus). • Operate both redundant modules on a common load voltage supply. • When you select an encoder, always compare its properties with specified input characteristics. Note that the function must be guaranteed both for one and for two inputs. This is for NAMUR encoders, for example, a “0” signal current > 0.7 mA and a “1” signal current > 4.2mA. DI 4 x NAMUR Ex 6ES7 321-7RD00-0AB0 • Please note the relevant maximum current and voltage specifications for the operation of modules in Ex applications. • You can use only the 2-wire NAMUR encoders or contact elements. • Equipotential bonding of the encoder circuit should always be referenced to one point (usually encoder minus). • When you select an encoder, always compare its properties with specified input characteristics. Note that the function must be guaranteed both for one and for two inputs. This is for NAMUR encoders, for example, a lo signal current > 0.2 mA and a hi signal current > 4.2mA. Automation System S7-400H Fault-tolerant Systems A5E00068197-07 7-19 Using I/O on the S7-400H Using redundant digital input modules with redundant sensors You install digital input modules with redundant sensors in a 1-out-of-2 configuration: Digital input modules Figure 7-8 Fault-tolerant digital input modules in a 1-out-of-2 configuration with 2 sensors The use of redundant sensors increases their availability. Discrepancy analysis detects all errors – except for the failure of a non-redundant on-load voltage supply. You can further increase the availability by installing redundant on-load voltage supplies. When connecting a sensor to several digital input modules, the redundant modules have to have the same reference potential. Connection examples are available in Appendix F and in the SIMATIC FAQs at http://www.siemens.com/automation/service&support under the keyword “Redundant I/O”. 7-20 Automation System S7-400H Fault-tolerant Systems A5E00068197-07 Using I/O on the S7-400H Redundant digital output modules The fault-tolerant control of an actuator can be achieved by connecting two outputs of two digital output modules or fail-safe digital output modules in parallel (1-out-of-2 configuration) Wiring with external diodes Figure 7-9 Wiring without external diodes Fault-tolerant digital output module in a 1-of-2 configuration The digital output module have to have a common on-load voltage supply. Connection examples are available in Appendix F and in the SIMATIC FAQs at http://www.siemens.com/automation/service&support under the keyword “Redundant I/O”. Wiring with external diodes <–> without external diodes The table below shows which of the digital output modules you interconnect by means of external diodes (cf. diagram 7-9) for operation in redundant mode: Table 7-2 Digital output module connected through/without diodes with diodes without diodes 6ES7 422-7BL00-0AB0 X – 6ES7 422-1FH00-0AA0 – X 6ES7 326-2BF00-0AB0 X X 6ES7 322-1BL00-0AA0 X – 6ES7 322-1BF01-0AA0 X – 6ES7 322-8BF00-0AB0 X X 6ES7 322-1FF01-0AA0 – X 6ES7 322-8BH00-0AB0 X – 6ES7 322-5SD00-0AB0 X – Modules Automation System S7-400H Fault-tolerant Systems A5E00068197-07 7-21 Using I/O on the S7-400H Notes on diodes • Suitable is any diode of the 1N4003 ... 1N4007 series, or any other with U_r >=200 V and I_F >= 1 A • You should separate the chassis ground of the modules from load ground and install a potential equalization circuit between them Additional marginal conditions for various modules DO 8xDC24V/0,5A 6ES7 322-8BF00-0AB0 • A definite evaluation of the “P short-circuit” and “M short-circuit” diagnosis is not possible. Deselect these function individually in your configuration. DO32xDC24V/0,5A 6ES7 422-7BL00-0AB0 • A definite evaluation of the “P short-circuit” and “M short-circuit” diagnosis is not possible DO 16xDC24V/0,5A 6ES7 322-8BH00–0AB0 • Equipotential bonding of the load circuit should always be referenced to one point (preferably load minus). • Channel diagnostics is not supported. DO 16xDC24V/10mA Ex 6ES7 322-5SD00-0AB0 • Please note the relevant maximum current and voltage specifications for the operation of modules in Ex applications. • Equipotential bonding of the load circuit should always be referenced to one point (preferably load minus). 7-22 Automation System S7-400H Fault-tolerant Systems A5E00068197-07 Using I/O on the S7-400H Using analog input modules as redundant I/O The following parameters are set to configure analog input modules for redundant operation: • Tolerance window (configured as a percent of the end value of the measuring range). Two analog values are the same when they within the tolerance window. • Discrepancy time (maximum allowed time in which the redundant input signal can be outside the tolerance window). A fault is occurs when there is an input value discrepancy after expiration of the configured discrepancy time. If you connect identical sensors to the two analog input modules, the default value for the discrepancy time is usually sufficient. If you connect different sensors, especially when they are temperature sensors, you will have to increase the discrepancy time. • Applied value The applied value is the value from the two analog input values that is entered into the user program. The system checks if the two read analog values are within the configured tolerance window. If this is the case, the applied value is written to the lower data memory area of the input’s process image. If there is a discrepancy and it is the first discrepancy, it is marked and the discrepancy time is started. When the discrepancy time is running the most recently valid value is written to the process image of the module with the lower address and made available to the current process. When the discrepancy time is expired the module with the configured standard value is declared as valid and the other module is passivated. If the maximum value from both modules is configured as the standard value, this value is then taken for further program execution and the other module is passivated. If the minimum value is set, this module supplies the data for the process and the module with the maximum value is passivated. The passivated module is registered in the diagnostic buffer in any case. When the discrepancy ceases within discrepancy time, the analysis of the redundant input signals continues. Notice The time that the system actually needs to determine a discrepancy depends on several factors: bus operating times, cycle and call-up time of the user program, conversion time, etc. Redundant input signals may therefore be different longer than the discrepancy time. Note You have to deactivate non-switched inputs in HW Config (parameter “Measuring type”). Automation System S7-400H Fault-tolerant Systems A5E00068197-07 7-23 Using I/O on the S7-400H Redundant analog input modules with non-redundant sensors Analog input modules in a 1-out-of-2 configuration are used for non-redundant sensors: Analog input modules Analog input modules Analog input modules R U Voltage measurement I I IIndirect current measurement dirDirect current measurement Figure 7-10 Fault-tolerant analog input modules in a 1-out-of-2 configuration with one sensor Pay attention to the following when connecting a sensor to several analog input modules: • Connect the voltage sensors in parallel to the analog input modules (left in illustration). • You can convert a current into voltage using external impedance to enable you to use voltage analog input modules connected in parallel (right in illustration). • 2-wire transducers are powered externally to enable you to repair the module online. The use of redundant fail-safe analog input modules increases their availability. Connection examples are available in Appendix F and in the SIMATIC FAQs at http://www.siemens.com/automation/service&support under the keyword “Redundant I/O”. Redundant analog input modules for voltage measurement Module not suitable for voltage measurement with non-redundant encoder: AI 4x15bit Ex 7-24 6ES7 331-7RD00-0AB0 I-Input Automation System S7-400H Fault-tolerant Systems A5E00068197-07 Using I/O on the S7-400H Redundant analog input modules for indirect current measurement To note when wiring analog input modules as shown in the diagram above: • Suitable for use in the circuit shown above are active measurement transducers with voltage output and thermocouples • The “wire break” diagnostic function may not be enabled in HW Config when the module is operated with measurement transducers or thermocouples • Suitable sensor types are active 4-wire and passive 2-wire-measuring transducers with output ranges +/–20mA, 0...20mA and 4...20mA. 2-wire-measuring transducers are supplied via an external auxiliary voltage. • The resistance and input voltage range is selected according to the measurement precision, number format, maximum resolution and possible diagnostics criteria. • Other input resistance and voltage combinations according to ohms law are also possible in addition to the options listed. However, note that the number format, diagnostic options and resolutions will be lost. Likewise is the measurement error highly dependent on the amount of the shunt resistance for certain modules. • Use a measurement resistance of type tolerance +/– 0,1% and TK 15ppm. Module not suitable for use in the circuit shown above: AI 4x15bit Ex 6ES7 331-7RD00-0AB0 I-Input Additional marginal conditions for various modules AI 8x12bit AI 8x12bit 6ES7 331-7K..01-0AB0 6ES7 331-7K..02-0AB0 • The modules have a low common mode voltage of 2.5 V. Careful layout of the wiring circuit is therefore vital, particularly when using encoders referenced to ground (encoders with floating potential do not have this high demand on wiring quality). • The rated accumulated input resistance is reduced from > 150 Ohm to 50 Ohm when two inputs with the measuring range > 2.5 V are wired in parallel. Depending on accuracy requirements, it is useful to calculate accuracy based on the source and line resistance. • The “wire break” diagnostic function may not be enabled in HW Config when the module is operated with measurement transducers or thermocouples • You can use a 50 Ohm or 250 Ohm shunt resistor for voltage measurements: Automation System S7-400H Fault-tolerant Systems A5E00068197-07 7-25 Using I/O on the S7-400H Resistance 50 Ohm Current measuring range +/–20mA +/–20mA 4...20mA Input range to be configured +/–1V +/–5 V 1...5V Measuring range cube positioning “A” Resolution 12bit+sign S7 number format x 250 Ohm “B” 12bit+sign 12bit x switching cond. meas. error 1) – 2 parallel inputs – 0.5% – 1 input – 0.25% Diagnostics “wire break” – – x *) Load for 4-wire-measurement transducer 50 Ohm 250 Ohm Input voltage for 2-wire-measurement transducer > 1,2 V >6V *) The AI 8x12bit outputs diagnostic interrupt and measuring value “7FFF” in the event of wire break The listed measurement error is caused only by the connection of one or two inputs to a shunt resistor. Neither the resistance tolerance, nor the basic / operational error limits of the modules are here taken into account. The measurement error at one or two inputs indicates the difference in the measurement result, depending on whether one or two inputs record the current of the measurement transducer when an error occurs. AI 8x16bit 6ES7 331-7NF00-0AB0 • For voltage measurements: The “wire break” diagnostic function may not be enabled in HW Config when the module is operated with measurement transducers or thermocouples • You can use a 250 Ohm shunt resistor for voltage measurements: Resistor 250 Ohm *) Current measurement range +/–20mA 4...20mA Input range to be configured +/–5V 1...5V Resolution 15 bits + sign 15 bits S7 number format X Measurement error caused by circuit – 2 parallel inputs – – 1 input – “wire break” diagnosis X Load resistance for 4-wire measurement transducer 250 Ohm X *) You may be able to connect the free internal 250 Ohm resistors of the module 7-26 Automation System S7-400H Fault-tolerant Systems A5E00068197-07 Using I/O on the S7-400H AI 16x16bit 6ES7 431-7QH00-0AB0 • For voltage measurements: The “wire break” diagnostic function may not be enabled in HW Config when the module is operated with measurement transducers or thermocouples • You can use a 50 Ohm or 250 Ohm shunt resistor for voltage measurements: Resistor 50 OHM 250 Ohm *) Current measurement range +/–20 mA +/–20 mA 4...20 mA Input range to be configured +/–5 V +/–5 V 1...5 V Measurement range selector position A A Resolution 15 bits + sign bits + sign S7 number format 15 bits X Measurement error caused by circuit – 2 parallel inputs – – – 1 input – – “wire break” diagnosis X x Load resistance for 4-wire measurement transducer 50 Ohm 250 Ohm Input voltage for 2-wire measurement transducer > 1.2 V >6 V Automation System S7-400H Fault-tolerant Systems A5E00068197-07 7-27 Using I/O on the S7-400H Redundant analog input module for direct current measurements The following applies to the analog input module circuit shown in the diagram above: • Suitable encoder types are: Active 4-wire and passive 2-wire measurement transducers with an output range of +/–20 mA, 0...20 mA and 4...20 mA. 2-wire measurement transducers are connected to an external auxiliary voltage. • The “wire break” diagnostic function supports only the input range 4...20 mA. All other unipolar or bipolar ranges are not supported. • Suitable diodes: The BZX85 or 1N47..A (Zener diodes 1.3W) series, of the voltage range specified in the module data. For the selection of other elements you should note that the off-state forward current is as low as possible. • In this type of circuit and when using the named diodes, a principal measurement error is caused by the off-state forward current of maximum 1∝A. In the 20-mA range with 16-bit resolution, this value results in an error < 2 bits. In the circuit above, various analog inputs return an additional error. For further information, refer to the marginal conditions. These and all other error values specified in the module manual form a cumulative error. • The 4-wire measurement transducers used must be capable of driving the load of the above circuit. For further information, refer to the marginal conditions. • Please note that the installation of a Zener diode circuit forms a heavy influence on the voltage requirements of 2-wire measurement transducers, which is why the necessary input voltages are specified in the technical data of the various modules. The internal supply (IS) of the measurement transducer (MT) determines the minimum supply voltage and is calculated as follows: L+ > Uin–2Dr + UIS–MT This module is not suitable for the use in the circuit shown above: AI 8x12bit 7-28 6ES7 331-7KF02-0AB0 Automation System S7-400H Fault-tolerant Systems A5E00068197-07 Using I/O on the S7-400H Additional marginal conditions for various modules AI 8x16bit 6ES7 331-7NF00-0AB0 • Suitable Z diodes: BZX85C8v2 or 1N4738A (8.2 V because of 250 Ohm input resistance) • Cumulative circuit error: When one of the modules fails, the error value of the other may increase instantaneously by approx. 0.1% • Load capability of 4-wire measurement transducers: RB > 610 Ohm (worst case calculation: 1 input + 1 Zener diode with an S7 saturation value of 24 mA; RB = (RE * Imax + Uz max) / Imax) • Input voltage of 2-wire measurement transducers: Uin–2Dr < 15 V (worst case calculation: 1 input + 1 Zener diode with an S7 saturation value of 24 mA; Uin–2Dr = RE * Imax + Uz max) AI 16x16bit 6ES7 431-7QH00-0AB0 • Suitable Z diodes BZX85C6v2 or 1N4734A (6.2 V because of 50 Ohm input resistance) • Cumulative circuit error: –– • Load capability of 4-wire measurement transducers: RB > 325 Ohm (worst case calculation: 1 input + 1 Zener diode with an S7 saturation value of 24 mA; RB = (RE * Imax + Uz max) / Imax) • Input voltage of 2-wire measurement transducers: Uin–2Dr < 8 V (worst case calculation: 1 input + 1 Zener diode with an S7 saturation value of 24 mA; Uin–2Dr = RE * Imax + Uz max) Note The circuit shown above operates only with active 4-wire measurement transducers, or with passive 2-wire measurement transducers connected to an auxiliary load voltage supply. The module channels always have to configured for “4-wire measurement transducer” operation. The module (2DMU) can not supply the MT voltage. AI 4x15bit Ex 6ES7 331-7RD00-0AB0 • Note the relevant specifications when operating the module in Ex areas. • Suitable Zener diodes: BZX85C6v2 or 1N4734A (6.2 V because of 50 Ohm input resistance) • Cumulative circuit error: –– • Load capability of 4-wire measurement transducers: RB > 325 Ohm (worst case calculation: 1 input + 1 Zener diode with an S7 saturation value of 24 mA; RB = (RE * Imax + Uz max) / Imax ) • Input voltage of 2-wire measurement transducers: Uin-2Dr < 8 V (worst case calculation: 1 input + 1 Zener diode with an S7 saturation value of 24 mA; Uin-2Dr = RE * Imax + Uz max ) Automation System S7-400H Fault-tolerant Systems A5E00068197-07 7-29 Using I/O on the S7-400H Note This circuit supports only 2-wire measurement transducers with external 24-V power supply or 4-wire measurement transducers. For this circuit you can not use the integrated measurement transducer supply voltage, because its output voltage is only 13V and in worst case it would thus only supply 5 V to the transducer. Redundant analog input modules with redundant sensors Analog input modules in a 1-out-of-2 configuration are preferred for double redundant sensors: Analog input module Figure 7-11 Analog input module Fault-tolerant analog input modules in a 1-out-of-2 configuration with two sensors The use of redundant sensors increases their availability. Discrepancy analysis also detects external errors – except for the failure of a non-redundant on-load voltage supply. Connection examples are available in Appendix F and in the SIMATIC FAQs at http://www.siemens.com/automation/service&support under the keyword “Redundant I/O”. The general information in the introductory section applies. Additional marginal conditions for various modules AO 4x15bit Ex 6ES7 332-5RD00-0AB0 Please note the relevant maximum current and voltage specifications for the operation of modules in Ex applications. 7-30 Automation System S7-400H Fault-tolerant Systems A5E00068197-07 Using I/O on the S7-400H Redundant sensor <–> Non–redundant sensor The following table lists the analog input modules you can use in redundant mode with redundant or non-redundant sensors: Table 7-3 Analog input modules and sensors Redundant sensor Non-redundant sensor 6ES7 431-7QH00-0AB0 X X 6ES7 336-1HE00-0AB0 X – 6ES7 331-7KF02-0AB0 X X 6ES7 331-7NF00-0AB0 X X 6ES7 331-7RD00-0AB0 X X Modules You can use a redundant sensor for the AI8x12Bit, 6ES7 331-7KF02-0AB0 with the following voltage settings: +/– 80 mV (only without wire break monitoring) +/– 250 mV (only without wire break monitoring) +/– 500 mV (wire break monitoring not configured) +/– 1 V (wire break monitoring not configured) +/– 2,5 V (wire break monitoring not configured) +/– 5 V (wire break monitoring not configured) +/– 10 V (wire break monitoring not configured) 1...5 V (wire break monitoring not configured) Automation System S7-400H Fault-tolerant Systems A5E00068197-07 7-31 Using I/O on the S7-400H Redundant analog output modules Redundant control of a final control element is achieved by interconnecting two outputs of two analog output modules in parallel (1-of-2 structure) Analog output modules I Final control element Figure 7-12 Redundant analog output modules in a 1-of-2 structure To wire the analog output module circuit shown above: • Wire the ground lines in star pattern in order to avoid output errors (limited common-mode suppression for the analog output modules). Depassivation of modules Passivated modules are reactivated by the following events: • When fault-tolerant system starts up • When the fault-tolerant system switches to the “Redundant” operating mode • Following a system modification during ongoing operation • By the function FC 451 “RED DEPA” when at least one redundant module is passivated. The functionality and use of FC 451 are described in the corresponding online help. The depassivation is performed in FB 450 “RED IN” when one of these events occur,. When the all of modules have been depassivated, an entry is made in the diagnostics buffer. When you use redundant I/O in a one-way central device or one-way DP slave, you have to depassivate the redundant modules after the station failure/return or replacement of a defective module. You can trigger a complete depassivation with FC 451. Note If a redundant module is assigned a process image partition but the corresponding OB is not available in the CPU, the complete passivation can take approximately 1 minute. 7-32 Automation System S7-400H Fault-tolerant Systems A5E00068197-07 Using I/O on the S7-400H 7.4.1 Determining the status of the passivation Procedure First determine the status of the passivation with the status byte in the status word / control word “FB_RED_IN.STATUS_CONTROL_W”. If you find that a module has been passivated, you can determine the status of this module – or the corresponding modules pair – in the MODUL_STATUS_WORD. Determining the passivation status with the status byte The status word / control word “FB_RED_IN.STATUS_CONTROL_W” is located in the instance DB of FB 450 “RED_IN”. The status byte provides information about the status of the redundant I/O. Table 7-4 Assignment of the status byte Bit Meaning Status byte (byte 1) 0 Standby 1 Standby 2 0 = No analog output module available 1 = at least one analog output module available 3 0 = No passivation by OB 85 1 = at least one passivation by OB 85 4 0 = No passivation by OB 82 1 = at least one passivation by OB 82 5 0 = No channel information available 1 = at least channel information available 6 0 = No module passivated 1 = at least one module passivated 7 0 = Complete depassivation not running 1 = Complete depassivation running Automation System S7-400H Fault-tolerant Systems A5E00068197-07 7-33 Using I/O on the S7-400H Status of the passivation of individual module pairs determined by MODUL_STATUS_WORD MODUL_STATUS_WORD is in the instance DB of FB 453 “RED_STATUS”. The two status bytes provide information about the status of individual module pairs. MODUL_STATUS_WORD is an output parameter of FB 453 and can be connected accordingly. Table 7-5 Assignment of the status bytes Meaning Bit Status byte 1 0 0 = Passivation of module_L triggered by OB 82 1 = No passivation of module_L triggered by OB 82 1 0 = Passivation of module_H triggered by OB 82 1 = No passivation of module_H triggered by OB 82 2 0 = Overflow or underflow (for analog input modules) 1 = No overflow or underflow 3 0 = Channel information is available 1 = Channel information is not available 4 0 = Discrepancy time expired (for input modules) 1 = Discrepancy time not expired 5 0 = Module pair is discrepant (for input modules) 1 = Module pair is not discrepant 6 0 = Module_L passivated 1 = Module_L depassivated 7 0 = Module_H passivated 1 = Module_H depassivated Status byte 2 7-34 0 Standby 1 Standby 2 0 = No enable for depassivation of module_L after outgoing event of OB 85 1 = Enable for depassivation of module_L after outgoing event of OB 85 3 0 = No enable for depassivation of module_H after outgoing event of OB 85 1 = Enable for depassivation of module_H after outgoing event of OB 85 4 0 = No enable for depassivation of module_L after outgoing event of OB 82 1 = Enable for depassivation of module_L after outgoing event of OB 82 5 0 = No enable for depassivation of module_H after outgoing event of OB 82 1 = Enable for depassivation of module_H after outgoing event of OB 82 6 0 = Passivation of module_L triggered by OB 85 1 = No passivation of module_L triggered by OB 85 7 0 = Passivation of module_H triggered by OB 85 1 = No passivation of module_H triggered by OB 85 Automation System S7-400H Fault-tolerant Systems A5E00068197-07 Using I/O on the S7-400H 7.5 Other possibilities for connecting redundant I/O Redundant I/O on the user level If you cannot use the redundant I/O (Chapter 7.4) supported by the system (perhaps because the redundancy module is not included in the list of supported modules), you may be able to use redundant I/O on the user level. Configurations The following configurations having a redundant I/O are possible (Figure 7-13): 1. Redundant system with one-way central and/or distributed I/O. One I/O module is inserted for this purpose in the subsystems of CPU 0 and one in the subsystem of CPU 1. 2. Redundant configuration with a switched I/O Two I/O modules are inserted into two ET 200M distributed I/O devices with an active backplane bus. Redundant one-way I/O Redundant switched I/O Figure 7-13 Redundant one-way and switched I/Os Automation System S7-400H Fault-tolerant Systems A5E00068197-07 7-35 Using I/O on the S7-400H Notice When using redundant I/O, an extra value might have to be added to the calculated monitoring times; refer to Section 6.3.2. Hardware installation and configuration of the redundant I/O If you wish to use a redundant I/O, we would recommend you the following strategy: 1. Use the I/O in the following manner: – With a one-way configuration, one I/O module in each subsystem – With a switched configuration, two I/O modules in two distributed ET 200M I/O devices. 2. Wire the I/O in such a way that it can be addressed by both subsystems. 3. Configure the I/O modules for different logical addresses. Notice We do not recommend configuration of the output modules you use to the same logical addresses as the input modules; if it is done nevertheless, you have to query the type (input or output) of the defective group in OB 122, in addition to the logical address. The user program must update the process image for redundant one-way output modules in single mode too (e.g. direct accesses). If subprocess images are used, the user program must update the subprocess images in OB 72 (redundancy return) accordingly (SFC 27 “UPDAT_PO”). If it did not, old values would initially be read out to the single-channel, one-way output modules of the standby CPU following transition to redundant system mode. 7-36 Automation System S7-400H Fault-tolerant Systems A5E00068197-07 Using I/O on the S7-400H Redundant I/O in the user program The following example program shows the use of two redundant digital input modules: • module A in rack 0 with logical base address 8 and • module B in rack 1 with logical base address 12. One of the two modules is read directly in OB1. It is assumed for the following, without limiting general applicability, that it is module A (the value of variable BGA is TRUE). If no error occurred, processing continues with the value read. If an I/O access error has occurred, module B will be read by direct access (“second attempt” in OB1). If no error has occurred, processing continues with the value read by module B. However, if an error has similarly occurred in this instance, both modules are currently defective, and work continues with a substitute value. The example program is based on the fact that following an access error to module A, module B is always processed first in OB1 after the former has been replaced. Module A is not processed first again in OB1 until an access error to module B occurs. Notice Variables BGA and PZF_BIT must also be valid outside OB1 and OB122. The variable VERSUCH2, on the other hand, is used only in OB1. Automation System S7-400H Fault-tolerant Systems A5E00068197-07 7-37 Using I/O on the S7-400H 2nd attempt: = WRONG Read module A first? Yes No Access to Read module A I/O access error? Access to module B Yes Read mod. A first any more in future 2nd attempt: = TRUE Read mod. A first again in future 2nd attempt: = TRUE No No 2nd attempt == TRUE? 2nd attempt == TRUE? No Yes Use value of Read module A Use Figure 7-14 7-38 Yes I/O access error? No Yes use substitute value Use value of module B Use Flowchart for OB1 Automation System S7-400H Fault-tolerant Systems A5E00068197-07 Using I/O on the S7-400H Example of STL The requisite sections of the user program (OB1, OB 122) are listed below. Table 7-6 OB 1 STL Explanation NOP 0; SET; WBGA: R VERSUCH2; //Initialization A BGA; //Read module A first? JCN WBGB; //If No, continue with module B SET; R PZF_BIT; //Delete PZF bit L PED 8; //Read CPU 0 U PZF_BIT; //Was PZF detected in OB 122? SPBN PZOK; //If no, process access OK U VERSUCH2; //Was this access the second attempt? SPB WBG0; //If yes, use substitute value SET; R BGA; //Do not read module A first any more //in future S VERSUCH2; WBGB: SET; R PZF_BIT; //Delete PZF bit L PED 12; //Read CPU 1 U PZF_BIT; //Was PZF detected in OB 122? SPBN PZOK; //If no, process access OK U VERSUCH2; //Was this access the second attempt? SPB WBG0; //If yes, use substitute value SET; WBG0: S BGA; S VERSUCH2; JU WBGA; L ERSATZ; PZOK: Automation System S7-400H Fault-tolerant Systems A5E00068197-07 //Read module A first again in future //Substitute value //The value to be used is in Accumulator1 7-39 Using I/O on the S7-400H Table 7-7 OB 122 STL Explanation // Does module A cause PZF? L OB122_MEM_ADDR; //Logical base address affected L W#16#8; == I; //Module A? SPBN M01; //If no, continue with M01 //PZF upon access to module A SET; = PZF_BIT; //Set PZF bit SPA CONT; // Does module B cause PZF? M01: NOP 0; L OB122_MEM_ADDR; //Logical base address affected L W#16#C; == I; //Module B? SPBN CONT; //If no, continue with CONT //PZF upon access to module B SET; = PZF_BIT; CONT: 7-40 //Set PZF bit NOP 0; Automation System S7-400H Fault-tolerant Systems A5E00068197-07 Communication Functions 8 In this chapter you will find an introduction to communications with fault-tolerant systems and their specific characteristics. You will learn the basic concepts, the bus systems you can use for fault-tolerant communications and the types of connection. You will learn how communications take place via fault-tolerant connections and standard connections, and how to configure and program them. • You will find examples of communication via fault-tolerant S7 connections and will learn about their advantages. • By way of comparison, you will learn how communication takes place over S7 connections and also how you can communicate in redundant mode by means of S7 connections. In Section Description On Page 8.1 Fundamentals and Basic Concepts 8-2 8.2 Suitable Networks 8-5 8.3 Supported Communication Services 8-8 8.4 Communications via fault-tolerant S7 connections 8-8 8.5 Communications via S7 Connections 8-15 8.6 Communication Performance 8-21 Automation System S7-400H Fault-tolerant Systems A5E00068197-07 8-1 Communication Functions 8.1 Fundamentals and Basic Concepts Overview Fault-tolerant controllers make it possible for controllers, including their I/O, to feature redundancy. With growing demands on the availability of an overall system it is necessary to raise the fault tolerance of communications – in other words, communications have to be configured so that they are also redundant. You will find below an overview of the fundamentals and basic concepts which you ought to know with regard to using fault-tolerant communications. Redundant communication system The availability of the communication system can be enhanced by redundancy of the media, duplication of subcomponents, or duplication of all bus components. Monitoring and synchronization mechanisms ensure that should one component fail, communications in routine operation are continued by means of standby components. A redundant communications system is a requirement for the configuration of fault-tolerant S7 connections. Fault-tolerant communications Fault-tolerant communications means the use of SFBs in S7 communications via fault-tolerant S7 connections. Fault-tolerant S7 connections are only possible with the use of redundant communications systems. Redundant nodes Redundant nodes represent the fault tolerance of communications between two fault-tolerant systems. A system with multi-channel components is represented by redundant nodes. The independence of a redundant node is given when the failure of a component within the node does not result in reliability constraints in other nodes. 8-2 Automation System S7-400H Fault-tolerant Systems A5E00068197-07 Communication Functions Connection (S7 Connection) A connection is the logical assignment of two communication peers to implement a communication service. Every connection has two endpoints containing the information required for addressing the communication peer and other attributes for establishing the connection. An S7 connection is the communication connection between two standard CPUs or from one standard CPU to a CPU in a fault-tolerant system. In contrast to a fault-tolerant S7 connection, which contains at least two partial connections, an S7 connection actually consists of just one connection Communications are terminated should this one connection fail. S7 connection CPU 0 CPU CPU 1 Figure 8-1 Example of an S7 connection Note Generally speaking, “connection” in this manual means the “configured S7 connection”. For other types of connection please refer to the manuals SIMATIC NET NCM S7 for PROFIBUS and SIMATIC NET NCM S7 for Industrial Ethernet. Fault-tolerant S7 connections The requirement for higher availability by means of communication components – for example, CPs and buses – necessitates redundant communication connections between the systems involved. Unlike the S7 connection, a fault-tolerant S7 connection consists of at least two lower-level partial connections. From the point of view of the user program, the configuration and the connection diagnostics, the fault-tolerant S7 connection with its subordinate partial connections is represented by exactly one ID (like a standard S7 connection). Depending on the configuration set, it can consist of up to four partial connections, of which two are always made (active) so as to maintain communications in the event of an error. The number of partial connections depends on possible alternative paths (refer to Figure 8-2) and is determined automatically. Automation System S7-400H Fault-tolerant Systems A5E00068197-07 8-3 Communication Functions Redundant connections CPU a1 CP a1 CPU a2 Bus 1 Bus 2 CP a2 Fault-tolerant system CP CPU a a1 a1 CP b1 CPU b1 CP b2 CPU b2 Fault-tolerant system b CP CPU b1 b1 Bus 1 Bus 2 CPU a1 CP a1 CP b1 CPU b1 CP b2 CPU b2 LAN (red.) CP a2 CPU a2 Redundant connections: CPU a1 –> CPU b1, CPU a2 –> CPU b2, CPU a1 –> CPU b2, CPU a2 –> CPU b1 Fault-tolerant system a CPU a1 CP a1 OLM Fault-tolerant system b CPU b1 OLM CP b1 OLM OLM System bus as optical two-fiber ring Figure 8-2 Example of the number of resulting partial connections being dependent on the configuration Should the active partial connection fail, a previously established second partial connection assumes responsibility for communications. 8-4 Automation System S7-400H Fault-tolerant Systems A5E00068197-07 Communication Functions Resource requirements of fault-tolerant S7 connections The fault-tolerant CPU permits the operation of 64/32 (cf. Technical Data) fault-tolerant S7 connections. On the CP each partial connection requires a connection resource. Note If you have configured several fault-tolerant S7 connections for a fault-tolerant station, setting them up may take a considerable length of time. If the configured maximum communication delay has been set too short, link-up and updating is cancelled and redundant system mode is no longer reached (see Section 6.3). 8.2 Suitable Networks The choice of physical transfer medium depends on the desired expansion, the fault tolerance aimed at and the transmission rate. The following bus systems are used for communications with fault-tolerant systems: • Industrial Ethernet (fiber-optic cable, triaxial or twisted pair copper cable) • PROFIBUS (fiber-optic cable or copper cable) You will find further information on suitable networks in the manuals “Communication with SIMATIC”, “Industrial Twisted Pair Networks” and “PROFIBUS Networks”. 8.2.1 Industrial Ethernet The industrial Ethernet is a communications network for cells in baseband transmission technology complying with IEEE 802.3, with the CSMA/CD access procedure. An industrial Ethernet network can be configured as a redundant medium with either electrical or optical components. A very wide range of electrical and optical network components is available for the industrial Ethernet. Electrical network The electrical network can be configured as a classical bus structure with triaxial cabling for the transmission medium. An addition and an alternative to conventional bus cabling for connections to terminals are electrical link modules (ELMs) or industrial twisted pairs (ITPs). With them star networks complying with IEEE 802.3 can be configured. Automation System S7-400H Fault-tolerant Systems A5E00068197-07 8-5 Communication Functions Optical network The optical industrial Ethernet network (transmission medium: fiber-optic cable) can be configured as a line-type, ring or star network. The configuration is accomplished for a transmission rate of 10 Mbps with optical link modules (OLMs) and/or star hubs for the fast Ethernet of 100 Mbps with optical switching modules (OSMs) and optical redundancy manager (ORM). 8.2.2 PROFIBUS PROFIBUS is a communications network for cells and fields in accordance with PROFIBUS Standard EN 50 170, Volume 2, with the hybrid token bus and master slave access procedure. Networking takes place over two-wire cables or fiber-optic cables. The PROFIBUS bus system can be used as a redundant medium with electrical or optical components. The number of connected stations should not exceed 30. An Industrial Ethernet bus system is recommended for larger plants. The transmission rate can be adjusted in steps from 9.6 kb’s to 12 Mbps. 8-6 Automation System S7-400H Fault-tolerant Systems A5E00068197-07 Communication Functions Electrical network The transmission medium of the electrical network is a shielded, twisted pair. The RS 485 interface operates with voltage differences. It is therefore less sensitive to interference than a voltage or current interface. In the case of PROFIBUS the nodes are connected through a bus terminal or a bus connector to the bus (up to 32 nodes per segment). The different segments are interconnected by means of repeaters. The maximum segment size depends on the transmission rate. Apart from RS-485 transmission technology, there is PROFIBUS PA to IEC 1158 for process automation. PROFIBUS PA transmission technology aims at the intrinsically safe EX area and thus operates with a synchronous, low-energy transmission method. Up to ten nodes can be operated in the intrinsically safe Exi area on a single PROFIBUS PA segment, provided that the overall power requirement never exceeds 100 mA. In the non-intrinsically safe area as many as 30 nodes can operated on one PROFIBUS PA segment. The transmission rate used is then 31.25 kbytes. Optical network The optical PROFIBUS network uses fiber-optic cables as a transmission medium. The fiber-optic cable variant is insensitive to electromagnetic interference, is lightning-proof, does not require electrical equipotential bonding and is suitable for long distances (glass fiber-optic cable). The maximum segment length does not depend on the transmission rate (except redundant optical rings). Optical rings can be configured as one- or two-fiber rings (enhanced network availability). Configuration of the fiber-optic cable networks is accomplished by means of optical link modules (OLMs). A network can be configured with OLMs as a line-type, ring or star network. Automation System S7-400H Fault-tolerant Systems A5E00068197-07 8-7 Communication Functions 8.3 Supported Communication Services The following services can be used: • S7 communications over fault-tolerant S7 connections via PROFIBUS and Industrial Ethernet • S7 communications over S7 connections via MPI, PROFIBUS and Industrial Ethernet • Standard communications (FMS, for example) via PROFIBUS • S5-compatible communications (SEND and RECEIVE blocks, for example) via PROFIBUS and Industrial Ethernet The following are not supported: • Basic communications • Global data communication 8.4 Communications via Fault-tolerant S7 Connections Availability of communicating systems Fault-tolerant communications add additional, redundant communication components, such as CPs and LAN cables, to the overall SIMATIC system. To illustrate the actual availability of communicating systems when using an optical or electrical network, a description is given below of the possibilities for communication redundancy. Prerequisite A requirement for the configuration of fault-tolerant connections with STEP 7 is a configured hardware installation. The hardware configuration of the two subsystems integrated in a fault-tolerant system must be identical. This is especially true of the slots. Depending on the network being used, the following CPs can be used for fault-tolerant communications: • Industrial Ethernet: S7: CP 443-1 • PROFIBUS: S7: CP 443-5 Extended (not configured as DP master system) To be able to use fault-tolerant S7 connections between a fault-tolerant system and a PC, you must install the “S7-REDCONNECT” software package on the PC. Please refer to the Product Information Leaflet on “S7-REDCONNECT” to learn more about the CPs you can use at the PC end. 8-8 Automation System S7-400H Fault-tolerant Systems A5E00068197-07 Communication Functions Configuration The availability of the system, including communications, is set during configuration. Please refer to the STEP 7 documentation to find out how to configure connections. Only S7 communication is used for fault-tolerant S7 connections. To do this, select in the “New Connection” dialog box the “S7 Connection Fault-Tolerant” as the type. The number of required redundant connections is determined by STEP 7 as a function of the redundant nodes. If the network architecture allows them, up to four redundant connections are generated. Higher redundancy cannot be achieved by using more CPs. In the “Properties - Connection” dialog box you can modify specific properties of a fault-tolerant connection, should you require to do so. If you are using more than one CP, you can also switch the connections in this dialog box. This may be practical since, by default, all connections are routed initially through the first CP. If all the connections have been assigned there, the other connections are routed through the second CP etc. Programming Fault-tolerant communication can be used on the fault-tolerant CPU and takes place by means of S7 communication. This is possible solely within an S7 project. The programming of fault-tolerant communications with STEP 7 is accomplished by means of communication system function blocks. With these blocks, data can be transmitted over subnets (Industrial Ethernet, PROFIBUS). The standard communication SFBs integrated in the operating system offer you the option of acknowledged data transmission. Not only data transmission is possible; other communication functions for controlling and monitoring the communication peer can also be used. User programs written for standard communications can be run for fault-tolerant communications as well, without being modified. Cable and connection redundancy has no effect on the user program. Note You will find tips on programming communications in the S7 standard documentation – for example, Programming with STEP 7. The communication functions START and STOP act on exactly one CPU or on all CPUs of the fault-tolerant system (for more details refer to the Reference Manual System Software for S7-300/400, System and Standard Functions). Automation System S7-400H Fault-tolerant Systems A5E00068197-07 8-9 Communication Functions 8.4.1 Communications between Fault-Tolerant Systems Availability The simplest method of enhancing the availability of interconnected systems is to use a redundant system bus configured with an optical two-fiber ring or a duplicated electrical bus system. In this case the connected nodes may consist of simple standard components. An increase in availability can best be obtained with an optical two-fiber ring. Should the two-fiber optic cable rupture, communications continue to exist between the systems involved. The systems then communicate as if they were connected to a bus system (line). A ring system contains two redundant components as a matter of principle and therefore automatically forms a 2-out-of-2 redundant node. An optical network can also be configured in line-type or star topology. There is no cable redundancy with line-type topology, however. Should one electrical cable segment fail, communications between the systems involved similarly continue to exist (2-out-of-2 redundancy). The following examples illustrate the differences between the two versions. Note The number of connection resources required on the CPs depends on the network you are using. If you are using an optical two-fiber ring (refer to Figure 8-3), two connection resources are required per CP. In contrast to this, only one connection resource is required per CP if a duplicated electrical network (refer to Figure 8-4) is being used. 8-10 Automation System S7-400H Fault-tolerant Systems A5E00068197-07 Communication Functions Fault-tolerant system a CP a1 CPU a1 Fault-tolerant system b CP b1 CPU b1 OLM OLM OLM OLM System bus as optical twofiber ring Fault-tolerant system a Redundancy block diagram CPUa1 CPa1 OLM/ Bus1 CPUa2 CPa2 OLM/ Bus2 Fault-tolerant system b CPb1 CPUb1 CPb2 CPUb2 2oo2 redundancy Figure 8-3 Example of redundancy with fault-tolerant system and redundant ring Fault-tolerant system a Fault-tolerant system b CPU a1 CPU b1 CP a1 CP b1 Bus 1 Bus 2 Fault-tolerant system a Redundancy block diagram Figure 8-4 Fault-tolerant system b CPUa1 CPa1 Bus 1 CPb1 CPUb1 CPUa2 CPa2 Bus 2 CPb2 CPUb2 Example of redundancy with fault-tolerant system and redundant bus system Fault-tolerant system a Fault-tolerant system b CPU a1 CPU a1 CPU b1 CPU a1 CP CP a11CPa12CP a11 a22 CP CP b11CPb12CP a11 b22 Bus 1 Bus 2 Redundancy block diagram Fault-tolerant system a Fault-tolerant system b CPa11 CPUa1 CPb11 Bus 1 CPa12 CPa21 CPUa2 CPb21 Bus 2 CPa22 Figure 8-5 CPUb1 CPb12 CPUb2 CPb22 Example of a fault-tolerant system with additional CP redundancy Automation System S7-400H Fault-tolerant Systems A5E00068197-07 8-11 Communication Functions Response to failure Only a double error within a fault-tolerant system (e.g. CPUa1 and CPa2 in a system) in the case of a two-fiber ring leads to total failure of communications between the redundant systems concerned (refer to Figure 8-3). If a double error (CPUa1 and CPb2, for example) occurs in the first case of a redundant electrical bus system (see Figure 8-4), a this results in a complete failure of communication between the systems involved. In the case of a redundant electrical bus system with CP redundancy (see Figure 8-5), only a double error within a fault-tolerant system (CPUa1 and CPUa2, for example) or a triple error (CPUa1, CPa22 and bus2, for example) will result in a complete failure of communication between the systems involved. Redundant S7 connections Interruptions of a connection unit while communication requests are being processed will lead to extended runtimes. 8.4.2 Communications between Fault-Tolerant Systems and a Fault-Tolerant CPU Availability Availability can be enhanced by using a redundant system bus and by using a fault-tolerant CPU on a standard system. If the communication partner is a fault-tolerant CPU, fault-tolerant connections can also be configured here,in contrast to a CPU 416, for example. 8-12 Automation System S7-400H Fault-tolerant Systems A5E00068197-07 Communication Functions Note Fault-tolerant connections occupy two connection resources on CP b1 for the redundant connections. One connection resource each is assigned to CP a1 and CP a2. Fault-tolerant system a CPU a1 CP a1 OLM Standard system with fault-tolerant CPU CP b1 CPU b1 OLM OLM System bus as optical two-fiber ring Redundancy block diagram Fault-tolerant system a CPUa1 CPa1 Bus 1 Standard system with fault-tolerant CPU CPb1 CPUa2 Figure 8-6 CPa2 CPUb1 Bus 2 Example of redundancy with fault-tolerant system and fault-tolerant CPU Response to failure Double faults in the fault–tolerant system (in other words, CPUa1 and CPa 2) and a single fault in the standard system (CPb1) result in a complete failure of communication between the systems involved (refer to Figure 8-6). Fault-Tolerant S7 Connections Interruptions of a partial connection result in a prolonging of the runtime for ongoing communication jobs via fault-tolerant S7 connections. Automation System S7-400H Fault-tolerant Systems A5E00068197-07 8-13 Communication Functions 8.4.3 Communications between Fault-Tolerant Systems and PCs Availability When fault-tolerant systems are connected to a PC, the availability of the overall system concentrates not only on the PCs (OS) and their data management but also on data acquisition on the programmable logic controllers. PCs are not fault-tolerant on account of their hardware and software characteristics. They can be arranged in a redundant manner in a system, however. The availability of this kind of PC (OS) system and its data management is ensured by means of suitable software such as WinCC Redundancy. Communications take place via fault-tolerant connections. The “S7-REDCONNECT” software package as of V1.3 is a requirement for fault-tolerant communication on a PC. It makes it possible to connect a PC to an optical network with a CP or to a redundant bus system with two CPs. Configuring connections No additional configuration of fault-tolerant communications is required at the PC end. Connection configuration is taken care of by the STEP 7 project in the form of an XDB file at the PC end. You can find out how to use STEP 7 fault-tolerant S7 communications to integrate a PC in your OS system in the WinCC documentation. Fault-tolerant system a PC CP a1 CPU a1 OLM CP 1 WinCC server OLM OLM System bus as optical two-fiber ring Redundancy block diagram Fault-tolerant system a CPUa1 CPa1 Bus 1 CPUa2 CPa2 Bus 2 CP 1 PC 2oo2 redundancy Figure 8-7 8-14 Example of redundancy with fault-tolerant system and redundant bus system Automation System S7-400H Fault-tolerant Systems A5E00068197-07 Communication Functions Fault-tolerant system a CP a1 CPU a1 OLM PC CP CP 1 2 WinCC server OLM OLM OLM System bus as optical two-fiber ring Redundancy block diagram Fault-tolerant system a CPUa1 CPa1 Bus 1 CP 1 CPUa2 CPa2 Bus 2 CP 2 PC 2oo2 redundancy Figure 8-8 Example of redundancy with a fault-tolerant system, redundant bus system and CP redundancy in the PC Response to failure Double faults in the fault–tolerant system (in other words, CPUa1 and CPa 2) and the failure of the PC result in a complete failure of communication between the systems involved (refer to Figures 8-7and 8-8). 8.5 Communications via S7 Connections Communications with standard systems Fault-tolerant communications are not possible between fault-tolerant and standard systems. The following examples illustrate the actual availability of the communicating systems. Configuration Standard connections are configured with STEP 7. Programming If standard communications are used on a fault-tolerant system, all the communication functions apart from “global data communications” can be used for them. The standard communication SFBs are used for programming communications with STEP 7. Automation System S7-400H Fault-tolerant Systems A5E00068197-07 8-15 Communication Functions Note The communication functions START and STOP act on exactly one CPU or on all CPUs of the fault-tolerant system (for more details refer to the Reference Manual System Software for S7-300/400, System and Standard Functions). 8.5.1 Communications via S7 Connections – One-Sided Mode Availability Availability is similarly enhanced by using a redundant system bus for communications from a fault-tolerant system to a standard system. If the system bus is configured as an optical two-fiber ring, communications between the systems involved continue to exist in the event of the two-fiber optic cable rupturing. The systems then communicate as if they were connected to a bus system (line), see Figure 8-9. When fault-tolerant systems and standard systems are interconnected, the availability of communications cannot be enhanced by means of a twin electrical bus system. In order to be in a position to use the second bus system as a redundant bus, you have to use a second S7 connection, which has to be managed accordingly in the user program (refer to Figure 8-10). 8-16 Automation System S7-400H Fault-tolerant Systems A5E00068197-07 Communication Functions Fault-tolerant system a System b CP a1 CPU a1 CPU b OLM OLM CP b OLM System bus as optical two-fiber ring Redundancy block diagram Fault-tolerant system a Connection CPUa1 CPa1 OLM/ Bus1 CPUa2 CPa2 OLM/ Bus2 System b CPb Figure 8-9 CPUb Example of interconnected standard and fault-tolerant systems on a redundant ring Fault-tolerant system a CP a1 CPU a1 System b CPU b1 CP CP b1 b2 Bus 1 Bus 2 Redundancy block diagram Fault-tolerant system a System b Connection CPUa1 CPa1 CPUa2 CPa2 Bus 1 CPb1 Bus 2 CPb2 CPUb1 Figure 8-10 Example of interconnected standard and fault-tolerant systems on a redundant bus system Response to failure Two-fiber ring and bus system Since standard S7 connections are used in this particular instance (the connection terminates at the CPU of the subsystem, in this instance CPUa1), an error on the fault-tolerant system – for example, CPUa1 or CPa1 – and an error on system b – for example, CP b – both result in a complete failure of communication between the systems involved (refer to Figures 8-9 and 8-10). There are no differences specific to the bus system’s response to failure. Automation System S7-400H Fault-tolerant Systems A5E00068197-07 8-17 Communication Functions 8.5.2 Communications over Redundant S7 Connections Availability Availability can be enhanced by using a redundant system bus and by using two separate CPs on a standard system. Redundant communications can be operated even with standard connections. Two separate S7 connections have to be configured for this. Connection redundancy has to be implemented by means of programming for this purpose. Communication monitoring has to be implemented for both connections at the user program level to detect a communications failure and to switch to the second connection. Figure 8-11 shows an example of such a configuration. Fault-tolerant system a Standard system b CPU a1 CPU b1 CP a1 CP CP b1 b2 Bus 1 Bus 2 Redundancy block diagram Fault-tolerant system a Standard system CPUa1 CPa1 Bus 1 CPb1 CPUa2 CPa2 Bus 2 CPb2 CPUb1 Figure 8-11 Example of redundancy with fault-tolerant systems and redundant bus system with redundant standard connections Response to failure Double faults in the fault-tolerant system (in other words, CPUa1 and CPa 2), double faults in the standard system (CPb1 and CPb2) and a single fault in the standard system (CPb1) result in a complete failure of communication between the systems involved (refer to Figure 8-11). 8-18 Automation System S7-400H Fault-tolerant Systems A5E00068197-07 Communication Functions 8.5.3 Communications via a Point-to-Point CP on the ET 200M Connection via ET 200M Connections of fault-tolerant systems to single-channel systems are frequently possible only through a point-to-point connection since many systems have no other connection option. To have the data of a single-channel system available on the CPUs of the fault-tolerant system as well, the point-to-point CP (CP 341) has to be inserted in a distributed mounting rack with two IM 153-2s. Configuring connections Redundant connections between the point-to-point CP and the fault-tolerant system are not necessary. Fault-tolerant system a Single-channel other system CP 443-5 Ext CPU a1 2 x IM153-2 CPU CP CP PtP ET 200M Redundancy block diagram Fault-tolerant system a CPUa1 Single-channel other system IMa1 CP PtP CPUa2 Figure 8-12 Cable CP PtP CPU IMa2 Example of interconnection of a fault-tolerant system and a single-channel third-party system Response to failure Double faults in the fault-tolerant system (in other words, CPUa1 and IM153-2) and a single fault in the third-party system result in a complete failure of communication between the systems involved (refer to Figure 8-12). The point-to-point CP can alternatively be inserted centrally in “fault-tolerant system a”. But with this configuration even a failure of the CPU results in a complete failure of communication. Automation System S7-400H Fault-tolerant Systems A5E00068197-07 8-19 Communication Functions 8.5.4 Random Connection with Single-channel Systems Connection via a PC as gateway When fault-tolerant systems are linked to single-channel systems, they can alternatively be connected via a gateway (no connection redundancy). The gateway is connected via one or two CPs to the system bus, depending on availability requirements. Fault-tolerant connections can be configured between the gateway and the fault-tolerant systems. The gateway makes it possible to link any kind of single-channel system – for example, TCP/IP with a specific manufacturer’s protocol). A software instance written by the user in the gateway implements the single-channel transition to the fault-tolerant systems. Any single-channel system can be linked in this way to a fault-tolerant system. Configuring connections Fault-tolerant connections are not required between the gateway CP and the single-channel system. The gateway CP is located on a PC system that has fault-tolerant connections to the fault-tolerant system. In order to be able to use fault-tolerant S7 connections between fault-tolerant system A and the gateway, the S7-REDCONNECT” software package is required on the gateway. Data conversion for routing via the single-channel connection has to be implemented in the user program. You will find further information on this point in the catalog called “Industrial Communications IK10”. Fault-tolerant system a Single-channel system PC as gateway CP a1 CPU a1 CP 1 CP 2 Single-channel nection OLM OLM CPU CP con- System bus as optical two-fiber ring Redundancy block diagram Fault-tolerant system a CPUa1 CPa1 OLM/ Bus1 PC as gateway CP 1 CPUa2 Figure 8-13 CPa2 Gateway CP 2 Single-channel system Cable CP CPU OLM/ Bus2 Example of interconnection of a fault-tolerant system and a single-channel third-party system 8-20 Automation System S7-400H Fault-tolerant Systems A5E00068197-07 Communication Functions 8.6 Communication Performance The following explanation applies to: • CPU 414-4H with order number 6ES7 414-4HJ00-0AB0, all releases. • CPU 417-4H with order number 6ES7 417-4HL01-0AB0, all releases. In an H-system the communication performance (response time and data throughput) during redundant operation is considerably lower in an H-CPU during single operation or in a standard CPU. This description is meant to provide the assessment criteria, with which you can evaluate the effects of the different communication mechanisms on the communication performance. Definition of Communication Load Communication is the sum of all jobs sent to the CPU via the communication mechanisms per second plus the jobs and messages output by the CPU. The bigger the communication load, the larger the CPU response time, this means the CPU requires a longer period of time to respond to a job (e.g., read job) or to output jobs and messages. Automation System S7-400H Fault-tolerant Systems A5E00068197-07 8-21 Communication Functions Work Area In every automation system there is a linear work area, in which an increase in the communication load will lead to an increase in the data throughput. This will lead to clear reaction times, which are usually acceptable for the respective automation task. If there is further increase in the communication load, the throughput will enter the saturation area. The amount of the requests may no longer be processed in the automation system whithin required the response time. The data throughput will reach a maximum and the reaction time will increase exponentially, see diagram below. The data throughput will decrease in part due to additional internal device load. Data throughput Standard CPU H-CPU Communication load Figure 8-14 Data throughput via communication load (basic trend) Response time Standard CPU H-CPU Communication load Figure 8-15 8-22 Response time via communication load (basic trend) Automation System S7-400H Fault-tolerant Systems A5E00068197-07 Communication Functions Standard and H systems The descriptions so far, apply to standard and H systems. Saturation is rarely reached in todays plants because the communication performance of the standard systems is substantially higher than that of the redundant H systems. On the other hand, synchronizations are required for H systems to retain the synchronous run. This increases the runtime of the block and reduces the communication performance. This is why the performance limit is reached earlier.If the redundant H system running has not reached the performance limit, the approximate value of the performance will be less by factor 2 to 3 compared to the standard system. Which sizes influence the communication load? The communication load is influenced by the following sizes: • Number of connections /connected operator control and monitoring systems • Number of variables and number of variables in pictures displayed via WinCC or on OPs. • Communication type(operator control and monitoring, S7 communication, S7-messagefunctions, S5 compatible communication, ...) • The extension of the configured maximun cycle via communication. The subsequent section will show you the factors that influence the communication performance. Automation System S7-400H Fault-tolerant Systems A5E00068197-07 8-23 Communication Functions General Information on Communication Reduce the amount of the communication jobs per second as much as possible. Use the maximum user data length for the communication jobs by grouping some variables and data areas in one read job. Each job requires a processing period, its status should therefore not be checked until the expiration of this period. A free tool for estimating the processing time is available for download at: http://www4.ad.siemens.de/view/cs/de/1651770, article ID 1651770 Call the communication jobs in a way that allows event–controlled data transfer. You can only continue to check the result of the data transfer until the completion of the job. Call the communication blocks at time intervals and in slow cycles to distribute the communication load evenly. If no user data is to be transferred, you can skip the block call with a conditional jump. If you use S7 communication functions instead of instead of S5 compatible commnunication functions, you will get a considerably higher communication performance with the S7 components. Use S5 compatible communication (FB “AG_SEND”, FB “AG_RECV”, AP_RED) only when S7 components are not to communicate with non–S7 components because S5 compatible communication functions (FB “AG_SEND”, FB “AG_RECV”, AP_RED) produce a substantially higher communication load. 8-24 Automation System S7-400H Fault-tolerant Systems A5E00068197-07 Communication Functions Connecting Standard Systems to H Systems Driver block“S7H4_BSR”: you can use the driver block “S7H4_BSR” to connect an H system to a STEP7 library. This block can be ordered at: http://www.khe.siemens.de/it/index1360712_1.htm Alternative SFB 15 “PUT” and SFB 14 “GET” in H System: Use SFB 15 “PUT” alternatively via two standard connections. The first block will be called first. If no error message is output during the execution of the block, the transfer will be considered successful. If an error message is output, the data transfer will be repeated via the second block. Even if an interruption in communication is discovered later, the data will be transferred again to avoid any loss of information. You can apply the same method to an SFB 14 “GET”. If possible use the S7 communication mechanisms for communication. AP Red Software package : Limit your user data size to 240 bytes when using the software “AP_RED”. If a larger amount of data is required, transfer it by calling the blocks sequentially. The software package “AP_RED” uses the FB “AG_SEND” und FB “AG_RCV” mechanisms. Use APRED to link to only SIMATIC S5 / S5 H controls or devices from other manufacturers which support S5 compatible communication. S7 Communication (SFB 12 “BSEND” and SFB 13 “BRCV”) Bear in mind that an SFB 12 “BSEND” in the user program is not called more often than the corresponding SFB 13 “BRCV” in the communications partner. S7 Communication (SFB 8 “USEND” and SFB 9 “URCV”) Use an SFB 8 “USEND” only as event–driven because this bus causes a high communication load. Bear in mind that a SFB 8 “USEND” in the user program is not called more often than corresponding SFB 9 “URCV” in the communications partner. SIMATIC OPs, SIMATIC MPs Use a maximum of 4 OPs or 4 MPs in an H system. If more OPs/MPs are required, you have to examine your entire automation task. In this case, consult your local SIMATIC sales representative. Do not select less than 1s for the picture update and increase this value to 2 s where applicable. Make sure that all the variables of a picture are requested with the same cycle time so the jobs for reading variables can be grouped optimally. Automation System S7-400H Fault-tolerant Systems A5E00068197-07 8-25 Communication Functions OPC Server If several HMI devices OPC are connected to the H system for visualization, then keep the number of the OPC servers accessing the H system low. The OPC clients should access a common OPC server, which then reads the data from the H system. You can optimize data exchange by using WinCC and its client/server concept. Some HMI devices of other manufacturers support the S7 communication protocol, use this option. 8-26 Automation System S7-400H Fault-tolerant Systems A5E00068197-07 9 Configuring with STEP 7 This chapter presents an overview of the special features and possibilities of the S7-400H options package. The first section describes how to install the options package. The second section lists the extensions of the STEP 7 options package and summarizes some central points which you have to take into account when you are configuring a fault-tolerant system. The third section deals with the programming device functions contained in the STEP 7 options package. You will find a more detailed description in basic Help dealing with options packages, Configuring Fault-tolerant Systems. You will find the help information under the Help > Help topics > Help on option packages menu command. In Section Description On Page 9.1 Installing the Options Package 9-2 9.2 Configuring with STEP 7 9-3 9.3 Programming Device Functions in STEP 7 9-8 Automation System S7-400H Fault-tolerant Systems A5E00068197-07 9-1 Configuring with STEP 7 9.1 Installation of the Options Package Software requirements In order to install the “S7 fault-tolerant system” option package, version 2 or higher, you must have the STEP 7 standard package, V5.2 (or higher) installed on your PG or PC. Installing the options package 1. Start the PC or programming device on which you have installed the STEP 7 standard package and make sure that no STEP 7 applications are open. 2. Insert the product CD for the options package. 3. Call the SETUP.EXE program on the CD. 4. Follow the instructions given by the setup program and select the options you require. Reading the Readme file Important late-breaking information on the software supplied is recorded in a readme file. You can view this file when you have completed the Setup program or open it at a later point of time. It is located in the S7hsys directory of STEP 7. Starting the options package The options package does not contain any applications that have to be started explicitly. The additional options are integrated in the familiar user interface. Displaying integrated Help The dialog boxes of the options package have integrated help information, which you can call at any stage of configuration either by pressing F1 or clicking the Help button. You can obtain more detailed information by choosing Help > Help Topics from the menu. 9-2 Automation System S7-400H Fault-tolerant Systems A5E00068197-07 Configuring with STEP 7 9.2 Configuring with STEP 7 The basic approach to configuring the S7-400H is no different from that used to configure the S7-400 – in other words • creating projects and stations • configuring hardware and networking • loading system data onto the programmable logic controller. Even the different steps that are required for this are identical for the most part to those with which you are familiar from the S7-400. Notice The following error OBs must be loaded to the CPU in the S7-400H: OB 70, OB 72, OB 80, OB 82, OB 83, OB 85, OB 86, OB 87, OB 88, OB 121 and OB 122. If these OBs are not loaded, the H- system goes into the STOP system state when a fault occurs. Creating a fault-tolerant station The SIMATIC fault-tolerant station is offered as a separate station type by SIMATIC Manager. It allows the configuration of two central controllers, each having a CPU and thus the redundant fault-tolerant station configuration. 9.2.1 Rules for Fitting a Fault-Tolerant Station The following rules have to be complied with for a fault-tolerant station, in addition to the rules that generally apply to the arrangement of modules in the S7-400: • The central processing units must be inserted in the same slots in each case. • Redundantly used external DP master interfaces or communication modules must be inserted in the same slots in each case. • External DP master interface modules for redundant DP master systems should only be inserted in central racks and not in expansion racks. • Redundantly used modules (for example, CPU 417-4H, DP slave interface module IM 153-2) must be identical – in other words, they must have the same order number, the same version, and the same firmware version. Automation System S7-400H Fault-tolerant Systems A5E00068197-07 9-3 Configuring with STEP 7 Installation rules • A fault-tolerant station may contain up to 20 expansion racks. • Even-numbered mounting racks can be assigned only to central controller 0, whereas odd-numbered mounting racks can be assigned only to central controller 1. • Modules connected to a communication bus can be operated only in mounting racks 0 through 6. • Communication-bus capable modules are not permissible in switched I/Os. • Pay attention to the mounting rack numbers when operating CPs for fault-tolerant communications in expansion racks: The numbers must be directly sequential and begin with the even number – for example, mounting racks numbers 2 and 3, but not mounting racks numbers 3 and 4. • A mounting rack number is also assigned for DP master No. 9 onwards when equipping a central controller with DP master modules. The number of possible expansion racks is reduced as a result. Compliance with the rules is monitored automatically by STEP 7 and taken into account in an appropriate manner during configuration. 9.2.2 Configuring Hardware The simplest way of achieving a redundant hardware configuration consists in initially equipping one mounting rack fully with all the redundant components, assigning parameters to them and then copying them. You can then specify the various addresses (for one-way I/O only!) and arrange other, non-redundant modules in individual racks. Special features in presenting the hardware configuration To make it possible for a redundant DP master system to be detected quickly, it is represented by two closely parallel DP cables. 9-4 Automation System S7-400H Fault-tolerant Systems A5E00068197-07 Configuring with STEP 7 9.2.3 Assigning Parameters to Modules in a Fault-Tolerant Station Introduction Assigning parameters to modules in a fault-tolerant station is no different to assigning parameters to modules in S7-400 standard stations. Procedure All the parameters of the redundant components (with the exception of MPI and communication addresses) must be identical. Central processing unit (exception) CPU parameters can only be set for CPU0 (CPU on rack 0). Any values that you specify for it are automatically allocated to CPU1 (CPU on rack 1). The settings of CPU1 cannot be changed with the exception of the following parameters: • MPI address of the CPU • Station and diagnostics addresses of the integrated PROFIBUS DP interfaces Modules in the I/O address area A module that is addressed in the I/O address area must either be completely within or completely outside the process image. Otherwise, consistency cannot be guaranteed, and the data may be corrupted. 9.2.4 Recommendations for Setting the CPU Parameters CPU parameters that determine cyclic behavior You specify the CPU parameters that determine the cyclic behavior of the system on the “Cycle/Clock memory” tab. Recommended settings: • As long a scan cycle monitoring time as possible (e.g.6000 ms) • As small a process input image as possible (slightly larger than the number of inputs actually used) • As small a process output image as possible (slightly larger than the number of outputs actually used) • OB 85 call when there is an I/O access error: only with incoming and outgoing errors Automation System S7-400H Fault-tolerant Systems A5E00068197-07 9-5 Configuring with STEP 7 Number of messages in the diagnostics buffer You specify the number of messages in the diagnostics buffer on the “Diagnostics/Clock” tab. We recommend that you set a large number (1500, for example). Monitoring time for transferring parameters to modules You specify this monitoring time on the “Startup” tab. It depends on the configuration of the fault-tolerant station. If the monitoring time is too short, the CPU enters the W#16#6547 event in the diagnostics buffer. For some slaves (e.g. IM 157) these parameters are packed in system data blocks. The transmission time of the parameters depends on the following factors: • Baud rate of the bus system ( high baud rate => short transmission time) • Size of the parameters and the system data blocks (long parameter => long transmission time) • Load on the bus system (many slaves => long transmission time); Note: The bus load is at its peak during restart of the DP master, for example, following Power OFF/ON Suggested setting: 600 corresponds to 60 sec. Note The special H CPU parameters and the associated monitoring times are calulated automatically. This involves setting a default value for the total memory load of all data blocks specifically for a CPU. If your H system does not link up, check the memory load setting (HW Config –> CPU Properties –> H Parameters –> Work memory used for all data blocks). Notice CP443-5 Extended may be only used in an S7-400H or S7-400FH when connecting a DP/PA-Link or Y-Link (IM157) with a transmission rate up to 1.5 Mbaud. (Help: see FAQ 11168943 at http://www.siemens.com/automation/service&support) 9-6 Automation System S7-400H Fault-tolerant Systems A5E00068197-07 Configuring with STEP 7 9.2.5 Configuring Networks The fault-tolerant S7 connection is a separate connection type of the “Configure Networks” application. The following communication peers can communicate with each other: S7 fault-tolerant station (with 2 fault-tolerant CPUs)–> station (with 2 fault-tolerant CPUs) S7 400 station (with 1 fault-tolerant CPU) 2 fault-tolerant CPUs) SIMATIC PC stations fault-tolerant CPUs) –> –> S7 fault-tolerant S7 fault-tolerant station (with S7 fault-tolerant station (with 2 Fault-tolerant connections are only permissible if at least one communications terminal is an S7 fault-tolerant station. When this type of connection is being configured, the application automatically determines the number of possible connection paths: • If two independent but identical subnets are available which are both suitable for an S7 connection (DP master systems), two connection paths will be used. In practice these are generally electrical networks, each a CP in a subnet: • If only one DP master system is available – in practice typically fiber-optic cables – four connection paths are used for a connection between two fault-tolerant stations. All the CPs are in this subnetwork: Downloading the network configuration to the fault-tolerant station The network configuration can be downloaded to the entire fault-tolerant station in one go. To do this, the same requirements must be met as for downloading the network configuration to a standard station. Automation System S7-400H Fault-tolerant Systems A5E00068197-07 9-7 Configuring with STEP 7 9.3 Programming Device Functions in STEP 7 Display in SIMATIC Manager In order to do justice to the special features of a fault-tolerant station, the way in which the system is displayed and edited in SIMATIC Manager differs from that of a S7-400 standard station as follows: • In the offline view, the S7 program is displayed only under CPU0 of the fault-tolerant station. No S7 program is visible under CPU1. • In the online view, the S7 program is displayed under both central processing units and can be selected in both locations. Communication functions For programming device functions that lead to the establishment of an online connection – for example, downloading and deleting blocks – one of the two CPUs has to be selected even if the function affects the entire system over the redundant link. • Data which are modified in one of the central processing units in redundant operation affect the other CPUs over the redundant link. • Data which are modified when there is no redundant link – in other words, in single mode – initially affect only the edited CPU. The blocks are applied by the master CPU to the standby CPU during the next link-up and update procedure. Exception: after a configuration modification no new blocks are applied (only the unchanged data blocks). Loading the blocks is then the responsibility of the user. 9-8 Automation System S7-400H Fault-tolerant Systems A5E00068197-07 Failure and Replacement of Components During Operation 10 One factor that is crucial to the uninterrupted operation of the fault-tolerant controller is the replacement of failed components during operation. Rapid repair quickly reestablishes the fault tolerance. We will show you in the sections that follow how simple and fast it can be to repair and replace components in the S7-400H. Please pay attention to the tips in the corresponding sections of the installation manual, S7-400/M7-400 Programmable Controllers, Hardware and Installation In Section Description On Page 10.1 Failure and Replacement of Components in Central Racks and Expansion Racks 10-2 10.2 Failure and Replacement of Components of the Distributed I/O 10-12 Automation System S7-400H Fault-tolerant Systems A5E00068197-07 10-1 Failure and Replacement of Components During Operation 10.1 Failure and Replacement of Components in Central Racks and Expansion Racks Which components can be replaced? The following components can be replaced during operation: • central processing units – for example, CPU 417-4H • power supply modules – for example, PS 405 and PS 407 • signal and function modules • communication processors • synchronization submodules and fiber-optic cables • interface modules – for example, IM 460 and IM 461 10-2 Automation System S7-400H Fault-tolerant Systems A5E00068197-07 Failure and Replacement of Components During Operation 10.1.1 Failure and Replacement of a Central Processing Unit (Fault-Tolerant CPU) Complete replacement of the CPU is not always necessary. If the failure affects only the load memory, all you have to do is replace the memory card concerned. Both cases are described below. Starting situation for replacement of the complete CPU Failure The S7-400H is in redundant system mode and a CPU fails. How Does the System React? • Partner CPU switches to single mode. • Partner CPU reports the event in the diagnostics buffer and via OB 72. Requirements for a replacement The module replacement described below is possible only if the “new” central processing unit • has the same operating system version as the failed CPU and • the same main memory and load memory as the failed CPU. Notice New CPUs are always delivered with the latest operating system version. To be able to use this type of CPU as a replacement module, you must create an operating system update card for the operating system version of the failed CPU and use it to transfer the operating system to the replacement CPU. Procedure To change a central processing unit, perform the following steps: Step 1 What Has To Be Done? Turn off the power supply module. How Does the System React? • Entire subsystem is turned off (system operating in single mode). 2 Replace the central processing unit. - 3 Plug in the synchronization submodules. Make sure the rack number is set correctly. - 4 Plug in the fiber-optic cable connections of the synchronization submodules. - Automation System S7-400H Fault-tolerant Systems A5E00068197-07 10-3 Failure and Replacement of Components During Operation Step 5 What Has To Be Done? How Does the System React? • CPU executes the self-tests and Switch the power supply module on again. goes to STOP. 6 Perform Memory Reset on the replaced CPU. - 7 Start the replaced CPU (e.g. STOP³RUN or Start via programming device). • CPU performs automatic LINK-UP and UPDATE. • CPU changes to RUN and operates as the standby CPU. Starting situation for replacement of the load memory Failure How Does the System React? • Affected CPU switches to STOP and The S7-400H is in redundant system mode and an error access to the load memory is executed. makes a reset request. • Partner CPU switches to single mode. Procedure To change the load memory, perform the following steps: Step What Has To Be Done? How Does the System React? 1 Change the memory card on the stopped CPU. - 2 Perform a reset on the CPU with the replaced memory card. - 3 Start the CPU. • CPU performs automatic LINK-UP and UPDATE. • CPU changes to RUN and operates as the standby CPU. 10-4 Automation System S7-400H Fault-tolerant Systems A5E00068197-07 Failure and Replacement of Components During Operation 10.1.2 Failure and Replacement of a Power Supply Module Initial situation Both central processing units are at RUN. Failure The S7-400H is in redundant system mode and one power supply module fails. How Does the System React? • Partner CPU switches to single mode. • Partner CPU reports the event in the diagnostics buffer and via OB 72. Procedure To change a power supply module in the central rack, perform the following steps: Step What Has To Be Done? 1 Turn off the power supply (24 V DC for PS 405 or 120/230 V AC for PS 407). 2 Replace the module. 3 Switch the power supply module on again. How Does the System React? • Entire subsystem is turned off (system operating in single mode). - • CPU executes the self-tests. • CPU performs automatic LINK-UP and UPDATE. • CPU changes to RUN (Redundant system mode) and now operates as the standby CPU. Note If you use a redundant power supply (PS 407 10A R), two power supply modules are assigned to one fault-tolerant CPU. If a part of the redundant PS 407 10A R power supply module fails, the corresponding CPU keeps on running. The defective part can be replaced during operation. Other power supply modules If the failure concerns a power supply module outside the central rack (e.g. in the expansion rack or in the I/O device) the failure is reported as a rack failure (central) or station failure (remote). In this case, simply switch off the power supply to the power supply module concerned. Automation System S7-400H Fault-tolerant Systems A5E00068197-07 10-5 Failure and Replacement of Components During Operation 10.1.3 Failure and Replacement of an Input/Output or Function Module Initial situation Failure The S7-400H is in redundant system mode and an input/output or function module fails. How Does the System React? • Both CPUs report the event in the diagnostics buffer and via appropriate OBs. Procedure To replace signal and function modules (central or remote), perform the following steps: Step 1 What Has To Be Done? Disconnect the wiring. How Does the System React? • Call OB 82 if the module concerned is diagnosis-interruptible and diagnostics interrupts are released via the configuration. – Call OB 122 if you are accessing the module by direct access – 2 3 Call OB 85 if you are accessing the module by means of the process image Extract the failed module (in RUN mode). • Both CPUs process the Insert the new module. • Both CPUs process the insert/remove-module interrupt OB 83 in synchronism. insert/remove-module interrupt OB 83 in synchronism. • Parameters are assigned automatically to the module by the CPU concerned and the module is addressed again. 4 10-6 Connect the wiring. Call OB 82 if the module concerned is diagnosis-interruptible and diagnostics interrupts are released via the configuration. Automation System S7-400H Fault-tolerant Systems A5E00068197-07 Failure and Replacement of Components During Operation 10.1.4 Failure and Replacement of a Communication Processor This section describes the failure and replacement of communication processors for the PROFIBUS and Industrial Ethernets. The failure and replacement of communication processors for the PROFIBUS-DP are described in Section 10.2.1 Initial situation Failure The S7-400H is in redundant system mode and one communication processor fails. How Does the System React? • Both CPUs report the event in the diagnostics buffer and via appropriate OBs. • With communications via standard connections Connection failed • With communications via redundant connections Communications are maintained without interruption over an alternative channel. Procedure To replace a communication processor for a PROFIBUS or an industrial Ethernet, perform the following steps: Step What Has To Be Done? How Does the System React? 1 Extract the module. Both CPUs process the insert/remove-module interrupt OB 83 in synchronism. 2 Make sure that the new module has no parameter data in its integrated FLASH EPROM and plug it in. • Both CPUs process the insert/remove-module interrupt OB 83 in synchronism. • The module is automatically configured by the appropriate CPU. 3 Turn the module back on. Automation System S7-400H Fault-tolerant Systems A5E00068197-07 The module resumes communications (system establishes communication connection automatically). 10-7 Failure and Replacement of Components During Operation 10.1.5 Failure and Replacement of a Synchronization Submodule or Fiber-Optic Cable In this section three different error scenarios are to be differentiated: • Failure of a synchronization submodule or fiber-optic cable • Successive failure of the two synchronization submodules or fiber-optic cables • Simultaneous failure of the two synchronization submodules or fiber-optic cables Initial situation Failure How Does the System React? Failure of a Fiber–Optic or Synchronization Module: • Master CPU reports the event in the The S7-400H is in redundant system mode and a fiber-optic cable or a synchronization submodule fails. • Master CPU remains in RUN mode; diagnostics buffer and via OB 72. standby CPU goes into STOP Procedure To replace a synchronization submodule or fiber-optic cable, perform the following steps: Step 10-8 What Has To Be Done? How Does the System React? 1 1 Replace the fiber-optic cable first. - 2 Start the standby CPU (e.g. STOP³RUN or Start via programming device). The following reactions are possible: 1. CPU goes into RUN mode. 2. CPU goes into STOP mode. In this case continue with step 3. 3 Unplug the faulty synchronization submodule from the standby CPU. To do so, screw the threaded pin in the additional front panel of the synchronization submodule into the thread of the module. - 4 Insert the new synchronization submodule in the standby CPU.1 Make sure the rack number is set correctly. - 5 Plug in the fiber-optic cable connections of the synchronization submodules. - 6 Start the standby CPU (e.g. STOP³RUN or Start via programming device). The following reactions are possible: 1. CPU goes into RUN mode. 2. CPU goes into STOP mode. In this case continue with step 7. Automation System S7-400H Fault-tolerant Systems A5E00068197-07 Failure and Replacement of Components During Operation Step 7 What Has To Be Done? If in step 6 the standby CPU has gone to STOP: Extract the synchronization submodule from the master CPU. 8 Plug the new synchronization submodule into the master CPU. Make sure the rack number is set correctly. How Does the System React? • Master CPU executes insert/remove-module interrupt OB 83 and redundancy error OB 72 (incoming). • Master CPU executes insert/remove-module interrupt OB 83 and redundancy error OB 72 (outgoing). 9 Plug in the fiber-optic cable connections of the synchronization submodules. - 10 Start the standby CPU (e.g. STOP³RUN or Start via programming device). • CPU performs automatic LINK-UP and UPDATE. • CPU changes to RUN (Redundant system mode) and now operates as the standby CPU. 1 The CPU displays by means of LEDs and by means of the diagnosis whether the lower or upper redundant link has failed. After the defective parts (fiber-optic cable or synchronization submodule) have been replaced, LEDs IFM1F and IFM2F go out. Not until then can you perform the next step. Note If both fiber-optic cables or synchronization submodules are successively damaged or replaced the system reactions are the same as described above. The only exception is that the standby CPU does not go to STOP mode but instead requests a reset. Automation System S7-400H Fault-tolerant Systems A5E00068197-07 10-9 Failure and Replacement of Components During Operation Initial situation Failure How Does the System React? Simultaneous Failure of a Fiber–Optic or Synchronization Module: • Both CPUs report the event in the The S7-400H is in redundant system mode and both fiber-optic cables or synchronization submodules fail. • Both CPUs become the master CPU and diagnostics buffer and via OB 72. remain in RUN mode. Procedure The double error described results in loss of redundancy. In this event proceed as follows: Step What Has To Be Done? How Does the System React? 1 Switch off a subsystem. - 2 Replace the faulty components. - 3 Turn the subsystem back on. LEDs IFM1F and IFMF2F go out. The standby LED lights. 4 Start the CPU (e.g. STOP³RUN or Start via programming device). • CPU performs automatic LINK-UP and UPDATE. • CPU changes to RUN (Redundant system mode) and now operates as the standby CPU. 10-10 Automation System S7-400H Fault-tolerant Systems A5E00068197-07 Failure and Replacement of Components During Operation 10.1.6 Failure and Replacement of an IM 460 and IM 461 Interface Module The IM 460 and IM 461 interface modules make it possible to connect expansion racks. Initial situation Failure The S7-400H is in redundant system mode and one interface module fails. How Does the System React? • Connected expansion unit is turned off. • Both CPUs report the event in the diagnostics buffer and via OB 86. Procedure To change an interface module, perform the following steps: Step What Has To Be Done? 1 Turn off the power supply of the central rack. How Does the System React? • The partner CPU switches to single mode. 2 Turn off the power supply of the expansion unit in which you want to replace the interface module. - 3 Extract the interface module. - 4 Insert the new interface module and turn the power supply of the expansion unit back on. - 5 Switch the power supply of the central rack back on and start the CPU. • CPU performs automatic LINK-UP and UPDATE. • CPU changes to RUN and operates as the standby CPU. Automation System S7-400H Fault-tolerant Systems A5E00068197-07 10-11 Failure and Replacement of Components During Operation 10.2 Failure and Replacement of Components of the Distributed I/O Which components can be replaced? The following components of the distributed I/O can be replaced during operation: • PROFIBUS-DP master • PROFIBUS-DP interface module (IM 153-2 or IM 157) • PROFIBUS-DP slave • PROFIBUS-DP cable Note Replacement of I/O and function modules located in remote stations is described in Section 10.1.3. 10-12 Automation System S7-400H Fault-tolerant Systems A5E00068197-07 Failure and Replacement of Components During Operation 10.2.1 Failure and Replacement of a PROFIBUS-DP Master Initial situation Failure The S7-400H is in redundant system mode and one DP master module fails. How Does the System React? • With single-channel, one-way I/O: DP master can no longer process connected DP slaves. • With switched I/O: DP slaves are addressed via the DP master of the partner. Procedure To replace a PROFIBUS-DP master, perform the following steps: Step What Has To Be Done? How Does the System React? 1 Turn off the power supply of the central The fault-tolerant system goes to rack. single mode. 2 Unplug the DP Profibus cable for the affected DP master module. - 3 Replace the affected module. - 4 Plug in the DP Profibus cable again. - 5 Turn on the power supply of the central rack. • CPU performs automatic LINK-UP and UPDATE. • CPU changes to RUN and operates as the standby CPU. Automation System S7-400H Fault-tolerant Systems A5E00068197-07 10-13 Failure and Replacement of Components During Operation 10.2.2 Failure and Replacement of a Redundant PROFIBUS-DP Interface Module Initial situation Failure The S7-400H is in redundant system mode and a PROFIBUS-DP interface module (IM 153-2, IM 157) fails. How Does the System React? Both CPUs report the event in the diagnostics buffer and via OB 70. Replacement procedure To replace PROFIBUS-DP interface module, perform the following steps: Step What Has To Be Done? How Does the System React? 1 Turn off the supply for the affected DP interface module. - 2 Unplug the connected bus connector. - 3 Insert the new DP Profibus interface module and turn the supply back on. - 4 Plug the bus connector back on. • CPUs process the mounting rack failure OB 70 in synchronism (outgoing event). • Redundant access to the station is again possible for the system. 10-14 Automation System S7-400H Fault-tolerant Systems A5E00068197-07 Failure and Replacement of Components During Operation 10.2.3 Failure and Replacement of a PROFIBUS-DP Slave Initial situation Failure The S7-400H is in redundant system mode and one DP slave fails. How Does the System React? Both CPUs report the event in the diagnostics buffer and via the appropriate OB. Procedure To replace a DP slave, perform the following steps: Step What Has To Be Done? How Does the System React? 1 Turn off the supply for the DP slave. - 2 Unplug the connected bus connector. - 3 Replace the DP slave. - 4 Plug the bus connector on and turn the supply back on. • CPUs process the mounting rack failure OB 86 in synchronism (outgoing event). • DP slave can be addressed by the relevant DP master system. Automation System S7-400H Fault-tolerant Systems A5E00068197-07 10-15 Failure and Replacement of Components During Operation 10.2.4 Failure and Replacement of PROFIBUS-DP Cables Initial situation Failure The S7-400H is in redundant system mode and the PROFIBUS-DP cable is defective. How Does the System React? • With single-channel, one-way I/O: Rack failure OB (OB 86) is started (incoming event). DP master can no longer process connected DP slaves (station failure). • With switched I/O: I/O redundancy error OB (OB 70) is started (incoming event). DP slaves are addressed via the DP master of the partner. Replacement procedure To replace PROFIBUS-DP cables, perform the following steps: Step What Has To Be Done? How Does the System React? 1 Check the wiring and localize the interrupted PROFIBUS-DP cable. - 2 Replace the defective cable. - 3 Switch the failed modules to RUN. CPUs process error OBs in synchronism • With one-way I/O: Mounting rack failure OB 86 (outgoing event) DP slaves can be addressed via the DP master system. • With switched I/O: I/O redundancy error OB70 (outgoing event). DP slaves can be addressed via both DP master systems. 10-16 Automation System S7-400H Fault-tolerant Systems A5E00068197-07 Modifying the System During Operation 11 In addition to the options described in Chapter 10 on how to replace failed components during operation, you can also modify the system with the CPU 417-4H as of firmware version V2.0.0 and with the CPU 414-4H without interrupting the current program. The procedure depends on whether you are working on your user software in PCS 7 or STEP 7. In Section Description On Page 11.1 Possible Hardware Modifications 11-2 11.2 Adding Components in PCS 7 11-6 11.3 Removing Components in PCS 7 11-16 11.4 Adding Components in STEP 7 11-24 11.5 Removing Components in STEP 7 11-32 11.6 Changing the CPU Parameters 11-41 11.7 Changing the Memory Components of the CPU 11-47 The procedures described below for making modifications during operation are each structured so as to start from redundant system mode (see Section 5.2) and then to return to this mode again. Notice Keep strictly to the rules described in this chapter with regard to modifications of the system during routine operation. If you contravene one or more rules, the response of the fault-tolerant system can result in its availability being restricted or even failure of the entire programmable logic controller. Security-relevant components are not taken into account in this description. For more details of dealing with fail-safe systems refer to the manual S7-400F and S7-400FH Programmable Controllers. Automation System S7-400H Fault-tolerant Systems A5E00068197-07 11-1 Modifying the System During Operation 11.1 Possible Hardware Modifications How is a hardware change made? If the hardware components concerned are suitable for unplugging or plugging in live the hardware modification can be carried out in redundant system mode. However, since loading a modified hardware configuration in redundant system mode would result in the fault-tolerant system stopping this must temporarily be put into single mode. In single mode the process is then controlled by only one CPU while the desired configuration modifications are carried out on the other CPU. Notice You should load configuration changes into the CPU only from “Configure Hardware”. Since in this process the load memory content of both CPUs has to be modified more than once, expansion of the integrated load memory with a RAM card is to be recommended (at least temporarily) is recommended. You may only perform the substitution of the FLASH card with required for this with a RAM card if the FLASH card has as much storage space at most as the largest RAM card available. If your FLASH card is larger than the largest available RAM card, you must perform the necessary configuration and program changes in such small steps that there is space for them in the integrated load memory. ! Caution Whenever you make hardware changes, ensure that the synchronization link between the two CPUs is re-established before the standby CPU is started or activated. When the power supplies of the CPUs are switched on, the IFM1F and IFM2F LEDs – which are used to indicate faults on the interfaces for memory submodules – must go out on both CPUs.. Which components can be modified? The following modifications can be made to the hardware configuration during operation: • Adding or removing modules to/from the central or expansion units (e.g. one-way I/O module). 11-2 Automation System S7-400H Fault-tolerant Systems A5E00068197-07 Modifying the System During Operation Notice The addition or removal of the IM460 and IM461 interface modules, the external DP master interface module CP443-5 Extended and the associated connecting cables is only permitted in a deenergized state. • Adding or removing components of the remote input/output station, such as – DP slaves with a redundant interface module (e.g. ET 200M, DP/PA link or Y link) – One-way DP slaves (in any DP master system) – Modules in modular DP slaves – DP/PA couplers – PA devices • Use of a free channel on an existing module • Reconfiguration of a module • Changing certain CPU parameters • Changing the parameters of an installed module • Changing the Memory Components of the CPU With all modifications observe the rules for the configuration of a fault-tolerant station (see Section 9.2.1). Refer to the information text in the “Hardware Catalog” window to determine which ET 200M modules (signal modules and function modules) can be reconfigured during ongoing operation. The special reactions of individual modules are described in the respective technical documentation. What should I note at the system planning stage? In order for switched I/O to be able to be expanded during operation the following points are to be taken into account at the system planning stage: • In both cables of redundant DP master system sufficient numbers of branching points are to be provided for spur lines or dividing points (spur lines are not permissible at transmission rates of 12 million bps). These may either be provided at regular intervals or at all well accessible points. • Both cables are to be uniquely identified so that the line which is currently active is not accidentally cut off. This identification should be visible not only at the end points of a line but also at each possible new connection point. Different colored cables are excellent for this. • Modular DP slave stations (ET 200M), DP/PA links and Y links must always be installed with an active backplane bus and fitted with all the bus modules required, wherever possible, because the bus modules cannot be installed and removed during operation. Automation System S7-400H Fault-tolerant Systems A5E00068197-07 11-3 Modifying the System During Operation • PROFIBUS DP and PROFIBUS PA LAN cables are to be equipped with active bus terminators at both ends so that the lines continue to be correctly terminated during the modification work. • PROFIBUS PA bus systems should be built up using components from the SpliTConnect product range (see interactive catalog CA01) so that separation of the lines is not required. • Loaded data blocks must not be deleted and created again. In other words, SFCs 22 (CREATE_DB) and 23 (DEL_DB) may not be applied to DB numbers occupied by loaded DBs. • Make sure that at the time the system modification is made on the PG/ES the current status of the user program is still available as a STEP 7 project in modular form. It is not sufficient for the user program from one of the CPUs to be loaded back into the PG/ES or compiled again from a STL source file. Modification of the hardware configuration With a few exceptions, all segments of the configuration can be modified during operation. As a rule, a configuration modification also results in a modification in the user program. The following must not be modified: • certain CPU parameters (for details refer to the relevant subsections) • the transmission rate (baud rate) of redundant DP master systems • S7 and S7H connections Modifications to the user program and the connection configuration The modifications to the user program and the connection configuration are loaded into the PLC in redundant system mode. The procedure depends on the software used. For more details refer to the Programming with STEP 7 V5.1 manual and the PCS 7, Configuration Manual. Special Features • Do not carry out more modifications than you can keep an overview of. We recommend that you modify only one DP master and/or a few DP slaves (e.g. no more than 5) per reconfiguration run. • During routine operation, you can add or remove modules in DP stations with a redundant PROFIBUS-DP interface module only with the interface modules IM 153-2, IM 153-2FO or IM 157 specified in Section 7.3. • In the case of IM 153-2 bus modules can only be plugged in is the power supply is interrupted. • Before making a change, check the fault tolerance parameter in HW Config. If this parameter is set to 0, have the parameter calculated again in HW Config using the Properties CPU –> H Parameter. 11-4 Automation System S7-400H Fault-tolerant Systems A5E00068197-07 Modifying the System During Operation Notice The following should be taken into consideration when using redundant I/O modules that you have installed as one–way modules on the user level (see Chapter 7.5): During link–up and synchronization following a change to the system, the I/O modules of the master CPU used up until this point may disappear from the process image for a short time before the (changed) I/O modules of the “new” master CPU are completely entered into the process image. This may lead to the false impression during the initial updating of the process image following a change to the system, that the redundant I/O modules are completely down or there are redundant I/O modules. The redundancy status can therefore only be correctly evaluated when the process image has been completely updated. This phenomenon does not occur with modules that have been released for redundant operation (see Chapter 7.4). Preparations To minimize the time during which the fault-tolerant system has to run in single mode, you should perform the following steps before making the hardware change: • Make sure that the memory components of the CPUs are sufficient for the new configuration and the new user program. If necessary, first expand the memory components (see Section 11.7). • Make sure that modules that are plugged in but not configured do not have any effect on the process. Automation System S7-400H Fault-tolerant Systems A5E00068197-07 11-5 Modifying the System During Operation 11.2 Adding Components in PCS 7 Initial situation You have ensured that the CPU parameters (e.g. the monitoring times) suit the planned new program. If necessary you must first change the CPU parameters accordingly (see Section 11.6). The fault-tolerant system is working in redundant system mode. Procedure Carry out the steps listed below to add hardware components to a fault-tolerant system in PCS 7. Details of each step are listed in a subsection. Step What Has To Be Done? Refer to Section 1 Modification of Hardware 11.2.1 2 Offline Modification of the Hardware Configuration 11.2.2 3 Stopping the Standby CPU 11.2.3 4 Loading New Hardware Configuration in the Standby CPU 11.2.4 5 Switch to CPU with modified configuration 11.2.5 6 Transition to Redundant System Mode 11.2.6 7 Changing and Loading User Program 11.2.7 Exceptions This procedure for system modification does not apply in the following cases: • Use of Free Channels on an Existing Module • When adding interface modules (see Section 11.2.8) 11-6 Automation System S7-400H Fault-tolerant Systems A5E00068197-07 Modifying the System During Operation 11.2.1 PCS 7, Step 1: Modification of Hardware Initial situation The fault-tolerant system is working in redundant system mode. Procedure 1. Add the new components to the system. – Plug new central modules into the rack. – Plug new module into existing modular DP stations – Add new DP stations to existing DP master systems. Notice With switched I/O: Complete all changes on one line of the redundant DP master system first before making changes to the second line. 2. Connect the required sensors and actuators to the new components. Result Plugging in modules that have not yet been configured will have no effect on the user program. The same applies to adding DP stations. The fault-tolerant system continues to work in redundant system mode. New components are not yet addressed. Automation System S7-400H Fault-tolerant Systems A5E00068197-07 11-7 Modifying the System During Operation 11.2.2 PCS 7, Step 2: Offline Modification of the Hardware Configuration Initial situation The fault-tolerant system is working in redundant system mode. Procedure 1. Perform all the modifications to the hardware configuration relating to the added hardware offline. Assign appropriate icons to the new channels to be used. 2. Compile the new hardware configuration, but do not load it into the PLC just yet. Result The modified hardware configuration is in the PG/ES. The PLC continues to work with the old configuration in redundant system mode. Configuring connections Connections from or to newly added CPs must be configured on both connection partners after modification of the hardware configuration is completed. 11-8 Automation System S7-400H Fault-tolerant Systems A5E00068197-07 Modifying the System During Operation 11.2.3 PCS 7, Step 3: Stopping the Standby CPU Initial situation The fault-tolerant system is working in redundant system mode. Procedure 1. In SIMATIC Manager, select a CPU of the fault-tolerant system, and choose the PLC > Operating Mode menu command. 2. In the Operating Mode dialog box, select the standby CPU and click the Stop button. Result The standby CPU switches to STOP mode, the master CPU remains in RUN mode, the fault-tolerant system works in single mode. One-way I/O of the standby CPU are no longer addressed. Whilst I/O access errors of the one-way I/O will result in OB 85 being called, due to the superior CPU redundancy loss (OB 72) these will not be reported. OB 70 (I/O redundancy loss) will not be called. Automation System S7-400H Fault-tolerant Systems A5E00068197-07 11-9 Modifying the System During Operation 11.2.4 PCS 7, Step 4: Loading New Hardware Configuration in the Standby CPU Initial situation The fault-tolerant system is working in single mode. Procedure Load the compiled hardware configuration in the standby CPU that is in STOP mode. Notice The user program and the connection configuration must not be overloaded in single mode. Result The new hardware configuration of the standby CPU does not yet have an effect on current operation. 11-10 Automation System S7-400H Fault-tolerant Systems A5E00068197-07 Modifying the System During Operation 11.2.5 PCS 7, Step 5: Switch to CPU with Modified Configuration Initial situation The modified hardware configuration is loaded into the standby CPU. Procedure 1. In SIMATIC Manager, select a CPU of the fault-tolerant system, and choose the PLC > Operating Mode menu command. 2. In the Operating Mode dialog box, click the Toggle button. 3. In the Toggle dialog box, select the option with modified configuration and click the Toggle button. 4. Confirm the query that follows with OK. Result The standby CPU links up, is updated (see Chapter 6) and becomes the master. The former master CPU switches to STOP mode, the fault-tolerant system works with the new hardware configuration in single mode. Behavior of the I/O Type of I/O One-way I/O of previous master CPU One-way I/O of new master CPU Switched I/O Added I/O modules Are not addressed by the CPU. Are configured and updated by the CPU. I/O modules that continue to be present Are no longer addressed by the CPU. Are re-parameterized1) and updated by the CPU. Added DP stations Are not addressed by the CPU. Driver blocks are not yet present. Any process or diagnostics interrupts occurring will be recognized but not reported. Continue to work without interruption. Output modules output the configured substitute or holding values. as for added I/O modules (see above) 1) Central modules are additionally first reset. Output modules briefly output 0 during this time (instead of the configured substitute or holding values). Automation System S7-400H Fault-tolerant Systems A5E00068197-07 11-11 Modifying the System During Operation Response if monitoring times are exceeded If one of the monitored times exceeds the maximum value configured the update is interrupted and no change of master takes place. The fault-tolerant system remains in single mode with the previous master CPU and in certain conditions attempts to perform the change of master later. For more details refer to Section 6.3. 11.2.6 PCS 7, Step 6: Transition to Redundant System Mode Initial situation The fault-tolerant system works with the new hardware configuration in single mode. Procedure 1. In SIMATIC Manager, select a CPU of the fault-tolerant system, and choose the PLC > Operating Mode menu command. 2. In the Operating Mode dialog box, select the standby CPU and click the Restart (warm restart) button. Result Standby CPU links up again and is updated. The fault-tolerant system works with the new hardware configuration in redundant system mode. Behavior of the I/O Type of I/O One-way I/O of standby CPU Added I/O modules Are configured and updated by the CPU. One-way I/O of master CPU Switched I/O Are updated by the CPU. Driver blocks are not yet present. Any process or Driver blocks are not yet diagnostics interrupts occurring will be recognized but present. Any interrupts not reported. occurring are not reported. I/O modules that continue to be present Are re-parameterized1) Continue to work without interruption. and updated by the CPU. Added DP stations as for added I/O modules (see above) Driver blocks are not yet present. Any interrupts occurring are not reported. 1) Central modules are additionally first reset. Output modules briefly output 0 during this time (instead of the configured substitute or holding values). 11-12 Automation System S7-400H Fault-tolerant Systems A5E00068197-07 Modifying the System During Operation Response if monitoring times are exceeded If one of the monitored times exceeds the maximum value configured the update is interrupted. The fault-tolerant system remains in single mode with the previous master CPU and in certain conditions attempts to perform the link-up and update later. For more details refer to Section 6.3. 11.2.7 PCS 7, Step 7: Changing and Loading User Program Initial situation The fault-tolerant system works with the new hardware configuration in redundant system mode. ! Caution The following program modifications are not possible in redundant system mode and result in the system mode Stop (both CPUs in STOP mode): • structural modifications to an FB interface or the FB instance data • structural modifications to global DBs • compression of the CFC user program. Before the entire program is recompiled and reloaded due to such modifications the parameter values must be read back into the CFC, since otherwise the modifications to the block parameters could be lost. More details of this can be found in the manual CFC for S7, Continuous Function Chart. Procedure 1. Perform all the program modifications relating to the added hardware. You can add the following components: – CFC and SFC charts – blocks in existing charts – connections and parameter settings 2. Assign parameters to the added channel drivers and connect these to the newly assigned icons (see Section 11.2.2). 3. In SIMATIC Manager, select the charts folder and choose the Extras > Charts > Generate module drivers menu command. 4. Compile only the modifications in the charts and load these into the PLC. Automation System S7-400H Fault-tolerant Systems A5E00068197-07 11-13 Modifying the System During Operation Notice Until the first FC is called the value of its coil is undefined. This is to be taken into account in the connection of the FC outputs. 5. Configure the connections from or to the newly added CPs on both connection partners and load these into the PLC. Result The fault-tolerant system processes the entire system hardware with the new user program in redundant system mode. 11.2.8 Adding Interface Modules in PCS 7 The addition of the IM460 and IM461 interface modules, the external DP master interface module CP443-5 Extended and the associated connecting cables is only permitted in a deenergized state. The power supply of the entire subsystem must be switched off. To ensure this has no effect on the process, it must be executed when this subsystem is in STOP mode. 11-14 Automation System S7-400H Fault-tolerant Systems A5E00068197-07 Modifying the System During Operation Procedure 1. Change the hardware configuration offline (see Section 11.2.2) 2. Stop the standby CPU (see Section 11.2.3) 3. Download the new hardware configuration to the standby CPU (see Section 11.2.4) 4. If you want to add to the subsystem of the present standby CPU, carry out the following steps: – Turn off the power supply for the standby subsystem. – Plug the new IM460 in the central controller and establish the link to a new expansion unit. or – Add a new expansion unit to an existing line. or – Plug in the new external DP master interface, and install a new DP master system. – Turn on the power supply for the standby subsystem again. 5. Switch to the CPU with the modified configuration (see Section 11.2.5) 6. If you want to expand the subsystem of the original master CPU (currently in STOP mode), carry out the following steps: – Turn off the power supply for the standby subsystem. – Plug the new IM460 in the central controller and establish the link to a new expansion unit. or – Add a new expansion unit to an existing line. or – Plug in the new external DP master interface, and install a new DP master system. – Turn on the power supply for the standby subsystem again. 7. Switch to redundant system mode (see Section 11.2.6) 8. Modify and download the user program (see Section 11.2.7) Automation System S7-400H Fault-tolerant Systems A5E00068197-07 11-15 Modifying the System During Operation 11.3 Removing Components in PCS 7 Initial situation You have ensured that the CPU parameters (e.g. the monitoring times) suit the planned new program. If necessary you must first change the CPU parameters accordingly (see Section 11.6). The modules to be removed and the associated sensors and actuators are no longer of any significance for the process to be controlled. The fault-tolerant system is working in redundant system mode. Procedure Carry out the steps listed below to remove hardware components from a fault-tolerant system in PCS 7. Details of each step are listed in a subsection. Step What Has To Be Done? Refer to Section I Offline Modification of the Hardware Configuration 11.3.1 II Changing and Loading User Program 11.3.2 III Stopping the Standby CPU 11.3.3 IV Loading New Hardware Configuration in the Standby CPU 11.3.4 V Switch to CPU with modified configuration 11.3.5 VI Transition to Redundant System Mode 11.3.6 VII Modification of Hardware 11.3.7 Exceptions This procedure for system modification should not be used to remove interface modules (see Section 11.3.8). 11-16 Automation System S7-400H Fault-tolerant Systems A5E00068197-07 Modifying the System During Operation 11.3.1 PCS 7, Step I: Offline Modification of the Hardware Configuration Initial situation The fault-tolerant system is working in redundant system mode. Procedure 1. Perform offline only the configuration modifications relating to the hardware to be removed. As you do, delete the icons to the channels that are no longer used. 2. Compile the new hardware configuration, but do not load it into the PLC just yet. Result The modified hardware configuration is in the PG/ES. The PLC continues to work with the old configuration in redundant system mode. Automation System S7-400H Fault-tolerant Systems A5E00068197-07 11-17 Modifying the System During Operation 11.3.2 PCS 7, Step II: Changing and Loading User Program Initial situation The fault-tolerant system is working in redundant system mode. ! Caution The following program modifications are not possible in redundant system mode and result in the system mode Stop (both CPUs in STOP mode): • structural modifications to an FB interface or the FB instance data • structural modifications to global DBs • compression of the CFC user program. Before the entire program is recompiled and reloaded due to such modifications the parameter values must be read back into the CFC, since otherwise the modifications to the block parameters could be lost. More details of this can be found in the manual CFC for S7, Continuous Function Chart. Procedure 1. Perform only the program modifications relating to the hardware to be removed. You can remove the following components: – CFC and SFC charts – blocks in existing charts – channel drivers, connections and parameter settings 2. In SIMATIC Manager, select the charts folder and choose the Extras > Charts > Generate module drivers menu command. This removes the driver blocks that are no longer required. 3. Compile only the modifications in the charts and load these into the PLC. Notice Until the first FC is called the value of its coil is undefined. This is to be taken into account in the connection of the FC outputs. Result The fault-tolerant system continues to work in redundant system mode. The modified user program will no longer attempt to access the hardware to be removed. 11-18 Automation System S7-400H Fault-tolerant Systems A5E00068197-07 Modifying the System During Operation 11.3.3 PCS 7, Step III: Stopping the Standby CPU Initial situation The fault-tolerant system is working in redundant system mode. The user program will no longer attempt to access the hardware to be removed. Procedure 1. In SIMATIC Manager, select a CPU of the fault-tolerant system, and choose the PLC > Operating Mode menu command. 2. In the Operating Mode dialog box, select the standby CPU and click the Stop button. Result The standby CPU switches to STOP mode, the master CPU remains in RUN mode, the fault-tolerant system works in single mode. One-way I/O of the standby CPU are no longer addressed. 11.3.4 PCS 7, Step IV: Loading New Hardware Configuration in the Standby CPU Initial situation The fault-tolerant system is working in single mode. Procedure Load the compiled hardware configuration in the standby CPU that is in STOP mode. Notice The user program and the connection configuration must not be overloaded in single mode. Result The new hardware configuration of the standby CPU does not yet have an effect on current operation. Automation System S7-400H Fault-tolerant Systems A5E00068197-07 11-19 Modifying the System During Operation 11.3.5 PCS 7, Step V: Switch to CPU with Modified Configuration Initial situation The modified hardware configuration is loaded into the standby CPU. Procedure 1. In SIMATIC Manager, select a CPU of the fault-tolerant system, and choose the PLC > Operating Mode menu command. 2. In the Operating Mode dialog box, click the Toggle button. 3. In the Toggle dialog box, select the option with modified configuration and click the Toggle button. 4. Confirm the query that follows with OK. Result The standby CPU links up, is updated (see Chapter 6) and becomes the master. The former master CPU switches to STOP mode, the fault-tolerant system works with the new hardware configuration in single mode. Behavior of the I/O Type of I/O One-way I/O of previous master CPU One-way I/O of new master CPU I/O modules to be removed1) Are no longer addressed by the CPU. I/O modules that continue to be present Are no longer addressed by the CPU. DP stations to be removed: as for I/O modules to be removed (see above) Switched I/O Driver blocks are no longer present. Are re-parameterized 2) and updated by the CPU. Continue to work without interruption. Output modules output the configured substitute or holding values. 1) No longer contained in the hardware configuration, but still plugged in 2) Central modules are additionally first reset. Output modules briefly output 0 during this time (instead of the configured substitute or holding values). 11-20 Automation System S7-400H Fault-tolerant Systems A5E00068197-07 Modifying the System During Operation Response if monitoring times are exceeded If one of the monitored times exceeds the maximum value configured the update is interrupted and no change of master takes place. The fault-tolerant system remains in single mode with the previous master CPU and in certain conditions attempts to perform the change of master later. For more details refer to Section 6.3. 11.3.6 PCS 7, Step VI: Transition to Redundant System Mode Initial situation The fault-tolerant system works with the new hardware configuration in single mode. Procedure 1. In SIMATIC Manager, select a CPU of the fault-tolerant system, and choose the PLC > Operating Mode menu command. 2. In the Operating Mode dialog box, select the standby CPU and click the Restart (warm restart) button. Result Standby CPU links up again and is updated. The fault-tolerant system works with the new hardware configuration in redundant system mode. Behavior of the I/O Type of I/O One-way I/O of standby CPU One-way I/O of master CPU I/O modules to be removed1) Are no longer addressed by the CPU. I/O modules that continue to be present Are re-parameterized 2) and updated by the CPU. DP stations to be removed: as for I/O modules to be removed (see above) Switched I/O Driver blocks are no longer present. Continue to work without interruption. 1) No longer contained in the hardware configuration, but still plugged in 2) Central modules are first reset in addition. Output modules briefly output 0 during this time (instead of the substitute or holding values configured). Automation System S7-400H Fault-tolerant Systems A5E00068197-07 11-21 Modifying the System During Operation Response if monitoring times are exceeded If one of the monitored times exceeds the maximum value configured the update is interrupted. The fault-tolerant system remains in single mode with the previous master CPU and in certain conditions attempts to perform the link-up and update later. For more details refer to Section 6.3. 11.3.7 PCS 7, Step VII: Modification of Hardware Initial situation The fault-tolerant system works with the new hardware configuration in redundant system mode. Procedure 1. Disconnect all the sensors and actuators from the components to be removed. 2. Unplug modules of the one-way I/O that are no longer required from the rack. 3. Unplug components that are no longer required from the modular DP stations. 4. Remove DP stations that are no longer required from the DP master systems. Notice With switched I/O: Complete all changes on one line of the redundant DP master system first before making changes to the second line. Result Unplugging modules that have been removed from the configuration has no effect on the user program. The same applies to the removal of DP stations. The fault-tolerant system continues to work in redundant system mode. 11-22 Automation System S7-400H Fault-tolerant Systems A5E00068197-07 Modifying the System During Operation 11.3.8 Removing Interface Modules in PCS 7 The removal of the IM460 and IM461 interface modules, the external DP master interface module CP443-5 Extended and the associated connecting cables is only permitted in a deenergized state. The power supply of the entire subsystem must be switched off. To ensure this has no effect on the process, it must be executed when this subsystem is in STOP mode. Procedure 1. Change the hardware configuration offline (see Section 11.3.1) 2. Modify and download the user program (see Section 11.3.2) 3. Stop the standby CPU (see Section 11.3.3) 4. Download the new hardware configuration to the standby CPU (see Section 11.3.4) 5. If you want to remove an interface module from the subsystem of the current standby CPU, carry out the following steps: – Turn off the power supply for the standby subsystem. – Remove an IM460 from the central controller. or – Remove an expansion unit from an existing line. or – Remove an external DP master interface. – Turn on the power supply for the standby subsystem again. 6. Switch to the CPU with the modified configuration (see Section 11.3.5) 7. If you want to remove an interface module from the subsystem of the original master CPU (currently in STOP mode), carry out the following steps: – Turn off the power supply for the standby subsystem. – Remove an IM460 from the central controller. or – Remove an expansion unit from an existing line. or – Remove an external DP master interface. – Turn on the power supply for the standby subsystem again. 8. Switch to redundant system mode (see Section 11.3.6) Automation System S7-400H Fault-tolerant Systems A5E00068197-07 11-23 Modifying the System During Operation 11.4 Adding Components in STEP 7 Initial situation You have ensured that the CPU parameters (e.g. the monitoring times) suit the planned new program. If necessary you must first change the CPU parameters accordingly (see Section 11.6). The fault-tolerant system is working in redundant system mode. Procedure In order to add hardware components to a fault-tolerant system under STEP 7 the steps listed below are to be performed. Details of each step are listed in a subsection. Step What Has To Be Done? Refer to Section 1 Modification of Hardware 11.4.1 2 Offline Modification of the Hardware Configuration 11.4.2 3 Expanding and Loading Organization Blocks 11.4.3 4 Stopping the Standby CPU 11.4.4 5 Loading New Hardware Configuration in the Standby CPU 11.4.5 6 Switch to CPU with modified configuration 11.4.6 7 Transition to Redundant System Mode 11.4.7 8 Changing and Loading User Program 11.4.8 Exceptions This procedure for system modification does not apply in the following cases: • Use of Free Channels on an Existing Module • When adding interface modules (see Section 11.4.9) 11-24 Automation System S7-400H Fault-tolerant Systems A5E00068197-07 Modifying the System During Operation 11.4.1 STEP 7, Step 1: Modification of Hardware Initial situation The fault-tolerant system is working in redundant system mode. Procedure 1. Add the new components to the system. – Plug new central modules into the rack. – Plug new module into existing modular DP stations – Add new DP stations to existing DP master systems. Notice With switched I/O: Complete all changes on one line of the redundant DP master system first before making changes to the second line. 2. Connect the required sensors and actuators to the new components. Result Plugging in modules that have not yet been configured will have no effect on the user program. The same applies to adding DP stations. The fault-tolerant system continues to work in redundant system mode. New components are not yet addressed. Automation System S7-400H Fault-tolerant Systems A5E00068197-07 11-25 Modifying the System During Operation 11.4.2 STEP 7, Step 2: Offline Modification of the Hardware Configuration Initial situation The fault-tolerant system is working in redundant system mode. The modules added will not yet be addressed. Procedure 1. Perform all the modifications to the hardware configuration relating to the added hardware offline. 2. Compile the new hardware configuration, but do not load it into the PLC just yet. Result The modified hardware configuration is in the PG. The PLC continues to work with the old configuration in redundant system mode. Configuring connections Connections from or to newly added CPs must be configured on both connection partners after modification of the hardware configuration is completed. 11.4.3 STEP 7, Step 3: Expanding and Loading Organization Blocks Initial situation The fault-tolerant system is working in redundant system mode. Procedure 1. Make sure that the interrupt OBs 4x, 82, 83, 85, 86 and 122 react in the desired way to interrupts from the newly added components. 2. Load the modified OBs and the program segments affected by these into the PLC. Result The fault-tolerant system is working in redundant system mode. 11-26 Automation System S7-400H Fault-tolerant Systems A5E00068197-07 Modifying the System During Operation 11.4.4 STEP 7, Step 4: Stopping the Standby CPU Initial situation The fault-tolerant system is working in redundant system mode. Procedure 1. In SIMATIC Manager, select a CPU of the fault-tolerant system, and choose the PLC > Operating Mode menu command. 2. In the Operating Mode dialog box, select the standby CPU and click the Stop button. Result The standby CPU switches to STOP mode, the master CPU remains in RUN mode, the fault-tolerant system works in single mode. One-way I/O of the standby CPU are no longer addressed. OB 70 (I/O redundancy loss) is not called due to the superior CPU redundancy loss (OB 72). 11.4.5 STEP 7, Step 5: Loading New Hardware Configuration in the Standby CPU Initial situation The fault-tolerant system is working in single mode. Procedure Load the compiled hardware configuration in the standby CPU that is in STOP mode. Notice The user program and the connection configuration must not be overloaded in single mode. Result The new hardware configuration of the standby CPU does not yet have an effect on current operation. Automation System S7-400H Fault-tolerant Systems A5E00068197-07 11-27 Modifying the System During Operation 11.4.6 STEP 7, Step 6: Switch to CPU with Modified Configuration Initial situation The modified hardware configuration is loaded into the standby CPU. Procedure 1. In SIMATIC Manager, select a CPU of the fault-tolerant system, and choose the PLC > Operating Mode menu command. 2. In the Operating Mode dialog box, click the Toggle button. 3. In the Toggle dialog box, select the option with modified configuration and click the Toggle button. 4. Confirm the query that follows with OK. Result The standby CPU links up, is updated and becomes the master. The former master CPU switches to STOP mode, the fault-tolerant system works with the new hardware configuration in single mode. Behavior of the I/O Type of I/O One-way I/O of previous master CPU One-way I/O of new master CPU Switched I/O Added I/O modules Are not addressed by the CPU. Are configured and updated by the CPU. I/O modules that continue to be present Are no longer addressed by the CPU. Are re-parameterized1) and updated by the CPU. Added DP stations Are not addressed by the CPU. Output modules briefly output the substitute values configured. Continue to work without interruption. Output modules output the configured substitute or holding values. as for added I/O modules (see above) 1) Central modules are first reset in addition. Output modules briefly output 0 during this time (instead of the substitute or holding values configured). 11-28 Automation System S7-400H Fault-tolerant Systems A5E00068197-07 Modifying the System During Operation Response if monitoring times are exceeded If one of the monitored times exceeds the maximum value configured the update is interrupted and no change of master takes place. The fault-tolerant system remains in single mode with the previous master CPU and in certain conditions attempts to perform the change of master later. For more details refer to Section 6.3. 11.4.7 STEP 7, Step 7: Transition to Redundant System Mode Initial situation The fault-tolerant system works with the new hardware configuration in single mode. Procedure 1. In SIMATIC Manager, select a CPU of the fault-tolerant system, and choose the PLC > Operating Mode menu command. 2. In the Operating Mode dialog box, select the standby CPU and click the Restart (warm restart) button. Result Standby CPU links up again and is updated. The fault-tolerant system works with the new hardware configuration in redundant system mode. Behavior of the I/O Type of I/O One-way I/O of standby CPU Added I/O modules Are configured and updated by the CPU. One-way I/O of master CPU Are updated by the CPU. Switched I/O Are updated by the CPU. Generate plug in interrupt; must be ignored in OB 83. Output modules briefly output the substitute values configured. I/O modules that continue to be present Are re-parameterized1) and updated by the CPU. Continue to work without interruption. Added DP stations as for added I/O modules (see above) Are updated by the CPU. 1) Central modules are additionally first reset. Output modules briefly output 0 during this time (instead of the configured substitute or holding values). Automation System S7-400H Fault-tolerant Systems A5E00068197-07 11-29 Modifying the System During Operation Response if monitoring times are exceeded If one of the monitored times exceeds the maximum value configured the update is interrupted. The fault-tolerant system remains in single mode with the previous master CPU and in certain conditions attempts to perform the link-up and update later. For more details refer to Section 6.3. 11.4.8 STEP 7, Step 8: Changing and Loading User Program Initial situation The fault-tolerant system works with the new hardware configuration in redundant system mode. Restrictions ! Caution Structural modifications to an FB interface or the instance data of an FB are not possible in redundant system mode and result in the system mode Stop (both CPUs in STOP mode). Procedure 1. Perform all the program modifications relating to the added hardware. You can add, modify or remove OBs, FBs, FCs and DBs. 2. Load only the program modifications into the PLC. 3. Configure the connections from or to the newly added CPs on both connection partners and load these into the PLC. Result The fault-tolerant system processes the entire system hardware with the new user program in redundant system mode. 11-30 Automation System S7-400H Fault-tolerant Systems A5E00068197-07 Modifying the System During Operation 11.4.9 Adding Interface Modules in STEP 7 The addition of the IM460 and IM461 interface modules, the external DP master interface module CP443-5 Extended and the associated connecting cables is only permitted in a deenergized state. The power supply of the entire subsystem must be switched off. To ensure this has no effect on the process, it must be executed when this subsystem is in STOP mode. Procedure 1. Change the hardware configuration offline (see Section 11.4.2) 2. Add and download the organization blocks (see Section 11.4.3) 3. Stop the standby CPU (see Section 11.4.4) 4. Download the new hardware configuration to the standby CPU (see Section 11.4.5) 5. If you want to add to the subsystem of the present standby CPU, carry out the following steps: – Turn off the power supply for the standby subsystem. – Plug the new IM460 in the central controller and establish the link to a new expansion unit. or – Add a new expansion unit to an existing line. or – Plug in the new external DP master interface, and install a new DP master system. – Turn on the power supply for the standby subsystem again. 6. Switch to the CPU with the modified configuration (see Section 11.4.6) 7. If you want to expand the subsystem of the original master CPU (currently in STOP mode), carry out the following steps: – Turn off the power supply for the standby subsystem. – Plug the new IM460 in the central controller and establish the link to a new expansion unit. or – Add a new expansion unit to an existing line. or – Plug in the new external DP master interface, and install a new DP master system. – Turn on the power supply for the standby subsystem again. 8. Switch to redundant system mode (see Section 11.4.7) 9. Modify and download the user program (see Section 11.4.8) Automation System S7-400H Fault-tolerant Systems A5E00068197-07 11-31 Modifying the System During Operation 11.5 Removing Components in STEP 7 Initial situation You have ensured that the CPU parameters (e.g. the monitoring times) suit the planned new program. If necessary you must first change the CPU parameters accordingly (see Section 11.6). The modules to be removed and the associated sensors and actuators are no longer of any significance for the process to be controlled. The fault-tolerant system is working in redundant system mode. Procedure In order to remove hardware components from a fault-tolerant system under STEP 7 the steps listed below are to be performed. Details of each step are listed in a subsection. Step What Has To Be Done? Refer to Section I Offline Modification of the Hardware Configuration 11.5.1 II Changing and Loading User Program 11.5.2 III Stopping the Standby CPU 11.5.3 IV Loading New Hardware Configuration in the Standby CPU 11.5.4 V Switch to CPU with modified configuration 11.5.5 VI Transition to Redundant System Mode 11.5.6 VII Modification of Hardware 11.5.7 VIII Modifying and Loading Organization Blocks 11.5.8 Exceptions This procedure for system modification should not be used to remove interface modules (see Section 11.5.9). 11-32 Automation System S7-400H Fault-tolerant Systems A5E00068197-07 Modifying the System During Operation 11.5.1 STEP 7, Step I: Offline Modification of the Hardware Configuration Initial situation The fault-tolerant system is working in redundant system mode. Procedure 1. Perform offline all the modifications to the hardware configuration relating to the hardware to be removed. 2. Compile the new hardware configuration, but do not load it into the PLC just yet. Result The modified hardware configuration is in the PG. The PLC continues to work with the old configuration in redundant system mode. Automation System S7-400H Fault-tolerant Systems A5E00068197-07 11-33 Modifying the System During Operation 11.5.2 STEP 7, Step II: Changing and Loading User Program Initial situation The fault-tolerant system is working in redundant system mode. Restrictions ! Caution Structural modifications to an FB interface or the instance data of an FB are not possible in redundant system mode and result in the system mode Stop (both CPUs in STOP mode). Procedure 1. Perform only the program modifications relating to the hardware to be removed. You can add, modify or remove OBs, FBs, FCs and DBs. 2. Load only the program modifications into the PLC. Result The fault-tolerant system continues to work in redundant system mode. The modified user program will no longer attempt to access the hardware to be removed. 11-34 Automation System S7-400H Fault-tolerant Systems A5E00068197-07 Modifying the System During Operation 11.5.3 STEP 7, Step III: Stopping the Standby CPU Initial situation The fault-tolerant system is working in redundant system mode. The user program will no longer attempt to access the hardware to be removed. Procedure 1. In SIMATIC Manager, select a CPU of the fault-tolerant system, and choose the PLC > Operating Mode menu command. 2. In the Operating Mode dialog box, select the standby CPU and click the Stop button. Result The standby CPU switches to STOP mode, the master CPU remains in RUN mode, the fault-tolerant system works in single mode. One-way I/O of the standby CPU are no longer addressed. 11.5.4 STEP 7, Step IV: Loading New Hardware Configuration in the Standby CPU Initial situation The fault-tolerant system is working in single mode. Procedure Load the compiled hardware configuration in the standby CPU that is in STOP mode. Notice The user program and the connection configuration must not be overloaded in single mode. Result The new hardware configuration of the standby CPU does not yet have an effect on current operation. Automation System S7-400H Fault-tolerant Systems A5E00068197-07 11-35 Modifying the System During Operation 11.5.5 STEP 7, Step V: Switch to CPU with Modified Configuration Initial situation The modified hardware configuration is loaded into the standby CPU. Procedure 1. In SIMATIC Manager, select a CPU of the fault-tolerant system, and choose the PLC > Operating Mode menu command. 2. In the Operating Mode dialog box, click the Toggle button. 3. In the Toggle dialog box, select the option with modified configuration and click the Toggle button. 4. Confirm the query that follows with OK. Result The standby CPU links up, is updated (see Chapter 6) and becomes the master. The former master CPU switches to STOP mode, the fault-tolerant system continues to work in single mode. Behavior of the I/O Type of I/O One-way I/O of previous master CPU One-way I/O of new master CPU I/O modules to be removed1) Are no longer addressed by the CPU. I/O modules that continue to be present Are no longer addressed by the CPU. DP stations to be removed: as for I/O modules to be removed (see above) Are re-parameterized 2) and updated by the CPU. Switched I/O Continue to work without interruption. Output modules output the configured substitute or holding values. 1) No longer contained in the hardware configuration, but still plugged in 2) Central modules are first reset in addition. Output modules briefly output 0 during this time (instead of the substitute or holding values configured). 11-36 Automation System S7-400H Fault-tolerant Systems A5E00068197-07 Modifying the System During Operation Response if monitoring times are exceeded If one of the monitored times exceeds the maximum value configured the update is interrupted and no change of master takes place. The fault-tolerant system remains in single mode with the previous master CPU and in certain conditions attempts to perform the change of master later. For more details refer to Section 6.3. 11.5.6 STEP 7, Step VI: Transition to Redundant System Mode Initial situation The fault-tolerant system works with the new (restricted) hardware configuration in single mode. Procedure 1. In SIMATIC Manager, select a CPU of the fault-tolerant system, and choose the PLC > Operating Mode menu command. 2. In the Operating Mode dialog box, select the standby CPU and click the Restart (warm restart) button. Result Standby CPU links up again and is updated. The fault-tolerant system is working in redundant system mode. Behavior of the I/O Type of I/O One-way I/O of standby CPU One-way I/O of master CPU I/O modules to be removed1) Are no longer addressed by the CPU. I/O modules that continue to be present Are re-parameterized 2) and updated by the CPU. DP stations to be removed: as for I/O modules to be removed (see above) Switched I/O Continue to work without interruption. 1) No longer contained in the hardware configuration, but still plugged in 2) Central modules are first reset in addition. Output modules briefly output 0 during this time (instead of the substitute or holding values configured). Automation System S7-400H Fault-tolerant Systems A5E00068197-07 11-37 Modifying the System During Operation Response if monitoring times are exceeded If one of the monitored times exceeds the maximum value configured the update is interrupted. The fault-tolerant system remains in single mode with the previous master CPU and in certain conditions attempts to perform the link-up and update later. For more details refer to Section 6.3. 11.5.7 STEP 7, Step VII: Modification of Hardware Initial situation The fault-tolerant system works with the new hardware configuration in redundant system mode. Procedure 1. Disconnect all the sensors and actuators from the components to be removed. 2. Remove the desired components from the system. – Unplug central modules from the rack. – Unplug modules from modular DP stations – Remove DP stations from DP master systems. Notice With switched I/O: Complete all changes on one line of the redundant DP master system first before making changes to the second line. Result Unplugging modules that have been removed from the configuration has no effect on the user program. The same applies to the removal of DP stations. The fault-tolerant system continues to work in redundant system mode. 11-38 Automation System S7-400H Fault-tolerant Systems A5E00068197-07 Modifying the System During Operation 11.5.8 STEP 7, Step VIII: Modifying and Loading Organization Blocks Initial situation The fault-tolerant system is working in redundant system mode. Procedure 1. Make sure that the interrupt OBs 4x and 82 no longer react to interrupts from the removed components. 2. Load the modified OBs and the program segments affected by these into the PLC. Result The fault-tolerant system is working in redundant system mode. Automation System S7-400H Fault-tolerant Systems A5E00068197-07 11-39 Modifying the System During Operation 11.5.9 Removing Interface Modules in STEP 7 The removal of the IM460 and IM461 interface modules, the external DP master interface module CP443-5 Extended and the associated connecting cables is only permitted in a deenergized state. The power supply of the entire subsystem must be switched off. To ensure this has no effect on the process, it must be executed when this subsystem is in STOP mode. Procedure 1. Change the hardware configuration offline (see Section 11.5.1) 2. Modify and download the user program (see Section 11.5.2) 3. Stop the standby CPU (see Section 11.5.3) 4. Download the new hardware configuration to the standby CPU (see Section 11.5.4) 5. If you want to remove an interface module from the subsystem of the current standby CPU, carry out the following steps: – Turn off the power supply for the standby subsystem. – Remove an IM460 from the central controller. or – Remove an expansion unit from an existing line. or – Remove an external DP master interface. – Turn on the power supply for the standby subsystem again. 6. Switch to the CPU with the modified configuration (see Section 11.5.5) 7. If you want to remove an interface module from the subsystem of the original master CPU (currently in STOP mode), carry out the following steps: – Turn off the power supply for the standby subsystem. – Remove an IM460 from the central controller. or – Remove an expansion unit from an existing line. or – Remove an external DP master interface. – Turn on the power supply for the standby subsystem again. 8. Switch to redundant system mode (see Section 11.5.6) 9. Modify and download the organization blocks (see Section 11.5.8) 11-40 Automation System S7-400H Fault-tolerant Systems A5E00068197-07 Modifying the System During Operation 11.6 Changing the CPU Parameters Only certain parameters (object properties) of the CPUs can be modified during operation. They are identified in the screen form by blue text (if you have set blue as the color for dialog box text on the Windows Control Panel, the modifiable parameters are shown in black). Notice If you modify parameters that should not be changed, there is no automatic transfer to the CPU whose parameters have been modified. In this case the event W#16#5966 is entered in the diagnostics buffer. You must reassign the previously valid values in the configuration to the parameters you incorrectly modified. Table 11-1 Modifiable CPU parameters Tab Startup Modifiable Parameter Monitoring time for signaling readiness by modules Monitoring time for transferring parameters to modules Scan cycle/clock memory Scan cycle monitoring time Cycle load due to communications Size of the process image of inputs Size of the process image of outputs Memory Local data (for the different priority classes) Communication resources: maximum number of communication jobs (you are only allowed to increase this parameter compared to its previously configured value.) Time-of-day interrupts (for every time-of-day interrupt OB) “Active” check box “Execution” list box Starting date Time Watchdog interrupt (for every watchdog interrupt OB) Execution Diagnostics/clock Correction factor Security Protection level and password Phase offset Automation System S7-400H Fault-tolerant Systems A5E00068197-07 11-41 Modifying the System During Operation Table 11-1 Modifiable CPU parameters, continued Tab Fault-tolerant parameters Modifiable Parameter Test scan cycle time maximum scan-cycle time extension Maximum communication delay Maximum retention time for priority classes > 15 minimum I/O retention time The new values are to be chosen to suit both the user program currently loaded and the new user program planned. Initial situation The fault-tolerant system is working in redundant system mode. Procedure To change the CPU parameters of a fault-tolerant system the steps listed below are to be performed. Details of each step are listed in a subsection. Step 11-42 What Has To Be Done? Refer to Section A Changing the CPU Parameters Offline 11.6.1 B Stopping the Standby CPU 11.6.2 C Loading Modified CPU Parameters in the Standby CPU 11.6.3 D Switch to CPU with modified configuration 11.6.4 E Transition to Redundant System Mode 11.6.5 Automation System S7-400H Fault-tolerant Systems A5E00068197-07 Modifying the System During Operation 11.6.1 Step A: Changing the CPU Parameters Offline Initial situation The fault-tolerant system is working in redundant system mode. Procedure 1. Change the desired properties of the CPU offline in the hardware configuration. 2. Compile the new hardware configuration, but do not load it into the PLC just yet. Result The modified hardware configuration is in the PG/ES. The PLC continues to work with the old configuration in redundant system mode. 11.6.2 Step B: Stopping the Standby CPU Initial situation The fault-tolerant system is working in redundant system mode. Procedure 1. In SIMATIC Manager, select a CPU of the fault-tolerant system, and choose the PLC > Operating Mode menu command. 2. In the Operating Mode dialog box, select the standby CPU and click the Stop button. Result The standby CPU switches to STOP mode, the master CPU remains in RUN mode, the fault-tolerant system works in single mode. One-way I/O of the standby CPU are no longer addressed. Automation System S7-400H Fault-tolerant Systems A5E00068197-07 11-43 Modifying the System During Operation 11.6.3 Step C: Loading Modified CPU Parameters in the Standby CPU Initial situation The fault-tolerant system is working in single mode. Procedure Load the compiled hardware configuration in the standby CPU that is in STOP mode. Notice The user program and the connection configuration must not be overloaded in single mode. Result The modified CPU parameters in the new hardware configuration of the standby CPU do not yet have an effect on ongoing operation. 11-44 Automation System S7-400H Fault-tolerant Systems A5E00068197-07 Modifying the System During Operation 11.6.4 Step D: Switch to CPU with Modified Configuration Initial situation The modified hardware configuration is loaded into the standby CPU. Procedure 1. In SIMATIC Manager, select a CPU of the fault-tolerant system, and choose the PLC > Operating Mode menu command. 2. In the Operating Mode dialog box, click the Toggle button. 3. In the Toggle dialog box, select the option with modified configuration and click the Toggle button. 4. Confirm the query that follows with OK. Result The standby CPU links up, is updated and becomes the master. The former master CPU switches to STOP mode, the fault-tolerant system continues to work in single mode. Behavior of the I/O Type of I/O I/O modules One-way I/O of previous master CPU Are no longer addressed by the CPU. One-way I/O of new master CPU Are re-parameterized1) and updated by the CPU. Switched I/O Continue to work without interruption. Output modules output the configured substitute or holding values. 1) Central modules are first reset in addition. Output modules briefly output 0 during this time (instead of the substitute or holding values configured). Response if monitoring times are exceeded If one of the monitored times exceeds the maximum value configured the update is interrupted and no change of master takes place. The fault-tolerant system remains in single mode with the previous master CPU and in certain conditions attempts to perform the change of master later. For more details refer to Section 6.3. If the values for the monitoring times in the CPUs are different then the higher value always applies. Automation System S7-400H Fault-tolerant Systems A5E00068197-07 11-45 Modifying the System During Operation 11.6.5 Step E: Transition to Redundant System Mode Initial situation The fault-tolerant system works with the modified CPU parameters in single mode. Procedure 1. In SIMATIC Manager, select a CPU of the fault-tolerant system, and choose the PLC > Operating Mode menu command. 2. In the Operating Mode dialog box, select the standby CPU and click the Restart (warm restart) button. Result Standby CPU links up again and is updated. The fault-tolerant system is working in redundant system mode. Behavior of the I/O Type of I/O I/O modules One-way I/O of standby CPU Are re-parameterized1) and updated by the CPU. One-way I/O of master CPU Switched I/O Continue to work without interruption. 1) Central modules are additionally first reset. Output modules briefly output 0 during this time (instead of the configured substitute or holding values). Response if monitoring times are exceeded If one of the monitored times exceeds the maximum value configured the update is interrupted. The fault-tolerant system remains in single mode with the previous master CPU and in certain conditions attempts to perform the link-up and update later. For more details refer to Section 6.3. If the values for the monitoring times in the CPUs are different then the higher value always applies. 11-46 Automation System S7-400H Fault-tolerant Systems A5E00068197-07 Modifying the System During Operation 11.7 Changing the Memory Components of the CPU Redundant system mode is only possible if the two CPUs have the same memory components. For this, the following conditions must be met: • The main memory of the two CPUs must be the same size. • The load memory of the two CPUs must be the same size and of the same type (RAM or FLASH). The memory components of the CPUs can be modified during operation. Possible memory modifications in S7-400H are: • Expansion of the main memory and/or load memory • Changing the type of load memory 11.7.1 Expanding the Main and/or Load Memory The following methods of memory expansion are possible: • expanding the main memory by plugging in additional or larger memory modules • expanding the load memory by plugging in a larger memory card of the same type instead of the existing one • expanding the load memory by plugging in a RAM card if no memory card was plugged in previously With this type of memory change the complete user program is copied from the master CPU to the standby CPU on link-up (see Section 6.2.1). Restrictions Expanding the load memory is only meaningful in the case of RAM Cards, since only then can the user program be copied to the load memory of the standby CPU on link-up. In principle it is also possible to expand the load memory in the form of FLASH cards, but it is then the user’s responsibility to load the complete user program and the hardware configuration into the new FLASH card (see procedure in Section 11.7.2). Initial situation The fault-tolerant system is working in redundant system mode. Automation System S7-400H Fault-tolerant Systems A5E00068197-07 11-47 Modifying the System During Operation Procedure Perform the steps below in the order specified: Step What Has To Be Done? How Does the System React? 1 Switch the standby CPU to STOP mode using the PG. The system is working in single mode. 2 If you want to expand the main memory: Subsystem is disabled for periods. A Turn off the power supply for the standby CPU. B Unplug the standby CPU from the central controller (CC). C Install the desired memory modules as described in the installation manual S7-400, M7-400 Programmable Controllers, Hardware and Installation. D Plug the CPU back into in the CC. E Make sure that the synchronization link is re-established and that the mode selector of the standby CPU is switched to RUN or RUN-P. F Turn the power supply for the standby CPU back on. 3 If you want to expand the load memory: Standby CPU requests reset. Unplug the existing memory card from the CPU and plug in a memory card of the same type with the desired (larger) capacity. 4 Reset the standby CPU using the PG. – 5 Start the standby CPU by means of the menu command PLC > Mode > Switch to CPU with... expanded memory configuration. • Standby CPU links up, is updated and 6 Turn off the power supply for the second CPU. Subsystem is disabled. 7 Modify the memory components of the second CPU as you did for the first CPU in steps 2 to 4. 8 Start the second CPU using the programming device. becomes the master. • Previous master CPU goes into STOP. • System works in single mode. – • Second CPU links up and is updated. • System works redundant system mode again. 11-48 Automation System S7-400H Fault-tolerant Systems A5E00068197-07 Modifying the System During Operation 11.7.2 Changing the Type of Load Memory The following types of memory cards are available as load memory: • RAM card for the test and commissioning phase • FLASH card for the permanent storage of the finished user program The size of the new memory card is irrelevant here. With this type of memory modification no program segments are transferred from the master CPU to the standby CPU, only the contents of the blocks in the user program that remain unchanged (see Section 6.2.3). It is the user’s responsibility to load the entire user program into the new load memory. Initial situation The fault-tolerant system is working in redundant system mode. The current status of the user program is available on the PG/ES as a STEP 7 project in modular form. Caution ! You cannot use a user program loaded from the PLC here. It is not permissible to recompile the user program from an STL source file since then all the blocks will be given a new time stamp. No block contents will then be copied on master/standby switch-over. Procedure Perform the steps below in the order specified: Step What Has To Be Done? 1 Switch the standby CPU to STOP mode using the PG. The system is working in single mode. 2 Unplug the existing memory card from the standby CPU and plug in a memory card of the desired type. Standby CPU requests reset. 3 Reset the standby CPU using the PG. – 4 Load the user program and the hardware configuration into the standby CPU. – 5 Start the standby CPU by means of the menu command PLC > Mode > Switch to CPU with... modified configuration. Automation System S7-400H Fault-tolerant Systems A5E00068197-07 How Does the System React? • Standby CPU links up, is updated and becomes the master. • Previous master CPU goes into STOP. • System works in single mode. 11-49 Modifying the System During Operation Step What Has To Be Done? How Does the System React? 6 Modify the memory components of the second CPU as you did for the first CPU in step 2. – 7 Load the user program and the hardware configuration into the second CPU. – 8 Start the second CPU using the programming device. • Second CPU links up and is updated. • System works redundant system mode again. Notice If you want to change to FLASH cards you can load these outside the CPU with the user program and hardware configuration. You can then omit steps 4 and 7. However, the memory cards in the two CPUs must be loaded using the same procedure. Changing the order of the blocks in the load memories will result in cancellation of the link-up. 11-50 Automation System S7-400H Fault-tolerant Systems A5E00068197-07 Modifying the System During Operation Writing to a FLASH Card in the H System You can write to a FLASH card in an H system in the RUN mode without having to stop the H system. To do this the online data of the hardware configuration and the user program in the CPUs have to match the corresponding offline data in the engineering station. Proceed as follows: 1. Set the standby CPU to STOP and insert the FLASH card in the CPU. 2. Perform a memory reset for the CPU using STEP 7. 3. Download the hardware configuration with STEP 7. 4. Download the program data using the STEP 7 command “Download User Program to Memory Card“. Attention: Be sure to select the correct CPU in the selection dialog. 5. Switch to the CPU with the changed configuration using the “Operating Mode“ dialog. The master-standby switch-over is performed; the CPU with the Flash card is no the master CPU. The standby CPU is now in STOP. 6. Now insert the Flash card into the CPU in the STOP mode. Perform a memory reset for the CPU using STEP 7. 7. Carry out step 4: Download the program data using the STEP 7 command “Download User Program to Memory Card“. Attention: Be sure to select the correct CPU in the selection dialog. 8. Perform a warm restart of the standby CPU using the “Operating Mode“ dialog. The system now goes to the “Redundant” system mode. The online and offline data consistency described above also applies when you remove FLASH Cards from an H- system. In addition, the available RAM cannot be less than actual size of the STEP 7 program (STEP7 Program > Block Container > Properties “Blocks”). 1. Set the standby CPU to STOP and remove the FLASH card. Check the RAM configuration if necessary. 2. Perform a memory reset for the CPU using STEP 7. 3. Download the block container using STEP 7. 4. Switch to the CPU with the changed configuration using the “Operating Mode“ dialog. 5. Remove the FLASH card from the CPU now in the STOP state. Check the RAM configuration if necessary and perform a memory reset for the CPU. 6. Perform a warm restart of the standby CPU using the “Operating Mode“ dialog. The system now goes to the “Redundant” system mode. Automation System S7-400H Fault-tolerant Systems A5E00068197-07 11-51 Modifying the System During Operation 11-52 Automation System S7-400H Fault-tolerant Systems A5E00068197-07 12 Synchronization Module Chapter Overview In Section Description On Page 12.1 Synchronization Module for S7-400H 12-2 12.2 Routing Cables Using Fiber Optics 12-6 Automation System S7-400H Fault-tolerant Systems A5E00068197-07 12-1 Synchronization Module 12.1 Synchronization Module for S7-400H Function of the Synchronization Module The synchronization module serves as the point-to-point communication of two redundant S7-400H CPUs with two channels. You require two synchronization modules per CPU for the fault-tolerance of 1 of 2 systems. You can connect the modules in pairs via a fiber optic cable. You can replace the synchronization module when voltage is applied. This supports the repair behavior of H systems and thus tackles the failure of the redundant connection without having to bring the plant to a halt. Mechanical Configuration Rack No. 0–x–1 Additional Front Cover 12-2 Switch for setting the rack number Automation System S7-400H Fault-tolerant Systems A5E00068197-07 Synchronization Module ! Caution The synchronization module contains a laser system and is classified as “CLASS 1 LASER PRODUCT” according to IEC 60825-1. Please read the operating instructions thoroughly for the right use of this module and save it as reference. If you encounter problems with this model, please contact the Siemens Service Partner close to you. The casing must remain closed to avoid direct contact with the laser ray. CLASS 1 LASER PRODUCT CLASS 1 LASER PRODUCT TO EN 60825 Removing and Inserting when Voltage is Applied You have to switch off the power supply when removing or inserting a synchronization module in an (PS). The synchronization module has a second front cover which you have to unscrew before removing the module. If you unscrew the front cover, the synchronization module will be disconnected from the voltage and you can remove it without any damage. After inserting the synchronization module, a connection will not be made to the voltage until you have screwed back the the front cover. Note The reserved CPU will go to STOP when you unscrew the synchronization module or the fiber optic cable in the redundant mode of the system. The master CPU remains in RUN. Automation System S7-400H Fault-tolerant Systems A5E00068197-07 12-3 Synchronization Module Setting the Rack Number To be able to differentiate between the two subsystems, the CPU must be able to output the rack numbers. A CPU has rack number 0 and the others have rack number 1. Set the rack number to the synchronization module. There is a miniature slide switch on the module for this and it permits 3 points. The rack number is applied during POWER ON and a manual memory reset. The partner module must have different points for the CPU to startup properly, this means the synchronization module must have the rack number 0 and the other must have rack number 1. The two synchronization modules in a CPU must have the same rack number. Switch Position Meaning The CPU has rack number 1 The CPU has not been assigned a rack number The CPU has rack number 0 Fiber optic cable for connecting two synchronization modules Length 12-4 Order Number 1M 6ES7960-1AA00-5AA0 2M 6ES7960-1AA00-5BA0 10M 6ES7960-1AA00-5KA0 Automation System S7-400H Fault-tolerant Systems A5E00068197-07 Synchronization Module Changing the Operating Mode of an H CPU To change the operating mode of an H CPU, carry out one of following procedures depending on the operating mode you wish to change to and the module rack number of the CPU: Changing from redundant to single mode 1. Remove the interface module. 2. Perform a power on without backup e.g., by removing and inserting the CPU. 3. Load a project into the CPU in which it is configured for single mode. Changing from Single to Redundant Mode, Module Rack Number 0 1. Connect the synchronization modules set for rack number 0. 2. Perform a power on without backup e.g., by removing and inserting the CPU. 3. Load a project into the CPU in which it is configured for redundant mode. Changing from single to redundant mode, module rack number 1 1. Connect the synchronization modules set for rack number 1. 2. Perform a power on without backup e.g., by removing and inserting the CPU. 3. Load a project into the CPU in which it is configured for redundant mode. Cable length up to 500m You can use the synchronization module in 2 pairs with fiber optic cables of up to 500m as of product release 2 . S7-400 with CPU 417-4H rack 0 S7-400 with CPU 417-4H rack 1 max. 500m Prefabricated cable SC/ST Splicebox SC/ST Splicebox Prefabricated cable The following points are important: • You can use the synchronization modules with product release 1 and 2 together and this will make a cable length of up to 10m possible. • Make sure there is enough strain relief on the modules if you use fiber optic cables longer than 10m. • Adhere to the specified ambient conditions for using fiber optic cables (bending radius, pressure, temperature...) • Note the technical specifications of the fiber optic cable (attenuation, bandwidth...) Automation System S7-400H Fault-tolerant Systems A5E00068197-07 12-5 Synchronization Module During the storage of unused modules, you have to seal the fiber optic cable interfaces with blind plugs to protect the optic (blind plugs are in the synchronization module in the delivery state). Technical Specification Technical Specifications 12.2 Supply Voltage Supplied from CPU Current consumption from 0.6 A Module ID 85H Power loss 3W Dimensions B x H x T (mm) 18.2 x 67 x 97 Weight 0.080 kg Routing Cables Using Fiber Optics Cable Routing Indoor fiber-optic cables (e.g., for connecting synchronization modules) are permitted for use in buildings, cable ducts and channel trunking. The maximum strain during installation is 1000 N and 150 N during operation. Bending Radius You may not go below the bending radius when laying the cable: • Next to connector: 55 mm • Otherwise: 30 mm Laying Fiber Optic Cables for Synchronized Coupling of S7-400H In addition, make sure the two fiber-optic cables are always laid isolated from each other when routing the cable. Laying them separately enhances their availability and protects then from potential dual faults in the event, say, of simultaneous interruption of the fiber-optic cables. Always make sure the fiber optic cables are connected to both CPUs before switching on the power supply or the system, otherwise the CPUs may process the user program as the master CPU. 12-6 Automation System S7-400H Fault-tolerant Systems A5E00068197-07 13 Technical Specifications Chapter Overview In Section Description On Page 13.1 Technical Specifications of the CPU 414-4H; (6ES7 414-4HJ00-0AB0) 13-2 13.2 Technical Specifications of the CPU 417-4H; (6ES7 417-4HL01-0AB0) 13-6 13.3 Run times of the FCs and FBs for redundant I/O 13-10 Automation System S7-400H Fault-tolerant Systems A5E00068197-07 13-1 Technical Specifications 13.1 Technical Specifications of the CPU 414-4H; (6ES7 414-4HJ00-0AB0) CPU and Version MLFB • • 6ES7 414-4HJ00-0AB0 Hardware version 01 Firmware version 3.1 V Associated programming package beginning with STEP7 V 5.2; optional package S7 H System Memory Working memory • Integrated 384 Kbytes for code 384 Kbytes for data • Expandable No Data Areas and Their Retentivity Total retentive data area (incl. memory markers, timers, counters) Total working and load memory (with backup battery) Memory markers 8 Kbytes • • Retentivity can be set From MB 0 to MB 8191 Preset retentivity From MB 0 to MB 15 Clock memories 8 (1 memory byte) Data blocks Max. 4095 (DB 0 reserved) • Max. 64 Kbytes Size Local data (can be set) Max. 16 Kbytes • 8 Kbytes Preset Blocks Load memory • • • Integrated 256 Kbytes RAM Expandable FEPROM With memory card (FLASH) up to 64 Mbytes Expandable RAM With memory card (RAM) up to 64 Mbytes Backup • • With battery Max. 64 Kbytes Without battery Size Nesting depth • • Per priority class 24 Additionally in an error OB 2 FBs Max. 2048 None • Max. 64 Kbytes Size FCs • Max. 2048 Size Max. 64 Kbytes Bit operations Min. 0.1 s Word instructions Min. 0.1 s Total I/O address area Integer math instructions Min. 0.1 s • Floating-point math instructions Min. 0.6 s Timers/Counters and Their Retentivity S7 counters • • • • All data Processing times for • See instruction list Yes Processing Times • • • OBs 256 Address Areas (Inputs/Outputs) MPI/DP interface 2 Kbytes/2 Kbytes DP interface 6 Kbytes/6 Kbytes Process Image • • 8 Kbytes/8 Kbytes Of which distributed 8 Kbytes/8 Kbytes (can be set) Preset 256 bytes/256 bytes Number of partial process images Max. 8 Consistent data Max. 244 bytes Retentivity can be set From Z 0 to Z 255 Preset From Z 0 to Z 7 Counting range 1 to 999 • IEC counter Yes Digital channels 65536/65536 • Type SFB • 65536/65536 S7 timers • • • those central 256 Analog channels 4096/4096 Retentivity can be set From T 0 to T 255 • 4096/4096 Preset No retentive timers Time range 10 ms to 9990 s IEC timers Yes • SFB Type 13-2 those central Automation System S7-400H Fault-tolerant Systems A5E00068197-07 Technical Specifications Configuration Central racks/expansion units Max. 1/21 Multicomputing No Number of plug-in IMs (overall) Max. 6 • • IM 460 Max. 6 IM 463-2 maximum 4, only in single operation Number of DP masters • • Integrated 2 Via CP Max. 10 Operable function modules and communication processors • • • FM, see Appendix E Limited by the number of connections (maximum of 30) Profibus and Ethernet CPs including CP 443-5 Extended Number of stations that can log on for message functions (e.g. WIN CC or SIMATIC OP) • Max. 14 Simultaneously active ALARM-S/SQ blocks and ALARM-D/DQ blocks • • • Yes Buffered Yes Resolution 1 ms Yes Number of communication jobs for ALARM-8 blocks and blocks for S7 communication (can be set) Max. 600 Preset 300 Statuses Yes Number of archives that can log on simultaneously (SFB 37 AR_SEND) 16 Test and Startup Functions Monitor/modify tag Power off Deviation per day 1.7 s – Power on Deviation per day 8.6 s Runtime meter • • • • 8 Number 0 to 7 Value Range 0 to 32767 hours Granularity 1 hour Retentive Yes Time synchronization Yes • as master or slave In PLC, on MPI and DP Yes • Variables Inputs/outputs, memory markers, DB, distributed inputs/outputs, timers, counters • Number of variables Max. 70 Force Yes • Variables Inputs/outputs, memory markers, distributed inputs/outputs • Number of variables Max. 256 Accuracy at – Max. 100 • Time Clock Max. 8 ALARM-8 blocks • Limited by the number of slots and the number of connections CP 441 S7 Message Functions Status block Yes Single sequence Yes Diagnostics buffer Yes • • Number of entries Max. 3200 (can be set) Preset 120 Number of breakpoints 4 Time of day difference in the system for synchronization via • • ETHERNET maximum 10 ms MPI maximum 200 ms Automation System S7-400H Fault-tolerant Systems A5E00068197-07 13-3 Technical Specifications Communication Functions Programming device/OP communication Yes Number of connectable OPs 8 with message processing Number of connection resources for S7 connections via all interfaces and CPs 32, with one each of those reserved for PG and OP S7 communication Yes S7 basic communication no no • Max. 64 Kbytes User data per job Of which consistent 32 bytes Utilities – Programming device/OP communication Yes – Routing Yes – Global data communication No – S7 basic communication No – S7 communication Yes • Transmission rates • Utilities 1st Interface in DP mode – Programming device/OP communication Yes – Routing Yes User data per job Max. 8 Kbytes – 240 bytes Global data communication no – – S7 basic communication no – S7 communication yes – Equidistance No – SYNC/FREEZE No – Enable/disable DP slaves No Of which consistent Standard communication (FMS) yes (via CP and loadable FB) Interfaces 1st Interface Type of interface Integrated Physical RS 485/Profibus Isolated Yes Power supply to interface (15 VDC to 30 VDC) Max. 150 mA Number of connection resources MPI: 32 DP: 16 • • • • Transmission rates Up to 12 Mbps Number of DP slaves Max. 32 Address area Max. 2 Kbytes inputs/ 2 Kbytes outputs User data per DP slave Maximum of 244 bytes E, maximum of 244 bytes A, divided into 244 Slots with 128 bytes each Functionality • • Up to 12 Mbps yes (via CP –max. 10 simultaneously– and FC AG_SEND and FC AG_RECV) S5-compatible communication • • 31 without message processing Global data communication – 1st Interface in MPI mode MPI Yes PROFIBUS DP DP Master 13-4 2nd Interface Type of interface Integrated Physical RS 485/Profibus Isolated Yes Power supply to interface (15 VDC to 30 VDC) Max. 150 mA Number of connection resources 16 Automation System S7-400H Fault-tolerant Systems A5E00068197-07 Technical Specifications Functionality • PROFIBUS DP DP Master DP Master • Utilities – – • • • • Programming device/OP communication Yes Routing Yes System function blocks (SFC) See instruction list Number of SFBs active at the same time • • RD_REC 8 WR_REC 8 User program protection Password protection Access to consistent data in the process image Yes Transmission rates Up to 12 Mbps Number of DP slaves Max. 96 Address area Max. 6 Kbytes inputs/6 Kbytes outputs Mounting dimensions B×H×T (mm) 50×290×219 User data per DP slave Maximum of 244 bytes E, maximum of 244 bytes A, divided inot 244 slots with 128 bytes each Slots required 2 Weight Approx. 1.07 kg Dimensions Voltages, Currents 3rd Interface Type of interface Plug-in interface submodule (fiber-optic cable) Current consumption from S7-400 bus (5 VDC) Typ. 1.6 A Insertable interface submodule Synchronization module IF 960 (only during redundancy mode; during single mode the interface is free/covered) Current consumption from the S7-400 bus (24 VDC) The CPU does not consume any current at 24 V, and it only makes this voltage available at the MPI/DP interface. Total current consumption of the components connected to the MPI/DP interfaces, with a maximum of 150 mA per interface Backup current Typ. 40 A 4th Interface Type of interface Plug-in interface submodule (fiber-optic cable) Insertable interface submodule Synchronization module IF 960 (only during redundancy mode; during single mode the interface is free/covered) Max. 1.8 A Max. 420 A Incoming supply of external backup voltage to the CPU 5 VDC to 15 VDC Power loss Typ. 8 W Programming Programming language LAD, FBD, STL, SCL Instruction set See instruction list Bracket levels 8 System functions (SFC) See instruction list Number of SFCs active at the same time • • • • • • WR_REC 8 WR_PARM 8 PARM_MOD 1 WR_DPARM 2 DPNRM_DG 8 RDSYSST 1 ... 8 CPU as DP Slave You must not configure the CPU as DP slave. Automation System S7-400H Fault-tolerant Systems A5E00068197-07 13-5 Technical Specifications 13.2 Technical Specifications of the CPU 417-4H; (6ES7 417-4HL01-0AB0) CPU and Version MLFB • • 6ES7 417-4HL01-0AB0 Hardware version 01 Firmware version 3.1 V Associated programming package beginning with STEP7 V 5.2; optional package S7 H System Memory Working memory • • Integrated 2 Mbytes for code2 Mbytes for data Expandable Up to 10 Mbytes for codeUp to 10 Mbytes for data Load memory • • • Total working and load memory (with backup battery) Memory markers 16 Kbytes • • Retentivity can be set From MB 0 to MB 16383 Preset retentivity From MB 0 to MB 15 Clock memories 8 (1 memory byte) Data blocks Max. 8191 (DB 0 reserved) • Max. 64 Kbytes Size Local data (can be set) • OBs See instruction list • Max. 64 Kbytes Size Nesting depth 256 Kbytes RAM Expandable FEPROM With memory card (FLASH) up to 64 Mbytes • • With memory card (RAM) up to 64 Mbytes FBs Max. 6144 Yes • Max. 64 Kbytes With battery All data FCs Max. 6144 Without battery None • Max. 64 Kbytes Expandable RAM Processing times for • Per priority class 24 Additionally in an error OB 2 Size Size Address Areas (Inputs/Outputs) Total I/O address area • 16 Kbytes/16 Kbytes Bit operations Min. 0.1 s Word instructions Min. 0.1 s MPI/DP interface 2 Kbytes/2 Kbytes Integer math instructions Min. 0.1 s DP interface 8 Kbytes/8 Kbytes Floating-point math instructions Min. 0.6 s Timers/Counters and Their Retentivity S7 counters • • • 32 Kbytes Blocks Processing Times • • • Max. 64 Kbytes Preset Integrated Backup • • Data Areas and Their Retentivity Total retentive data area (incl. memory markers, timers, counters) 512 Of which distributed Process Image • • 16 Kbytes/16 Kbytes (can be set) Preset 1024 bytes/1024 bytes Number of partial process images Max. 8 Consistent data Max. 244 bytes Retentivity can be set From Z 0 to Z 511 • Preset From Z 0 to Z 7 Digital channels 131072/131072 Counting range 1 to 999 • 131072/131072 IEC counter Yes • Analog channels 8192/8192 Type SFB • 8192/8192 S7 timers 512 • • • Retentivity can be set From T 0 to T 511 Preset No retentive timers Time range 10 ms to 9990 s IEC timers Yes • SFB Type 13-6 those central those central Automation System S7-400H Fault-tolerant Systems A5E00068197-07 Technical Specifications Configuration Central racks/expansion units Max. 1/21 Multicomputing No Number of plug-in IMs (overall) Max. 6 • • IM 460 Max. 6 IM 463-2 maximum 4 in single operation Number of DP masters • • Integrated 2 Via CP Max. 10 Number of plug-in S5 modules via adapter casing (in the central rack) None S7 Message Functions Number of stations that can log on for message functions (e.g. WIN CC or SIMATIC OP) Max. 16 – With 100 ms grid Max. 1 – With 500, 1000 ms grid Max. 10 Block-related messages Yes • Max. 200 Simultaneously active ALARM-S/SQ blocks and ALARM-D/DQ blocks ALARM-8 blocks Yes • Number of communication jobs for ALARM-8 blocks and blocks for S7 communication (can be set) Max. 10000 Preset 1200 Operable function modules and communication processors • FM Limited by the number of slots and the number of connections • Statuses Yes • CP 441 Limited by the number of connections (maximum of 30) Number of archives that can log on simultaneously (SFB 37 AR_SEND) 64 Profibus and Ethernet CPs including CP 443-5 Extended Max. 14 • Time Clock • • • Yes Resolution 1 ms Variables Inputs/outputs, memory markers, DB, distributed inputs/outputs, timers, counters • Number of variables Max. 70 Force Accuracy at Yes • Yes Buffered Yes • Variables Inputs/outputs, memory markers, distributed inputs/outputs 8 • Number of variables Max. 512 Number 0 to 7 Status block Yes Value Range 0 to 32767 hours Single sequence Yes Granularity 1 hour Diagnostics buffer Yes Retentive Yes – Power off Deviation per day 1.7 s – Power on Deviation per day 8.6 s Runtime meter • • • • Test and Startup Functions Monitor/modify tag Time synchronization Yes • • • as master or slave Number of breakpoints In PLC, on MPI and DP Number of entries Max. 3200 (can be set) Preset 120 4 Time of day difference in the system for synchronization via • • ETHERNET maximum 10 ms MPI maximum 200 ms Automation System S7-400H Fault-tolerant Systems A5E00068197-07 13-7 Technical Specifications Communication Functions Programming device/OP communication Yes Number of connectable OPs 16 with message processing 1st Interface in DP mode • – 63 without message processing Number of connection resources for S7 connections via all interfaces and CPs 64, with one each of those reserved for PG and OP S7 communication Yes • – Global data communication no – S7 basic communication no User data per job Max. 64 Kbytes – 32 bytes Of which consistent S5-compatible communication • yes (via CP –max. 10 simultaneously– and FC AG_SEND and AG_RECV) User data per job Max. 8 Kbytes – 240 bytes Of which consistent Standard communication (FMS) Yes (via CP and downloadable FC) • • • • Yes Global data communication no – S7 basic communication no – S7 communication yes – Equidistance no – SYNC/FREEZE no – Enable/disable DP slaves no Transmission rates Up to 12 Mbps Number of DP slaves Max. 32 Address area Max. 2 Kbytes inputs/2 Kbytes outputs User data per DP slave Maximum of 244 bytes E, maximum of 244 bytes A, divided into 244 Slots with 128 bytes each 2nd Interface RS 485/Profibus 1st Interface Isolated Yes Power supply to interface (15 VDC to 30 VDC) Max. 150 mA Number of connection resources 32 RS 485/Profibus Yes Power supply to interface (15 VDC to 30 VDC) Max. 150 mA Number of connection resources MPI: 44 DP: 32 Functionality MPI Yes PROFIBUS DP DP Master Functionality • Programming device/OP communication Yes – Routing Yes – Global data communication no – S7 basic communication no – S7 communication Yes Transmission rates PROFIBUS DP DP Master DP Master • 1st Interface in MPI mode Utilities 13-8 Routing – Physical Isolated • – Interfaces Physical – Yes Integrated Integrated • Programming device/OP communication Type of interface Type of interface • • Utilities • • • • Utilities – Programming device/OP communication Yes – Routing Yes Transmission rates Up to 12 Mbps Number of DP slaves Max. 125 Address area Max. 8 Kbytes inputs/ 8 Kbytes outputs User data per DP slave Maximum of 244 bytes E, maximum of 244 bytes A, divided into 244 slots with 128 bytes each Up to 12 Mbps Automation System S7-400H Fault-tolerant Systems A5E00068197-07 Technical Specifications 3rd Interface Dimensions Type of interface Plug-in interface submodule (fiber-optic cable) Mounting dimensions B×H×T (mm) 50×290×219 Insertable interface submodule Synchronization module IF 960 (only during redundancy mode; during single mode the interface is free/covered) Slots required 2 4th Interface Type of interface Plug-in interface submodule (fiber-optic cable) Insertable interface submodule Synchronization module IF 960 (only during redundancy mode; during single mode the interface is free/covered) Programming Programming language LAD, FBD, STL, SCL Instruction set See instruction list Bracket levels 8 System functions (SFC) See instruction list Weight Approx. 1.07 kg Voltages, Currents Current consumption from S7-400 bus (5 VDC) Typ. 1.8 A Current consumption from the S7-400 bus (24 VDC) The CPU does not consume any current at 24 V, and it only makes this voltage available at the MPI/DP interface. Total current consumption of the components connected to the MPI/DP interfaces, with a maximum of 150 mA per interface Backup current Typically 75 A Max. 2.0 A Maximum 860 A Incoming supply of external backup voltage to the CPU 5 VDC to 15 VDC Power loss Typ. 9 W Number of SFCs active at the same time • • • • • • WR_REC 8 WR_PARM 8 PARM_MOD 1 WR_DPARM 2 DPNRM_DG 8 RDSYSST 1 ... 8 System function blocks (SFB) See instruction list Number of SFCs active at the same time • • RD_REC 8 WR_REC 8 User program protection Password protection Access to consistent data in the process image Yes CPU as DP Slave You must not configure the CPU as DP slave. Automation System S7-400H Fault-tolerant Systems A5E00068197-07 13-9 Technical Specifications 13.3 Run Times of the FCs and FBs for Redundant I/O Table 13-1 Run times of the blocks for redundant I/O Block FC 450 RED_INIT Specifications are based on the startup Run time in single/single mode 2 ms + 300 s / configured module pairs Run time in redundant mode – The specification for a module pair is a mean value. The run time may be < 300 s for a few modules. For the great majority of redundant modules the value may even be > 300 s. FC 451 RED_DEPA 160 s 360 s FB 450 RED_IN 750 s + 60 s / module pair of the current TPA 1000 s + 70 s/ module pair of the current TPA The specification for a module pair is a mean value. The specification for a module pair is a mean value. The run time may be additionally increased if discrepancies occur resulting in passivation and logging to the diagnostics buffer. The run time may be additionally increased if discrepancies occur resulting in passivation and logging to the diagnostics buffer. The run time may also be increased by a depassivation carried out in the individual sequence levels of FB RED_IN. Depending on the number of modules in the sequence level, the depassivation may increase the run time of the FB RED_IN by 0.4 to 8 ms. The run time may also be increased by a depassivation carried out in the individual sequence levels of FB RED_IN. Depending on the number of modules in the sequence level, the depassivation may increase the run time of the FB RED_IN by 0.4 to 8 ms. An 8 ms increase can be expected in redundant operation of modules totalling more than 370 pairs of modules in a sequence level. An 8 ms increase can be expected in redundant operation of modules totalling more than 370 pairs of modules in a sequence level. 650 s + 2 s / module pair of the current TPA 860 s + 2 s / module pair of the current TPA The specification for a module pair is a mean value. The run time may be < 2 s for a few modules. For the great majority of redundant modules the value may even be > 2 s. The specification for a module pair is a mean value. The run time may be < 2 s for a few modules. For the great majority of redundant modules the value may even be > 2 s. Invoked from the corresponding sequence level. FB 451 RED_OUT Invoked from the corresponding sequence level. 13-10 Automation System S7-400H Fault-tolerant Systems A5E00068197-07 Technical Specifications Table 13-1 Run times of the blocks for redundant I/O, continued Block FB 452 RED_DIAG FB 453 RED_STATUS Run time in single/single mode Run time in redundant mode Invoked in OB 72: 160 s Invoked in OB 72: 360 s Invoked in OB82, 83, 85: Invoked in OB82, 83, 85: 250 s + 5 s / configured module pairs 430 s (basic load) + 6 s / configured module pairs The run time of FB RED_DIAG is always increased by addresses which are not located at the beginning of the DB. If these are interrupt trigger addresses that do not belong to the redundant I/O, the run time may increase up to approx. 1.5 ms. This is the case when the working DB is 60 Kb or larger. The run time of FB RED_DIAG is always increased by addresses which are not located at the beginning of the DB. If these are interrupt trigger addresses that do not belong to the redundant I/O, the run time may increase up to approx. 1.5 ms. This is the case when the working DB is 60 Kb or larger. 160 s + 4 s / configured module pairs 350 s + 5 s / configured module pairs The run time depends on the (random) position of the module being searched for in the working DB. When a module address is not redundant, the entire working DB is searched. This results in the longest run time of FB RED_STATUS. The run time depends on the (random) position of the module being searched for in the working DB. When a module address is not redundant, the entire working DB is searched. This results in the longest run time of FB RED_STATUS. Maximum run time = 160 s + 4 s/ configured module pairs * total number of module pairs) Maximum run time = 350 s + 5 s/ configured module pairs * total number of module pairs) The number of module pairs is based either on all inputs (DI/AI) or all outputs (DO/AO). The number of module pairs is based either on all inputs (DI/AI) or all outputs (DO/AO). Notice These are typical and not absolute values. The actual value may deviate from these specifications in some cases. This overview is intended as a guide and should help you estimate how the use of the RED_IO library may change the cycle time. Automation System S7-400H Fault-tolerant Systems A5E00068197-07 13-11 Technical Specifications 13-12 Automation System S7-400H Fault-tolerant Systems A5E00068197-07 Characteristic Values of Redundant Programmable Logic Controllers A The present appendix presents a brief introduction to the characteristic values of redundant programmable logic controllers and shows the practical effects of redundant configuration types by means of a few selected configurations. An overview of the MTBF for a variety of SIMATIC products is available in the SIMATIC FAQs at http://www.siemens.com/automation/service&support under the ID 1160399. In Section You Will Find On Page A.1 Basic Concepts A-2 A.2 Comparison of MTBFs for Selected Configurations A-4 Automation System S7-400H Fault-tolerant Systems A5E00068197-07 A-1 Characteristic Values of Redundant Programmable Logic Controllers A.1 Basic Concepts The parameters normally used for a quantitative assessment of redundant programmable logic controllers are reliability and availability, which are described in further detail below. Reliability Reliability is the characteristic of a technical device to fulfill its function during its operating period. This is usually no longer possible when a component fails. The criterion frequently specified for reliability is therefore MTBF (Mean Time Between Failures). It can be determined statistically by systems that are operating or by calculating the failure rates of the components used. Reliability of modules The reliability of SIMATIC components is extremely high as a consequence of wide-ranging quality assurance measures in development and manufacture. The following average values apply to SIMATIC modules: • MTBF of a central processing unit: 15 years • MTBF of an I/O module: 50 years Reliability of programmable logic controllers The use of redundant modules prolongs the MTBF of a system to a very large extent. In connection with the high-quality self-tests and the mechanisms for error detection, which are integrated in the CPUs of the S7-400H, virtually all errors are discovered and localized. The diagnostics coverage (dc) is approximately 95 percent. Starting from the reliability of a single system (1-out-of-1 systems having an MTBF 1oo1), it is possible to calculate the reliability of the S7-400H as a two-channel (2-out-of-2) fault-tolerant system from the following formula: 2 MTBF1v2 + MTBF 1v1 2MDT ) 2(1 * dc)·MTBF 1v1 The MTBF of the S7-400H is determined by its MDT (Mean Down Time). This time consists essentially of the time for error detection and the time required to repair or replace defective modules. The error detection time is half the configured test cycle time (by default, 90 min.). The repair time for a modular system such as the S7-400H is normally four hours. A-2 Automation System S7-400H Fault-tolerant Systems A5E00068197-07 Characteristic Values of Redundant Programmable Logic Controllers Availability Availability is the probability of a system being capable of operation at a specified point of time. It can be enhanced by means of redundancy – for example, by using redundant I/O modules or by using multiple sensors at one sampling point. Redundant components are arranged such that system operability is not affected by the failure of a single component. Here, again, an important element of availability is a detailed diagnostics display. The availability of a system is expressed as a percentage. It is determined by the mean time between failure (MTBF) and the mean repair time (MTTR). The availability of a two-channel (2-out-of-2) fault-tolerant system can be calculated from the following formula: V+ MTBF1v2 100% MTBF1v2 ) MDT Automation System S7-400H Fault-tolerant Systems A5E00068197-07 A-3 Characteristic Values of Redundant Programmable Logic Controllers A.2 Comparison of MTBFs for Selected Configurations The following sections compare systems with a central I/O. The following framework conditions are set for the calculation. • MDT (Mean Down Time) 4 hours • ambient temperature 40 degrees • buffer voltage is guaranteed A.2.1 System Configurations With Central I/O The following system with a standard CPU (e.g. CPU 417-4) is taken as a basis for calculating a reference factor which specifies the multiple of availability that other systems with a central I/O have, compared with the baseline. Standard and fault-tolerant CPU in single operation Standard CPU (e.g. CPU 417-4) Baseline SM 421 SM 422 CPU 417-4 PS 407, 10 A 1 Mounting rack, UR1 Fault-Tolerant CPU in Single Operation (e.g. CPU 417-4H) Factor A-4 SM 421 SM 422 CPU 417-4H PS 407, 10 A 1 Mounting rack, UR1 Automation System S7-400H Fault-tolerant Systems A5E00068197-07 Characteristic Values of Redundant Programmable Logic Controllers Redundant CPUs in different mounting racks Redundant CPU 417-4 H in split mounting rack Factor 2 Mounting rack UR2-H SM 421 SM 422 CPU 417-4H PS 407, 10 A SM 421 SM 422 CPU 417-4H PS 407, 10 A 57 fiber-optic cables Redundant CPU 417-4H in separate mounting racks Factor 2 Mounting rack, UR1 SM 421 SM 422 CPU 417-4H PS 407, 10 A Mounting rack, UR1 SM 421 SM 422 CPU 417-4H PS 407, 10 A 59 fiber-optic cables Automation System S7-400H Fault-tolerant Systems A5E00068197-07 A-5 Characteristic Values of Redundant Programmable Logic Controllers A.2.2 System Configurations With Distributed I/O The following system with two fault-tolerant CPUs 417-4 H and a one-way I/O is taken as a basis for calculating a reference factor which specifies the multiple of the availability of the other systems with a distributed I/O compared with the baseline. Redundant CPUs with a single-channel, one-way or switched I/O One-way, distributed I/O 1 CPU 417-4H PS 407, 10 A fiber-optic cables CPU 417-4H PS 407, 10 A 2 Baseline SM 321 SM 322 IM 153-1 ET 200M Switched distributed I/O Factor 3 or. 12 * DP CPU 417-4H CPU 417-4H PS 407, 10 A fiber-optic cables DP PS 407, 10 A 2 IM 153-2 SM 321 SM 322 IM 153-2 ET 200M * A factor of 3 applies to the condition when the failure of an I/O module has resulted in the entire system stopping. A factor of 12 applies when the failure of an I/O module has not resulted in the entire system stopping. A-6 Automation System S7-400H Fault-tolerant Systems A5E00068197-07 Characteristic Values of Redundant Programmable Logic Controllers Redundant CPUs with redundant I/O Single–channel, one–way I/O 65 DP SM 321 SM 322 SM 321 SM 322 ET 200M IM 153-1 ET 200M IM 153-1 CPU 417-4H PS 407, 10 A fiber-optic cables CPU 417-4H DP PS 407, 10 A 2 MTBF factor Single–channel switch I/O CPU 417-4H PS 407, 10 A SM 321 SM 322 IM 153-2 IM 153-2 DP DP 70 fiber-optic cables CPU 417-4H PS 407, 10 A 2 MTBF factor SM 321 SM 322 IM 153-2 IM 153-2 Active backplane bus Automation System S7-400H Fault-tolerant Systems A5E00068197-07 A-7 Characteristic Values of Redundant Programmable Logic Controllers Redundant I/O MTBF factor CPU 417-4H SM 321 SM 322 ET 200M IM 153-1 SM 321 SM 322 DP ET 200M IM 153-1 DP Table A-1 see table below PS 407, 10 A fiber-optic cables CPU 417-4H PS 407, 10 A 2 MTBF factor for redundant I/O Modules MLFB MTBF factor Digital input module, distributed DI 24xDC24V 6ES7 326-1BK00-0AB0 500 DI 8xNAMUR [EEx ib] 6ES7 326-1RF00-0AB0 500 DI16xDC24V, interrupt 6ES7 321-7BH00-0AB0 20 AI 6x13Bit 6ES7 336-1HE00-0AB0 500 AI8x12Bit 6ES7 331-7KF02-0AB0 25 DO 10xDC24V/2A 6ES7 326-2BF00-0AB0 500 DO8xDC24V/2A 6ES7 322-1BF01-0AA0 3 DO32xDC24V/0.5A 6ES7 322-1BL00-0AA0 3 Analog input module, distributed Digital output module, distributed A-8 Automation System S7-400H Fault-tolerant Systems A5E00068197-07 Characteristic Values of Redundant Programmable Logic Controllers A.2.3 Comparison of System Configurations With Standard and Fault-Tolerant Communications The following section gives you a comparison between standard and fault-tolerant communication for a configuration consisting of a fault-tolerant system, a fault-tolerant CPU in single operation and a single-channel OS. By comparison, only the communication components CP and cable were taken into account. Systems with standard and fault-tolerant communications Standard communication Baseline 1 S7-400 with Single-user OS S7-400H system fault-tolerant CPU Fault-tolerant communication Factor 83 S7-400 with Single-user OS S7-400H system fault-tolerant CPU Automation System S7-400H Fault-tolerant Systems A5E00068197-07 A-9 Characteristic Values of Redundant Programmable Logic Controllers A-10 Automation System S7-400H Fault-tolerant Systems A5E00068197-07 Single Operation B Overview This appendix gives you the information you need for single operation of a fault-tolerant CPU (CPU 414-4H or CPU 417-4H). You will learn in the following • how single operation is defined • when single operation is necessary • what you have to take into account with single operation • how the fault tolerant-specific LEDs respond • how to configure a fault-tolerant CPU for single operation • how you can expand it to form a fault-tolerant system The differences compared to a standard S7-400 CPU that you have to take into account when configuring and programming the fault-tolerant CPU are contained in Appendix D. Definition By single operation, we understand use of a fault-tolerant CPU in a standard SIMATIC-400 station. Reasons for single operation The following applications are only possible with a fault-tolerant CPU. In other words, they are not possible with standard CPUs in the S7-400 range. • Use of fault-tolerant connections • Configuration of the S7-400F fail-safe programmable logic controller A fail-safe user program can only be compiled as being executable if the fault-tolerant CPU is used with a fail-safe runtime license (for more information refer to the manual S7-400F and S7-400FH Programmable Controllers.). Note The fault-tolerant CPU self-test can also be performed in single operation. Automation System S7-400H Fault-tolerant Systems A5E00068197-07 B-1 Single Operation What do you have to take into account for single Operation of a fault-tolerant CPU Notice Synchronization submodules must not be inserted when a fault-tolerant CPU is used in single operation. Compared to a standard S7-400 CPU, a fault-tolerant CPU has additional functions, but it does not support certain other functions. You must therefore know on which CPU your user program should run, especially when you are programming your programmable logic controller. A user program that you have written for a standard S7-400 CPU will therefore not normally run on a fault-tolerant CPU in single operation without adjustments. The following table lists the differences between the operation of a standard S7-400 CPU and the single operation and redundant operation of a fault-tolerant CPU. Table B-1 Differences between S7-400 and S7-400H Standard S7-400 CPU H-CPU in single operation H-CPU redundantsystem mode Use of symbol-oriented messages (SCAN) Yes No No Multicomputing (OB60, SFC35) Yes No No No No Function Startup without configuration loaded Yes, if no IMs, no CPs and FMs are plugged in and no expansion units are connected Insertion of DP modules in the module slots for interface modules Yes No. The module slots are only intended for the synchronization submodules. No. The module slots are only intended for the synchronization submodules. Connection of S5 modules via IM or adapter casings Yes beginning with firmware version 3.1 through IM 463-2 No A high-quality RAM test after POWER ON No Yes Yes Self-test in RUN No Yes Yes Redundancy error OBs (OB70, OB72) No Yes, but no calls Yes Background processing (OB90) Yes No No Restart (OB101) Yes No No B-2 Automation System S7-400H Fault-tolerant Systems A5E00068197-07 Single Operation Table B-1 Differences between S7-400 and S7-400H, continued Function Standard S7-400 CPU H-CPU in single operation H-CPU redundantsystem mode Specify the rack number and the CPU in the OB start information No Yes Yes SSL ID W#16#0019 (status of all LEDs) No data records for the fault tolerant-specific LEDs Data records for all LEDs Data records for all LEDs SSL ID W#16#0222 (data record for the specified interrupt) No data record for the redundancy error OBs (OB70, OB72) Data records for all interrupt OBs Data records for all interrupt OBs SSL ID W#16#0232 index W#16#0004 byte 0 of the word “index” in the data record W#16#00 W#16#F8 Single mode: W#16#F8 or W#16#F9 SSL ID W#16#xy71 fault-tolerant CPU group information Redundant: W#16#F8 and W#16#F1 or W#16#F9 and W#16#F0 No Yes Yes SSL ID W#16#0174 (status of a module LED) No data record for the fault tolerant-specific LEDs Data records for all LEDs Data records for all LEDs Specify the rack number and the CPU in diagnostics buffer entries No Yes Yes Multi-DP master mode Yes Yes No Direct communication between DP slaves Yes No No Equidistance of DP slaves Yes No No Groups of DP slaves synchronize with SFC11 “DPSYC_FR” Yes No No Global data communication Yes No: neither cyclically, nor by means of SFC60 “GD_SND” and SFC61 “GD_RCV” No: neither cyclically, nor by means of SFC60 “GD_SND” and SFC61 “GD_RCV” S7 basic communication Yes No No SFC90 “H_CTRL” No Yes Yes Central use of FMs Yes Yes No Operator panel can be operated on the MPI Yes Yes Yes Operator panel can be operated on the PROFIBUS-DP Yes Yes No Automation System S7-400H Fault-tolerant Systems A5E00068197-07 B-3 Single Operation Table B-1 Differences between S7-400 and S7-400H, continued Function Standard S7-400 CPU H-CPU in single operation H-CPU redundantsystem mode Yes No No Yes, as described in the manual “System Modification during Operation Using CIR”. Yes, as described in the manual “System Modification during Operation Using CIR”. Yes, as described in the Chapter 11 for redundant operation. Operation as DP slave Dynamic modifications to the system Special fault tolerant LEDs LEDs REDF, IFM1F, IFM2F, MSTR, RACK0 and RACK1 show the response specified in the following table. LED Response REDF Dark IFM1F Dark IFM2F Dark MSTR Lights RACK0 Lights RACK1 Dark Configuring single operation Requirement: The “S7 Fault-Tolerant Systems” option pack must be installed. No synchronization module should be in the H CPU. Perform the following steps: 1. Insert a SIMATIC-400 station in your project. 2. Configure the station with the fault-tolerant CPU in accordance with your hardware setup. For single operation, you must insert the fault-tolerant CPU in a standard rack (Insert > Station > S7-400 Station in SIMATIC Manager). 3. Assign parameters to the fault-tolerant CPU. You can use the default values or customize the necessary parameters. 4. Configure the necessary networks and connections. For single operation, you can configure “fault-tolerant S7 connection” type connections. You will find help on the procedure in the SIMATIC Manager Help topics and in the Help of the “S7 Fault-Tolerant Systems” option pack. B-4 Automation System S7-400H Fault-tolerant Systems A5E00068197-07 Single Operation Upgrading to a fault-tolerant system Note Upgrading to a fault-tolerant system is only possible if you have not assigned any odd numbers for expansion units in single operation. If you want to upgrade the fault-tolerant CPU later to a fault-tolerant system, proceed as follows: 1. Open a new project and insert a fault-tolerant station. 2. Copy the complete rack from the standard SIMATIC-400 station and insert it twice in the fault-tolerant station. 3. Insert the necessary subnets. 4. If required, copy the DP slaves from the old single operation project in the fault-tolerant station. 5. Reconfigure the communication links. 6. Perform modifications as necessary – by inserting one-way I/O. The procedure for configuration is described in the online help system of the add-on package of “S7 H Systems”. Installing and starting the fault-tolerant system We recommend you to perform the following steps when installing and starting up the fault-tolerant system. 1. Save the configured H system on a Flash Memory Card or to the engineering system (ES) when using PCS7. 2. When installing the synchronization submodules, make sure the rack numbers are set correctly. 3. Do not connect the synchronization submodules with fiber-optic cables. 4. Plug the flash memory card into the central processing unit concerned and start it. Then the Stop LED flashes (reset request). 5. Perform a manual reset for both central processing units. 6. Now connect the two synchronization modules with fiber–optic cables. 7. Start the two central processing units. The fault-tolerant system then works in Redundant system mode. Automation System S7-400H Fault-tolerant Systems A5E00068197-07 B-5 Single Operation Changing the operating mode of an H CPU To change the operating mode of an H CPU, carry out one of following procedures depending on the operating mode you wish to change to and the module rack number of the CPU: Changing from redundant to single mode 1. Remove the interface module. 2. Perform a power on without backup. 3. Load a project into the CPU in which it is configured for single mode. Changing from single to redundant mde, mdule rack number 0 1. Connect the synchronization modules set for rack number 0. 2. Perform a power on without backup. 3. Load a project into the CPU in which it is configured for redundant mode. Changing from single to redundant mode, module rack number 1 1. Connect the synchronization modules set for rack number 1. 2. Perform a power on without backup. 3. Load a project into the CPU in which it is configured for redundant mode. B-6 Automation System S7-400H Fault-tolerant Systems A5E00068197-07 Converting from S5-H to S7-400H C This appendix will help you to convert to fault-tolerant S7 systems if you are already familiar with fault-tolerant systems of the S5 family. Generally speaking, knowledge of the STEP 7 configuration software is required for converting from the S5-H to the S7-400H. C.1 General Information Documentation The following manuals are available for learning how to use the STEP 7 base software: • Configuring Hardware and Communication Connections STEP 7 V5.2 • Programming with STEP 7 V5.2 The following reference manuals describe the individual programming languages. • System and Standard Functions • AWL, KOP, FUP for S7-300/400 The From S5 to S7 manual will support you while you are converting and provides detailed information. Automation System S7-400H Fault-tolerant Systems A5E00068197-07 C-1 Converting from S5-H to S7-400H C.2 Configuration, Programming and Diagnostics Configuration In STEP5, configuration was performed with a separate configuration package – for example, COM 155H. In STEP 7 we use the standard software in conjunction with the option package “S7 H Systems” to configure the fault-tolerant CPUs. Using SIMATIC Manager, create a fault-tolerant station and configure it with HWCONFIG. The special features of the fault-tolerant CPUs are summarized in a few registers. The integration in networks and the configuration of connections are performed with NetPro. Diagnostics and programming Error diagnostics on the S5 is implemented with the help of the error data block, into which the system enters all errors. The error OB 37 is started automatically for every entry. Further information has been stored in the H memory word. The H memory word consists of a status byte and a control byte. Control information can be set bit by bit in the STEP5 user program. In STEP 7, system diagnostics is accomplished by means of the diagnostics buffer or by displaying what are known as partial lists from the system status list (specific information for fault-tolerant systems, for example, are located in SSL71). This check can be performed with the help of the programming device or by the user program with SFC 51 “RDSYSST”. OB 70 and OB 72 are available for I/O redundancy loss and CPU redundancy loss, respectively. The function of the control byte is implemented in STEP 7 by means of the SFC 90 H_CTRL. Subject with S5 C-2 Equivalent in S7 Error OB37 Error OBs OB 70 and OB 72 Memory control word SFC 90 “H_CTRL” Memory status word SZL71 Error block Diagnostics buffer Automation System S7-400H Fault-tolerant Systems A5E00068197-07 Differences Between Fault-Tolerant Systems and Standard Systems D When you configure and program a fault-tolerant programmable logic controller with fault-tolerant CPUs, certain differences to the standard S7-400 CPUs will become apparent. On the one hand, compared to a standard S7-400 CPU, a fault-tolerant CPU has additional functions, while on the other hand a fault-tolerant CPU does not support certain other functions. This has to be taken in account particularly if you wish to run a program that was created for a standard S7-400 CPU on a fault-tolerant CPU. The items in which the programming of fault-tolerant systems differs from that for standard systems are summarized below. You will find further differences in Appendix B. If you use one of the calls concerned (OBs and SFCs) in your user program, you will need to adapt your program accordingly. Additional functions of fault-systems Function Redundancy error OBs Additional Programming • I/O redundancy error OB (OB 70) • CPU redundancy error OB (OB 72) You can find detailed information in the System and Standard Functions reference manual. Additional information in OB start information and in diagnostics buffer entries The rack number and the CPU (master/standby) are specified. You can evaluate this additional information in the program. SFC for fault-tolerant systems You can control the processes in fault-tolerant systems with the SFC 90 “H_CTRL”. Fault-tolerant communication connections Fault-tolerant connections are configured, no further programming is required. You can use the SFBs for configured connections when you are using fault-tolerant connections. Self-test The self-test is performed automatically, no further programming is required, Switched I/O No additional programming is required, see Section 7.3. Automation System S7-400H Fault-tolerant Systems A5E00068197-07 D-1 Differences Between Fault-Tolerant Systems and Standard Systems Function Information on the system status list Additional Programming • You also obtain data records for the fault tolerant-specific LEDs by means of the partial list with the SSL ID W#16#0019. • You also obtain data records for the redundancy error OBs by means of the partial list with the SSL ID W#16#0222. • You obtain information on the current state of the fault-tolerant system by means of the partial list with SSL ID W#16#xy71. • You also obtain data records for the fault tolerant-specific LEDs by means of the partial list with the SSL ID W#16#0174. • The partial list with the SSL-ID W#16#xy75 provides you with information on the status of the communications between the fault-tolerant system and switched DP slaves. Monitoring during update The operating system monitors the following four configurable timers: • • • • maximum scan-cycle time extension Maximum communication delay Maximum retention time for priority classes > 15 minimum I/O retention time No additional programming is required for this. For more details refer to Chapter 6. Restrictions for the Fault-Tolerant CPU Compared to a Standard CPU Function D-2 Restriction for the Fault-Tolerant CPU Use of symbol-oriented messages (SCAN) Use of symbol-oriented messages is not possible. Warm Restart A warm restart is not possible. OB 101 is not supported Multicomputing Multicomputing is not possible. OB 60 and SFC 35 are not supported Startup without configuration loaded Startup without loaded configuration is not possible. Background OB OB 90 is not supported. CPU hardware error OB 84 is not supported. Should a sporadic interface error occur, the CPU enters the error in the diagnostics buffer and continues running. Global data communication GD communication is not possible (neither cyclically nor by calling system functions SFC 60 “GD_SND” and SFC 61 “GD_RCV”) Automation System S7-400H Fault-tolerant Systems A5E00068197-07 Differences Between Fault-Tolerant Systems and Standard Systems Function Restriction for the Fault-Tolerant CPU Basic communication Communication functions (system functions) for basic communication are not supported. Multi-DP master mode The H-CPUs do not support multi-DP master mode in the REDUNDANT operating mode. Direct communication between DP slaves Cannot be configured in STEP 7 Equidistance of DP slaves No equidistance for DP slaves in the fault-tolerant system Synchronizing DP slaves The synchronization of DP slave groups is not possible. SFC 11 “DPSYC_FR” is not supported. Deactivating and Activating DP Slaves It is not possible to deactivate and activate DP slaves. SFC 12 “D_ACT_DP” is not supported. Non-initialized local data When local data are stored in a data area (memory markers, data blocks, etc.) or if they influence program execution, the local data have to be initialized. Non-initialized local data result in a synchronization error on a fault-tolerant system. The system goes to single mode with one CPU at STOP. Runtime response The command execution time in the case of the CPU 414-4H and CPU 417-4H is slightly greater than for the corresponding standard CPU (CPU 414-and CPU 417-4) (see S7-400 Operations List). This is to be taken into account in all time-critical applications. You may need to increase the scan cycle monitoring time. DP cycle time The DP cycle time is slightly longer for CPU 414-4H and CPU 417-4H than for corresponding standard CPUs. Delays and blocks During update: • the asynchronous SFCs for data records are given a negative acknowledgement • • • • messages are delayed all priority classes up to 15 are initially delayed communications jobs are refused or delayed finally all priority classes are blocked. For more details refer to Chapter 6. S5 connection It is not possible to connect S5 modules via an adapter module. The connection of S5 modules via an IM 463-2 can only be made in single mode. CPU as DP Slave Not possible Automation System S7-400H Fault-tolerant Systems A5E00068197-07 D-3 Differences Between Fault-Tolerant Systems and Standard Systems D-4 Automation System S7-400H Fault-tolerant Systems A5E00068197-07 E Function Modules and Communication Processors Used on the S7-400H You can use the following function modules (FMs) and communication processors (CPs) on a S7-400: FMs and CPs used centrally Module Order no. Release one-way redundant Counter module FM 450 6ES7450-1AP00-0AE0 Vesion 2 or later Yes No Communication processor CP441-1 (point-to-point connection) 6ES7441-1AA02-0AE0 Vesion 2 or later Yes No 6ES7441-1AA03-0XE0 Version 1 or later with firmware V1.0.0 Communication processor CP441-2 (point-to-point connection) 6ES7441-2AA02-0AE0 Vesion 2 or later Yes No 6ES7441-2AA03-0XE0 Version 1 or later with firmware V1.0.0 Communications processor CP443-1 Multi (SINEC H1 (Ethernet), TCP/ISO transport) 6GK7443-1EX10-0XE0 Version 1 or later with firmware V1.0.1 Yes Yes 6GK7443-1EX11-0XE0 Version 1 or later with firmware V1.1.0 Yes Yes Communications processor CP443-5 Basic (PROFIBUS; S7 communications) 6GK7443-5FX01-0XE0 Version 1 or later with firmware V3.1 Yes Yes Communication processor CP443-5 Extended (PROFIBUS; master on PROFIBUS-DP) 1) 6GK7443-5DX02-0XE0 Version 2 or later with firmware V3.2.3 Yes Yes Communication processor CP443-5 Extended (PROFIBUS DPV1) 1) 2) 6GK7443-5DX03-0XE0 Version 2 or later with firmware V4.0.0 Yes Yes 1) Only these modules should be used as external master interfaces on the PROFIBUS DP. 2) Only this module supports DPV1 as external DP master interface (in accordance with IEC 61158/ EN 50170). Automation System S7-400H Fault-tolerant Systems A5E00068197-07 E-1 Function Modules and Communication Processors Used on the S7-400H FMs and CPs for distributed one-way use Note You can use all the FMs and CPs released for the ET 200M with the S7-400H distributed and one-way. FMs and CPs for distributed switched use Module Communication processor CP 341-1 (point-to-point connection) Order no. Release 6ES7341-1AH00-0AE0 6ES7341-1BH00-0AE0 6ES7341-1CH00-0AE0 Version 3 or later 6ES7341-1AH01-0AE0 6ES7341-1BH01-0AE0 6ES7341-1CH01-0AE0 Version 1 or later with firmware V1.0.0 Communication processor CP 342-2 (ASI bus interface module) 6GK7342-2AH01-0XA0 Version 1 or later with firmware V1.10 Communication processor CP 343-2 (ASI bus interface module) 6GK7343-2AH00-0XA0 Version 2 or later with firmware V2.03 Counter module 350-1 6ES7350-1AH01-0AE0 6ES7350-1AH02-0AE0 Vesion 1 or later Counter module 350-2 6ES7350-2AH00-0AE0 Vesion 2 or later Controller module FM 355 C 6ES7355-0VH10-0AE0 Vesion 4 or later Controller module FM 355 S 6ES7355-1VH10-0AE0 Version 3 or later High Speed Boolean Processor FM 352-5 6ES7352-5AH00-0AE0 Version 1 or later with firmware V1.0.0 Controller module FM 355–2 C 6ES7355-0CH00-0AE0 Version 1 or later with firmware V1.0.0 Controller module FM 355–2 S 6ES7355-0SH00-0AE0 Version 1 or later with firmware V1.0.0 Notice One–way and switched function and communication modules are not synchronized in H system even if there are two of them in the system. Two FM 450 that are both operated one–way, for example, do not synchronize their counters. E-2 Automation System S7-400H Fault-tolerant Systems A5E00068197-07 Connection Examples for Redundant I/O F This appendix contains examples for connecting redundant I/O. To simplify the illustrations, only the first channel of the two redundant modules is shown in the diagrams. More connection examples are available in the SIMATIC FAQs at http://www.siemens.com/automation/service&support under the keyword “Redundant I/O”. In Section Description On Page F.1 SM 321; DI 8 x AC 120/230 V, 6ES7 321-1FF01-0AA0 F-2 F.2 SM 322; DO 8 x AC 230 V/2 A, 6ES7 322-1FF01-0AA0 F-3 F.3 SM 321; DI 16 x AC 120/230V, 6ES7 321-1FF00-0AA0 F-4 F.4 SM 331; AI 8 x 16 Bit; 6ES7331-7NF00-0AB0 F-5 F.5 SM 332; AO 4 x 12 Bit; 6ES7 332-5HD01-0AB0 F-6 F.6 SM 421; DI 32 x UC 120 V, 6ES7 421-1EL00-0AA0 F-7 F.7 SM 422; DO 16 x AC 120/230 V/2 A, 6ES7 422-1FH00-0AA0 F-8 F.8 SM 321; DI 16 DC 24V, 6ES7321-7BH00-0AB0 F-9 F.9 SM 322; DO 32 DC 24 V/0,5 A, 6ES7 322-1BL00-0AA0 F-10 F.10 SM 331; AI 8 12 Bit, 6ES7 331-7KF02-0AB0 F-11 Automation System S7-400H Fault-tolerant Systems A5E00068197-07 F-1 Connection Examples for Redundant I/O F.1 SM 321; DI 8 x AC 120/230 V, 6ES7 321-1FF01-0AA0 The following diagram shows the connection of two redundant sensors to two SM 321; DI 8 x AC 120/230 V. The sensors are always connected to Channel 0. 1N 120/230V 1N Figure F-1 F-2 Connection example SM 321; DI 8 x AC 120/230 V Automation System S7-400H Fault-tolerant Systems A5E00068197-07 Connection Examples for Redundant I/O F.2 SM 322; DO 8 x AC 230 V/2 A, 6ES7 322-1FF01-0AA0 The following diagram shows the connection of an actuator to two redundant SM 322; DI 8 x AC 230 V/2 A. The actuator is always connected to Channel 0. 1L 1N 120/230V 1L 1N Figure F-2 Connection example SM 322; DO 8 x AC 230 V/2 A Automation System S7-400H Fault-tolerant Systems A5E00068197-07 F-3 Connection Examples for Redundant I/O F.3 SM 321; DI 16 x AC 120/230 V, 6ES7 321-1FF00-0AA0 The following diagram shows the connection of two redundant sensors to two SM 321; DI 16 AC 120/230 V. The sensors are always connected to Channel 0. 1N 120/230V 1N Figure F-3 F-4 Connection example SM 321; DI 16 x AC 120/230 V Automation System S7-400H Fault-tolerant Systems A5E00068197-07 Connection Examples for Redundant I/O F.4 SM 331; AI 8 x 16 Bit; 6ES7331-7NF00-0AB0 The following diagram shows the connection of a transmitter to two redundant SM 331; AI 8 x 16 Bit. The transmitter is always connected to Channel 0. Transmitter +/– 10V +/– 5V 1 – 5V Figure F-4 Connection example SM 331; AI 18 x 16 Bit Automation System S7-400H Fault-tolerant Systems A5E00068197-07 F-5 Connection Examples for Redundant I/O F.5 SM 332; AO 4 x 12 Bit; 6ES7 332-5HD01-0AB0 The following diagram shows the connection of an actuator to two redundant SM 332; AO 4 x 12 Bit. The actuator is always connected to Channel 0. L+ M Mana 24V M Figure F-5 F-6 Connection example SM 332, AO 4 x 12 Bit Automation System S7-400H Fault-tolerant Systems A5E00068197-07 Connection Examples for Redundant I/O F.6 SM 421; DI 32 x UC 120 V, 6ES7 421-1EL00-0AA0 The following diagram shows the connection of two redundant sensors to two SM 421; DI 32 UC 120 V. The sensors are always connected to Channel 0. 120 VUC 1 –––– 2 –––– 3 4 o –––– 5 o –––– 6 o –––– 7 o –––– 8 o –––– 9 o –––– 10 o –––– 11 o –––– 12 13 –––– 14 15 o –––– 16 o –––– 17 o –––– 18 o –––– 19 o –––– 20 o –––– 21 o –––– 22 o –––– 23 24 –––– 25 26 27 o –––– 28 o –––– 29 o –––– 30 o –––– 31 o –––– 32 o –––– 33 o –––– 34 o –––– 35 36 –––– 37 38 39 o –––– 40 o –––– 41 o –––– 42 o –––– 43 o –––– 44 o –––– 45 o –––– 46 o –––– 47 48 –––– Figure F-6 0 1 2 3 4 5 6 7 1N 0 1 2 3 4 5 6 7 1 –––– 2 –––– 3 4 o –––– 5 o –––– 6 o –––– 7 o –––– 8 o –––– 9 o –––– 10 o –––– 11 o –––– 12 13 –––– 14 15 o –––– 16 o –––– 17 o –––– 18 o –––– 19 o –––– 20 o –––– 21 o –––– 22 o –––– 23 24 –––– 25 26 27 o –––– 28 o –––– 29 o –––– 30 o –––– 31 o –––– 32 o –––– 33 o –––– 34 o –––– 35 36 –––– 37 38 39 o –––– 40 o –––– 41 o –––– 42 o –––– 43 o –––– 44 o –––– 45 o –––– 46 o –––– 47 48 –––– 0 1 2 3 4 5 6 7 1N 0 1 2 3 4 5 6 7 2N 0 1 2 3 4 5 6 7 3N 0 1 2 3 4 5 6 7 4N 2N 0 1 2 3 4 5 6 7 3N 0 1 2 3 4 5 6 7 4N Connection example SM 421; DI 32 x UC 120 V Automation System S7-400H Fault-tolerant Systems A5E00068197-07 F-7 Connection Examples for Redundant I/O F.7 SM 422; DO 16 x AC 120/230 V/2 A, 6ES7 422-1FH00-0AA0 The following diagram shows the connection of an actuator to two redundant SM 422; DO 16 x AC 120/230 V/2 A. The actuator is always connected to Channel 0. 110/220 V 1 –––– 2 –––– 3 4 o –––– 5 6 o –––– 7 8 o –––– 9 10 o –––– 11 –––– 12 –––– 13 –––– 14 –––– 15 o –––– 16 17 o –––– 18 19 o –––– 20 21 o –––– 22 –––– 23 –––– 24 –––– 25 –––– 26 –––– 27 o –––– 28 29 o –––– 30 31 o –––– 32 33 o –––– 34 –––– 35 –––– 36 –––– 37 –––– 38 –––– 39 o –––– 40 41 o –––– 42 43 o –––– 44 45 o –––– 46 –––– –––– 47 48 –––– Figure F-7 F-8 0 1 2 3 1L 1N 4 5 6 1 –––– 2 –––– 3 4 o –––– 5 6 o –––– 7 8 o –––– 9 10 o –––– 11 –––– 12 –––– 13 –––– 14 –––– 15 o –––– 16 17 o –––– 18 19 o –––– 20 21 o –––– –––– 22 23 –––– 24 –––– 25 –––– 26 –––– 27 o –––– 28 29 o –––– 30 31 o –––– 32 33 o –––– 34 –––– 35 –––– 36 –––– 37 –––– 38 –––– 39 o –––– 40 41 o –––– 42 43 o –––– 44 45 o –––– 46 –––– –––– 47 48 –––– 0 1 2 3 1L 1N 4 5 6 7 2l 2N 0 1 2 3 3L 3N 4 5 6 7 4L 4N 7 2l 2N 0 1 2 3 3L 3N 4 5 6 7 4L 4N Connection example SM 422; DO 16 x AC 120/230 V/2 A Automation System S7-400H Fault-tolerant Systems A5E00068197-07 Connection Examples for Redundant I/O F.8 SM 321; DI 16 DC 24 V, 6ES7 321-7BH00-0AB0 The following diagram shows the connection of two redundant sensors to two SM 321; DI 16 DC 24 V. The sensors are always connected to Channel 0 or Channel 8. CH0 Vs Vs CH8 CH0 Vs Vs CH8 24V Figure F-8 Connection example SM 321; DI 16 x DC 24V Automation System S7-400H Fault-tolerant Systems A5E00068197-07 F-9 Connection Examples for Redundant I/O F.9 SM 322; DO 32 DC 24 V/0.5 A, 6ES7 322-1BL00-0AA0 The following diagram shows the connection of an actuator to two redundant SM 322; DO 32 DC 24 V/0.5 A. The actuator is always connected to Channel 1. 1 L+ e.g. 1 N 4003 1M 1 L+ e.g. 1 N 4003 24V 1M Figure F-9 F-10 Connection example SM 322; DO 32 x DC 24 V/0.5 A Automation System S7-400H Fault-tolerant Systems A5E00068197-07 Connection Examples for Redundant I/O F.10 SM 331; AI 8 12 Bit, 6ES7 331-7KF02-0AB0 The following diagram shows the connection of a transducer to two SM 331; AI 8 x 12 Bit. The transducer is always connected to Channel 1. L+ M L+ Transducer = +/–10 V 24V Figure F-10 Connection example SM 331; AI 8 x 12 Bit Automation System S7-400H Fault-tolerant Systems A5E00068197-07 F-11 Connection Examples for Redundant I/O F-12 Automation System S7-400H Fault-tolerant Systems A5E00068197-07 Glossary 1–out–of–2 system See Dual–channel H system Comparison error An error that may occur while memories are being compared on a fault–tolerant system. Dual–channel H system H system with two central modules Fail–safe systems Fail–safe systems are characterized by the fact that they remain in a safe state when certain failures occur or go directly to another safe state. Fault-tolerant systems Fault–tolerant systems are designed to reduce production downtime. Availability can be enhanced, for example, by means of component redundancy. H station A station containing two central processing units (master and standby). H system Fault–tolerant system consisting of at least two central processing units (master and standby). The user program is processed identically in both the master and standby CPUs. I/O, one–way We speak of a one–way I/O when an input/output module can be accessed by only one of the redundant central processing units. It may be single–channel or multi–channel (redundant). Automation System S7-400H Fault-tolerant Systems A5E00068197-07 Glossary-1 Glossary I/O, redundant We speak of a redundant I/O when there is more than one input/output module available for a process signal. It may be connected as one–way or switched. Usage: ”redundant one–way I/O” or ”redundant switched I/O” I/O, single–channel We speak of a single–channel I/O when – in contrast to a redundant I/O – there is only one input/output module for a process signal. It may be connected as one–way or switched. I/O, switched We speak of a switched I/O when an input/output module can be accessed by all of the redundant central processing units on a fault–tolerant system. It may be single–channel or multi–channel (redundant). Linking In the link–up system mode of a fault–tolerant system the master CPU and the standby CPU compare the memory configuration and the contents of the loadmemory. If they establish differences in the user program, the master CPU updates the user program of the standby CPU. Master CPU The central processing unit that is the first redundant central processing unit to start up. It continues to operate as the master when the redundancy connection is lost. The user program is processed identically in both the master and standby CPUs. Meantime between failures (MTBF) The average time between two failures and, consequently, a criterion for the reliability of a module or a system. Meantime down time (MDT) The mean down timeMDT essentially consists of the time until error detection and the time required to repair or replace defective modules. Meantime to repair (MTTR) ”Meantime to repair” denotes the average repair time of a module or a system, in other words, the time between the occurrence of an error and the time when the error has been rectified. Glossary-2 Automation System S7-400H Fault-tolerant Systems A5E00068197-07 Glossary Redundancy, functional Redundancy with which the additional technical means are not only constantly in operation but also involved in the scheduled function. Synonym: active redundancy. Redundant mode In redundant system mode of a fault–tolerant system the central processing units are in RUN mode and are synchronized over the redundant link. Redundant systems Redundant systems are characterized by the fact that important automation system components are available more than once (redundant). When a redundant component fails, processing of the program is not interrupted.. Redundant link A link between the central processing units of a fault–tolerant system for synchronization and the exchange of data. Self-test In the case of fault–tolerant CPUs defined self–tests are executed during startup, cyclical processing and when comparison errors occur. They check the contents and the state of the CPU and the I/Os. Single mode In the single system mode of a fault–tolerant system, the master CPU is in RUN mode, whereas the standby CPU is in the STOP, TROUBLESHOOTING or DEFECTIVE mode. Single operation Referring to single operation, we mean the use of a fault-tolerant CPU in a standard SIMATIC-400 station. Standby CPU The redundant central processing unit of a fault–tolerant system that is linked to the master CPU. It goes to STOP mode when the redundancy connection is lost. The user program is processed identically in both the master and standby CPUs. STOP With fault–tolerant systems: in the Stop system mode of a fault–tolerant system the central processing units of the fault–tolerant system are in STOP mode. Automation System S7-400H Fault-tolerant Systems A5E00068197-07 Glossary-3 Glossary Synchronization module An interface module to the redundant link on a fault–tolerant system TROUBLESHOOTING An operating mode of the standby CPU of a fault–tolerant system in which the CPU performs a complete self–test.. Update In the update system mode of a fault–tolerant system, the master CPU updates the dynamic data of the standby CPU (synchronization). Glossary-4 Automation System S7-400H Fault-tolerant Systems A5E00068197-07 Index A Address area, CPU 31x-2, 4-30 Availability communications, 2-6 definition, A-3 I/O, 7-2 of systems, 1-4 B Base system, 2-3 Bus connectors, 4-25 MPI, 4-24 Profibus DP interface, 4-25 Bus interrupt, 4-39 BUSF, 4-35 BUSF1, 4-9 BUSF2, 4-9 C Central processing unit, 2-3 Change memory card, 4-20 Change memory type, 11-49 Changing the operating mode of an H CPU, B-6 Checksum error, 5-12 Cold restart, 4-13 operating sequence, 4-14 Commissioning, 3-1 Communication, 2-6 Communication modules, E-1 Comparison error, 5-12 Components base system, 2-3 duplicating, 1-4 Configuration types, I/O, 7-2 Configuring, 9-3 Configuring networking, 9-7 Connection fault-tolerant S7, 8-3 S7, 8-3 Consistent data access, 4-47 Automation System S7-400H Fault-tolerant Systems A5E00068197-07 CPU mode selector, 4-11 parameters, 4-26 CPU 315-2 DP See also CPU 31x-2 DP master, 4-30 CPU 316-2 DP. See CPU 31x-2 CPU 318-2. See CPU 31x-2 CPU 31x-2 DP address areas, 4-30 DP master, diagnostics using LEDs, 4-35 CPU 414–4H, operation and display elements, 4-2 CPU 417–4H, operation and display elements, 4-2 CPU–CPU communication, 4-24 D Data consistency, 4-40 Depassivation, 7-32 Determining memory requirements, 4-15 Diagnostics addresses, 4-38 Diagnostics addresses for PROFIBUS, 4-38 Diagnostics buffer, 4-10 Diagnostics coverage, A-2 Digital output, fault–tolerant, 7-21 Discrepancy, digital input modules, 7-17 Discrepancy time, 7-17, 7-23 Documentation, 2-9 DP interface, 4-25 DP master CPU 31x-2, 4-30 diagnostics using LEDs, 4-35 DP-master, Diagnostics with STEP 7, 4-36 DPV1 and EN 50170, 4-32 Index-1 Index E H Error LEDs all CPUs, 4-9 CPU 414-4H, 4-10 CPU 417-4H, 4-10 CPU 41x-3 and 41x-4, 4-10 Error messages, 4-6 Expanded memory, 4-15 Expanded memory configuration, 11-47 Expanding load memory, 4-17 Expanding working memory, 4-22 EXT. BATT., 4-40 External backup current, 4-5 EXTF, 4-9 Hardware components, 2-3 configuring, 3-4, 9-4 installation, 3-3 Help, 9-2 HOLD, 5-9 F Fail-safe, 1-2 Failure of components, 10-1 in central racks and expansion racks, 10-2 of distributed I/O, 10-12 Fault-tolerant, 1-2 Fault-tolerant communications, 8-2 Fault-tolerant connections configuration, 8-9 programming, 8-9, 8-15 properties, 8-9 Fault-tolerant station, 9-3 Fault-tolerant system faults, 3-5 starting, 3-4 FB 450 ”RED_IN”, 7-13 FB 451 ”RED_OUT”, 7-13 FB 452 ”RED_DIAG”, 7-13 FB 453 ”RED_STATUS”, 7-13 FC 450 ”RED_INIT”, 7-13 FC 451 ”RED_DEPA”, 7-13 Fiber optic cable, 12-4 Bending radius, 12-6 Fiber Optics, Cable Routing, 12-6 Fiber-optic cables, 2-4 Fitting, M7-400, memory cards, 4-22 FLASH card, 4-19 Flash card, 4-18 FRCE, 4-9 Function modules, E-1 Functional I/O redundancy, 7-13 Index-2 I I/O, 7-1 one-way, 7-3 redundant, 7-10 switched, 7-5 I/O direct access, 5-14 I/O modules, 2-5 IF 960-HF, 12-2 IFM1F, 4-10 IFM2F, 4-10 Installation, 2-1, 9-2 overview, 2-2 Interface for expanded memory, 4-4 INTF, 4-9 L Link, up, 6-16 LINK–UP, 5-7 Link–up and update functional sequence, 6-3 performance, 6-25 Link–up, updating in single mode, 5-8 Link-up process, 6-7 process diagram, 6-4 Link-up and update block, 6-13 effects, 6-2 Automation System S7-400H Fault-tolerant Systems A5E00068197-07 Index M Master CPU, 5-2 Master/standby assignment, 5-2 Maximum blocking time for priority classes > 15 calculating, 6-20 definition, 6-14 Maximum communication delay calculation, 6-24 definition, 6-14 Maximum scan-cycle time extension calculation, 6-24 definition, 6-14 MDT, A-2 Memory card, 4-17, 4-18 technical specifications, 4-21 Memory modules, 4-22 Memory reset, operating sequence, 4-13 Minimum I/O retention time calculating, 6-19 definition, 6-15 Mode selector, 4-11 Monitoring functions, 4-6 Monitoring time accuracy, 6-18 determining, 6-17 monitoring time, configuring, 6-19 Mounting rack, 2-4 MPI interface, 4-24 MPI/DP interface, 4-4 MSTR, 4-8 MTBF, A-2, A-4 N Network Industrial Ethernet, 8-5 PROFIBUS, 8-6 Network configuration, 9-7 O Operating mode, changing, 4-28, 12-5 Operating mode changes, 4-39 Operating mode selector, 4-3 Operating modes CPU, 5-5 STARTUP, 5-7 STOP, 5-6 Operating objectives, 1-2 Automation System S7-400H Fault-tolerant Systems A5E00068197-07 Operating state, TROUBLESHOOTING, 5-10 Operating states HOLD, 5-9 LINK–UP, 5-7 RUN, 5-8 UPDATE, 5-7 Order number 6ES7 414-4HJ00-0AB0, 13-2 6ES7 417-4HL01-0AB0, 13-6 Organization blocks, 2-8 P Parameters, 4-26 module rack number, 4-27 operating mode, 4-27 Partial connection, active, 8-4 PG/OP–CPU communication, 4-24 Power supply, 2-4 Process interrupt, in the S7-400H system, 5-14 Profibus–DP inteface, 4-4 Programming device functions, 9-8 Protection level, 4-12 setting, 4-12 R RACK0, 4-8 RACK1, 4-8 RAM Card, 4-19 RAM card, 4-18 RAM/PIQ comparison error, 5-12 Reading data consistently from a DP standard slave, 4-45 Reading tags, consistency rules, 4-43 Readme file, 9-2 Reboot, 4-14 operation sequence, 4-14 REDF, 4-10 Redundancy active, 5-2 functional, 5-2 Redundant communication system, 8-2 Redundant I/O, 7-10, 7-35 analog input modules, 7-23 configuration, 7-14 configurations, 7-10 digital input modules, 7-17 digital output modules, 7-21 run times of the blocks, 13-10 Index-3 Index Redundant nodes, 1-5, 8-2 Redundant PLCs, 1-2 Redundant sensor, 7-20 analog input modules, 7-30 Redundant system mode, 5-8 Reliability, A-2 Repair, 10-1 Replacement during operation, 10-1 in central racks and expansion racks, 10-2 of distributed I/O, 10-12 Rules for fitting a fault-tolerant station, 9-3 RUN, 4-8, 5-8 S S5 to S7 configuration, C-2 diagnostics and programming, C-2 S7 connections, configured, 8-3, 8-9 S7–400 optional software, 2-7 required software, 2-7 S7–400H communication, 2-6 configuration and programming, 2-7 documentation, 2-9 I/O modules, 2-5 user program, 2-7 S7–400H , blocks, 2-8 S7-REDCONNECT, 8-8, 8-20 Self-test, 5-4, 5-11 Sensor, double redundant, 7-20 Setting, Rack Number, 12-4 SFB 14 ”GET”, consistency rules, 4-43 SFB 15 ”PUT”, Consistency rules, 4-44 SFC 103 ”DP_TOPOL”, 4-33 SFC 14 ”DPRD_DAT”, 4-45 SFC 15 ”DPWR_DAT”, 4-45 SFC 81 ”UBLKMOV” , 4-41 Signal modules for redundancy, 7-15 SIMATIC Manager, 9-8 Single operation, B-1 configure, B-4 definition, B-1 points for consideration, B-2 upgrading to fault-tolerant system, B-5 Slot for interface modules, 4-4 Slot for memory cards, 4-3 SM 321; DI 16 x AC 120/230 V, Connection example, F-4 SM 321; DI 32 x DC 24V, Connection example, F-9 Index-4 SM 321; DI 8 x AC 120/230 V, Connection example, F-2 SM 322; DI 8 x AC 230 V/2 A, Connection example, F-3 SM 322; DO 32 DC 24V, Connection example, F-5 SM 322; DO 32 x DC 24V, Connection example, F-10 SM 331; AI 2 x 12 Bit, Connection example, F-11 SM 332; AO 4 x 12 Bit, Connection example, F-6 SM 421; DI 32 x UC 120 V, Connection example, F-7 SM 422; DO 16 x AC 120/230 V/2 A, Connection example, F-8 Software components, 2-7 redundancy, 1-3 requirements, 9-2 Standby CPU, 5-2 Starting up, requirements, 3-2 Startup types, 5-7 Status byte, 7-33 Status displays all CPUs, 4-8 CPU 414-4H, 4-8 CPU 417-4H, 4-8 Status word, 7-33 STOP, 4-8 Suitable CPs, 8-8 Synchronization, 5-3 event-driven, 5-3 Synchronization Module, 12-2 Function, 12-2 Removing and Inserting, 12-3 Technical Specification, 12-6 Synchronization submodules, 2-4 System modes, 5-4 system, 5-4 System modification during ongoing operation, single mode, 4-33 System modification during operation hardware requirements, 4-34 software requirements, 4-34 Automation System S7-400H Fault-tolerant Systems A5E00068197-07 Index T Technical specifications CPU 414-4H, 13-2 CPU 417-4 H, 13-6 Time monitoring, 6-14 Time response, 5-14 Tolerance window, 7-23 Tools , 2-7 TROUBLESHOOTING, 5-10 U UPDATE, 5-7 Update procedure, 6-9 process diagram, 6-5 time response, 6-16 Automation System S7-400H Fault-tolerant Systems A5E00068197-07 User program, 2-7 V Value applied, 7-23 W Warm restart, 4-14 operation sequence, 4-14 WinCC, 8-14 Write tag, consistency rules, 4-44 Writing data consistently to a DP standard slave, 4-45 Index-5 Index Index-6 Automation System S7-400H Fault-tolerant Systems A5E00068197-07