1
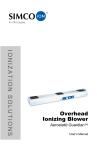
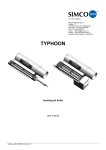
IONIZING
AIR BLOWER
MODEL:QUICK442-3
INSTRUCTIONS
Operation/Maintenance BLOWER OVERHEAD lonizing Air Blower
The Ionizing AIR BLOWER (OVERHEAD) is a member of the ionizing air blower
family. The BLOWER OVERHEAD is a three-Fan unit designed to provide targeted
coverage for electrostatic problems.
MATTERS FOR DAILY INSPECTION
*Clean high voltage needles
*Verify grounding connection
*Inspec equipment for damage
*Inspect for moisture or other contaminates
SECTION 1
SECTION 2
SECTION 3
SECTION 4
SECTION 5
SECTION 6
SECTION 7
SECTION 8
Description
Features
Specifications
Safety
Installation
Operation
Maintenance
How to hang
SECTION 1 Description
The BLOWER OVERHEAD ionized air blower produces an air flow that is rich in
positive and negative ions. Directing the air flow on an object that has a static
electricity charge will neutralize the charge. If the object has a negative static charge,
it will draw positive ions from the air flow. Conversely, if the object has a positive
static charge, it will draw negative ions from the air flow. The air ions are attracted
to the oppositely charged object and neutralize the change on the object.
The BLOWER OVERHEAD is a portable ionized air blower. It uses three small
fan to produce air flow, The volume of air flow is controlled by variable speed
control which provides a wide range of air flow settings. The low wattage heating
element can be turned on at any time for user comfort. The ionizing elements are
energized with a low current, high voltage transformer. The transformer contains a
current limiting resistor which enhances ionization stability and provides for safety.
The high voltage AC is applied to a circular arrangement of stainless steel ion
emitter points which results in an intense alternating electric field at the tip of the
emitter points. It is this electric field that creates alternating polarity air ions in the
air flow. To assure that the unit is working properly, the high voltage AC is
monitored by an ionization indicator lamp.
The ionizer of the BLOWER OVERHEAD features a patented balancing circuit.
Using the point cleaner takes only seconds. Cleaning the emitter points on a weekly
basis provents the build-up of airborne debris all electrical ionizers are prone to.
This keeps your BLOWER OVERHEAD working in top form for the life of the
unit.
The BLOWER OVERHEAD was designed for use with sensitive electronic
components, where electrostatic discharge is a problem. The BLOWER
OVERHEAD can also be used where static electricity causes problems such as:
attraction of dirt to product, misalignment of small parts due to electrostatic
“jumping” and undesirable adhesion of plastic films due to electrostatic charge.
SECTION 2 Features
* Rapidly neutralizes static charges.
* Covers an extended distance and large area coverage with ionized air.
* Variable speed fan with wide range of air flow.
* Integrated task lights (2×9 watt twin tube)
* Inherently balanced ion output.
* Expediently ion emitter cleaner.
* Ionization indicator lamp.
* Durable, electrically grounded metal enclosure.
SECTION 3 Specifications
Unit Part Number:
46004
46005
Line Voltage:
120 VAC 60 Hz
230 VAC 50Hz
Current Draw:
Max. 2 Amp
Air Volume Output:
Air Velocity
Air Flow Characteristics:
Operating Temperature:
Fan Speed
Low
High
1 Amp
Flow
3*35 CFM
3*70 CFM
Fan Speed
1ft. 2ft. 3ft. 4ft.
Low
250 200 150 125
High
500
400
300
250
Velocity in FPM measured at center line of air stream
4’ x 5’ Area Coverage(1200mm×1500mm)
32℉(0℃)
122℉(50℃)
Ozone Production:
0.01 ppm measured 6’’in front of unit,
fan low.
Audible Noise:
Fan Speed
Low
45dB
High 55dB
Measured 2 ft. from unit.
Enclosure:
Steel
Finish:
Acrylic Enamel
Weight:
9.0 kg
Size:
108.6 cm W x 9.0 cm(H)x17.1cm(D)
Bench Stand Feet:
Nonconductive, Nonstaining Polymer
Optional Air Filter:
Ion Balance (offset voltage):
30 PPI Open Cell Polyurethane Foam
OV ±15V
Lamp:
Ion Output(discharge time)
300mm
2 x 13 watte twin tube
300mm
tp1
5.5
300mm
tp7
8.5
300mm
tp19
11.0
tp25
16.5
300mm
tp2
1.5
tp8
3.5
tp20
8.0
tp26
12.0
300mm
tp3
3.0
tp9
6.5
tp21
9.0
tp27
13.0
300mm
Blower
tp4
3.0
tp10
7.0
tp22
9.0
tp28
14.0
300mm
Tp5
1.5
tp11
3.5
tp23
8.0
tp29
12.5
tp30
13.0
300mm
Tp6
5.5
tp12
8.5
tp24
18.0
Offset voltage and discharge time determined as per ESD Association Standard No.
3 using 6’’ x 6’’, 20pF plate(charged plate monitor). Discharge times are in seconds
from 1000 volts to 100 volts at locations shown.
Note: Discharge times for high speed are 10% longer for 230 v, 50Hz.
SECTION 4 Safety
4.1 Read instruction manual before installing or operating device.
4.2 This unit is equipped with a 3-prong grounding plug and must be plugged into a
3-terminal grounded receptacle. Do not defeat the grounding by modifying the
plug
or using an ungrounded 3-prong adapter, If an extension cord is necessary, use
only
a 3-wire extension cord that provides grounding.
4.3 Do not insert objects through intake or outlet grille.
4.4 Do not operate unit in flammable or explosive atmospheres.
4.5 Internal repairs or servicing must be done by qualified personnel.
SECTION 5 Installation
The BLOWER OVERHEAD is designed for permanent operation. The overhead
blower can be used in permanent operation by hanging it to a sturdy flat surface such
as a wall or under a shelf.
For extremely dirty environments, an optional air filter may be installed. The air
filter consists of a filter retainer and an air filter element.
The BLOWER OVERHEAD should be placed approximately 1 to 3 feet from the
critical work area or objects to be neutralized. It should be positioned to cover as
much of the area as possible with the ionized air stream.
The BLOWER OVERHEAD, part number 46004, requires 120 VAC 60 Hz for
proper operation. The unit must be grounded for safe operation. Plug the unit into a
standard 3-terminal grounded receptacle. If an extension cord is necessary, use only
a 3-wire extension cord that provides grounding.
The BLOWER OVERHEAD, part number 46005,requires 230 VAC 50 Hz for
proper operation. The unit must be grounded for safe operation. The unit comes with
line cord, without plug. A plug must be installed on the line cord for operation.
Installation of the plug must be performed by qualified personnel. The color code for
wiring the plug is as follows: Brown – Line; Blue – Neutral; Green/Yellow –
Ground.
Under the unclean environment, please set the filtration attached.
This filtration includes a fixture and a carbon filter.
Put the carbon filter inside the fixture, then fix the fixture to the plastic shield. Press
down the edge of fixture slightly, so that the fixture will be locked in.
Note: Make figures of the fixture and the shield superposed. Keep the
arrowhead gadarene.
SECTION 6 Operation
Activate the BLOWER by turning the FAN SPEED knob clockwise. The
IONIZATION INDICATOR will illuminate to indicate the presence of ionized air.
Set the air flow as desired by adjusting the FAN SPEED knob. The direction of the
air stream can be adjusted upward or downward by loosening the LOCK KNOBS,
tilting the unit and retightening the knobs. To clean the ion emitter points, rotate the
POINT CLEANER knob clockwise to the stop (approximately one turn) and
release.Turn on the light if need.
The BLOWER OVERHEAD produces an ionized air stream that covers a targeted
area. The time required to neutralize a static charge on an item in the air stream
depends on many factors. Two important factors are: distance to ionizer and air
velocity. Air ions constantly “neutralize” each other. Positive and negative ions are
electrostatically attracted to each other. When they contact, the charge transfers and
the ions “recombine”. With high air velocity, the air ions travel further before they
“recombine”. Setting the fan speed as high as acceptable results in more rapid
neutralization. For fast neutralizing, the item should be held within 1 to 3 feet from
the BLOWER.
When using the BLOWER in an electronics assembly area, the ionized air stream
should cover as much of the work area as possible. Charged items introduced into
the work area will be neutralized and will remain neutral while in the ionized air
stream.
SECTION 7 Maintenance
The BLOWER OVERHEAD has been designed with low maintenance in mind. The
only regular maintenance suggested is emitter point cleaning, ion balance checking
and ion output checking, Emitter point cleaning takes only seconds with the point
cleaner. The BLOWER OVERHEAD contains an balancing circuit that is inherently
self balancing. This circuit compensates for dirt build – up on emitters, emitter point
wear, line voltage fluctuations and variations in air velocity. Scheduled checking of
the ion output and balance should be considered to assure quality audit
requirements.
7.1 Emitter Cleaning
To clean the ion emitter points: simply rotate the point cleaner knob located at the
center of the outlet grille clockwise to the stop (approximately one turn)and release,
The spring loaded point cleaning brush will return to its parking spot.
Recommended frequency of cleaning is once a week.
7.2 Air Inlet and Outlet Cleaning
The air inlet grille on the rear of the unit and the ionized air outlet should remain
clean to prevent restriction of air flow. They can be cleaned with a soft brush or
vacuum.
7.3 Air Filter Cleaning
Remove the air filter from the rear of the unit by unsnapping the filter retainer. Rinse
the filter in plain water while gently squeezing. If the dirt is stubborn, wash the filter
in mild soap and water then rinse. Blot the filter dry with paper towels and allow to
dry. Install filter on air inlet and secure by snapping the filter retainer in place.
IMPORTANT: If an air filter is used, clean the air filter regularly.
7.4 Ion Output Check
To test the unit for ion output the use of a charged plate monitor is recommended.
Discharge times can be measured and checked against the Ion Output tables in
Section3, Specifications. If a charged plate monitor is not available, but a static
meter such as a SIMCO handheld electrostatic fieldmeter or SHISHIDO electrostatic
Analyzer or warmbier Charged plate monitor is available, ion output may be
checked with the following procedure. Take a piece of plastic and rub it with cloth
until a static charge can be read with the static meter. Turn on the BLOWER
OVERHEAD and set the fan speed to high. Hold the plastic one foot away from the
ionized air outlet for five seconds. Remove the plastic from the ionized air stream
and measure the static charge. The plastic should be neutralized.
If no instrumentation is available, the unit’s operation can be verified with the
following procedure. Tear-off about a 10 inch length of transparent tape. Approach
the nonadhesive side of the tape with your free hand note the electrostatic attraction
of the tape to your hand. Pass the tape through the ionized air stream approximately
1 foot from the unit and again approach the nonadhesive side of the tape with your
free hand, If the tape has been neutralized, it will not attract.
CAUTION! ELECTRICAL SHOCK HAZARD – Do not insert objects through
intake or outlet grille.
Do not try to verify operation of the unit by drawing a spark from an ion emitter
point. The design of the balancing circuit makes the “spark test” inconclusive.
Sustained grounding of the ion emitters may damage the balancing circuit.
7.5 Ion Balance Check
To test the unit for ion balance, the use of a charged plate monitor such as the
SIMCO Electrostatic Analyzer or H0601(SSD) or CPM(Warmbier)is recommended.
Offset voltage should be measured and checked against the Ion Balance in Section 3,
Specifications.
Do not try to determine ion balance by holding a static meter in the ionized air
stream. This will result in s meaningless reading.
7.6 Calibration
The BLOWER OVERHEAD’s ion output is inherently balanced by design. As a
result, there are no calibration adjustments. If, after checking the ion balance as
outlined above, an unbalance or offset voltage exists in excess of ±5 volts, contact
our Customer Service.
SECTION 8 How to hang