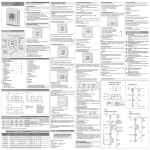
Download Xelee PowerLED Driver User Manual
Transcript
XELEE PowerLED Driver – User Manual
Xelee PowerLED Driver
User Manual
www.nelectrica.com
page 1
XELEE PowerLED Driver – User Manual
Contents
1. Overview
2. DMX receiver operation
2.1 Creating devices network
2.1.1 Daisy-Chain topology.............................................................5
2.1.2 Bus topology.........................................................................6
2.1.3 Mixed topology..................................................................... 7
2.2 Configuration
2.2.1 Address settings................................................................... 8
2.2.2 Autoadressing...................................................................... 8
2.2.3 Micro-switch configuration.................................................... 9
2.2.4 Configuration using PC..........................................................9
3. Independent driver operation
3.1 Light shows................................................................................... 10
3.2 Controling other Xelee devices........................................................ 11
4. Installation
4.1 Front panel.................................................................................... 12
4.2 LED outputs...................................................................................13
4.3 Connecting LED modules................................................................ 13
4.4 Thermal safety.............................................................................. 14
5. Connecting accessories
5.1 External switch.............................................................................. 15
5.2 IR remote......................................................................................15
www.nelectrica.com
page 2
XELEE PowerLED Driver – User Manual
1. Overwiev
Xelee PowerLED is a multichannel driver designed to drive most of the market available
high power LED modules. Integrated logics allow light scenes and shows generation, with
no need for additional controllers. Each LED output can be dimmed independently,
resulting in millions of high saturated or pastel colors in RGB/RGBW lighting systems. High
output resolution, makes color changes incredibly smooth and light shows extremely
dynamic.
Features:
– standard light switch or IR remote control,
– 350mA to 700mA constant current LED outputs,
– high output refresh rate,
– DMX512 controller or repeater operation,
– max. 14-bit per channel resolution,
– dedicated software for monocolor and multicolor lighting,
– built in thermal safety for harsh operating environment,
– software modifications available for special orders,
– compact dimensions,
– thermal protection for harsh environment operation.
Dane techniczne
Parameter
Symbol
Min
Typ
Max
USUP
12
24
32
V (DC)
I SUP MAX
-
-
4
A
IOUT
350
-
700
mA
PSUP MAX
-
-
90
W
N
-
90
-
%
Output resolution**
RES
8
-
14
bit
Output refresh rate
Fout
-
366
-
Hz
Ambient temperature
TA
-20
-
40
°C
Maximum case temperature
TC
-
-
80
°C
Supply voltage
Maximum supply current
Output current*
Maximum supply power
Efficiency
www.nelectrica.com
Unit
Additional info
* value
channel
for
single
** Single channel
resolution,
14-bit only in Xelee
show mode
page 3
XELEE PowerLED Driver – User Manual
Available software options
RGBW
RGB
MONO
Dimensions
Order codes (P/N)
---Current value for
consecutive channels
(WRGB):
0 - disabled
3 - 350 mA
5 - 500mA
7 - 700 mA
X
Software:
W - RGBW
R - RGB
M - MONO
10
Software version:
Current - 1.0
Example: P/N: 3377XW10
www.nelectrica.com
page 4
XELEE PowerLED Driver – User Manual
2. DMX receiver operation
Xelee devices can operate with DMX512 input signal. The brightness of LEDs connected
to each output is set to the level corresponding with received DMX512 channel value.
The signal is regenerated and sent to DMX512 output, allowing connection of additional
devices.
For quick lighting system diagnostic, DMX512 signal reception is indicated by green
DMX LED.
2.1 Creating devices network
2.1.1 Daisy-chain topology
A larger lighting system can be built using Xelee drivers connected in daisy-chain. In this
type of topology each device's DMX512 input is connected to previous device's output.
The biggest advantage of this type connection is signal regeneration by each device
in chain.
www.nelectrica.com
page 5
XELEE PowerLED Driver – User Manual
The connections between devices can be done with UTP cable of at least 5e category, with
both ends fixed with RJ-45 plugs. Both plugs should be fixed using the same
or
T-568A
T-568B standard. Maximum cable length is 300m. Xelee device built-in terminator
should be turned ON with the TERM SW switch.
2.1.2 Bus topology
Connecting
devices in bus topology means that all devices inputs are connected
to common control bus. The connections are made with the same cable as for the daisychain and RJ-45 passive splitters. Maximum bus length for cat.5e cable is 300m. Single
bus can hold up to 32 devices. Connecting more devices can be done after regenerating
the signal with dedicated DMX512 repeater or single Xelee device. The last driver
connected to the bus has to have it's built-in terminator switched ON with the TERM SW
switch. Maximum length of the stub (connection between the driver and the bus) is 3m.
www.nelectrica.com
page 6
XELEE PowerLED Driver – User Manual
2.1.3 Mixed topology
Xelee devices network can be also built in mixed topology, keeping all rules for both
previous topologies. Devices which operate as the only receiver for transmitting device
(daisy chain) should have the built-in terminator switched ON. Devices connected
to shared bus should have the built-in terminator switched off, except for the last device,
at the end of the bus.
www.nelectrica.com
page 7
XELEE PowerLED Driver – User Manual
2.2 Configuration
2.2.1 Address settings
Default settings of Xelee device assign LED outputs to 1-4 DMX512 addresses. Changing
this settings is possible with Xelee Programmer PC software and Xel_USB interface,
described in latter part of this manual.
DMX512 address
Xelee output
1
R
2
G
3
B
4
W
2.2.2 Autoaddressing
By default all Xelee devices are set to work on the same DMX512 addresses.
Autoaddressing mode enables quick configuration, allowing the devices to operate
at higher DMX512 addresses. In this mode of operation, there is no need to configure
each device separately. Configuration of autoaddressing mode will cause devices
to choose other addresses automatically. If this feature is turned on for a driver, the
devices connected to it's output will switch to higher addresses.
CAUTION! Using autoaddressing feature is reccomended only for daisy-chain
topolgy of Xelee drivers network.
www.nelectrica.com
page 8
XELEE PowerLED Driver – User Manual
2.2.3 Micro-switch configuration
Xelee driver has two micro-switches allowing the change of autoaddressing mode and bus
terminator operation. Micro-switch settings are loaded after switching on the driver's
power supply. Autoaddressing mode is indicated by diagnostic LED.
Autoaddressing
ADR SW
ADR LED
OFF
OFF position
not lit
ON
ON position
lit
Terminator
TERM SW
OFF
OFF position
ON
ON position
2.2.4 Configuration using PC
Advanced configuration of Xelee driver settings is possible using PC computer, Xel_USB
interface and Xelee Programmer application. PC software allows the change of outputs
DMX addresses, selection of autoaddressing mode, and other diagnostic operations. With
proper selection of configuration options, software configuration of autoaddressing mode
can override the hardware switch setting, removing the need to physically access the
device during the system reconfiguration. Detailed configuration description can be found
in Xelee Programmer application's doccumentation.
www.nelectrica.com
page 9
XELEE PowerLED Driver – User Manual
3. Independent driver operation
3.1 Light shows
Xelee devices can change the output LED brightness according to preloaded light show
sequences. Show presentation starts automatically after turning on the power supply,
if there is no DMX512 signal present on the input. If the input signal is present, the device
switches from light show presentation to receiver operation. Stopping the DMX512
transmission causes the outputs to freeze on the last received values.
Operation
DMX512 input signal
Response
Switching power ON
not present
Light show presentatnion
Switching power ON
present
DMX512 receiver operation
Light show presentatnion
not present
Light show presentatnion
Light show presentatnion
present
DMX512 receiver operation
DMX512 receiver operation
not present
Freeze on the last values
DMX512 receiver operation
present
DMX512 receiver operation
CAUTION! Returnig from receiver operation to light show presentation requires
turning off and on the power supply or sending the „reset” command from
Xelee Programmer PC application.
The control over light shows is possible with external switch or additional IR remote.
At any time during the show, Xelee device outputs can be switched off without switching
off the power supply. In this mode supply current is lower than 30 mA. Light show
settings are saved during external switch or IR remote shutdown and reloaded even after
the power supply restart. Detailed information on external switch and IR remote control
can be found in “Xelee devices control” document.
www.nelectrica.com
page 10
XELEE PowerLED Driver – User Manual
3.2 Controlling other Xelee devices
In light shows mode, Xelee device sends the output brightness levels for other devices
through DMX512 output. Data is sent using modified DMX512 protocol, and will not be
received by devices other than Xelee drivers. All receiving Xelee devices will respond the
same way, even if their address settings are different. The only important configuration
step is enabling bus termination, depending on the network topology used.
www.nelectrica.com
page 11
XELEE PowerLED Driver – User Manual
4. Installation
4.1 Front panel
DC IN (+/-) - power supply connection
DMX512/IR/SW IN - DMX512 signal input, external switch or IR remote receiver
DMX512 OUT - DMX512 output
DMX512/IR/SW IN:
DMX512 OUT:
1. DMX512 DATA IN (+)
1. DMX512 DATA OUT (+)
2. DMX512 DATA IN (-)
2. DMX512 DATA OUT (-)
3. External switch (+)
3. not used
4. External switch/IR receiver (GND)
4. not used
5. IR receiver (1)
5. not used
6. IR receiver (2)
6. not used
7. DMX512 COMMON
7. DMX512 COMMON
8. DMX512 COMMON
8. DMX512 COMMON
PWR LED - power supply indicator
ADR LED - autoaddressing mode indicator
IR CH LED - IR channel indicator
DMX LED - DMX512 input indicator
ADR SW - autoaddressing configuration
TERM SW - bus termination configration
www.nelectrica.com
page 12
XELEE PowerLED Driver – User Manual
4.2 LED outputs
LED outputs (W, R, G, B) – depending on the hardware configuration, 1-4 channels
assigned to LED colors. LED current of 350, 500, 700 or 1000 mA available.
XeLED output – for easy LED modules connection with single RJ-45 plug.
XeLED:
1. Green (+)
2. Blue (-)
3. Blue (+)
4. Green (-)
5. White (+)
6. Red (-)
7. Red (+)
8. White (-)
4.3 Connecting LED modules
Xelee driver LED outputs allow serial connection of high power LED modules. For correct
light scene generation in RGB/RGBW version, diodes with certain color should be
connected to proper output: R - red, G - green, B - Blue, W – white.
CAUTION! Standard outputs and XeLED output are in parallel connection,
allowing the use of only one output type at time.
www.nelectrica.com
page 13
XELEE PowerLED Driver – User Manual
Driver's supply voltage should be at least 3V higher than the highest total forward voltage
of single LED series. Maximum supply voltage is 32V. The current output of power supply
needed for correct operation can be calculated by adding the output channels currents
with addition of 20% spare.
Example:
Xelee outputs configuration XEL-RPLD-0379:
channel 1 – 350 [mA], channel 2 – 350 [mA],
channel 3 – 700 [mA], channel 4 – 1000 [mA].
Required power supply current output:
(350 + 350 + 700 + 700) * 120% = 2520 [mA] = 2,52A
4.4 Thermal safety
Xelee devices feature a built-in thermal safety. Internal sensor detects temperature rise in
harsh operating conditions, preventing the device overheating and malfunction. If the
temperature rises above certain threshold, output power is limited and connected LEDs
are dimmed. Improvement of thermal conditions causes the device to return to normal
operation.
www.nelectrica.com
page 14
XELEE PowerLED Driver – User Manual
5. Connecting accessories
5.1 External switch
Xelee devices can be controlled by standard one-position (bell-push type) lighting switch.
The switch should be connected to pins 3 and 4 of DMX512/IR/SW IN connector. Detailed
control description can be found in “Xelee devices control” document.
5.2 IR remote
Xelee devices can be controlled with IR remote, available as additional accessory. To
enable remote operation, IR receiver should be connected to driver's DMX512/IR/SW IN
connector. Detailed control description can be found in “Xelee devices control” document.
Driver and remote IR channel change feature allows usage of two different remotes and
drivers in close distance. Each Xelee driver and IR remote can be set to one of two IR
channels.
To change remote IR channel hold MENU and ON/OFF buttons for 10 seconds. To change
Xelee driver IR channel use the IR remote, operating on the same IR channel, and hold
MENU button for 15 seconds. Two resets will occur during the operation, and the
IR CH LED indicator will change it's status.
Xelee PowerLED User Manual, version 1.2 EN, publication date 25-06-2011.
All information contained in this document are destined only for information purposes. The author has put best effort to keep all the information reliable. All information can be
changed without any notice. ALS company does not hold responsibility for any technical and editing errors or lack of information in this document. The newest version of the
document is available on www.als-company.pl website. All used product names can be registered trademarks of certain companies. | ALS company does not hold responsibility for
any direct and indirect damage caused by using the information included in this document. All installation and configuration operations on described equipment should be conducted
according to obligatory regulations. | ALS company product and service warranties are described in proper warranty statements. Any statement included in this document can not be
considered as additional warranty.
www.nelectrica.com
page 15


