1
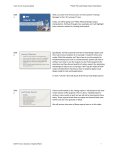
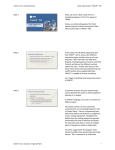
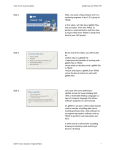
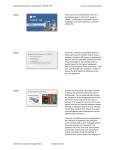
Trane C.D.S. eLearning Series
TRACE 700 Top 10 Tips
Slide 1 TRACE™ 700
Top 10 Expert Tips
Slide 2 By the end of this video,
you will be able to:
• Improve productivity/
efficiency
• Better analyze and
troubleshoot results
• Feel more confident
about modeling in
TRACE 700
Slide 3 11. Adjusting the load model for a
simplified energy model
• What is the desired level of detail to meet
project objectives
• Combining rooms
• Direction heading
• Usage type
• Air side system level
©2015 Trane. All rights reserved.
January 2015
Hello, my name is Kevin Simms and I’m a marketing engineer in the C.D.S. group at TRANE. In this video, I am going to be discussing some of the best things you can do to help create and analyze your model in TRACE 700. We will go through 10 tips that the experts in the C.D.S group have decided are some of the most important for your TRACE 700 model. There are many techniques to make you a better building load and energy modeler with the TRACE 700 program. Some of the tips in this video may seem simple but we have many customers that do not take advantage of even the most basic features in TRACE. By only doing a few of the things in this video, it may help you be more efficient at inputting values, better at analyzing and troubleshooting results, and in general more confident in the application of TRACE 700. For the first tip, let’s talk about when it makes sense to simplify a load design model for energy analysis. There are several questions that need to be addressed in order to maximize modeling efficiency in this conversion process. First and foremost you need to ask yourself what is the desired level of detail to meet the project objectives? How many alternatives will I need to run? What are the chances that this model will be used for more detailed analysis in the future? How much project time has been budgeted for analysis and model refinement? All of these questions impact the level of granularity allowed for the model and because the answers to these questions may vary significantly with each project, you will find that a little effort at the beginning of each project can help ensure the appropriate level of detail in the model. Typically load design requires a detailed room level model to verify proper equipment sizes and ensure ventilation requirements are met. However, energy models can generally be less granular especially when they are being used for comparative purposes. For most users the load to energy analysis 1
Trane C.D.S. eLearning Series
TRACE 700 Top 10 Tips
adjustment will come in the form of building foot print re –distribution or Zoning. For higher level energy analysis, you may want to combine the zones based on directional facing. When higher fidelity is necessary, zoning based on directional orientation may not be sufficient‐ In this case the combination of spaces that are of the same usage type (meaning no major parameter differences such as thermostat set points, internal or external exposures, or continuous versus non continuous ventilation rate), will help reduce the complexity of the model without a significant lose in accuracy. Now, some people may say “That is good for some energy modelers, but I am doing a LEED model and I need to be as precise as possible.” Although I would agree that the model needs to be precise, ASHRAE 90.1 encourages you to create thermal blocks in order to create a more simplified model. Lastly when zoning a model for energy analysis, you must also include already designed HVAC systems. Make sure to take into account the as‐
designed zoning model as this will dictate which rooms can be zoned together. The benefit of simplifying the model commonly manifests by limiting the opportunity for mistakes, reducing the potential for unmet hours and significantly reducing calculation time. Slide 4 22. Proper usage of Templates
©2015 Trane. All rights reserved.
January 2015
For tip number three, use of templates may seem like a simple idea but it is one of the things the CDS support center, most often, sees improperly used in TRACE. Technically you do not need to use the templates section to create and run a model. As people who do a lot of modeling understand, using the templates section is probably the single best thing you can do to speed up the modeling process. The trick is to know how many to create without going overboard. As a general rule of thumb you want to make enough templates to describe the different zones and rooms in your building. For instance, the internal loads tab normally contains the most templates because this is where most of the diversity resides. However, the construction tab may only have one or two templates because typical buildings 2
Trane C.D.S. eLearning Series
TRACE 700 Top 10 Tips
use the same construction materials throughout, allowing the same template to be applied multiple times to different room types. Finally, you need to take advantage of the Rooms Tab. This is where you combine the Internal Loads, Airflows, Thermostat, and Construction templates in to one master template for each room type. Once these master templates are created, you can fill in the majority of a room’s inputs with a single click. Also if you have overwritten a library value remember that you can fill in the filed with an asterisks symbol and you will revert back to using the library value. Slide 5 33. Proper Zoning
https://www.youtube.
com/watch?v=AX_vgg
Xm‐QU
Slide 6 44. Calculation Tips
• Reduced year
Weather Profile
(1440 Hrs)
• Full Year Weather
Profile (8760 Hrs)
• Scan for Errors
•
•
•
Static pressures
62.1 compliance
issues
Mis-matched
Ventilation Schedules
©2015 Trane. All rights reserved.
January 2015
For tip three, we will talk about proper zoning. Proper Zoning is incredibly important as it can affect outputted SADB temperatures and CFM rates. For proper zoning you will need to know what type of Airside System you have. This will help you zone the rooms properly the first time and potentially save a lot of time and hassle for interpreting outputs later. I am not going to cover this topic in this presentation because we already have a presentation completely devoted to the subject. Just click the link below to view the video. For tip number 4, we are going to talk about calculation tips. Before doing a detailed analysis, it is recommended that you run your model in reduced year mode. Running a model in full year mode will increase the calculation time by up to 5 times the typical run time. Running in reduced year mode will allow you to flush out any large issues with as little run time as possible. Once you refine your model, run in full year mode to satisfy LEED and any other bodies that would require you to run an energy model with a full year profile. Hopefully, you will not have to run the full year more than a few time to Completely polish your model. Next, use the scan for errors button. This will provide a good high‐ level check of the most basic data entry mistakes. It can tell you if you have forgotten to input a static pressure for a fan, or if you have applied ASHRAE standard 3
Trane C.D.S. eLearning Series
TRACE 700 Top 10 Tips
62.1 at the room level but have forgotten to turn it on at the system level. The best part though, is that it happens before you calculate and only takes a few seconds. Slide 7 55. Analyzing an issue in my model,
where do I start?
•
•
•
•
ECB/PRM Report
Equipment Energy Consumption report
System Component Summary
Visualizer
©2015 Trane. All rights reserved.
January 2015
Tip number 5, when you finish calculating your model, one of the first things to look at is the ECB/PRM summary report. This will give you a building level overview of the energy usage for equipment within the building. From here you can compare the overarching power consumers in your alternatives along with total dollars spent on energy. If you are noticing that your economic results are a lot less than you predicted, the first thing to look at would be the economics section of the program and the resulting inputs. Frequently what happens is that people have input a rate structure that has On and Off peak definitions but they have forgotten to input a Time of Day Schedule that dictates to the program when those On and Off peak times occur. If you return to the ECB and see that one of the alternatives is using a large amount of cooling, heating, or fan energy, look at the Equipment Energy Consumption Report. This will output the monthly energy consumption and demand values for the equipment. Additionally, it will output the full load energy rate and the capacity of the components. Typically the full load energy rate or energy rate units are inputted incorrectly into the program. Also if you want to look at the loads, you may want to look at the system component selection report. This will give you the capacity of your cooling and heating coils. Lastly, if you want to view things that are not on a report or you want to dive deeper, you can, with the Graph Profiles and Energy button. This tool can output hourly loads for the airside systems which can show whether or not the end results of your output is due to an issue on the building side. (We have a video out about how to use this tool so please check it out on YouTube. It is called TRACE 700 Visualizer.) 4
Trane C.D.S. eLearning Series
Slide 8 TRACE 700 Top 10 Tips
66. Viewing Reports
Slide 9 77. Basic unmet load hour tips
©2015 Trane. All rights reserved.
January 2015
For tip number 6, were going to talk about viewing reports. (Start screen cast, start at system checksums report) The report viewing buttons and checksum select are fantastic when trying to compare alternatives or troubleshoot issues. The reason these are so helpful is mobility. The Group Tree button brings up a tree on the left hand side of that page that will allow you to click on whatever page you want. Allowing you to select whichever report you want without having to scroll through all the reports. The Toolbar also increases mobility but more importantly allows you to lock in which alternatives reports you wish to view. The feature really shines when you add the comparison button. (Switch to the Equipment energy report) By hitting the comparison button you add another window to the screen. If you have the toolbars still active you can now view the alternative 1 reports in one window and alternative 2 reports in the other, allowing for incredibly easy comparisons of the alternatives (Close out and go to the Checksums select) Additionally, the Checksums Select is handy because it allows you to select only the Room, Zone or System Reports that you actually want to see. So if you only have a few rooms out of 100, that require deeper investigation, you can make TRACE only show those particular rooms in the preview window. For tip number 7, we will talk about unmet load hours. (Start Screen Cast) One of the biggest things to know about unmet hours is where to look for clues that will help you resolve them. The building temperature profile report is generally a great place to start. This report will show you how many unmet heating hours and unmet cooling hours are in each room. It will also tell you when those unmet load hours are occurring during the day as well as what day type. This is important because it leads you to different conclusions for the cause of the unmet load hours. For instance, if all your unmet load hours are happening at 8 AM then 5
Trane C.D.S. eLearning Series
TRACE 700 Top 10 Tips
maybe you need to include morning warm up as a control strategy. Next, if you find a room that is giving you plenty of unmet hours, look at the room checksums report. Here you are going to look at two different outputs: the first output is the SADB and the second output is main fan airflow. The reason we want to look at these two parameters is because if you have a room that has quite a bit of unmet hours it is normally because there is low cooling or low heating coil capacity for the space and/or system. The reason for this low capacity could be that the space load during design (which is what the checksums report shows) is very minimal. With a small load, either the SADB will result in a very small delta T, or your Main Fan CFM will be very low compared to a typical diffuser CFM. A good example of this would be storage rooms or closets. This is why we suggest tip number 1, which can reduce the amount of unmet load hours by combining smaller areas into thermal zones. To continue on, in CDS we have seen some room outputs with a heating SADB matching the specified room set point because of low heating loads. So if the set point is 72, and the room is allowed to drift to 65 F, then with a SADB of 72, it will be impossible for the room to be brought back under control. Similarly if the room is a restroom or corridor, the outputs could read an airflow rate as small as 15 CFM for the entire space (or smaller). And as before, if the room goes into drift then there is no way the room could ever be brought back under control with such a low airflow rate. If either of these situations occur, you have a few options to mitigate it. The first option is fixing the supply air dry bulb temperature. This can easily be taken care of by inputting a Design Supply Value on the Create Systems > Temp/Humidity tab > Design section > Supply field. The second option is to adjust the CFM. The best method is to input an increased CFM rate in the room on the Create Rooms Section > Airflows tab > Main Supply section. This will force the design airflow rate to the specified value and provide more airflow to cover the load in the space. There can be many reasons for unmet hours but we hope that with a sound starting point and some basic places to look, it will increase your understanding of the software and your ability to troubleshoot your problems in a fast ©2015 Trane. All rights reserved.
January 2015
6
Trane C.D.S. eLearning Series
TRACE 700 Top 10 Tips
and efficient manner. Slide 10 88. Unconditioned spaces
Slide 11 99. Component Tree Tip
©2015 Trane. All rights reserved.
January 2015
In tip number eight, when you have unconditioned spaces, it is always better to attach all unconditioned rooms to their own system so they do not interfere with the systems psychrometric calculations. For the unconditioned rooms’ system, it does not matter what type of system you choose, as that system will then become unconditioned as long as all rooms are unconditioned on that system. For tip number 9, the best thing to know about the Component Tree View is how to copy and paste. This is because the spreadsheet view acts differently than a typical spreadsheet program. (Start screen cast) As an example let’s say we want to change 25 five rooms Lighting load from 1.3 to 1 W/sq ft. You would highlight all 25 fields press control C to copy them. Then you would open excel and press control V to paste them into excel. Change the values how you wish. In this case we will make all of them 1. Then you highlight all 25 again and press control C to copy and return to TRACE. You need to highlight the 25 cells you wish to overwrite (sometimes the fields are still highlighted from the last time in you were in the program) then you can press control V to paste them back in. This Component Tree View is just another way to view and input data. It is a great place to look for mistakes since all the room inputs are side by side and can easily be scanned for simple input errors. 7
Trane C.D.S. eLearning Series
Slide 12 TRACE 700 Top 10 Tips
10 Sort lists
10.
• Schedules
• Rooms
• equipment
Slide 13 Additional resources
• TRACE™ 700 User’s Manual
• TRACE online (F1) help
Slide 14 contact us
phone I
608.787.3926
fax I
608.787.3005
email I
[email protected]
Web I
www.tranecds.com
For tip number 10, TRACE normally will display inputs in the order they are created. Most people seem to be used to drop downs providing information in alphanumeric order. To change this, you will need to travel to Options > Sort Lists > Alphanumeric. Additionally, when you are importing library members or if you are creating library members, remember that you need to let TRACE 700 refresh before you can select the library members. For instance, if you are on the internal loads tab and decide to make a new people schedule, after you create it in the library you will need to refresh the Internal Loads tab page. You can do this by clicking off the current tab to another and then coming back to the internal loads tab. Then your library member will be selectable in the drop down. Do not click the Actions > Refresh library Values. This is something very different and it will convert over written values in the project to the library value. It is not reversible so be careful if you decide to use it. This video has covered a lot of tips, and we hope that you will use all of them to speed up your energy model creation and analysis. We also hope that these tips will help you feel more confident about energy modeling in TRACE. If you want more information on these topics, check out the TRACE User’s Manual or the online (F1) help. Or contact us at the CDS help center with the phone number or email address above. We have already created other videos to help with different aspects of TRACE and we will continue to make videos to help our users become more proficient with the software. So, if there are other sections you wish to learn more about, let us know. Have a great day ©2015 Trane. All rights reserved.
January 2015
8