1
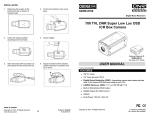
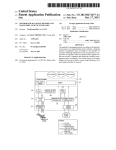
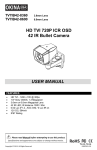
HD21T-K10 HD21T-K4 International Patent Registered: PCT/KR2011/007613 & 7656 & 8080 HD SDI 1080p Optical Zoom & Auto Focus Box Camera USER MANUAL Auto ZF Camera ̶ Made in Korea Auto ZF Lens ̶ Made in Korea 4x/10x Various Auto DC IRIS Twin stepping Motorized Varifocal Lens with Dual Filter change mechanism F1.4 FEATURES • • • • • • • • • SDI 1080p - 1920 x 1080 1/3" Panasonic CMOS HD21T-K10: Auto IRIS Twin Stepping Motorized Lens - 10X Zoom - 5~50mm HD21T-K4: Auto IRIS Twin Stepping Motorized Lens - 4X Zoom - 2.8~12mm 0.03 Lux @ F1.4 Mechanical IR Cut Filter - ICR OSD and RS485 520mA max. Dual Power 12V DC / 24V AC Due to the Twin Motorized AF Lens, we recommend to use 12V DC 1A / 1000mA for each camera. Copyright © 2013. All Rights Reserved. HDC-1_HDC-2 R201310-V22 Please read the Manual before attempting to use this product. Specifications and appearance are subject to change without notice. Disposal of Old Electrical & Electronic Equipment (Applicable in the European Union and other European countries with separate collection systems). This symbol on the product or on its packaging indicates that this product shall not be treated as household waste. Instead it shall be handed over to the applicable collection point for the recycling of electrical and electronic equipment. By ensuring this product is disposed of correctly, you will help prevent potential negative consequences for the environment and human health, which could otherwise be caused by inappropriate waste handling of this product. The recycling of materials will help to conserve natural resources. For more detailed information about recycling of this product, please contact your local city office, your household waste disposal service or the shop where you purchased the product. CAUTION 1. Never point the camera toward the sun Do not expose the lens directly to the sun or to strong light as this may damage the pick-up device. 2. Handle this camera with care Avoid any shock or bumping of the camera. Improper handling could damage the camera. 3. Requires a proper operating environment This camera is designed for indoor use. The allowable temperature range for operation of this camera is between -4°F ~ 144°F / -20°C ~ 60°C. 4. Clean the front face or lens It is recommended that the surface be cleaned every 3~6 months. Cleaning should be done by using a chamois, a very fine soft cloth, lens tissue, or cotton tipped applicator and ethanol to carefully remove any fingerprint or dust. 5. Check the power source voltage The power source voltage should be within the specified range. (Camera must meet the specifications). Camera must be connected to a surge protector at all times. 6. Objects and liquid entry Never push objects of any kind into this camera as this may touch dangerous voltage points of short out parts that could result in a fire or electric shock. Never spill any kind of liquid on the video product. 2 7. Servicing Do not attempt to service this video product by yourself as opening or removing covers may expose you to dangerous voltage or other hazards. Refer all service to qualified servicing personnel. 8. Damage requiring service Unplug this video product from the wall outlet and refer service to qualified servicing personnel under the following conditions: a. When the power supply cord or plug is damaged. b. If liquid has been spilled, or objects have fallen into the video product. c. If the video product has been exposed to rain or water. d. If the video product has been dropped or the cabinet has been damaged. e. When the video product exhibits a distinct change in performance. LIMITED WARRANTY OKINA USA products are covered under warranty for three (3) years from the date of purchase. The warranty will automatically be voided if any of the following occurs: 1. Camera sticker is removed If the camera sticker is removed, we will not be able to confirm any information regarding when and where the product was purchased. We have no other way to verify the purchase record without the serial number on the camera sticker; therefore, it should not be removed. 2. Camera is modified in any way If the camera is scratched, damaged, or modified in a manner not described in this manual, the warranty will be voided immediately. It is the customer’s responsibility to keep the camera in good condition. 3. Video or power cable is cut The video cable and the power cable should not be tampered with. Cutting or modifying of the cables will result in termination of the warranty. PACKAGE CONTENTS 1. 2. 3. One (1) HD21T-K10 / HD21T-K4 Camera One (1) Power Cord One (1) User Manual * For any returns, please include all components listed above with original packaging in Resalable Condition. Absolutely No Returns will be accepted if any component is missing/damaged. 3 DIMENSIONS (Unit: inches / mm) 12V DC 24V AC PARTS AND FUNCTIONS OSD Control Mode Label Function Name MENU OSD Menu & Enter Button (Press 3 second) Up Down Left Right Power Light BNC-FE Video Output 12V DC / 24V AC Power Connector + 12V DC / 24V AC - GND RS-485 Connector PELCO D 9600bps connection Five Direction Joystick Key Control for OSD/LENS Mode LENS (AF) Control Mode – Zoom & Focus Label Function Name MENU Quick Auto Focus Button (Press 1 second) Zoom-In (Tele) Zoom-Out (Wide) Focus-In (Near) Focus-Out (Far) 4 HARDWARE RS485 WITH PTZ KEYBOARD SETUP Default protocol is Pelco-D and default baud rate is 9600 for RS485 communication between camera and PTZ controller. NOTE: It is highly recommended that you run an additional cable for your RS485 communication from your camera. Some models may have RS485 setting in menu. Please leave RS485 baud rate setting at 38400. OSD OPERATION OSD Main Menu The menu consists of a main menu and sub-menu. Each menu has a total of seven sub-menus of the camera functions. Each sub-menu, the sub menu back to the primary and secondary and tertiary sub-menu consists of ENTER through the key mark from the primary to the secondary can be moved to the third sub-menu. 1. LENS: Lens Mode Setting 1. VIDEO: VIDEO IRIS LENS drive is used. 2. MANUAL: MANUAL IRIS LENS mode when you apply FIXED TYPE lens, it can used, 2.1mm ~ 50mm lens can be applied to a variety of lens. 3. DC: AUTO DC IRIS lens, if applicable, DC IRIS MOTOR driven by the Open the aperture is closed. Indoor mode (INDOOR) and outdoor (OUTDOOR) In the sub-modes can be adjusted. 2. LENS: Lens Mode Setting 1. SHUTTER: AUTO, MANUAL is set to a. AUTO b. 1/30(25);1/60(50); 1/120(100); 1/240; 1/500; 1/1000; 1/2000; 1/5000; 1/10000; 1/50000 c. DSS Mode conversion: DSS (Digital Slow Shutter) to set the value: x2, x4, x6, x8, x10, x15, x20, x30, x60 5 2. AGC (Auto Gain Control): -0 ~ 16 *Day / night brightness, clarity and improved noise rise is closely related to the one using it, will demand attention. 3. SENSE-UP: a. AUTO b. MANUAL: - X2, x4, x6, x8, x10, x15, x20, x30, x60. 4. BRIGHTNESS (brightness): - 0 (dark) to 100 (bright) 5. WDR (Wide Dynamic Range): Set the backlight compensation function Broadband a. OFF, b. LOW, c. MIDDLE, d. HIGH *Indicates the degree of exposure of the shutter. The higher the value, the better the show listings, shadow appears relatively darker. *When WDR is ON, the function of DEFOG will be unable. 6. BACKLIGHT (Back Light Compensation): Backlight compensation function and high-brightness backlight reverse function a. OFF: Turn off the backlight compensation function. b. BLC: BLC function is being used. c. HSBLC: black against the brightness of the light is reversed. *HSBLC used in the vehicle identification number plate is a function of. 3. WHITE BAL: White Balance Setting White balance can be manually or automatically adjusted to fit environmental lighting, e.g., matching the light source of white object caught in sunlight to color balance in the camera. 1. MANUAL: (Fig. 3.2) Adjust the white balance manually. The manual mode enables finer adjustment. "RED GAIN" and "BLUE GAIN" can be adjusted to increase or decrease the desired concentration: a. RED GAIN: Adjusts the red value (0-100 levels). b. BLUE GAIN: Adjusts the blue value (0-100 levels). 6 2. ATW (Auto Tracking White balance): Solar and other sources automatically adjust the white balance. Used to set current lighting environment and the most appropriate white balance to the light source in order to obtain the status by pressing the ENTER button once will temporarily adjust. *When the environment changes, it will readjust it. INDOOR: Indoor lighting is used (± 3700° K). OUTDOOR: Used in outdoor environments (± 5100° K). 4. DAY & NIGHT: Day & Night Mode Setting 1. D&N AUTO Mode: (Fig. 4.1) a. DELAY: 0 ~ 255Second. Fast conversion time, you can adjust slowly. b. D-> N (AGC): 0 ~ 100 *AGC value is based on the color mode (weeks) in the black-and-white mode (night) to adjust the time of the conversion. c. N-> D (AGC): 0 ~ 100 *AGC value is based on the black-and-white mode (night) in the color mode (weeks) to adjust the time of the conversion. *Change the reference level in the daytime and night-night in the week that changes the thickness of the reference level adjustable one, if the value is too small hunting (screen flicker) do occur, please be careful. 2. B/W Mode: (Fig. 4.2) a. BURST: OFF or ON. Color signal to noise generated by switching to black and white mode to full function is used b. IR SMART: OFF or ON. IR LED lights up at night or, if the object is close to the front of the camera, IR LED to increase visibility for yourself is to adjust the brightness. LEVEL 15 steps and AREA (area) can be set. 3. EXT Mode: (Fig. 4.3) External input to the value of the amount of light control sensor day & night conversion is performed. *The case of an infrared camera, EXT mode is set by default. 7 4. COLOR Mode: (Fig. 4.3) Color (weeks) only mode is fixed. 5. NR: Digital Noise Reduction Feature Setting 1. 3DNR, three-dimensional digital noise on the screen (3D image) compression that reduces the noise significantly functions: a. ON: (Fig. 5.2) i. S-LEVEL: Indicates where to Start the 3DNR. ii. E-LEVEL: Indicates where to End the 3DNR. b. OFF: Turn off the function. 2. LEVEL: Increase the level of noise reduction. *DNR LEVEL increasing, powerful noise reduction performed by the first, so the camera's resolution is to take off. 3. SMART NR: Intelligent Noise Reduction a. ON: Autumnally reduce noise when a person or object is motion. b. OFF: Function off. *DNR feature on-screen Functionality first performed to remove noise, so the camera's resolution is closely related to the decrease in the LEVEL control. 6. SPECIAL: Special Feature Setting 1. CAM TITTLE, the name of the camera: a. ON: A keyboard layout will pop up in order to edit the name. b. OFF: Turn off this function. 2. D-EFFECT: (Fig. 6.2) a. FREEZE: Freeze Frame function can be selected. b. MIRROR: REVERSE mode. i. OFF: Turn off function. ii. V-FLIP: H: vertical (up and down the screen can be reversed). V: right (screen left and right can be reversed). iii. ROTATE: FLIP & ROTATE: up and down and side to side (the screen up and down, side to side, and can be rotated reverse). 8 c. d. D-ZOOM: x2 ~ 32x digital zoom. NEG.IMAGE: Inverts the negative image contrast screen offers. 3. MOTION: If motion is detected, objects on screen will move. a. OFF: Turn off function. b. ON: (Fig. 6.3) Select motion detection functions. i. SELECT: Set up AREA 1 ~ 3. ii. DISPLAY: Motion detection to adjust the position and size of the area. iii. SENSITIVITY: Subtle movements to adjust the sensitivity to detect motion (0 – 60 steps) and the more steps, the sensitivity. *If the movement of the object is divided into multiple zones, the smaller the value. And if movement of several objects is contained in one area, the larger the value. iv. MOTION VIEW: A moving object image into a mosaic shows. v. DEFAULT: Restore to the previous setting. 4. PRIVACY: Mask off certain areas on the screen. a. OFF: Turn off function. b. ON: (Fig. 6.4) Select motion detection functions. i. SELECT: Set up AREA 1 ~ 8. ii. DISPLAY: The location and size of the masked area can be adjusted. iii. COLOR: Select a color masking. (1 – 6 colors) iv. DEFAULT: Restore to the previous setting. 5. LANGUAGE (Fig. 6.1): Select different language. ENG, b. JPN, c.CHN1, d.CHN2 6. DEFECT: CMOS sensor caused by heat or other harmful frequencies on the screen. Defective pixels (black dots or white point) to calibrate. a. Selected: (Fig. 6.5) i. LIVE DPC: 60 steps can be set to the regular calibration. *Adjust the level by set to ON, and the LEVEL adjustment will show 9 ii. iii. 7. up on the next line. STATIC DPC: 60 steps can be set up & cover the front of the lens, etc. Close the light so that the effects of bad pixels on the entire screen section disappear. *Adjust the level by set to ON, and the LEVEL adjustment will show up on the next line. SENSE-UP: select the calibration settings are available under each step. RS485: communication camera ID can be set to 0-255. *For all the Auto ZF Cameras the PELCO 'D' 9600bps fixed PROTOCOL is supported. a. Selected: (Fig. 6.6) i. CAMERA ID: can be set to 0-255 ii. ID DISPLAY: the camera ID of 485 communications. iii. BAUDRATE: communication speed of 485 communication. * For all the Auto ZF Cameras with the BAUDRATE 38400 is fixed, this is because the camera's internal communication and relationship changes randomly, RS485 communication is not. To close Auto ZF Cameras, please do not change the BAUDRATE. 7. ADJUST: Screen Adjustment Function 1. SHARPNESS: display precision (Sharpness) 0 ~ 100 steps to adjust the level. a. Selected: i. RESOLUTION: ON / OFF at the same time, the resolution will augment. 2. MONITOR: select the type of vide o output device-optimized video monitoring of the environment provided. a. LCD: gamma level (GAMMA) and blue (BLUE GAIN) and red (RED GAIN) to 100 steps each can be adjusted. b. CRT: Black Level (BLACK) and blue (BLUE GAIN) and red (RED GAIN) to 100 steps each can be adjusted. 3. LSC: adjust digital Keystone Correction. a. OFF: Turn off this function. b. ON: digital Keystone Correction function is selected, and an optimized digital image to automatically adjust the amount of light that is optimized for video. 4. NTSC / PAL: select CVBS additional video connection, TV. 10 8. RESET: Factory Reset Function FACTORY: The factory, set to default values to initialize the set of all modes. TROUBLE SHOOTING If there are failures, check below for possible solutions. If abnormality persists, please contact us. Product Status and Action: If the camera does not function properly: Connect the power of the camera, and wait until the boot is complete The screen flashes the boot is complete, ready to use condition. Nothing appears on the screen: Please confirm the power is connected. Please confirm the video signal line is connected. The screen is dim: Clean, wipe the lens with a cloth or brush. The screen is exposed to too strong light; change the camera angle or the position. The screen is dark: Please adjust the contrast of your monitor. Check that the system is properly terminated. When used with other equipment, 75 Ω / Hi-z terminals, please confirm the exact match. Align-Brightness levels. Motion Detection function does not work: Check if the motion detection function is enabled. Check if the motion detection sensitivity is set too low. WDR function does not work: Check if the level is set too low. AE mode is set to Manual. Check if the WDR standing is not working in the AE manual mode. Color is not correct: Check if the camera facing sunlight or fluorescent light. 11 Day & Night function does not work: Check if it is auto set to another mode. DAY-> NIGHT, NIGHT-> DAY LEVEL to adjust the value looks. If the camera cannot auto focus: When the camera points at a direction where it detects two distances, it will keep tracking to correct the focusing for objects over 40% of the image area. Check the camera angle and adjust angle until camera is able to focus. Example: Distance #1 Distance #2 12 SPECIFICATION Model HD21T-K10 HD21T-K4 1/3" Panasonic 2.2 Megapixel WDR (Wide Dynamic Range) Image Sensor Format CMOS - ACCE Technology Total Pixels Max.1920 x 1080 (1080p FULL HD) Horizontal Resolution 2.1 Megapixel (1920 x 1080) Synchronizing system Internal/Line Lock (Selectable by OSD) Scanning system Progressive Scan - Non-Interlaced BT.656/BT.1120/YC16bits/Max.1920 x 1080@30p/1920 x Video output 1080@60i/1280 x 720@60p/CVBS 1.0Vp-p Composite S/N ratio More than 58dB (AGC Off / F1.0) 0.03Lux/F1.4 Min. Illumination (IR LED Off) True Day & Night Function (Selectable by OSD) BLC (Back Light Compensation) WDR / Wide Range BLC, Automatic ( Selectable On/Off by OSD) Shutter Speed NTSC : 1/60∼1/120,000 sec PAL : 1/50∼1/120,000 sec 1800°K ∼12,500°K Auto Tracing / Auto White Balance White Balance (Selectable by OSD) Gain Control 4dB~35dB Auto (ON/Off) / SMEAR Effect : 0.005% MTTF 80,000 hours or more SENS-UP AUTO / FIXED / OFF (Selectable Limit : 2x ~ 256x) 3D-DNR (Digital Noise Reduction) OFF / ON (1~32 level Adjustable / Max. 128x - 2D+3D DNR) 5~50mm 2.8~12mm ZOOM Lens Spec. TWIN Motorized AF Lens TWIN Motorized AF Lens Optical 10X + Digital 10X = Optical 4X + Digital 10X = ZOOM Magnification Total 100X Total 40X Lens Angle Of View 64.2° ~ 6.9° 124.2° ~ 31.8° Day & Night AUTO (True Day & Night with Dual IR Filter Change) / Performance OFF / B&W / EXT (Dwell Time Adjustable AUTO IRIS & Dual Motorized AUTOMATIC ELECTRONIC IRIS Control Filter Change (AUTO DC IRIS) / Dual IR Filter change Mechanism Power source Dual Power 12V DC / 24V AC Power Consumption 520mA max. Operation Temperature -4°F ~ 144°F / -20°C ~ 60°C Storage Humidity RH 80% or less 4.27”(L) x 2.28”(W) x 2.28”(H) Dimension 108.4mm(L) x 58mm(W) x 58mm(H) Net Weight 0.35 lbs / 159g NOTE: PAL version also available. * Specifications are subject to change without notice. 13 RELATED PRODUCTS HD SDI 1080p Optical Zoom & Auto Focus 36 IR LED Vandal Dome Camera HD21VDX36-K10 HD21VDX36-K4 HD SDI 1080p Optical Zoom & Auto Focus 36 IR LED Indoor Dome Camera HD21DX36-K10 HD21DX36-K4 HD SDI 1080p Optical Zoom & Auto Focus 36 IR LED Bullet Camera HD21B36-K10 HD21B36-K4 HD SDI 1080p Optical Zoom & Auto Focus 54 IR LED Bullet Camera HD21B54-K10 14 15 www.okinausa.com MADE IN KOREA Copyright © 2013. All Rights Reserved. www.okinausa.com 16 HDC-1_HDC-2 R201310-V22