1
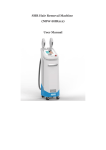
Three handles IPL machine (NBW-I323) User Manul 1 Table of Content Table of Content 1. System Overview………………………………………………………………………………...… 1 1.1 System Introduction………………………………………………………………… 1 1.2 Operation Introduction……………………………………………………………… 1 2 . S a f e ty … … … … … … … … …… … … … … … … … …… … … … … … … … … … … … … … 1 2.1 Electrical and Mechanical safety…………………………………………………………… 1 2.2 Movement and Transportation safety…………………………………………………… 2 2.3 Optical safety……………………………………………………………………………… 2 2.4 Warnings…………………………………………………………………………………… 2 3. System Description………………………………………………………………… 3 3.1 Main S tructure ..………… .………… ………… ………………………………… … 3 3.2 Components Description…………………………………………………………… 4 4. Installation & Commissioning……………………………………………………… 6 4.1 Installation ………………………………………………………………………………… 6 4.2 Commissioning…………………………………………………………………………………… 1 2 5. Technical Parameters………………………………………………………………………… 18 5.1 Technical Parameters……………………………………………………………………… 18 5.2 Relevant requirements………………………………………………………………………19 6. OperationPrecedures…………………………………………………………………………19 6.1 Skin test………………………………………………………………………………………20 6.2 Treatment course……………………………………………………………………………… 21 6.3 Attentions……………………………………………………………………………………… 21 6.4 Power off……………………………………………………………………… 22 7. Treatment Principle and Features………………………………………… 22 7.1 Treatment Principle……………………………………………………………………………22 7.2 Features………..……………………………………………………………………… 23 8. Indications and Contraindications……………………………………………… 24 8.1 Indications…………………………………………………………………………………… 24 8.2 Contra-indications………………………………………………………………………… 24 9. Post-treatment Care………………………………………………………………… 24 10. Maintenance and troubleshooting………………………………………… 25 10.1 Cleaning the unit………………………………………………………………………… 25 10.2 Cleaning the crystal…………………………………………………………………… 25 10.3 Troubleshooting solution…………………………………………………………………25 10.4 Trouble shooting………………………………………………………………………… 25 10.5 Error information………………………………………………………………………… 26 10.6 The cooling system maintenance………………………….………………………… 27 1 10.7 Touch Screen Calibration…………………………….……………………… 27 11. Contact us……………………………………………………………………………...27 2 Chapter 1 System Overview Thanks for your purchasing NBW-I323 Intense Pulse hair removal machine! Believe that the machine can give you a believable, reliable function and satisfied repay. This is the introduction of NBW-I323 machine in this chapter. Note: The person operating or keeping it must read this manual carefully before using. 1-1 System Introduction Name: Intense pulse hair removal machine, skin rejuvenation, vascular removal,spot, skin Whitening, hair removal etc. The treatment theory is the selective absorption effect. The system is controlled by MCU. It is composed of mainframe, touch screen, handles. Operation and controlling part is in the mainframe. The controller in it can monitor the machine comtinuously. Controlling system: TFT touch screen, key switch and emergency stop etc Power source: Supply the voltage(the core part of the machine) Waterway: Help the treatment handle cooling Power warehouse : store and release voltage Screen: Display and adjust working mode and parameter Treatment handle: Xenon, crystal, switch and transfer tools 1-2 operation Introduction Surplus for limbs all over the body such as the torso armpit hair removal Changes of aging skin The treatment of pigment pathological changes Chapter 2 Safety 2.1. Electrical and mechanical safety Considerable thought was given during the design and producing of the system, to minimize the hazard for both operator and clientele. 1 The system requires 220 V, single-phase power source, the strongest output Current is not beyond 10A. On the maintenance panel, Automatic electric leakage was installed, when electric is leaking, it will protect the system. Open the machine again, you need raise up electric leakage device. Dangerous voltage presents inside the console during course of the treatment. After turning off the system, dangerous voltage still left. Removing the covers creates a safety hazard. 2.2 Movement and Transportation safety The unit contains delicate components and no allowance of long transportation after first installation and adjustment. During the movement, the shock-absorbing package originated from the manufacturer must be used. Otherwise it might cause adverse effect to the system. 2.3 Optical safety Intense pulse light with wavelength of 420-1200nm sourced from the system, can create safety hazard. All personnel including clientele in the treatment room must wear protective glasses whenever the unit is in use Intense pulse light emission presents an eye hazard. Take all necessary precautions in areas where the system is being used. Never permit reflective objects such as jewelry, mirrors and watches to reflect the intense pulse light. Never look directly at the intense pulse light emitted from the treatment handle, even when wearing the protective glasses. Never direct the intense pulse light at any skin except the test patch and the target area 2.4 Warnings Allow access to the treatment room only to those essential to the procedure and well trained in the required safety procedures. Make sure that all treatment room staffs are familiar with the system’s control and know how to shut down the system instantly. Clear identify that no igniting combustible materials present in and around the treatment area. Make sure the caution signs are posted in a prominent place of the treatment room. 2 Chapter 3: System Description 3-1 Main Structure SR handle HR handle VR handle Touch screen Key switch Emergency stop Handle pull 3 VR connection HR connection SR connection Protection switch Power line Filler Water level observation window 水位观察窗 outlet Vents The structure is shown above: touch screen, emergency stop, key switch, treatment handles etc. 3-2 Component Description Touch screen: show and adjust the info of operation system Emergency stop: Close the power source when urgent thing happened Key switch: open or close the machine Handle pull: carry the machine 4 Main engine: cooling system, power supply, controlling system, integrated circuit etc. HR handle: changeable, painless, remove all kinds of hair SR handle: changeable, skin rejuvenation, skin tightening VR handle: changeable, vascular removal Filler: add pure water into the machine Water level observation window: monitor the water yield Vents: adding/drawing off the water, open it, then you can add water. Outlet : let out the water Power line connection: connecting the power line, change fuse Protection switch: protect the safety of the machine HR Connection: install HR handle SR Connection:install SR handle VR Connection:install VR handle 5 Chapter 4 Installation and Commissioning 4-1, installation The system can be installed in hospitals, medical clinics and beauty salons, little preparation is needed before installation. When you purchase our company's instruments, you can enjoy our free onsite installation and commissioning services. The system should be installed and commissioned by professional and technical personnel authorized by our company. Installation work includes: 4-1-1, check equipment list: Equipment lists: Mainframe (1) Hr treatment handle (1) SR treatment handle (1) VR treatment handle (1) Switch key (2) Protective glasses (1) Power cord (1) Rubber ring (4) Spare fuse (2) Package box (1) Water funnel (1) 6 4-1-2, Be familiar with the installation requirements: 4-1-2, Be familiar with the installation requirements: Before unpacking the Instrument, you should check whether the accessories are complete, the installation location meets the requirements of this section. The system should be installed away from heat vents and keep an appropriate distance from other objects, the temperature should keep about 20 ℃. The instrument is preset the rated voltage of the installation place before delivery according to the user's requirements. The corresponding electrical equipment requirements are as follows: Single phase 220V ±10%, 10A 50Hz/110v ±10% The equipment lands the ground through the ground wire of the power sheath, passing the wall line. Good ground connection is essential for safe operation. The input voltage can not have transients, voltage and current spikes, collapse or surge. To ensure that the system is in the best condition, the room temperature should be maintained at about 20 ℃, relative humidity should not exceed 80% .The thermal power of the system is about 200W during work, so it’s the best if the treatment rooms are air-conditioned. Do not allow the instrument being irradiated by prolonged direct sunlight, nor being placed near a heater. 4-1-3 installation steps 1) Carefully open the package of the machine, place the machine in a preselected position 7 2) Take out the handle bracket, and install it in the corresponding position, check whether the connection is good or not, shown as below picture, Note: intall the handles first, and then adding water. 3) Plug in the power cord . 8 4)Insert the switch key and the Chassis key. 5) Fulfill water A First prepare 8 liters distilled or purified water. Running water or mineral water is not allowed. B Unscrew the waterinlet of the machine. C Unscrew the overflow(vents) at he back of the machine. You can fill in water only when the overflow(vents) is open. 9 D. Fill in water with the water funnel delivered along with the machine. E. Fill in water until the overflow(vents) overflows, shows the water is enough. You can also observe by the water level viewing window. 10 F. Do not tighten the overflow mouth at first, please wait until the machine finish debugging, then tighten the overflow mouth. The inside of the machine is a closed water loop, if tighten overflow mouth at first, there will be air inside the water tank,which will make water do not circulate, cause machine failure. After the above water filling steps, please start power and commission. Note: Please install the treatment handles as shown below. Press the Spring as the arrow pointed in order to avoid the rubber ring leaking water. During the use, dragging the handle is strictly prohibited. 11 intall the handle Don’t intall the handle 4-2 Commissioning 1) Make sure the emergency shut-off knob is Upward bounce. Turn right the key clockwise to start the system, then the system starts to work. (you can hear the sound of water circulating if normal ) The touch play screen shows as following (picture 1): Pic 1 Pic 1 shows the initialization process of the machine, please check whether the the 12 connecting place between the machine and treatment handles is leaking or not. If there is water leakage, stop the commissioning of the machine immediately. Take off the treatment handles, check whether the rubber ring inside the handle joint is good or not. If broken, please replace a new one. Note 1: Make sure the handle in place before commissioning. Plug out handles is strictly prohibited during treatment. Note 2: Make sure the red emergency stop button is up, or the machine can not supply power. 2) 、The system will enter language select interface after initialization, shown as Picture 2, Pic 2 3)、Please press the pic on this interface, then the system will go into the operation interface, shown as pic 3. Note: When water circulation has problems, the system will alarm, "Error 1" will appear, which shows the water circulation is not smooth or little, and the equipment can not work normally. The pic in the operation interface show the actual flow size, if it is "0." It means that the water 13 circulation is not smooth at all. If the working temperature is higher than the set temperature alarm (set alarm temperature is 60 ℃), the system will also alarm, "Error 2" will appear, indicating the temperature is too high, not suitable for treatment. Pic 3 The picture 3 is operation interface, show the runing state and parameters(including working model,water flow, energy, pulse quatity, and pulse width), also can set the system running parameters, change system running state. The client can set the parameters as following: Function select: 4 kinds of functions(HR, SH, VR, PR), click the corresponding function, the system will go into the related function, and do treatment. The operator can also adjust corresponding parameters according to actual situation, and save. Reaching to better result. Energy adjust: click the adjust botton increase, the down arrow representative decrease. he up arrow representative this botton shows Energy adjust, the adjusting rage is 10-60J/cm2. 14 Width parameters asjust: this botton is parameter display areas.The functions as belowing: :pulse output quatity.(1~15) :output first width.(1~30ms) :output first delay.(5~50ms) :output second width.(1~30ms) :output second delay.(5~50ms) Please choose corresponding function buttons above, adjust the output parameter through button Set parameters: Press the set button in the operation interface, then goes into the parameter set interface. Shown as Pic 4. Pic 4 This interface is “adjustment of the same pulse width”. The button is water flow regulation. The set range is 5-10. 15 There will be “ERROR 1” appearing if the actual water flow is less than the set amount. Note: Please do not adjust the Water flow alarm value. Press button to save the changed parameters and get back to the previous interface. Press button not to save the changed parameters, get back to the previous interface directly. Counting display : refer counting display button, the “Total Couner” is for the total count, “Clear” is for single count. Press “Clear” can clear the single count. System information display : referes system informationbutton, used to show all warning information. Including: ERROR 1 !!!: Water circulation has problems ERROR 2 !!!:Precombustion fails.(you need cancel the Precombustion and Precombustion again ) ERROR 3 !!!: Charging of the machine is not finished ERROR 4 !!!: Water temperature is overheat, not suitable for further treatment. 16 The system status display: from left to right, they are water flow button, water temperature alarm button, precombustion button. Water flow button: use to show the size of the flow of water in real time. Water temperature alarm button: hen the temperature of water is too high, the icon will be red 1 !!!” ,while the system will display “ERROR Precombustion button: when you click precombustion button, will appear when the Xenon lamp precombusting successfully. Charging complete button:after the Xenon lamp precombuste successfully, the machine is charging, while finish charging, you will see this the button . Start working: After you set the right treatment parameters, press the button to be . When the machine finishes precombusting and charging, the button you will see is , then the system enters the treatment status. At this time you can not change the parameters, press the trigger button on the treatment handle, the corresponding handle will flashes according to the set parameter and the buzzer will beep. The total count and single count will be increased on the screen. When you release the trigger button, the flashes will stop. Press the button to be , the system will enter standby status, when you can modify the treatment parameters if you need. 17 Note: If the machine is not flashing, prohibit staying in the working state for a long time. Shut down: when the treatment is completed, click button , the system will return to the initial interface, then turn off the key switch is OK. Note: Do not force the machine shut down during working. Chapter 5 Technical Parameters 5-1 Technical specifications This system has multi-pulse and multi-wavelength, its technical specifications is: Laser Type Intense Pulse light Wavelength 560-1200 nm,690-1200nm,420-1200nm Output mode Pulsed Control mode Touch Transmission Crystal light system Safety class Class I type B Screen size 8.0 inch Energy Density 10-60J/cm2 (≤±2%) Pulse width 1-30ms Spot size 8*34mm(SR/VR) 16*57(HR) (≤0.2mm) Repetition Rate ≤1P/3S Crystal 0-30℃ temperature Cooling system Semi-conductor+water+Air Dimension 50*40*121cm Net weight About 47kg Fuse Ø5×20 15A 18 Input power 1800W Power supply AC220V±10% 15A 50-60HZ , 110v±10%25A50-60HZ 5-2 Relevant Requirements Running environment of this system: Environmental temperature:10℃~30℃ Relative humidity: no more than 80% Storage environment of this system: Environmental temperature:0℃~40℃ Relative humidity: no more than 80% Chapter 6 Operating Procedures Before receiving treatment, a low energy skin test should be done first. After selecting the appropriate energy, covering the treatment area with a thin layer of gel, and then making the treatment handle work at the target area, pushing the button switch to do treatment repeatedly. The output frequency is generally 1p/3s. After treatment, it is better to build a treatment file for your clients to improve the effects during the following treatments. Pls note the working life of treatment handles: The standard working life of each treatment handle is about 2 years, or 50000 spots. When reach its standard working life, the treatment effects will be not so obvious, so we suggest a change of new treatment handles. Besides, the treatment handles that reached their standard working life will not be included in our guarantee. 19 6-1 Skin test Before receiving treatment, the client has to do a skin test. The content is as the following: 1) If do whole face treatment, pls choose ear root part as the test area. If it is chest, neck or other body areas, pls choose the parts that will not affect appearance as the test area. 2) When the testing area is chosen, pls clean it and cover a thin layer of gel, and then make the treatment handle fully touch the testing area, shooting 2-3 light spots. 1/3 light spots overlap is acceptably. After2-3 minutes, pls observe the testing area. If a slight redness could be seen, it indicates that the used energy is suitable, and the operator could use this energy and parameter to do treatments for the client. If nothing happens on the testing area, it indicates a lower energy, and the operator should increase energy, 1-2J every time. If an excessive redness occurs immediately, it indicates a super high energy and the operator should reduce the energy. 3) If doing hair removal, a cut of hair to 1-2mm is a first thing, and then clean the target area. Shooting the treatment area with trial light spots, if a slight redness and a burning of the hair on the whole area occur, it indicates the energy is suitable; if no redness and a burning of the hair on the part area occur, it indicates the energy is low and the operator should enhance energy. Generally, the energy of trial light spots starts from 15J/cm2. Reference paramters I-II II-III III-IV Treatment Interval white skin Yellow skin Brown times time 4-6 times 30 days skin H 25-35J/c 20-30J/cm 15-25J/cm R m2 2 2 20 SR VR 22-28J/c 20-25J/cm 18-25J/cm 3-5 times m2 2 2 25-30J/c 20-25J/cm 18-25J/cm 2-4 times m2 2 2 21 days 30 days Pulse reference set HR SR VR P_AMT P1 D1 P2 D2 2-4 6-9ms 10-20ms 7-10ms 10-20ms P_AMT P1 D1 P2 D2 2-4 2-6ms 12-18ms 3-7ms 12-18ms P_AMT P1 D1 P2 D2 1-3 3-7ms 10-20ms 4-8ms 20ms Notes: It is not suggested to do treatments on the hair whose color is lighter than the surrounding skin. 6-2 Treatment course 1、 It is suggested to do 4-6 courses, every 28 days a course according to hair growth cycle and different treatment areas. 2、 After a month, the patients can provide their feedback to the clinics. If needed, a second treatment could be done to achieve better results. Notes:After the hair is removed, it will have some burning sensation within 3 hours. But, pls do not worry. It does not need any special care, generally it will disappear after 3 hours. 6-3 Attentions 1) Completely protect the client’s eyes when doing treatment 2) When doing treatment, pls starts from the thicker skin and then extends to the surrounding. 3) A second scan on the lesion area is acceptable. 21 4) It’s better to avoid eyelashes, and do not repeat the light spots when treat forehead 5) When doing treatment, pls touch the treatment area tightly, but avoid pressure on the area. 6) When doing treatment, the light spots should be continuous. 1/3 overlap is acceptable. 7) It is allowed to change the direction of treatment handle to achieve full treatment. 8) For darker skin, D1 and D2 should be lengthened appropriately 9) For whiter skin, D1 and D2 should be shortened appropriately 6-4 Power off Put the treatment handle back to its place Push the button “Ready” to “Standby”, turning off the handle light Turn the key switch to “OFF” Clean the light guide crystal with cotton or soft cloth Chapter 7 Treatment principle and features 7-1 Treatment principle The Intense Pulse light delivered by I323 can penetrate into deep skin, and take effects on the targeted tissues. After an absorbtion of energy, the pigment cells will be broken and absorbed by the body gradually. When the blood vessels are exposed to intense light, the hemoglobin will selectively absorb the energy. The photo-thermal effect makes the blood vessels closed and then absorbed by the body gradually. The normal skin seldom absorbs the delivered energy, so the normal skin will not be hurt. The Intense Pulse light takes effects on pigments and blood vessels. Meanwhile, it can stimulate the proliferation of collagen and improve the rearrangement of elastic fiber, finally achieving the purpose of skin rejuvenation, wrinkles removal and pores shrinking Intense pulse light hair removal is different from laser hair removal. The delivered light is broad spectrum( 560-1200nm) intense pulse light. Its adjustable scope is wide, so it can do permanent hair removal to different colors and different depth of skin hair. Its principle is that the pigments in hair follicle and hair shaft has an selective absorption of light, and the photo-thermal effect will increase the temperature of 22 hair follicles, make the hair cells dead and achieve the effects of permanent hair removal. I323 has a breakthrough aiming at the common problem of burning skin. During treatment, each light spot is made of soft pulsed lights; the maximum pulse width is 20ms. The long pulse width ensures the treated area has a longer time to absorb the light and heat. Then a soft treatment can be achieved to improve the treatment effects and greatly reduce the skin burning, which can avoid the chromatosis and improve the treatment safety. I323 has 2 working principles: Biological stimulation: when the intense pulsed light applies to the skin, the produced photochemical effect can make a molecular structure chemical change inside the dermis collagen fibers and elastic fibers to restore its original elasticity. In addition, its photo-thermal effect can strengthen the function of blood vessels and improve its circulation so as to achieve the therapeutic effects of removing wrinkles and shrinking pores. Photo-thermal effect: The pigments group of the diseased tissue is much more than the normal tissues. Its temperature rise after a absorption of lights is higher than normal skin. Using the temperature difference between them to close diseased blood vessels and break down pigments without hurting normal tissues. I323 Treatment scopes Vascular disease:telangiectasias, reddening of skin and red nose caused by rosacea Pigmentary changes: freckles, skin spots, poikiloderma, sun damage and skin aging, pores, rough skin, lack of elasticity and acne. Improve facial skin aging, restore skin’s luster and elasticity and regain youth. This machine could be used to treat black spots and black eye, shorten the recovery time of laser resurfacing. This machine could do hair removal. This machine could treat face, neck, chest, hands and 4 limbs. 7-2 Features 1. IPL Hair removal is the less pain compared with all the other hair removal methods. Clinical cases indicates most patients just feel like they are been beating by a rubber band. 2. The advantage of IPL Hair removal is its permanent hair removal. Using the theory that Intense pulse light could penetrate into dermis and subcutaneous fatty tissue, take effects on the deep hair follicles of different areas to remove the hair on any area. 3. IPL Hair removal has the advantage of no injury to skin. 4. IPL Hair removal has the advantage that its pigmentation after hair removal is closing to our skin. 23 5. The long pulse adjustments of Ipl Hair removal can protect epidermis and remove thin and thick hairs. 6. Square large spot can remove hair quickly, and increase treatment speed. Chapter 8: Indications and contra-indications 8.1 Indications Pigment removal: Speckles, age spot, sun-induced freckles and all kind pigment sourced from cosmetics (most effective). Blood vessel removal : Red blood streak, bottlenose, erythematic spot and so on Anti-ageing: Wrinkles, acne scar, low skin elasticity, Trichopore and so on Hair removal on limbs, body, face and lips 8.2 Contra-indication Pregnant woman Using photosensitive medicine Recently tanned skin (within the last month) History of keloid scarring Diabetes, unless under control Cancer, particular skin cancer Heart disease, epilepsy Chapter 9: Post-treatment care 9.1 No exposure to sunlight Clients should use highest factor sunscreen and protect the treated area from exposure to sunlight, sunbed or other artificial tanning for one month following treatment. Tanning after treatment sessions may enhance melanin regeneration, which may result in hyper-pigmentation 9.2 Free from always touching and pressing Clients must do not press and scratch the treated area against infection. 9.3 Makeup Makeup immediately after the treatment is not allowed for better curative-effect, advising no use of makeup for four to five days following treatment. The skin is sensitive during this period. Remove the makeup when swelling and reddening appearing at the treated site against infection and pigmentation. In the mean time advise client take some medicine such as VitC, VitE. 9.4 Food Advising not eat the hot and spicy food because the skin is sensitive during this period. 24 9.5 Other Advise that improve other causes of disease, such as adjusting the endocrine situation by taking Chinese herb of medicine, taking few medicines that include VitC and Vit E. Caution: According to the normal physiological process, clients should take the next treatment 21 days later. The whole treatment needs 3-5 sessions. Due to physical difference between individuals, a few of clients may have temporary discomfort such as blister, deposit of pigment, swelling and so on. Advise you to use ice bag to cover the treated area for 30 minutes right after treatment. No make up in 5 days after treatment. Chapter 10 Maintenance and troubleshooting 10.1 Cleaning the unit Clean the system exterior at least once a week. Wipe all surfaces with soft, damp, non-abrasive cloth. Mild cleansing solution may be used. Not spill liquids in the unit. 10.2 Cleaning the crystal on hand piece The crystal on hand piece should be kept clean at all times and should be cleaned after each treatment. To clean the crystal on hand piece, first dry it with a lint-free cloth. Then clean it with a cloth moistened with water-free alcohol and let it dry thoroughly. 10.3 Changing of the cooling water Change the purified or distilled water once a month by outfall, you may find it at the down back of the unit. You may find 2 parts, one is blue, another is black, push the blue part with your left hand and pull the black part with your right hand, the black part will be taken off the unit, water out then. 10.4Troubleshooting The chart below shows some possible trouble and solution accordingly Problem Solution Check the power line loose or not Machine cannot open Check fuse If add enough water Check if the followed the order of adding water Water warning Handle working Add water mouth, release air inside but no Check water cycling 25 cooling Connector leak water Check rubber ring broken or not 1 check if you press Work Button on LCD Handle no flash 2, check if the counter work well, if counter not working, the handle button broken Check whether the power supply voltage is too low clean the crystal check if the energy you chose is too low Output energy weak check if the handle need to be changed Check if the setting protecting Temperature is too low(normal 35℃) Warning in shot time The environment temperature is too high For other problem, please contact us, please don’t open the machine yourself 10.5 Error information If the system malfunctions during start-up or normal operation, turn the system off immediately and contact with our service department. Only the technician authorized by our company can service the system. Otherwise, we bear no responsibility. 10-6 Replace the fuse wire: Turn off all power switch, unplug the power cord; open the fuse holder with a small flathead screwdriver, and then take the fuse wire in the fuse holder. Take out the spare (15A / 250V) fuse wire in the accessories sent to you along with the machine. 1 2 3 26 10-6 The cooling system maintenance Please check the fan regularly, fan damage will cause machines overheating, causing the machine doesn't work or even completely damaged. Regularly check the cooling water, if necessary, please add. 10-7 Touch Screen Calibration Turn on the machine without any operation, continue press the button on the handle 11 times, the LCD will appear blue. On the up left corner of the LCD you can find a write +, press the +, it will run to right, press + again, it will run to the bottom, press + 3times, then reopen the machine to finish it. Chapter 11 Contact Us Beijing Nubway S&T Co.Ltd Web: www.nubway.com Email: [email protected] Address: Room 805 No.12,Yabao Rd Chaoyang District Beijing 100020 China Tel: 010-10-5120-6522 Fax: 010-10-5120-6522 27