1
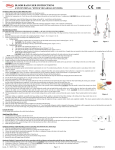
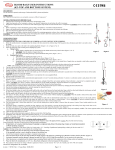
BLOOD BAGS USER INSTRUCTIONS (BLOOD BAG SYSTEMS WITH RBC FILTER) 1008 DESCRIPTION For Leukodepleted Red cells, Plasma and Platelet collection, separation and storage of human blood components. INDICATIONS See, “Guide to the preparation, use and quality assurance of Blood Components.” GENERAL PREPARATIONS BEFORE USAGE 1. Open the outer wrap at the tear notches and remove one blood bag system 2. Apply blood pressure cuff or tourniquet on donor’s arm, identify venipuncture site and release the cuff or tourniquet. 3. Disinfect the venipuncture site. Cover the area with sterilized gauze strip and do not touch until the time of venipuncture .CAUTION: Beware of iodine sensitive donors! 4. Before venipuncture, inspect the blood bag system; tubing, and needle for visual defects and discoloration 5. Signs on the needle protector and hub should be the in the same line. Apply some pressure to determine any leakages. 6. Place the collection bag below the level of donor's arm 7. The anticoagulant and additive solutions should be checked for containing appropriate volume, color or particule contaminants. CAUTION: While opening the blood bag system, blood taking tube should be held from needle protector not from the needle safety cover. Pay attention not to lock the needle safety cover before collection of blood by mistake. USER INSTRUCTIONS BLOOD COLLECTION: IF SAMPLING BAG SYSTEM IS USED FOLLOW NUMBER 1-4, IF NOT CONTINUE WITH NUMBER 5: 1. Before the needle protector is uncapped close the clamp on the line connected to collection bag. If the bag system has a breakaway part there is no need to close Figure 1 the clamp. 2. Break the break-away part on the tube to the sampling bag/holder. (Figure 1, No: 2, Figure 2, No: 3). Figure 2 3. Follow the following steps according to the sampling bag system: a. Tubing System i. Blood samples; sampling tubes are inserted into the tube holder and necessary blood is taken (Figure 1, No: 3). ii. CAUTION: Take the samples to bigger tubes first. iii. The clamp on the tubing to the bag is opened and blood taking starts. (Figure 1, No: 1) b. Sampling Bag System; i. Take blood to the sampling bag (Figure 2, No: 5), ii. The clamp on the tubing to the sampling bag is closed. (Figure 2, No: 2), iii. The clamp on the tubing to the bag is opened and blood taking starts. (Figure 2, No: 1) iv. Sampling bag is placed in palm in a position of sampling bag tube holder is to be stayed below. Sample tubes are inserted in tube holder connected to the sampling bag and sufficient blood sample is taken.(Figure 2, No:4) CAUTION: Sample blood in the sampling bag should immediately transferred to the tubes otherwise they get coagulated. NOTE: After sampling, break the breakaway part on the tubing to collection bag for the systems with donor line breakaway 4. The tube with the tube holder is hanged on to donor’s wrist in a way not to compress the needle, continue with number 9. 5. If the blod bag system does not have a sampling bag/samling port, put a temporary clamp or knot to blood taking tube. 6. Reapply tourniquet or inflate blood pressure cuff until previously selected vein is prominent again. 7. Hold the needle from marked side. To remove the needle cap, twist to break the seal between the needle and its cap and remove it by sliding it down the axis of the needle. CAUTION: Bu sure not to touch the cannula! 8. Apply the venipuncture immediately. Venipuncture is very important for a non-coagulated blood. 9. Strap the needle to the donor’s arm. 10. Mix blood and anticoagulant gently and periodically (approximately in every 45 seconds) during collection. If a mixer or a collection system is used, please refer to their operator’s manual. 11. Make sure there is continuous blood flow. If there is continuous, adequate blood flow and constant agitation, blood collection is expected to be completed under 12 minutes. CAUTION: If it s above 12 minutes, collected blood may not be suitable for Platelets, Fresh Frozen Plasma or Cryoprecipitate AHF. 12. Collect the quantity of blood within the limits indicated on the bag label. Monitor the blood being drawn. 13. After blood collection is finished, blood collection mixer collects the desired blood and stops the collection by clamping the blood collection tube. 14. Stop the blood taking and agitating device, and after opening the clamp of the device; 15. Loosen the tourniquet or deflate the pressure cuff. Figure 3 16. When blood taking is done, to remove the needle hold the hub with one hand between the thumb and index finger while the other hand holding the sterile gauze and pull the hub without exerting pressure completely. Let the donor keep sterile gauze on the point of entry of the needle into vein. 17. Hold the needle with one hand as the tip stay at the upper position; wait for flowing off the blood to bag in the blood taking tube 18. The clamp on the tube to the bag is closed after that step. Put a knot on the systems without sampling bag. CAUTION: When the needle is locked if the clamp is not closed there is a risk of blood flushing from the needle safety cover. 19. For the blood bag systems with needle safety cover, while holding the needle with one hand hold the needle safety cover with the other one, than leave the needle, pull the needle to the safety cover by pulling the tube under the safety cover and be sure that it is locked (Figure 3, No:6). CAUTION To prevent accidental injuries or contamination of the personnel, insert the needle into the locked system or throw it to the medical waste. 20. The blood taking tube is closed from under the Y port with tube sealing device and the needle is removed from the system. Caution: Throw locked needle kit to the Figure 4 medical waste. 21. Strip donor tubing as completely as possible into bag, starting at seal. Work quickly, to prevent the blood from clotting in the tubing. Invert bag several times to mix thoroughly; then allow tubing to refill with anticoagulated blood from the bag. Repeat this procedure twice. (Figure 4) 22. For cross match purposes, seal the tubing attached to the collection bag into segments leaving a segment number clearly and completely readable. The closest segment number to the collection bag should always remain attached to the bag for identification 23. Check the blood bag again for any faults. 24. Make sure all the donor information required is filled out on the label of the blood bag. 25. Immediately after collection, whole blood should be placed at 1-6 °C in a blood bank refrigerator which is designed for this purpose. If platelets will be separated, do not cool the blood but wait under 20-24 °C for a min. of 1 hour with 45 angle. For gaining fresh freezed plasma and platelets finish all the steps within 8 hours after collection. COMPONENT SEPARATION: CLASSICAL Triple Bag Sets:(Intended for PLT separation with PRP) 1. Load the full blood filled bag system in the centrifuge buckets. Caution: Proper positioning of the bags will prevent burst of the bags during centrifugation. 2. Centrifuge at 2500 g for 15 minutes under +22 C. Caution: Centrifuge settings may vary according to the centrifuge brand used. 3. Place the centrifuged bag to the blood component extractor. 4. Clamp all tubing except for the tubing of transfer bag used in plasma separation. Meanwhile put a clamp on the tube connected with filter to prevent leakages of plasma into filter. 5. Separate the plasma in accordance with the extractor operation manual.. 6. Break the break-off part at the opening of the bag by turning left and right (Figure 5) and transfer the plasma into the the transfer bag labelled 5. 7. The transfer bag labelled 5 contains plasma and the transfer bag connected to it are removed from the bag system. Check number 19 for continue with product gaining. Figure 5 8. Hook the SAG-M bag to filter hanger from a height of 150 cm (Figure 6). 9. Break the breakaway part at the output of SAG-M bag by turning left and right. (Figure 5) 10. SAG-M solution flows through the filter. 11. After SAG-M process is finished the tube is clamped under leukocyte filter with temporary clamp. CAUTION: Beware to put the clamp to the closest point of redcells bag. 12. Rinse the redcells bag before hang up. Caution: Rinsing the bag decreases filtration time. 13. Reverse the whole kit, hook redcell bag to the top and the SAG-M bag will be on the bottom. (Figure 7). 14. Unlock the temporary clamp. Redcells flow into the filter and leukocytes are filtered and they are collected in the SAG_M bag. kt_kk_5 - 58720 / Rev: 1 / Issue Date: 27.08.2014 Page 1 / 2 CAPA NO: 125/14 15. Caution: Be sure that the tube is flat to avoid remaining of air in the filter and to increase the filtration speed, pull the clamp at once.. 16. Filtration time is around 25 minutes at controlled room temperature. Caution: Do not use the product if the filtration time is less than 5 minutes! 17. After the procedure seal the tube under filter. 18. Samples for cross-match can be taken from tube of the bag. Invert bag several times to mix thoroughly; then allow tubing to refill with anticoagulated blood from the bag. Repeat this procedure twice (Figure 3). Closest segment to collection bag always remains with the bag for identifying. 19. Red cells should be placed into blood bank refrigerators under 1-6 C. 20. If PLTs will be separated, plasma is re-centrifuged at 3000 g for 10 mins. 21. After centrifuge, PLTs remain at the bottom, and plasma on the top of the bag. 22. Place the plasma bag to the blood component extractor, and unlock the clamp. 23. Transfer plasma to the empty transfer bag. 24. PLTs can be stored up to 5 days in incubator under agitation if they are transferred into the transfer bag from PVC (TOTM). 25. Store the plasma in the freeze. If the separation takes place within 6 hours after collection, it can be stored at -18°C/-25°C for 3 months, -30°C/-40°C for 6 months and at lower temperatures for 12 months. TOP&BOTTOM Triple and Quadruple Bag Sets (Intended for PLT separation by BC) 1. Place the bags into centrifuge bucket as the breakaway part stands on above. Caution: Place the filter into the housing. Proper positioning of the bags will prevent burst of the bags during centrifugation. 2. If the blood will be used as a whole blood, break the breakaway part on the main bag and transfer whole blood into 500 ml capacity transfer bag. 3. Centrifuge at 3500 g for 15 mins at 22° C. Caution: Centrifuge settings may vary according to the centrifuge brand used. 4. Place the centrifuged bag to the blood component extractor. If quadruple bag is used, seal the PLT bag’s tube. 5. Use the blood component separator according to it separator using manual. 6. Firstly, break the main bag’s breakaway part, then the transfer bags. (Figure 5) 7. Separator transfers plasma to the plasma bag, redcells to the transfer bag while keep Buffy-Coats remaining in the main bag. 8. When the procedure is done, seal transfer bags with plasma and redcells; than remove them from the kit. Figure 6 Figure 7 9. Store plasma as identified in number 24. 10. Hook the SAG-M bag to filter hanger from 150 cm high (Figure 6). 11. Break the breakaway part at the output of SAG-M bag by turning left and right (Figure 5 ). 12. SAG-M solution flows through the filter. 13. After SAG-M process is finished lock the tube under leukocyte filter with clamp. CAUTION: Beware to put the clamp to the closest point of redcells bag. 14. Rinse the redcells bag before hook up. Caution: Rinsing the bag decreases filtration time. 15. Reverse the whole kit, hook redcells to the top and leave the SAG-M bag on the bottom (Figure 7). 16. Unlock the temporary clamp. Redcells flow into the filter and leukocytes are filtered and they are collected in the SAG_M bag. Caution: Beware not to lose air, and a flat tube for increasing filtration, and lock the clamp at one time. 17. Filtration time is 25 mins in average at a room temperature. 18. Invert bag several times to mix thoroughly; then allow tubing to refill with anticoagulated blood from the bag. Repeat this procedure twice. (Figure 4) 19. If quadruple bag is used, lock main bag with BC with PLT clamp, rinse the bag and rest it for an hour. 20. Centrifuge main bag and 5T transfer bag at 500 g for 6 mins at 20°C. Caution: Centrifuge settings may vary according to the centrifuge brand used. 21. Separator transfer PLTs to the transfer bag. Caution: PLTs are separated after centrifuge. 22. PLTs can be stored in a TOTM transfer bag up to 5 days in incubator under agitation. 9 TRANSFUSION: 1. Inspect the container and blood for any defects. 2. Before transfusing the blood, make sure that serological test results are acceptable, cross match test results match with the recipient. If appropriate, apply cross match again at bed side. 3. Use transfusion set compatible with ISO EN 1135–4. 4. Hold the top part of the T port with one hand and bag from the bottom part of T port with other hand, and twist of the upper part by 270 (Figure 8) 5. Keep holding the bag from T port, remove the cap of the transfusion spike with other hand. 6. Insert the spike by ¾ of its length into outlet port. Do not touch the spike of the transfusion set and open outlet port to prevent contamination. 7. After inserting the spike, squeeze the bag to the level that transfusion set filter is filled with blood. 8. Hook the bag from its holder. GENERAL CAUTIONS During storage and transportation; 1. During shipment, up to two blood bags shippers shall be carried at the same time manually or on a trolley. Parcels should not be dropped and/or crushed and should be loaded in a way to prevent fall over. 2. In the warehouse, up to seven parcels can be stored on top of each other and in a way to prevent fall over. Before opening overwrap; 3. Store the overwrapped bags at clean, dry and cool places. 4. Do not use if there is visible sign of deterioration on the overwraps. 5. Blood bags are packed with sterilized. After opening overwrap; 6. Store the bags in their outer wraps at clean, dry and cool places. 7. Bags should be used within 10 days after removal of the transparent overwrap. Before usage; 1. Store the closed overwraps at clean, dry and cool places. 2. Intended for human blood and blood components. 3. Sterile and non pyrogenic - Steam sterilization. 4. Do not use unless solutions are clear. 5. Do not use if there is visible sign of deterioration on the bags. 6. Protect the bag and tubing from sharp objects. 7. Do not use if needle protector is opened. Bars on the needle should be in the same line. (Figure 9) 8. Do not recap the opened needles. Figure8 9. Do not use if fluid path closures are loose and not intact 10. Do not vent. 0 11. Store blood between 1–6 C. 12. Do not add medication to blood. 13. Cross match the contents of the bag with recipient before transfusion. 14. Use transfusion sets in compliance with ISO EN 1135–4. Figure9 15. Mix thorougly before use and if necessary, store under controlled conditions to achieve the appropriate temperature. When frozen, plastic is more fragile. After usage: Single use only, Throw to medical waster after use. Caution: In case of reuse, there is infection risk. CAUTION: This medical device contains di(2-etilhekzil) ftalat (DEHP). Considering the animal data’s, precautions should be taken to restrict to be a subject of DEHP especially for certain patients affected on their reproduction and development processes. These patients are newborn boys, infants and children, prepubertal boys and pregnant, and nursing mothers. Please check out the updated literature to give a conscious decision. KANSUK LABORATUARI SANAYİ VE TİCARET AŞ Eski Londra asfaltı, Beşyol Mah. No:4, 34295 Sefaköy, İSTANBUL/TÜRKİYE Tel: +90 212 592 15 76, Faks: +90 212 580 37 72 www.kansuk.com, e-mail: [email protected] kt_kk_5 - 58720 / Rev: 1 / Issue Date: 27.08.2014 Page 2 / 2 CAPA NO: 125/14