1
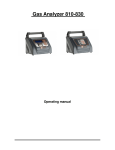
SO CI O 5 0 0
(GB)
English
User Manual
1.1
FOREWORD TO USER MANUAL .............................................................. 3
1.1.1 Contents of the User Manual............................................................ 3
1.1.2 Symbols and glossary of safety-related terms and warnings .......... 3
1.1.3 Safety rules....................................................................................... 4
1.2
HARDWARE SPECIFICATIONS OF SOCIO 500 ......................................... 7
1.3
SOFTWARE SPECIFICATIONS OF SOCIO 500 .......................................... 8
1.4
FOREWORD - SOCIO 500....................................................................... 9
1.4.1 Upon receipt..................................................................................... 9
1.4.2 How to obtain your User Password ................................................ 9
1.4.3 Product Identification Number ........................................................ 9
1.4.4 Maintenance and care ...................................................................... 9
1.4.5 Package contents ............................................................................ 10
1.4.6 Accessories ..................................................................................... 11
1.4.7 Description of SOCIO 500 ............................................................. 17
1.4.8 Description of keyboard................................................................. 20
1.5
INSTALLATION AND PRELIMINARY OPERATIONS .................................. 21
1.5.1 Installation...................................................................................... 21
1.5.2 Connections .................................................................................... 22
1.5.3 SOCIO 500 power-up ..................................................................... 22
1.5.4 How to enable the SOCIO 500 Self-diagnosis software ................. 23
1.6
HOW TO USE SOCIO 500 ..................................................................... 24
1.6.1 How to start the SOCIO programme .............................................. 24
1.6.2 Function key ................................................................................... 25
1.6.3 Vehicle and system selection .......................................................... 26
1.7
TROUBLESHOOTING ............................................................................. 32
1.7.1 Problems during operation............................................................. 32
1.8
APPENDIX ............................................................................................ 33
1.8.1 Warranty information..................................................................... 33
1
SOCIO Collection
Produced by TECNOMOTOR S.p.A
All rights reserved. This publication may not be reproduced, in full or in part, without
the express written consent of TECNOMOTOR S.p.A.
TECNOMOTOR S.p.A reserves the right to revise or make changes to this publication
without prior notice.
Copyright information
Microsoft, Windows and Windows 98 are registered trademarks of Microsoft Corporation.
All other product and firm names within this manual may be trademarks of other entities.
2
English
1.1
Foreword to User Manual
Dear Customer, thank you for choosing the SOCIO Collection of diagnostic tools that
will enable you to keep the pace with the ever-changing technology of on-board
electronics.
Please read this manual carefully and follow the indications provided in paragraph
Safety rules.
1.1.1
Contents of the User Manual
The User Manual is divided into sections:
Product Description
Product description, list of components
Product installation
Software and Hardware installation
Operating instructions
Description of functions, legend of icons and
commands
Solutions to frequently encountered problems/FAQ's
Troubleshooting
1.1.2
Symbols and glossary of safety-related terms and warnings
The following symbols are used throughout the manual to highlight
important indications or information:
Warning
This symbol is used to call your attention to certain particular
operations and the relevant instructions
Important
This symbol is designed to draw your attention to important
information.
Note
This symbol is used to highlight useful indications on how to use
the product.
3
1.1.3
Safety rules
Signs and symbols:
The symbols used in this paragraph have the following meanings.
DANGER: Failure to comply with or improper use of the information
identified by this symbol may result in severe injury or death.
WARNING: Failure to comply with or improper use of the
information identified by this symbol may result in personal injury
and equipment or property damage.
CAUTION: Failure to comply with or improper use of the information
identified by this symbol may result in improper operation of device
and/or software.
4
English
Precautions required during operation/installation:
DANGER:
•
•
•
•
•
Abnormal conditions: Continued operation when the device has been producing smoke
or abnormal odours may create a fire or electric shock hazard. Cut off power supply
immediately and contact a service centre.
Water and foreign matter: If foreign matter (metal, water or other fluids) enter the device,
cut off power supply immediately and contact a service centre.
Shocks and damage: If the device is damaged, unplug it from the power mains and
contact a service centre.
Disassembly: Never attempt to dismantle or make changes to the device, as this may
result in a risk of fire or electric shock.
Placement: Keep device away from heat, oil fumes or vapour. Such ambient conditions
might create a risk of fire and electric shock. Keep the device away from fluids and volatile
flammable materials. Non compliance may create a fire hazard.
WARNING:
•
•
•
Placement: Do not place the device on unstable surfaces, high shelves or other
unstable locations or the unit may fall, leading to injury and/or damage.
Foreign bodies: Do not insert any foreign bodies into the connectors as this may
lead to device failure.
Maintenance: Never use thinners, cosmetics or other volatile agents to clean the
exterior of the device. Clean with a cloth wetted with a diluted solution of water and
mild detergent.
WARNING:
•
•
Recharging the device: The device must be recharged in compliance with the
manufacturer's instructions. Tecnomotor S.p.A. shall not be liable for damage in the
event the device is recharged using other power sources.
WARNING
For the maintenance of packages containing the equipment and the relocation of
the equipment once installed, the provisions of Italian Law Decrees DDLL 626 of
19/9/94 and 242 of 19/3/96 apply. Use appropriate tools to open package.
5
WARNING:
•
Usage conditions: This appliance has been designed and tested to ensure safe
operation. The user is required to observe the information and warnings provided in
this manual to ensure safe operation and preserve the safety features of the
appliance.
Do not allow operation of this equipment by unqualified persons.
It is the owner's responsibility to keep warning labels and rating plates clean
and legible.
This manual is subject to changes and updates.
Be sure to read the update and customisation instructions included in this
manual.
The manual is divided into sections for ease of reference. Manual instructions especially those concerning maintenance - are intended for use by specialised
technical personnel with good knowledge of mechanics, electromechanics or of
the operation of computerised unit-based systems. The system has been
designed to facilitate operation and troubleshooting, with a wide range of
display messages providing detailed indications to help locate problems.
Please read these instructions carefully before operating the equipment.
Collect this manual and all literature supplied with the equipment in a file folder
and keep it with the machine where operators can easily access it.
Make sure installation has been performed in compliance with all applicable
regulations and standards.
Read this manual carefully and learn how to use the equipment properly and
safely.
Be sure to observe applicable accident prevention rules when operating and
servicing the equipment.
In the event of unauthorised changes to the equipment, the manufacturer shall
not be liable for any resulting damage or incident. Please note that bypassing or
removing safety devices is in violation of workplace safety rules in force in the
user's country.
6
Hardware Specifications of SOCIO 500
Dimensions
Height
Length
Depth
Processor:
Intel/Marvell II PXA270
416MHz Internal Clock
208MHz Bus
32MB RAM
16MB StratFlash
SD Removable >= 1GB
Memory:
LCD:
Keyboard:
Power supply:
Current draw:
Battery:
200mm
120mm
35mm
Resolution 320x240 Size 3.5”
262144 Colours – Brightness 300 cd/m2
6 Navigation keys
10 Alphanumeric keys
1 Function key
1 On/Off Button
8-36Vdc (diagnostic socket, 230Vac power mains adapter, 12V
battery cable)
250mA (12Vdc)
NiMh 7.2V 700mA/H
Battery life over 90 min
Automatic recharge from diagnostic socket, 230
Vac power mains adapter, 12Vdc battery cable)
Total weight:
500g
Serial port
MASTER USB 1.1 port
SLAVE USB 1.1 port
RS232 serial port
USB 1.1 port for printer, Bluetooth module, other
USB 1.1 port for PC updates
Supported Hardware Protocols:
ISO9141 – ISO14230 – J1850 PWM – J1850 VPW – RS485 – ISO15765 – CAN C – J2411
7
English
1.2
1.3
Software Specifications of SOCIO 500
The Software of SOCIO 500 has been developed on a Linux Embedded 2.6.x platform.
This operating system ensures high stability, a high security level, complete software control, real-time
hardware control and real-time processor control.
The software of SOCIO 500 is based on images, animations and strings.
Navigation is intuitive, fast and efficient (it takes just 6 steps to establish communication with the
vehicle's ECU).
The QUICK MENU function key provides shortcuts to Home page, On-Line Help (it indicates what
you can do from the selected page), language selection (lets you select display language from any point
in the software), date and time or equipment SW shutdown.
Supported languages are the same as for the SOCIO COLLECTION line of products.
An additional new feature is the Dashboard Page, which is displayed as soon as communication with the
selected vehicle's ECU is established and offers the most significant or most frequently used
components for system diagnosis.
Any errors are immediately displayed and may be deleted right away (with no need to access the
dedicated error page).
The Database may be customised according to the desired option (Body Shop, Tyre Specialist, Fast Fit,
Filling Station).
Also available is a FULL option database that includes all four Databases.
8
1.4.1
English
1.4
Foreword - SOCIO 500
Upon receipt
Upon receipt, check packing and product components for damage in the presence of the
carrier. Liability for transport damage attaches to the forwarding agent or carrier. Report
any damage, giving details of the nature and severity of the damage, in the shipping
document and file a claim against forwarding agent or carrier.
1.4.2
How to obtain your User Password
TECNOMOTOR S.p.A. or the Sales Network will issue the User Password directly to
the addressee so it can be used during the registration procedure upon first powerup.
1.4.3
Product Identification Number
A label with the product serial number is
affixed to the outside of the case. This
Identification Number is used when
requesting service or in the product return
application claim procedure.
1.4.4
Maintenance and care
Please follow these instructions to avoid malfunction or unexpected failures:
Do not drop or knock the equipment.
Avoid spilling fluids on the equipment.
Do not use batteries other than those specified in this manual.
Do not service the equipment when it is in operation.
Do not clean the equipment when it is in operation.
Keep the package for safe handling.
9
1.4.5
Package contents
Image
Description
SOCIO 500 package + updating SOFTWARE
SOCIO 500
EOBD cable
User Manual
SD Card reader
7.2V 700mA/H NiMh battery
USB serial cable for PC connection
10
English
1.4.6
Accessories
Accessory cables for individual vehicles - EUROPE
Image
Description
Item Number
Connection cable for Ford vehicles up to 1995
-
Connection cable for vehicles of the VAG group up to
1995
-
Connection cable for FIAT Group vehicles
(Packard, 3-way)
-
Connection cable for Opel vehicles up to 1995
-
Connection cable for Renault vehicles up to 1995
-
Bipolar connection cable for first PSA vehicles
-
11
Accessory cables for individual vehicles - EUROPE
Image
Description
Item Number
Connection cable for SPRINTER
-
Connection cable for IVECO DAILY
-
30-pin connection cable for PSA vehicles
-
Connection cable for BMW vehicles
-
Connection cable for Mercedes vehicles before
introduction of EOBD port
-
12
English
Accessory cables for individual vehicles - ASIA
Image
Description
Item Number
Universal connection cable (accessory cable)
-
Connection cable for HONDA vehicles, 5 + 3-pin
-
Connection cable for SUZUKI vehicles, 6 + 4-pin
-
Connection cable for SUBARU vehicles, 9-pin
-
Connection cable for KIA vehicles, 20-pin
-
Connection cable for NISSAN vehicles, 14-pin
-
13
Accessory cables for individual vehicles - ASIA
Image
Description
Item Number
Connection cable for MAZDA vehicles, 17-pin, round
-
Connection cable for TOYOTA vehicles, 17-pin,
rectangular
-
Connection cable for HYUNDAY-MITSUBISHI
vehicles, 12-pin
-
14
English
Cable KITs for cars and motorcycles
Image
Description
Item number
EUROPEAN VEHICLE CABLE KIT
-
ASIAN VEHICLE CABLE KIT
-
MOTORCYCLE CABLE KIT
-
15
Miscellaneous accessory components
Image
Description
Item Number
220V power mains adapter
-
Support for SOCIO 700
-
Trolley for SOCIO 500
-
Battery power supply cable (12V)
-
BBAD self-diagnosis module adapter wiring
-
16
English
1.4.7
1.4.7.1
Description of SOCIO 500
Connector identification
The self-diagnosis module features the following ports:
“Diagnosis” 26-pin high-density D connector
for connection to vehicle ECU.
KYCON “Power Supply” connector to feed
module where vehicle diagnostics socket
does not provide for power supply
“Serial” 9-pin sub-D connector for connection
to PC
17
Diagnostic module status LED.
GREEN LED FLASHING: Module powered
and ready to start diagnostic session
GREEN/RED LEDs FLASHING
ALTERNATELY: Module powered, starting
diagnostic session with selected system.
“Serial” 9-pin sub-D connector for connection
to PC
1
2
1 SLAVE USB 1.1 port USB port for updates
(connection to PC).
2 MASTER USB 1.1 port for connection to
printer and Bluetooth module
Memory Card slot
18
English
1.4.7.2
Power supply
SOCIO 500 incorporates a rechargeable battery that ensures operation and power-up.
It may also be powered from one of the following sources:
•
•
•
230Vac power mains adapter
vehicle battery via 12Vdc battery power supply cable
diagnostic cable
1.4.7.3
Battery installation or replacement
The equipment comes with the batteries installed in the battery compartment and ready for
operation. If further recharging is needed, the equipment may be connected to a vehicle using
the EOBD cable or the accessory 12Vdc battery power supply cable or 230Vac power mains
cable.
Full recharge time when the battery is fully flat is about 20 hours.
Under average usage conditions, battery life is about 1 ½ hours.
Remove the cover at the rear of the
equipment and lift the battery.
Disconnect the white connector
inside the battery compartment.
Display flicker indicates that the batteries
are low and should be replaced as soon
as possible.
19
1.4.8
Description of keyboard
Enter key
Function key
Escape key
Arrow keys for
navigation
Selection key
(Right arrow)
Alphanumeric
keypad
On/Off key
20
English
1.5
Installation and preliminary operations
SOCIO 500 requires no particular installation procedure.
Important
Before powering on the display for the first time, make sure you have the User
Password supplied by Tecnomotor handy.
Note
If you experience any problems with installation, please read the manual section that
discusses
Troubleshooting
1.5.1
Installation
Warning
Make sure the equipment is off before performing the following inspection.
Make sure the SD memory card is in place in its slot:
Example of Memory Card with
‘ FULL’ Database
21
1.5.2
Connections
Warning
Make sure the equipment is off before performing the following inspection.
Connect the diagnostic cable across vehicle connector and
self-diagnosis module (BBAD) connector.
If the connector has been plugged correctly to SOCIO 500,
you will hear the retaining clip click into place, indicating the
connector has locked into place in the mating piece. To
remove the connector, press the tab on the side and then
pull.
Connect the round connector of the power supply cable to SOCIO
500 if power supply through the OBD connector is not available.
While inserting the connector, its armour will slide to lock the
connector into place.
To remove this connector, pull on the sliding armour and the
connector will come clear.
Connect the clamps of the SOCIO 500 battery power supply cable
(if power supply via the OBD connector is not available) to the
vehicle's battery; make sure to connect the red clamp to the
positive terminal and the black clamp to the negative terminal and
check to ensure the green light is flashing.
1.5.3
SOCIO 500 power-up
After connecting the cables as required, press the indicated key to
power on the equipment.
To power off, see 1.6.2 ‘ Shutdown ‘.
22
1.5.4
On first power-up, you will need to enter the User Password (see 1.4.2)
Power on SOCIO 500.
Enter the User Password from the
alphanumeric keypad.
Press the Enter key to confirm.
Important
The SOCIO 500 software will not work if the enable procedure has been aborted.
Important
If you enter a wrong User Password, a warning message appears on the display and
the password entry window remains displayed so the correct password can be entered.
23
English
How to enable the SOCIO 500 Self-diagnosis software
1.6
1.6.1
How to use SOCIO 500
How to start the SOCIO programme
Warning:
Before connecting the diagnosis connector to the vehicle system, ensure that
the cable is the number specified by the software when selecting the ECU to
be diagnosed.
For correct vehicle diagnosis, all specifications of the system to be diagnosed
must be selected correctly.
The status of communication with ECU can be monitored on a dedicated
graphic display.
If there are any errors stored in the ECU, the corresponding graphic display
is turned on.
The programme starts automatically when the display is switched on. The main page is shown
below:
24
English
1.6.2
Function key
Function key
Function Key F lets you select the following
options.
Use the Arrow keys (up and down) to select
an option and press the Right arrow key or
the Enter key to confirm.
On-line Help
On-line Help.
Language
Selection
Selection of display language.
Use the Arrow keys (up and down) to select
the language and press the Right arrow key
or the Enter key to confirm.
Settings
In Settings, you may set Date and Time.
Use the alphanumeric keypad and press
Enter to confirm.
Info
Information on Display Software and
Diagnosis Database versions.
Tetrix
This function is used to control proper
display and key operation.
Shutdown
Software shutdown.
25
1.6.3
Vehicle and system selection
Vehicle can be selected in one of two ways:
•
Select in the order: make, fuel, vehicle model and version.
•
Choose from the last ten vehicles selected.
BROWSING
Main Page
Vehicle selection.
Last 10 vehicles diagnosed.
Reports on last 10 vehicles
diagnosed.
Use the Arrow keys (up and
down) to select the desired
item and press the Right
arrow key or the Enter key to
confirm.
Vehicle
selection
Use the Arrow keys (up and
down) to select the vehicle
and press the Right arrow key
or the Enter key to confirm.
For quick selection, press the
vehicle letter.
Model selection
Selection of model of the
previously selected make
(confirm using Right arrow
key or Enter key).
26
English
System
selection
Selection of system to be
diagnosed (confirm using
Right arrow key or Enter key).
ECU selection
Selection of control unit or
ECU type of selected system
(confirm using Right arrow
key or Enter key).
When specified, select the
system according to vehicle's year of
manufacture.
Diagnostic
socket location
Diagram showing location of
the diagnostic socket.
"Wait" message
This message indicates that
the equipment is waiting for
the system enable signal.
27
Example
Year of manufacture of vehicle:
99- from 1999 onwards
-99 before 1999
98-99 from 1998 to 1999
"Key-on"
message
When you see message, you
must turn the vehicle's
ignition key to On and then
press the Enter arrow key.
"Wait" message
This message indicates the
equipment is establishing
communication with the ECU.
Diagnosis page
display
First diagnosis page.
Note: The icons in the display pages provide the functions of the following keys:
Escape key
Enter key
Arrow key
28
English
The initial diagnosis page (DASHBOARD page) provides the following:
Example of DASHBOARD page
Error presence signal
Equipment communicating
with vehicle
Short list of key functions
(actuators and settings) of
selected system
Display of some key
parameters
29
NAVIGATION during
SYSTEM DIAGNOSIS
Technical
Data Sheet
Errors
Parameters
Report
ECU Info
Actuators
Settings
30
English
BROWSING
Escape key
Overview of
Navigation keys
To exit diagnosis, press the ESC key.
The selected diagnosis page remains displayed,
but communication with the vehicle is
disconnected.
Always use this key to go back to previous pages.
Left Arrow key
Right Arrow key and Confirm/Enter or Forward
key
Arrow keys for vertical scroll
Enter key
31
1.7
Troubleshooting
1.7.1
Problems during operation
Problem:
Remedy
Problem:
Remedy
After a vehicle is selected correctly, the tester shows message
:“Warning, password used for updating is wrong”
The registration or update procedure has been omitted or was not successful
because the password for another BBAD self-diagnosis module was used.
Check your ID and Password
Repeat the update procedure.
After a vehicle is selected correctly, the tester shows message
:“Warning, system not enabled under current subscription”
Registration or update procedure has been omitted or was unsuccessful
because the password is linked to an old subscription (e.g. 2007 system,
2006 password).
Apply for current-year subscription.
Repeat update procedure when you receive the new password.
Problem:
Remedy
Failure to establish communication with vehicle's ECU
Make sure the vehicle and ECU selected in the software match the system
you wish to diagnose (check type and year).
Problem:
Remedy
Equipment does not power on when the on key is pressed.
Incorporated battery may be flat. Connect OBD cable to vehicle (or battery
cable or mains adapter if available) and try again
32
English
1.8
Appendix
Warranty information.
1.8.1
This product is covered by 12-month warranty from date of purchase. For detailed
information on warranty terms and service procedures, please see the Warranty
Terms and Conditions or contact TECNOMOTOR S.p.A. “Customer Service”.
Please note that warranty does not cover:
•
Physical damage to equipment.
•
Malfunction of any connection and accessory cables (unless claimed
within 10 days from date of receipt and notified in writing to local
distributor or TECNOMOTOR SPA).
•
Damage resulting from tampering/unauthorised changes.
•
Short circuits caused by external events or improper use of equipment.
33
1.8.2
EC statement of conformity
34
35
English