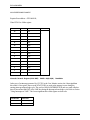
1
EXCALIBUR EXC-H009VME/M H009 Test and Simulation Board for VME and VXI Systems User’s Manual 311 Meacham Avenue Elmont, NY 11003 Tel. (516) 327-0000 Fax (516) 327-4645 e-mail: [email protected] website: www.mil -1553.com EXC-H009VME/M TABLE OF CONTENTS INTRODUCTION .......................................................................................................................1 INSTALLATION.........................................................................................................................2 H009 BUS CONNECTIONS .........................................................................................................................2 VME INTERFACE......................................................................................................................3 VME PARAMETERS.........................................................................................................................................3 VXI PARAMETERS...........................................................................................................................................3 Accessing VME/VXI Configuration Registers................................................................................................3 Accessing Data Storage Area and Control Registers....................................................................................3 The Memory Map..........................................................................................................................................4 VME/VXI CONFIGURATION REGISTERS......................................................................................................4 Configuration Register Memory Map ............................................................................................................4 ID Register (VXI only) BASE + 00 READ ONLY...................................................................................5 Device Type Register (VXI only) BASE + 02 READ ONLY..................................................................5 Status Register (VXI & VME) BASE + 04 READ ONLY .......................................................................6 Control Register (VXI & VME) BASE + 04 WRITE ONLY....................................................................7 Offset Register (VXI & VME) BASE + 06 Read/Write ..........................................................................9 Vector#0 / Vector#1 Register (VXI & VME) BASE + 20(H) /22(H) Read/Write .................................10 TTAG DIVIDER (VXI & VME) BASE + 24(H Read/Write.................................................................11 Reserved Register (VXI & VME) BASE + 26(H) to 30(H) Read/Write...............................................11 MEMORY/REGISTERS ADDRESS MAPPING DIAGRAM...........................................................................11 GENERAL MEMORY MAP.....................................................................................................13 H009VME MEMORY MAP..............................................................................................................................13 PU OPERATION......................................................................................................................14 PU MEMORY MAP .........................................................................................................................................15 DATA WORDS LOOK-UP TABLE 6600 75FE(H)..............................................................................16 HOW TO CREATE THE ADDRESS TO THE TABLE...............................................................................16 MESSAGE STACK 7600 7DFE(H) ....................................................................................................17 ACTIVE PU TABLE 7E00 7E1E(H)....................................................................................................18 ERROR INJECTION TABLE 7E20 7E3E(H) .....................................................................................19 WORD COUNT ERROR TABLE 7E40 7E5E(H)...............................................................................19 Æ Æ Æ Æ Æ i EXC-H009VME/M Æ Æ BIT COUNT ERROR TABLE 7E60 7E7E(H).....................................................................................19 PERIOD DATA TIME TABLE 7E80 7E9E(H) ....................................................................................20 COMMAND RESPONSE TABLE 7EA0 7EBE(H) .............................................................................20 FIRMWARE DATE CODE 7EC0(H).......................................................................................................21 FIRMWARE REVISION REGISTER 7EC2(H).......................................................................................21 MESSAGE STACK POINTER 7EC4(H).................................................................................................21 VARIABLE DATA AMPLITUDE REGISTER 7EC6(H)...........................................................................21 MESSAGE STATUS REGISTER 7ECE(H) ...........................................................................................22 START REGISTER 7ED0(H)..................................................................................................................22 BOARD STATUS REGISTER 7ED2(H) .................................................................................................22 BOARD ID REGISTER 7ED4(H)............................................................................................................23 BOARD CONFIGURATION REGISTER 7ED6(H).................................................................................23 CLOCK SKEW REGISTER 7ED8(H).....................................................................................................23 SOFTWARE RESET REGISTER 7F80(H) ............................................................................................23 TIME TAG RESET REGISTER 7F84(H) (WRITE) ............................................................................23 TIME TAG COUNTER 7F86-7F88(H) (READ)...................................................................................24 TIME TAG OPTIONS REGISTER 7F8A(H) (WRITE)........................................................................24 Æ CCC / CONCURRENT-PU OPERATION...............................................................................25 CCC/CONCURRENT PU MEMORY MAP .....................................................................................................26 INSTRUCTION STACK ..................................................................................................................................27 Message Status...........................................................................................................................................28 Intermessage Gap Time Hi and Low — Written by user ............................................................................29 Message Block Pointer — Written by user..................................................................................................29 MESSAGE BLOCK.........................................................................................................................................30 CONTROL WORD......................................................................................................................................30 Memory Location Sequence .......................................................................................................................32 MESSAGE BLOCK FORMATS .....................................................................................................................33 CONTINUOUS OR ONE-SHOT MESSAGE TRANSFERS ..........................................................................37 CONTROL REGISTER DEFINITIONS...........................................................................................................38 INSTRUCTION COUNTER 7EB2(H) .....................................................................................................38 FRAME TIME REGISTERS - HI & LO 7EB4 7EB6(H)......................................................................38 WORD COUNT REGISTER 7EB8(H)....................................................................................................39 BIT COUNT REGISTER 7EBA(H)..........................................................................................................39 PERIOD DATA GAP REGISTER 7EBC(H)............................................................................................40 LOOP COUNT REGISTER 7EBE(H) .....................................................................................................40 FIRMWARE DATE CODE 7EC0(H).......................................................................................................40 FIRMWARE REVISION REGISTER 7EC2(H).......................................................................................40 STACK POINTER 7EC4(H)....................................................................................................................41 VARIABLE AMPLITUDE (DATA) REGISTER 7EC6(H).........................................................................41 Æ ii EXC-H009VME/M VARIABLE AMPLITUDE (CLOCK) REGISTER 7EC8(H)......................................................................41 INTERRUPT CONDITION REGISTER 7ECC(H) ..................................................................................41 MESSAGE STATUS REGISTER 7ECE(H) ...........................................................................................42 START REGISTER 7ED0(H)..................................................................................................................42 BOARD STATUS REGISTER 7ED2(H) .................................................................................................43 BOARD ID REGISTER 7ED4(H)............................................................................................................43 BOARD CONFIGURATION REGISTER 7ED6(H).................................................................................43 CLOCK SKEW REGISTER 7EDA(H).....................................................................................................44 SOFTWARE RESET REGISTER 7F80(H) ............................................................................................44 BUS MONITOR OPERATION (NON CONCURRENT/CONCURRENT) .............................45 MONITOR MEMORY MAP.............................................................................................................................46 CONCURRENT MONITOR MEMORY MAP..................................................................................................47 BUS MONITOR MESSAGE BLOCK..........................................................................................................48 FILTER/FUNCTION TABLE 6E00(H) 7DFF(H)/ EE00(H) FDFF(H) .............................................50 HOW TO CREATE THE ADDRESS TO THE TABLE...............................................................................50 Æ Æ CONTROL REGISTERS DEFINITIONS.........................................................................................................51 MESSAGE COUNTER 7EBC - 7EBE (H) / FEBC - FEBE (H) ..............................................................51 FIRMWARE DATE CODE 7EC0(H) / FEC0(H) ....................................................................................51 FIRMWARE REVISION REGISTER 7EC2(H) / FEC2(H)......................................................................52 CURRENT BLOCK INDEX 7ECA(H) / FECA(H)....................................................................................52 MESSAGE STATUS REGISTER 7ECE(H) / FECE(H)..........................................................................52 START REGISTER 7ED0(H) / FED0(H) ................................................................................................52 BOARD STATUS REGISTER 7ED2(H) / FED2(H)................................................................................53 BOARD ID REGISTER 7ED4(H) / FED4(H)...........................................................................................53 BOARD CONFIGURATION REGISTER 7ED6(H) / FED6(H) ...............................................................53 SOFTWARE RESET REGISTER 7F80(H) / FF80(H)............................................................................54 GLOBAL REGISTERS............................................................................................................55 BOARD RESET REGISTER 7F90(H) WRITE ONLY ........................................................................55 CONCURRENT START REGISTER 7F94(H) / FF94(H) WRITE ONLY...............................................55 CARD LAYOUT.......................................................................................................................56 LEDS........................................................................................................................................56 DIP SWITCH SETTINGS ........................................................................................................57 Card Logical Address Dip Switch Setting SW5.......................................................................................57 H009 Coupling Mode Select (SW1, SW2, SW3, SW4) .........................................................................57 FACTORY DEFAULT DIP SWITCH SETTINGS...........................................................................................58 iii EXC-H009VME/M JUMPERS................................................................................................................................59 VME Address Space Select Jumper [JP1]..............................................................................................59 VXI MODID Connect Jumper [JP4].........................................................................................................59 Transformers Central Tap Gnd Connection [JP5-JP8] ...........................................................................59 FACTORY DEFAULT JUMPER SETTINGS .................................................................................................60 Factory Jumpers Setup for VME.................................................................................................................60 Factory Jumpers Setup for VXI ...................................................................................................................60 TERMINATION RESISTORS..................................................................................................60 CONNECTORS .......................................................................................................................61 1553 CONNECTORS......................................................................................................................................61 IN SYSTEM PROGRAMMABLE CONNECTORS.........................................................................................61 VME INTERFACE CONNECTORS................................................................................................................61 Connector P1 Pinout ...................................................................................................................................62 Connector P2 Pinout ...................................................................................................................................63 POWER REQUIREMENTS.....................................................................................................64 ORDERING INFORMATION...................................................................................................64 iv EXC-H009VME/M INTRODUCTION The EXC-H009VME/M is a memory-mapped 'H009' interface card which operates for VME / VXI systems. The "H009" is the perfect solution for developing and testing H009 interfaces and for performing system simulation of the MIL-STD-H009 bus. The user has direct access to all control registers and data blocks, and can modify various parameters and data in Real Time. The user controls the operation of the card by accessing the memory-mapped control registers. The EXC-H009VME/M contains a 16k X 16 [true dual-ported] RAM for data blocks, control registers, and look-up tables and another 16k X 16 Dual-Port Ram for a Concurrent Monitor(option). The base board has three modes of operation: Peripheral Unit (Multiple - up to 16 PU's); CCC with Concurrent PU operation (0 up to 16 PU's) and Bus Monitor Mode. The Monitor section contains a Concurrent Bus Monitor that works separately from the other section. Error injection capability exists in both the PU and CCC/Concurrent-PU modes. • VME interrupts are available. • Variable amplitude transceiver for both data and clock outputs. • 32 bit Hardware Time Tag circuit for use within PU and Monitor modes. The EXC-H009 board features include: • Operates as CCC (Central Control Complex) PU (Peripheral Unit) CCC/Concurrent PU Concurrent Monitor (Option) • Separately Selectable Variable Amplitude for Clock and Data • Multiple-PU Simulation (Up to 16 Peripheral Units) • 16 Bit Data Transfers • Error Injection Capability: Bit Count Word Count Period Data Gap Error Parity • Error Detection Capability No Clock on Active Bus Manchester Error Parity Error Bit Count High Bit Count Low Word Count High Word Count Low • Compatible with VME & VXI Systems • "B" and "C" Size Cards • VME/VXI Compliance Slave: Address - A16 & A24/A32 Data - D16 Interrupt - D08(O), ROAK • Memory - Mapped, Dual-Port RAM: 16k x 16 (32k x 16 with Concurrent Monitor Option) • Easy to Install and Operate • C Software Library Included • Extensive Interrupt Features • Real-Time Operation • 32 Bit Time Tagging in PU Mode 1 EXC-H009VME/M INSTALLATION Before installing the card it is very important to determine which 64 byte section of A16 address space is available for the card’s VME/VXI Configuration Registers. When this is determined, the SW5 dip switch should be set accordingly (see Dip Switch Settings section). The user should also decide if A24 or A32 address space is to be used and set the appropriate jumper, JP1 (see Jumpers section). Once all the jumpers are set properly, make certain the computer is turned off and insert the card into any available slot. Once the card is installed, the H009 twinax cables should be attached to the card and to the bus. The cables may be connected and disconnected to the card while power to the computer is turned on but not while the card is transmitting over the bus. H009 BUS CONNECTIONS Direct coupling must be used to connect the EXC-H009VME/M to another H009 device. Switches 1 & 2 in dip switches SW1, SW2, SW3 and SW4 must be closed in-order to obtain the correct ratio of the transformers and provide series resisters to the load line. The user must make certain that the cable connecting the two devices is properly terminated with 68 Ohm resistors to insure data integrity. The board has an option of inserting a resistor between the two taps of the DATA and CLOCK lines. The board’s default is a resistor of ‘68 ohm’ between each two taps. (When only one board has a Termination Resistor, two resistors should be maintained in parallel to achieve a total resistance of ‘34 ohm’. (See “Termination Resistors” section). 2 EXC-H009VME/M VME INTERFACE The EXC-H009VME/M complies with the following VME/VXI parameters: VME PARAMETERS Board type SLAVE Addressing A16 and A24/A32 Data D16 Interrupts IRQ1-7*; D08(O); ROAK VXI PARAMETERS Device Class Register Based Manufacturer ID 3924dec (F54H) Address Space A16/A24 or A16/A32 Required Memory 64K; m=0100(A24)/1100(A32) Model Code 999 Hex The card interfaces to the VME via a 16-bit data bus. Note that all accesses to the card must be 'Word' accesses (16 bits). All byte accesses will be ignored. The card may be accessed by using addresses in the following form: accessing VME/VXI Configuration Registers XXXX (H) (A16 mode) with ADDRESS MODIFIER CODES: 29, 2D Accessing Data Storage Area and Control Registers XX XXXX (H) (A24 mode) with ADDRESS MODIFIER CODES: 39, 3A, 3D, 3E or XXXX XXXX (H) (A32 mode) with ADDRESS MODIFIER CODES: 09, 0A, 0D, 0E 3 EXC-H009VME/M The Memory Map is divided into two distinct blocks: 1. VME/VXI Configuration Registers. 2. H009 Storage Area and Control Registers. The VME/VXI Configuration Registers are used for setting up the card within the user's VME or VXI system. The H009 Storage Area and Control Registers are used to control the operation of the card on the H009 busses. VME/VXI CONFIGURATION REGISTERS The VME/VXI Configuration registers are located within a 64 byte block in the A16 address space between the addresses 49152 (dec) [C000H] and 65472(dec) [FFC0H]. The base address of the Configuration registers is determined by the following equation: Base Address (dec.) = V*64 + 49152 (dec.) “V” - the "Logical Address" of the card, is an integer which varies between 0 and 255 and is defined by the user via the 8 pole dip switch SW5 (see Dip Switch Settings section). In order to ensure correct operation of the card within the user's VME or VXI system the Configuration registers must be reinitialized after power up or after assertion of SYSRESET*. For a full explanation of the VXI Configuration registers and other topics relating to operation of the VXI bus refer to the “VXI Bus System Specification” section. Configuration Register Memory Map REGISTER ADDRESS TTAG DIVIDER READ/WRITE BASE + 24 (H) VECTOR#1 REGISTER BASE + 22 (H) VECTOR#0 REGISTER BASE + 20 (H) OFFSET REGISTER BASE + 06 (H) STATUS/CONTROL REGISTER BASE + 04 (H) DEVICE TYPE REGISTER BASE + 02 (H) ID REGISTER BASE + 00 (H) 4 EXC-H009VME/M ID Register (VXI only) BASE + 00 READ ONLY The contents of this 16-bit register provides the following information about the card's configuration. BIT # SET TO FUNCTION 11-0 “F54” (Hex) MANUFACTURER ID - 3924 (Dec.) 13-12 “01” A32 ADD. SPACE (JP1 UNCONNECTED) ADDRESS SPACE “00” A24 ADD. SPACE (JP1 CONNECTED) 15-14 NOTE REGISTER BASED “11” DEVICE CLASS This register contains the same value whether set up for VME or VXI installation. The VXI specification requires all VXI devices to identify themselves via an ID register. This location is not defined under the VME specification. Device Type Register (VXI only) BASE + 02 READ ONLY This 16 bit register contains a fixed Device Type Identifier as well as a four bit field which reflects the Required Memory usage of the card. BIT # SET TO FUNCTION 11 - 0 “999” (Hex) MODEL CODE 15 - 12 “C”(Hex) - A32 ADD. SPACE (JP1 UNCONNECTED) REQUIRED MEMORY (m) “4”(Hex) - A24 ADD. SPACE (JP1 CONNECTED) NOTE This register contains the same value whether set up for VME or VXI installation. The VXI specifications requires the user to let the system know how much memory the device requires. This is known as the 'm' value in VXI parlance. This location is not defined under the VME specification. 5 EXC-H009VME/M Status Register (VXI & VME) BASE + 04 READ ONLY A read of this 16 bit register provides information as defined below. BIT # FUNCTION Description 0 RESET Indicates the state of the RESET bit in the Control Register 1 SYSFAIL INH. Indicates the state of the SYSFAIL INHIBIT bit in the Control Register 2 PASSED This bit is always set to "1" 3 READY A "1" indicates that the power up sequence has completed and that the card is ready to accept commands. This bit is a logical 'AND' with the Conc. Monitor’s READY bit. 4 LED TEST T.B.D. 7-5 RESERVED 10-8 IRQSEL2-0 13-11 RESERVED 14 MODID* Indicates the inverted value of the VXI bus "MODID" line. 15 A24/A32 ACTIVE Indicates the state of the A24/A32 ENABLE bit in the Control Register NOTE 6 Indicates the state of the IRQSEL2-0 bits in the Control Register. The MODID, READY, PASSED, SYSFAIL INHIBIT and RESET functions are included to maintain compliance with the VXI specification. It is recommended that VME users make use of the software reset described in the main body of this manual. EXC-H009VME/M Control Register (VXI & VME) BASE + 04 WRITE ONLY Writing to this 16-bit register causes the actions listed below to be executed by the card. Note that all bits in this register are set to "0" after assertion of VME bus line SYSRESET*. BIT # FUNCTION Description 0 RESET Writing a "1" to this bit forces the card into the "RESET" state. 1 SYSFAIL INH. This bit has no effect. 7-2 RESERVED 10-8 IRQSEL2-0 14-11 RESERVED Writing to these bits selects which one of the VME bus Interrupt Request lines IRQ1* - IRQ7* will be driven active when the card generates an interrupt. Refer to section "Using Interrupts on VME" in following. 14 MODID* Indicates the inverted value of the VXI bus "MODID" line. 15 A24/A32 ENABLE Writing a "1" to this bit enables access to the card's H009 Storage Area and Control Registers residing in A24 or A32 VME address space. If this bit is set to "0" none of the on card registers and memory which are resident in the A24 or A32 address space may be accessed. The Configuration registers, of course remain accessible regardless of the state of this bit, as they reside in the A16 address space of the card. NOTE 1. The user must not write a "0" into the “RESET” bit for at least 100 usec after writing a "1" into it. While in the "RESET" state the card is completely inactive and will not respond to any commands. Upon releasing the card from the "RESET" state (write "0" to this bit), the card will perform its self test routines. The card may also be reset via the Software Reset Registers defined within the main body of this manual. This second method is the preferred mechanism for resetting the card. 2. The following table shows the relationship between IRQSEL2-0 and IRQ7-1. SELECTED IRQ LINE IRQSEL2 IRQSEL1 IRQSEL0 NONE 0 0 0 IRQ1* 0 0 1 IRQ2* 0 1 0 IRQ3* 0 1 1 IRQ4* 1 0 0 IRQ5* 1 0 1 IRQ6* 1 1 0 IRQ7* 1 1 1 7 EXC-H009VME/M Using Interrupts on VME The Interrupt generated on the selected IRQ* line is the "logical OR" of all interrupt generating sources on the card. An interrupt which was generated by the CCC/PU section of the card will result in the interrupt routine whose vector resides in VECTOR#0 register to be executed. The card will place the value in the VECTOR#0 register, called the STATUS/ID, onto the VME data lines when issuing the interrupt acknowledge cycle. The user's processor will use this value to determine which entry in the user's interrupt vector table to jump to. Within this interrupt routine the actual source of the interrupt can be determined by polling the Pending Interrupt Register. Likewise, an interrupt which was generated by the Concurrent Bus Monitor will result in the interrupt routine whose vector resides in VECTOR#1 register to be executed. If case of multiple pending interrupt requests, the highest priority request STATUS/ID will appear first. After the user services this interrupt, a second interrupt will be generated for the next pending interrupt. The priorities are defined as follows: Request name Priority Module #0 Request Highest Module #1 Request · Module #2 Request · Module #3 Request · Module #4 Request · Module #5 Request · Module #6 Request · Module #7 Request Lowest For all interrupts, the serviced interrupt request is cleared automatically at the end of the interrupt acknowledge cycle. This method is referred to within the VME specification as ROAK (Release On AcKnowledge). 8 EXC-H009VME/M Offset Register (VXI & VME) BASE + 06 Read/Write This 16 bit read/write register defines the base address of the card's A24 or A32 memory and registers. If A24 addressing is used the 8 most significant bits of the Offset register are the values of the 8 most significant bits of the card's memory and register addresses and the 8 least significant bits of the register are not used. If A32 addressing is used the Offset register represents the 16 most significant bits of the card's memory and register addresses. Thus, the Offset register bits 15 through 8 map to the address lines A23 through A16 for the A24 Address Space, and the Offset register bits 15 trough 0 map to address lines A31 through A16 for the A32 Address Space. A24 ADDRESSING EXAMPLE: Required base address = 18 0000 H; Write 18XX H to Offset register OFFSET BIT VALUE ADDRESS LINE FUNCTION 15 0 A23 O 14 0 A22 F 13 0 A21 F 12 1 A20 S 11 1 A19 E 10 0 A18 T 9 0 A17 8 0 A16 7-0 Don’t care Don’t care 9 EXC-H009VME/M A32 ADDRESSING EXAMPLE: Required base address = FF38 0000 H; Write FF38 H to Offset register OFFSET BIT VALUE ADDRESS LINE 15 1 A31 14 1 A30 13 1 A29 12 1 A28 11 1 A27 10 1 A26 9 1 A25 8 1 A24 7 0 A23 6 0 A22 5 1 A21 4 1 A20 3 1 A19 2 0 A18 1 0 A17 0 0 A16 Vector#0 / Vector#1 Register (VXI & VME) FUNCTION O F F S E T BASE + 20(H) /22(H) Read/Write In the case of an interrupt generated by CCC/PU or the Con. Monitor section, the 8 least significant bits of this 16 bit register, known as the STATUS/ID, are used as the interrupt vector during the ensuing interrupt acknowledge cycle. The card is a D08(O) INTERRUPTER, and as a result will place these 8 bits on lines D00-D07 of the VME bus during the interrupt acknowledge cycle. Refer to section "Using Interrupts on VME." The 8 most significant bits of this register are don't care. OFFSET BIT 10 FUNCTION 15-8 Don’t care (x) 7-0 STATUS/ID EXC-H009VME/M TTAG DIVIDER (VXI & VME) BASE + 24(H Read/Write This register allows the user to input an external Clock to the ‘32 Bit Time-Tag’. This register contains a divider of the ‘16Mhz VME System Clock’. The clock generated can be the source of the Time-Tag Clock. (See ‘Time-Tag Options Register’). The description of this register is as following: BIT FUNCTION 15-8 Don’t care (x) 7-0 TTAG DIVIDER The divider’s equation is as following: 16Mhz/(2n)+2 (n is the current TTAG DIVIDER value). For a TTAG Div. Value of 4: 16Mhz/10 = 1.6 Mhz. Example Reserved Register (VXI & VME) BASE + 26(H) to 30(H) Read/Write These registers are reserved for future uses. MEMORY/REGISTERS ADDRESS MAPPING DIAGRAM Area and Control Registers On-Board CARD CONFIGURATION REGISTERS BLOCK FFFF H Memory and Registers RESERVED REGISTERS +24 to 30H VECTOR #1 REGISTER +22H VECTOR #0 REGISTER +20H 0000 H "A24/A32" ADDRESS SPACE RESERVED OFFSET REGISTER +06H STATUS/CTRL. REG. +04H DEVICE TYPE REG. +02H ID REGISTER +00H "A16" ADDRESS SPACE (I/O) . . . . . . . . Logical Address Dip Switch (SW5) 11 EXC-H009VME/M A16 ADDRESSING EXAMPLE: Given: Required configuration registers base address = E000(H), Then: Set dip-switch SW5 to LOGICAL ADDRESS = 80(H) SW5 12 OFF ON ON ON ON ON ON ON 1 2 3 4 5 6 7 8 EXC-H009VME/M GENERAL MEMORY MAP The board occupies 32Kx16 of the VME A24 or A32 address space, which are mapped via the Offset Register within the VME/VXI Configuration Registers. The 32K Words occupied by the H009VME/VXI are divided into two blocks of 16K Words the first one 0000H to 7FFFH for the main CCC/PU/Monitor section and the other one 8000H to FFFFH for the Concurrent Monitor section. H009VME MEMORY MAP C RESERVED FF96 H to FFFE H O EXTERNAL START REGISTER FF94 H N RESERVED FF92 H C RESERVED FF90 H . RESERVED FF8E H M RESERVED FF8C H O TIME TAG OPTIONS REGISTER FF8A H N TIME TAG COUNTER HIGH FF88 H I TIME TAG COUNTER LOW FF86 H T TIME TAG RESET REGISTER FF84 H O RESERVED FF82 H R CONCURRENT MON. RESET REGISTER FF80 H MEMORY AND CONTROL REGISTERS (16K x 16) 8000H to FF7E H C RESERVED 7F96 H to 7FFE H C EXTERNAL START REGISTER 7F94 H C RESERVED 7F92 H / BOARD RESET REGISTER 7F90 H P RESERVED 7F8E H U RESERVED 7F8C H / TIME TAG OPTIONS REGISTER 7F8A H M TIME TAG COUNTER HIGH 7F88 H O TIME TAG COUNTER LOW 7F86 H N TIME TAG RESET REGISTER 7F84 H . RESERVED 7F82 H CCC/PU/MON. RESET REGISTER 7F80 H MEMORY AND CONTROL REGISTERS (16K x 16) 0000H to 7F7E H 13 EXC-H009VME/M PU OPERATION The EXC-H009VME/M can be configured to simulate up to 16 Peripheral Units. The user selects which terminal(s) are operating ["ACTIVE"]. The EXC-H009VME/M handles all message transfers subsequent to receiving a "START" command (see Control Registers). In addition, errors can be injected into the message responses. The PU data transfers operates via a 2Kx16 Look Up Table which points to the exact data words. The user loads the H009 data blocks with transmit data and reads the received H009 data from the pre-assigned memory. The user can specify whether or not the Peripheral Unit should retransmit the select word upon receiving a select word with the command indicator set or send a different user selectable word in its place. The Peripheral Unit transmits its data words in 5 usec. (measured as: "dead time on the bus"); a value which can be altered via the PU Period Data Error Table. The board will respond properly to messages received at the minimum rate permitted by the H009 specification, i.e., it will respond properly to messages received with an intermessage gap of 8.0 usec measured as dead time on the bus. NOTE The user should use the following sequence to determine whether the board is installed AND ready to operate: * Check the Board ID register (test for value = 4939 Hex) * Check Board Status Register (test for Board Ready bit = '1') The board is installed and ready when BOTH of these registers contain the correct values (as written above). This sequence should be used after power-on and software reset operations. For Software Reset operations; these values should be set to ZERO by the user immediately prior to writing to the [software] Board Reset Register. 14 EXC-H009VME/M PU MEMORY MAP TIME TAG OPTIONS 7F8A H TIME TAG COUNTER HI 7F88 H TIME TAG COUNTER LO 7F86 H TIME TAG RESET 7F84 H RESERVED 7F82 H CCC/PU/MON. RESET 7F80 H RESERVED 7EDA to 7F7E H CLOCK SKEW REGISTER 7ED8 H BOARD CONFIGURATION REG. 7ED6 H BOARD ID REGISTER 7ED4 H BOARD STATUS REGISTER 7ED2 H START REGISTER 7ED0 H MESSAGE STATUS REGISTER 7ECE H RESERVED 7EC8to7ECC H VARIABLE AMPLITUDE DATA 7EC6 (H) MESSAGE STACK POINTER 7EC4 (H) FIRMWARE REVISION REGISTER 7EC2 (H) FIRMWARE DATE CODE 7EC0 (H) COMMAND RESPONSE TABLE (16 WORDS) 7EA0 to 7EBE H PERIOD DATA ERROR TABLE (16 WORDS) 7E80 to 7E9E H BIT COUNT ERROR TABLE (16 WORDS) 7E60 to 7E7E H WORD COUNT ERROR TABLE (16 WORDS) 7E40 to 7E5E H ERROR INJECTION TABLE (16 WORDS) 7E20 to 7E3E H ACTIVE PU TABLE 7E00 to 7E1E H MESSAGE STACK (256 BLOCKS) 7600 to 7DFE H DATA WORDS LOOK-UP TABLE (2K WORDS) 6600 to 75FE H H009 DATA WORDS 0000 to 65FE H 15 EXC-H009VME/M DATA WORDS LOOK-UP TABLE 6600 Æ 75FE(H) The received Select word's PU Address, Control Field and T/R bit are used to index into the [userprogrammed] look-up table. Each entry in the table represents the address of the buffer from/to which data is to be sent/stored. UNIT ADDRESS CONTROL FIELD T/R 11 bits of the H009 Select Word 65FE H . top 6600+ 1111 111111 1 . POINTER # . . LOOK-UP . TABLE . (2K x 16) . POINTER # DATA WORD #1 POINTER # DATA BLOCK 6600+ 0000 000000 0 XXXX H bottom HOW TO CREATE THE ADDRESS TO THE TABLE 1. Isolate the ELEVEN relevant bits of the H009 Select Word (PU Address, Control Field and T/R Field). Example Allocate a data block for a H009 Receive message to PU#5, CF#3. PU Address = 5 Control field = 3 T/R field = 0 0101 000011 00 hex representation = 50C (H) 2. Add this value to the base address of the Look-Up Table (6600H): 6600 (H) + 50C (H) = 6B0C (H) 3. Write the Data Pointer to this location NOTE 16 The Command indicator bit is not used in this calculation. Since each entry in the table takes up two bytes an additional 0 is added to the end of the address. EXC-H009VME/M MESSAGE STACK 7600 Æ 7DFE(H) The EXC-H009VME/M generates a Message Stack within the dual-port memory. This stack contains information which can be utilized by the user for post processing of the Peripheral Unit messages. The stack is divided into 256 blocks - each containing four 16 bit words. The stack operates as a Circular Buffer. The Message Stack Pointer points to the beginning of the [next] unused block. Only "ACTIVE" PU messages are stored. The figure below illustrates one instruction block. MESSAGE STATUS WORD 4th word TIME TAG - HI 3rd word TIME TAG - LO 2nd word H009 SELECT WORD 1st word Message Status Word Definitions: The Message Status Word indicates the status of the message transfer. This word is created by the Board. The contents of the Message Status word are shown below: BIT # FUNCTION DESCRIPTION 15 End of Message Indicates that the message transfer has been completed 14 Bus B/A Indicates on which bus the message was transferred. '1' = BUS B '0' = BUS A RESERVED Set to logic '0' 8 High Word Count Error Indicates that more words were received than were described within the select word's word count 7 Low Word Count Error Indicates that fewer words were received than were described within the select word's word count 6 Inter Word Gap Time Error Indicates that two words were received with a gap between them different from 5 microseconds 5 No Clock Response Indicates that no clock signal was detected on the active bus 4 Manchester Error Indicates that a bit with illegal Manchester coding was received 3 Parity Error Indicates that a data word with even parity was received 2 High Bit Count Error Indicates that a word with greater than 16 bits + 1 parity bit was received 1 Low Bit Count Error Indicates that a word with fewer than 16 bits + 1 parity bit was received 0 Error Indicates the occurrence of an error (defined within one of the other message status bit locations) 9-13 17 EXC-H009VME/M TIME TAG (Read by user) The Time Tag value is a 32-bit word which may be used to determine the time elapsed since 'START' or to determine the time between the H009 messages. The Time Tag implementation utilizes a 32-bit, free running counter with a resolution of 4 µsec per bit. The Time Tag counter can be reset by the user (to '0') any time by writing to the "Time Tag Reset Register" (see Control Register Definitions sections). NOTE 1. The user can also read the counter's value any time at the "Time Tag Counter" addresses (see Control Register Definitions section). 2. The counter can also be clocked and/or reset from external source (see Connectors section). H009 Select This location contains the H009 Select Word associated with the message. Only ACTIVE PU H009 Select Words are stored !! ACTIVE PU TABLE 7E00 Æ 7E1E(H) These 16 locations (words) contain the list of Active Peripheral Units and their Interrupt Enables. Each PU which is to be simulated is selected by setting bit 0 within the Active Peripheral Unit Word to a logic '1'. This register also allows the user to enable an interrupt trigger. Writing a logic '1' to bit 1 enables the interrupt condition. An interrupt will be generated at the end of processing for every message directed to a PU being simulated by the board for which the Interrupt Bit is set. The first Active PU word relates to PU #0, the next to PU #1, while the last location relates to PU #15. Active PU #15 Active Peripheral Unit WORD Peripheral . . Unit . . Table . . PU #0 Active Peripheral Unit WORD ACTIVE Peripheral Unit WORD DEFINITION BIT # FUNCTION 15-2 RESERVED set to “0” 18 1 '0' = NO INTERRUPT '1' = INTERRUPT 0 '0' = INACTIVE '1' = ACTIVE 7E1E(H) 7E00(H) 16th WORD 1st WORD EXC-H009VME/M ERROR INJECTION FEATURES The EXC-H009VME/M card allows a variety of error injection options. The error injection table is used to select which errors are to be associated with each PU. Separate table are used to determine the precise nature of the error to be injected, e.g., how many words to send if a word count error is to be injected. ERROR INJECTION TABLE 7E20 Æ 7E3E(H) The type of error to be injected within a transmitted message is selected by writing to the Error Injection Table. This table contains 16 Words (one per Peripheral Unit). The first word relates to PU #0, the second to PU #1, while the last location relates to PU #15. BIT # FUNCTION 15-4 RESERVED set to “0” 4 Data Word Parity Error (Data Words Sent With Even Parity) 3 Command Response Error (See Command Response Table) 2 Period Data Gap Error (See Period Data Error Table) 1 Bit Count Error (See Bit Count Error Table) 0 Word Count Error (See Word Count Error Table) WORD COUNT ERROR TABLE 7E40 Æ 7E5E(H) The Word Count error is selected by writing to the Word Count Error Table. This table contains 16 WORDS (one per Peripheral Unit). The first word relates to PU #0, the second to PU #1, while the last location relates to PU #15. The contents of each location controls the number of H009 words to be sent within the message regardless of the contents of the word count field within the select word. This table is defaulted to '00' by the board upon power-on or software reset. BIT COUNT ERROR TABLE 7E60 Æ 7E7E(H) The Bit Count Error is selected by writing to the Bit Count Error Table. This table contains 16 WORDS (one per Peripheral Unit). The first word relates to PU #0, the second to PU #1, while the last location relates to PU #15. This register sets the number of total bits within the H009 DATA word including 'Parity bit'. This register is utilized by the board only if the "Bit Count Error bit" is set within the Error Injection Register of this particular PU#. If the bit is not set, then a [valid] 17 bit word (16 data bits + 1 parity bit) is transmitted regardless of the contents of this register. 19 EXC-H009VME/M BIT COUNT ERROR WORD DEFINITION PU# 15 7E7E(H) OFFSET TABLE VALUE # BITS sent . . -3 bits 0006 (H) 14 . . -2 bits 0005 (H) 15 . . -1 bit 0004 (H) 16 0 0003 (H) 17 +1 bit 0002 (H) 18 +2 bits 0001 (H) 19 +3 bits 0000 (H) 20 PU# 0 7E60(H) PERIOD DATA TIME TABLE 7E80 Æ 7E9E(H) This table contains registers which set the DEAD TIME between Data Words sent from the different Peripheral Units. The resolution of these registers is 1 microsecond per bit. This time is measured as the "DEAD TIME" on the H009 bus. The default time is equal to 5.0 µsec if no error injection is requested. A value greater than 7 is not recommended as it will cause each data word to be interpreted as a select word by other PU's on the bus and may crash into new select words from the CCC. PU# 15 7E9E(H) . . . . . . PU# 0 7E60(H) COMMAND RESPONSE TABLE 7EA0 Æ 7EBE(H) Upon receiving a Select Word with the 'Command Indicator Bit' set to '1', the PU responses by returning the Select Word back to the CCC. When the Command Response Error Bit is set in the appropriate register in the Error Injection Table, the specific PU does not send back the last SELECT word but the word written in the COMMAND RESPONSE TABLE. This table contains 16 WORDS (one per Peripheral Unit). The first word relates to PU #0, the second to PU #1, while the last location relates to PU #15. PU# 15 . . . . . . PU# 0 20 7EBE(H) 7E60(H) EXC-H009VME/M FIRMWARE DATE CODE 7EC0(H) This register indicates the date of release of the firmware revision level written in the 'Firmware Revision Code. The lower nibble is the year. The offset is year 1990, The value written in this field is added to the offset. This field can reach year 2005. The next higher nibble is the month. It's value is written in HEX. The upper Byte is the day of the month. It's value is also in HEX. BIT # FUNCTION 15-8 DAY 7-4 MONTH 3-0 YEAR Example For a revision date of 22/10/95: the register will contain 16A5(H) FIRMWARE REVISION REGISTER 7EC2(H) This register indicates the revision level of the on-board firmware. The value 0100(H) would be read as revision level: 1.00. MESSAGE STACK POINTER 7EC4(H) The Stack Pointer indicates the position within the Message Stack area where the next message is to be recorded. This pointer is updated (incremented by '8') after an entire message has been received. This word "circulates" within the Message Stack between 7600(H) to 7DF8(H). It is initialized to '7600(H)'. VARIABLE DATA AMPLITUDE REGISTER 7EC6(H) This register specifies the amplitude of the H009 data output signal. The signal can be programmed from 0 volts up to 15 volts (p-p) - measured on the H009 bus with 175 ohm load. A higher Transmit [output] amplitude will appear on the H009 bus if 68 ohm termination resistors are used. The register has a resolution of 60mv/bit (p-p) on the bus. In general, the accuracy of the measured signal depends on the accuracy of the components involved (termination and isolation resistors, transformers, transceivers etc.). Therefore a difference may be encountered between two different boards or the same board on two different buses. This register must be set before issuing a START to the board. To modify this register: issue a "STOP", modify and then re-issue a START (see START Register). This Register defaults to FFH after Reset, providing maximum amplitude. 21 EXC-H009VME/M MESSAGE STATUS REGISTER 7ECE(H) This register indicates that a H009 message has been received. The figure below illustrates the placement of the status bit. A logic '1' indicates active condition (bit is also set for messages with errors). BIT # FUNCTION 15-1 NOT IN USE (SET T0 “0”) 0 NOTE MESSAGE COMPLETE Message Complete bit is NOT reset by the board and should be reset by the user after reading it. START REGISTER 7ED0(H) This register controls the 'START / STOP' operation of the EXC-H009VME/M. The user can Start then Stop the PU operation, modify PU parameters and then re-issue a new Start in real-time. See note on the Board Status Register (Board Halted/Running Bit 04.) BIT # FUNCTION 15-1 NOT IN USE (SET T0 “0”) 0 ‘1’ = START; '0' = STOP BOARD STATUS REGISTER 7ED2(H) This register indicates the status of the EXC-H009VME/M card. BIT # FUNCTION 15-5 NOT IN USE (SET T0 “0”) 4 1= BOARD HALTED 0= BOARD RUNNING 3 SELF-TEST OK 2 RESERVED 1 RAM OK 0 BOARD READY NOTE 22 Bit "04" (Board Halted) is set by the board after the user "stops" the current operation (by resetting the START bit within the Start Register). The user must check this bit first before modifying registers which first require a "STOP" operation. The board resets this bit after receiving a subsequent START command (by writing to the Start Register). The condition of this bit after power-on or software reset is a logic "1". EXC-H009VME/M BOARD ID REGISTER 7ED4(H) This register contains a fixed value which can be read by a user's initialization routine to detect the presence of the EXC-H009VME/M card. The one-word value of this register is: 4939 (Hex); ASCII 'H9'. BOARD CONFIGURATION REGISTER 7ED6(H) The operating mode of the board is set via this register. This register must be set before issuing a START to the board. To modify this register: issue a "STOP", modify and then re-issue a START (see START Register). HEX VAL. MODE 0001 PU MODE 0002 CCC / CONCURRENT-PU 0004 BM - SEQUENTIAL BLOCK MODE OTHERS RESERVED CLOCK SKEW REGISTER 7ED8(H) Writing to this location will alter the synchronization of the data sent by the PU with respect to the clock signal received from the CCC. The default value of 4 results in complete synchronization. Higher numbers delay the data by approximately 25 nanoseconds per bit. Lower numbers cause the data to be sent earlier. Valid values are from 0 to 15. This register takes effect only when the board is turned off. To alter the value, write a '0' to the START register, check the Board Status Register to make sure it is off, alter the value of the Clock Skew Register and then write a '1' to the START register. SOFTWARE RESET REGISTER 7F80(H) Writing to this location will RESET the board. The board will act as if POWER had been switched off then on. The data field is ignored. NOTE 'RESET' ERASES ALL MEMORY LOCATIONS WITHIN THE DUAL-PORT RAM!!! The Board Status, the Board ID, Firmware Revision and Variable Amplitude registers are written by the board after the reset operation has been completed. TIME TAG RESET REGISTER 7F84(H) (WRITE) Writing to this location (data field = don't care) will reset the current bank's Time Tag Counter. The counter will start to count from 0 immediately after the reset. 23 EXC-H009VME/M TIME TAG COUNTER 7F86-7F88(H) (READ) These two words contain the current bank's free-running, 32 bit Time Tag Counter value. The user may read this value at any time. The counter is reset upon power-up or software reset and stays reset until the board has been started. After the board is started in PU or Bus Monitor modes the counter starts counting up and may be re-initialized to 0 by writing to the "Time Tag Reset Register". When reaching the value FFFFFFFFH, the counter will wrap-around to 0 and continue counting. The user must first read the 16 bit value in address 7F86H, and then read the 16 bit value in 7F88H. The address location 7F86H contains the LSW while the address location 7F88H contains the MSW. In CCC mode this value represents the Frame Time remaining. When this value goes to 0 a new frame will be sent out (if running in loop mode). The resolution of this counter is 4 microseconds per bit. TIME TAG OPTIONS REGISTER 7F8A(H) (WRITE) Writing to this register bit 0 will select the CCC/PU/MON’s Time Tag Counter clock source. This register is set to `0' after power-up or software reset. In this card the External Clock is a clock generated from the ‘16Mhz System Clock’ and divided by one of the Configuration Registers. BIT # FUNCTION 15-1 NOT IN USE (SET T0 “0”) 0 '0' - Time Tag clock = Internal. ‘1' - Time Tag clock = External (see TTAG CLOCK DIVIDER in Configuration-Registers) 24 EXC-H009VME/M CCC / CONCURRENT-PU OPERATION The EXC-H009VME/M can operate as the Central Computer Complex and up to 16 Peripheral Units. If no PUs are activated the board will act as a CCC only. For ‘CCC to PU’ commands the user sets up the select word and all the data words to be sent. For ‘PU to CCC’ commands for which the user is simulating only the CCC, the user sets up the select word and leaves space for the data words to be read into. If the user is simulating both the CCC and the PU in a ‘CCC to PU’ command, the user must fill in both the select word and the data words. NOTE The user should use the following sequence to determine whether the board is installed AND ready to operate: * Check the Board ID register (test for value = 4939 Hex) * Check Board Status Register (test for Board Ready bit = '1') The board is installed and ready when BOTH of these registers contain the correct values (as written above). This sequence should be used after power-on and software reset operations. For Software Reset operations; these values should be set to ZERO by the user immediately prior to writing to the [software] Board Reset Register. 25 EXC-H009VME/M CCC/CONCURRENT PU MEMORY MAP FRAME COUNTER HIGH 7F88 H FRAME COUNTER LOW 7F86 H FRAME COUNTER RESET 7F84 H *** RESERVED *** 7F82 H CCC/PU/MON RESET 7F80 H *** RESERVED *** CLOCK SKEW REGISTER 7EDA (H) BOARD CONFIGURATION REG. 7ED6 (H) BOARD ID REGISTER 7ED4 (H) BOARD STATUS REGISTER 7ED2 (H) START REGISTER 7ED0 (H) MESSAGE STATUS REGISTER 7ECE (H) *** RESERVED *** 26 7EDC (H)- 7F7E (H) 7ECA - 7ECC (H) VARIABLE AMPLITUDE CLOCK 7EC8 (H) VARIABLE AMPLITUDE DATA 7EC6 (H) INSTRUCTION STACK POINTER 7EC4 (H) FIRMWARE REVISION REGISTER 7EC2 (H) FIRMWARE DATE CODE 7EC0 (H) LOOP COUNTER 7EBE (H) PERIOD GAP ERROR REG 7EBC (H) BIT COUNT ERROR REG 7EBA (H) WORD COUNT ERROR REG 7EB8 (H) FRAME TIME REGISTER HI 7EB6 (H) FRAME TIME REGISTER LO 7EB4 (H) INSTRUCTION COUNT REG 7EB2 (H) *** RESERVED *** 7EB0 (H) ACTIVE PU TABLE 7E90(H) - 7EAF (H) INSTRUCTION STACK AND MESSAGE BLOCK AREA 0000(H) - 7E8F(H) EXC-H009VME/M INSTRUCTION STACK The user programs the EXC-H009VME/M via the Instruction Stack. The Instruction Stack is divided into instruction blocks - each containing four words. Each instruction block corresponds to a single H009 message. The block contains “control” information (written by the user) and status information (written by the board). The figure below illustrates one instruction block. MESSAGE STATUS WORD fourth word INTERMESSAGE GAP TIME HI third word INTERMESSAGE GAP TIME LO second word MESSAGE BLOCK POINTER first word The user may define several Instruction Stacks simultaneously. The Instruction Stack Pointer is used to select the current stack, i.e., the stack that will be run upon issuing a Start command. Jump instructions allow the user to jump from stack to stack in real time. 27 EXC-H009VME/M Message Status The Message Status Word indicates the status of the message transfer. This word is created by the board and written at the end of each message. The contents of the message status word become valid when the End of Message bit is set. The user should zero out this bit after reading the message status word (or set one of the 0 bits) in order to recognize the next time a message comes in. All error values refer to data received in a ‘PU to CCC’ transfer. Message Status Word Definitions Bit Message Meaning 15 Message Complete Indicates that the message transfer has been completed RESERVED Set to '0' 10 Bad Mode Error Indicates that the PU responded to a select word with the command indicator set with a bad data word 09 Wrong Bus Error Indicates that the PU data from a PU->CCC message was received on the wrong bus 08 Word Cnt Hi Error Indicates that more words were received than were described within the select word's word count 07 Word Cnt Lo Error Indicates that fewer words were received than were described within the select word's word count 06 Gap Time Error Indicates that two words were received with a gap between them different from 5 microseconds 05 RESERVED 04 Manchester Error Indicates that a bit with illegal Manchester coding was received 03 Parity Error Indicates that a data word with even parity was received 02 Bit Count Hi Error Indicates that a word with greater than 16 bits + 1 parity bit was received 01 Bit Count Lo Error Indicates that a word with fewer than 16 bits + 1 parity bit was received 00 ERROR Indicates the occurrence of an error (defined within one of the other message status bit locations) 14-09 NOTE 28 A logic '1' indicates occurrence of status flag. EXC-H009VME/M Intermessage Gap Time Hi and Low — Written by user The Intermessage Gap Time is a 24 bit value indicating the time between the end of this message and the beginning of the following message. The minimum intermessage gap time permitted by the H009 specification is 8 microseconds. The intermessage gap time is given in units of 1 microsecond per bit. The actual intermessage gap will be 4 microseconds greater than the number written to this field. To request an intermessage gap of 8 microseconds write a 4 to this field. Message Block Pointer — Written by user The Message Block Pointer is a sixteen bit word which points to the beginning of a H009 Message Block. Like all on board pointers it is actually a byte index into the board. The Message Block may be located anywhere within the 'Instruction Stack and Message Block Area' section of the board Instruction Stack . . . Message Status Word Intermessage Gap Time Hi Intermessage Gap Time Lo pointer H009 SELECT WORD Message CONTROL WORD Block Message Block Pointer 29 EXC-H009VME/M MESSAGE BLOCK The user loads the Message Block anywhere within the Instruction Stack/Message Block Area (see: Memory Map). Message Blocks do NOT have to be stored in sequential locations within the memory since the Message Block Pointers "point" to the Message Blocks in sequence. CONTROL WORD Each block contains a H009 message plus its Control Word. This Control Word is written into the FIRST word of each block. The Control Word provides the EXC-H009VME/M with additional information about the message to be transmitted. The size of the message block is not fixed and is dependent upon the size of the message itself. The description of each bit within the Control Word follows: 30 EXC-H009VME/M Control Word Definitions Bit Message Meaning 15 Stop on Error Error message stops CCC operation. The user can restart by writing to the Instruction Count and Start bit. 14 Parity Error Selects Even parity in H009 word. 13 Halt / Continue 1 = Halt; stops CCC transfer operation. This bit must be reset to 0 to Run or Continue. 12 Word Count Error Transmits fewer or more words than are indicated by the Word Count field. This function is valid for CCC to PU messages only. 11 Bit Count Error Transmits invalid number of bits within H009 words. 10 RESERVED Set to ‘0’ 09 Period Data Gap First H009 data word is transmitted with invalid gap time (between select and data word). 08 Error Placement For ‘Parity” and ‘Bit Count” error injection, this bit chooses whether to insert t he error in the select word or the data words. 0 in Select word 1 in Data words 07 Channel A / B Selects active H009 channel: logical 1 selects channel A; logical 0 selects channel B. 06 Auto Bus Switch 05-04 Auto Retry Code On error, the CCC will retry message transfer on alternate bus (auto-retry must be selected). On error, selects the number of retries before transferring the next message. Retries are executed with a short intermessage gap. Code _1 _0 meaning: 0 0 1 1 03-00 Command Code 0 no retry 1 1 retry 0 2 retries 1 3 retries 0000 Send Message 0001 Skip Message 0010 Jump Command 0011 RESERVED . . 1111 RESERVED 31 EXC-H009VME/M HALT Operation The user normally sets this bit to a logic '0' before writing to the Start Register. The user may, in realtime (during execution), set this bit (to a logic '1'). The board, when operating on that particular Message Block's Control Word, will HALT transfer operations until the bit is reset to a logic '0'. When the board detects that the HALT bit is set, it sets the "WAIT FOR CONTINUE" bit within the Message Status Register (see: Control Register Section). This bit can be used by the user in order to know when the board has arrived at this Instruction block. When the board detects that the Halt bit has been reset (continue mode), the board will then reset the "WAIT FOR CONTINUE" bit within the Message Status Register. NOTE This operation can be used in conjunction with the JUMP feature described below. Skip Message Operation The SKIP MESSAGE command allows the user to easily skip a message defined in a certain Message Block by only modifying the Command field within the Control Word. This allows the user to selectively send a message within the current frame. The Intermessage Gap Time associated with the SKIP Message has no effect. JUMP Command Operation The EXC-H009VME/M allows the user to modify the CCC transfer cycle by setting the "JUMP" command within the CCC Control Word. The Jump command instructs the board to operate on a New instruction stack or New stack entry within the same stack. This Control word is followed by a Stack Pointer word instead of the usual H009 SELECT Word. In addition, the Stack Pointer is followed by an Instruction Count value. The Jump command is tested AFTER the board has tested the HALT/CONTINUE bit within the Control Word. The Intermessage Gap Time associated with the JUMP command has no effect. The Memory Location Sequence is illustrated below: 15 32 8 7 0 INSTRUCTION COUNT 3rd word STACK POINTER 2nd word CONTROL WORD 1st word EXC-H009VME/M MESSAGE BLOCK FORMATS The Message Block contains, or will contain, the entire H009 message as it appears on the H009 bus including Select Word(s) and Data Word(s) where applicable. EXAMPLE NO. 1 Before executing Transmit command (operating as CCC only): H009 Transit command Control word First location of block After executing Transmit command (operating as CCC only): H009 Data word From transmitting peripheral unit (not simulated) • • • • H009 Data word • H009 Data word From transmitting peripheral unit (not simulated) H009 Transmit command Control word First location in block 33 EXC-H009VME/M EXAMPLE NO. 2 Before executing Receive command: H009 Data word . . H009 Data word H009 Data word H009 Transmit command Control word First location of block After executing Transmit command: H009 Data word . . H009 Data word H009 Data word H009 Transmit command Control word Since all traffic in CCC 34 First location of block Æ PU commands is in one direction. The before and after are the same. EXC-H009VME/M EXAMPLE NO. 3 : (PERIPHERAL UNIT SIMULATION) In the case where the board is simulating both the Bus Controller and one or more Peripheral Units, the user must write (into the Message Block) the simulated Peripheral Unit H009 DATA word(s) in the sequence in which they are to appear over the H009 bus (see MESSAGE BLOCK FORMATS). The user instructs the board as to which Peripheral Units are to be simulated by writing to the (16 word) Active Peripheral Unit Table. Each entry within the 16-word table relates to a specific Peripheral Unit. The first location relates to PU #00, while the last location relates to PU #15 (for a total of 16 locations). Writing a value '0001' to the table entry ENABLES the Peripheral Unit simulation by the board. A value of '0000' written to the table disables the simulation by the board. PU# 15 ACTIVE PU WORD 7EAE(H) PU# 14 ACTIVE PU WORD . . . PU# 0 ACTIVE PU WORD 7E90(H) ACTIVE Peripheral Unit WORD DEFINITION: Bit 15 - 1 0 Function Not in use - set to ‘0’ 1 = Enabled; 0 = Disabled 35 EXC-H009VME/M Before executing Transmit command (operating as both CCC and PU): H009 Data word Peripheral Unit Data (Simulated by the EXC-H009PC) H009 Data word . . . H009 Data word H009 Transmit command Control word First location of block After executing Transmit command (operating as both CCC and PU): H009 Data word H009 Data word . . . H009 Data word H009 Receive command Control word First location of block In this example all data is being sent by the board. From a system point of view the select word is sent as part of the CCC function and the data is sent as part of the PU function. 36 EXC-H009VME/M CONTINUOUS OR ONE-SHOT MESSAGE TRANSFERS The EXC-H009VME/M offers the capability of transferring all programmed messages once, in a continuous loop, or for 'N number of times'. In the One-Shot mode, the board transfers all messages [after receipt of a "START" command], sets the Message Complete Bit within the Message Status Register, issues an Interrupt [if programmed] and waits for a new "START". This mode is selected via the Start Register (see Start Register definition). In the 'N' Times Mode, the user loads the Loop Count Register with the number of times to transmit the messages [frame] and sets the LOOP and START bits within the Start Register. The user can select to transmit from one to 255 times (see: Start and Loop Count Registers). The time between frames is predetermined via Frame Time Register (see below). In the Continuous mode, the EXC-H009VME/M will re-transmit the message frame at a predetermined, user-programmable rate. This mode is selected via the Start Register and the Loop Count Register (see Register definitions). In this mode, all messages relating to the [active] Stack Pointer and Instruction Counter are continuously "looped" until the user halts the board's operation (see Start Register definition). The "loop" time or Frame Time is a function of the two-Word Frame Time Registers (Hi and Lo). The internal Frame Time counter is loaded upon receipt of a "START" command with the 32-bit value found within the Frame Time Registers (Hi and Lo). The Frame Time counter is decremented every N x 4 usec - where N is the value of Frame Time Registers (Hi and Lo). The resolution of the FrameTime Counter is 4usec. After the execution of all instructions (1 frame), the EXC-H009VME/M will wait until the internal Frame Time Counter reaches ZERO before re-transmitting the next frame. NOTE If the Frame time is less than the time required to transmit all messages [within 1 frame], the subsequent frames will be transmitted with a minimal delay between them. 37 EXC-H009VME/M CONTROL REGISTER DEFINITIONS INSTRUCTION COUNTER 7EB2(H) The Instruction Counter is loaded with the number of instructions (H009 Messages) to execute in the current frame. The value must be greater than '0' before beginning transmission (by writing to the 'START REGISTER'). Load '1' for one message, '2' for two messages, etc. The EXC-H009VME/M updates this register by decrementing the value and writing it back to the memory. This register must be set before issuing a START to the board. This register is decremented and updated by the board at the end of each message transfer. To modify this register: issue a "STOP", modify and then re-issue a START (see START Register). When in the "loop mode", this register cycles from the initial value to "0". Following the transmission of the last message in the loop the Instruction counter is set to 0 for the duration of the frame time. Just prior to transmitting the first message of the next loop the Instruction Counter is set to its initial value. FRAME TIME REGISTERS - HI & LO 7EB4 Æ 7EB6(H) These registers contain the 32-bit Frame Time Value for Continuous and N-times Modes Operation. The resolution of this register is 1 usec. This register must be set before issuing a START to the board. To modify this register: issue a "STOP", modify and then re-issue a START (see START Register). 38 EXC-H009VME/M WORD COUNT REGISTER 7EB8(H) This register controls the number of H009 data words within the message. When NO error is selected (see: Control Word), this register is ignored and the number of words sent is determined by the select word. When a word count error is selected, the number of words sent is the number of words in the select word + the number written to this register. WORD COUNT ERROR WORD DEFINITION Offset Table Value –3 words FFFD (H) –2 words FFFE (H) –1 word FFFF (H) no error injection 0000 (H) +1 word 0001 (H) +2 words 0002 (H) +3 words 0003 (H) BIT COUNT REGISTER 7EBA(H) Sets the number of total bits within the H009 Data words including parity. When NO error is selected (see: Control Word), this register is ignored (17-bit word - including parity - is selected). BIT COUNT ERROR WORD DEFINITION No. Bits Sent Offset Table Value 14 –3 bits 0006 (H) 15 –2 bits 0005 (H) 16 –1 bit 0004 (H) 17 no error injection 0003 (H) 18 +1 bit 0002 (H) 19 +2 bits 0001 (H) 20 +3 bits 0000 (H) 39 EXC-H009VME/M PERIOD DATA GAP REGISTER 7EBC(H) This register sets the DEAD TIME between Data Words sent from the CCC. When NO error is selected (see: Control Word), this register is ignored. The resolution of the register 1 microsecond per bit. This time is measured as the "DEAD TIME" on the H009 bus. The default period gap is 5 microseconds. The actual gap will be 4 microseconds greater than the number written to this field. To request an gap of 6 microseconds write a 2 to this field. Gaps less than 5 microseconds are not supported. Gaps greater than 8 microseconds will be interpreted as separate messages by a PU. LOOP COUNT REGISTER 7EBE(H) This register is used in conjunction with the Loop Bit in the Start Register. If that bit is set, the user sets this register to specify the number of times (1 to 65535) the Message Frame will be transmitted. A value of zero is interpreted as a request for continuous looping. This register must be set before issuing a START to the board. To modify this register: issue a "STOP", modify and then re-issue a START (see START Register). FIRMWARE DATE CODE 7EC0(H) This register indicates the date of release of the firmware revision level written in the 'Firmware Revision Code. The lower nibble is the year. The offset is year 1990, The value written in this field is added to the offset. This field can reach year 2005. The next higher nibble is the month. It's value is written in HEX. The upper Byte is the day of the month. It's value is also in HEX. Bit Function 15 - 8 Day 7-4 Month 3-0 Year Example For a revision date of 22/10/95: write 16A5(H) to the register. FIRMWARE REVISION REGISTER 7EC2(H) This register indicates the revision level of the on-board firmware. The value 0100(H) would be read as revision level: 1.00 40 EXC-H009VME/M STACK POINTER 7EC4(H) The Stack Pointer points to the Instruction Stack. The Instruction Stack can reside anywhere within locations 0000(H) and 7E8F(H). This register must be set before issuing a START to the board. To modify this register: issue a "STOP", modify and then re-issue a START (see START Register). VARIABLE AMPLITUDE (DATA) REGISTER 7EC6(H) This register specifies the amplitude of the H009 output data signal. The signal can be programmed from 0 volts up to 7.5 volts (p-p) - measured on the H009 bus with specified H009 coupling and 35 ohm load (two 70 ohm termination resistors were used). A higher Transmit [output] amplitude will appear on the H009 bus if 78 ohm termination resistors are used. The register has a resolution of 30mv/bit (p-p) on the bus. This register must be set before issuing a START to the board. To modify this register: issue a "STOP", modify and then re-issue a START (see START Register). The Register defaults to FFH after Reset, providing maximum amplitude. VARIABLE AMPLITUDE (CLOCK) REGISTER 7EC8(H) This register has the same function as the Variable Data Amplitude Register. This register controls the amplitude of the clock extracting out of the board. INTERRUPT CONDITION REGISTER 7ECC(H) This register allows the user to set different interrupt triggers. When a condition that has been enabled within this register occurs, an interrupt will be generated. The user may check the Message Status Register to determine which condition caused the interrupt. A logic '1' enables the interrupt condition. Bit 15 - 4 Function Not used - Set to 0 3 Message Error 2 End of Frame 1 Message Complete 0 0 NOTE For all Interrupt conditions the interrupt will be sent at the end of the message. 41 EXC-H009VME/M MESSAGE STATUS REGISTER 7ECE(H) This register indicates the status of the EXC-H009VME/M card. The figure below illustrates the definition of each Status bit. A logic '1' indicates active condition. Bit 15 - 4 Function Not used - Set to ‘0’ 3 Message Error 2 End of Frame 1 Message Complete 0 Wait for Continue WAIT FOR CONTINUE A message with the halt bit set has been encountered. The user must reset the halt bit in the Control word to continue. MESSAGE COMPLETE The last word of a message has been sent END OF FRAME The last word of the last message in a frame has been sent MESSAGE ERROR A message has been sent resulting in the error bit being set in the Message Status Word * Starred Bits are NOT reset by the board and should be reset by the user after the user reads them. START REGISTER 7ED0(H) This register controls the 'START/STOP' operation of the EXC-H009VME/M. Writing to this register with the appropriate bit set begins the Bus Controller transfer operation. When operating in the "Loop" or "N Times" mode, the user must set the Start and Loop bits within this register. The "loop" and "Ntimes" number is selected via the Loop Count Register. In the One-Shot and "N-Times" modes, the board RESETS the Start bit within the register after ALL messages have been transferred. The board does not reset any bit while in the Continuous Loop mode. Write "0" to 'bit 0' to halt the LOOP operation between messages. Write, instead, a "0" to 'bit 1' in order to halt the operation at the end of the entire frame (this bit is not tested between message transfers). See the related bit (data bit "04") within the Board Status Register which indicates when the board has been halted. Bit Function 15 -2 Not used - Set to ‘0’ 1 1 = Loop mode 0 = One-shot mode 0 1 = Start 0 = Stop 42 EXC-H009VME/M BOARD STATUS REGISTER 7ED2(H) This register indicates the status of the EXC-H009VME/M card. In addition, this register indicates option selection as defined below. (Status bits are active '1').The upper bits (b15-b5) should be set to '0'. Bit 15 -5 Function Not used - Set to ‘0’ 4 1 = Board halted 0 = Board running 3 Self-test ok 2 RESERVED 1 RAM ok 0 Board ready Bit "04" (Board Halted) is set by the board after the user "stops" the current operation (by resetting the START bit within the Start Register). The user should check this bit first before modifying registers which first require a "STOP" operation. The board resets this bit after receiving a subsequent START command (by writing to the Start Register). BOARD ID REGISTER 7ED4(H) This register contains a fixed value which can be read by a user's initialization routine to detect the presence of the EXC-H009VME/M card. The one-word value of this register is: 4939 (Hex) ; ASCII 'H9'. BOARD CONFIGURATION REGISTER 7ED6(H) The operating mode of the board is set via this register. This register must be set before issuing a START to the board. To modify this register: issue a "STOP", modify and then re-issue a START (see START Register). HEX VAL. MODE 0001 PU MODE 0002 CCC / CONCURRENT-PU 0004 BM -SEQUENTIAL BLOCK MODE OTHERS RESERVED 43 EXC-H009VME/M CLOCK SKEW REGISTER 7EDA(H) Writing to this location will alter the synchronization of the data sent by the CCC with respect to the clock signal that is also sent from the CCC. The default value of 6 results in complete synchronization. Higher numbers delay the data by approximately 25 nanoseconds per bit. Lower numbers cause the data to be sent earlier. Valid values are from 0 to 15. This register takes effect only when the board is turned off. To alter the value, write a '0' to the START register, check the Board Status Register to make sure it is off, alter the value of the Clock Skew Register and then write a '1' to the START register. This feature can be used, in the CCC Mode, for Error Injection functions. SOFTWARE RESET REGISTER 7F80(H) Writing to this location will RESET the CCC/PU/MON section only. This section will act as if POWER had been switched off and then on. The data field is ignored. NOTE 44 'RESET' ERASES ALL MEMORY LOCATIONS WITHIN THE DUAL-PORT RAM!!! The Board Status, the Board ID, Firmware Revision and Variable Amplitude registers are written by the board after the reset operation has been completed. EXC-H009VME/M BUS MONITOR OPERATION (non concurrent/concurrent) The EXC-H009VME/M can be configured as a passive monitor. It will store all traffic on the H009 bus associating a 32 bit time tag and a status word with each H009 message. The user may selectively monitor messages based on the unit address, Command indicator, control filed and T/R bit fields of the select word and may choose to generate an interrupt or halt transmission based on those same criteria. A running count of all messages recorded is maintained. There are 586 data blocks which are filled in sequentially. When the last data block is filled in the buffer wraps around and the following block is place in block number 0. The Non Concurrent Mode and the Concurrent Mode have exactly the same descriptions and addresses, therefore the manual will show them together. The Concurrent Monitor has an offset of 8000 Hex from the Non-Concurrent Monitor (see Memory Maps below).The Non-Concurrent Monitor will be refered at the remainder of this manual as: ‘Monitor.’ NOTE The user should use the following sequence to determine whether the board is installed AND ready to operate: * Check the Board ID register (test for value = 4939 Hex) * Check Board Status Register (test for Board Ready bit = '1') The board is installed and ready when BOTH of these registers contain the correct values (as written above). This sequence should be used after power-on and software reset operations. For Software Reset operations; these values should be set to ZERO by the user immediately prior to writing to the [software] Board Reset Register. 45 EXC-H009VME/M MONITOR MEMORY MAP TIME TAG OPTIONS 7F8A H TIME TAG COUNTER HI 7F88 H TIME TAG COUNTER LO 7F86 H TIME TAG RESET 7F84 H RESERVED 7F82 H CCC/PU/MONITOR RESET 7F80 H RESERVED 7ED8 to 7F7E H BOARD CONFIGURATION REGISTER 7ED6 H BOARD ID REGISTER 7ED4 H BOARD STATUS REGISTER 7ED2 H START REGISTER 7ED0 H MESSAGE STATUS REGISTER 7ECE H RESERVED 7ECC H CURRENT BLOCK INDEX 7ECA H RESERVED 46 7EC4 to 7EC8 H FIRMWARE REVISION REGISTER 7EC2 (H) FIRMWARE DATE CODE 7EC0 (H) MESSAGE COUNT HI 7EBE H MESSAGE COUNT LO 7EBC H RESERVED 7E00 to 7EBB H FILTER/FUNCTION TABLE 6E00 to 7DFF H RESERVED (16 words) 6DE0 to 6DFF H MESSAGE BLOCK AREA (586 BLOCKS) 0000 to 65FE H EXC-H009VME/M CONCURRENT MONITOR MEMORY MAP TIME TAG OPTIONS FF8A H TIME TAG COUNTER HI FF88 H TIME TAG COUNTER LO FF86 H TIME TAG RESET FF84 H RESERVED FF82 H CONCURRENT MONITOR RESET FF80 H RESERVED FED8 to FF7E H BOARD CONFIGURATION REGISTER FED6 H BOARD ID REGISTER FED4 H BOARD STATUS REGISTER FED2 H START REGISTER FED0 H MESSAGE STATUS REGISTER FECE H RESERVED FECC H CURRENT BLOCK INDEX FECA H RESERVED FEC4 to FEC8 H FIRMWARE REVISION REGISTER FEC2 (H) FIRMWARE DATE CODE FEC0 (H) MESSAGE COUNT HI FEBE H MESSAGE COUNT LO FEBC H RESERVED FE00 to FEBB H FILTER/FUNCTION TABLE EE00 to FDFF H RESERVED (16 words) EDE0 to EDFF H MESSAGE BLOCK AREA (586 BLOCKS) 8000 to E5FE H 47 EXC-H009VME/M BUS MONITOR MESSAGE BLOCK The figure below illustrates the contents of a Message Block. Each block takes up 24 words (48 bytes) so that the first block begins at address 0 the second at 0030 (H) and so on with the final block beginning at 6DB0 (H). In Conc. Mon.:8000 (H) for the first and EDB0 (H) for the final block. . WORD 23 RESERVED . . . . . H009 DATA WORD 15 . . . H009 DATA WORD 1 48 H009 SELECT WORD WORD 3 TIME TAG WORD - #2 (HI) WORD 2 TIME TAG WORD - #1 (LO) WORD 1 MESSAGE STATUS WORD WORD 0 EXC-H009VME/M MESSAGE STATUS WORD The Message Status Word indicates the status of the message transfer. This word is created by the Board. The contents of the Message Status word are shown below: BIT # FUNCTION DESCRIPTION 15 End of Message Indicates that the message transfer has been completed 14 Bus B/A Indicates on which bus the message was transferred. '1' = BUS B '0' = BUS A 13 Message Pending Set to logic '1' following reception of the select reset to '0' when End of Message is set RESERVED Set to logic '0' 8 High Word Count Error Indicates that more words were received than were described within the select word's word count 7 Low Word Count Error Indicates that fewer words were received than were Lo Error described within the select word's word count 6 Inter Word Gap Time Error Indicates that two words were received with a gap Error between them different from 5 microseconds 5 No Clock Response Indicates that no clock signal was detected on the Response active bus 4 Manchester Error Indicates that a bit with illegal Manchester coding Error was received 3 Parity Error Indicates that a data word with even parity Error received 2 High Bit Count Error Indicates that a word with greater than 16 bits + 1 parity bit was received 1 Low Bit Count Error Indicates that a word with fewer than 16 bits + 1 parity bit was received 0 Error Indicates the occurrence of an error (defined within one of the other message status bit locations) 12-9 Time Tag (Read by user) The Time Tag value is a 32-bit word which may be used to determine the time elapsed since 'START' or to determine the time between the H009 messages. The Time Tag implementation utilizes a 32-bit, free running counter with a resolution of 4 msec per bit. The Time Tag counter can be reset by the user (to '0') any time by writing to the "Time Tag Reset Register" (see Control Register Definitions sections). NOTE 1. The user can read the counter's value any time at the "Time Tag Counter" addresses (see Control Register Definitions section). 2. The counter can also be clocked and/or reset from an external source (see Connectors section). 49 EXC-H009VME/M FILTER/FUNCTION TABLE 6E00(H) Æ 7DFF(H)/ EE00(H) Æ FDFF(H) The Filter/Function table is a byte wide table indexed by the upper 12 bits of the select word. UNIT ADDRESS CI CONTROL FIELD T/R (12 hi bits of the H009 Select Word) top 6E00+ 1111 1 111111 1 ENTRY # 4095 FILTER TABLE (4k x8) 6E00+ 0000 0 000000 1 ENTRY # 1 6E00+ 0000 0 000000 0 ENTRY # 0 bottom HOW TO CREATE THE ADDRESS TO THE TABLE 1. Isolate the twelve relevant bits of the H009 Select Word (PU Address, CI, Control Field and T/R Field). Select filter entry for a H009 Receive message to PU#5, CF#3. Example PU Address = 5 CI = 0 Control field = 3 T/R field = 0 0 1 0 1 0 000 011 0 The Hex representation = 506 (H) 2. Add this value to the base address of the Filter/Function Table (6E00H)/ (EE00H). 6E00 (H) + 506 (H) 7306 (H) 50 EXC-H009VME/M FILTER/FUNCTION TABLE ENTRY BIT # FUNCTION 15 to 4 RESERVED 3 DESCRIPTION STOP ON ERROR 1 - Stop Monitoring if message contains an error ERROR 0 - Continue even following error 2 INTERRUPT / NO INTERRUPT 1 - Generate interrupt when message is received 0 - No interrupt on message 1 STOP / NO STOP 1 - Stop monitoring following receipt of message 0 - Continue monitoring 0 STORE / NO STORE 1 - Don't store this 0 - Store this message NOTE 1. Interrupts are generated at the end of the message. 2. If the NO STORE bit is set the other bits are ignored. CONTROL REGISTERS DEFINITIONS MESSAGE COUNTER 7EBC - 7EBE (H) / FEBC - FEBE (H) This register is set to 0 following START. It is incremented by one every time a message is recorded by the monitor. Messages which are not stored due to NO STORE entries in the Filter/Function table are not included in the count. FIRMWARE DATE CODE 7EC0(H) / FEC0(H) This register indicates the date of release of the firmware revision level written in the 'Firmware Revision Code. The lower nibble is the year. The offset is year 1990, The value written in this field is added to the offset. This field can reach year 2005. The next higher nibble is the month. It's value is written in HEX. The upper Byte is the day of the month. It's value is also in HEX. BIT # FUNCTION 15-8 DAY 7-4 MONTH 3-0 YEAR EXAMPLE: For a revision date of 22/10/95: Write 16A5(H) to the register. 51 EXC-H009VME/M FIRMWARE REVISION REGISTER 7EC2(H) / FEC2(H) This register indicates the revision level of the on-board firmware. The value 0100(H) would be read as revision level: 1.00 CURRENT BLOCK INDEX 7ECA(H) / FECA(H) The Current Block Index register contains the block number of the last block to have been filled in by the board. It circulates between 0 and 585. On start it contains FFFF (H) to indicate no messages have been received by the board. MESSAGE STATUS REGISTER 7ECE(H) / FECE(H) This register indicates the status of the EXC-H009VME/M card. The figure below illustrates the definition of each Status bit. A logic '1' indicates active condition. BIT # 15 to 2 FUNCTION DESCRIPTION RESERVED, set to “0” 1 MESSAGE ERROR A message with an error has been received by the board 0 MESSAGE COMPLETE A message has been received by the board NOTE Status Bits are NOT reset by the board and should be reset by the user after the user reads them. START REGISTER 7ED0(H) / FED0(H) This register controls the 'START/STOP' operation of the EXC-H009VME/M. Writing to this register with the appropriate bit set begins the Bus Monitor operation. See the related bit (data bit "04") within the Board Status Register which indicates when the board has been halted. BIT # FUNCTION 15 to 1 RESERVED, set to “0” 0 '1’ = START; '0' = STOP 52 EXC-H009VME/M BOARD STATUS REGISTER 7ED2(H) / FED2(H) This register indicates the status of the EXC-H009VME/M card. In addition, this register indicates option selection as defined below. (Status bits are active '1').The upper bits (b15-b5) should be set to '0'. BIT # 15 to 5 FUNCTION RESERVED, set to ‘0’ 4 ‘1’= BOARD HALTED ; ‘0’= BOARD RUNNING 3 SELF-TEST OK 2 RESERVED 1 RAM OK 0 BOARD READY Bit "04" (Board Halted) is set by the board after the user "stops" the current operation (by resetting the START bit within the Start Register). The user should check this bit first before modifying registers which first require a "STOP" operation. The board resets this bit after receiving a subsequent START command (by writing to the Start Register). BOARD ID REGISTER 7ED4(H) / FED4(H) This register contains a fixed value which can be read by a user's initialization routine to detect the presence of the EXC-H009VME/M card. The one-word value of this register is: 4939 (Hex); ASCII 'H9'. BOARD CONFIGURATION REGISTER 7ED6(H) / FED6(H) The operating mode of the board is set via this register. This register must be set before issuing a START to the board. To modify this register: issue a "STOP", modify and then re-issue a START (see START Register). HEX VALUE MODE 0001 PU MODE 0002 CCC / CONCURRENT-PU 0004 BM - SEQUENTIAL BLOCK MODE OTHERS RESERVED 53 EXC-H009VME/M SOFTWARE RESET REGISTER 7F80(H) / FF80(H) Writing to this location will RESET the CCC/PU/MON or the Conc. Monitor section. The section that is been reset will act as if POWER had been switched off and then on. The data field is ignored. NOTE 54 'RESET' ERASES ALL MEMORY LOCATIONS WITHIN THE DUAL-PORT RAM!!! The Board Status, the Board ID, Firmware Revision and Variable Amplitude registers are written by the board after the reset operation has been completed. EXC-H009VME/M GLOBAL REGISTERS These registers may be accessed at all times regardless of the current MODE. BOARD RESET REGISTER 7F90(H) WRITE ONLY Writing to this register will reset the both sections of the board (CCC/PU/MON and CONC. MON.) at the same time. CONCURRENT START REGISTER 7F94(H) / FF94(H) WRITE ONLY These registers allow the user to start the operation of the PU, CCC/Concurrent-PU, or NonConcurrent Monitor at the SAME TIME as the Concurrent Monitor. This allows for synchronization of these two sections of the board. The dual-port RAM's "normal" Start Registers must have their START bits set to a logic '0' when using this register. To stop the selected operation(s), follow the normal procedure as described in the Start Register sections. Writing to one of these registers starts the Concurrent Start operation. SWITCHING MODES OF OPERATION The user can switch between modes of operation (e.g., between CCC and Peripheral Unit) by "HALTING" the operation of the board (VIA THE START REGISTER), modify the Configuration Register, setup the memory as required, and then set the START bit within the Start Register. 55 EXC-H009VME/M CARD LAYOUT T.B.D LEDS The individual functions of the front panel leds are listed below. MODID (LD1) Reflects the state of the MODID pin on the VXI bus (JP4 must be installed). This LED has no function in a VME system. READY (LD2) Indicates that the card is ready to receive commands. Reflects the state of the bit of the same name in the Configuration Status Register. CCC (LD3) Reflects that the CCC mode is active at this moment. PU (LD4) Reflects that the PU mode is active at this moment. MON (LD5) Reflects that the Non Concurrent Monitor mode is active at this moment. BUSA (LD2) Reflects that the H009 Bus A is active at this moment. BUSB (LD3) Reflects that the H009 Bus B is active at this moment. CMON (LD4) Reflects that the Concurrent Monitor mode is active at this moment. 56 EXC-H009VME/M DIP SWITCH SETTINGS The EXC-H009VME/VXI card contains 1 Dip Switch which controls the Logical Address of the card. The lines A15 & A14 are set, by default, to ‘1’ logic (The 2 Factory-Jumpers: JP3 (A14) and JP2 (A15) are disconnected). Card Logical Address Dip Switch Setting SW5 Dip switch SW5 is used to select the card's Logical Address as described in the section "VME/VXI Configuration Registers". The Logical Address is set as shown below. MSB LSB 1 1 SW5/1 SW5/2 SW5/3 SW5/4 SW5/5 SW5/6 SW5/7 SW5/8 A15 A14 A13 A12 A11 A10 A9 A8 A7 A6 Switch "ON" or "Closed" = logic 0 at bit position Switch "OFF" or "OPEN" = logic 1 at bit position NOTE Address lines A15, A14 are always decoded as '1'. Example For a Logical Address of C0(H) ( = A16 address F000H), set positions '1'and '2' to "OFF" or "OPEN" and ALL other positions to "ON" or "CLOSED". H009 Coupling Mode Select (SW1, SW2, SW3, SW4) These switches select the coupling mode to the H009 Bus. The following list describes the difference Dip Switches: SW1 BUS A of the CCC, PU and Concurrent Monitor SW2 CLK A of the CCC, PU and Concurrent Monitor SW3 BUS B of the CCC, PU and Concurrent Monitor SW4 CLK B of the CCC, PU and Concurrent Monitor All the switches on Dip Switches SW1-SW4 should be in the following situation: Switches 1 & 2 ON/CLOSED and Switches 3 & 4 OFF/OPEN. In this position the Series Resisters are connected on the H009 line. 57 EXC-H009VME/M FACTORY DEFAULT DIP SWITCH SETTINGS SW5 Set to Logical Address 80H (1 off; 2-8 on = A16 address E000 H) SW1-SW4 Set as following: Switches 1 & 2 ON / CLOSED Switches 3 & 4 OFF / OPEN 58 EXC-H009VME/M JUMPERS Few Jumper Headers are provided on the card for various user selectable functions. These headers are mounted with shorting blocks according to the default card setup (see Factory Default Jumper Settings section below). In high vibration environments these jumpers can be soldered or "Wire-Wrapped". Jumpers not appearing on the Card Layout are factory set and should not be used. VME Address Space Select Jumper [JP1] This jumper selects the VME Address Space that the card's memory will be located at: Jumper shorted A24 address space Jumper open A32 address space VXI MODID Connect Jumper [JP4] This jumper connects the card to the VXI 'MODID' signal located at P2-A30. Jumper shorted 'MODID' connected (ready for VXI environment) Jumper open 'MODID' disconnected (pin P2-A30 free for VME user-defined) Transformers Central Tap Gnd Connection [JP5-JP8] These jumpers connect the Central tap of the 1553 Transformers to gnd. They should be left OPEN. 59 EXC-H009VME/M FACTORY DEFAULT JUMPER SETTINGS Factory Jumpers Setup for VME JP1 Set to A24 Address Space (Shorted) JP2 + JP3 Set to High Address Space (A15 + A14) (Open) JP4 Set to 'MODID' disconnected (Open) JP5 - JP8 Set to Not GND Middle Tapped (Open) Factory Jumpers Setup for VXI JP1 Set to A24 Address Space (Shorted) JP4 Set to 'MODID' connected (Shorted) TERMINATION RESISTORS Because the H009 Spec. does not clarify how the H009 bus should exactly behave, Excalibur added an option on the board to add parallel Resistors on the two taps of the DATA and CLOCK lines (BUS A and B).Their description are as following: R11 A termination resistor for the DATA A lines. R14 A termination resistor for the CLOCK A lines. R17 A termination resistor for the DATA B lines. R20 A termination resistor for the CLOCK B lines. The boards come with a default Resistor with a value of ‘68 ohm’ on all of the lines. It is recommended to have a total resistance of ‘34 ohm’ on each one of the lines. 60 EXC-H009VME/M CONNECTORS 1553 CONNECTORS The EXC-H009VME/M card contains 4 Twinax Connectors:P3,P4,P5,P6. They connect the card to the H009 Bus. The connectors’ pinouts are described below: P3 + DATA A - DATA A P4 + CLK A P5 + DATA B - DATA B P4 + CLK B - CLK A - CLK B IN SYSTEM PROGRAMMABLE CONNECTORS The connectors ‘CON1’, ‘CON2’, and ‘CON3’ are used for down-loading the In-SystemProgrammable chips on the board. They are used for future Updating of the boards. VME INTERFACE CONNECTORS The connectors ‘P1’ and ‘P2’ are used for connecting the board to the VME bus. Their descriptions are on the following pages: 61 EXC-H009VME/M Connector P1 Pinout The following VME signals are used by the EXC-H009VME/M. PIN # SIG. NAME PIN # SIG. NAME PIN # SIG. NAME A1 D00 A2 D01 B1 C1 D08 B2 C2 D09 A3 D02 B3 A4 D03 B4 BG0IN* C3 D10 C4 D11 A5 D04 B5 A6 D05 B6 BG0OUT* C5 D12 BG1IN* C6 D13 A7 D06 A8 D07 B7 BG1OUT* C7 D14 B8 BG2IN* C8 D15 A9 GND B9 BG2OUT* C9 GND A10 SYSCLK B10 BG3IN* C10 A11 GND B11 BG3OUT* C11 A12 DS1* B12 C12 SYSRESET* A13 DS0* B13 C13 LWORD* A14 WRITE* B14 C14 AM5 A15 GND B15 C15 A23 A16 DTACK* B16 AM0 C16 A22 A17 GND B17 AM1 C17 A21 A18 AS* B18 AM2 C18 A20 A19 GND B19 AM3 C19 A19 A20 IACK* B20 GND C20 A18 A21 IACKIN* B21 C21 A17 A22 IACKOUT* B22 C22 A16 A23 AM4 B23 GND C23 A15 A24 A07 B24 IRQ7* C24 A14 A25 A06 B25 IRQ6* C25 A13 A26 A05 B26 IRQ5* C26 A12 A27 A04 B27 IRQ4* C27 A11 A28 A03 B28 IRQ3* C28 A10 A29 A02 B29 IRQ2* C29 A09 A30 A01 B30 IRQ1* C30 A08 A31 -12V B31 C31 +12V A32 +5V B32 C32 +5V 62 +5V EXC-H009VME/M Connector P2 Pinout The following VME signals are used by the EXC-H009VME/M. PIN # SIG. NAME PIN # SIG. NAME PIN # A1 B1 +5V C1 A2 B2 GND C2 A3 B3 A4 B4 A24 C4 A5 B5 A25 C5 A6 B6 A26 C6 A7 B7 A27 C7 A8 B8 A28 C8 A9 B9 A29 C9 A10 B10 A30 C10 A11 B11 A31 C11 A12 B12 GND C12 A13 B13 +5V C13 A14 B14 C14 A15 B15 C15 A16 B16 C16 A17 B17 C17 A18 B18 C18 A19 B19 C19 A20 B20 C20 A21 B21 C21 A22 B22 A23 B23 C23 A24 B24 C24 A25 B25 C25 A26 B26 C26 A27 B27 C27 A28 B28 C28 B29 C29 B30 C30 A29 A30 MODID (x) C3 GND C22 A31 B31 GND C31 A32 B32 +5V C32 NOTE SIG. NAME (x) - VXI signals (each of them is unconnected, unless the specific jumper is shorted. See Jumpers section) 63 EXC-H009VME/M POWER REQUIREMENTS The following table shows the Power Requirements of the Full-Board (EXC-H009VME/M - including the Conc. Monitor): SIGNAL QUIESCENT 50% DUTY CYCLE +5V 1.75 Amp 1.75 Amp +12V 0.085 Amp 0.185 Amp -12V 0.155 Amp 0.255 Amp ORDERING INFORMATION Part Number Description EXC-H009VME BASE H009 VME B-size (6"x9) card. Supports CCC/PU/Non Concurrent Monitor EXC-H009VME/M FULL H009 VME B-size (6"x9) card. Supports CCC/PU/Non Concurrent Monitor + Concurrent Monitor 64 EXC-H009VME/M The information contained in this document is believed to be accurate. However, no responsibility is assumed by Excalibur Systems, Inc. for its use and no license or rights are granted by implication or otherwise in connection therewith. Specifications are subject to change without notice. April 1997 Rev. A - 3 65