1
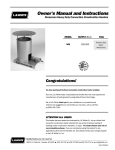
Owner's Manual and Instructions
“Workman” Convection Construction Heaters
MODELS
OUTPUT (Btuh)
FUEL
CV225
225,000
Propane Vapor
Withdrawal
Certification by:
Congratulations!
You have purchased the finest convection heater available.
Your new L.B. White heater incorporates the benefits from the most experienced
manufacturer of heating products using state-of-the-art technology.
We, at L.B. White, thank you for your confidence in our products and
welcome any suggestions or comments you may have...call us, toll-free,
at 1-800-345-7200.
ATTENTION ALL USERS
This heater has been tested and evaluated by C.S.A. International in accordance with
Standard ANSI Z83.7 CSA 2.14 and is listed and approved as a direct fired vertical
convection construction heater for use on combustible floors. This heater is
intended for use as a portable, temporary heater for buildings under construction,
alteration, or repair. If you are considering using this product for any application
other than its intended use, then please contact your fuel gas supplier, or the
L.B. White Co., Inc.
150-27644
GENERAL HAZARD WARNING
■ Failure to comply with the precautions and instructions provided with this heater, can result in:
— Death
— Serious bodily injury or burns
— Property damage or loss from fire or explosion
— Asphyxiation due to lack of adequate air supply or carbon monoxide poisoning
— Electrical shock
■ Read this Owner’s Manual before installing or using this product.
■ Only properly-trained service people should repair or install this heater.
■ Save this Owner’s Manual for future use and reference.
■ Owner’s Manuals and replacement labels are available at no charge. For assistance, contact
L.B. White at 800-345-7200.
WARNING
■ Proper gas supply pressure must be provided to the inlet of the heater.
■ Refer to data plate for proper gas supply pressure.
■ Gas pressure in excess of the maximum inlet pressure specified at the heater inlet can cause
fires or explosions.
■ Fires or explosions can lead to serious injury, death, or building damage.
■ Gas pressure below the minimum inlet pressure specified at the heater inlet may cause
improper combustion.
■ Improper combustion can lead to asphyxiation or carbon monoxide poisoning and therefore
serious injury or death.
WARNING
Fire and Explosion Hazard
■ Not for home or recreational vehicle use.
■ Installation of this heater in a home or
recreational vehicle may result in a fire or
explosion.
■ Fire or explosions can cause property
damage or loss of life.
WARNING
Fire and Explosion Hazard
■ Keep solid combustibles a safe distance
away from the heater.
■ Solid combustibles include wood or paper
products, building materials, and dust.
■ Do not use the heater in spaces which
contain or may contain volatile or airborne
combustibles.
■ Volatile or airborne combustibles include
FOR YOUR SAFETY
gasoline, solvents, paint thinner, dust
Do not store or use gasoline or other
particles or unknown chemicals.
flammable vapors and liquids in the vicinity of
■ Failure to follow these instructions may
this or any other appliance.
result in a fire or explosion.
FOR YOUR SAFETY
■ Fire or explosions can lead to property
damage, personal injury or loss of life.
If you smell gas:
1. Open windows.
2. Don't touch electrical switches.
3. Extinguish any open flame.
4. Immediately call your gas supplier.
2
Table of Contents
SECTION
PAGE
General Information . . . . . . . . . . . . . . . . . . . . . . . . . . . . . . . . . . . . . . . . . . . . . . . . . . . . . . . . . . . . . . . . . . .3
Heater Specifications . . . . . . . . . . . . . . . . . . . . . . . . . . . . . . . . . . . . . . . . . . . . . . . . . . . . . . . . . . . . . . . . . .4
Safety Precautions . . . . . . . . . . . . . . . . . . . . . . . . . . . . . . . . . . . . . . . . . . . . . . . . . . . . . . . . . . . . . . . . . . . .5
Installation Instructions
General . . . . . . . . . . . . . . . . . . . . . . . . . . . . . . . . . . . . . . . . . . . . . . . . . . . . . . . . . . . . . . . . . . . . . . . . .7
Hose and Regulator Assembly . . . . . . . . . . . . . . . . . . . . . . . . . . . . . . . . . . . . . . . . . . . . . . . . . . . . . . .8
Connecting Regulator to Propane Gas Supply . . . . . . . . . . . . . . . . . . . . . . . . . . . . . . . . . . . . . . . . . .8
Start-Up Instructions . . . . . . . . . . . . . . . . . . . . . . . . . . . . . . . . . . . . . . . . . . . . . . . . . . . . . . . . . . . . . . . . . .9
Shut-Down Instructions . . . . . . . . . . . . . . . . . . . . . . . . . . . . . . . . . . . . . . . . . . . . . . . . . . . . . . . . . . . . . . . .9
Cleaning Instructions . . . . . . . . . . . . . . . . . . . . . . . . . . . . . . . . . . . . . . . . . . . . . . . . . . . . . . . . . . . . . . . . .10
Maintenance Instructions . . . . . . . . . . . . . . . . . . . . . . . . . . . . . . . . . . . . . . . . . . . . . . . . . . . . . . . . . . . . .10
Service Instructions
General . . . . . . . . . . . . . . . . . . . . . . . . . . . . . . . . . . . . . . . . . . . . . . . . . . . . . . . . . . . . . . . . . . . . . . . .11
Safety Control Valve / Variable rate Valve / Burner Orifice Manifold . . . . . . . . . . . . . . . . . . . . . . .11
Thermocouple . . . . . . . . . . . . . . . . . . . . . . . . . . . . . . . . . . . . . . . . . . . . . . . . . . . . . . . . . . . . . . . . . . .12
Igniter and Electrode . . . . . . . . . . . . . . . . . . . . . . . . . . . . . . . . . . . . . . . . . . . . . . . . . . . . . . . . . . . . .12
Gas Pressure Checks . . . . . . . . . . . . . . . . . . . . . . . . . . . . . . . . . . . . . . . . . . . . . . . . . . . . . . . . . . . . .13
Troubleshooting . . . . . . . . . . . . . . . . . . . . . . . . . . . . . . . . . . . . . . . . . . . . . . . . . . . . . . . . . . . . . . . . . . . . .14
Heater Component Function . . . . . . . . . . . . . . . . . . . . . . . . . . . . . . . . . . . . . . . . . . . . . . . . . . . . . . . . . . .15
Parts Identification
Parts Schematic . . . . . . . . . . . . . . . . . . . . . . . . . . . . . . . . . . . . . . . . . . . . . . . . . . . . . . . . . . . . . . . . .16
Parts List . . . . . . . . . . . . . . . . . . . . . . . . . . . . . . . . . . . . . . . . . . . . . . . . . . . . . . . . . . . . . . . . . . . . . . .17
Warranty Policy . . . . . . . . . . . . . . . . . . . . . . . . . . . . . . . . . . . . . . . . . . . . . . . . . . . . . . . . . . . . . . . . . . . . . .18
Replacement Parts and Service . . . . . . . . . . . . . . . . . . . . . . . . . . . . . . . . . . . . . . . . . . . . . . . . . . . . . . . .18
General Information
This Owner's Manual includes all options and accessories
commonly used on this heater. However, depending on the
configuration purchased, some options and accessories
may not be included.
When calling for technical service assistance, or for other
specific information, always have model number,
configuration number and serial number available. This
information is contained on the dataplate.
This manual will instruct you in the operation and care of
your unit. Have your qualified installer review this manual
with you so that you fully understand the heater and how it
functions.
The gas supply line installation, installation of the heater,
and repair and servicing of the heater requires continuing
expert training and knowledge of gas heaters and should
not be attempted by anyone who is not so qualified. See
page 6 for definition of the necessary qualifications.
Contact your local L.B. White distributor or the L.B. White
Co., Inc. for assistance, or if you have any questions about
the use of the equipment or its application.
The L.B. White Co., Inc. has a policy of continuous product
improvement. It reserves the right to change specifications
and design without notice.
3
Heater Specifications
Model
SPECIFICATIONS
CV225
Fuel
Propane
Gas
Input (BTUH)
Inlet Gas Supply Pressure Acceptable at
the Gas Connection of the Heater(PSIG)
MAX
MIN.
MAX.
MIN.
MAX
MIN.
Dimensions (Inches)
LxWxH
Minimum Safe Distances From
Nearest Combustible Materials
10.2
10.2
10.4
2.1
17 x 15 x 26
TOP
SIDES
GAS SUPPLY
4
45,000
10
Burner Manifold Pressure (PSIG)
Fuel Consumption Per Hour (Lbs. / hour)
225,000
5 ft. 10 in.
4 ft.
6 ft. (1.83 m.)
Safety Precautions
WARNING
Asphyxiation Hazard
■ Do not use this heater for heating human living
quarters.
■ Lack of proper ventilation air will lead to improper
combustion.
■ Do not use in unventilated areas.
■ Improper combustion can lead to carbon monoxide
poisoning leading to serious injury or death. Symptoms
of carbon monoxide poisoning can include headaches,
dizziness and difficulty in breathing.
■ The flow of combustion and ventilation air must not be
obstructed.
■ Proper ventilation air must be provided to support the
combustion air requirements of the heater being used.
FUEL GAS ODOR
Propane gas and natural gas have man-made odorants added specifically for detection of fuel gas leaks.
If a gas leak occurs, you should be able to smell the fuel gas.
THAT’S YOUR SIGNAL TO GO INTO IMMEDIATE ACTION!
■ Do not take any action that could ignite the fuel gas. Do
not operate any electrical switches. Do not pull any
power supply or extension cords. Do not light matches
or any other source of flame. Do not use your
telephone.
■ Get everyone out of the building and away from the area
immediately.
■ Close all propane gas tank or cylinder fuel supply
valves, or the main fuel supply valve located at the
meter if you use natural gas.
■ Propane gas is heavier than air and may settle in low
areas. When you have reason to suspect a propane
leak, keep out of all low areas.
■ Natural gas is lighter than air and can collect around
rafters or ceilings.
■ Use your neighbor’s phone and call your fuel gas
supplier and your fire department. Do not re-enter the
building or area.
■ Stay out of the building and away from the area until
declared safe by the firefighters and your fuel gas
supplier.
■ FINALLY, let the fuel gas service person and the
firefighters check for escaped gas. Have them air out
the building and area before you return. Properly
trained service people must repair the leak, check for
further leakages, and then relight the appliance for you.
ODOR FADING -- NO ODOR DETECTED
■ Some people cannot smell well. Some people cannot
smell the odor of the man-made chemical added to
propane or natural gas. You must determine if you can
smell the odorant in these fuel gases.
■ Learn to recognize the odor of propane gas and natural
gas. Local propane gas dealers and your local natural
gas supplier (utility) will be more than happy to give you
a “scratch and sniff” pamphlet. Use it to become
familiar with the fuel gas odor.
■ Smoking can decrease your ability to smell. Being
around an odor for a period of time can affect your
sensitivity to that particular odor.
■ The odorant in propane gas and natural gas is colorless
and the intensity of its odor can fade under some
circumstances.
■ If there is an underground leak, the movement of gas
through the soil can filter the odorant.
■ Propane gas odor may differ in intensity at different
levels. Since propane gas is heavier than air, there may
be more odor at lower levels.
■ Always be sensitive to the slightest gas odor. If you
continue to detect any gas odor, no matter how small,
treat it as a serious leak. Immediately go into action as
discussed previously.
ATTENTION -- CRITICAL POINTS TO REMEMBER!
■ Propane gas and natural gas have a distinctive odor.
Learn to recognize these odors. (Reference “Fuel Gas
Odor” and “Odor Fading” sections above.
■ Even if you are not properly trained in the service and
repair of the heater, ALWAYS be consciously aware of
the odors of propane gas and natural gas.
■ If you have not been properly trained in repair and service
of propane gas and natural gas fueled heaters, then do
not attempt to light heater, perform service or repairs, or
make any adjustments to the heater on propane gas or
natural gas fuel system.
■ A periodic sniff test around the heater or at the heater’s
joints; i.e. hose, connections, etc., is a good safety
practice under any conditions. If you smell even a small
amount of gas, CONTACT YOUR FUEL GAS SUPPLIER
IMMEDIATELY. DO NOT WAIT!
5
WARNING
Burn Hazard
■ High surface and discharge temperatures.
■ Do not touch the heater or come within safe
clearances given on dataplate.
■ Use extreme caution when lighting the heater or
■
■
adjusting heat levels.
Failure to follow this warning and come too close to
the heater can result in burns or ignition of clothing.
Burns cause serious injury or death.
1. Do not attempt to install, repair, or service this heater
or the gas supply line unless you have continuing
expert training and knowledge of gas heaters.
Qualifications for service and installation of this
equipment are as follows:
a. To be a qualified gas heater service person, you
must have sufficient training and experience to
handle all aspects of gas-fired heater installation,
service and repair. This includes the task of
installation, troubleshooting, replacement of
defective parts and testing of the heater. You
must be able to place the heater into a continuing
safe and normal operating condition. You must
completely familiarize yourself with each model
heater by reading and complying with the safety
instructions, labels, Owner’s Manual, etc., that is
provided with each heater.
b. To be a qualified gas installation person, you must
have sufficient training and experience to handle
all aspects of installing, repairing and altering gas
lines, including selecting and installing the proper
equipment, and selecting proper pipe and tank
size to be used. This must be done in accordance
with all local, state and national codes as well as
the manufacturer’s requirements.
2. All installations and applications of L.B. White heaters
must meet all relevant local, state and national
codes. Included are L.P. gas, natural gas, electrical,
and safety codes. Your local fuel gas supplier, a local
licensed electrician, the local fire department or
similar government agencies, or your insurance agent
can help you determine code requirements.
Also refer to:
-- ANSI/NFPA 58, latest edition, Standard for
Storage and Handling of Liquefied Petroleum
Gas
-- ANSI Z223.1/NFPA 54, National Fuel Gas
Code
3. Adequate ventilation air for combustion must be
provided in accordance with OSHA 29 CFR 1926.154,
Temporary Heating Devices, and ANSI A10.10, Safety
Requirements for Temporary and Portable Space
Heating Devices.
4. We cannot anticipate every use which may be made
of our heater. Check with your local fire safety
authority if you have questions about applications.
6
5. Other standards govern the use of fuel gases and
heat producing products in specific applications.
Your local authority can advise you about these.
6. Use only compressed air, soft brush or dry cloth to
clean the interior of the heater and it’s components.
7. Always use approved pipe thread compound suitable
for use with propane gas on the threaded
connections.
8. Do not block air intakes or discharge outlets of the
heater. Doing so may cause improper combustion or
damage to heater components leading to property
damage.
9. The hose assembly shall be visually inspected on a
daily basis after heater relocation and when the
heater is in use. If it is evident there is excessive
abrasion or wear, or if the hose is cut, it must be
replaced prior to the heater being put into operation.
The hose assembly shall be protected building
materials, and contact with hot surfaces during use.
The hose assembly shall be that specified by the
manufacturer. See parts list.
10. Check for gas leaks and proper function upon heater
installation or when relocating. Refer to leak check
instructions within installation section of this manual.
11. This heater should be inspected for proper operation
by a qualified service person before each use and at
least annually.
12. Always turn off the gas supply to the heater if the
heater is not going to be used in the heating of the
work space.
13. If gas flow is interrupted and flame goes out, do not
relight the heater until you are sure that all gas that
may have accumulated has cleaned away. In any
event, do not relight the heater for at least 5 minutes.
14. Minimum propane gas supply cylinder size to be used
shall be 100 pounds. When using a cylinder supply
system, the system must be arranged to provide
vapor withdrawal from the operating cylinder.
15. When the heater is to be stored indoors, the
connection between the propane gas supply
cylinder(s) and the heater must be disconnected and
the cylinder(s) removed from the heater and stored in
accordance with the Standard and Handling of
Liquefied Petroleum Gases, ANSI/NFPA 58.
16. Propane gas supply containers have left handed
threads. Always use the appropriate wrench to
tighten or loosen the P.O.L. fitting at the propane gas
containers supply valve. Do not use pliers.
Installation Instructions
GENERAL
WARNING
Fire or explosion hazard.
Can cause property damage, severe injury or death.
1. To avoid dangerous accumulation of fuel gas, turn off
the gas supply at the heater service valve before
starting installation, and perform gas leak test after
completion of installation.
2. Do not force the gas control button. Use only normal
hand pressure to depress the button. Never use any
tools. If the button will not operate by normal hand
pressure, the control should be replaced by a
qualified service technician. Force or attempted
repair may result in fire or explosion.
1. Read all safety precautions and follow L.B. White
recommendations when installing this heater. If
during the installation or relocating of heater, you
suspect that a part is damaged or defective, call a
qualified service agency for repair or replacement.
2. Position heater properly before use. The heater must
be installed on a level, flat, horizontal and stable
surface when hot or in operation and according to
minimum clearances from combustible surfaces such
as walls, floor or ceilings. Do not place combustible
materials within this zone of clearance. Minimum
safe distances are as follows:
Top to Ceiling
All Sides
Gas Supply
5 ft. 10 in.
4 ft.
6 ft.
3. L.P Gas Installation Requirements
■ Ensure all L.P. gas containers are secured and
protected from people, vehicular traffic and
contact.
■ L.P. gas containers must be located on a flat,level,
and stable surface.
■ L.P. gas cylinders (100 lb. cylinders/tanks) must be
secured from tip-over.
6. The heater’s gas pressure regulator (with pressure
relief valve) must be protected from adverse weather
conditions (rain, ice, snow) as well as from building
materials (tar, concrete, plaster, etc.) which can affect
safe operation and could result in property damage or
injury.
7. Heaters used in the vicinity of combustible tarpaulins,
canvas, plastics, wind barriers, or similar coverings
shall be located at least 10 feet from the coverings.
The coverings shall be securely fastened to prevent
ignition or upsetting of the heater due to wind action
on the covering or other material.
8. Check all connections for gas leaks using approved
gas leak detectors. Gas leak testing is performed as
follows:
WARNING
■
■
■
■
Fire and Explosion Hazard
Do not use open flame (matches, torches, candles,
etc.) in checking for gas leaks.
Use only approved leak detectors.
Failure to follow this warning can lead to fires or
explosions.
Fires or explosions can lead to property damage,
personal injury or loss of life.
-- Check all pipe connections, hose connections,
fittings and adapters upstream of the gas
control with approved gas leak detectors.
-- In the event a gas leak is detected, check the
components involved for cleanliness and
proper application of pipe compound before
further tightening.
-- Furthermore tighten the gas connections as
necessary to stop the leak.
-- After all connections are checked and any
leaks are stopped, turn on the main burner.
Contact your local authorities, L.P. gas dealers, or fire
marshalls for specifics dealing with installation in your
area.
-- Stand clear while the main burner ignites to
prevent injury caused from hidden leaks that
could cause flashback.
4. Position the heater and its gas supply hose so as to
protect heater and its gas supply hose from traffic.
Protect hoses with a shielding device of suitable
nature to protect the hose from traffic and movement
or other construction equipment.
-- With the main burner in operation, check all
connections, hose connections, fittings and
joints as well as the gas control valve inlet and
outlet connections with approved gas leak
detectors.
5. The heater is approved for indoor use only. The
heater shall be installed so it is not directly exposed to
water spray, rain, and /or dripping water.
-- If a leak is detected, check the components
involved for cleanliness in the thread areas
and proper application of pipe compound
before further tightening.
-- Tighten the gas connection as necessary to
stop the leak.
7
-- If necessary, replace the parts or components
involved if the leak cannot be stopped.
-- Ensure all gas leaks have been identified and
repaired before proceeding.
9. A qualified service agency must check for proper
operating gas pressure upon installation of the heater.
10. Light according to instructions on heater or within
owner's manual.
11. Make sure the heater has the proper gas regulator for
the application. A regulator must be connected to the
gas supply so that gas pressure at the inlet to the gas
valve is regulated within the range specified on the
dataplate at all times. Contact your gas supplier, or
the L.B. White Co., Inc. if you have any questions.
12. This heater is configured for use with propane vapor
withdrawal only. Consult the heater’s dataplate for the
gas configuration of the specific heater. Do not use
the heater in an propane liquid withdrawal system or
application. If you are in doubt, contact the L.B. White
Co., Inc.
13. Take time to understand how to operate and maintain
the heater by using this Owner’s Manual. Make sure
you know how to shut off the gas supply to the building
and also to the individual heater. Contact your fuel gas
supplier if you have any questions.
14. Any defects found in performing any of the service or
maintenance procedures must be eliminated and
defective parts replaced immediately. The heater
must be retested by properly qualified ser vice
personnel before placing the heater back into use.
HOSE AND REGULATOR ASSEMBLY
1. Apply a small amount of pipe thread sealant to
threads of rigid hose connection. Connect this end to
to regulator outlet. See Fig.1 Tighten securely.
FIG. 2
2. Connect opposite end of hose with nut to safety
control valve at heater. See Fig.2. Tighten securely.
FIG. 1
NUT HAS LEFT HANDED
THREADS
APPLY SEALANT
CONNECTING REGULATOR TO PROPANE GAS SUPPLY
1. Remove protective cap from POL fitting. Do not
discard cap. Position regulator as shown.
FIG. 3
2. Insert POL fitting into propane supply valve. See Fig.2.
Thread nut on fitting counterclockwise into propane
supply valve. Tighten nut securely with a wrench.
-- When storing or transporting the heater, ensure the
cap is pushed onto the POL fitting to prevent
damage or dirt entry into regulator.
VENT ON REGULATOR WILL BE
DIRECTED DOWN
8
Start-Up Instructions
WARNING
■
■
■
1.
■ On new installations it may take a short time for gas to
purge out any air before the burner lights.
Burn Hazard
Before lighting, ensure the variable heat valve on
heater is located in minimum heat output position.
See Fig.4.
Failure to do so will result in the main burner igniting
at full heat output.
Serious injury or death due to burns may occur.
Slowly open the fuel supply valve at the gas supply.
(This prevents lockup of the excess flow check valve
internal to the regulator’s POL fitting.)
3.
Keep the valve button depressed for about 30
seconds to allow the thermocouple to warm up.
4
Release the safety control valve button.
4.
Once the burner is lit, the variable rate valve can be
positioned to any setting from minimum to maximum
heat. See Fig.5
FIG. 5
.
2.
Fully depress the button on the safety control valve
while pushing the igniter button. The burner will light.
See Fig. 4.
FIG. 4
BUTTON ON SAFETY VALVE
SET VARIABLE RATE VALVE
TO MINIMUM POSITION
BEFORE LIGHTING
MAXIMUM HEAT
IGNITER BUTTON
Shut-Down Instructions
1. Close all fuel gas supply valves.
2. Allow the heater to burn off any fuel gas remaining in
the gas supply line.
3. Position the variable rate valve to its minimum heat
position.
4. Disconnect the heater from its gas supply.
9
Cleaning Instructions
WARNING
Fire, Burn, and Explosion Hazard
■ This heater contains mechanical components used in the gas management and safety systems.
■ Such components may become inoperative or fail due to dust, dirt, wear or aging.
■ Periodic cleaning and inspection as well as proper maintenance are essential to avoid serious injury or damage.
1. Before cleaning, close all gas supply valves.
2. The heater should have dir t or dust removed
periodically:
a. Before each use give the heater a general
cleaning using compressed air, a soft brush, or
dry rag, on its case and internal components.
b. At least once a year, give the heater a thorough
cleaning. At this time, remove the case assembly
and brush and/or blow off the burner and related
components.
WARNING
Do not use a pressure washer, water or liquid cleaning
solution on any gas controls. Use of a pressure washer,
water, or liquid cleaning solution on the control
components can cause severe personal injur y or
property damage due to water and/or liquids:
* On gas control valves causing corrosion which can
result in gas leaks and fire or explosion from the
leak.
Clean all components of the heater with a pressurized
air, a dry brush or a dry cloth.
Maintenance Instructions
1. The area surrounding the heater shall be kept clear
and free from combustible materials, gasoline, and
other flammable vapors and liquids.
2. Have your gas supplier check all gas piping annually
for leaks or restrictions in gas lines.
3. Regulators must be periodically inspected to make
sure the regulator vents are not blocked. Debris,
insects, insect nests, snow, or ice on a regulator can
block vents and cause excess pressure at the
appliance.
4. Regulators can wear out and function improperly.
Have your gas supplier check the date codes on all
regulators installed and check delivery pressures to
the appliance to make sure that the regulator is
reliable.
10
5. Check all wiring associated terminals and electrical
components within the heater for corrosion, frayed or
cut insulation, tight connections, etc. Repair or
replace as necessary.
6. Review all heater markings (i.e. warnings, start-up,
shut-down, etc.) at the time of maintenance for
legibility. Make sure none are cut, torn, or otherwise
damaged. Any damaged markings must be replaced
immediately by contacting the L.B. White Co., Inc.
Dataplates, start-up and shut-down instructions and
warnings are available at no cost.
Service Instructions
GENERAL
WARNING
Burn Hazard
■ Heater surfaces are hot for a period of time after the
heater has been shut down.
2. Disconnect the thermocouple from the safety control
valve when servicing either the pilot saftey control
valve or the burner orifice manifold.
■ Allow the heater to cool before performing service,
3. Remove the heater’s barrel for access to burner
related components.
■ Failure to follow this warning will result in burns
4 Disconnect the gas hose if needed for the service
procedure.
maintenance, or cleaning.
causing injury.
WARNING
Fire and Explosion Hazard
■ Do not disassemble or attempt to repair any heater
components or gas train components.
■ All component parts must be replaced if defects are
found.
■ Failure to follow this warning will result in fire or
explosions, causing property damage, injury, or death.
1. Close the fuel supply valve to the heater before
ser vicing unless necessar y for your ser vice
procedure.
5. For reassembly, reverse the respective service
procedure. Ensure gas connections are tightened
securely.
6. After servicing, start the heater to ensure proper
operation and check for gas leaks.
7. Clean the heater’s orifice manifold with compressed
air or a soft, dry rag. Do not use files, drills, etc.,
which may enlarge the holes, causing combustion
problems or burner flame extending outside of the
case barrel. Replace the manifold if its holes cannot
be cleaned properly.
SAFETY CONTROL VALVE/VARIABLE RATE
VALVE/BURNER ORIFICE MANIFOLD
1. Straighten the mounting bracket tabs and remove
thermocouple from safety control valve.
2. Remove the jam nut securing the safety control valve
to its mounting bracket.
FIG.7
SAFETY
VALVE
3. Pull the safety control with manifold from heater.
4. Replace or clean components as needed.
FIG. 6
VARIABLE RATE
VALVE
ORIFICE
MANIFOLD
BRACKET
JAM NUT
11
THERMOCOUPLE
The thermocouple may need replacement if the burner
goes out after allowing the thermocouple to heat up for an
extended period of time.
To determine if the thermocouple is defective:
-- Connect an ohm meter between the ends of
the thermocouple.
1. Pull back on the thermocouple to disengage it from
its mounting bracket.
2. Loosen the thermocouple connector nut which is
threaded into the safety control valve. Slide the
thermocouple through the bushing at the back of the
heater.
-- A good thermocouple will show some level of
resistance from end to end.
-- A defective thermouple will show an open
circuit on the ohm meter
FIG. 8
■ The thermocouple uses a clip to mount within its
support bracket. See Fig.8. Ensure the thermocouple
is completely pushed into its bracket. Failure to do so
may cause burner outage.
■ When connecting the thermocouple to the safety
control valve, thread the thermocouple finger tight to
the valve, then snug it in with a wrench.
IGNITER and ELECTRODE
Servicing of the igniter and electrode is needed when a spark
is not observed at the electrode when pushing the igniter
button. This may happen with hard use over a long period of
time, or due to dust and dirt accumulation.
B. Electrode
If you do not see a spark being generated at the electrode
check the following areas:
A. Igniter
1. Remove the wire from the push button igniter.
2. Position a screwdriver tip) about 1/8 in. from igniter.See
Fig.9
3. Holding the screwdriver by its handle, push the igniter’s
button several times. If spark is not seen, replace the
igniter. If spark is observed, proceed to electrode
servicing.
FIG. 9
REMOVE NUT TO REPLACE IGNITER
1. Ensure the wire between the electrode and the igniter is
securely connected.
2. Check the wire for nicks, cuts, or mars. Nicks or cuts
will prevent a spark from being generated at the
electrode tip. Replace the electrode if necessary. The
electrode ships with the wire.
3. Ensure electrode tip is 5/32 in. (.156) from inside of
burner. Clean the electrode with emery cloth or steel
wool. See Fig.10.
4. Verify that the electrode’s insulator body is not cracked
and that the electrode rod does not move within its the
body. See Fig.11. If it does, replace the electrode.
FIG. 10
TIP GAP: 5/32 IN.
CLEAN-USE EMERY CLOTH
12
FIG. 11
INSULATOR
GAS PRESSURE CHECKS
■ This procedure is to be done once a year prior to the
FIG.13
heating season, anytime the heater is moved from one
job location to the next, or after servicing the heater.
WARNING
■ Do not disassemble the safety control valve.
■ Do not attempt to replace any components of the
safety control valve.
■ The safety control must be replaced if any physical
damage occurs to it.
■ Failure to follow this warning will result in fire or
explosions, leading to injury or death, and building
damage.
MATERIALS REQUIRED
(To be secured through local purchase)
Quantity
1
1
Description
High Pressure Gas Gauge capable of
reading up to 15 PSIG
1/8 in. black iron street ell.
A. PREPARATION
1. Close fuel supply valve at propane gas supply
container.
2. Allow heater to burn off gas remaining in it’s gas
supply line..
3. Position the variable heat valve to its lowest setting..
4. Remove case barrel from heater.
B. GAUGE INSTALLATION
1. Using an wrench, remove the cap from the safety
control valve as shown in Fig. 12
FIG.12
3. Open fuel supply valves to heater.
C. READING PRESSURES
1. Light the heater. Set the variable rate valve to its
highest setting.With the heater operating, the
pressure gauge should read the pressure specified on
the dataplate or in the specification section of this
owner’s manual.
2. Does the pressure reading agree with that given on
the dataplate? If so, no fur ther checking or
adjustment is required. Proceed to section D.
3. If the pressures does not agree with that specified on
the dataplate, then check the following:
-- Improper regulator for heater.
-- Regulator out of adjustment.
(Replace if necessary).
-- Blockage in gas hose.
-- Insufficient size or quantity of propane gas supply
containers.
CAP
D. COMPLETION
1. Once the proper pressure has been confirmed, close
fuel supply valves.
2. Allow heater to burn off fuel remaining in gas supply
line.
3. Remove elbow, and gauge.
2. Install a 1/8 in. street elbow and pressure gauge at
this point. See Fig.13
4. Install hex cap onto safety valve. Tighten securely.
5. Check for gas leaks.
13
Troubleshooting
PROBLEMS
1. Burner will not light.
CAUSES
* Propane gas container is empty.
REMEDIES
* Fill container.
* Fuel supply valves closed.
* Open fuel supply valves.
* Excess flow valve in P.O.L.
fitting on regulator is closed.
* Close propane container valve. Wait 5 minutes
and open container’s valve slowly.
* Safety control button not fully pushed in.
* Push in button completely.
* Burner orifice manifold is plugged.
* Clean or replace manifold.
* Restriction in gas hose.
* Remove hose from heater and blow
out with compressed air or replace if necessary.
* Air in gas line.
* Push in safety control valve’s pilot button (normally 15 20 seconds is sufficient) on control of gas valve to purge
air from line (usually necessary at time of installation).
NOTE:
2. Burner lights but will not
stay lit when safety control
button is released.
3. Burner flame lifting
off burner.
Make sure you are pushing the Piezo igniter
button during this time to prevent gas
accumulation.
* Safety control valve is defective.
* Replace safety control valve.
* Defective Piezo igniter or electrode.
* Refer to the igniter and electrode service instruction
section for problems associated with these parts.
* Restriction in gas hose.
* See remedy for same cause in Problem #1.
* Insufficient time allowed for
thermocouple to heat up..
* Hold in control button for 30 seconds to allow proper
warm up.
* Loose thermocouple.
* Tighten thermocouple at gas control. Make sure
it is securely pushed into its bracket. Tighten
finger tight and snug the contact nut with an
appropriate wrench.
* Defective thermocouple.
* Replace thermocouple.
* Orifice manifold is plugged.
* See remedy for same in Problem #1.
* Defective safety control valve.
* Replace safety control valve.
* Improper gas pressure.
* Set pressure according to pressure on dataplate.
* Fuel pressure set too high.
* Set pressure according to pressure on dataplate.
* Blockages in burner manifold orifice or at * Clean suspected area with soft brush, dry cloth,
primary air inlets of burner.
or compressed air.
4. Heater not delivering
maximum heat output.
14
* Gas supply valves not fully open.
* Open valves completely.
* Variable rate valve not positioned
to maximum
Burner manifold orifice plugged.
* Position the valve to maximum
* Low fuel supply pressure.
* Consult propane gas supplier. Cylinder or tank needs
replacement or refill. Regulator needs adjustment.
Check for use of proper regulation and fuel gas.
* Clean burner orifice with compressed air or replace.
Heater Component Function
BARREL w/ TOP (CASE)
Upright sheet metal case component. Acts as a chimney to
distribute heat to surrounding area.
BASE
Sheet metal case platform used to support and stabilize
burner and barrel assemblies.
BURNER
Component at which combustion of fuel gases takes place.
BURNER ORIFICE / MANIFOLD
Metering device used to feed gas to burner at a specific
rate, with the appropriate pressure.
ELECTRODE
Ignites gas by spark. Receives spark voltage from piezo
igniter.
GAS HOSE
Flexible connector used to convey gas from supply line or
cylinder to heater.
REGULATOR
The heart of any gas supply installation. Used to deliver a
working pressure to the appliance under varying conditions
in tank pressure.
SAFETY CONTROL VALVE
A gas control valve which is held open by electrical power
supplied by the thermocouple and which closes
automatically to shut off the flow of gas to the main burner
when flame is extinguished or is too small to heat the
thermocouple.
THERMOCOUPLE
A thermoelectric device that converts heat directly into
electrical energy. Works in conjunction with electromagnet
in gas control valve thereby assisting in maintaining gas
supply for the pilot light.
VARIABLE RATE VALVE
A manually adjsuted valve that allows the user to operate
the heater from its lowest to highest heat output, or
anywhere in-between. .
PIEZO IGNITER
Generates ignition voltage when igniter button is pushed.
This voltage is sent to electrode to provide spark.
15
Parts Identification
Parts Schematic
16
Parts List
Item
1
2
3
4
5
6
7
8
9
10
11
12
Description
Regulator w/POL Fitting
Hose, 1/4 in./ 10 ft.
Valve, Safety Control
Nut, Jam
Valve, Variable Rate
Orifice Manifold
Igniter, Piezo
Thermocouple
Electrode
Burner Assembly
Barrel w/ Top
Base
Part Number
23463
20706
572506
572587
572507
572508
570434
571030
572509
572504
572505
572510
17
Warranty Policy
EQUIPMENT
L.B. White Co., Inc. warrants that the component parts of its
heaters are free from defects in material and workmanship,
when properly installed, operated, and maintained in
accordance with the Installation and Maintenance
Instructions, safety guides and labels contained with each
unit. If, within 12 months from the date of purchase by the
end user, any component is found to be defective, L.B.
White Co., Inc. will at its option, repair or replace the
defective part or heaters, with a new part or heaater, F.O.B.,
Onalaska, Wisconsin.
A warranty card on file at L.B. White will automatically
qualify a unit and its component par ts for warranty
consideration. If a warranty card is not on file, a copy of the
bill of sale will be required to establish warranty
qualification. If neither is available, the warranty period will
be 12 months from date of shipment from L B. White.
PARTS
L.B. White Co., Inc. warrants that replacement parts
purchased from the company and used on the appropriate
L. B. White heater are free from defects both in material and
workmanship for 12 months from the date of purchase by
the end user. Warranty is automatic if a component is found
defective within 12 months of the date code marked on the
part. If the defect occurs more than 12 months later than
the date code but within 12 months from the date of
purchase by the end user, a copy of a bill of sale will be
required to establish warranty qualification.
The warranty set forth above is the exclusive warranty
provided by L.B. White, and all other warranties, including
any implied warranties or merchantability or fitness for a
particular purpose, are expressly disclaimed. In the event
any implied warranty is not hereby effectively disclaimed
due to operation of law, such implied warranty is limited in
Replacement Parts and Service
Contact your local L.B. White dealer for replacement parts
and service or call the L.B. White Co., Inc. at (800) 3457200 for assistance. Be sure that you have your heater
model number and configuration number when calling.
18
duration to the duration of the applicable warranty stated
above. The remedies set forth above are the sole and
exclusive remedies available hereunder. L.B. White will not
be liable for any incidental or consequential damages
directly or indirectly related to the sale, handling or use of
the heater, and in any event L.B. White's liability in
connection with the heater, including for claims based on
negligence or strict liability, is limited to the purchase price.
Some states do not allow limitations on how long an implied
warranty lasts, so the above limitation may not apply to you.
Some states do not allow the exclusion or limitation of
incidental or consequential damages, so the above
limitation or exclusion may not apply to you. This warranty
gives you specific legal rights, and you may also have other
rights which vary from state to state.