1
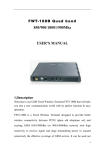
GSM Gateway with 4/8/16/32 Ports
USER MANUAL
Page 1 of 9
Introducing the GSM Gateway with 4, 8, 16 or 32 incoming ports.
When connected to a PABX or various SLT phones the Gateway provides clear and reliable
voice communication and is ideal for use in schools, hospitals, site offices etc., particularly in
areas where land lines are erratic or not available.
Please read the user manual carefully before installing the Gateway.
Contents
1
Summarize
…………………………………………………………………………2
2
Configurationand installation
3
Function
………………………………………………………………..…………3
4
Operation
…………………………………………………………..………………3
5
Technology ……………………………………………………………………………4
6
Led status describe…………………………………………………….……………6
7
Parameter setting…………………………………….………………………………6
…………………………………….……………2
Page 2 of 9
1. Summarize
The design of the 4/8/16/32 Gateway is to connect a standard telephone or PABX to
the GSM Cell Network of your choice.
The interface board of the 4/8/16/32 Gateway supply a clear bond between standard
phone or a VOIP GATEWAY or A PBX and GSM Cell Network it has the function
of the emulation phone exchanger and supply:
Dialing tone
DTMF Dialing
FSK/DTMF Caller ID.
Bell signal
Polarity reversal
The RJ-11 socket which connects the phone or the payphone
Antenna socket (FME)
IP usage switch
Working state indicator
Signal Strength indicator
2. Configuration and installation
1). 4/8/16/32 port Gateway package list
Fixed Wireless Terminal(mainframe)
850/1900/1800/900MHz antenna(FME)
Users Guide
Data cable
1pcs
1set(4/8/32pcs)
1pcs
(optional)
1pcs
2). Installation Steps:
The equipment adopts digit GSM network communication mode, it need effective
SIM card.
① Install the Fixed Wireless Terminal in a suitable place.
Page 3 of 9
② Turn off the power at the back of the unit.
③ Install effective SIM card.
a) Take off the screw of the SIM card cover at the back of the unit
b) Open the SIM card cover.
c) Move the SIM card clamp according to the arrow.
d) Lift the SIM card clamp to insert the SIM card
e) Press the SIM card clamp and move it to firm
Close the SIM card cover then wring the screw.
④ Input the antenna into the socket.
⑤
Plug the end of the conjunction line of the phone(payphone) into the RJ-11
socket of the FWT and connect the other end to the phone(payphone).
⑥ Plug the 220v/110v socket and connect the other end to the power socket at the
back of the FWT.
⑦ Turn on the power at the back of the FWT
You can operate the FWT after installing and passing the setting of the system
initialization of the network supplier.
3.
Function
4/8/16/32 port GSM Gateway is wireless equipment which is based on
wireless module SIM340 or Q2403, it communicates clearly and has no noise, with
insider backup battery and is convenient and durable.
The function of the FWT is as follows:
1. Supply two set extensions to connect
2. Incoming call display
3. Set local code, IP access code and special number;
Set limiting
to dial national long distance call,mobile
4. phone call and local call,set using IP or not ;
6.Lock phone and telecom operator;
7.Lock card automatically,lock card with random PIN code or fixed PIN code .
4. Operation
4.1 Turn on
Turn on the power, the unit need about 2 minutes to load initialize date automatically
and search network, in the period the working indicator keep on lighting, you can listen to
the dialing tone after picking up the handset, the indicator will flash at 1Hz frequency. In
Page 4 of 9
the process of turning on the phone , when you set locking unit (lock card ,lock network),
the unit will check automatically according to the setting, if it fails to pass check, it will
supply 2 minutes error tone through the phone then disconnect the phone.
4.2 Board indicator state:
Power light: external power indicator
Talking light: The indicator will light when the talking or ring or cannot find simcard.
Signal light: network signal indicator, flashing with signal and extinguish without signal.
In use light: it lights when start the unit and cannot connect to the
gsm module. It lights
when you pick off the hand of a phone.
4.3 Dialing call
When signal strength indicator displays to receive strength signal and the working indicator
in the light state, pick off the handset which connects to the FWT, you can hear the dialing
tone, if it connects to the payment, the payphone will display the dialing number and the
charger when it get through. It will give the payphone or voip gateway a ACCURACY
reverse polarity.
4.4 Incoming call
The phone will ring when call comes, pick off the handset to talk with the other side.
4.5 How to use payphone.
Please refer to the payphone manual.
4.6 Parameter Set
You can set through outside phone keyboard, input *888999# to enter into setting and input
**00*0# to drop out. The setting directive and format is as follows, a long tone means
setting successfully, two short tone means error setting, hang the phone and pick off again
to set again.
5. Technology Index
1). Frequency ranges: GSM 900/1800MHZ. GSM850/1900MHZ(option)
2). SIM Card:It support 3VG-SIM card.
3). Phone interface:Supply RJ-11 Phone Interface
Hanging voltage:45V Picking off voltage:30mA/41mA
Dialing tone Frequency:450Hz
Ring voltage: 75V,25HZ,1second ring,4seconds silence
4). Antenna interface:Antenna amplifying 〉1.5DB
Page 5 of 9
Sensitivity 〈 -104DBM
Transmitting power≤3W
5). Adapter interface:INPUT:AC 110v/220v
OUTPUT:+12V/6000MA
6). Serial communication interface:RS-232 full serial interface mode (with assign date
transport line)
7). Operation Circumstance:
Operation temperature:-10℃ ~ 60℃
Storage temperature:-20℃ ~ 70℃
Operation humidity:45% —95%
Atmosphere pressure:86 —106Kpa
Environment noise:〈 60DB
Transmitting Power: 2W
Sensitivity: <-104dbm
Antenna Amplifying: >1.5db
Dialing frequency: 450Hz
Hanging voltage: 45V
Picking carrent: 30mA/41mA
Notice!
● Please read the rules carefully:
It is dangerous or will break the law against the rules
● Masking
Please make sure there is no masking to wireless frequency signal before using.
● Pay attention to the Traffic Security
Do not use the phone which connects to the FWT when you are driving.
● Disturbance
Affect by disturbance leads up to affect the phone capability like other mobile phone.
● Explosion Zone
Do not use the FWT in explosion zone or the place with the sign of “closing the
wireless receive and dispatch unit”
● Latent explosive circumstances
Do not use the unit in latent explosive areas (e.g. Gas station, Flammable liquid, Gas
transportation vehicle, warehouse etc.)
● Children
Do not let children play with the FWT. Perhaps they will be stabbed by antenna or stab
Page 6 of 9
others. They may destroy the interface or make wrong call to add the charge.
● The eligible maintenance
Install and maintain by eligible maintenance people. Please contact to the supplier if
there is something wrong with the unit. Do not open the equipment box or repaired by
unauthorized company or persons. Avoid abnormal damage.
● Antenna
Use the antenna which is via approbation. Do not connect to the unnecessary
antenna.
The unqualified antenna will damage the unit. Lay the antenna vertically and be far
from the phone, do not bind the antenna cable and the phone line. Do not touch the
antenna or close to the antenna less 10cm when you are on communication.
● Power Supply
Use the power supply which is via approbation. Do not connect to the unnecessary
one.
The unqualified power supply will damage the unit.
Operation temperature go up is the normal phenomenon.
● Installation and Conjunction
Install the unit according to the manual and close the power when you connects the
unit to other unit because during operation , the power is on and it will damage the unit.
● Set
Carry out operation and communication after being initialized setting by the supplier or
the network operator. Only the supplier and the network operator have right to set the
system setting.
● Connect to other equipment
Please read the manual carefully to gain safe guide before connecting to other
equipment. Do not connect to unnecessary products.
6. Led status describe:
PWR:red,power indication
Talking: Yellow ,talking, ring, no sim card insert
SIG:green,signal indication
In use:green,pick off indication , no gsm module
7. Parameter setting
Setting the parameter by phone,Entering the setting statuse“*888999#”,Esc the setting
statuse and saveing the data“**00*0#”。
Page 7 of 9
type
A
B
C
D
E
F
G
describe
Set local code
setting
**10*code#
Set IP1 (0)
Set IP2 (00)
Set IP3 (013)
Set IP5 (13)
Limit (out 2-9)
Limit (in)
Limit (out 0)
Limit (out 00)
Limit (out 013)
Limit (out 13)
Spk gain
Mic gain
Spk value
Mic value
Lock
Random lock
sim
Fix lock
Lock FCT
Lock net
HIDE
caller ID.
AUTO
DIAL
DIALING out
WAITIN
AFTER
G TIME
DELAY TIME
Auto search
PGSM
900MHZ
DCS 1800M
Work
PCS
frequenc
1900MHZ
y(option)
EGSM
900/1800M
GSM
850/1900M
**11*IP1#
**11* #
**12*IP2#
**12* #
**13*IP3#
**13* #
**15*IP5#
**15*#
**20*1#
**21*0#
**21*1#
**22*0#
**22*1#
**23*0#
**23*1#
**24*0#
**24*1#
**25*0#
**29*1#
**29*#
**30*X# (note X:1-4)
**31*X# (note X:1-4)
**32*X# (note X:1-4)
**33*X# (note X:1-4)
**40*1#
**40*#
**41*1#
**41*#
**42*1#
**43*0#
**43*1#
**44*0#
H
CALLER ID.(option)
I
DATE AND TIME(option)
H
013 → 13
Reset to Factory seting
esc
**10*#
**66*1#
**66*0#
**67*X#
X IS DELAY TIME
**78*0#
**78*1#
**78*2#
**78*3#
**78*4#
**78*5#
**88*1#,FSK Mode.
if you want a caller is
**88*0#,
DTMF
with a correct date
mode
need to set the date
and time
Fist MM is month,DD
is
day,HH
is
**44*MMDDHHmm#
hours,Second mm is
minutes.
**51*1#
**51*0#
**52*#
Page 8 of 9
Acquiescence:
Special number:6000
Local code:no
IP1:
Phone IP:
no
close
Call limit:close
International call limit:close
Internal long distance call limit: close
local call: close
Local phone number call limit:close
PIN:
Earphone volume rate:3[1-4]
Earphone volume :
MIC Volume rate:3[1-4]
MIC Volume adjust: 3[1-4]
Lock card state:
Lock unit state: close
close
3[1-4]