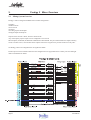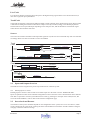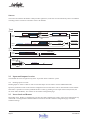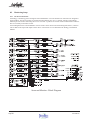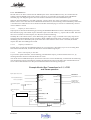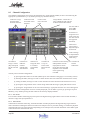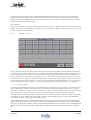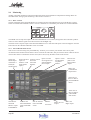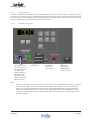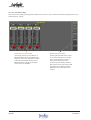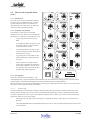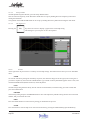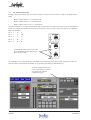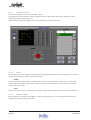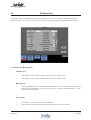
1
Mix/Automation Manual Software Version 3.1 Part Number: DPR2101-A Document Number: 165 Manual by: Andrew Bell/Ross Caston/Owen Walker Copyright © August 2000 Important Notice The material in this document is copyright to Fairlight ESP Pty Ltd, and may not be quoted or reproduced in any form without written permission from the company. LIMITED SOFTWARE WARRANTY POLICY All the software provided with, or purchased especially for, Fairlight products has been tested for functionality. Fairlight ESP Pty Ltd will make its best efforts to correct reported software defects for future releases subject to technical practicabilities. Fairlight ESP will also replace any defective media on which software has been delivered provided that the item to be replaced is returned to the dealer who supports the product within 90 days of purchase. Fairlight ESP Pty Ltd makes no warranty or representation either expressed or implied with respect to the system's performance or fitness for a particular purpose. In no event will Fairlight ESP Pty Ltd be liable for direct or indirect damages arising from any defect in the software or its documentation. Further, Fairlight ESP Pty Ltd will not accept any liability for any programs, sounds, audio recording or sequences stored in or used with Fairlight products, including the cost of recovery of such data. The warranties, remedies and disclaimers above are exclusive and take precedence over all others, oral or written, express or implied, to the extent permitted by law in the geographical area of the product's use. No employee of Fairlight ESP, agent, distributor or employee of an agent or distributor is authorised to offer any variation from this policy. Copyright 2000 Fairlight ESP Pty Ltd, Unit 2, 1 Skyline Place, French's Forest, NSW 2086, AUSTRALIA. Telephone +61 2 8977 9999 Fax +61 2 8977 9900 Text and Graphics by Andrew Bell / Ross Caston Updated by Owen Walker Page 2 User Manual Contents 1. 2. 3. 4. System Components ........................... 5 1.1 Prodigy 2 Engine .............................. 5 1.2 Disk Drives for Audio Storage ............ 5 1.3 MFX Editing Console ......................... 5 1.4 MFX Video Monitor ........................... 5 1.5 Fame 2 Mixing Surface ..................... 5 1.6 Surround Monitor Box ....................... 5 Prodigy 2 Mixer Overview ................. 6 2.1 Mixing System Overview ................... 6 Live Feeds .................................................. 7 Track Feeds ................................................ 7 Sources ...................................................... 7 2.2 Inputs and Outputs Overview ............. 7 2.3 Insert Sends and Returns .................. 7 Sources ...................................................... 8 2.2 Inputs and Outputs Overview ............. 8 2.3 Insert Sends and Returns .................. 8 7.3.5 7.3.6 7.3.7 7.3.8 7.3.9 8. 8.1 Running the System ............................ 9 Powering on the system ................... 9 ...................................................... 3.2 Running the Prodigy 2 Editor ............ 9 3.3 Running the Prodigy 2 Mixer ............. 9 4.1 4.2 4.3 Restarting the System ....................... Restarting the Mixer ........................ Restarting the PRODIGY 2 Engine .. Running the System as an Editor .... 10 10 10 10 The Control Surface ........................... 11 6.3 6.4 6.5 7. 7.3.4 3.1 5. 6. 7.3.3 7.1 7.2 7.3 8.2 8.3 User Interface .................................... 12 System Modes ............................... 12 Mixer Screen Menu Summary ........ 14 6.4.1 6.4.2 6.4.3 The Mix Menu ............................. 14 The Data Menu .......................... 15 The System Menu ..................... 16 Fader Screen Menus ....................... 17 Starting a Job .................................... 18 File Types ....................................... 18 7.1.1 7.3.1 7.3.2 User Manual Recording Files ......................... 18 MFX and Prodigy 2 Communication 18 MFX User Interface ......................... 19 Creating a new project: ............. 19 Opening a project that does not 8.4 contain mix data. ....................... 19 Opening a project that contains mix data. ........................................... 19 Using LOAD MIXDATA in the import menu. ........................................ 20 Closing a project. ...................... 20 The UPDATE button on the Mixer.21 Extending Project containing embedded Mixer Data. .......................... 21 Removing Embedded Mixer Data from a project. .................................... 21 Notes ......................................... 22 Setting Up the Console ..................... 23 Buss Allocation ............................... 23 8.1.1 8.1.2 8.1.3 8.1.4 8.1.5 8.1.6 8.1.7 8.1.8 8.1.9 8.1.10 8.1.11 The Buss Allocation Screen ...... 23 Mono Aux Busses ...................... 23 Stereo Aux Busses .................... 23 Sub Busses .............................. 23 Main Busses ............................. 24 Multitrack Busses ...................... 24 5.1 Format ................................. 24 Solo ........................................... 24 C/R Monitor ................................ 24 Define Port ................................ 25 Free Mix Busses ....................... 25 8.2.1 8.2.2 The Surround Monitor ............... 27 Internal Sources ........................ 27 8.3.1 8.3.2 8.3.4 8.3.5 8.3.6 8.3.7 8.3.8 8.3.9 8.3.10 8.3.11 8.3.12 8.3.13 Live Feeds ................................. 28 Track Feeds .............................. 28 Sources ..................................... 29 Insert Points .............................. 30 Copying Channel Configuration 30 Stereo Linking ........................... 30 Arming Tracks ........................... 30 Signal Flow ................................ 30 EQ/COMP/EXP buttons ............. 30 Multitrack busses ...................... 30 MS Decoding/Input configuration options ...................................... 31 Input Phase Reverse ................ 31 8.4.1 8.4.2 8.4.3 8.4.4 Selection of Sources ................. 33 Show Mode ................................ 33 Link Mode .................................. 33 Unlink Mode .............................. 33 Monitoring Setup ............................. 27 Channel Configuration ..................... 28 The Patch Page .............................. 32 Page 3 Contents 8.5 8.6 8.7 8.8 8.9 9. 9.1 9.4 9.5 9.6 9.7 9.8 10. continued Buss and Group Assignment .......... 34 Naming Signal Paths ...................... 34 8.6.1 8.6.2 Tracks ........................................ 34 Live Feeds ................................. 35 8.7.1 8.7.2 8.7.3 Switching Between Sets ........... 35 Editing a Fader Set .................... 35 Saving Fader Sets ..................... 37 8.8.1 8.8.2 Editing a Meter Set .................... 37 Saving Meter Sets ..................... 37 8.9.1 8.9.2 8.9.3 8.9.4 Operation ................................... 38 Setup ......................................... 38 Automatic Cue ........................... 39 Use of System Resources ........ 39 10.1.3 Mix Screen Menu Buttons .......... 66 10.3.1 10.3.2 10.3.3 10.3.4 Set Write Enables ..................... 69 Write New Data ......................... 69 Correct Existing Fader Data ...... 69 Other Automatable Parameters 69 10.4.1 10.4.2 10.5.1 10.5.2 Method 1 .................................... 71 Method 2 .................................... 71 Mix Processing Commands ..... 73 Snapshots ................................. 73 10.2 Getting Started with Automation ...... 68 10.3 How to Change an Existing Mix ...... 69 Fader Sets ...................................... 35 10.4 How to Set Up for a new Scene ...... 71 Meter Sets ...................................... 37 Talkback ......................................... 38 11. Preferences ........................................ 73 11.1 Preference Descriptions ..................... 73 Operating the Console Manually ..... 40 Fader Operation .............................. 40 9.1.1 9.1.2 9.1.3 9.1.4 9.1.5 9.1.6 9.1.7 9.1.8 9.2.2 9.2.3 9.2.4 Level .......................................... 40 Pan / Balance ............................ 40 Trim / Surround ......................... 40 Solo ........................................... 40 Mute ........................................... 42 Fader Sets ................................. 42 Faders To .................................. 42 Fader Groups ............................ 42 Level .......................................... 44 Pan Pot ...................................... 44 Trim Pot ..................................... 44 Monitoring ....................................... 47 9.4.1 Basic Controls .......................... 47 9.4.2 The CR Mon & Studio Screen ... 47 9.4.3 The Aux Masters Page ...................... 48 The Central Assignable Panel (CAP) 49 9.5.1 9.5.2 9.5.3 9.5.4 9.5.5 Introduction ................................ 49 Assigning a Signal Path ........... 49 The Equaliser ............................ 49 The Auxiliary Send Panel ........... 53 Dynamics .................................. 53 Joystick Operation .......................... 55 Writing Screen Macros ................... 57 The Cue List ................................... 57 9.9.2 Presets .............................................. 61 9.9.3 The Patch Library .............................. 61 9.10.3 Setting ON Triggers .................. 63 Console Automation .......................... 63 10.1 Mix Control Buttons ........................ 63 10.1.2 Page 4 Write Enables ............................ 66 User Manual 1. System Components There are eight major subassemblies to the Fame 2 system : 1.1 Prodigy 2 Engine This is an 8-unit rack mount device, normally located in a machine room away from the recording area. It provides processing for all the audio recording, editing and mixing, as well as running the graphics display for the audio waveform and editing screens. 1.2 Disk Drives for Audio Storage These may be located inside the Prodigy 2 Engine and on an external SCSI buss, if an additional SCSI card is fitted. They may include fixed and removable hard disks, magneto-optical disks, and backup tape devices. 1.3 MFX Editing Console This is built into the Prodigy 2 Mixing Surface, and used for recording and editing functions. 1.4 MFX Video Monitor Connects to a 15 pin socket on the Prodigy 2 Engine. 1.5 Fame 2 Mixing Surface Includes faders, Master section, touch screen and a built in automation system, controls the automation of the console and displays the graphics on an external monitor. 1.6 Surround Monitor Box The Surround Monitor Box is a 3 unit rack mount providing analog monitoring for Prodigy 2. Its use is fully described in the section called Monitoring Setup. User Manual Page 5 2. 2.1 Prodigy 2 Mixer Overview Mixing System Overview Prodigy 2 comes configured standard with a 24 track configuration 16 Faders 24 Editor Tracks 24 Live Feeds 24 Busses 24 Analog Inputs and Outputs 24 Digital Inputs and Outputs Outputs of the recorder / editor, known as Track Feeds. Any of the opther physical inputs can be configured as Live Feeds. Mixed outputs (or BUSES) are different combinations of the FEEDS. They are used for Main mix outputs,auxiliary sends, extra mix busses, solo and mix minus outputs and can be assigned to any of these functions at any time. See Prodigy 2 mixer core diagram below for signal flow details. Further options can be ordered which allow the configuration to be upgraded. Please contact your local Fairlight office or Distributer for details. Page 6 User Manual Live Feeds Live feeds are channels connecting physical inputs to the digital mixing engine. Before a live feed can be heard, it must have a physical input patched to it. Track Feeds Track feeds are channels connecting the audio from disk recorder playback to the digital mixing engine. When a track is armed for recording the situation is a little more complex. Like any recorder, Prodigy 2 switches the playback of armed tracks between input and output depending on the transport state, and this determines which audio signal comes into the mixer from the track feed. Sources The source for a FEED is the INPUT which provides signal for it (in the case of a Track Feed only when it is armed for recording). Busses can also be selected as sources for FEEDS. Track Feed A Input Insert Return Disk B 4-Band EQ Xfade Source Insert Send 4-Band EQ Track 4-Band EQ Track Feed OR A 4-Band EQ Input 4-Band EQ Insert Return Disk Dynamics Live Feed Input 4-Band EQ Insert Return Dynamics Dynamics B Xfade 4-Band EQ Source Insert Send Track Track Feed Insert Send Live Feed Bus Feed 1 Feed 2 Dynamics Bus Output Feed 48 2.2 Inputs and Outputs Overview The INPUTS can be assigned to any of the 24 possible busses within the system. 2.2.1 Patching Inputs to Tracks Patching Inputs to Tracks is done in order to record the input on to the track or use the THROUGH mode. Inputs are patched to Tracks on the Channel Configuration screen of the mixer. This is described later in this manual. Note that it is possible to record a system BUSS into a Track, by patching it to the input of the Track (beware, this can create audio feedback!). This is done on the Channel Configuration page. 2.3 Insert Sends and Returns The number of Insert points available depends on the configuration of the system, but is never less than 24, which can be patched into any of the feeds. Creating the Insert Send and Return can be done from the Channel Configuration page or from the Channel List Page. User Manual Page 7 Sources The source for a FEED is the INPUT which provides signal for it (in the case of a Track Feed only when it is armed for recording). Busses can also be selected as sources for FEEDS. Track Feed A Input Insert Return Disk B 4-Band EQ Xfade Source Insert Send 4-Band EQ Track 4-Band EQ Track Feed OR A 4-Band EQ Input 4-Band EQ Insert Return Disk Dynamics Live Feed Input 4-Band EQ Insert Return Dynamics Dynamics B Xfade 4-Band EQ Source Insert Send Track Track Feed Insert Send Live Feed Bus Feed 1 Feed 2 Dynamics Bus Output Feed 48 2.2 Inputs and Outputs Overview The 48 INPUTS can be assigned to any of the 24 possible busses within the system. 2.2.1 Patching Inputs to Tracks Patching Inputs to Tracks is done in order to record the input on to the track or use the THROUGH mode. Inputs are patched to Tracks on the Channel Configuration screen of the mixer. This is described later in this manual. Note that it is possible to record a system BUSS into a Track, by patching it to the input of the Track (beware, this can create audio feedback!). This is done on the Channel Configuration page. 2.3 Insert Sends and Returns Depending on the Prodigy 2 configuration you have there XX available insert points, which can be patched into any of the feeds. Creating the Insert Send and Return can be done from the Channel Configuration page or from the Channel List Page. Page 8 User Manual 3. 3.1 Running the System Powering on the system a) First turn on the Engine, using the power button on the front panel. b) Next turn on the Mixer Surface, using the power switch on the rear panel. C) Turn on the surround monitor. 3.2 Running the Prodigy 2 Editor The Fame 2 engine, once started, will boot up and launch the main software application. Open or create a project on the MFX Editor, See Section 7 for further instructions. 3.3 Running the Prodigy 2 Mixer Once the surface has been powered up and a project has been loaded on the Editor, type prodigy at the prompt, displayed on the external monitor, using the keyboard. User Manual Page 9 4. 4.1 Restarting the System Restarting the Mixer If you have made a controlled exit from the mixer computer (by pressing the Quit to DOS button) you can restart it by typing: PRODIGY<ENTER> If you wish to restart the mixer, and there is no response from the touch screen, you can hold down all of the following keys: <ALT>-CTRL>-<DEL> This can normally be done without disturbing the Recorder/Editor. Then type PRODIGY<ENTER>. After this you should load the Mixer Title, which will return you to the last point you saved. 4.2 Restarting the PRODIGY 2 Engine If the recorder/editor needs to be restarted, the best way to do it is to turn the power off on the front of the FAME 2 Engine and PC, then on again, waiting at least 10 seconds in between. It is usually best to save and then reload the Title from the mixer, so that everything is "in sync". It is also possible to exit the Prodigy 2 application by typing: QUIT<RETURN>Y This will take the machine to a command line interface known as the Shell where various OS9 commands can be entered. If you have ventured into this area and wish to return to the FAME 2 environment, type: FAME<RETURN> You should always restart the Prodigy 2 application on the PC after restarting the Editor. 4.3 Running the System as an Editor If you wish to run the system as an editor only, exit to the Shell as described above and type: MFX3<RETURN> This will cause the system to run as MFX3 this particular time, but next time it is booted it will start as FAME 2 again. To make the system boot up as MFX3, boot it normally, then type: BEMFX<RETURN> then reboot. This can be useful if you wish to move the system to another room or connect it temporarily to another mixing console. When you wish to change the system back into a FAME 2, type: BEPRODIGY<RETURN> Note: the main differences between MFX3 and FAME 2 are: MFX3 is a multitrack editor whose tracks come out of individual outputs (or as a stereo mix from outputs 1 and 2) PRODIGY 2 is a multitrack editor with a built in mixer. All outputs are mixes of the tracks and Live Feeds (except those used as Insert Sends or Direct Outputs) Page 10 User Manual 5. The Control Surface Prodigy Keyboard Used for entering text into the Mix system and controlling the Mix computer Central Assignment Panel Any signal path can be assigned to this panel, where its EQ, Dynamics and Auxiliary send levels may be altered and automated. Master Control Section Used for high level control of configuration and displays. Faders Faders are used for level control during recording and mixing. User Manual Editing Console Used to control all aspects of recording and editing. Described in more detail in the PRODIGY 2 Recording and Editing Manual. Talkback Mic and Floppy Drive Panel Contains the Floppy Drive and the Talkback Mic Input Track Ball and Monitor Panel Contains the Mix computer Trackball and Monitor controls Joysticks Used for Panning in Surround Modes Page 11 6. 6.3 User Interface System Modes The System Mode Keys determine which display is shown on the user interface. To enter a mode, press the System Mode key. To exit, press the same System Mode key again, or press the CLOSE command on the touch screen. This will return you to the fader screen. The available system modes are: CHAN CONFIG Allows you to see and change the physical input and output, insert send and return and buss assignment of any signal path. The channel selected when you open the screen will be the same one you have selected for the CAP, and you can change the selection by the same methods. These are: by pressing the INT button on any fader by touching the fader (if Assign to CAP via Touch Sensors has been checked on the Preferences screen) by soloing the fader (if Assign to CAP via Solo Switches has been checked on the Preferences screen) by pressing the Assign button on the CAP and choosing a signal path from the screen by touching the Feed name at the top of the screen and choosing from the new screen that appears EQ Shows a graph of the EQ setting for the currently selected signal path, which changes as the EQ is altered. A library of saved EQ settings is also shown, and these can be auditioned with the current setting. The channel selected when you open the screen will be the same one you have selected for the CAP, and you can change the selection by the same methods. These are listed in the previous paragraph. DYN Shows a graph of the Dynamics setting for the currently selected signal path, which changes as the Dynamics are altered. CR MON + STUDIO Allows you to see and change the sources feeding your monitoring system. Page 12 User Manual CUES + COMMS Screen for assignment of talkback to appropriate destinations. MASTER AUXES Sets the master level and output assignment for aux busses and multitrack busses. VFX Virtual Effects. Allows control of external MIDI devices from an animated screen. METERS Places meters on the screen. You may also choose and edit meter sets, which are arrangements of meter numbers, source channels and types that have been saved with the current title or preset. MATRIX Gives you a picture of your X-Point switching system, and allows you to change the connections. The Matrix setup is saved as part of the current title. FADERS TO..? Allows you to switch the faders to control such things as the Aux send level from each channel, or the send level to the 6th (Boom) channel of a 5.1 mix setup. Record Allows users to record automation. User Manual Page 13 6.4 Mixer Screen Menu Summary The lower area of the screen interface has three menus of commands, which are accessed using the MIX, DATA and SYSTEM screen buttons. Here is a summary of their usage: 6.4.1 The Mix Menu ALL WRITE Puts all faders into Write mode for use in automation. ALL READ Puts all faders into Read mode for use in automation. ALL UPDATE Puts all faders into Update mode for automation. ARM ALL Arms all faders in Touch-Write or Preview mode (when enabled) for automation. GIANT SMPTE Turns the whole touch screen into a timecode display. NEW MIX Unloads the current mix (if any) from memory, puts Mix automation online, and sets all channels to WRITE mode, ready for a complete new mix to be recorded. FORGET Throws away any new automation data that was recorded on the last timecode pass. SPEED SAVE Saves the current mix with the same name as the last, except for incrementing a number at the end of the name. LOAD Allows you to load an existing mix. This mix must have been saved under the current title. DELETE Allows you to delete mixes that have previously been saved to disk in this Title. MIX PROC Opens a screen allowing parts of mixes to be processed in different ways. For example, you may copy a section from one track to another, or trim the fader levels in a given timecode range by a number of dB. This processing only affects the mix data, not the audio content. All editing of audio content is done on the Editing console. AUTO REC Allows setup of Automation Drop-In and Drop-Out. NORMAL/ZOOM Changes the default fader screen to give an enlarged view. <<< >>> Moves the display one fader to the left or right. SAVE Allows you to create a new name for the mix before saving it. Page 14 User Manual 6.4.2 The Data Menu UPD TITLE Saves your currently loaded title without changing its name. Allows you to quickly get your changes safely to disk. PRESETS Allows you to see, load and save presets. A preset is like a snapshot of all the system parameters at a given moment, and can be used to save and restore settings of the following: Configuration of Tracks, Inputs, etc., including names, grouping, buss allocation, routing to busses and assignment of physical inputs and outputs Fader, EQ and Dynamics setting for each source signal Settings of outboard equipment being controlled by the VFX system Settings of all non-automated controls, such as input trims, stereo width etc. Current patching of X-Point matrix switcher Current settings of Monitor Box TITLE SHEET Allows you to record and store information about the current title. CUE LIST A list of events that may be fired at preset timecodes. CHANNEL LIST A screen showing all fader channels, allowing you to view and change their names. FAD STARTS If the optional GPO card is fitted, this allows the setup of GPOs to correspond with opening and closing of nominated faders. I/O LIST A list of the physical inputs and outputs, allowing you to see the usage of these resources. BUSS ALLOC. Allows display and configuration of all the system buses. This is where buses are created and assigned physical outputs. ROUTING Shows you all feeds, routable busses and fader groups. It allows you to choose which feeds are routed to which buses, and to assign them to fader groups. NORMAL/ZOOM Changes the default fader screen to give an enlarged view. <<< >>> Moves the display one fader to the left or right. SNAPSHOTS Allows up to 64 snapshots to be made of all dynamically automatable parameters. User Manual Page 15 6.4.3 The System Menu SYS INFO Displays information about the computer system and the software revision. ABOUT Displays information about the program and its authors OSC TRIGGERS Triggers fire macros. 12 triggers are pre-defined in PRODIGY 2, and these are the 6 user keys and 6 SHIFT-user keys. The trigger system allows System Macros to be assigned to these User keys. QUIT TO DOS This allows you to exit the Prodigy 2 system and return to DOS. Settings for the system oscillator. PREFERECES Provides choices for some user settings including assignment of faders to the CAP, operation of the screen saver, and startup definitions. MACROS This screen allows screen macros to be recorded into the system, and assigned to the User Keys on the console. SMART KEYS This screen is used to set up the optional Smartkey Panel, if fitted. Page 16 User Manual 6.5 Fader Screen Menus There are several screen menus which only appear when the default fader screen is being shown. These are summarised below: Mix Turns automation on or off. Blend Sets the time for the automation to ramp to stored values at the end of a WRITE On Stop Governs what the automation does when you stop the transport while writing data. Sel-SW Governs the sequence of automation states that occurs when the SEL button is pressed on any channel. Punch Controls the Automation Auto Punch-In Punch-Out facility. Solo Sys This switch determines the behaviour of the solo switches. Off No solo switches have any effect. Interlock Soloing one channel switches solo off for all other channels. Latching Solos behave normally, allowing many channels to be soloed at the same time. User Manual Page 17 7. 7.1 Starting a Job File Types There are two types of work going on inside Prodigy 2. One type is recording and editing, which are fully described in the Recording and Editing Manual. The other is mixing, which is the subject of this manual. The files used to contain audio and editing information are also different from those containing mixing information. 7.1.1 Recording Files Prodigy 2 uses files called Projects to contain audio and editing information. The project file must be created or opened before any recording or editing take place, and there is no need to save this file, as it is automatically updated every few seconds to make sure that you do not lose any audio information. Whenever you close down the machine, or even if you just turn the power off, all audio and editing information more than 10 seconds old is safe. A title contains the following information: Title sheet: framerate, producer/engineer data, start and end times Channel names (entered on the Channel List page) Matrix settings created while the title was open Fader sets created while the title was open Meter sets created while the title was open All Cue List information 10 user presets and one system preset containing all the current settings that were active when the title was saved or updated, consisting of: Configuration of Tracks, Inputs, etc., including names, grouping, buss allocation, routing to busses and assignment of physical inputs and outputs Current Fader, EQ and Dynamics setting for each source signal Settings of outboard equipment being controlled by the VFX system Settings of all non-automated controls, such as input trims, stereo width etc. Current patching of X-Point matrix switcher Current settings of Surround Monitor, excluding Monitor volume levels. Mix data The Title that is currently active on the Prodigy 2 is called the Workfile. When saving this data, the Prodigy 2 compresses the data into one file and sends it to the MFX. The MFX then embeds this Title into the currently open project. 7.2 MFX and Prodigy 2 Communication It is essential that an MFX project be open before starting up the Prodigy 2. The reason for this is that when the MFX is booted up, there is a port-to-track association: Input 1 to track 1 Input 2 to track 2 Page 18 User Manual Input 3 to track 3 and so on When the Prodigy 2 surface is started, it will load a system default setup which configures the Inputs, Outputs and buses. To achieve this, the Prodigy 2 sends instructions to the MFX to change its configuration. The MFX will only process these instructions when it has a project open. Failure to have a project open on starting the Prodigy 2 will result in the systems being out of synchronization, which can cause serious problems in operation. 7.3 MFX User Interface The term START UP Menu refers to the initial state of the Mixer after being booted. It boots to the START UP menu with the only option being to QUIT TO DOS. Initially, a title must be loaded from or stored to, an MFX Project before it is possible to start work. This is achieved in one of the following methods: 7.3.1 Creating a new project: A Message box will appear on the MFX Screen: Create New Mixer Data? (YES / NO) a) Select YES and the current mixer settings are copied and loaded into the mixer as a new title, with the data being stored into the newly created project, Prodigy 2 now has a title loaded and the new project is open. Messages on MFX: Creating New Mixer Title, on clicking Y. New Mixer Title Created, at completion of title load. This allows for a new project to be created and mixer data to be copied from the current settings of the mixer into a title for starting work from scratch. The current settings are dependent on the Preferences set and whether or not any mixing has been done since Prodigy 2 was booted. b) Select NO and the newly created project opens, but the Mixer stays in the START UP menu. No messages on MFX. This allows for the user to create a new project and then load a title from another project. The title is loaded using the IMPORT >> LOAD MIXDATA option. At this point the title data is not stored in the project. 7.3.2 Opening a project that does not contain mix data. Message on MFX: Create New Mixer Data? (YES / NO) This will work the same way as it does above. 7.3.3 Opening a project that contains mix data. Message on MFX: Load Mixer Data from Project? a) (YES / NO) Select YES and title stored in project is loaded onto the mixer. Messages in MFX: Sending data to mixer, on clicking Y. Unpacking and Loading title. Please wait., during title loading. Title Load Complete., at completion of title load. During this transfer the following functions are disabled: 1. Project Open library files 2. Project Close User Manual Page 19 3. Project Version downgrade 4. Extend 5. Import Load Mix Data 6. Clicking UPDATE on the mixer again (possible but ignored) 7. Import Open b) Select NO and the project opens, but the mixer remains in the START UP menu. At this stage it is possible to load Mixer data from a completely separate Project using the LOAD MIXDATA option (see below). 7.3.4 Using LOAD MIXDATA in the import menu. Anytime there is a project open, it is possible to load mix data that is stored from within another project, onto the Prodigy 2. This is done by going to the IMPORT menu, browsing to the project you wish to get the embedded mix data out of, clicking ENTER (opening the project as a library file) and then clicking LOAD MIXDATA, the second soft key. Prodigy 2 must either be in the START UP menu, or have a title already loaded. Upon doing so the mix data embedded in the library file is sent to Prodigy 2. If you have a project open which contains embedded mix data, clicking BLUE-IMPORT/LOAD MIXDATA, without opening a library file first, will send the data contained in the current project to the Prodigy 2. Messages displayed after clicking LOAD MIXDATA: Sending Data to Mixer Unpacking and Loading Mix Data. Please Wait. Title Load Complete. During this transfer the following functions are disabled: 1. Project Open library files 2. Project Close 3. Project Version downgrade 4. Extend 5. Import Load Mix Data 6. Clicking UPDATE on the mixer again (possible but ignored) 7. Import Open 7.3.5 Closing a project. 1. If you close a project when there is no title loaded on the mixer, the project will close and nothing else will happen. 2. Whenever you close a project, while there is a title loaded on Prodigy 2, you get: Message on MFX: Update stored Mixer data? (YES / NO) a) When you select YES the mixer data currently on the mixer will be packed up and stored into the project you are closing. This operation will overwrite existing mixer data within the project. The project will close and the mixer will return to the START UP menu. Messages on MFX: Receiving Title Data from Mixer , on starting transfer. Page 20 User Manual Importing object into project , during transfer. Title Store Complete., on the completion of the transfer. b) If you select NO, the project will close and the mixer will return to the START UP menu. Closing a project which contains no mix data will result in: Message on MFX: Store Mixer Data in Project? (YES / NO) a) b) On YES, Mix data is embedded into the project with the Prodigy 2 messaging as 2(a) above. On NO the project will close and will not contain any mixer data. 7.3.6 The UPDATE button on the Mixer. This button is only available once a title is loaded. Clicking this button will embed the current mix data into the current project. On clicking the update button it is impossible to activate the following commands, until the transfer is complete. 1. Project Open library files 2. Project Close 3. Project Version downgrade 4. Extend 5. Import Load Mix Data 6i. Clicking UPDATE on the mixer again (possible but ignored) The Messages displayed during this operation are: Updating Mixer Data, on clicking UPDATE. Mixer Data Updated, on completion of transfer. 7.3.7 Extending Project containing embedded Mixer Data. On Extending the project, a message box appears: Update existing Mixer data before extend? (YES / NO) a) On selecting YES the title is updated and then a copy of the title data is embedded into the extended project. b) On NO, the mixer title isnt updated and a copy of the title data embedded into the original project is copied and stored into the extended project. Thus the original and the extension both contain un-updated mix data. 7.3.8 Removing Embedded Mixer Data from a project. To remove embedded mixer data from the project, go to the PROJ >> NEXT >> NEXT, click the PROJ VER soft key and select to 15.1 then click ENTER. Message on MFX: WARNING: This Operation will permanently discard the following: Embedded Mixer Data (OK / CANCEL) a) Selecting OK will downgrade the project version to 15.1 removing any embedded mixer data stored in the project. This is signified by the message: PROJECT VERSION DOWNGRADED User Manual Page 21 b) Selecting CANCEL returns the user to the project menu. 7.3.9 Notes The system detects which state the Prodigy 2 is in. If it is off or in DOS, projects will load as they would if you were running the editor as an MFX. If you try to LOAD MIX DATA while the Mixer is off, or in DOS, you will get an error message: Mixer Not Connected Page 22 When a project is closed, the Mixer will always return to the START UP menu, even though the Title data and mixes are still present. This is because no file operations are possible on Prodigy 2 unless a Project is open on MFX. User Manual 8. 8.1 Setting Up the Console Buss Allocation Prodigy 2 allows you to create a number of busses, spread amongst all mix requirements (main mixes, sub-busses, auxiliary sends and solo facilities). Monitoring does not require extra busses, since the system is able to route "copies" of the other busses to monitoring outputs on request. Buss allocation can be changed at any time, and the system will automatically adjust to the new setup. The current setup is saved in presets and in the Title when that is updated. Any main buss or sub buss in the system may be configured up to 5.1 operation, subject of course to there being enough busses available to create them. The panning on all channels will be appropriate to the largest buss created in the system. Each buss may be individually configured to any configuration (although M1 must be at least stereo). 8.1.1 The Buss Allocation Screen To set up your bussing requirements, press DATA followed by BUSS ALLOC. To use this display, touch any of the rectangles that allocate the number of busses used for each purpose. 8.1.2 Mono Aux Busses You may create as many as 12 mono aux busses, known as Auxes 1 to 12. If you set up too few aux busses now, you can add more later, as long as you have not used up all the busses for other things. 8.1.3 Stereo Aux Busses You may create as many as 3 stereo auxes. These are known as Auxes A, B and C to distinguish them from mono auxes. 8.1.4 Sub Busses You may create as many as 4 sub-busses, known as B1 to B4. They can be separately configured up to 5.1 format. Panning on all channels will be displayed as appropriate to the largest buss created in the system, but narrower subbuses receive only panning parameters they can use. Sub Busses must be created in the order B1, B2, B3, B4 and destroyed in the reverse order. Thus it is impossible to have B2 and not B1. User Manual Page 23 8.1.5 Main Busses You may create 1 or 2 main busses, known as M1 and M2. They may have any buss width, namely stereo, Dolby Surround (LCRS), Stereo Surround (LCRSS), or 5.1 format (LCRSSB). Panpots on faders that are assigned to main busses automatically configure themselves to deliver the right number of destinations. 8.1.6 Multitrack Busses These are separate mono busses that are accessed from the Channel Configuration page. Stabbing the Box under Multitrack Busses allows the user to enter a number corresponding to the number of Multitrack Busses required. These will then appear on the Channel Configuration page for access. 8.1.7 5.1 Format 5.1 format is enabled by setting at least one main buss to be 5.1 format on the Buss allocation page. Monitoring is separately switched to 5.1 on the same page. When 5.1 is enabled, the level of any channel to the Boom channel is set by activating the Faders To function, and selecting BOOM. At this point, whilst the Faders To page is active, the faders will be controlling the levels sent to the Boom buss. On the channel configuration page you will see a button that makes the SUB send pre main fader. Normally the SUB send is a trim to the main fader position (i.e. SUB follows main fader). This button makes the SUB fader an absolute fader level. 8.1.8 Solo Check only This will allow only Solo-in-Place to be selected. AFL/PFL-Dest. In this mode, no busses are dedicated for AFL/PFL. When AFL or PFL is selected as the Solo Mode, two of the M1 busses are stolen and replaced by the soloed channels. Even when M1 is wider than 2 channels, e.g. LCRS, all of M1s outputs are muted. The advantage of this mode is that SOLO does not consume busses. AFL/PFL-Non Dest. With this option selected, AFL/PFL have a pair of busses reserved for their use. M1 is not interrupted by solo, making it possible to solo a channel while the main buss is being recorded. SOLO to C/R With this option checked, soloing a channel causes the SOLO busses to take the Control Room Monitor outputs, replacing whatever was being monitored in the main speakers. Switching this option off allows SOLO to be sent to alternative speakers without interrupting the main ones. 8.1.9 C/R Monitor See Monitoring Setup, below. Page 24 User Manual 8.1.10 Define Port For each group of busses, the Define Port button allows you to set the output port for each element of each buss. To set the ports for a category of busses: 1. Press the Define Port button 2. Choose a buss element by touching its named box 3. Touch the field showing the current port, and the screen will show you the available ports on a grid 4. Touch the desired port to allocate it. 5. Press the CLOSE button to return to the Buss Allocation screen. 8.1.11 Free Mix Busses This box keeps a count of the number of busses you have created, and shows you how many are left. User Manual Page 25 8.2 Monitoring Setup 8.2.1 The Surround Monitor All Prodigy 2 monitoring passes through the Surround Monitor. It is an 8 channel level control device designed to feed 8 speakers. The first 6 speakers are used for the main monitor mix, up to 5.1 format, with the Control Room Monitor pot and switches controlling their level. The other 2 speakers are used for studio communication and have their own volume pot and mute switch. A block diagram for the Surround Monitor is shown below. In the discussion of monitoring that follows, reference will be made to the inputs and outputs of this device. Connections to it are detailed in the Prodigy 2 Installation Manual. Surround Multiplexer Option Surround Monitor - Block Diagram Page 26 User Manual 8.2.2 Internal Sources Internal sources are those connected to the MAIN inputs on the Surround Monitor. They are switched into the speakers when the NEAR switch on the console is not active, or by the INT screen button on the CR MON & STUDIO page. The diagram opposite shows the normal connections to the Surround Monitor inputs. When the Surround Monitor is switched to Internal, you may choose any of the system busses as your Internal Monitor source. This is also done on the CR MON & STUDIO screen, and switching is done immediately. When Solo is non-destructive and SOLO to C/R is checked on the Buss Allocation page, its busses are automatically selected when a channel is soloed. 8.2.2.1 Outputs for Internal Sources Output ports are allocated to monitoring by touching the DEFINE PORTS button on the C/R Monitoring line of the Buss Allocation page. The number of ports should be equal to the width of M1, e.g. 4 ports if M1 is LCRS. Note that there is no restriction on which outputs (A or B) can be used for monitoring. Normally M1 is the Internal source, so the Monitoring ports output a "copy" of the M1 busses (they may also be emerging from other dedicated ports for recording). When a different internal source is selected (e.g. AUX A) the monitoring ports are re-directed to pick up the stereo Aux A buss. When a stereo source is selected, all monitor outputs other than Left and Right are muted. 8.2.2.2 Outputs for Sub-Busses In many cases you may not need dedicated outputs for your sub-busses, particularly if you are re-recording them back into the Disk Recorder, and this can make more room for Monitoring outputs. 8.2.2.3 Busses and Outputs for AFL/PFL If you need to operate AFL/PFL, without affecting your Main Buss Output, you must allocate busses to it, by checking AFL/PFL -Non Dest on the BUSS ALLOC screen. You still do not need dedicated outputs, because the Solo busses can be automatically switched into the monitoring. You should assign outputs to AFL/PFL by touching the Define Ports button in the SOLO line of the BUSS ALLOC screen. Then switch off SOLO to C/R to prevent the main monitors from being interrupted. Example Monitor Box Connections for 5.1, LCRS and Stereo operation Engine Outputs 24,23,22,21,19 From Patch (External Source) SPEAKER 1A, 2A, and 3-6 Main Monitors L,R,C,SUB,LS,RS Ext. I/Ps 1 to 6 (Monitor EXT) SPEAKER 1B, 2B Nearfield Monitors L & R Ext. I/Ps 7 & 8 (Studio Feeds - M1) From Cue send Outputs Console T/B microphone O/P Main I/Ps 1 to 6 (Monitor INT) SPEAKER 7, 8 Studio Speakers or Headphone amps Meter O/Ps 1-8 Main Output Metering Engine I/P 24 Studio T/B Studio T/B microphone O/P I/Ps Return T/B O/Ps Stereo I/P 1&2 (Post Dolby Insert EXT Monitor) 2-T REC machine INS RET 1-4 Sends 1,2 only Main I/Ps 7 & 8 (Studio Feeds - C/R) Dolby Decode User Manual INS SEND 1-4 LT/RT Dolby Encode Sends 1-4 Page 27 8.3 Channel Configuration The Channel Configuration screen shows all parameters for a single channel (FEED). It can be accessed using the appropriate System Mode key, or by double-pressing any channels INT key. Click here to copy and paste data between channels. Click here to link and unlink stereo channels. Click to select Next / Previous Feed. Assign Button - Touch here to select a different feed (can also be done with the INT button). Sets the send to Auxes PRE/ POST fader. Touch here to assign the feed to M1 (icons for the other busses also appear if allocated). Click here to select a direct Physical Output for the feed. Click to change to Input balance control (Stereo Feeds only) Click here to assign a source (Physical Input) for the selected feed. Click here to make the channel immune from Solo-in-Place. Click here to assign the feed to a Control (VCA Fader) Group. You may select a feed for configuration: Click here to set up an Insert Send/ Return for the feed. Click here to move the EQ and Dynamics into the input path of a Track Feed. This allows EQ and Dynamics to be included in the signal being recorded. Click here to arm the audio track. by pressing the INT button on its fader (double press if the Channel Config page is not currently shown) by touching the fader (if Assign to CAP via Touch Sensors has been checked on the Preferences screen) by soloing the fader (if Assign to CAP via Solo Switches has been checked on the Preferences screen) by pressing the Assign button on the Central Assign Panel and choosing a signal path from the screen by pressing the Assign button on the screen and choosing a signal path from the new screen that appears Note: if the Channel Configuration screen is currently displayed, you can make it go away by pressing its System Mode key, or by double pressing the INT button of the currently displayed FEED. 8.3.1 Live Feeds Live feeds are channels connecting physical inputs to the digital mixing engine. Before a live feed can be heard, it must have a physical input patched to it. 8.3.2 Track Feeds Track feeds are channels connecting the audio from disk recorder playback to the digital mixing engine. When a track is armed for recording the situation is a little more complex. Like any recorder, Prodigy 2 switches the playback of armed tracks between input and output depending on the transport state, and this determines which audio signal comes into the mixer from the track feed. Page 28 User Manual In general mixes are performed with the tracks disarmed, and then there is no work to do to get the sound coming through the channel. As long as there is audio on the track it will be heard. When a track is armed (or switched to monitor its input at the Editing console) it will only be heard if a physical input is patched to it (actually you cannot arm a track unless it has a physical input). 8.3.4 Sources The source for a FEED is the physical INPUT which provides signal for it. Busses can also be selected as sources for FEEDS. This allows you, for example, to record a Buss on to a disk track. Channels which have been stereo linked will present two fields for input patching. 8.3.4.1 Input port selection The top section of the screen contains a grid, into which are placed the appropriate selection buttons for the operation at hand. At the bottom of the screen is a set of buttons representing different classes of Inputs that may be used for the chosen operation. For example, in an Input port selection page for a LIVE FEED, the classes of inputs available are Input ports, Main Buss Out and Buss Out, so three buttons with these names on appear at the lower left of the screen. Pressing one of these buttons puts buttons corresponding to all available inputs of that class onto the screen grid. The buttons are additive, so if we press both Input Port and Main Buss Out, we see both types of inputs available for selection. Once on the screen, the appropriate button may be pressed to select that Input. 8.3.4.2 Sharing Inputs A buss may be attached to more than one feed simultaneously, but an input may not. If a buss is selected for connection to a feed which is already connected to another feed or feeds, a dialogue will appear asking the user whether they wish to Takeover or Share that buss. Selection of Takeover will disconnect the buss from any other feeds, whereas selection of share will connect it to the new feed in addition to any previously connected feeds. Where the feed is a track feed, the input will only become active when it is armed or switched to THRU. On arming or switching a track to THRU, any other armed or THRU track with that input as its source will be disarmed or switched out of THRU, according to normal MFX rules. A LIVE FEED behaves as if it were a permanently armed track. Thus in all circumstances the lowest numbered LIVE FEED with an input attached will have access to that input, disabling that input to any other tracks or LIVE FEEDS. Thus it will be impossible to arm any track if the input attached to that track is also connected to any LIVE FEED, and the input will not be active on any higher numbered LIVE FEEDS until it is disconnected from the lower numbered one. User Manual Page 29 8.3.4.3 Source Type To set the Source Type, touch the screen knob at the top left of the screen. You can use the mixing console Jogger Wheel to move it up and down, or move by single steps using the Up and Down keys. The mouse can also be used, with left button clicks moving up and right ones moving down. 8.3.4.4 Source Trim Input trim level operates in the digital domain for both analog and digital sources. It can be set by touching the red knob in the lower left of the screen, and turning the mixing console Jogger Wheel. 8.3.5 Insert Points Insert sends and returns may be created on the Channel Configuration screen. 8.3.6 Copying Channel Configuration Pressing Copy copies the following data from the current channel into a clipboard: 1. Level and Pan 2. Routing: The Buss destinations 3. EQ 4. Dynamics 5. Auxes: Aux. set-ups At any time the entire contents of the clipboard may be pasted simultaneously (press PASTE) or each separate section independently (Press SOME) into the current channel. 8.3.7 Stereo Linking The LINK button links and unlinks the channel with an adjacent channel. This has the effect of combining control of the two channels on to one fader. It also locks the EQ and Dynamics parameters of the two channels to be the same, and causes the same level to be sent from both channels to the aux buses. 8.3.8 Arming Tracks The ARM button allows the current Track to be armed directly from the Channel Configuration page. 8.3.9 Signal Flow The FLOW button allows EQ and Dynamics to be placed either at the Input to a track or the return from the Track. If an input is connected directly to a track, and the EQ/Dyn are at the input, the results of the EQ/Dyn will be recorded. If the EQ/DYN are set to TRACK, the results of the EQ/DYN will be monitored but not recorded. For LIVE FEEDS, the EQ/DYN are always at the input. Note that inserts cannot be created on armed tracks when the EQ and Dynamics are in the Input path. 8.3.10 EQ/COMP/EXP buttons The EQ/COMP/EXP buttons may be used to switch the EQ and dynamics in and out from the Channel Configuration page. 8.3.11 Multitrack busses If any Multitrack busses have been created in the Buss Allocation page, channels are routed to them by selecting the appropriate Track buttons at the bottom of the Channel Configuration page. Switching on SFS causes the send to follow the pan, from ODD to EVEN (Left goes to ODD numbered busses, Right to EVEN). Page 30 User Manual 8.3.12 MS Decoding/Input configuration options When a Stereo Channels Channel Configuration page is displayed, options are available for L and R input phase reverse, MS Decoding On/Off and selection of Input format. The Input format buttons operate as follows: Normal - Left Input to Left Feed, Right to Right Feed L sends left Input to Land R Feeds R sends Right Input to L and R feeds REV sends Left Input to Right Feed and Vice Versa. NOTE: These options (MS Decoding, Phase Reverse and Input configuration) only apply to PHYSICAL INPUTS, not to Disc recorder returns 8.3.13 Input Phase Reverse The L-PH and R-PH buttons reverse the phase of the input. This works on PHYSICAL Inputs only, not disk recorder returns. User Manual Page 31 8.4 The Patch Page The Patch page allows patching of multiple inputs and outputs to Feeds very quickly and efficiently. To view this page, touch the Patching key on the Data Screen. Touch to enter Show Mode. Touch to show lower numbered sources. Touch to show higher numbered sources. Touch to include the indicated signal sources. Page 32 Touch to enter Link Mode Touch to enter Unlink Mode. Touch to show lower numbered destinations. Touch to show higher numbered destinations. Touch to include the indicated signal destimations. User Manual 8.4.1 Selection of Sources The sources for patching are physical inputs, bus outputs, Feed sends, Feed direct outputs etc. The destinations for patching are Feed inputs, physical outputs, Feed insert returns etc. To display each of these groups of sources and destinations, touch the appropriate screen button. 8.4.2 Show Mode Show Mode allows you to see the current patching of any signal path. To do this, simply touch a screen button corresponding to that path. The path currently patched to it, if there is one, will be highlighted. 8.4.3 Link Mode Link Mode is used to patch sources to destinations. To enter it, touch the Link Mode screen button. Now choose one or more sources / destinations. Choosing more than one source / destination will also choose all the intervening ones. For example, choosing Analog input 7 and Analog Input 15 will also choose Analog Inputs 8 to 14. Now choose the destination / source that will be patched to the first source / destination chosen. At this time a new screen button called LINK will appear. Pressing this will cause the patch to be made, and the following choices will all be patched to the following destinations / sources. For example: Touch Analog Input 11 - it is illuminated Touch Analog Input 16 - all analog inputs from 11 to 16 are illuminated Touch Track 5 - it is illuminated, and the LINK button appears. Touch the LINK button - Analog Input 11 is patched to Track 5 Analog Input 12 is patched to Track 6 Analog Input 13 is patched to Track 7 Analog Input 14 is patched to Track 8 Analog Input 15 is patched to Track 9 Analog Input 16 is patched to Track 10 If any of the sources or destinations are already patched to something, messages will appear asking for confirmation that the patching will be changed. 8.4.4 Unlink Mode Unlink Mode is used to unpatch sources and destinations. To enter it, touch the Unlink Mode screen button. Now choose one or more sources / destinations as before, and touch the UNLINK screen button that appears. Touching this button will cause all these sources / destinations to be unpatched from their corresponding destinations / sources. User Manual Page 33 8.5 Buss and Group Assignment The easiest way to do buss and group assignment is to use the Routing Screen (under DATA), because you can set the assignment for all channels and busses without changing displays. To use this screen: 1. Press DATA 2. Press ROUTING 3. Touch a Buss or Group to which you want to assign feeds. 4. Touch all feeds you want to assign. 5. Move to the next Buss or Group. The Channel Configuration screen can also be used for routing. Each destination has a box on the screen which assigns when you touch it. All busses that have been created are automatically placed on the config screen. If you assign a channel to more than one buss, equal levels are sent from the channel fader to each assigned buss, though the Master Fader for each buss will also increase or reduce this level. The Zoomed Fader screen allows you to assign Feeds to Fader Groups, by touching the square buttons above the faders. 8.6 Naming Signal Paths 8.6.1 Tracks Tracks can be named in two places. One of these is on the Editing console, which has a Name Menu for naming clips, tracks and projects. If you use this menu, the name is also transmitted to the mixing console, and will always appear on the Electronic Writing Strip (EWS), or any screen display, with the new name. The other place you can name tracks is on the CHANNEL LIST screen display (under DATA). To change the name, touch the current name of a track, then use the screen typewriter to spell out a new name. This typewriter includes a Page 34 User Manual backspace key (back arrow) to remove characters, a Shift key (touch this to put the next single character in upper case) and an Alpha Lock key, which puts all characters you type in upper case. You can use the PC keyboard if you dont like typing on the touch screen. Naming the tracks on the Mixer screen does not cause them to be named on the Disk Recorder. If you want non-standard names on the Disk Recorder screen but not on the Mixer, name them on the Disk Recorder but do not subsequently Update your Title. Since the Title is always loaded after the Disk Recorder project, it will avoid "seeing" the non-standard track names. On the other hand, if you want to copy all the track names from the Disk Recorder to the Mixer, reload the Disk Recorder Project. 8.6.2 Live Feeds Live Feeds are named on the CHANNEL LIST screen display, the same way as for Tracks (see above). 8.7 Fader Sets A Fader Set is a mapping of the system signal paths and control paths to the physical faders on the console. The total list of paths in the system is as follows: Tracks Live Feeds Master Faders for M1, M2 and B1 to B4 (only those which have been created are available) Master Faders for VCA Groups (only those to which one or more faders have been assigned are available) 8.7.1 Switching Between Sets There are 16 Fader Sets, including 8 unshifted and 8 shifted sets. To access a Fader Set: 1. Press its button in the Fader Set area of the Master Control Section of the console. 2. If it is a shifted Fader Set, press and latch the Shift key, then press the Fader Set key. 8.7.2 Editing a Fader Set The system defaults to a state where all Fader Sets have the lowest numbered tracks spread across the console. To change a fader set: 1. Select the Fader Set you want to change. This will place it on the console surface. 2. Press the EDIT key next to the Fader Set keys. It will flash while Fader Sets are being changed. User Manual Page 35 3. Touch the INT button of the first fader you want to reassign. 4. The screen shows you the current path assigned to the selected fader. Touch the path you want to assign to that fader. 5. The screen automatically moves to the next fader to the right of the one you just assigned. You may set that one, or touch the INT button of the next fader you want to change. 6. When you are happy with the Fader Set you have edited, press the EDIT button again, or touch the CLOSE screen button. 8.7.3 Saving Fader Sets Fader Sets are automatically saved when updating the current title. 8.8 Meter Sets A meter set is a predetermined grouping of channels, together with a certain meter look which you have saved for quick access. To view the meters, press the METERS System Mode key. 8.8.1 Editing a Meter Set To edit a Meter Set: 1. Press: 2. Select the Meter Set you want to change. This will put it on the screen. 3. Press the EDIT screen button. 4. Edit the meter characteristics. This is described below. 5. Press the CLOSE screen button. Your changes will be visible, and the meter set will have been changed. To save Meter Sets, see below. 8.8.1.1 METERS Layout Choose a number of Bargraph Meters up to 8, or select dual VU Meters. DUAL VU If you selected Dual VU there is no more work to do. Press the CLOSE screen button to keep your changes. BARS If you selected BARS there are many choices for the look of the meters. Bar Type This affects the appearance of the bars. You can try all four types quicker than you can read about them here. Bar These choices affect the scaling and ballistics of the meters. 0 on each scale is defined differently for each type of meter relative to 0dBFS. 0dBFS will relate to absolute values when converted to or from analogue at the I/O stages depending on what reference level has been set in hardware on the system. In a standard, unmodified system, 0dBFS equates to an Input/Output level of +22dBU (+18dBm). Common alternative reference levels for 0dBFS are +18dBU (+14dBm) and +12 dBU (+8dBm). Check to see what your standard is using external analogue meters. In all cases, the value given below represents the amount of digital headroom left in the system when the meters are registering 0. The 0 levels for each different type of meter in Prodigy 2 (relative to 0dBFS) are: Page 36 User Manual System meters Channel Configuration page meter, SOLO meter and I/O port meter: 0 = 0dBFS Software meters (main meter page) Default Meter settings: DIN PEAK: 0 = -9 dBFS (+13 dBu on standard system) VU: 0 = -18 dBFS (+4 dBu on standard system) BBC: PPM6 = -14 dBFS (+8 dBu on standard system) NORDIC: 0 = -18 dBFS (+4 dBu on standard system) DIGITAL: 0 = 0 dBFS (+22 dBu on standard system) The meter scales may be adjusted to accommodate different operating levels. See the Installation Manual for details. Dot These choices affect the hold time of the peak meters. 8.7.1.2 Select Channels Choose the signal paths you would like to meter by pressing the fields in the Select Channels box, and touching the signal path for each of the meters. You may use the scroll bars on the side of the Select Channels box to access more signal path names. 8.8.2 Saving Meter Sets Meter Sets are automatically saved when you update the current title. User Manual Page 37 8.9 Talkback A microphone is provided for talkback. When needed it is connected to one system input, and controlled by the CUES & COMMS System Mode. 8.9.1 Operation There are two talkback buttons on the console, TALK 1 and TALK 2. Each one controls a different routing for the talkback signal, available at any time. 8.9.2 Setup 1. Press: CUES + COMMS 2. Set up the Physical Input which will be the source for talkback. 3. Set the destination(s) for Talk 1. The destination marked SLT is Slate, and goes to all sub-busses. 4. Set the destination(s) for Talk 2. Page 38 User Manual 8.9.3 Automatic Cue It is possible to have Talkback 1 and/or 2 come on automatically, every time the transport goes out of Play/Record. To do this check one or both of the Automatic Cue boxes on the PREFERENCE screen (under System). 8.9.4 Use of System Resources There are three modes for talkback configuration, disabled, destructive and permanent. The choice is made by a statement in the CONSOLE.CON file, which is described in detail in the Installation Manual. Disabled - Mode 0 No talkback is possible, and the CUES AND COMMS screen is locked out. Destructive - Mode 1 One Live Feed is nominated (in the CONSOLE.CON file) to be consumed whenever talkback is switched on. Live Feed 24 is chosen by default to be replaced, which means that whenever talkback is switched on, the signal in Live Feed 24 disappears from all its destinations, and the talkback signal comes through that path and goes to its destination(s). In Mode 1, the objective is that all 24 Live Feeds can be used, as well as the talkback system. Permanent - Mode 2 This is the default setting. One Live Feed is dedicated permanently to talkback and does not appear in any menu or screen. By default this is Live Feed 24. Note: if it is a requirement to slate audio to Prodigy 2 tracks while recording, Permanent mode must be used, or else an error message will be seen "....Can't do that while recording..." User Manual Page 39 9. 9.1 Operating the Console Manually Fader Operation To hear a FEED you must: 1. assign the FEED to a fader (use the Fader Sets editing screen) 2. route the FEED to a BUSS (use the Routing screen) 3. make sure the Master fader for the BUSS is up 4. make sure the Control Room or Studio Level knob is up, and not muted by its switch 5. make sure the output of the BUSS you are listening to has a path to Monitor speakers or headphones 9.1.1 Level Fader level works the same way in Prodigy 2 as in any analog console of our day. When a level change is made with the fader, the channel configuration EWS panel displays the level in dbs. 9.1.2 Pan / Balance The panpot works like a normal panpot when panning a mono channel into a stereo buss. At the centre position the signal is at -3dB gain to the Left and Right channels. At either extreme position, the signal has 0 dB gain. When panning a mono channel into a surround format, the panpot moves the signal from left through centre to right. It sends with 0 dB gain to a single buss at the extreme left, dead centre and extreme right positions, and -3 dB when positioned exactly in between two bus outputs. When panning a mono signal into a Stereo Surround format, the panpot can be set to balance between Left Surround and Right Surround. To do this, press the ALT button until the red light appears under the label LS/RS. Stereo channels are described in a later section called Stereo Faders. Note that the Pan Laws can be modified as described in "Custom Pan Laws". 9.1.3 Trim / Surround The trim pot acts in between the analog to digital converter (for an analog input) and the equaliser. This can be used to set a useful working range for the fader, and to set the correct headroom for the equaliser. When working with a mono signal into any Surround format, the Trim pot can be set to control the balance between the front channels (LCR) and the surround channels (mono or stereo). To do this press the ALT button until the red light appears under the label F/S (front/surround). Behaviour of the Trim pot with stereo channels is described under Stereo Faders, later in this section. 9.1.4 Solo To operate the Solo system, press the Solo button on the channel fader. Alternatively, you may touch the Solo screen button on any fader in the Zoomed Fader screen. 9.1.4.1 Solo Modes Button The Solo Modes Button in the console allows you to choose Page 40 Master Control Section of the amongst three styles of solo. User Manual AFL - After Fade Listen - the soloed channel(s) are heard after attenuation by their faders. (Even a channel which is not on a physical fader at the moment still has a fader level, which is visible on the Fader Screen). Soloing a channel causes the Solo buss (a mix of the soloed channels) to replace whatever was being monitored previously. PFL - Pre Fade Listen - the soloed channel(s) are heard before attenuation by their faders. SIP - Solo in Place - this works by muting all channels except the one(s) soloed. It gives an accurate picture of the stereo placement of the channel, and can be heard with reverb sends and returns etc., which render it exactly as it is in the mix. SIP is always destructive of the main mix, so it should not be used while a mix is being printed to a recorder. 9.1.4.2 Solo Defeat While using Solo in Place, it may be desirable to exempt some channels from being muted. This would apply, for example, to reverb returns which help to give the sound its correct perspective in the mix. To prevent SIP from muting a channel: Open the Zoomed Fader Screen (press NORMAL/ZOOM under MIX) Touch the letter D (for Defeat) on the fader channels that you want exempted from SIP. Part of the Zoomed Fader Screen Read/Write Switch Solo Button Solo Defeat Button Group Controls Pan Button Mute Button Group Assign Buttons. Note: it is also possible to Defeat Solo by pressing the SAFE button on the Channel Config screen. User Manual Page 41 9.1.4.3 Clear Solo To remove the solo button from all soloed sources at once, press the CLEAR button in the Solo Modes section. All channels will return to normal. 9.1.5 Mute Muting a channel has exactly the same effect as pulling its fader all the way down. 9.1.6 Fader Sets Fader Sets are described in the section called Setting up the Console. 9.1.7 Faders To This allows the channel faders to be used to control the send level to a buss. These can be Aux sends or 'Boom' sends. Selecting one of the busses on the Faders To page will set all the faders to their channel's send level for the selected buss. This behaviour for the faders persists while the Faders To... screen is displayed. If the Latch button is pressed, then the current selection will be retained the next time the Faders To page is selected. 9.1.8 Fader Groups Grouping several faders under the control of one is an efficient way to get control of a complex mix. Prodigy 2 allows you to create up to 8 fader Groups, and set Master faders for each of them. To assign channels to a fader group: 1. Open the ROUTING Screen (under DATA) 2. Touch one of the buttons representing Groups. 3. Touch all signal paths that you want in the group. OR 1. Open the Zoomed Fader Screen (press NORMAL/ZOOM under MIX) 2. Touch one of the grey buttons between the fader track and the Mute button. Each button represents one of the Groups, counting down from the top. OR 1. Open the Channel Configuration screen by pressing its System Mode key. 2. Touch the desired Fader Group button in the lower centre of the screen. 3. Touch the CLOSE button. OR Page 42 User Manual 1. Press the CHANNEL LIST screen button (under DATA). 2. Touch the box under the Group column, opposite the channel you wish to assign. 3. Touch the number pad, selecting the number of the Group to assign. 4. Touch the CLOSE button. Make sure that the Group Master Fader is set to a reasonable value, or the Group members will send no sound to the mix. Group Masters are only available when there is a channel assigned to that Group, and they disappear when the last channel is removed from the Group. When the G-C-P (Group Controls Pan) button is pressed above a Group Master on the Zoomed Faders screen, then the pans of all the group members are controlled directly from the Group Master pan. Note that grouped faders do not move when their Master fader moves. This is to preserve the VCA Group quality of the software. It has the following advantages: The operating range of the faders is maintained at the high part of their throw even when the Group Master level is very low. It is possible to write a changing automation level on an individual fader, even when the Group Master is also changing. By showing the resultant fader level in blue on the screen, the user has the advantage of seeing both the balance of that fader within the Group, and the actual level of the fader in the mix. 9.2 Stereo Faders Stereo faders can be used to control any pair of adjacent channels. These provides easy control of stereo signals, and ensures the same settings for EQ and Dynamics apply to both sides. 9.2.1 Setting up a Stereo Fader To link two channels 1. Interrogate a channel to display the Channel Configuration page. 2. Touch the LINK button. 3. The screen will ask whether you want to link to the channel above or the one below. The stereo fader will be the one currently assigned to the lower numbered of the two channels. Any fader assigned to the higher numbered channel will go blank and have no further function. User Manual Page 43 To unlink stereo channels: 1. Interrogate a channel to display the Channel Configuration page. 2. Touch the UNLINK button. 3. The screen will ask you to confirm the unlinking of the channels 9.2.2 Level Fader level works the same way as for mono channels, except that both channels are controlled. 9.2.3 Pan Pot The function of the Pan Pot on a stereo channel is switched between Pan and Balance using the Bal button on the Channel Configuration page. When set to Bal mode, the panpot works as a stereo balance control. It works between the ranges -7 and +3 dB and affects the amount of Left and Right input feeding the Width control. When set to Pan mode, the panpot moves the output of the Width control from left through centre to right. The range of possible movement is determined partially by the position of the WIDTH control (see next section). If, for example, the WIDTH is set to maximum, the Pan control has no room to move at all. At the other extreme, it is moving both stereo channels from far left, through centre and to far right, exactly as though it was two mono signals combined. 9.2.4 Trim Pot The trim pot acts as a master level control for the channel, just as for a mono channel. When working with a stereo signal into a stereo or surround format buss, the Trim pot can act as a stereo WIDTH control. This will range from extremely wide (Left channel hard LEFT, Right channel hard RIGHT), to extremely narrow (Left and Right panning to the same position, as determined by the panpot). To do this, press the ALT button until the red light appears under the label WIDTH. When working with a stereo signal in any Surround format, the Trim pot can also be set to control the balance between the front channels (LCR) and the surround channels (mono or stereo). To do this press the ALT button until the red light appears under the label F/S (front/surround). Page 44 User Manual 9.3 Custom Pan Laws Custom pan and divergence laws can be created for each different type of pan available. Touching the Panning button on the Master Assign page accesses the custom panning page. The Master Assign page is accessed by either pressing the Assign button on the C.A.P. or by touching the channel name bar in the centre top of the Channel Configuration page. Once in this page, various options are available for adjusting the laws for different panning situations. The small graphs represent the law that will be applied when that type of pan is used. Thus when operating in stereo, the L-R pan graph is employed. When operating in LCRS, LCRSS or LCRSSB mode, the pan law from left through centre to right will be governed by the L-C-R law, with the Front-Back law separately defined. For each type of pan, there are 4 preset laws defined, which may be applied by touching the selector box and selecting a different preset.. These presets may be edited by touching the edit button, at which time a variety of different pan laws and parameters may be changed. The presets may also be renamed. The main graph shows the level curves for each output from the panning system. Thus for a mono signal being panned from left to right, on a standard L-R pan law screen, the green line represents how that signal will appear on the Left Output, and the Red line how it will appear on the Right output as you pan from left to right. In an L-C-R pan, a yellow line represents the output from the centre channel. The left of the graph represents the pan pot being panned full left, and the right side of the graph panned full right. In the Edit screen, the small graph above the main graph shows the sum of the levels at any given pan position. Thus a flat line indicates that the total output power will be constant across the pan. Changing parameters has an immediate effect on the pan law for the currently selected channel, i.e. the effect may be auditioned whilst in the edit page. Closing the edit page and the main panning page leaves that pan law assigned to that channel. If desired, a pan law may be applied to all channels simultaneously by checking the Assign These 4 Formats to All Channels box at the top of the panning screen. Once set, pan laws are fixed. They cannot be changed by the automation system. They are however stored with Titles. The automation stores knob positions, not absolute level values. Thus a previously automated pan may be changed by changing the pan law for that channel, but this change will not be stored unless the title is updated. Accurate automated reproduction of a pan depends on the correct pan law being in place at the time of playback, as recalled from the title. When the "Assign These 4 Formats to All Channels" is pressed, then all channels are set to use the same presets, and any channels using a preset which is edited will register the change in law made in the edit. User Manual Page 45 9.4 Monitoring Prodigy 2 provides monitoring control for studio and control room, and offers a comprehensive analog matrix for surround sound. Setting up the monitoring is discussed in section 8.2 9.4.1 Basic Controls The first 6 channels of the Surround Monitor are connected to the Control Room level pot on the Mixing Console, and its associated Dim and Mute switches. The last 2 channels are controlled by the Studio level control and Mute. The NEAR switch swaps the outputs of the Surround Monitor to a second set, designed to drive alternate speakers. These are stereo and the signal sent to them will be Left and Right only. The EXT switch swaps the inputs of the Surround Monitor over to their External option. This also happens when the EXT button on the CR Mon and Studio screen is touched. 9.4.2 The CR Mon & Studio Screen This screen is accessed using its System Mode key. It allows you to choose your monitor source at any time. An Internal choice and an External choice can be current at the same time, and you can then choose which of the two is heard. This choice is made either on this screen (INT / EXT) or by the EXT switch on the console. Selects the MAIN inputs of channels 7 and 8 (the Studio inputs). Selects the EXT inputs of channels 7 and 8 (the Studio inputs). Switches inserts ON in the Surround Monitor. Opens a screen for assignment of Surround Multiplexer inputs. Opens a screen for adjustment of speaker balance. Reverses the phase of the Right speaker output. Makes the Control Room output mono. Touch one of these to make it your INTERNAL choice. Touch one of these to make it your EXTERNAL choice. Switches the Surround Monitor inputs to INTERNAL. Page 46 Switches the Surround Monitor inputs to EXTERNAL. Sets the attenuation of the DIM switch. EXT ST See below. Mutes the Left output. Mutes the Right output. User Manual 9.4.2.1 The EXT ST button The EXT ST button enables the EXT ST input on the Monitor System. This is a stereo input to the monitors, which is post Insert return. When EXT ST is activated, the monitoring is switched to Stereo, but the feeds to the Insert Sends are left as they were. Thus if feeding a Dolby Encoder in LCRS from the Insert sends, The EXT ST input may be used to monitor LT/RT directly without affecting the feed to the encoder. 9.4.2.2 CR Monitor Setup Page This selects where the meter outputs on the Monitor System are driven from: POST Monitor Pot (Pre Mute); PRE Monitor Pot (Post MONO); Post Insert RETurn or at the Insert SEND. SOLO Meters switch- described below. SPK2 trim is applied when Nearfield Monitors are selected Mute When the C/R button is NOT activated, this is a simple Mute for the Mono Speaker. When the C/R button IS activated, the Mute button will TOGGLE with the main C/R monitor mute. Thus if we set the Mono Mute to be OFF whilst the Main Mute is currently ON, cancelling the Main Mute will toggle the Mono Mute to ON, and the monitors can be A-Bed between MONO and MAIN, using the Main Mute switch. Conversely, setting the Mono Mute to match the Main Mute will cause them to track exactly (Both either muted or un-muted). User Manual Page 47 9.4.3 The Aux Masters Page This screen is accessed by pressing the Aux Masters key. It allows you to control the Auxiliary output master levels and assign their outputs. Output Port selector buttons The output port for any Aux Master or Multitrack Buss may be selected directly from here. Press the destination button at the top of the display for any Aux or Multitrack buss to bring up an Output port selector for that Buss. Page 48 Display Selector buttons On the right hand side of the screen are 5 selector buttons: Aux 1-8 and Aux 9-12 display their respective mono auxes (if they have been created). ST Aux displays whatever Stereo Auxes have been created, and TK1-8 and TK1-9 display whatever Multitrack busses that have been created. User Manual 9.5 The Central Assignable Panel (CAP) 9.5.1 Introduction The CAP is used to set EQ, Dynamics and Aux send levels for one channel at a time. For most systems it forms the entire user interface for these functions, but where there are dedicated controls it works in parallel with them. 9.5.2 Assigning a Signal Path One channel at a time can be viewed and changed on the CAP. There are several methods for doing this. A channel is assigned to the CAP: by pressing the INT button on any fader by touching the fader (if Assign to CAP via Touch Sensors has been checked on the Preferences screen) by soloing the fader (if Assign to CAP via Solo Switches has been checked on the Preferences screen) by pressing the Assign button on the CAP and choosing a signal path from the screen Once a channel is assigned into the CAP, if EQ or Dynamics are applied to the channel, a display is shown on the user interface (above the mute display) with E for EQ or D for Dynamics. 9.5.3 The Equaliser There are two forms of EQ in Prodigy 2 . One, called dynamic EQ, is operated from the CAP, and works just like controls on an analog console. The other, called clip-based EQ, is operated from the Editing console, and works more like an editing function. Both forms of EQ can be operated simultaneously, allowing two 4-band equalisers to be active on every track (actually there are three equalisers during a crossfade). 9.5.3.1 Dynamic EQ This form of EQ takes its name from its ability to change the EQ value from moment to moment continuously. All changes made in the EQ values can be written to the automation and thereby become a repeatable part of the mix. Using the EQ controller on the CAP (or any dedicated equaliser above a fader), you can access four bands on any signal path. There are two types of band: The High Frequency (HF) and Low Frequency (LF) bands are shelves with a choice of two turnover frequencies. The High Mid (MH) and Low Mid (LM) bands are bell curves with sweepable mid-frequencies and a choice of two Q-factors. User Manual Page 49 9.5.3.2 Sweep Enable To make dynamic EQ more flexible, press the Sweep Enable button. Now the turnover frequency of the HF and LF bands can be swept by holding down the Frequency button and turning the Gain knob. The Q-factor of the HM and LM bands can be swept by holding down the Q button and turning the Gain knob. 9.5.3.3 The EQ Screen Pressing the 9.5.3.4 EQ key causes the screen to display a graph of the current EQ setting. This changes as you turn pots on the CAP equaliser Presets At the right of the EQ screen there is a library of saved EQ settings. The buttons below allow you to use and add to these. STORE To store the current EQ setting into the library of presets, first touch an empty box at the right (or an existing one if you want to replace it), then touch the STORE button. Type a name on the keyboard that appears on the screen, and touch the ENTER button (double left arrow) on that keyboard. LOAD To load an EQ setting from the library into the current selected channel, touch the setting you want to load, then press the LOAD button. PREVIEW Touch an EQ setting and press the PREVIEW button. This will temporarily load the setting into the current selected channel, and you will hear the result. UNDO Press the UNDO button to return to the EQ setting you had before the preview. CLOSE Press this button to close the EQ screen. You can also do this by pressing the illuminated EQ System Mode key. Page 50 User Manual 9.5.3.5 Clip Based EQ Clip based EQ is operated from the Editing console. It is completely independent of dynamic EQ, and can be run at the same time. For instructions on the use of clip based EQ, please see the Prodigy 2 Editing and Recording Manual. User Manual Page 51 9.5.4 The Auxiliary Send Panel Prodigy 2 allows the creation of up to 12 mono and up to 3 stereo aux busses. The aux sends are arranged in three banks. Bank 1 contains Auxes 1, 2, 3, 4 and stereo A. Bank 2 contains Auxes 5, 6, 7, 8 and stereo B. Bank 3 contains Auxes 9, 10, 11, 12 and stereo C. The panel contains aux send pots for four mono and one stereo aux buss. Each pot can be set to one of the banks at a time. For example, the topmost pot can be set to control Aux 1, Aux 5 or Aux 9. Other pots may be set to different banks - for example: Pot 1 1 5 9 Pot 2 2 6 10 Pot 3 3 7 11 Pot 4 4 8 12 Pot 5 A B C To change the bank of an Aux pot, hold down the MODE button, and press the pot's selector button. To send audio to one of the aux busses, first unmute the send for that pot if required, then turn the pot clockwise. You may need to check that the Aux Master is up (press the Aux Master System Mode key). To select whether an Aux send is Pre or Post fader, use the AuxPre panel on the Channel Configuration page. Page 52 User Manual 9.5.5 Dynamics Dynamics is provided on each system Feed, with a Compressor/Limiter and Expander/Gate for each. Access is from the Central Assignment Panel (CAP), which shows all parameters for the currently selected Feed. Press the INT button on any fader to display it on the CAP. The Compressor/Limiter and Expander/Gate each have an ON/OFF switch to activate them. The other controls are as follows: 9.5.5.1 Compressor/Limiter Threshold - sets the audio input level above which gain reduction will start to occur. The rotary control is labelled from -40 dB to +10 dB, and this is referenced to -10 dBFS to provide headroom. This means that +10 on the rotary control corresponds to 0 dBFS, the maximum level of the digital channel. Ratio - shown as N:1 - for every N dBs by which the input audio exceeds the Threshold level, the output audio rises by one dB. For example, if the Ratio is set to 3:1, the audio output from the compressor rises by one dB for every three dB increase at its input. Attack - the time taken by the compressor to activate after the audio exceeds Threshold. Setting the attack too fast may result in objectionable artifacts due to the gain reduction aliasing into the audible spectrum. Release - the time taken for the compressor to remove its gain reduction after the audio has dropped below Threshold. 9.5.5.1 Expander/Gate Threshold - sets the audio input level below which gain reduction will start to occur. The rotary control is labelled from -40 dB to +10 dB, and this is referenced to -10 dBFS to provide headroom. This means that +10 on the rotary control corresponds to 0 dBFS, the maximum level of the digital channel. Range - the maximum amount of gain reduction produced by the Expander/Gate. Gate ON/OFF - When the Gate is switched ON, the audio level is reduced by the entire amount of RANGE whenever it drops below Threshold. When it is switched OFF, the Expander operates, and this drops the level by a ratio of 2:1. Attack - the time taken by the Expander/Gate to activate after the audio drops below Threshold. Setting the attack too fast may result in objectionable artifacts due to the gain reduction aliasing into the audible spectrum. Release - the time taken for the Expander/Gate to remove its gain reduction after the audio has risen above Threshold. Notes: 1. The Expander/Gate and the Limiter/Compressor combine to produce a single transfer function. It is possible to get quite eccentric transfer functions by having the Expander Threshold above that of the Compressor. 2. In general the audio level drops when Dynamics are used. You can use the Makeup Ref control on the Dynamics Page to compensate for this. User Manual Page 53 9.5.5.2 The Dynamics Screen To access the Dynamics screen, press the DYN button. The graph shows two possible views of the Dynamics activities. When G/R is selected, the graph shows the expected gain reduction at any input level. When X-FER is selected, the graph shows the expected output level at any input level. 9.5.5.3 Presets Presets allow you to create a library of useful dynamics settings and recall them at any time. Each preset is stored on one line of the preset box, and is accessed by touching it. STORE Touch a line on the preset box, then touch this switch to store the current dynamics setting into it. A name will be requested if the line is empty, otherwise the software will first ask for confirmation that you want to overwrite the current contents of the line. LOAD Touch a line on the preset box, then touch this switch to load its dynamics setting into the currently selected Feed. 9.5.5.4 Dynamics to Busses If the INT button is pressed on a Buss Master, it will be assigned to the C.A.P., and Compression functions (not Expander/gate) may be applied to that Buss. Page 54 User Manual 9.6 Joystick Operation Joysticks pan in surround format, either 4 way when M1 is set to LCRS mode, or 5 way when it is set to LCR-SS mode. To assign a channel to the Joystick, press its Assign button and then press the INT button on a fader. Repeating this action on the same fader releases it from the Joystick. Repeating the action on a different fader replaces the first one on the Joystick. The LED matrix shows you the current position of the signal in the surround field. When replaying automated mixes in surround format, the LED moves independently of the joystick, showing the position of the signal being played back by the automation. When you switch the panel into WRITE, the signal switches to follow the stick. User Manual Page 55 9.7 Writing Screen Macros Screen Macros can be used to automate functions on the mixer screen. Each macro is a recording of a sequence of poins you touch on the screen, exactly as you did it. (This means that the starting point of the actions has an effect on the proper working of the macro when it plays back!) To access macros: 1. Touch SYSTEM followed by MACROS On the acro Sheet, the 5 by 5 grid of rectangles represents the macros that can be stored into the system at one time. Touching any icon immediately executes the macro. Alternatively, touch one of the commands at the bottom of the screen, then the macro to be acted upon. DEMO MODE Starts a demonstration of all the macros in the system. This is intended for unattended demonstration of the system, and is inappropriate for use in production. SPEED The execution speed of a macro can be varied. Click this button, then select the macro whose speed you want to change. The screen will ask you to choose Normal or Fast, with Normal being the Debug speed. ASSIGN Allows you to attach any macro to any of the 6 User Keys on the console surface. Click this button, then the macro to be assigned, and the system will ask you to choose a hardware button, or NO KEY if you want to deassign the macro. Macros can also be assigned to the Shift function for the User Keys. RECORD Click this button, then the macro to be recorded (or over-recorded). The macro screen exits back to the default fader screen, allowing you to touch any screen items. When you have finished, touch the STOP icon in the lower left of the screen. RENAME Allows you to rename any macro. Page 56 User Manual 9.8 The Cue List The Cue List allows you to create a list of timecodes which can be used for a variety of purposes: 1. To automate MIDI events. 2. To switch VFX device Performance Presets. 3. To switch Console Snapshots. To access Cue List functions: 1. Touch SYSTEM followed by MACROS The Cues are displayed in timecode order in the main part of the screen, and can be selected by touching. At the bottom of the screen are commands that affect the cues. At the right side of the screen are commands affecting the Events triggered by the Cues. COPY Allows you to copy a Cue. Click COPY, then touch the number of the Cue to be copied. MOVE Allows you to offset a Cue. Click MOVE, then touch the number of the Cue to be moved. INS CUE Inserts a Cue in the list. Click INS CUE, then touch the number of a Cue. The inserted Cue will go before it. DEL CUE Deletes a Cue. Click DEL CUE, then touch the number of the Cue to be deleted. COPY SEL Allows multiple selected Cues to be copied. Touch the SEL field of all Cues to be copied, then touch COPY SEL. MOVE SEL Allows multiple selected Cues to be moved. Touch the SEL field of all Cues to be copied, then touch MOVE SEL. User Manual Page 57 DEL SEL Allows multiple selected Cues to be deleted. Touch the SEL field of all Cues to be copied, then touch DEL SEL. ALL/NONE Selects all Cues. If already selected, deselects all Cues. SETUP Opens a screen allowing you to customise the behaviour of selections during COPY and MOVE operations. RECORD Opens a screen which allows you to enter Cues on the fly while the transport is running. The timecodes are captured from Prodigy 2's current position. ADD/INS Allows you to add events to the Cues. Click ADD/INS, then touch the type of Event (icons above) then drag the icon to the Event(s) field of the Cue. EDIT Click EDIT, then touch the Event icon in a Cue, allowing you to determine exactly what the event is. DELETE Allows you to delete an event. Click DELETE, then touch the event to be deleted. PREV Allows you to preview an event. Click PREV, then touch any event. It will immediately be executed in isolation from any others. Page 58 User Manual 9.9 VFX Virtual Effects is the control of external devices from the Prodigy 2 screen via MIDI. Refer to the installation manual for details on setting up VFX devices. 9.9.1 Operating VFX To use VFX, first press Select VFX device by touching one of these icons User Manual VFX Loading meter (VFX begins loading MIDI data to its devices immediately on startup, but it does this in the background to avoid wasting time. If this meter is present, loading is in progress. Changes you make to a device will be made after the current load.) Touch to save or load device presets (see below) Touch to load Touch to save Touch to repatches (see patch (see send the below) below) current screen setup to the device Page 59 9.9.2 Presets Ten Presets may be stored for each VFX device within each Prodigy 2 title. They are therefore title specific. Touch to change the name of this preset. When you save the name, the current setting is also saved into this location. Stores the current setting into this patch number. Also prompts for a name, and asks to confirm if you have selected an existing patch. Touch to load the selected patch into the VFX device. Shows the MIDI patch number associated with this preset. 9.9.3 The Patch Library The Patch Library contains MIDI setups for all fitted VFX devices and is always available regardless of what title is loaded. To Save a patch, touch the SAVE button on the VFX screen. Touch to open a list location. You will be prompted for a name. Pressing ENTER on the keyboard completes the name and saves the patch. To Load a patch, touch the LOAD button on the VFX screen. Patches applying to the current VFX device are black, while others are grey. Touch one of the black patches to load it into the VFX device. Page 60 User Manual 9.10 Fader Starts (GPOs) Fader Starts, or GPOs (General Purpose Outputs) are used to trigger various events from the action of opening a fader. These events include starting tape machines or CD players, switching on lights, and many others. Prodigy 2 provides a simple but comprehensive method of setting up the open collector circuits that are used for electronic triggering. Note that the operation of this software depends on the presence of the GPO card in your PC. 9.10.1 Setting up GPOs To set up GPOs Touch DATA followed by GPO Touch here to set the OFF triggers (only if output mode is continuous) Touch here to set the ON triggers (see below) Touch here to change the name of this GPO Shows the current state of the GPOs, and will react in real time. Touch here to choose which fader's Electronic Writing Strip shows the special symbols indicating GPO ON or OFF. Touch here to set Output Mode for a GPO (see below) Touch here to toggle the output polarity 9.10.2 Output Mode The output mode of the GPO can be set to any of three states: Disabled The GPO does nothing Continuous The GPO has separate triggers to turn it on and off. The ON and OFF Triggers are set by touching the appropriate boxes. They may be related to different faders if required. After the ON trigger has been activated, the GPO stays ON until the OFF trigger is activated. Pulse The GPO turns ON when its ON Trigger is activated, stays ON for the period of the Pulse, then turns OFF. There is no separate OFF Trigger. User Manual Page 61 9.10.3 Setting ON Triggers It is possible to set four different fader channels to control a single GPO. Then it is possible to choose whether the GPO fires when any one of the these faders is in the right state, or whether they must all be in the right state. By touching the ON Triggers box on the GPO display, you will open another display. Touch to choose a fader to control this GPO. Page 62 Choose whether all faders must be in the active state for triggering, or just one of them. Touch to toggle the fader's active state between becoming open and becoming closed. User Manual 10. Console Automation Prodigy 2 provides automation of faders, mutes, auxes and EQ parameters. Each type of data can be independently enabled for writing to the automation file. Control of the automation system is mostly achieved from the main (unzoomed) fader screen, whose controls are listed below. 10.1 Mix Control Buttons There are several screen menus on the main fader screen. These are summarised below: Mix On Line / Off Line This determines whether the automation is active or not. If it is offline, no automation data can be read (played back) or written (recorded). If it is online, automation data is always being read or written for every signal path. Blend Choice of Number of Frames When a mix is updated, there is a period between dropping out of write and back to read during which the automation data is automatically joined up with the data after the newly written section. This is to allow smooth transitions between sections of the mix. The blend time determines over how many timecode frames the new data is joined up with the old. On Stop Once you have begun a mix pass, the system will continue to write or update the mix until you put the faders into READ, or take the transport out of PLAY. When you do the latter, a number of outcomes are possible: Return to Mix The current fader or other switch and pot positions are written only to the point where the transport was stopped, and then the values are blended into the previously recorded data over the period defined by Blend (described above). Write to Next The current fader or other switch and pot positions are written forwards to the next piece of valid automation data i.e. the next change on this track, then blended with the existing data at that timecode. Write to End The current fader or other switch and pot positions are written all the way to the end of the Title (as defined on the Title Sheet screen). Auto Read When Auto Read is on, the automation status goes back to READ whenever the transport stops playing. This is a safe mode, because any following Play command will not alter the automation data unless you explicitly put a fader into WRITE. Auto Disarm When this check box is enabled, all faders armed for Touch Write will automatically disarm when the transport is stopped, as a safety feature to avoid accidentally changing values by touching faders. Particularly relevant when Touch Write to End is in use! Auto Disarm also automatically disarms faders enabled for Punch when the transport is stopped. This prevents them from punching again when listening back to an automation pass that was just completed. User Manual Page 63 Sel-SW When the SEL switch on the fader panel is pressed, that fader changes its automation status (only if Mix Mode has been selected - see above). The sequence through which the fader status changes is set by the SEL-SW menu, and the choice of sequences is: Read-Upd-Write Normally the fader starts in Read mode (i.e. if Auto Read is ON), which means that the fader moves according to the automation data, and the audio level does not respond when you move it by hand (this applies only when the transport is in play). Pressing the SEL switch once puts the fader in Update mode. This means the fader is being used to add or subtract dBs from the existing automation level. The position of the fader at the moment you enter update is taken as the zero level, after which moving the fader up or down adds or subtracts from the automated level. You will hear the changes in real time. Using UPDATE mode with rotary controls causes them to enter WRITE when moved. This is useful for separating the functions of the EQ bands (see below, this page). Pressing the SEL switch a second time puts the fader into Write mode. This means the absolute position of the fader controls the level, and is written into te automation file. Read-Update Toggles between Read and Update modes. Read-Write Toggles between Read and Write modes. Update-Write Toggles between Update and Write modes. Touch-Write-Snap Toggles between Read and Touch-Write. When Touch-Write is enabled, the READ light flashes, and the fader is ready to go into Write as soon as it is touched. It stays in Write as long as you keep your finger touching it, and when you let go it stops writing, merges with the existing data, and goes back to flashing READ, i.e. ready for you to touch it again. When you stop the transport it goes back to Read, if Auto Disarm is ON, otherwise it stays in TouchWrite, ready for you to start the transport and make some more changes. Touch-Write-To End A fader that is put into Touch Write will stay in write even when released. On stopping the transport, data will be written according to the setting of the On-Stop function. The fader reverts to Read if Auto Disarm is ON, otherwise it stays in Touch-Write. Read-(Preview)Write Preview is a special mode which allows you to move a fader, hear the results in real time, but not write these moves to the automation. It is very useful because it allows you to set up the mix for a section without disturbing the existing automation, and without the automation moving these faders every time you go into Play. Preview mode becomes active only when the Record button on the mixing console is pressed, which must be done while the transport is stopped. The Record light flashes to show that Preview mode has been entered. Pressing the SEL button on any channel moves it from READ to PREVIEW-WRITE, and the Write indicator flashes red. A further press of the SEL key puts the channel into WRITE. Another method is to select preview mode, arm a channel and set any required levels etc and locate to where the automation should begin. Then press SELECT and the Prodigy 2 RECORD buttons. The system will pre roll and drop into write mode at the time at where the RECORD button. Page 64 User Manual If the Record button is pressed again while the transport is stopped, PREVIEW Mode is exited, and all channels in PREVIEW-WRITE go back to READ. If the Record button is pressed again while the transport is Playing, all channels in PREVIEW are switched to WRITE. This can be used to punch-in on the automation. Punch This button when pressed drops down a list which controls an automated Drop In and Drop Out feature for the automation system. The features are available when the mix system is ON-LINE and the SEL switch setting includes WRITE mode. The options that may be selected on this list are Disabled, Auto and Drop In/Out. Disabled In this mode, the automation operates normally. Auto When this option is selected, an additional mode ARM is added to whatever other modes are set for the SEL switch. Thus if the SEL switch is set to be READ-WRITE-UPDATE, then when Auto is enabled, the SEL switch will toggle between READ-WRITE-UPDATE-ARM, where ARM is indicated by a flashing READ light. All channels that are ARMED will drop into automation WRITE when the Play key is pressed and the system becomes locked (some frames after the play key is pressed). Drop In/Out In this mode, channels which are ARMED as above will automatically drop into and out of Write mode at predetermined points. The points are defined on the AUTOREC screen, which may be accessed from the MIX page. At the top of the AUTOREC screen, there are timecode locations for Drop In and Drop Out. These may be entered manually, or captured by one of two methods: Capture In: Pressing this button transfers the current timecode position into the Drop In point Capture out: Pressing this button transfers the current timecode position into the Drop Out point Learn: When this is enabled, the next two depressions of the RECORD button on the locator panel will capture the In Point and the Out Point respectively, allowing capture on-the-fly. Note that when PREVIEW mode is enabled, the RECORD button is used to drop in and out of PREVIEW mode, and is therefore not available for this operation. The Capture In and Capture Out buttons must therefore be used instead when using Preview mode. User Manual Page 65 10.1.2 Write Enables At the upper right of the main fader screen is a grid showing all the parameters that can be enabled for automation, including level (fader), mute, individual aux sends, individual EQ bands, and dynamics modules (not in this software revision). Touching any box will make it ready to be written. Touch ALL to enable all parameters. From that time, any channel that is put into Write with timecode running will start to write over the existing data for that parameter. Note that two EQ bands (HM/HMF and LMF/LM) are included in each EQ choice. To record one of these bands without the other, use UPDATE mode, and leave one of them static while moving the other. 10.1.3 Mix Screen Menu Buttons Touching the All Write screen button puts all channels into Write mode. This should be used carefully, because it applies to channels which have a fader on the console surface, and also to those which do not. In other words you could be overwriting fader moves which you cannot see. Touching the All Read screen button puts all channels into Read mode. Puts all channels into Update mode, described above. This is a safe move, because no data is changed until you move a fader. Page 66 User Manual Touching Arm All puts all faders into TOUCH WRITE (if Touch-Write has been enabled on the Sel-SW button) or it puts all faders into PREVIEW (if Read-Prv-Write has been enabled and the Record button has been pressed). Prepares everything so you can start writing automated mixes. This includes: 1. Puts Mix ONLINE 2. Puts all faders into WRITE. 3. Switches on all WRITE ENABLES. This is especially useful for writing a manual balance to the automation without the risk of the automation moving anything before you are ready. Heres how: 1. Mix should be OFFLINE, because you have been working manually. 2. Locate to the first point of the sound (allow about half a second for the automation to start up.) 3. Touch the NEW MIX screen button. 4. Put the transport into Play, and the automation will start writing in about half a second. Throws away all the mix changes in the last timecode pass. Saves the current mix using the last name, if any, of a mix you saved, plus an incremental number. This avoids interruption to the creative process. SAVE Asks you to type a name for this mix and saves it to disk. You must have a title loaded (or created and saved) before you can save any mixes. LOAD Allows you to choose a stored mix for loading. DELETE Allows you to remove mixes from storage on hard disk. User Manual Page 67 10.2 Getting Started with Automation To try and make it easier for you to get started with the automation, here is a step-by-step description of what you have to do. It is assumed you have already created a balance for the first moment of the mix. Touch New Mix Mix is now Online, all WRITE ENABLES are ON, all faders are in WRITE mode, and ON STOP will Write to End. Locate the transport to a suitable time before the start of audio (approximately 10 seconds). Start Timecode Press the Play button on the mixing console or the editing console. Now you may make mixing moves, while the computer writes them against the current timecode. Stop Timecode Press the Stop button when you are ready. If you have Auto Read checked (highly advisable), you can go into Play and hear your mix. If you do not want to keep any of the mix, you may simply put the same channels back into Write mode and repeat the procedure. If you have something of value, please save it now. Save Mix It is a good idea to save your mix immediately if it has any value whatsoever. This allows recovery from accidents of all types. The first time you save it might be a good idea to use normal save (the SAVE MIX button), so that you start with a sensible name. If youre in a hurry, use SPEED SAVE. It will save your mix with the next available number. Page 68 User Manual 10.3 How to Change an Existing Mix Once you have a starting point for a mix, safely locked away on disk, you are ready to add new things or adjust existing ones. 10.3.1 Set Write Enables Change the write enables at the top right of the screen if you want to add new parameters or protect existing ones. 10.3.2 Write New Data Put channels into write mode and write new data for them. Be careful not to overwrite existing good data by carefully selecting faders, and by disabling parameters that you do not want to change just now. 10.3.3 Correct Existing Fader Data If you want to correct an existing fader pass, there are several ways to do it. Start timecode a few seconds before the part you want to change, then: Put the fader into WRITE using the SEL button and take control of the level. When you get to the end of the part you want to write, put the fader back into READ, and the Blend function will join your last level with the stored automation data. If you exit by pressing STOP, make sure you do not have Write to End or Write to Next enabled, or all the subsequent mix information will be over-written. Note that the data at the point you stop will be merged into the previous data over the time in the Merge field. OR Put the fader into UPDATE using the SEL button. The fader will stop moving, and you may use it to offset the level of whatever has been written for that fader, by raising or lowering the fader from its current level. You may decide to remember where you started, so that you can return to that level before you STOP, and get a smooth transition between the old and new parts of the mix. This can also be done by putting the fader back into READ mode, which will cause the Blend function to work. To put the fader from UPDATE back into READ, you must select READ-UPDATE on the Sel-SW screen button. OR Put the fader into Touch-Write Snap using the SEL-SW screen button and then the SEL switch. When you are ready, grab the fader and write a new section, then let it go and it will merge back into the existing recorded data. 10.3.4 Other Automatable Parameters Other parameters which may be automated are: Input Parameters. Buss Assignments. Boom Channel (Faders To). Trim. User Manual Page 69 10.4 How to Set Up for a new Scene Sometimes you have recorded automation for one section, or scene, of a production, and the next one is completely different. You want to create a transition between the two scenes, and the first requirement is to get a general balance, or "sound" for the new scene. 10.4.1 Method 1 Put all the faders into PREVIEW-WRITE mode. To do this, 1. Click Sel-SW 2. Select READ-(PREVIEW)WRITE 3. Click the Record 4. Click the SEL button on all faders whose balance you wish to set. button on the mixing console. All selected faders now have real time control of level (and all other automatable parameters), and you can work on the new scene. It is safe to preroll the scene from the earlier one where you have automation data written, because the automation will not move any settings while PREVIEW mode is on. (This means, of course, that you will not hear the correct automation for the previous scene). When you have set a balance for the new scene, you may commence writing it to the automation in two possible ways: 1. Roll the transport from before the start of the new scene, and "punch-in" the automation by pressing the Record button. 2. Set the scene start and end points in the Auto Rec menu, and set Punch to DROP-IN DROP-OUT. Then roll the transport from before the scene and the automation will punch the new values in for the whole scene. 10.4.2 Method 2 1. Save the mix you already had 2. Take Mix OFFLINE. 3. Set up the balance you want for the new scene 4. Click NEW MIX and record your balance through the scene. 5. Use Mix Processing (see next section) to get a precise turnover point between the two mixes, including a crossfade of the levels. Page 70 User Manual 10.5 Mix Processing Mix processing allows you to perform operations on the automation data that you have recorded. These operations involve copying, merging, shifting, trimming and so on, within a controlled timecode range, and on selected tracks. To open Mix Processing: 1. Touch MIX Select source and/ or destination channels. Select all channels. User Manual Deselect all channels. followed by Choose the type of process (see below). Choose which type(s) of mix events you wish to process. MIX PROC. Start processing at the start of the Title. Click here to open a Timecode keypad for typing the start or end of the range in which to process. Finish processing at the end of the Title. Start processing, using the parameters that have been set up. Capture the current timecode point. Page 71 10.5.1 Mix Processing Commands REPEAT Take the data within a range and reproduce it at another timecode, for any selection of feeds. MERGE Take a section from a selected mix (saved on disk) and place it into the current mix (in memory). SHIFT Take the data within a range and shift it to another timecode, for any selection of feeds. ERASE Zero the data for a range of timecode, for a selection of feeds. TRIM Move all fader levels up or down by a number of dBs, within a timecode range, for a selection of feeds. COPY Copy data from one feed to another, within a range of timecode. SWAP Swap data between feeds, within a range of timecodes. 10.5.2 Snapshots In the DATA page, the button titled snapshots gives access to a Snapshot screen On the Snapshot Screen, up to 64 snapshots can be captured (stored) or loaded (recalled) by stabbing the Capture button followed by a Snapshot Button, or the Load button followed by a snapshot button. A Snapshot consists of an instantaneous snap of all of the dynamically automatable parameters of the console: Faders, Pans, EQ, Auxes, Dynamics, Buss assignments, Insert switching, trim levels, Input phase. Snapshots may then be recalled either manually in sequence or against Timecode by inserting them into the Cue List. The automation system must be on line to use the Cue List, and snapshots are recalled for any parameters on any channels that are in Read. The parameters will hold their snapshot values until the next change of that parameter in the underlying mix data being read back. Page 72 User Manual 11. Preferences The Prodigy 2 Mix and Automation software can be configured to run with a number of differnt options via the preferences page. This can be accesssed via pressing the SYSTEM button and then the PREFERENCES button. 11.1 Preference Descriptions Automatic Cue - Talk1 Enabled - Talk 1 will be activated when the transport is NOT in play. Talk2 Enabled - Talk 2 will be activated when the transport is NOT in play. Miscellaneous Cancel Auto Read on Forget - When the FORGET PASS facility is used when Mixing, enabling this option will cause the faders to stay in whatever status they were prior to FORGET PASS, i.e. Auto READ will not be activated Screen Saver User Manual ScreenSaver On - Enables the Screen saver Function Wait for: (mins) - Sets the number of minutes before the Screensaver is activated Page 73 Automatic Mix Save No Auto Save - Disables Mix Auto saving. Make new Backup Each Time - Creates a new Mix Backup file for every Auto Save Save into same Backup - Creates a single Mix Backup file which is overwritten with every Auto Save. Interval: (mins) - Interval between Auto Saves. Solo Clear Recall Prev Solo - If checked, the solo CLEAR button will recall the previous solo state (toggle between solos). If not checked, the solo will simply be cleared. Solo Meters Show Solo Meters - If checked, solo meters will be displayed on screen with every solo Solo In Place Disable in AFL/PFL Mode - When checked, Solo in Place will be disabled if AFL/PFL has been selected on the Buss Configuration page. Solo PFL Only Enable in AFL/PFL Mode - If checked, all solo modes other than PFL are disabled when AFL/PFL has been selected on the Buss Configuration page. Assign to CAP Via Solo Switches - Causes a soloed channel to be selected to the Central Assignment Panel Via Touch Sensors - Causes a channel whose fader has been touched to be selected to the Central Assignment Panel. Aux Pre Send Pre Mute - Causes Pre-Fader Aux sends to be unaffected by fader Mutes Writing Strip Page 74 User Manual Show Fader Starts - Adds a symbol to the writing strip of any fader that has a fader start associated with it. Show Grouping Information - Adds a symbol to the writing strip of any fader that has a fader start associated with it. Show Stereo Channels - Stereo Channels are indicated by ST in the writing strip. Show Channel Level - Shows the channel level in dB in the writing strip. Ch-Parameter Auto Include Trim - Dynamic automation Write enable for Input TRIM. Include Buss Assign - Dynamic automation Write enable for Buss routing assignments Include I/P Pars - Dynamic automation Write enable for Input Phase, M/S decoding and Mode settings Preset Page Always Load All - When Checked, Loading a Preset will load the complete console configuration in one go. When NOT checked, loading a Preset will bring up a dialogue box allowing incremental loading of different types of Preset data. Date Format DD/MM/YY MM/DD/YY YY/MM/DD Function Keys Use to Access Monitor Section - When checked, the Function keys of the PC keyboard are mapped onto button functions in the System Modes section of the Prodigy 2 centre section. SMPTE Cues Only Trigger on Pass Through - Defines whether a Cue is initiated only as the Timecode point is passed or for any point after that Timecode point. Mute Format User Manual Page 75 Mute LED shows ON - When Checked, the Mute Button above each FADER shows that that Channel is ON, as opposed to MUTED (reverses the logic of the MUTE button) C/R Pot O/P range reduction (0%-50%) - Allows adjustment of the range of level control on the Control Room Potentiometer GPI/GPO Polarity Reverse GPI Logic Reverse GPO Logic Fader Starts Threshold (30 to 90 dB) EQ Library Preset 1 as Default M1 & M2 Has Master Mute switch - Enables the MUTE button for M1 and M2 M1& M2 10 dB Main Enabled - When NOT checked, unity gain for M1 and M2 is at the TOP of the Fader, i.e. there is no gain available on M1 or M2 Stereo Pan Default to unity - When this is checked, stereo pan is set to unity gain for left and right with 3dB gain at centre. The defaut setting (when this is not checked) is +3dB left and right with unity at centre. Title File Page 76 User Manual User Manual Verify Disc Write - With this on a verify is performed whenever the title is updated. Update Title when Saving mix - Whenever a mix is saved, the title is updated automatically. Page 77 Index A A inputs 7, 8 AFL/PFL 24 After Fade Listen 40 Arming Tracks 30 Auto Read 64 Automation 63, 64 Aux Buses 23 Aux buses 23 Aux Masters 48 Auxiliary Send Panel 53 Auxiliary Sends 53 B Balance 40 Blend 63 Bus Allocation 23 Bus allocation 23 Bus and Group Assignment 34 C C/R Monitor 24 Central Assignable Panel 49 Central Assignment Panel 11 Channel Configuration 28 Clear Solo 42 Clip Based EQ EQ, clip based 51 Compressor 53 Compressor/Limiter 53 Cue 39 Cue List 57, 58 D DATA Menu 15 Data Menu 15 Define Port 25 Direct Output 28 Dynamics 53, 55 E Editing Console 11 Editing console 5 Page 78 EQ 49 EQ Screen 50 Equaliser 49 Expander 53 Expander/Gate 53 EXT switch 47 Monitoring 27, 44, 47 Monitoring Setup 27 Multitrack Buses 24 Multitrack busses 30 F Naming 34 Naming Signal Paths 34 Fader Groups 42 Fader Operation 40 Fader Screen Menus 17 Fader Sets 35 Fader Starts 60, 63 Faders To 42 Fast Keys 58 File Types 18 Free mix buses 25 G Gate 53 GPOs 60, 63 Groups 42 I Input port selection 29 Inputs 7, 8 Insert 7, 8 Insert Points 30 Insert sends and returns 7, 8 Inserts 30 Internal Sources 27 J Joystick 55 L Limiter 53 Live Feeds 28, 35 M Macros 57 Main Buses 24 Master Control Section 11 Menus 17 Meter Sets 37 Meters 37 MFX3plus rack 5 Mix 63 Mix Menu 14 Mix Processing 70 N O On Stop 63 Outputs 7, 8, 27 Outputs for AFL/PFL 27 P Pan 40, 44 Pan / Balance 40 Pan Laws 44 Patching 7, 8 Pre Fade Listen 40 Pre or Post fader 53 Preview 67 Project 18 Q Q-factor 50 R Read-Upd-Write 64 Restart mixer 10 Return to Mix 64 Returns 7, 8 Routing 34 S Screen Macros 57 Sel-SW 64 Sends 7, 8 Sharing Inputs 29 slate 39 Solo 24, 40 Solo Defeat 40 Solo immunity 28 Solo in Place 40 Solo Modes 40 Source for a Feed 7, 8, 29 Source Trim 30 Source Type 30 Sources 29 SPK2 switch 47 Stereo Faders 42 User Manual Stereo Linking 30, 33 Sub Buses 23 Sub-buses 23 Surround 40 Surround Monitor 5, 27, 47 Sweep Enable 50 System Menu 16 System Modes 12 System Overview 6 T Talkback 38 Title 18 Touch Screen Menus 14 Touch-Write 66 Track Feeds 7, 28 Trim 30, 40, 44 Trim / Surround 40 Type 30 V VFX 58 W Write to End 64 Write to Next 64 User Manual Page 79