1
- Replace the battery, first locating one side under the
small lugs opposite the metal spring.
- Replace the cover.
Connect Zeppelin to the power supply. When plugged
in, Zeppelin will go through a system check for a couple
of seconds, during which it will not accept commands,
and then assume standby mode. In standby, the LED at
the front will glow red.
To turn Zeppelin fully on, press the button, either on
the remote handset or on Zeppelin itself. When fully
on, the LED colour will depend on the selected source
- blue for iPod or green for AUX. To totally disconnect
Zeppelin from the power supply (see safety instruction
10), you will have to remove the plug from or switch off
the wall outlet.
5
your iPod will charge. If that’s all you want it to do, put
Zeppelin into standby to reduce power consumption
using the button, either on Zeppelin or on the remote
handset.
A 3G iPod will dock with Zeppelin and play
music, but not charge from it.
If you remove your iPod while it is the selected source,
Zeppelin will automatically go into standby after 5
minutes to reduce power consumption.
6
OUTPUTTING VIDEO
If you want to feed images from a video iPod to your
television, use either an S-video or composite video
cable between Zeppelin and your set. If you have a
choice, S-video offers better quality.
approximately 75% full scale.
If your source has a line output - a standard ‘stacking’
CD player or advanced computer sound card, for
example - you will probably need two RCA Phono plugs
at the source end. If the source has its own volume
control, set it to approximately 90% full scale.
Digital sources use a fibre-optic cable, sometimes called
a TOSlink. The standard TOSlink termination has a
stubby, block-ended shape, but some devices, including
Zeppelin and Apple Airport Express, use an optical mini
jack plug. You can buy cables terminated with optical
mini jack plugs or use a standard plug with a suitable
adaptor. These optical mini jacks have the same outline
shape as the analogue version, but have no black
stripes and have an optic fibre for the light to pass
through at the very tip.
DOCKING AND REMOVING THE iPod
7
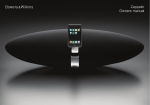
To dock your iPod, simply angle it, locate the long
socket over the connector on the support bracket and
push down fully (figure 5). The spring-loaded design
automatically adjusts for all models and causes the iPod
to rest on the back support. There’s plenty of room to
get your hand round the back of the support to operate
the iPod’s own controls in the normal way (figure 6).
Note that, because the socket in the base of the Nano is
offset to one side, it will not sit centrally on the support
bracket.
As soon as you dock your iPod, Zeppelin automatically
selects it as the source. If Zeppelin is in standby, it will
turn itself fully on. The LED will glow yellow for a couple
of seconds while the amplifier initialises and then turn to
blue when Zeppelin is ready to play.
If your iPod was turned off or in pause mode when
you docked it, it will end up in paused mode. If it was
playing, it will continue to play. All the time your iPod is
docked and Zeppelin is plugged into the power supply,
CONNECTING A SECOND SOURCE
You can connect a second source to Zeppelin using
the AUX socket at the rear. The socket accepts both
analogue and digital signals and Zeppelin will know
which type it is receiving. You don’t have to flip any
switches. Examples of some possible sources are given
in the Quick Start Guide.
An analogue source will need a 2-core coaxial cable
terminated at the Zeppelin end by a single mini
stereo jack plug, just like the plug used for your iPod
headphones. This plug will show 2 black rings on
the metal tip that separate the left, right and ground
contacts. The plug required at the other end will depend
on the source.
If the source is an early generation iPod, shuffle, MP3
player, laptop computer or portable CD player, for
example, the output will probably be from a headphone
socket and the same style mini jack will be needed.
If the source has its own volume control, set it to
Separately purchased optical cables and mini
jack adaptors are variable in their compatibility
and may not work properly. One-piece cables are
preferred. Ask your dealer for advice.
8
USING A SECOND SOURCE
You can switch between the iPod and a second (AUX)
button on the remote handset
source by using the
or by pressing and holding the combination button
on the top of Zeppelin itself. See the tables below for
details. When AUX is selected, the LED glows green.
If Zeppelin is manually switched to standby and on
again, it automatically selects the last used source. If
that source is no longer connected, Zeppelin will switch
to the alternative. If no source is conneted, Zeppelin
will return to standby after 5 minutes. Your iPod only
overrides source selection as it is docked or if you press
its own Play button while it is docked.
5