1
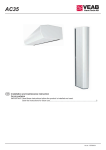
AC25
GB
Installation and maintenance instruction
for air curtains
IMPORTANT: Read these instructions before the product is installed and used.
Save the instructions for future use.....................................................................................................2
Art.nr: 172785-01
AC25
Assembly and operating instructions
Safety
• For all installations of electrically heated products
should a residual current circuit breaker 300 mA for
fire protection be used.
• Keep the areas around the air intake and exhaust grilles free from possible obstructions!
• CAUTION! During operation the surfaces of the unit
can be hot!
• The unit must not be fully or partially covered with
clothing, or similar materials, as overheating can result
in a fire risk! (E)
• The appliance can be used by children, aged from 8
years and above, and by persons (children included)
with reduced physical, sensory, or mental capabilities,
or lack of experience and knowledge, if they have been
given supervision or instruction concerning use of the
appliance in a safe way and understand the hazards
involved.
Children shall not play with the appliance.
Cleaning and user maintenance shall not be made
by children without supervision.
Children, of less than 3 years of age, should be kept
away unless continuously supervised.
Children, aged from 3 years and less than 8 years,
shall only switch on/off the appliance, provided that
it has been placed or installed in its intended normal
operating position and they have been giving supervision or instruction concerning use of the appliance in a
safe way and understand the hazards involved.
Children, aged from 3 years and less than 8 years,
shall not plug in, regulate and clean the appliance or
perform user maintenance.
Operation
Air is drawn in at the top of the unit and blown out
downwards so that it shields the door opening and minimizes heat loss. To achieve the optimum curtain effect
the unit must extend the full width of the door opening.
The grille for directing exhaust air is adjustable and is
normally angled outwards to achieve the best protection
against incoming cold air.
The efficiency of the air curtain depends on the air
temperature, pressure differences across the doorway and
any wind pressure.
NOTE! Negative pressure in the building considerably
reduces the efficiency of the air curtain. The ventilation should
therefore be balanced.
Mounting
The air curtain unit is installed horizontally with the
supply air grille facing downwards as close to the door as
possible. Minimum distance from outlet to floor for electrically heated units is 1800 mm. For other minimum
distances, see fig. 4.
Mounting with wall brackets (fig. 6)
1. Mount the brackets on the wall, see fig.6A and dimension drawing fig.1. If the wall is uneven the brackets must be compensated for this.
2. Hook on the unit at the lower edge of the brackets.
(Fig.6B-C)
3. Bend the top of the console over the unit and slide
the unit's screws along the rail into the slots on the
consoles, (Fig.6D). When the bracket is bent once,
it must be replaced if bent back more than 45 °.
4. Lock the nuts against the brackets. (Fig.6E)
General Instructions
Read these instructions carefully before installation
and use. Keep this manual for future reference.
The product may only be used as set out in the
assembly and operating instructions. The guarantee
is only valid if the product is used in the manner intended and in accordance with the instructions.
Horizontal mounting on the ceiling
Threaded rods, hanging brackets and ceiling mounting
brackets for ceiling mounting are available as accessories,
see accessories pages and separate manuals.
Application area
The AC25 air curtain unit is supplied with electrical
heating or hot water heating. AC25 is intended for
installation heights up to 2.5 metres.
Protection class for units with electrical heating: IP20.
Protection class for units with water heating: IP21.
2
AC25
Connecting the water coil (W)
The installation must be carried out by an authorised
installer.
The water coil has copper tubes with aluminium louvers
and is suitable for connection to a closed water heating
system. The heating coil must not be connected to a
mains pressure water system or an open water system.
Note that the unit shall be preceded by a regulating
valve, see valve kits.
The water coil is connected on the upper side of the unit
with ø15 mm smooth copper pipe with a suitable coupling or soldering. The connections to the heating coil
must be equipped with shut off valves (not included) to
allow problem free removal. Water coil is equipped with
a drain valve.
A vent valve should be connected at a high point in the
pipe system. Air valves are not included.
NOTE: Care must be taken when connecting the pipes.
Use a wrench or similar to hold the air curtain connections to prevent straining of the pipes and subsequent
water leakage during connection to water supply pipework.
Electrical installation
The installation, which should be preceded by an omnipolar switch with a contact separation of at least 3
mm, should only be wired by a competent electrician
and in accordance with the latest edition of IEE wiring
regulations.
The control system is pre-installed in the air curtain with
an integrated control card.
PLS is supplied pre-programmed with quick-fit
connections.
Modular cables are connected to the control board.
See manual for PLS.
Unit with water heating
Connected via the built-in control board PLS with 1,5
m cord and plug.
Unit with electrical heating
The electrical installation is made on the top of the unit,
fig.2. Power supply for heating (400V3N~) are connected to terminal block in the internal connection boxes.
2-metre units require dual power supplies.
The largest cable diameter for the terminal block is 16
mm². The cable glands used must meet the protection
class requirements. In the distribution board it is to be
indicated that ”the air curtains can be supplied from
more than one connection”.
Adjustment of the air curtain and air flow
The direction and speed of the air flow should be adjusted considering the load on the opening. Pressure
forces affect the air stream and make it bend inwards
into the premises (when the premises are heated and the
outdoor air is cold).
The air stream should therefore be directed outwards to
withstand the load. Generally speaking, the higher the
load, the greater the angle that is needed.
See wiring diagrams.
Type
Output
[kW]
Voltage
[V]
Minimum
area*
[mm2]
AC25-10-E08
8
400V3N~
2,5
AC25-15-E12
12
400V3N~
4
AC25-20-E16
8
400V3N~
2,5
Basic setting fan speed
The fan speed when the door is open is set using the
control. Note that the air flow direction and fan speed
may need fine adjustment depending on the loading of
the door.
Start-up (E)
When the unit is used for the first time or after a long
period of disuse, smoke or odour may result from dust or
dirt that has collected on the element. This is completely
normal and disappears after a short time.
Filter (W)
The water coil is protected against dirt and blockage by
an internal air filter which covers the coil face.
3
AC25
Service, repairs and maintenance
For all service, repair and maintenance first carry out the
following
1. Disconnect the power supply.
2. The front hatch is removed by removing the screws
on the top of the unit and then detaches the bent
edge at the bottom. (Fig.3)
3. After the service, repair and maintenance reattach the front hatch. Place the hatch at the lower edge with the bent edge and fasten on top with screws.
Overheating
The air curtain unit with electric heater is equipped
with an overheat protector. If it is deployed due to
overheating, reset as follows:
1. Disconnect the electricity with the fully
isolated switch.
2. Determine the cause of overheating and
rectify the fault.
3. Remove the front hatch.
4. Press the red button located inside the air curtain
unit, at the inner gable of the connection box.
5. Reattach the front hatch and connect the
unit again.
Maintenance
Unit with water heating
The appliance filter should be cleaned regularly to ensure
the air curtain effect and the heat emission from the
device. How often depends on local circumstances. A
clogged filter is not a risk, but the appliance function can
fail.
1. Disconnect the power supply.
2. The front hatch is removed by removing the screws
on the top of the unit and then detaches the bent edge at the bottom. (Fig.3)
3. Remove the filter and vacuum clean or wash it.
If the filter is clogged or damaged, it may need to
be changed.
All motors are equipped with an integral thermal safety
cut-out. This will operate, stopping the air curtain
should the motor temperature rise too high. The cut-out
will automatically reset when the motor temperature has
returned to within the motor’s operating limits.
Temperature control
Temperature control of PLS maintains the exhaust
temperature to approx. +40 °C. If the temperature
should exceed anyway there is an overheating alarm.
For more information see the manual for PLS.
All units:
Since fan motors and other components are maintenance
free, no maintenance other than cleaning is necessary.
The level of cleaning can vary depending on local
conditions. Undertake cleaning at least twice a year.
Inlet and exhaust grilles, impeller and elements can be
vacuum cleaned or wiped using a damp cloth. Use a
brush when vacuuming to prevent damaging sensitive
parts. Avoid the use of strong alkaline or acidic cleaning
agents.
Replacing the electrical coil (E)
1. Mark and disconnect the cables to the electric coil.
2. Remove the mounting screws securing the electric
coil in the unit and lift the electric coil out.
3. Replace faulty electrical coil.
4. Install the new electric coil in reverse order to the above.
Replacing the water coil (W)
1. Shut off the water supply to the unit.
2. Disconnect the connections to the water coil.
3. Remove the mounting screws securing the coil in the unit and lift the coil out.
4. Install the new coil in reverse order to the above.
Draining the water coil (W)
The drain valves are on the underside of the coil on the
connector side. It can be accessed via the front hatch.
4
AC25
Trouble shooting
If the fans are not working or do not blow properly, check
the following:
That the intake grille/filter is not dirty.
Functions and settings of the control system PLS, see
manual for PLS.
If there is no heat, check the following:
Functions and settings of the control system PLS, see
manual for PLS.
For units with electrical heating, check also the following:
Power supply to electric heater coil; check fuses and
circuit-breaker (if any).
That the overheat protection for the motors has not been
deployed.
For units with water coil, check also the following:
That the water coil is air free.
That there is enough water flow.
That incoming water is heated enough.
If the fault cannot be rectified, please contact a qualified
service technician.
Residual current circuit breaker (E)
When the installation is protected by means of a residual
current circuit breaker, which trips when the appliance
is connected, this may be due to moisture in the heating
element. When an appliance containing a heater element
has not been used for a long period or stored in a damp
environment, moisture can enter the element.
This should not be seen as a fault, but is simply rectified
by connecting the appliance to the mains supply via a
socket without a safety cut-out, so that the moisture can
be eliminated from the element. The drying time can
vary from a few hours to a few days. As a preventive
measure, the unit should occasionally be run for a short
time when it is not being used for extended periods of
time.
5
AC25
210
20
1025 / 1535 / 2025
10
78
345
145
40
165
min 500
Cu ø15
40
145
min 500
min 500
145
min 500
min 500
145
22
183
2m
W
62
145
40
E
Fig.1
Gland
Gland
ø17,5
ø17,5
ø32,5
ø25,5
ø20,5
Knock-out
ø17,5
Fig.2
6
Knock-out
Knock-out
Gland
AC25
A
TX20
B
C
Fig.3: Open the unit.
7
AC25
min 60
Minimum distance
Fig.4: Minimum distance.
8
AC25
Mounting with wall brackets
A
D
00
5
min
mm
ø8 (3x)
20
ø5
75
162
210
35
ø10
B
E
33
C
Fig. 6: Mounting with wall brackets
9
AC25-10
2 pcs
AC25-15
2 pcs
AC25-20
2 pcs
AC25
Mounting accessories
PA2PF15
Ceiling mounting bracket for 1
and 1.5 meter unit
AC25-10, AC25-15
PA2PF20
Ceiling mounting bracket for 2
meter unit
AC25-20
PA34TR15
Threaded rods for 1 and 1.5
meter unit Length: 1 m
Units: 4 pcs
AC25-10, AC25-15
PA34TR20
Threaded rods for 2 meter unit
AC25-20
Length: 1 m
Units: 6 pcs
PA2P15
Pendulums for 1 and 1.5
meter unit
Length: 1 m
Units: 2 pcs
AC25-10, AC25-15
PA2P20
Pendulums for 2 meter unit
Length: 1 m
Units: 3 pcs
AC25-20
Pendulum brackets for unit mounting
and ceiling bracket for mounting
on the ceiling using hangers or
threaded rods
(not included).
PA2PF
Threaded rods for ceiling mounting.
Used with ceiling mounting brackets
PA2PF.
PA34TR
Pendulum brackets for mounting
the unit suspended from the ceiling.
The pendulum brackets are covered
by a white plastic duct to hide the
cables. The brackets may be cut to
the desired length should shorter
suspension heights than 1 m be
desired. Used with ceiling mounting
brackets PA2PF.
10
PA2P
AC25
Accessories PLS
PLSB
Control unit Basic
Incl. control unit PLSUB1 and 5 meter modular
cable with RJ12 quick connect.
IP30
PLSAC
Control unit Competent
Incl. PLSUA1 control unit, box cover, PLSC1X hub
unit, PLSDC door switch, and 2 modular cables
with RJ12 quick connects (1 pc 3 m, 1 pc 5 m).
IP30
PLSRTX
External room
temperature sensor
70x33x23 mm
SIRECJ4
RJ11 coupler (4/4)
SIRECJ6
RJ12 coupler (6/6)
Used to join together two RJ11 or RJ12 connectors.
SIRECC403
Length 10 m
Length 15 m
SIRECC603
Length 3 m
SIRECC605
Length 5 m
RJ12 modular cable (6/6)
SIRECC615
PAMLK
PLSRTX
Length 5 m
RJ11 modular cable (4/4)
SIRECC415
SIRECC610
PLSAC
Length 3 m
SIRECC405
SIRECC410
PLSB
SIRECJ4 / SIRECJ6
Length 10 m
SIRECC
Length 15 m
Motor alarm board
Provides a potential free alarm connection
when thermal contact is triggered in the motor.
Installed in the air curtain.
PAMLK
Control valves for water systems (optional)
Type
Connection
VOS15LF
DN15
VOS15NF
DN15
VOS20
DN20
VOS25
DN25
VOT15
DN15
VOT20
DN20
VOT25
DN25
VOT
VOS
VAT
11
VAT
PL2510E08
PL2515E12
PL2520E16
C1 = low power
C2 = high power
Blue
Brown
Black
12
C°
M
~
C°
Right motor
C3
Run
Only 2 m version
C1
Mid
°C
C2
Lo
Over heat
cut-out
C1
C3
Run
PLSB2
N H1 H2
Heating
Motor
Internal
protection sensor
C1
C2
Lo
°C
Over heat
cut-out
C1 = low power
C2
ROOM
M
~
C1
Mid
C3
C2 = high power
L3 L2 L1 PE L N
ACTUATOR
Left motor
C4
L3 L2 L1 PE
400V 3N~
SUPPLY
L N PE
Blue
Brown
Black
400V 3~
AC25
AC25-10-E08/ AC25-15-E12/ AC25-20-E16
C2
ID. pot.
N F1 F2 F3
Motor/trafo
PL2510W
PL2515W
PL2520W
13
Blue
Brown
Black
C°
Blue
Brown
Black
C°
Right motor
C3
Run
C1
Left motor
C2
Lo
ACTUATOR
M
~
C1
Mid
N H1 H2
Heating
C3
Run
ROOM
C2
Lo
Motor
Internal
protection sensor
SUPPLY
L N PE
M
~
C1
Mid
Only 2 m version
PLSB2
AC25
AC25-10-W/ AC25-15-W/ AC25-20-W
C2
ID. pot.
N F1 F2 F3
Motor/trafo
AC25
PAMLK, motor alarm card
SUPPLY
L N PE
ID. pot.
ACTUATOR
C1
C2
N F1 F2 F3
Motor/trafo
N F1 F2 F3
NC C NO
N H1 H2
Heating
OUT
M
~
Right motor
M
~
Left motor
Run
Mid
Lo
PA2MLK
PLSB2
Motor
Internal
protection sensor
ROOM
Blue
Brown
Black
M
~
Run
Mid
Only 2 m version
Lo
C°
C°
Blue
Brown
Black
14
C°
AC25
PLS Basic
AC25-E
PLSB2
PLSRTX
(optional)
230V~
Pot.
Unit ID
C2
X5
C1
X4
ROOM
X3
PLSUB1
ACTUATOR SUPPLY
N L PE PE N L
PLS Basic - Parallel connection
PLSB2
PLSB2
C2
Pot.
X5
Unit ID
C1
X4
ROOM
X3
230V~
ACTUATOR SUPPLY
C2
Pot.
X5
Unit ID
PLSRTX
(optional)
C1
X4
N L PE PE N L
ROOM
X3
230V~
ACTUATOR SUPPLY
N L PE PE N L
Wiring diagrams for PLSAC Competent, see manuals for PLS.
15
PLSUB1
AC25
PLS Basic
AC25-W
PLSB2
C2
Pot.
X5
Unit ID
SD230
SD3a0
C1
X4
ROOM
X3
PLSRTX
(optional)
230V~
PLSUB1
ACTUATOR SUPPLY
N L PE PE N L
C
16
AC25
PLS Basic - Parallel connection
AC25-W
PLSB2
C2
Pot.
X5
Unit ID
SD230
C1
X4
ROOM
X3
ACTUATOR SUPPLY
N L PE PE N L
PLSB2
SD230
C2
Pot.
X5
Unit ID
C1
X4
ROOM
X3
ACTUATOR SUPPLY
N L PE PE N L
PLSB2
SD230
C2
Pot.
X5
Unit ID
C1
X4
ROOM
X3
ACTUATOR SUPPLY
N L PE PE N L
Wiring diagrams for PLSAC Competent, see manuals for PLS.
17
PLSRTX
(optional)
PLSUB1
AC25
NB: We reserve us from typographical errors and the right to make changes and improvements to the contents of this manual without prior notice.
VEAB Heat Tech AB
Box 265
S-281 23 Hässleholm
SWEDEN
Visitors adress
Stattenavägen 50
Delivery adress
Ängdalavägen 4
Org.no/F-skatt
556138-3166
VAT.no
SE556138316601
Postal Cheque Service
48 51 08- 5
Bank Transfer
926-0365
18
Fax
Int +46 451 410 80
E-mail
[email protected]
Phone
Int +46 451 485 00
Website
www.veab.com