1
PRS-812 Resistance Meter
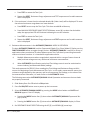
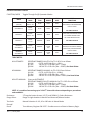
5. Set test voltage by pressing MANUAL SELECT TEST VOLTS button until the desired voltage is
displayed in lower right portion of LCD, i.e., <10, 10 or 100 Volts. MANUAL Test Voltage & Resistance Limits are defined below.
IMPORTANT: Exceeding these limits may affect measurement accuracy.
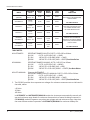
<10V: 0.1 to <1.0x10⁵ ohms
(0.1Ω - < 100KΩ)
10V: 1.0x10³ to <1.0x10⁹ ohms (1KΩ - < 1GΩ)
100V: 2.0x10⁵ to 2.0x10¹⁴ ohms (200KΩ - 200TΩ)
NOTE
If a test voltage is not manually selected, test voltage control will default to
Automatic Mode limits, switching higher or lower in accordance with resistance
range selection.
6. Press TEST to begin the Measurement Test Cycle.
a. The instrument will:
(1)
Apply and display the selected Test Voltage, or automatically default to and display the appropriate voltage for the selected resistance decade
(2)
Self adjust the measurement resistance range to the selected decade
(3)
Start the electrification period timer
b. If resistance is within the selected decade, the measurement and the electrification time
will be displayed continuously in the LCD.
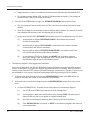
c. Pressing RESET will stop the Measurement Test Cycle, and simultaneously:
(1)
Turn Test Voltage power supply OFF
(2)
Save the displayed measurement in the Memory Register
(3)
Add one data point to the MEM XX counter and display total number of data points in the Memory Register, e.g., MEM 05
(4)
Prepare the instrument for the next measurement using the same Manual settings.
(5)
Pressing TEST will start a new Measurement Test Cycle
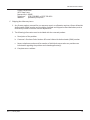
7. If the resistance you are measuring is higher than the selected decade, OL (Over Level) will be
displayed. To move the selected resistance range up to a higher decade:
a. Press RESET once to stop the Test Cycle. This does not add OL to Memory.
b. Press MANUAL RESISTANCE RANGE SELECTION up arrow (↑) to select the desired decade;
the appropriate LED will illuminate indicating the current selection
28
Rev. C / January 2012