1
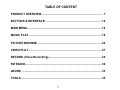
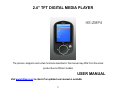
2.4” TFT DIGITAL MEDIA PLAYER HE-ZMP4 The pictures, diagrams and certain functions described in this manual may differ from the actual product due to different models USER MANUAL Visit www.hittusa.com to check if an updated user manual is available 1 PREFACE We express our sincere thanks for purchasing our Media Player! (MP) Before operating this MP, be sure to read this user manual carefully. After reading it, please keep it in a safe place for future reference. We reserve the right to make changes to this MP and/or this user manual without notice. Please visit our company’s website listed on the product packaging for additional product information and/or updates. NOTE: The pictures, diagrams and certain functions described in this manual may differ from the actual product due to different models. SAFETY AND GENERAL INFORMATION READ THIS INFORMATION BEFORE USING THIS MEDIA PLAYER A. B. C. D. New battery can reach its best performance after it has been completely charged and discharged for two or three times. Please charge the new battery for no less than 10 hours for the first three times, then from the forth time on, just charge it for four hours and it can reach its best performance. Do not operate this MP in extremely cold, hot, dusty or damp environment. Avoid putting this MP under direct sunlight 2 E. F. G. H. I. J. K. L. M. Do not scrub this MP with a hard thing; it may result in scratches on the screen and/or damage to the hardware. Use a damp cotton cloth to gently wipe the shell of the player. Using other chemical cleaning solutions is strictly prohibited. Keep this MP and all accessories out of children’s reach under 3 years old. Charge the MP when: The battery capacity icon is empty and flashing The MP powers off automatically, immediately after turned on. Avoid operating this MP under very dry environment to prevent damage from static-shock. Do not disconnect the USB cable while formatting, uploading or downloading files; disconnecting USB cable will result in file corruption and may require reformatting. When used as a removeable disk, users should backup important data. Our company is not responsibel for loss of data. This MP does not have any user-serviceable parts or accessories, do not try to disassemble this MP. Use only the AC charger that came with this MP to charge it. Try not to charge the MP while using it. After inserting or pulling out the earphones many times, the MP’s built-in speakers or the earphones may not work. If this happens, restart the MP. While taking photos or making a video, avoid shaking the MP to make sure the image quality is not bad. N. O. P. While operating this MP, protect camera’s lens from accidental scratches. Scratches on the lens will affect image quality. Long exposure to high sound volume may have an effect on your hearing, please use the appropriate volume level. Please use only the battery, charger and accessories permitted by 3 Q. R. manufacturer. Using other accessories or charger may be a safety hazard or affect product performance and/or void product warranty. Please properly dispose off the obsolete player and its accessories following your local environment laws. If you have any problem using this player, please email [email protected] or contact our customer service center – check our website www.hittusa.com for contact information NOTE: please charge the player no less than 10 hours before first time use. NOTE REGARDING FCC COMPLIANCE Users are not permitted to make changes or modify the device in any way. Changes or modifications not authorized by the party responsible for compliance could void the user’s authority to operate the equipment. This device complies with part 15 of the FCC Rules. Operation is subject to the following two conditions: (1) This device many not cause harmful interference, and (2) This device must accept any interference received, including interference that may cause undesired operation. 4 TABLE OF CONTENT PRODUCT OVERVIEW ............................................................................. 7 BUTTONS & INTERFACE: ...................................................................... 10 MAIN MENU............................................................................................. 14 MUSIC PLAY ........................................................................................... 16 PICTURE BROWSE ................................................................................ 22 VIDEO PLAY............................................................................................ 27 RECORD (Voice Recording) .................................................................. 29 FM RADIO................................................................................................ 30 eBOOK .................................................................................................... 33 TOOLS ..................................................................................................... 35 5 FILE NAVIGATION .................................................................................. 37 SETTINGS ............................................................................................... 37 CAMERA.................................................................................................. 43 FAQ .......................................................................................................... 48 SPECIFICATIONS: .................................................................................. 49 6 PRODUCT OVERVIEW 2.4 inch TFT screen,QVGA 320×240 Music Play: MP3, WMA, OGG, APE, FLAC and WAV file formats Video Play: RMVB /AVI in 320*240 resolution Picture Browse: JPEG, BMP and GIF file formats Digital Camera: Shoot Pictures & Videos (1.3 Mega Pixels) FM Radio Text File Reader Audio Recording: FM Radio and Voice Recording in MP3 or WAV format Additional Tools: Calendar, Stopwatch and Calculator Built-in High-fidelity speaker Synchronized lyric display (requires .lrc file) AV-OUT function (TV-NTSC/TV-PAL) Replaceable and Rechargeable Lithium Battery Multitask function: Enter music file navigation from the main interface - choose and play a music file, then press【MODE】button to return to the main menu, then while playing in the background browse pictures, read text, or use tools or settings options 7 SYSTEM REQUIREMENTS: Operating system: Windows XP, 2000, ME, Vista, Linux 9 and above or Mac 0S 10. CONNECTING TO A COMPUTER Connect Media Player (MP) to the computer using USB cable. Player will show the following screen: 1. Choose〈U Disk〉to copy or delete files to/from the player and press【MODE】 to complete selection NOTE: If〈File protection〉under〈Encrypted disk〉is enabled, the encrypted disk will be displayed on the computer. Under U disk mode, you can press【MODE】to exit. When 【MODE】 is pressed, a box will display “Updating music list, please wait…” Once the music list is updated the 8 player will display the Main Menu. 2. Choose〈USB Charging〉and press【MODE】to charge the player. NOTE: If you use USB charging, please make sure POWER】switch is in ON position for optimum charging. To use the player while it’s getting charged long press 【MODE】 to display Main Menu. 9 10 ON/OFF Switch: Turn POWER ON or OFF (To turn on the player long press 【PLAY】 button) PLAY: Use to Play or Pause and Turn Player ON or OFF MODE: Confirm Menu Selection, Enter Submenu; Enter File Navigation; Enter Explorer Interface and Return to previous Folder - When using Menus use【MODE】 to return to the Previous Menu VOL+: Increase Volume or used as navigation key during Menu operations VOL-: Decrease Volume or used as navigation key during Menu operations /NEXT: Next Song, Next Menu Option. /PRE: Previous Song, Previous Menu Option. USB Port: Connect to Computer or AC Charger Earphone Jack: Standard Earphone Jack. AV-Out: Connect to an external AV device (e.g. TV) Using Buttons: Short Press: press and quickly release the button Long Press: press and hold the button for 3 to 4 seconds. Hold: press the button and keep it pressed. 11 NOTE: if not specified in the manual, it means Short Press. SWITCH POWER ON/OFF and TURN PLAYER ON/OFF ◆ Switch Power ON / OFF Switch 【POWRE】 to OFF, the player is cut off power; and switch【POWRE】 to ON, the player is supplied with power. ◆ Turn Player OFF From the on state, long press【PLAY】to shut down. If the preset idle time has lapsed, the player will shut down automatically. NOTE: when the player is connected to the Computer, this function will not work. ◆ Turn Player ON From the OFF state, long press【PLAY】 to turn on the player. When the player is connected to the Computer, it will turn on automatically. LOW BATTERY When the battery is low, the player will remind you then shut down automatically and enter Stand By state, and then please do not try to restart the player and charge in time. DEFAULT FOLDERS TO SAVE MEDIA FILES Different types of files MUST be stored under different folders on the player, for example, store music file under MUSIC folder, recorded file under RECORD folder, picture file under 12 PICTURE folder, video file under VIDEO folder, text file under TXT folder. If you do not follow the file storage rules, the player won’t be able to find the files. NOTE: In case player’s memory has to be reformatted the player automatically creates the default folders to save different types of media files. 13 MAIN MENU From the Main interface, press 【VOL+】, 【VOL-】 to browse different submenus, and press 【MODE】 to choose one. Press 【MODE】 to display the explorer interface, and 14 press 【MODE】again to return to main interface. VOLUME CONTROL ◆ Volume Control Short press【VOL-】to decrease volume. Short press【VOL+】to increase volume. FILE NAVIGATION Use this option to browse all the files and folders on the player, and choose and play any recognizable files. ◆ Instructions 1. Multitask function file Enter music file navigation from the main interface and choose and play a music file, then press 【 MODE 】 to return, the playing music could be the background music, and you can browse picture, read text, play games, enter tools or setting.〉 2. Play Video Files Choose video file from the main folder, and press【MODE】to enter video player, then【MODE】 to display 〈current play〉list and choose the current file. 3. Browse Pictures Choose picture file from the main folder, and press【MODE】to enter picture list, 15 and press 【MODE】 again to enter 〈current play〉and choose the current picture. 4. Read Text File Choose text file from the main folder, press【MODE】to enter <folder list>, press 【MODE】 again to enter main folder, and choose the current file. MUSIC PLAY From the main menu, choose〈Music〉, then you can choose music file by different catalogue. Press 【VOL+】 or【VOL-】to browse different options, and press 【MODE】 to enter submenu. Current play: it lists the song you played last time and stops on it, press 【MODE】to play it from the breakpoint you exited last time. You can also choose to play other songs. All songs: it lists all the songs under MUSIC folder. Artist: it lists songs under singer’s name. When you choose a singer, it will list all his or 16 her songs. Album: it lists songs from the same album. Genre: it lists songs from the same genre. Playing list: it lists all the songs under each playing lists, and there are totally five playing lists. Folder List: it lists the main folder and Music folder. You can search from the main folder to Music folder and the next sub-folder till you find it. Press 【MODE】to play and press 【MODE】again to return to previous menu. Recorded file: it lists all recorded files. NOTE: these are stored under RECORD folder. Label list: it lists the label time when playing the music and it supports as many as 32 labels. Level: it has five levels (1 to 5). Choose a level and press【MODE】to enter the song list under this level. ◆ From the music playing mode Press【MODE】to enter submenus which contain <Circulation mode>, <EQ mode>, <Repeat times>, <Repeat interval>, <Repeat interval>, <Speed-change play>, <Remove>, <Add to play list>, <Detailed information>, <Add label>, <Fade-in and fade-out> and <Volume>. 17 NOTE: From the above submenu, press 【VOL+】 or 【VOL-】 to browse the options and press【PLAY】to return to previous menu. Playing interface instruction After you choose a song, press 【MODE】to enter playing interface. If AB repeat mode is not chosen, the repeat icon will not show. If there is no lyric for the current song, the lyric icon will not show. If the playing speed is 0, the speed-change icon will not show. NOTE: under this mode, music play and FM functions cannot be concurrently supported. Basic operation ◆ Play / Pause From the music-playing interface, press 【PLAY】 to shift between pause and play. ◆ Fast forwards /Fast reverse From the normal playing interface, when the song is playing or paused, Press and Hold 【NEXT】 or 【PRE】 to fast forwards or fast reverse. ◆ Skip to Next or Previous Song From the normal playing interface, press 【NEXT】 or 【PRE】 to shift from previous song or next song. ◆ Circulation mode From the Submenu, choose “Circulation mode” and press 【MODE】 to see the five 18 options including sequence, repeat one, repeat all, random, and intro. Press 【VOL+】 or 【VOL-】 to browse the options, and press 【MODE】 to choose one and return to previous menu.。 ◆ EQ mode From the Submenu, choose “EQ mode” and press 【MODE】 to see the options. Press 【NEXT】, PRE or move the rolling button to see different options. For the first 7 options, press 【MODE】 to choose and return to previous menu, while for SRS WOWHD, press 【MODE】 to enter user-defined menu, press 【NEXT】 or 【PRE】 to make adjustment, press 【MODE】 to save and return to previous menu; if you choose SRS WOWHD, the values for the user-defined mode are 8, 8, 5, 4, 6, 100MHZ and Disable respectively. If you choose SRS WOW, the values for the ser-defined mode are 8, 8, 4, 5, 0, 100MHZ and Disable; if you close SRS WOWHD, the EQ mode will directly enter natural mode. ◆ Repeat times From the Submenu, choose “Repeat times” and press 【VOL+】 or 【VOL-】 to set the repeat times from once to 10 times, and press 【MODE】 to save the setting and return to previous menu. ◆ Repeat interval Please see the operation of “Repeat times”. The repeat interval could be 1 to 6 seconds. 19 ◆ Repeat mode From the Submenu, choose “Repeat mode” and press 【MODE】 to enter the setting interface, you can will the icon 1 and you will see the icon 2 again, you will see the icon 3 which means A waiting point; press【NEXT】, which means B waiting point; press 【NEXT】 which means AB repeat begins. Then if you press 【NEXT】, it will cancel AB repeat. During the repeating, press 【PRE】 to return to the previous state; in the state of icon 1, if you press 【PRE】, AB repeat will be cancel. ◆ Speed-change play From the Submenu, choose “Speed-change play” and press 【NEXT】 or 【PRE】 or move the rolling button to adjust the speed from -4 to 4, and press 【MODE】 to save the setting and return to previous menu. NOTE: the speed-change play setting is for the currently playing MP3 or MAV song, and when it plays the next song, it will play it at normal speed. ◆ Remove From the Submenu, choose “Remove” and press 【MODE】 to enter its interface. Press【VOL+】or【VOL-】to shift from “Confirm” and “Cancel”, and press 【MODE】 to confirm your selection. NOTE: From the label list, it only removes the label record; from the play list, it only removes the song from the play list and does not delete the file. 20 ◆ Add to play list From the Submenu, choose “Add to play list” and press 【MODE】 to enter its interface. Press 【NEXT】 or 【PRE】 or move the rolling button to browse the lists, and return to previous menu. Then, the song will be added to the list. ◆ Detailed information From the Submenu, choose “Detailed information” and press 【MODE】 to enter its interface, and it will display the detailed information of the current song, Press 【MODE】 or 【PLAY】 to return to playing interface. ◆ Add label From the Submenu, choose “Add label” and press 【MODE】 to add the current song and point in time to the label list and return to playing interface. ◆ Fade-in and fade-out From the Submenu, choose “Fade-in and fade-out” and press 【NEXT】 or 【PRE】 or move the rolling button to choose on or off, press 【MODE】 to save the setting and return to previous menu. ◆ Volume From the Submenu, choose “Volume” and press 【VOL+】 or 【VOL-】 to adjust the volume from 0 to 31, if no keystroke during 3 seconds, it will return to playing interface. ◆ Set the song level From the playing interface, press 【MODE】 to shift to level setting mode, then the 21 place where shows playing progress turns into five starts, press 【NEXT】 or 【PRE】 to adjust the song level, and press 【MODE】 to save the setting. ◆ Lyric synchronization From the playing interface, press 【MODE】 to shift to lyric mode, then Song Lyrics will be displayed where the song information is displayed. PICTURE BROWSE Main menu introduction From the main menu, choose〈Picture〉and press 【VOL+】 or 【VOL-】to browse different options, and press 【MODE】to enter submenu. ◆ Picture list You can choose pictures by different classifications. Current play: it lists the pictures you browsed last time and you can press 【MODE】 to begin from the last picture you browsed. You can also play other 22 pictures. Folder list: search the file under main folder -->PICTURE folder, press 【MODE】 to confirm. Protection list: it lists the files in the encrypted disk, if there is no encrypted disk in the player, it will be a blank list. Choose this item and choose a file and press 【MODE】 to play it full screen. ◆ Browse mode It enables you to set the display way. File list: it displays pictures in the form of list, press 【MODE】 to return to previous menu. Press 【NEXT】 or 【PRE】 to browse the picture. See the chart below: 23 Thumbnail: it displays pictures in the form of thumbnail, press 【MODE】 to return to previous menu. Press 【NEXT】 or 【PRE】 to browse the pictures in landscape mode, press 【VOL+】 or 【VOL-】 to display pictures in portrait mode. See the picture below: 24 ◆ Playing mode Manual mode: choose manual mode and press 【VOL+】 or 【VOL-】 to switch files when playing in full-screen. The default setting is manual mode. PPT mode (Slide Show): choose PPT mode and it will shift pictures automatically when playing in full-screen. ◆ PPT interval Press 【NEXT】 or 【PRE】 to adjust the PPT interval raging from 1 second to 10 seconds. NOTE: if the picture decoding time is longer then the preset PPT interval, it will display at the interval of decoding time. Submenu introduction ◆ From the picture playing interface Press 【MODE】 to enter submenu that contains “Remove”, “Rotation”, “Zoom”, “Detailed information” and “Volume”. NOTE: From the above submenu, press 【VOL+】【 . VOL-】 to browse different options, Long press 【MODE】 to return to previous menu. Basic operation ◆ Play and stop 25 From the browse mode, press 【MODE】 to play pictures, long press【MODE】 to exit. ◆ Remove Please refer to “Remove” under music mode. ◆ Rotation From the Submenu, choose “Rotation” and press 【MODE】 to enter submenu. Choose the rotation angle and press 【MODE】 to return to playing interface and rotate the picture. ◆ Zoom From the Submenu, choose “Zoom” and press 【MODE】 to enter submenu. Press 【PRE】 and 【NEXT】 to zoom in and zoom out, and press 【MODE】 to confirm and enter area state, then press 【NEXT】 and 【PRE】 to adjust the browse area, and press 【MODE】 to return to normal play mode. NOTE: GIF pictures cannot be zoomed in, zoomed out or rotated. Pictures less then 320*240 cannot use the function. ◆ Picture information From the Submenu, choose “Detailed information”, and press 【MODE】 to enter next interface. It will display the current picture’s information. 26 VIDEO PLAY Main menu introduction From the main menu, choose〈Video〉, then you can choose video file by different catalogue. Press 【VOL+】 or【VOL-】to browse different options, and press 【MODE】 to enter submenu. Current play: it lists the video you played last time and stops on it, press【MODE】to play it full screen. Folder list: search the file under main folder -->VIDEO folder, press 【MODE】 to confirm. Label list: it lists all the videos with labels and supports 32 label lists at most. Protection list: it lists the videos in the encrypted disk. If no encrypted list, the list will be blank. Choose a file and press 【MODE】 to play it full-screen. Submenu introduction ◆ From the video playing interface Press 【MODE】 to enter submenu that contains “Remove”, “Playing mode”, “Add label”, “Detailed information” and “Volume”. NOTE: From the above submenu, press 【VOL+】 and 【VOL-】 to browse different 27 options, press 【PLAY】to return to previous menu. Basic operation ◆ Play and pause From the video-playing interface, press 【PLAY】to shift between play and pause. NOTE: multitask function is not available under this mode. ◆ Fast forwards and fast reverse From the playing interface, when the file is playing or paused, long press 【NEXT】 or 【PRE】 to fast play or fast reverse. ◆ File shift From the playing interface, short press 【NEXT】 or 【PRE】 to shift the next and last files. ◆ Playing mode setting From the Submenu, choose “Playing mode”, press 【MODE】 to enter playing mode setting interface. Press 【VOL+】 and 【VOL-】 to browse different options including sequence, repeat one, repeat all, random and intro, press 【MODE】 to choose one and return to previous menu. ◆ Add label From the Submenu, choose “Add label”, and press 【MODE】 to add the current file to the label list and return to playing interface. ◆ Detailed information 28 From the Submenu, choose “Detailed information” and press 【MODE】 to enter file information display interface. Press 【MODE】 or 【PLAY】 to return to playing interface. ◆ Volume From the Submenu, choose “Volume” and press 【MODE】 to enter volume display interface, press 【NEXT】 or 【PRE】 to adjust the volume from 0 to 31, and press 【MODE】 or 【PLAY】 to return to playing interface. If not keystroke in three seconds, it will return to playing interface automatically. RECORD (Voice Recording) Main menu introduction From the Main Menu, choose〈Record〉. Press 【VOL+】 or【VOL-】to browse different options, and press 【MODE】to enter submenu. ◆ Begin to record Choose this option, press 【MODE】 to enter recording interface and begin to record. 29 NOTE: multitask function is not available under this mode. ◆ Recording format It supports to set the recording formats. The default format is WAV. Press【VOL+】or 【VOL-】 to browse different options and press 【MODE】 to confirm. ◆ Line in It supports to record by the line-in cable. During the recording, if no space left, it will prompt, “Space is full.” and save the recorded file and return to recording stop mode. Basic operation ◆ Record, pause and stop From the recording interface, press 【PLAY】 to shift between record and pause, press 【MODE】 to save the recorded file and enter stop mode. FM RADIO Main menu introduction From the main menu, choose〈FM〉, press 【VOL+】 or【VOL-】 to browse different options, and press 【MODE】to enter submenu. ◆ Listening to radio Choose this item to enter the FM main interface. It is the frequency you exited last 30 time. If it is the first time you enter the interface, the default frequency is 87MHz. ◆ Channel list It lists all the channels you have saved before, choose one from them and press 【MODE】 to enter FM interface to listen to it. It can save 20 channels for each wave band at most. ◆ Wave band There are two wave bands: European and American wave band ranging from 87MHz to 108MHz and Japanese wave band ranging from 76MHz to 90MHz. Press 【MODE】 to confirm your selection. ◆ Stop to broadcast Choose this item and press 【MODE】 to stop broadcasting the current channel. ◆ From the FM main interface Press 【MODE】 to enter submenu, if the current channel is in the channel list, there will be five submenus including “Auto search”, “Manually search”, “Remove”, “Recording quality” and “Radio record”. If the current channel is not in the channel list, there will be four submenus including “Auto search”, “Save channel”, “Recording quality” and “Radio record”. FM main interface introduction From the main interface, press 【MODE】 to shift between the main menu and the channel list. 31 NOTE: under this mode, the player cannot support music and FM functions concurrently. Basic operation ◆ Auto search From the Submenu, choose “Auto search”, press 【MODE】 to begin searching. After searching, it will update the channel list and broadcast the first channel in the channel list. ◆ Manual search From the FM main interface, short press 【NEXT】 or 【PRE】 to adjust the current frequency. Long press 【NEXT】 or 【PRE】 to search the next or last channel. When it receives a channel, it will stop searching and broadcast the channel. ◆ Save channel If the current channel is not saved yet, you can choose “Save channel” from the submenu, press 【MODE】 to return to FM main interface. Then the current channel will be saved in the channel list. ◆ Remove channel From the Submenu, choose “Remove”, press 【MODE】 to remove the current channel from the channel list; if you choose “Remove all”, press 【MODE】 to delete all the channels in the channel list. ◆ Recording quality From the Submenu, choose “Recording quality”, press 【MODE】 to enter submenu. 32 The format is MP3 format, and “low”, “Medium” and “High” refer to 64kbps/128kbps/256kbps respectively. ◆ FM recording From the Submenu, choose “FM recording”, press 【MODE】 to enter the recording interface. Please follow the voice recording operation. NOTE: under this interface, press 【MODE】 to save the recording file and return to FM main interface. ◆ Multitask mode When you listen to radio, you can browse pictures, or read text files. eBOOK Main menu introduction From the main menu, choose〈Text〉. Press 【VOL+】 or【VOL-】to browse different options. You can choose files by different types. Current read: press 【MODE】 to enter the reading interface and continue to read from 33 the last time you stopped. Folder list: search the file under main folder -->TXT folder, press 【MODE】 to confirm. Label list: it lists all the text files with page labels. Choose a file and press 【MODE】 to enter reading interface, and continue to read from the pre-saved pages. Auto-reading interval: press 【NEXT】 or 【PRE】 to adjust the auto-reading interval ranging from 5 to 30 seconds. ◆ From the text playing interface Press 【MODE】 to enter submenu that contains “Add to label”, “Remove”, “Jump to 0%” and “Volume”. NOTE: From the Submenus above, press 【VOL+】 or 【VOL-】 to browse different options and press【PLAY】 to return to previous menu. Basic operation ◆ Play and stop From the playing mode, press 【MODE】 to play the text file, if you have set the manual playing, press 【MODE】 to exit the playing interface; if you have set the auto-playing, press 【MODE】 to enter submenu selection <Return to previous menu> and press 【MODE】 to return to the playing interface. Remove Please follow the “Remove” instruction under music play. ◆ Playing mode setting 34 From the text-reading interface, press 【PLAY】 to shift between manual mode and auto mode. ◆ Add label Please follow the “Add to label” instruction under music play. TOOLS From the Main Menu, choose “Game and tools”. Press 【VOL+】 or 【VOL-】 to browse different items. Choose “Tools” and press 【MODE】 to enter submenu. ◆ Stop watch From the stopwatch interface, press 【PLAY】 to start or pause, press 【NEXT】 to save the previous record and go on to count the next one, it can save five stopwatch records at most. Press 【MODE】 to choose “Clear” and you can clear the record. Choose “Volume” to adjust volume. ◆ Calculator Enter the calculator interface and follow the instruction below: 35 ◆ Key Basic function MODE Confirm the selection VOL- Next line VOL+ Last line NEXT Move right PRE Move left MODE Exit Calendar Enter the calendar interface and follow the instruction below: Key Calendar main interface Confirm interface MODE Flip out confirm interface Confirm input NEXT/PRE Adjust to move left or right Adjustment option VOL-VOL+ Adjust date Adjust the value MODE Exit Void NOTE: in the above tools, press 【MODE】 to enter submenu interface from the main interface and adjust the volume. 36 FILE NAVIGATION From the Main menu, choose “File Navi” to enter. You can see the number of files under different folders listed by file type. You can select and play the files through this interface. SETTINGS From the main menu, choose “Setting”, press 【VOL+】 or 【VOL-】 to browse different options, and press 【MODE】 to enter. Basic operation ◆ Information display 37 From the main menu, choose “Detailed information” to enter the next interface to display system information. Long press 【MODE】 to return to previous menu. ◆ Main configuration menu From the main menu, choose “Main configuration menu” to enter next interface, press 【VOL+】 or 【VOL-】 to browse different options, press 【MODE】 to shift between “On” and “Off’. If you choose “Off”, it will not display this item on the Main Menu. Press 【PLAY】 to return to previous menu. ◆ Display setting From the main menu, choose “Display setting” to enter next interface, press 【VOL+】 or 【VOL-】 to browse different options, press 【NEXT】 or 【PRE】 to adjust the value, and Long press 【MODE】 to return to previous menu. 1. Backlight You can set the backlit time ranging from 0 to 60 minutes. 0 means the backlit will not turn off. 2. Brightness You can set the brightness ranging from 1 to 5. ◆ Change the playing list name From the main menu, choose “Change the playing list name” to enter next interface. It lists the five playing lists under music play, press 【VOL+】 or 【VOL-】 to browse the different options, press 【MODE】 to enter digital keypad and change the name, 38 Long press 【MODE】 to return to previous menu. See the operation instruction below: MODE Confirm input MODE Delete VOL-VOL+ Next line / last NEXT/PRE Move right / move line ◆ left Date and time From the main menu, choose “Date and time” to enter submenu, press 【VOL+】 or 【VOL-】 to browse different options, and press PALY to return to previous menu. 1. Time adjustment To set the system time, press 【MODE】 to enter time setting interface, and press 【VOL+】 or 【VOL-】 to browse different options, press 【NEXT】 or PRE to adjust the value, press 【MODE】 to save and exit. 2. Time format Press 【MODE】 to shift between 12-hour system and 24-hour system. 3. Open in the title bar Press 【MODE】 to shift between “On” and “Off” to set whether to display the time information in the title bar. ◆ Player setting 39 Under main menu, choose “Player setting” and enter submenu, press 【VOL+】 or 【VOL-】 to browse different options, and long press 【MODE】 to return to previous menu. 1. Owner It displays the owner information. Press 【MODE】 to enter digital keypad to change the name. For the operation instruction, please follow the operation instruction of changing the name of playing list. 2. Power saving mode You can set the shutdown time if no keystroke from the stop mode; the player will shut down automatically. The time can be 0-60 seconds. Press 【NEXT】 or 【PRE】 to make adjustment and press 【MODE】 to save and exit.。 3. Sleeping mode You can set the shutdown time if no keystrokes. The time period will be 0-120 minutes. The operation is the same as the power saving mode. ◆ Language From the main menu, choose “Language” and enter submenu. It supports English, Simplified Chinese, Traditional Chinese and multiple languages. Press 【VOL+】 or 【VOL-】to browse different options, and press 【MODE】to shift system language, and press PALY to return to previous menu. 40 ◆ Encrypted disk From the main menu, choose〈Encrypted disk〉 to enter submenu. If the space of the encrypted disk is 0MB, it will display “Space adjustment”, “File protection setting” and “Change password”. Press 【VOL+】 or【VOL-】to browse different options, and press 【MODE】to return to previous menu. 1. Space adjustment Press 【NEXT】 or 【PRE】 to adjust the space of the encrypted disk, if the space is not 0, press 【MODE】 to enter input password interface, and press 【MODE】 again to display the password input interface. When you input the password, it will prompt out: the adjustment of encrypted disk will format the whole player. If you choose to confirm, it will divide the disk; if it choose to cancel, the original password is 000000. 2. File protection setting Press 【MODE】 to enter submenu, choose “Conceal”, and it will not display the picture, video and text files in the protection list; if you choose “Display”, you have to press 【MODE】 to enter password input interface, and input the correct password, the protection will display. 3. Change password Use this option to reset the password. ◆ Reset 41 Press 【MODE】 to display whether you want to resort to default settings, choose to confirm, and the application will resort to default setting. NOTE: From the “Setting”, if you play music or broadcast FM radio, you can press 【PLAY】 to pause. FIRMWARE UPGRADE Connect the player to the Computer, choose “U disk”, press 【MODE】 to enter U-disk mode to proceed to firmware upgrade. The upgrade will have four states: waiting, upgrading, complete upgrade and upgrade failure. Please see the chart below: 42 CAMERA CAPTURE (Snapshot): Select Camera from the Main Menu and Press 【MODE】to confirm the selection. Select Capture from the sub-menu and press 【MODE】to confirm the selection and to activate the camera Press【PLAY】to take a snapshot. Long Press【MODE】to exit from Capture mode. Pictures are saved in CAMERA subfolder under PICTURES folder. Submenu introduction: 43 During Camera/Capture mode press【MODE】 to display the photo-taking submenu Press 【NEXT】 or 【PRE】 to make a selection and press【MODE】 to confirm selection Long press【MODE】to exit from the submenu. 1.White balance Options: auto, indoor, outdoor. The default setting is auto. 2.Brightness Options: ranging from -3 to +3. The default setting is 0. 3.Exposure Mode Options: auto, indoor, outdoor. The default setting is auto. 4.Special Effect Options: none, black-and-white, Retro and negative. The default setting is none. 5.Save Path Options: main equipment. 44 6.Resolution The default setting is 640*480 (max resolution is 1280x960). 7.Free Space To show the spare space of the currently used equipment. The unit is MB. 8. Self-timer Options: off, 5 seconds, 10 seconds, 15 seconds and 20 seconds. The default setting is off. 9. Shutter Sound Options: off, sound effect 1, sound effect 2 and sound effect 3. The default setting is sound effect1. 10. Date Stamp Options: off, date, date and time. The default setting is off. DV (Digital Video) Select Camera from the Main Menu and Press【MODE】to confirm the selection. Select DV from the sub-menu and press【MODE】to confirm the selection and 45 to activate the camera Press【PLAY】to start making the video. Long Press【PLAY】to stop and save the video. Long Press【MODE】to exit from DV mode. The movie-shooting mode does not support multitask function. Press 【MODE】, 【NEXT】 or 【PRE】 to begin shoot the movie. Press 【NEXT】 or 【PRE】 again to stop shooting, press 【MODE】 to save the current movie file, and it will prompt out “File has been saved”. Video files are saved in CAMERA subfolder under VIDEO folder. Submenu Introduction During Camera/DV mode press【MODE】 to display the photo-taking submenu Press 【NEXT】 or 【PRE】 to make a selection and press【MODE】 to confirm selection Long press【MODE】to exit from the submenu. 1.White balance 46 Options: auto, indoor, outdoor. The default setting is auto. 2.Brightness Options: ranging from -3 to +3. The default setting is 0. 3.Exposure Mode Options: auto, indoor, outdoor. The default setting is auto. 4.Special Effect Options: none, black-and-white, Retro and negative. The default setting is none. 5.Save Path Options: main equipment. 6.Resolution The default setting is 320*240. 7.Free Space To show the spare space. 8.Record Quality Options: high, medium, low and auto. The default setting is high. 47 FAQ The player does not work or LCD cannot Check the battery. display. Check your shutdown setting. Failure in data exchange. There is no such equipment, or you haven’t formatted the disk. No enough spare space. Forget the password of the encrypted Set the space of the encrypted disk to disk. 0 and rearrange the disk. DEFAULT SETTINGS Music grade Playing mode EQ mode Picture browse mode Picture playing mode PPT interval 0 Sequential Natural Thumbnail Manual 2 seconds 48 Recording format VOR Frequency Wave band Auto reading interval Backlit time Backlit brightness Owner Idle shutdown time Hibernation shutdown time Document protection setting WAV Off 87MHz European and American 5 seconds 0 second 3 Unknown 0 second 0 minute Hidden SPECIFICATIONS: Functional Feature Item Description System Windows XP, 2000, ME, Remarks 49 requirement Display Built-in Flash Built-in SDRAM E-BOOK Vista, Linux 9 and above or Mac 0S 10 Size 2.4〞TFT display Resolution 320 X240 16-bit (262.144K colors), Color LCD backlit adjustable 1 GB ~8GB FLASH 32MB~128MB SDRAM TXT Format MP3, WMA, OGG, APE, FLAC, WAV and ASF 8~320kbps Yes Support AVI and RMVB, Music play Bit rate Lyric synchronization Video play Format Recording Voice & FM FM radio Yes Format Picture browse Size USB Support USB1.1/2.0 Loudspeaker Built-in loudspeaker Physical Feature Environment -20~+60 °C temperature Relative humidity 20%~ 93% (40℃) JPG/BMP 768*1024;480*640;240*320;120*160 50 Measurement Weight Battery AC adapter 100*60*13mm 70g Capacity 650mAh rechargeable Li battery About 5 hours AC100V-240V DC5V/550mA Playing time Input Output 51 Limited 90-Day Warranty Coverage: Hi-Tech Trading (USA), Inc. (“HiTT”) warrants this product (“product”) against defects in materials and workmanship under normal consumer use for 90 days from the date of purchase. HiTT, at its option, will at no charge repair, replace or refund the purchase price of this product should it not conform to this warranty. This limited warranty is a consumer’s exclusive remedy, extends only to the first consumer purchaser, is not transferable and is valid only on products purchased by consumers in the United States or Canada. Exclusions: Normal Wear and Tear: Periodic maintenance, repair and replacement of parts due to normal wear and tear are excluded from coverage. Batteries: Only batteries whose fully charged capacity falls below 80% of their rated capacity and batteries that leak are covered by this limited warranty. Miscellaneous: This warranty does NOT cover defects or damage that result from: (a) improper operation, storage, misuse or abuse, accident or neglect, such as physical damage (cracks, scratches, etc.) to the surface of the Product resulting from misuse; (b) contact with liquid, water, rain, extreme humidity or heavy perspiration, sand, dirt or the like, extreme heat, or food; (c) use of the Product for commercial purposes or subjecting the Product to abnormal usage or conditions; (d) service, installation, alteration, or modification in any way by someone other than HiTT and, (e) other acts which are not the fault of HiTT. Obtaining Service: To obtain service or information, please send email to [email protected]. You will receive instructions on how to ship the Product, at your expense, to a HiTT Service Center. To obtain service, you must include a copy of your receipt. 52 HE-ZMP4 COMPANY & CONTACT INFORMATION Hi-Tech Trading (USA); Inc. P.O. Box 179 Woodbury, NY 11797 U.S.A. Web: www.hittusa.com Email: [email protected] ZOpid and the Stylized Logo are registered in the US Patent & Trademark Office. other product or service names are the property of their respective owners. All © 2009 Hi-Tech Trading (USA); Inc. The information contained in this User Manual is believed to be correct at the time of printing. HiTT reserves the right to change or modify any information or specifications without notice. The contents of this User Manual are provided “as is.” Except as required by applicable law, no warranties of any kind, either express or implied, including, but not limited to, the implied warranties of merchantability and fitness for a particular purpose, are made in relation to the accuracy, reliability, or contents of this guide. 53