1
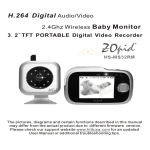
Digital Wireless Audio/Video Baby Monitor
The pictures, diagrams and certain functions described in this manual may differ from the actual product
due to different models.
Visit www.hittusa.com to check if new firmware or user manual is available for download.
SAFETY AND GENERAL INFORMATION
IMPORTANT INFORMATION ON SAFE AND EFFICIENT OPERATION OF THIS PRODUCT
READ THIS INFORMATION BEFORE USING THIS BABY MONITOR
Before operating your Wireless Baby Monitor,please read all these safety and operating instructions
completely and then retain for future reference.
1. Your Baby Monitor is designed to be an aid and should not be used as a substitute for responsible and
proper adult supervision.
2. Do not place the camera on any surface or mount it on any wall where the camera or the AC adapter
cord are within baby's reach.
3. Never place the camera inside your baby's cot, bed or playpen.
4. Never cover the camera and monitor (e.g.with clothes, towels or blankets).
5. Position the camera, monitor and AC adapters to allow adequate ventilation.
6. Never use or place your camera and monitor in moist places or near water. For example,do not use
near a bathtub,washbowl,laundry tub,kitchen sink,in a wet basement.etc.
7. To prevent overheating,keep the camera,monitor and AC adapters away from heat sources such as
radiators,heat registers,stoves or other appliances(including amplifiers)which produce heat.
8. Keep the camera out of direct sunlight.
9. Disconnect the AC adapter from wall outlets during long periods of non-use.
10.Use only the AC adapters provided.Use of any others may damage the camera and/or monitor.
11.If traveling abroad,make sure that the voltage shown on the power adapters correspond to the
local power, before plugging in the AC adapters into the electric outlets.
NOTE REGARDING FCC COMPLIANCE
Users are not permitted to make changes or modify the device in any way. Changes or modifications
not authorized by the party responsible for compliance could void the user's authority to operate the
equipment.
This device complies with part 15 of the FCC Rules. Operation is subject to the following two conditions:
(1) This device many not cause harmful interference,and (2) This device must accept any interference
received,including interference that may cause undesired operation.
FCC Notice to Users
This equipment has been tested and found to comply with the limits for a Class B digital device, pursuant
to part 15 of the FCC Rules. These limits are designed to provide reasonable protection against harmful
interference in a residential installation. This equipment generates, uses and can radiate radio frequency
energy and, if not installed and used in accordance with the instructions, may cause harmful interference
to radio communications. However, there is no guarantee that interference will not occur in a particular
installation. If this equipment does cause harmful interference to radio or television reception, which can
be determined by turning the equipment off and on, the user is encouraged to try to correct the
interference by one or more of the following measures:
●Reorient or relocate the receiving antenna.
●Increase the separation between the equipment and the receiver.
●Connect equipment to an outlet on a circuit different from that to which the receiver is connected.
●Consult the dealer or an experienced radio/TV technician for help.
CARE AND MAINTENANCE
1. Keep all parts and accessories out of young children's reach.
2. Fingerprints or dirt on the lens surface can adversely affect camera performances. Avoid touching
the lens with your fingers.
3. Should the lens become dirty, use a blower to blow off dirt and dust, or a soft dry cloth to wipe
the lens.
4. Keep the camera dry. Precipitation, humidity and other liquids contain minerals that will corrode
electronic circuits.
5. Do not use or store in dusty, dirty areas.
6. Do not store in hot areas. High temperatures can shorten the life of electronic devices and warp or
melt certain plastics.
7. Do not store in very cold areas. When the system warms up, the moisture can form inside the case,
which may damage electronic circuit boards.
8. Do not attempt to open the case. Non-expert handing of the device may damage the system.
9. Avoid dropping or strong shocks.
10.Operate the product using only the power supply include or provided as an accessory.
11.Do not overload electrical outlets or extension cords. This can result in fire or an electric shocks.
CONTENTS
Features-----------------------------------------------------------------------------2
Monitor Diagram-------------------------------------------------------------------3
Camera Diagram-------------------------------------------------------------------4
Child Unit (Camera)---------------------------------------------------------------5
Parent Unit (Monitor)-------------------------------------------------------------7
LCD Display-------------------------------------------------------------------------9
Register Additional Cameras--------------------------------------------------17
Explanation of Audio & Video Sensitivity Levels--------------------------24
1
MAIN FEATURES
*100% Digital Technology
*Digital signal for crystal clear clarity
*Digital security for complete privacy, no neighbors can hear and see
*Digital zoom with selectable regions
*Adjustable volume level, auto camera exposure and video timeout to save energy
*Signal strength indicator
*Wifi interference free
*Dynamic audio strength indicators
*Intelligent voice activity detector to lower noise and save battery
*Two transmission mode selection: Video & Audio or Audio Only
*Sleep mode with voice activation(VOX)
*Support Multi-Language( 5 Languages)
*Supports up to 8 cameras; with Auto and Manual Scan
2
Up(Vol+ or Select Previous camera/Menu Option)*
Down(Vol- or Select Next camera/Menu Option)*
OK/Menu
Voice Level Indicator LEDs
USB Port for charging or firmware update
Socket
On/Off/Esc
* Buttons assignment for Volume Control or Camera Selection is a user selectable optionsee "Up & Down Buttons Function” under Settings in Main Menu (see section 5.12 for details).
3
Used during firmware upgrate ONLY
USB Port for charging or firmware upgrade
On/Off/ESC
Power and charging status indicator LED
4
CHILD UNIT(CAMERA):
a.POWER ON:
Connect Camera to an A/C outlet using the included A/C adapter.
NOTE: Camera also works with a built-in rechargeable battery, or by connecting it to a computer's
USB port using a USB cable.
In Power Off Mode, press and hold ON/OFF button for 3 seconds. Power-indicator LED lights-up
indicating the camera is ON.
b.POWER OFF
To turn off the Camera press and hold ON/OFF button for 3 seconds, the Power-indicator LED turns OFF,
indicating the Camera is OFF.
c.BATTERY STATUS
When the Camera is not connected to an A/C adapter or computer's USB port, it automatically operates
on built-in rechargeable battery. When the battery voltage falls below 3.6V the Power Indicator LED
turns RED from GREEN, indicating the battery needs to be charged.
IMPORTANT NOTE: When camera battery is extremely low a red flashing “Low battery” message is displayed
on the monitor screen.
5
d.NIGHT-VISION(IR)OPERATION:
The camera is equipped with eight(8) Infrared LEDS for night-vision operation. In low light situation the
Infrared LEDS turn-on automatically, to activate night-vision.
NOTE: The night-vision picture is always black & white and not that sharp. This camera has up to
10 feet night-vision range.
e.CAMERA STAND / MOUNTING BRACKET:
Screw the stand to the camera screw hole.
Use a coin to tighten the screw on the back.
Coin
6
PARENT UNIT(MOINTOR)
1.1 POWER ON
Connect Monitor to A/C outlet using the included A/C adaper.
Note:Monitor also works with a rechargeable battery(see next section for instructions to install
rechargeable battery),or by connecting it to a computer's USB port using a USB cable.
In Power Off Mode, press and hold ON/OFF button for 3 seconds. Power indicator LED will light up and
monitor will display"system starting up...".If the camera is powered on then video will be displayed on
the screen else the monitor will display "connecting Camera 1".
Note:if the camera is powered ON but the monitor displays "Connecting Camera 1"or"Camera 1
unregistered", please see section 5.7 to first register/pair the camera. This message is also displayed
when camera is out of range.
1.2 POWER OFF
To turn off the monitor press and hold ON/OFF button for 3 seconds, the Power LED and display will
turn OFF.
7
2.1 Installing Rechargeable Battery:
Rechargeable battery is included with the system, but not installed,Please install the battery as shown
below, make sure to align metal contacts on the battery with the metal contacts in the battery compartment:
Battery
push
Push
2.2 Battery Operation:
When the battery voltage is above 3.6V,the Power LED is GREEN.When the voltage falls below 3.6V
the Power LED turns RED,indicating the battery needs to be charged.
2.3 Charging in Power Off Mode:
When power adapter is connect to the monitor the LCD screen display
indicating battery is getting charged until the battery is fully charged.
8
3.1 Signal Icon
The signal icon
works similar to mobile phone signal strength indicator,the signal
bars change indicating camera signal strength.
9
3.2 Battery Icon
The battery icon
displays 4 different battery levels. Solid icon
indicates full battery strength.
Blank blinking icon
indicates very low battery strength and monitor must be connected to the A/C
adapter to charge the battery and to continue using the monitor.
3.3 Alarm Icon:
The alarm icon
is displayed once an alarm is setup.
4.Voice Level Indicator:
4 LEDs below the Screen show the sound level. This feature is very helpful, when the Volume
Level is very low or set to zero,for visual notification of sound detection by the camera and the sound level.
10
5.Main Menu Operations:
5.1 Main Menu
Settings
Press &Hold ON/OFF button for three(3)seconds to turn ON the monitor.
● Press "OK/MENU"button to display Main Menu.
● Use "UP" or "DOWN" button to highlight a Menu Option and press "OK/MENU" button to complete
the selection.
● Press "ESC" button to exit from the Main Menu.
11
5.2 Volume Adjustment:
Use this option to adjust speaker volume
Volume
Settings
● Press"OK/MENU"button to display Main Menu.
● Use "UP"or "DOWN"button to highlight "Volume" Option and press "OK/MENU" button to complete
the selection.
● Use "UP" or "DOWN" button to adjust the "Volume" and press "OK/MENU"button to complete the
selection.
● Press "ESC" button to exit from the Menu.
NOTE: Up and Down Buttons on the Monitor can also be used to adjust volume if “Volume Control”
functionis assigned to these keys using “Up & Down Buttons Function” under “Settings” in the
Main Menu (see section 5.12 for details).
12
5.3 Brightness Adjustment:
Use this option to adjust picture brightness
Brightness
Settings
● Press"OK/MENU"button to display Main Menu.
● Use "UP"or "DOWN"button to highlight "Brightness" Option and press"OK/MENU" button to
complete the selection.
● Use "UP" or "DOWN" button to adjust the "Brightness" and press "OK/MENU"button to complete the
selection.
● Press "ESC" button to exit from the Menu.
13
5.4 Zoom In Function:
Use this option to zoom in on five pre-defined areas of the monitor screen
Zoom In
Center
Top Right
Top Left
Bottom Right
Bottom Left
Original Size
Settings
Camera2
● Press"OK/MENU"button to display Main Menu.
● Use "UP"or "DOWN"button to highlight "Zoom In" Option and press "OK/MENU" button to complete
the selection.
● Use "UP" or "DOWN" button to select the area you want to Zoom In on and press"OK/MENU"button
to complete the selection.
● The selected position will be displayed magnified 2X.
To display picture in it's original size:
● Press"OK/MENU"button to display Main Menu.
● Use "UP"or "DOWN"button to highlight "Zoom In" Option and press "OK/MENU" button to complete
the selection.
● Highlight "Original Size" option and press "OK/MENU" button to complete the selection.
● Press "ESC" button to exit from the Menu.
14
5.5 Multi Camera(Manual Camera Selection):
If you have more than one camera already registered/paired with the monitor,use this option to setup
default camera to view when monitor is turned on.NOTE: Up and Down Buttons on the Monitor can also
be used to manually select a camera to view. "Camera Selection " function is assigned to these keys
using “ Up & Down Buttons Function" under “Settings” in the Main Menu (see section 5.12 for details).
Multi Camera
Camera Selection
Register Camera
Settings
Camera Selection
Manual Selection
Auto Scan
Manual Selection
Camera
Camera
Camera
Camera
Camera
Camera
Camera
Camera
1
2
3
4
5
6
7
8
● Press"OK/MENU"button to display Main Menu.
● Use "UP"or "DOWN"button to highlight "Multi Camera" Option and press"OK/MENU" button to
complete the selection.
● From "Multi Camera" Menu highlight "Camera Selection" using "UP" or "DOWN" button and press
"OK/MENU"button to complete the selection
● From "Camera Selection" Menu highlight "Manual Selection" using "UP" or "DOWN" button and
press "OK/MENU" button to complete the selection.
● From "Manual Selection" Menu highlight the camera you want to view and press "OK/MENU" button
to complete the selection.
NOTE: You can only view cameras that are already registered - Registered cameras have"Thumbs up"
sign next to the camera number.
● Press "ESC" button twice to exit from the Menus and view the selected camera.
15
5.6 Multi Camera(Auto Scan):
If you have more than one camera already registered/paired with the monitor,use this option to setup auto
scan mode.
Multi Camera
Camera Selection
Register Camera
Camera Selection
Manual Selection
Auto Scan
Auto Scan
Never
5 Seconds
10 Seconds
15 Seconds
Settings
● Press"OK/MENU"button to display Main Menu.
● Use "UP"or "DOWN"button to highlight "Multi Camera" Option and press"OK/MENU" button to
complete the selection.
● From "Multi Camera" Menu highlight "Camera Selection" Using "UP" or "DOWN" button and press
"OK/MENU"button to complete the selection
● From "Camera Selection" Menu highlight "Auto Scan" using"UP" or "DOWN" button and press
"OK/MENU" button to complete the selection.
● From Auto Scan Menu highlight the Duration you will like to view each registered/Paired camera and
press "OK/MENU" button to complete the selection.
NOTE:Select "Never" to disable Auto Scan.
● Press "ESC" button twice to exit from the Menus and view the cameras.
16
5.7 Multi Camera(Register/Pair a Camera):
Use this option to register/pair an existing or an additional camera.
IMPORTANT:Make sure the camera you are trying to register is powered ON and all other cameras are
powered OFF during pairing process.
Multi Camera
Camera Selection
Register Camera
Settings
Register Camera
Camera
Camera
Camera
Camera
Camera
Camera
Camera
Camera
1
2
3
4
5
6
7
8
Register Camera
Register Camera 1?
Yes
No
●Press"OK/MENU"button to display Main Menu.
● Use "UP"or "DOWN"button to highlight "Multi Camera" Option and press"OK/MENU" button to
complete the selection.
● From "Multi Camera" Menu highlight "Register Camera" using "UP" or "DOWN" button and press
"OK/MENU"button to complete the selection.
● From "Register Camera" Menu highlight the camera number you want to use to register this camera
and press "OK/MENU" button to complete the selection.
NOTE: Camera numbers already allocated (used to register existing cameras) have "thumbs up "sign
next to the camera number. To assign this number to another camera, you must first unregister the old camera.
17
● Use "UP" or "DOWN" button to select "Yes" and press "OK/MENU" button to complete the selection;
the screen will display "register camera #" where # is the camera number you selected.
● Press and quickly release the ON/OFF button on the CAMERA to complete pairing process IMPORTANT: Camera must be powered ON and this step must be completed while the monitor
screen displays "register camera #".
● If pairing is successful, the screen will display "Camera # Registered",where # is the camera number
you selected in previous step. "Thumbs up" sign will appear next to the camera #.
NOTE:If the pairing/registration process is not successful, repeat this process again.
● Press "ESC" button twice to exit from the Menus and view the camera.
NOTE: Follow the same process to remove/unregister a camera - When a registered camera is selected
from "Register Camera" Menu list the screen will prompt you to select "Yes" to complete unregister
camera or "NO" to cancel operation.
18
5.8 Alarm Function:
Use this option to setup feeding or other reminder alarms(5 different alarms can be set).
NOTE: If an alarm is not disabled it will repeat every 24 hours. See next section to setup date and time.
Morning Call
Alarm Status
Alarm Time
Alarm
Alarm Time
Morning Call
Feeding Alarm 1
Feeding Alarm 2
Feeding Alarm 3
Feeding Alarm 4
07: 00AM
Settings
19
● Press"OK/MENU"button to display Main Menu.
● Use "UP"or "DOWN"button to highlight "Alarm" Option and press"OK/MENU" button to complete
the selection.
● From "Alarm" Menu select any one of the five(5)alarms using "UP" or "DOWN" button and press
"OK/MENU"button to complete the selection if, for example, you picked "Morning Call" from the
Alarm menu the "Morning Call" sub-menu will be displayed.
● From "Morning Call" Menu highlight:
1. "Alarm Status" to turn this alarm ON or OFF.Use "UP" or "DOWN" button to select "Alarm on"
or "Alarm off" and press "OK/MENU" button to confirm the selection.
2. "Alarm Time" to setup alarm time. Use "UP" or "DOWN" button to change hours and minutes
and confirm each entry by pressing "OK/MENU" button.
Note:time is entered in either 24-hour or 12-hour time format, depending on the time format selected
using "Setting" option from the Main Menu(see section 5.9 for details).
● Press "ESC" button to exit to the previous menu.
● Other alarms are setup by repeating these steps.
20
5.9 Settings(Date and Time):
Use this option to setup Date and Time and the Time Format.
Date and Time
Settings
Date and Time
Close Video Time
Voice Activation
Up & Down Buttons Function
Date
Time
Time Format
Language
System Information
Settings
● Press"OK/MENU"button to display Main Menu.
● Use "UP"or "DOWN"button to highlight "Settings" Option and press"OK/MENU" button to complete
the selection.
● From "Settings" Menu select "Date and Time" option using "UP" or "DOWN" button and press
"OK/MENU"button to complete the selection. Pick one of the following option from "Settings" Menu:
1. Date: Use "UP" or "DOWN" button to change Year, Month and day and confirm each entry by
press "OK/MENU" button .
2.Time:Use "UP" or "DOWN" button to change Hour and Minute and confirm each entry by pressing
"OK/MENU" button. NOTE:Time is entered in either 24-hour or 12-hour time format, depending
on the time format selected in the next step.
3.Time Format: to setup time format use "UP" or "DOWN" button to select "12 hours" or "24 hours"
and press "OK/MENU" button to confirm the selection.
● Press "ESC" button to exit to the previous menu.
21
5.10 Settings (Close Video Time):
Use this option to setup Power Save or Audio Only mode.
Settings
Date and Time
Close Video Time
Voice Activation
Up & Down Buttons Function
Language
System Information
Close Video Time
Never
15 Seconds
30 Seconds
60 Seconds
90 Seconds
Settings
● Press"OK/MENU"button to display Main Menu.
● Use "UP"or "DOWN"button to highlight "Settings" Option and press"OK/MENU" button to
complete the selection.
● From "Settings" Menu select "Close Video Time" option using "UP" or "DOWN" button and press
"OK/MENU"button to complete the selection
● From "Close Video Time" Menu select sleep time of 15,30,60 or 90 seconds (time after which
monitor will turn-off and go into power-save mode, if there is no sound detected).
IMPORTANT NOTE: Select "Never" to disable power-save mode.
● Press ESC" button to exit to the previous menu.
Also see next section to setup Audio & Video Sensitivity Levels to have the monitor switch between Audio
Only and Audio & Video Modes.
22
5.11 Settings(Voice Activation):
Use this option to setup voice activation sensitivity settings that determine when monitor switches from
Audio Only to Audio & Video mode.
Settings
Date and Time
Close Video Time
Voice Activation
Up & Down Buttons Function
Activation Sensitivity
Activation
Sensitivity
Sensitivity
Audio Sensitivity
Audio Sensitivity
Low
Video Sensitivity
Video Sensitivity
Medium
Video Sensitivity
High
Language
System Information
Settings
● Press "OK/MENU" button to display Main Menu.
● Use "UP" or "DOWN" button to highlight "Settings" option and press "OK/MENU" button to
complete the selection.
● From"Settings" Menu Select "Activation Sensitivity" option using "UP" or "DOWN" button, and
press "OK/MENU" button to complete the selection.
● From "Activation Sensitivity" Menu select one of the following:
● Audio Sensitivity: Select Low, Medium or High sensitivity level using "UP" or "DOWN" button and
confirming the selection by pressing "OK/MENU" button.
● Video Sensitivity: Select Low, Medium or High sensitivity level using "UP" or "DOWN" button and
confirming the selection by pressing "OK/MENU" button.
NOTE: In order for the Audio Only function to work, make sure that one of the time-interval is selected
using "Close Video Time" option in section 5.10.
23
AUDIO ONLY MODE & EXPLANATION OF AUDIO & VIDEO SENSITIVITY LEVELS:
To enable Audio Only mode set “Close Video Time” to time interval other than “Never” (see Section 5.10).
Switching of monitor from Audio Only to Audio and Video mode depends on the Audio & Video Sensitivity
settings.
● Audio Sensitivity level determines at what sound level camera sends sound alert to the monitor i.e.
Notifying monitor that sound is detected (the low pop sound from the monitor speaker means monitor
received the sound alert that sound was detected by the active camera) - High audio sensitivity level
means even slightest sound will cause camera to send the alert and Low audio sensitivity level means
camera will ignore low level sounds and won't send sound alerts to the monitor.
● Video sensitivity level determines at what sound level should the monitor switch from Audio Only
(Power Save) mode to Audio/Video mode (display picture) - High Video sensitivity means any sound
alert signal received from the camera will cause the monitor to switch to Audio & Video mode (display
picture) and Low video sensitivity setting will make monitor to ignore any low sound level alerts and
stay in Audio Only mode.
.
24
5.12 Settings(Up & Down Buttons Function):
Use this option to assign Volume Control or Camera Selection function to the Up & Down buttons on the
monitor
Settings
Up & Down Buttons Function
Date and Time
Volume Control
Close Video Time
Camera Selection
Voice Activation
Up & Down Buttons Function
Language
System Information
Settings
● Press "OK/MENU"button to display Main Menu.
● Use "UP" or "DOWN" button to highlight "Settings" option and press "OK/MENU" button to
complete the selection.
● From "Settings" Menu select "Up & Down Buttons Function" option using "UP" or "DOWN" button,
and press "OK/MENU" button to complete the selection.
● From "Up & Down Buttons Function" Menu select "Volume Control"or "Camera Selection" using "UP"
or "DOWN" button and complete selection using "OK/MENU" button.
● Press "ESC" button to exit to the previous menu.
25
5.13 Settings(Language):
Use this option to setup ON Screen Menu Display (OSD) Language.
Language
Settings
Date and Time
English
Close Video Time
Français
Voice Activation
Deutsch
Up & Down Buttons Function
Italiano
Language
Español
System Information
Settings
● Press "OK/MENU"button to display Main Menu.
● Use "UP" or "DOWN" button to highlight "Settings" option and press "OK/MENU" button to
complete the selection.
● From "Settings" Menu select "Language" option using "UP" or "DOWN" button, and press
"OK/MENU" button to complete the selection.
● From "Language" Menu select English, French, Deutsch, Italian or Spanish using "UP" or "DOWN"
button and complete selection using "OK/MENU" button.
● Press "ESC" button to exit to the previous menu.
26
5.14 Settings(System Information):
Use this option to view the firmware version of your baby monitor
Settings
System Information
Date and Time
Close Video Time
Voice Activation
Up & Down Buttons Function
Firmware:
V2.0.6
Date:
2009.07.25
Language
System Information
Settings
● Press "OK/MENU"button to display Main Menu.
● Use "UP" or "DOWN" button to highlight "Settings" option and press "OK/MENU" button to
complete the selection.
● From "Settings" Menu select "System Information" option using "UP" or "DOWN" button, and press
"OK/MENU" button to complete the selection.
● Press "ESC" button to exit to the previous menu.
27
Limited 1 Year Warranty
Coverage:Hi-Tech Trading (USA),Inc.("HiTT") warrants this product ("Product") against defects in
materials and workmanship under normal consumer use for 1 year from the date of purchase. HiTT,
at its option, will at no charge repair, replace or refund the purchase price of this Product should it not
conform to this warranty. This limited warranty is a consumer's exclusive remedy, extends only to the
first consumer purchaser, is not transferable and is valid only on Products purchased by consumers in
the United States or Canada.
Exclusions:
Normal Wear and Tear:Periodic maintenance, repair and replacement of parts due to normal wear and
tear are excluded from coverage.
Batteries:Only batteries whose fully charged capacity falls below 80% of their rated capacity and batteries
that leak are covered by this limited warranty.
Miscellaneous:This warranty does NOT cover defects or damage that result from:(a) improper operation,
storage, misuse or abuse, accident or neglect, such as physical damage(cracks,scratches,ets.) To the
surface of the Product resulting from misuse;(b) contact with liquid, water, rain, extreme humidity or heavy
perspiration, sand, dirt or the bike, extreme heat, or food;(c) use of the Product for commercial purposes or
subjecting the Product to abnormal usage or conditions;(d) service, installation, alteration, or modification
in any way by someone other than HiTT and,(e) other acts which are not the fault of HiTT.
Obtaining Service:To obtain service or information, please send email to [email protected] will
receive instructions on how to ship the Product, at your expense, to a HiTT Service Center. To obtain
service, you must include a copy of your receipt.Copy of receipt is not required if you registered this product
on our website www.hittusa.com within 30 days of purchase date.
28
ZOpid and the stylized logo are registered in the US Patent &Trademark Office. All other product or
service names are the property of their respective owners.
©2009 Hi-Tech Trading(USA),Inc.
The information contained in this User Manual is believed to be correct at the time of printing. HiTT
reserves the right to change or modify any information or specifications without notice. The contents of
this User Manual are provided "as is." Except as required by applicable law, no warranties of any kind,
either express or implied, including, but not limited to, the implied warranties of merchantability and
fintness for a particular purpose, are made in relation to the accuracy, reliability, or contents of this guide.
Hi-Tech Trading (USA),Inc.
P.O.Box 179
Woodbury,New York 11797
Email:[email protected]
Web:www.hittusa.com
29