1
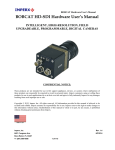
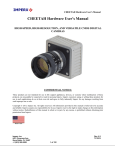
INDEPTH VISION TECHNOLOGY SUPERIOR SUPPORT COMPLETE PRODUCT LINE Wireless Camera Controller USE-WiCC USER’S MANUAL AND SET UP GUIDE (Rev. 1.0 – 01/15) HEADQUARTERS SOUTHERN CALIFORNIA OFFICE SOUTHWEST OFFICE MIDWEST OFFICE 42501 Albrae Street, Suite 210 15925 Cumberland Drive 2345 West Moore Road 707 South Grand Ave. Fremont, CA 94538 Poway, CA 92064 Tucson, AZ 85755 Bozeman, MT 59715 510.657.4000 ph 510.657.4010 fax 510.366.6235 ph 510.657.4010 fax 510.936.4061 ph 510.657.4010 fax 406.582.9100 ph 406.585.5925 fax www.uniforcesales.com [email protected] [email protected] [email protected] [email protected] [email protected] 1.) Introduction The Bobcat Camera Wireless Controller (USE-WiCC) is an accessory for the Bobcat series of HD-SDI cameras from Imperx (www.imperx.com). This device enables wireless Bluetooth-based or wired USB-based set up and control of the camera head from an Android tablet or Smartphone. The USE-WiCC eliminates the need to connect the camera head to a laptop or desktop PC in order to set up or modify camera settings. Instead, the camera configuration can be changed dynamically in the field using specifically designed Apps on an Android device. Fig. 1 – Bobcat Camera Set Up with USE-WiCC Wireless Controller The sections that follow describe how to set up and use your USE-WiCC wireless controller. 2.) System Description The USE-WiCC wireless controller is comprised of 2 elements: the Hardware that connects to the camera head and a collection of Android Apps that reside on the user’s tablet or Smartphone. A.) Hardware The standard USE-WiCC hardware package is comprised of the following components (see Figure 2.): 1.) USE-WiCC controller box 2.) DC power supply (+12V / 2A) 3.) Bluetooth Dongle 4.) 7” Android tablet www.uniforcesales.com -1- Figure 2. – USE-WiCC hardware 2.A.1 – USE-WiCC Controller Box – The USE-WiCC controller box (shown in Fig.3), contains the electronic hardware that controls the camera-side Bluetooth or USB interface. In addition, it supplies +12V DC power to the Bobcat camera head and has a BNC connector for input of an external camera trigger signal. The controller contains a USB 2.0 Type A socket that is compatible with a Bluetooth dongle or standard USB cable. The USE-WiCC box is designed to be mounted to the body of a Bobcat camera using the integral mounting bracket on the front side of the USE-WiCC. www.uniforcesales.com -2- +12V DC Input USB Socket External Trigger Input Camera I/O Camera Power Figure 3. – USE-WiCC controller box 2.A.2 - +12V DC Power Supply – The +12V/2A DC power supply provides power for both the USE-WiCC and the Bobcat camera head. It is designed for operation with a 110VAC power source. 2.A.3 – Bluetooth Dongle – The dongle is a Bluetooth Version 2.0 + EDR with a USB Type 2.0 interface. (Note: As shipped, the USE-WiCC Bluetooth dongle and the 7” Android tablet are paired to each other. If the dongle is lost, damaged, or you wish to replace it, please contact Uniforce Sales for assistance.) 2.A.4 – Android Tablet – A 7” Android tablet is included with the USE-WiCC. It employs the Android 4.1.1 (“Jelly Bean”) OS and comes pre-loaded with 3 USE-WiCC Apps: ‘CamInfo’, ‘Color’, and ‘CamGain’. In general, the USE-WiCC Apps should work with any Android-based tablet or Smartphone that is compatible with Android 4.1.1 and above. www.uniforcesales.com -3- B. Hardware Set Up – Connect the USE-WiCC to a Bobcat camera as follows: 1.) Attach the USE-WiCC box to the camera body (if desired) by lining up the slots on the integral mounting bracket of the USE-WiCC body with corresponding screw holes on the Bobcat camera body and fastening with two 3mm mounting screws. 2.) Connect the Camera I/O connector from the USE-WiCC box (shown in Fig. 3), to the corresponding female connector on the Bobcat camera body. 3.) Connect the Camera Power connector from the USE-WiCC box (shown in Fig. 3), to the corresponding female connector on the Bobcat camera body. 4.) Connect the Bluetooth dongle to the USE-WiCC box. 5.) Connect the +12V DC adapter 3-prong plug to a source of 110V AC power. 6.) Connect the +12V DC adapter round plug to the +12V DC input on the USE-WiCC box. The Bobcat camera LED should light to indicate ‘Power On’. At this point, the USE-WiCC should be ready to communicate with the Android tablet. C. Android Device Set Up 1.) Wireless Communication Set-up (Note – The USE-WiCC is pre-configured so that the included Android tablet is already paired with the included Bluetooth dongle. The procedure below describes how to pair the Bluetooth dongle with other compatible Android devices.) In order for a compatible Android device (tablet, Smartphone, etc.) to communicate with the USE-WiCC, the device must be ‘paired’ with the Bluetooth dongle on the USE-WiCC as follows: 1.) 2.) 3.) 4.) On the Android device, navigate to the “Settings” screen. Verify that the Bluetooth interface is “ON”. In the Bluetooth settings menu, press “Search for Devices”. After a few moments, a device name with the following format should appear: “IOIO(xx:xx)” where (xx:xx) = combination of numbers and letters. www.uniforcesales.com -4- 5.) Pair to this device. You may be asked to supply a PIN number to complete the pairing process. Type in: 4545 for the PIN. 6.) Your Android device should now be paired with the wireless controller. (Note: the Bluetooth pairing process connects your Android device with the Bluetooth dongle on the USE-WiCC and not the USE-WiCC itself. If you remove a Bluetooth dongle from one USE-WiCC and insert it into another USE-WiCC, your Android device will still be paired with the Bluetooth dongle and you will connect to the new wireless controller automatically.) 2.) Wired Communication Set-up If a wired connection is desired between a Smartphone/Tablet and the Bobcat wireless controller, the user may remove the Bluetooth dongle and replace it with a USB-compatible cable between the Android device and the controller. D. Camera Compatibility – The USE-WiCC has been successfully tested with the following Imperx Bobcat cameras: SDI-B1320C (1280x720p/50; 1280x720p/59.94; 1280x720p/60) SDI-B1921C SDI-B1923C 1920x1080p/23.98;1920x1080p/24; 1920x1080p/25; 1920x1080p/29.97;1920x1080p/30;1920x1080i/50; 1920x1080i/59.94;1920x1080i/60) USE-WiCC Hardware Specifications: Imperx Camera Interface: +12V DC Input via Camera Power connector; RS-232 I/O via Camera I/O connector (Baud Rate: 9600 – 115200(default) USB port: USB 2.0 Type A USB Bluetooth Dongle: Bluetooth v2.0 + EDR Compliant External Trigger Input: BNC cable Power Supply: +12V DC 2A Power consumption: < 1 W Physical: Controller box: 7/8 ″(H) X 2.25″(W) X 1.75″(D) ; 3x (6” cable) Compatibility: Imperx Bobcat HD-SDI cameras: SDI-B1320, SDI-B1921, SDI-B1923. www.uniforcesales.com -5- D.) Android Apps Android Apps provide the functional and user interface to the USE-WiCC wireless controller. These are Android-based programs that can be run on any Tablet or Smartphone running the Android operating system, version 4.1 (“Jelly Bean”) or higher. They are designed to duplicate the same set of camera head set up and control operations included with the Bobcat “Configurator” PC-based software. At present there are three (3) apps that are certified for the USE-WiCC: CamInfo CamGain Color These Apps and any that follow can be identified by the ‘RGB’ Android logo shown below. Figure 4. – USE-WiCC App logo www.uniforcesales.com -6- CamInfo The CamInfo App provides basic information about the connected Bobcat camera and enables the user to set the SDI output format and frame rate. Startup 1.) If it is not already installed on your Android device, download the Android App (labelled “CamInfo_xxxxx.apk”) from the Applied Color Science website (www.appliedcolorscience.com) and install it. 2.) Make sure that the USE-WiCC and the Bobcat camera are connected and powered on. 3.) Make sure that the Bluetooth dongle is correctly inserted into the Type A USB port OR Make sure that the Android device is directly connected to the USE-WiCC via the appropriate USB cable. Run the ‘CamInfo’ App. 4.) After a few moments, you should see the text at the bottom of the screen change from “Searching for Bluetooth connection” to “Bluetooth Connected”. - continued - www.uniforcesales.com -7- www.uniforcesales.com -8- 5.) After a couple seconds, the following information will now be displayed: - Camera Model: a 12 character display of the Imperx Bobcat camera model designation. - Ser.#: the serial number of the camera. - Firmware Version #: the internal firmware version of the camera. - Resolution: the current screen resolution of the camera displayed as number of horizontal pixels X number of vertical rows. - Frame Rate: the current frame rate of the camera expressed in ‘frames per second’. (Note: when the camera is configured to run in “Interlaced” mode, the reported frame rate will be the FULL frame rate – IE., the rate for 2 interlaced fields.) - Temperature: the internal camera temperature reported in degrees Celsius. 6.) SDI Format Select control Using the buttons listed under the ‘SDI Format Select’ heading, the user can select various frame rates and SDI output formats specific to the camera in use. Upon pressing one of the SDI Format Select buttons, after a short delay the CamInfo App will display the new frame rate setting. (Note: the SDI format settings are color coded to specific Bobcat camera types. Pressing a format selection button for a camera model other than the one connected will have no effect.) 7.) “Back” arrow Pressing the “back” arrow (lower left on screen) will stop the App. www.uniforcesales.com -9- CamGain The CamGain App controls all of the gain functions on the Bobcat cameras. Both slider and pushbutton controls are available for analog and digital gain. Startup 1.) If it is not already installed on your Android device, download the Android App (labelled “CamGain_xxxxx.apk”) from the Applied Color Science website (www.appliedcolorscience.com) and install it. 2.) Make sure that the USE-WiCC and the Bobcat camera are connected and powered on. 3.) Make sure that the Bluetooth dongle is correctly inserted into the Type A USB port OR Make sure that the Android device is directly connected to the USE-WiCC via the appropriate USB cable. 4.) Run the ‘CamGain’ App. After a few moments, you should see the text at the bottom of the screen change from “Searching for Bluetooth connection” to “Bluetooth Connected”. www.uniforcesales.com -10- www.uniforcesales.com -11- 5.) After a couple seconds, the following information will now be displayed: Analog Gain: - Ch. 1 Gain: Numerical Value (in dB) of the current Analog Gain for the channel 1 camera tap. The slider bar position reflects this value relative to full scale. - Ch. 2 Gain: Numerical Value (in dB) of the current Analog Gain for the channel 2 camera tap. The slider bar position reflects this value relative to full scale. Analog Offset: - Ch. 1 Offset: Numerical Value (in counts) of the current Analog Offset for the channel 1 camera tap. The slider bar position reflects this value relative to full scale. - Ch. 2 Gain: Numerical Value (in counts) of the current Analog Offset for the channel 2 camera tap. The slider bar position reflects this value relative to full scale. - Digital Gain: Numerical Value (in dB) of the current Digital Gain for the camera (both tap 1 and tap 2 ). The slider bar position reflects this value relative to full scale. - Digital Offset: Numerical Value (in counts) of the current Digital Offset for the camera (both tap 1 and tap 2). The slider bar position reflects this value relative to full scale. - Camera ID#: a 12 character display of the Imperx Bobcat camera model designation. www.uniforcesales.com -12- 6.) Adjustments / Controls – A.) Pre Amp Gain – To change the camera Pre Amp gain, press one of the Pre Amp Gain selector buttons. The button will indicate when a selection has been made. B.) Gain and Offset These parameters can be changed in either of two ways: 1.) Slide or Tap the desired control Slider Bar to the intended position. 2.) Use the buttons labeled “+” or “-“ on either side of the desired control to make fine adjustments. In either case, the slider bar will indicate the current value of the control. C.) “Store User 1”, “Load User 1” , Load Factory” Store User 1 - Saves the current camera settings to the non-volatile memory onboard the camera. Load User 1 - Retrieves the ‘User 1’ camera settings from the nonvolatile memory onboard the camera. Load Factory - Retrieves the Factory Default camera settings from the non-volatile memory onboard the camera. D.) “Back” arrow Pressing the “back” arrow (lower left on screen) will stop the App. www.uniforcesales.com -13- Color The Color App enables control of the Bobcat camera Exposure settings and Color channel gain settings including the option to enable Auto- exposure and Auto-Whiote Balance. Startup 1.) If it is not already installed on your Android device, download the Android App (labelled “Color_xxxxx.apk”) from the Applied Color Science website (www.appliedcolorscience.com) and install it. 2.) Make sure that the USE-WiCC and the Bobcat camera are connected and powered on. 3.) Make sure that the Bluetooth dongle is correctly inserted into the Type A USB port OR Make sure that the Android device is directly connected to the USE-WiCC via the appropriate USB cable. Run the ‘Color’ App. After a few moments, you should see the text at the bottom of the screen change from “Searching for Bluetooth connection” to “Bluetooth Connected”. 4.) www.uniforcesales.com -14- www.uniforcesales.com -15- 5.) After a couple seconds, the following information will now be displayed: - Camera Model: a 12 character display of the Imperx Bobcat camera model designation. - Firmware Rev: the internal firmware version of the camera. - Exposure Time: the current exposure time in microseconds. - Red Gain: the RED color channel gain expressed as a multiplication factor. - Green Gain: the GREEN color channel gain expressed as a multiplication factor. - Blue Gain: the BLUE color channel gain expressed as a multiplication factor. 6.) Adjustments / Controls – - Auto Exposure Button: Pressing this button either enables or disables the camera’s internal auto exposure control mechanism. - Exposure Slider / RED Gain Slider / GREEN Gain Slider / BLUE Gain Slider These parameters can be changed in either of two ways: 1.) Slide or Tap the desired control Slider Bar to the intended position. 2.) Use the buttons labeled “+” or “-“ on either side of the desired control to make fine adjustments. In either case, the slider bar will indicate the current value of the control. www.uniforcesales.com -16- - Auto White Balance Mode – These three buttons select among 3 modes of camera color control: -Auto White Balance OFF No auto white balance operation is performed in the camera. - Auto White Balance ONCE The camera performs a ‘one time’ white balance adjustment. - Auto White Balance AUTO The camera performs auto white balance continuously. (Note: If you wish to enable the ‘Auto White Balance ONCE’ or ‘Auto White Balance AUTO’ modes, please ensure that the color gains are adjusted to 1.0) - “Store User 1”, “Load User 1” , Load Factory” Store User 1 - Saves the current camera settings to the non-volatile memory onboard the camera. Load User 1 - Retrieves the ‘User 1’ camera settings from the nonvolatile memory onboard the camera. Load Factory - Retrieves the Factory Default camera settings from the non-volatile memory onboard the camera. - “Back” arrow Pressing the “back” arrow (lower left on screen) will stop the App. www.uniforcesales.com -17- Troubleshooting / Added Assistance For additional information or questions, contact: HEADQUARTERS 42501 Albrae Street, Suite 210 Fremont, CA 94538 510.657.4000 ph 510.657.4010 fax www.uniforcesales.com [email protected] www.uniforcesales.com -18-