1
HOW TO ORDER
YOUR BINDERS
UK and Republic of Ireland:Send £4.95 (inc p & p) (IR£5.45)TOr
each binder to the address below:
Marshall Cavendish Services Ltd,
Department 980, Newtown Road,
Hove, Sussex BN3 7DN
Australia: See inserts for details, or
write to INPUT, Gordon and Gotch
Ltd, PO Box 213, Alexandria, NSW
No 1
Vol 1
2015
BASIC PROGRAMMING 1
THINKOFANUMBER...ANYNUMBER
New Zealand: See inserts for details,
or write to INPUT,Gordonand Gotch
(NZ) Ltd, PO Box 1595, Wellington
Malta: Binders are available from
local newsagents.
2
The RND function. IF.. .THEN. Variables. INPUT
MACHINE CODE 1
SPEED UP YOUR GAMES ROUTINES
There are four binders each holding 13 issues.
Some striking graphics to introduce you to
machine code
BACK NUMBERS
16
Copies of any part of INPUT can be obtained from the following addresses at the
regular cover price, with no extra charge for postage and packing:
UK and Republic of Ireland:
INPUT, Dept AN, Marshall Cavendish Services,
Newtown Road, Hove BN3 7DN
Australia, New Zealand and Malta:
Back numbers are available through your local newsagent
221
COPIES BY POST
BASIC PROGRAMMING 2
I IM
THE FOR...NEXT LOOP
The computer as a counting device and how
its used
PERIPHERALS
UNTANGLING YOUR SAVES AND LOADS
he ins and outs of storing and loading
taped programs
GAMES PROGRAMMING 1
GETMOVING ON ANIMATION
26
Easy characters from your computer's
standard graphics
INDEX
The last part of INPUT, Part 52, will contain a complete, cross-referenced index.
For easy access to your growing collection, a cumulative index to the contents
of each issue is contained on the inside back cover.
PICTURE CREDITS
Front cover: Ian Taylor. Inside front cover: Binder picture, Graeme Harris/AA
Page/Mt. Tamborine Observatory. Pages 8, 9, 12, 13, 15, Jeremy Gower. Pages
16-21, illustrations, Peter Bentley; photos, John Darling. Pages 22-23, (top), Kevin
O'Keefe, (bottom), Chris Lyon. Pages 24-25, Kevin O'Keefe. Page 27, illustratiop,
Chris Lyon; photo NASA. Pages 28-29, illustration, Chris Lyon; photo, Tony Stone
Associates. Pages 30-31, illustration, Chris Lyon; photo, Jerry Young. Page 32,
illustration, Chris Lyon; photo, Rex Features Ltd. Computer effects by
J.D. Audio Visual.
© Marshall Cavendish Limited 1984/5/6
All worldwide rights reserved.
The contents of this publication including software, codes, listings,
graphics, illustrations and text are the exclusive property and copyright of
Marshall Cavendish Limited and may not be copied, reproduced,
transmitted, hired, lent, distributed, stored or modified in any form
whatsoever without the prior approval of the Copyright holder.
Published by Marshall Cavendish Partworks Ltd, 58 Old Compton Street, London W1V 5PA,
England. Printed by Artisan Presss, Leicester and Howard Hunt Litho, London.
Our Subscription Department can supply your copies direct to you regularly at £1.00
each. For example the cost of 26 issues is £26.00; for any other quantity simply
multiply the number of issues required by £1.00. These rates apply anywhere in the
world. Send your order, with payment to:
Subscription Department, Marshall Cavendish Services Ltd,
Newtown Road, Hove, Sussex BN 3 7DN
Please state the title of the publication and the part from which you wish to start.
HOW TO PAY: Readers in UK and Republic of Ireland: All cheques or postal orders
for binders, back numbers and copies by post should be made payable to:
Marshall Cavendish Partworks Ltd.
QUERIES: When writing in, please give the make and model of your computer, as
well as the Part No., page and line where the program is rejected or where it does
not work. We can only answer specific queries — and please do not telephone. Send
your queries to INPUT Queries, Marshall Cavendish Partworks Ltd, 58 Old
Compton Street, London W1V SPA.
INPUT IS SPECIALLY DESIGNED FOR:
The SINCLAIR ZX SPECTRUM (16K, 48K,128 and +),
COMMODORE 64 and 128, ACORN ELECTRON, BBC B
and B+,and the DRAGON 32 and 64.
In addition, many of the programs and explanations are also
suitable for the SINCLAIR ZX81, COMMODORE VIC 20, and
TANDY COLOUR COMPUTER in 32K with extended BASIC.
Programs and text which are specifically for particular machines
are indicated by the following symbols:
SPECTRUM 16K,
48K,128, and + %.' COMMODORE 64 and 128
ELECTRON,
BBC B and B+
1[4 ACORN
7181
-
VIC 20
DRAGON 32 and 64
7
.
TANDY T1580
COLOUR COMPUTER
Dice throwing, quizzes and many
other computer games use random
numbers to create a seemingly
irregular sequence of events. Here
we show you how
Learning to program a computer is a bit
like learning to play football.
Theoretically, you could learn football
by practising one skill at a time, stepping
out onto the pitch for an actual game only
when you have mastered every move. But
you would learn slowly — and have very
little fun in the process.
Similarly with programming. One way
is to plough your way through a manual
which teaches one function at a time—but
never how to combine them. A better way
is to 'step out on the pitch' and start
playing! So where do you begin?
GUESSING
THE NUMBER
The easiest of all home computer games to
program is the one in which the computer
`invents' a random number and the player
tries to guess what it is.
Some computers use the
keyword RANDOMIZE. What
exactly does this do?
The Spectrum uses the function
RANDOMIZE 1 (or any other number) to
make sure that a program repeats the
same sequence of random numbers
each time it is run. This is useful if you
are trying to debug a program as it is
easier to find any mistakes if the
program does the same thing each
time.
The Acorn, Commodore and
Dragon computers use RND(-1) for the
same purpose. Again, any number will
do but it must be negative.
The Spectrum can also use the
function RANDOMIZE without a number,
or with a 0 after it, and this has quite
the opposite effect. It makes the
random number sequence even
more random.
THE RND FUNCTIO
All home computers have a random number
generator to allow you to invent such
games. This is operated in BASIC by the
function RND.
On some computers the numbers it produces, however, are not much use in their
original form – they are all decimalized
fractions between 0 and 0.99999999.
To demonstrate this, type in this
program, first entering NEW to clear out
any existing program:
10 LET X=RND
20 PRINT X
30 DOM 10
10 LET X=RND (0)
20 PRINT X
30 GOTO 10
10 LET X=RND (1)
20 PRINT X
G0T0 10
(Remember to tap ENTER or RETURN'', —
whichever your computer has — after each
line of program.)
When you RUN this program, all you will
get will be a string of long, decimalized
fractions — far too hard for a guessing
game (for why this is, see the chart on
page 7.)
So how can you get the computer to produce only whole numbers? By putting INT
(short for integer, or whole number) in
front of the RND, thus:
■
■
■
■
THE RND FUNCTION
HOW RANDOM NUMBERS
ARE CREATED
USING VARIABLES
THE INPUT STATEMENT
■
■
■
ADDING IF ...THEN
FOR COMPARISONS
TWO NUMBERS GAMES
YOU CAN PROGRAM
RANDOM NUMBER RANGES
each line.)
Whichever computer you are using, you
are not limited to using a range of numbers
from 0 to 5. You could equally well choose
10, or even 10,000 — but this last would
make the guessing game very hard indeed!
>LIST
10 LET AS • "TODAY IS
20 LET OS
. TUESOAY•
> 30 LET CS AS OS
USING VARIABLES
In writing the short program above, you
have not only selected a random number
but also given it a name: X. From now on,
whenever X crops up, the computer will
know you mean 'that random number you
just thought of.'
Such a name, which allows the computer to identify a number — so that it can
compare it with another number, or
multiply it, or divide it, or whatever you
wish — is called a variable.
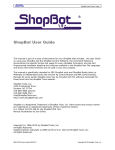
1. The cursor — a small underline on this machine, but a
`blob' on others — shows where
the next character you enter
will appear on the screen of the
television set
THE INPUT STATEMENT
10 LET X=INT (RND*6)
10 LET X=INT (RNO(1)*6)
This generates a whole number between 0
and 5. On other computers you do not have
to use INT. To generate whole numbers between 0 and 5, for example, you just type
aMl
INPUT G
ENTER or I RETURN) after
Some computers, such as the Acorns
and Dragon, go one better. They have an
extension of the statement, IF...THEN....
ELSE. In this case the computer does something else if the two numbers are not
equal.
On those computers without the ELSE
extension, such as the Sinclair and
Commodore home computers, the computer automatically skips to the next line
of program if, in this case, the two numbers are not equal.
PROGRAM OUTLINE
Now type in this program:
(The < > means "is less than or more
than" — in other words, G is notequal to X.)
1=
1=
20 LET X=INT (RND*6)
Now that your computer knows the secret
number it has generated, and your guess, it
can compare the two. This is done in a very
similar way to ordinary English:
550i0 11-11A0
IF X=G THEN PRINT "WELL DONE"
10 LET X=RND (6)-1
20 PRINT X
30 GOTO 10
(Remember to tap
Having generated the random number, the
next step is to warn the computer to accept
your guess at what that number is. So you
use the INPUT statement. This tells the
computer to wait until some information
has been typed in.
INPUT by itself, however, means nothing.
The computer must have a name by which
it can identify the data it will receive. So, as
before, a variable is used. In this case it is G
(for `guess'), but it doesn't have to be — it
could be any other letter, or combination
of letters, or even the whole word GUESS if
you feel that energetic.
So the whole statement is as follows (but
do not type it in yet):
The IF...THEN statement is clearly a very
useful one. In programming, you will use it
over and over again.
30 PRINT "THE COMPUTER HAS CHOSEN A
NUMBER BETWEEN 0 AND 5. CAN YOU
GUESS IT?"
40 INPUT G
60 IF G=X THEN PRINT WELL DONE"
80 IF G <> X THEN PRINT
"TOUGH LUCK — YOU'RE WRONG"
IA !HI
20 LET X=RND(6)-1
30 PRINT "THE COMPUTER HAS CHOSEN A
NUMBER BETWEEN 0 AND 5. CAN YOU
GUESS IT?"
40 INPUT G
60 IF G=X THEN PRINT "WELL DONE" ELSE
PRINT "TOUGH LUCK—YOU'RE WRONG"
20 LET X=RND(6)-1
30 PRINT "THE COMPUTER HAS CHOSEN A
NUMBER BETWEEN 0 AND 5. CAN YOU
GUESS IT? .
40 INPUT G
60 IF G=X THEN PRINT "WELL DONE" ELSE
PRINT "TOUGH LUCK - YOU'RE WRONG"
120 GOTO 100
00
20 LET X=INT(RND(1)*6)
30 PRINT "THE COMPUTER HAS CHOSEN A
NUMBER BETWEEN 0 AND 5. CAN YOU
GUESS IT?"
40 INPUT G
60 IF G=X THEN PRINT "WELL DONE"
80 IF G< >X THEN PRINT "TOUGH LUCK
—YOU'RE WRONG"
RUN this program, and you will see that it is
playable—but only just. To begin with, the
screen is a bit cluttered. On top of that, the
game expires after just one go.
To deal with the first problem, all you
need do is enter:
A4 !HI
AC 'HI
10 CLS
20 LET X=RND(6)-1
30 PRINT "THE COMPUTER HAS CHOSEN A
NUMBER BETWEEN 0 AND 5. CAN YOU
GUESS IT?"
40 INPUT G
50 CLS
60 IF G=X THEN PRINT "WELL DONE" ELSE
PRINT "TOUGH LUCK—YOU'RE WRONG"
90 PRINT "DO YOU WANT ANOTHER GO? IF SO,
PLEASE TYPE Y AND PRESS THE ENTER
KEY"
100 INPUT AS
110 IF AS="Y - THEN GOTO 10
120 GOTO 100
10 CLS
50 CLS
Finding your way out
Beginners sometimes find it difficult
to interrupt a RUNning program and
get back to the program listing —
perhaps because it needs amendment.
This usually happens when the
computer is expecting a series of
INPUTS. Whatever you type, it seems,
simply fills the screen with rubbish.
10 PRINT -0"
50 PRINT - 0"
This statement means "clear screen" so
that only the new, relevant information
appears there.
To deal with the second problem is
slightly harder. One way round it would be
to enter:
90 GOTO 10
a
10 CLS
20 LET X=RND(6)-1
30 PRINT "THE COMPUTER HAS CHOSEN A
NUMBER BETWEEN 0 AND 5. CAN YOU
GUESS IT?"
40 INPUT G
50 CLS
60 IF G=X THEN PRINT "WELL DONE" ELSE
PRINT "TOUGH LUCK—YOU'RE WRONG"
90 PRINT "DO YOU WANT ANOTHER GO? IF SO,
PLEASE TYPE Y AND PRESS THE RETURN
KEY"
100 INPUT A$
To re-start the game automatically.
First press [CAPS SHIFT' and MACE to
BREAK. If this doesn't work you could
be in INPUT mode. If this is the case,
use the cursor controls and DELETE to
remove any quotation marks. Then
use STOP (shifted A), then 'ENTER This
gives you report H
"stop in INPUT.'
Now press ENTER again to list the
program.
.
—
Try pressingR UN/STOP1, then type LIST.
If this does not work, hold down
I RUN/STOPI while you press RESTORE
Then type LIST.
PushESCAPEE , then type LIST. If this
does not work, press the BREAK key
and then type OLD, then LIST.
Press BREAK, then type LIST. If this
does not work, push the RESET
button located on the left
side of the machine. Then type LIST.
STRING VARIABLES
A better way is to offer the player the
chance of another game if he wants it. This
may sound complicated, but in practice it
is quite straightforward.
Start by typing in the complete program. On the ZX81, leave out OR A$="y" in
Line 110.
10 CLS
20 LET X=INT (RND*6)
30 PRINT "THE COMPUTER HAS CHOSEN A
NUMBER BETWEEN 0 AND 5. CAN YOU
GUESS IT?"
40 INPUT G
50 CLS
60 IF G=X THEN PRINT "WELL DONE"
70 IF G=X THEN GOTO 90
80 PRINT "TOUGH LUCK—YOU'RE WRONG"
90 PRINT "DO YOU WANT ANOTHER GO? IF SO,
PLEASE TYPE Y AND PRESS THE ENTER
KEY"
100 INPUT AS
110 IF A$="Y" OR A$= - y" THEN GOTO 10
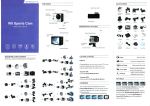
2. What punctuation means in
programming. The lines
at the top of the screen are
the programmer's instructions;
the other lines show how these
have been carried out. Thus a
comma (,) means `tabulate'; a
semi-colon (;) means 'close up
tight'; and a single quotation
mark (') on the Commodore,
Spectrum and Acorn machines
means 'begin a new line'.
110IF A$="Y" THEN GOTO 10
120 GOTO 100
0 ail
10 PRINT "Q"
20 LET X=INT (RND(1)*6)
30 PRINT "THE COMPUTER HAS CHOSEN A
NUMBER BETWEEN 0 AND 5. CAN YOU
GUESS IT?"
40 INPUT G
50 PRINT "a"
60 IF G=X THEN PRINT "WELL DONE.":GOTO
90
80 PRINT "TOUGH LUCK—YOU'RE WRONG."
90 PRINT "DO YOU WANT ANOTHER GO? IF SO,
PLEASE TYPE Y AND PRESS THE RETURN
KEY"
100 INPUT A$
110 IF A$= "Y" THEN GOTO 10
120 GOTO 100
As you can see, first you ask the player (in
Line 90) if he wants another game. Then,
to warn the computer to expect an answer,
you use in Line 100 the INPUT statement.
This time, however, there is an
important difference. After Line 20, the
player entered a number. This time he is
going to enter Y (for "yes") or N (for "no")
—not a number, but a letter.
This means that at Line 100, instead of
INPUT A, you must use INPUT A$.
The dollar sign is called a string, and A$
is known as a string variable.
Why is the $ necessary? To understand
this, you need to know a great deal about
how the computer stores and handles input
—the subject of a later chapter.
For now, the important point to
remember is:
When the computer is expecting a
number, you use INPUT A, INPUT B, INPUT X or
whatever.
When it is expecting a letter or word,
you must use INPUT A$, INPUT B$, INPUT X$
or whatever.
Line 120 is included so that, if the player
does not want another game immediately,
the computer waits until he does by
repeating the process until the answer does
equal Y. It does this by repeatedly jumping
back to Line 100 until a Y keypress after that
line breaks the cycle.
KNOW
YOUR TABLES?
The RND function has hundreds of uses in
programming. Suppose, for example, you
wanted a program to teach your eightyear-old son or brother his 9-times table.
You could set it up like this:
10 PRINT "WHAT IS 1 TIMES 9?"
20 INPUT A
30 IF A=9 THEN PRINT "CORRECT"
40 PRINT "WHAT IS 2 TIMES 9?"
50 INPUT B
60 IF B=18 THEN PRINT "CORRECT"
... and so on.
But this would give you a very long program — without even solving the problem
of how the computer responds if one of his
answers is wrong!
Use the RND function, however, and you
can produce a much more compact program that will not only ask all the right
questions, but ask them in random order —
a much better way of teaching, as well as of
programming.
Particularly when you are learning programming, it is always best to work out the
`core' of a program before adding the frills.
So first try these lines (remember NEW!):
10 LET N=INT (RND* 12+1)
20 PRINT "WHAT IS❑ "; N; "1=ITIMES 9?"
30 INPUT A
40 IF A=N*9 THEN PRINT "CORRECT"
F-1
10 LET N=RND(12)
20 PRINT "WHAT IS ❑ "; N; "1=1 TIMES 9?"
301NPUTA
40 IF A=N*9 THEN PRINT "CORRECT"
10 N=INT (RND(1)*12) +1
20 PRINT "WHAT IS ❑ "; N;" ❑TIMES 9?"
30 INPUT A
40 IF A=N*9 THEN PRINT "CORRECT"
This program is using RND in much the
same way as in the guessing game. In Line
10, you first set up a variable, or label, for
the random number the computer selects.
In this case it is N, but it could be any other
letter or letters.
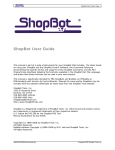
3. Computer symbols for basic
arithmetic. The * sign, and not
small x, is used for 'multiply.'
The / means 'divided by,' and
`raised to the power of,' (The
ZX81 uses ** instead). Plus and
minus signs are conventional.
Then, in the right-hand half of Line 10,
you tell the computer to pick a number —
any whole number — between 1 and 12.
(The +1 on the Spectrum, ZX81 and Commodore is necessary because their random
numbers start at 0 a number not wanted
for this job.)
In Line 20 you ask the player to multiply
—
by 9 whichever number the computer has
chosen this time. Line 40 warns the computer to multiply the random number by 9,
compare this with the player's answer and
—if the latter is correct —print "CORRECT".
RUN this program and you will find that
it works — once. You could make it continuous by adding:
50 GOTO 10
... but why not do the job properly, as here:
aNtoaaaA.
10 PRINT "HELLO. WHAT IS YOUR NAME?"
20 INPUT A$
30 CLS
40 PRINT "HELL0,111";AS, "I HAVE SOME - .
QUESTIONS FOR YOU"
50 PAUSE 200
60 CLS
70 LET N=INT (RND*12)+1
80 PRINT "WHAT IS ❑ ";N; "OTIMES 9?"
90 INPUT A
100 IF A=N*9 THEN GOTO 150
110 CLS
120 PRINT A;" ❑ ?"
130 PRINT "SORRY, PLEASE TRY AGAIN"
140 GOTO 80
150 PRINT "WELL DONE, ❑ "; A$,"HERE IS THE
NEXT ONE"
160 PAUSE 150
170 GOTO 60
Ell
NI
II
Push ESCAPE
10 PRINT "HELLO, WHAT IS YOUR NAME?"
20 INPUT A$
CLS
40 PRINT "HELL0,0";AS: PRINT "I HAVE
SOME QUESTIONS FOR YOU"
50 FOR X=1 TO 6000:NEXT X
60 CLS
70 LET N=RND(12)
80 PRINT "WHAT IS ❑ ";N;" ❑TIMES 9?"
90 INPUT A
100 IF A=N*9 THEN GOTO 150
110 CLS
120 PRINT A;"?"
130 PRINT "SORRY, PLEASE TRY AGAIN"
140 GOTO 80
150 PRINT "WELL DONE, ❑ ";AS:PRINT "HERE
IS THE NEXT ONE"
160 FOR X=1 TO 4000:NEXT X
170 GOTO 60
10 PRINT "HELLO, WHAT IS YOUR NAME?"
20 INPUT A$
30 PRINT "0"
40 PRINT "HELL0,1=1";AS:PRINT "I HAVE
SOME QUESTIONS FOR YOU"
50 FOR X=1 TO 2000:NEXT X
60 PRINT "CT
70 N=INT(RNO(1)*12)+1
80 PRINT "WHAT IS ❑ ";N;" ❑TIMES 9?"
90A=0: INPUT A
100 IF A=N*9 THEN GOTO 150
110 PRINT "0"
120 PRINT A;"I=I?"
130 PRINT "SORRY, PLEASE TRY AGAIN"
140 GOTO 80
150 PRINT "WELL DONE, ❑ ";AS:PRINT "HERE
IS THE NEXT ONE"
160 FOR X=1 TO 2000:NEXT X
170 GOTO 60
What most of these lines are doing will be
obvious when you RUN the program. But a
few are worth a comment:
Lines 30, 60 and 110 are to stop the
screen getting cluttered up with computer
chatter or columns of wrong answers. (RUN
the program with these lines deleted and
you will see the difference they make.)
0—]
Push1RUN/STOP .
4. The numbers at the start of
program lines are important.
Without them, the computer will
execute each line separately,
rather than carrying out the
program as a whole. However
you enter them, the computer
will automatically rearrange
the lines in numerical order.
Gaps between the numbers allow
you to amend the program later
Lines 50 and 160 simply waste time, 1):
making the computer 'count up to'
certain number before springing the nex
question on your unsuspecting infant
(How it does this is in BASIC Program
ming 2.)
In the Sinclair program the commas it
Lines 40 and 150, as all but absolute begin
ners will know, are to space out the mess
ages so there are no word splits at the enc
of the line. In the programs for the othe
machines, the colons and extra PRINT state
ments in Lines 40 and 150 are doing th(
same job
From the viewpoint of your eight-year
old, this program has one terribl(
disadvantage: it goes on and on without
stopping. You can release him from hi;
misery, like this:
Push STOP, then ENTER!
14 'Hi
Push 'BREAK!
From your viewpoint, on the other hand,
the program has a bonus feature:
Simply by changing the 9s in the program to 5s, 6s, 7s or whatever, you can test
him on all his tables.
And because the computer does all the
sums, you do not need to know any of the
answers yourself!
How do you specify a range of
random numbers?
RND on the Sinclair, RND(1) on the
Acorn, and RNO(0) on the Dragon and
Commodore generate a random
number between 0 and 0.999999. If
you want a larger range of random
numbers you have to multiply the
original RND function. For example to
generate a number between 0 and
39.999999, you would multiply the
original function by 40.
To generate a random whole
number, as opposed to a decimal
number, you use the integer or INT
function. The expression now looks
like this: INT (original function *40). It
will generate a number between 0 and
39 because the INT function merely
cuts off all the figures after the decimal
point.
Suppose you want to have a range of
numbers from 1 to 40. All you have to
do is to add 1 to the INT expression.
The Dragon and Acorn machines have
a shortcut. A whole number between 1
and 40 is generated when RND(40) is
typed. See the table for some
examples.
Specifying random number ranges
Generates a random number between 0 and 0.999999
Generates a random number between 0 and n*0.999999
Generates a random number between 10 and +10
Generates a random whole number between 0 and 39
Generates a random whole number between 1 and 40
—
RND(1)
RND(1)*n
RND(21)-11
INT(RN0(1)*40)
RND(40)
RND(1)
RND(1)'n
INT(RND(1)'21) —10
INT(RND(1)'40)
INT(RND(1)'40) +1
RND(0)
RND(0)*n
RND(21)-11
INT(RND(0)*40)
RND(40)
RND
RND*n
INT(RND*21)-18
INT(RND*40)
INT(RND*40)+1
Machine code is not just for the
experienced programmer. You can
start off by using short routines to
speed up your BASIC games—and
have fun while you're learning
Machine code programming — on the surface, anyway — is far from easy. To most
home computer owners, machine code is a
daunting maze of numbers.
The best way to begin is by actually trying
out some machine code routines. In this way
you, right from the start, will be familiar with
the advantages of machine code, and what it
can do for your programs. Then, in later
articles in the series, we will take you through
all the mysterious numbers so that you can
develop machine code programs of your own.
The graphics in this article use BASIC
programs to put machine code routines into
your computer's memory. In this way, you can
produce far faster and more lifelike movement
than you could using BASIC alone. Note that
because this is dependent on the characteristics
of individual computer's, the Sinclair and
Commodore programs are designed only for
the Spectrum and Commodore 64. Future
articles will show how you can apply these
Lct..nniqucb LU LLIC
La.A.01
B
One way to create this would be to use a
series of PRINT AT statements in BASIC:
To set up the graphics illustrated in figs 2
and 3 you will need to do three things.
First, you must set up in the computer's
memory a frame, or grid, which defines the
size of the graphic you want. At first, this
frame will be reproduced as a series of user
defined graphics characters (see below).
Second, you must enter a program
which will allow you to move the frame
around the screen.
Third, you must remove the user
defined graphics characters in the frame
and replace them with the graphic you
actually want — tank, frog or whatever.
PRINT AT 10,10; < graphics ABC>
PRINT AT 11, 10;< graphics DEF>
A better way is to use the machine code
routine which the BASIC program below
sets up. When you type it in, make sure you
use the Spectrum key words and not the
actual letters. CODE, for example, is entered
by pressing I CAPS SHIFT' and 'SYMBOL SHIFT'
together and then pressing the I key.
SPECTRUM UDG CHARACTERS
On the Spectrum a user definable graphics
character, or UDG character for short, is a
letter (such as A) which you can 'mould'
into something else.
411L1 V IL. GU.
Watch the numbers!
The numbers which make up machine
code routines must be typed into your
computer with great accuracy.
Once a routine is in memory, you
cannot normally recall it for amendment by using BASIC.
In this article, for example, the
BASIC programs which make the tank
and frog move can be changed at will.
You can experiment, too, by altering
the DATA which defines these two
graphics, because by doing this you
are only 're-shaping' the content of
the pictures.
But the program which sets up the
initial frames must be treated with
great care. RUN it only when you have
checked on the screen that your typing
is 'spot on'.
Each letter consists of 64 dots (some one
colour, some another) within an 8 x 8 grid
as in fig. 1. Provided you stay within the
grid, you can write a program which
changes each letter into any shape you like.
The Spectrum gives you 21 such letters:
A to U inclusive. As fig. 2 shows, you can
put these tiny grids together on the screen
to form larger frames. At any one time, for
example, you can have two 3 x 3 frames
(with three UDG characters left over), or
five 2 x 2 frames.
SETTING UP THE GRID
Both the frog and the tank illustrated in
this article need a 3 x 3 frame of UDG
characters, as under:
A
BC
E F
H
1.0 IF PEEK 23733=127 THEN CLEAR 32399:
LET B=32400: LET Z=0
20 IF PEEK 23733=255 THEN CLEAR 65199:
LET B=65200: LET Z=1
30 LET T = 0:FOR N=B TO B +129:READ
A:LET T= T + A:POKE N,A:NEXT N:READ
A:IF A< >T THEN PRINT "DATA
ERROR":STOP
40 IF Z=1 THEN POKE 65258,178: POKE
65259,254: POKE 65277,179: POKE
65278,254
50 SAVE "FramePrint" CODE B,130
60 STOP
100 DATA 24,55,1,22,0,0,32,32,32,22,0,0,
32,32,32,22,0,0,32,32
110 DATA 32,22,0,0,144,145,146,22,0,0,147,
148,149,22,0,0,150,151,152,22
120 DATA 0,0,153,154,155,22,0,0,156,157,
158,22,0,0,159,160,161,58,146,126
130 DATA 254,1,1,18,0,40,8,56,4,203,33,
24,2,14,0,221,33,147,126,221
140 DATA 9,58,137,92,71,62,24,144,221,
119,1,60,221,119,7,60,221,119,13,58
150 DATA 136,92,71,62,33,144,221,119,2,
221, 119,8,221,119,14,221,229,62,2,205
160 DATA 1,22,209,1,18,0,205,60,32,201,9913
This routine, you may feel, is a very longwinded way of entering the equivalent of
three PRINT AT statements. True, but it has
two big advantages:
1 Once you have typed it once, you can
SAVE it and use it over and over again.
2 In use, this routine will make the whole
frame (or the graphic you replace it with)
move about the screen much, much faster
than the equivalent BASIC.
Without knowing machine code you
cannot, of course, understand each of the
■
■
■
above DATA numbers. But in summary:
Lines 10 and 20 work out where the program will be stored. (If you have a 16K
machine the program is stored in a
different part of the machine from where it
would be in a 48K machine). Note that on
some 48K machines which have been upgraded from 16K, this may not work. If you
have a problem with a 48K machine, omit
Line 10 and substitute Line 20 with:
20 CLEAR 65199: LET B = 65200: LET Z =1
Line 30 tells the computer to memorize the
numbers out of DATA statements. If you make
a mistake in copying this long list of numbers
it will tell you there is a data error, so recheck
your entries in Lines 100 to 160. These lines
contain the numbers which, when placed in
memory, form your machine code routine.
SAVEing this program is done in a different way from usual. When you have typed it
and RUN it the screen will go blank and the
computer will prompt you to start your tape
recorder and then press "any key" to save the
routine on to e. To reLOAD it, use LOAD
"Frame Pri r
MOVING THE GRID
With the program still in memory (or
reLOADED from tape and RUN), you can
begin to use it. First type NEW and I ENTER I
so your new program does not corrupt the
old. Then type in:
20 LET print =32400: LET B=32402: IF PEEK
23733=255 THEN LET print =65200: LET
B=65202
90 BORDER 0: PAPER 0: INK 4: CLS
100 LET Y=8: LET X=15: LET Y1=8: LET
X1=15: LET Z=1
110 LET A$=1NKEY$
120 IF A$="z" AND X>0 THEN LET
X1=X-1: LET Z=1
130 IF AS="x" AND X < 29THEN LET
X1=X-1-1: LET Z=2
140 IF AS="p" AND Y>0 THEN LET
Y1=Y-1
150 IF A$="I" AND Y< 18 THEN LET Y1=Y+1
170 LET X=Xl: LET Y=Y1
180 PRINT AT Y,X;: POKE B,Z: RANDOMIZE
USR print
190 GOTO 110
SETTING UP A MOVEABLE
GRAPHICS 'FRAME'
GETTING FASTER MOVEMENT
A FROG THAT JUMPS—AND
A TANK THAT FIRES
Note that print in lower case letters has to be
typed in letter-by-letter, and is not the same as
PRINT on the P key.
This BASIC program lets you move the
frame around the screen using P-up; Z-left; Ldown; X-right. When you RUN the program
you will see that you have created not one 3 x 3
frame, but two, the second one consisting of the
letters JKLMNOPQR. This is to allow you to
have two versions of your final graphic—one
facing left as it moves left, and one facing right
as it moves right.
You will also notice something else: as
the frames move, they leave behind a trail
of unwanted characters. You do not need
to use up any of your UDG characters to get
rid of this clutter. All you need is:
160 PRINT AT Y,X;: POKE B, 0: RANDOMIZE
USR print
This produces a 3 x 3 frame of spaces
which rub out whatever is on the screen at
the Y,X position.
A
CREATING THE TANK
To turn your existing frames into a tank,
type in these few lines of statements plus
DATA. They define a tank pointing to the
left in frame 1, and to the right in frame 2.
10 FOR N=USR "a" TO USR "r" F7: READ A:
POKE N,A: NEXT N
1000 DATA 0,0,0,0,0,0,0,0,0,0,0,0,0,0,0,0
1010 DATA 0,0,0,0,0,0,0,0,0,0,0,0,255,0,1,O
1020 DATA 0,0,1,63,255,255,255,0,0,0,
192,224,254,254,224,0
1030 DATA 63,127,255,122,48,6,0,0,255,
255,255,235,65,102,0,0
1040 DATA 255,255,255,174,6,100,0,0
1050 DATA 0,0,0,0,0,0,0,0,0,0,0,0,0,0,0,0
1060 DATA 0,0,0,0,0,0,0,0,0,0,3,7,127,127,
-
7,0
1070 DATA 0,0,128,252,255,255,255,0,0,0,
0,0,255,0,128,0
1080 DATA 255,255,255,117,96,38,0,0,255,
255,255,215,130,102,0,0
1090 DATA 252,254,255,94,12,96,0,0
Two more UDG characters will 'arm' the
tank. First press BREAK, then type:
10 FOR N=USR "a" TO USR "t"+7: READ A:
POKE N,A: NEXT N
115 IF INKEYS=" ❑ " THEN GOTO 200
200 IF Z=2 THEN GOTO 300
210 FOR N=X-1 TO 0 STEP —1
220 PRINT INK 5;AT Y+1,N; CHR$ 162
230 PAUSE 1
240 PRINT AT Y+1,N;" ❑ "
250 NEXT N
260 GO TO 110
300 FOR N=X+3 TO 31
310 PRINT INK 5;AT Y+1,N; CHRS 163
320 PAUSE 1
330 PRINT AT Y+1,N;" ❑ "
340 NEXT N
350 GO TO 110
1100 DATA 0,4,9,2,176,2,9,4,0,32,144,64,
13,64,144,32
RUN this program, and you can use the
!SPACE' key to fire a shell.
CREATING THE FROG
To turn your existing frames into the frog,
you will of course first have to get rid of the
tank. So first type NEW, then ENTER_.
What this does is to clear away both the
tank and the program with which you
controlled it. The machine code program
which set up the frames, however, will still
be in the Spectrum's memory—unless you
have pulled the power plug.
If you have disconnected the power, first
type CLEAR 32399 on the 16K machine, or
CLEAR 65199 on the 48K machine. This
reserves for the machine code a space at
the top of the computer's memory, where
the BASIC you are going to enter cannot
reach — and corrupt — it. Next, type LOAD
"" CODE and switch on your tape recorder
to load the original machine code routine.
With the machine code loaded, type in
the following statements plus DATA to
define the frog. Then you can RUN the
program:
30 RESTORE 5000: FOR N=USR "a" TO USR
"r" +7: READ A: POKE N,A: NEXT N
5000 DATA 0,0,0,0,0,0,0,0,0,0,0,0,0,0,0,0
5010 DATA 0,0,0,0,0,0,0,0,0,0,0,0,0,0,1,1
5020 DATA 0,0,0,0,0,128,192,176,0,0,0,0,0,
0,0,0
5030 DATA 4,15,31,63,127,254,248,127,96,
240,224,192,64,32,156,192
5040 DATA 0,0,0,0,0,0,0,0
5050 DATA 0,0,0,0,0,0,0,0,0,0,0,0,0,1,3,7
5060 DATA 8,28,27,70,255,254,252,249,0,
0,0,0,0,0,0,0
5070 DATA 7,7,15,30,54,38,70,70,250,196,
0,0,0,0,0,0
5080 DATA 0,0,1,1,3,6,2,0,140,144,16,32,
32,48,32,0
5090 DATA 0,0,0,0,0,0,0,0
CONTROLLING THE FROG
To control the frog's movements, you need:
10 BORDER 0: PAPER 0: INK 4: BRIGHT 1: CLS
20 LET P=32400: IF PEEK 23733=255 THEN
LET P=65200
100 PRINT AT 10,0;: RANDOMIZE USR P: IF
INKEY$= "" THEN GOTO 100
110 RESTORE 1000: FOR F=1 TO 5
120 READ A,B,C: POKE P+2,A: PRINT AT B,C;:
RANDOMIZE USR P
130 PAUSE 2: CLS : NEXT F
150 PRINT AT 10,12;: RANDOMIZE USR P: IF
1NKEY$="" THEN GOTO 150
200 FOR F=1 TO 5
210 READ A,B,C: POKE P+2,A: PRINT AT B,C;:
RANDOMIZE USR P
220 PAUSE 2: CLS : NEXT F
230 GOTO 100
1000 DATA 1,10,0,2,7,3,2,5,6,2,7,9,1,10,12,
1,10,12,2,7,15,2,5,18,2,7,21,1,10,24
To set up the graphics illustrated in figs 2
and 3 you will need to do three things.
First, you must set up in the computer's
memory a frame, or grid, which defines the
size of the graphic you want. To begin
with, this frame will be reproduced as a
series of user defined graphics characters
(see below).
Second, you must enter a program
which will allow you to move the frame
around the screen. If your graphic is to be
part of a game in BASIC, this movement
routine will also normally be in BASIC.
Third, you must replace the user defined
graphics characters in the frame with the
graphic you actually want — tank, frog or
whatever.
ACORN UDG CHARACTERS
A better—if slightly longer—way is to use
a BASIC program to set up a machine code
routine, as shown below. This routine has
two advantages: once you have entered it
once, you can use it over and over again;
and of course it allows you to move your
graphics around the screen much faster
than you could using BASIC alone.
Before entering the program, type NEW.
Then type:
10 FOR T=&000 TO &D58
20 READ A:?T=A
30 NEXT T
40 *SAVE "FramePrint" 0000 +59
50 DATA 24,169,224,202,48,47,240,7,
202,240,2,105,9,105,9,162,3,160,3,32,
238,255,24,105,1,136,208,247,202,
240,21,72,169
60 DATA 10,32,238,255,169,8,32,238,255,
32,238,255,32,238,255,104,76,17,
&O0,96,169,32,162,3,160,3,32,238,
255,136,208,250
70 DATA 202,240,240,169,10,32,238,
255,169,8,32,238,255,32,238,255,32,
238,255,169,32,76,57,&0D
On the Electron and BBC B, a user definable graphics character, or UDG for short,
is a 'box' in which you can produce a
picture.
Each 'box' contains 64 dots within an 8
x 8 grid. Since they are all the same colour If you have a disk drive, this program will
as the background, the box is invisible to need some modification. Line 10 bebegin with. But provided you stay within comes....10 FOR T=M00 TO &A58. In Line
the box, you can change the colours of 40, replace....0000...with...0A00. And in
some or all of the dots to form any shape Lines 60 and 70, replace...&00...with... &OA.
you like. Now RUN the program. When you have
The Acorn machines normally let you finished, the computer will tell you to press
have 32 UDG characters. As fig 2 shows, the 'record' button on your tape recorder
you can put them next to each other on the and then press the computer's I RETURN I key.
screen to form larger shapes. At any one This will save the routine for immediate or
time, for example, you could have three future use.
3 x 3 frames with five UDG characters left
DO NOT BREAK
over. Or you could have eight 2 x 2 frames
— or even one massive 8 x 4 frame with Now a word of warning: do not use the
nothing left over. key at anyI BREAK
time while this machine
code routine is in your computer's memory
SETTING UP THE GRID
(as you might, for example, to amend a line
Both the frog and the tank illustrated in of BASIC program or of DATA). Using the
this article need a 3 x 3 frame of UDG BREAK key will corrupt the routine and you
characters, as under:
may be unable to get your program back
again.
226
225
224
Without knowing machine code you will
228
229
227
not
understand what the numbers in the
231
232
230
DATA statements above mean, but you may
You could create this using a series of PRINT find this helpful:
TAB commands, for example:
Lines 10-30 take the numbers out of the
DATA statement and place them into the
PRINT TAB (10,10); CHR$(224);CHR$(225);
memory of the machine.
CHR$(226)
Line 40 is the command needed to SAVE
your machine code routine. You can
PRINT TAB (10,11); CHR$(227);CHR$(228);
change the filename if you wish.
CHR$(229) . . . and so on.
MOVING THE GRID
Now you have a copy of the machine code
routine on tape you can begin to use it.
First you should clear the memory of
any 'rubbish; so type NEW. (This does not
get rid of the machine code routine, which
is protected from the NEW statement, or
any other BASIC, by its position in
memory.)
Next, to move the frame around the
screen, type in the following program:
10 MODE 1
20 VDU 23; 8202;0;0;0;
40 X=20:Y=20:X1=20:Y1=20:Z=1
50 A$=GET$
60 IF A$="Z" AND X>0 THEN
X1=X-1:Z=1
70 IF A$="X" AND X<37 THEN
X1=X+1:Z=2
80 IF A$="L" AND Y<29 THEN Y1=Y+1
90 IF A$="P" AND Y>0 THEN Y1=Y-1
120 X=X1:Y=Y1
130 VDU 31,X,Y:X%=Z:CALL 000
140 GOTO 50
(For
disk
drive,
in Line
130
replace...&000...with...&A00.)
You can now RUN the program and move
the frame using P-up, Z-left, L-down and Xright.
When the program is RUN you still will
not see very much. If you have just played a
game that uses UDG characters, you may
find that remnants of space ship or 'killer
gorilla' have invaded your frames. Otherwise, all you are likely to see is a horizontal
line when you move left. This is, of course,
because you have not yet defined the UDG
characters.
CREATING THE TANK
To make the program useful you can produce the tank in fig. 2 — pointing left in one
frame and pointing right in another. Press
'ESCAPE I , then enter:
30 GOSUB 260
260 VDU 23,224,0,0,0,0,0,0,0,0,23,
225,0,0,0,0,0,0,0,0
270 VDU23,226,0,0,0,0,0,0,0,0,23,227,
0,0,0,0,255,0,1,0
280 VDU 23,228,0,0,1,63,255,255,
255,0,23,229,0,0,192,224,254,254,
224,0
290 VDU 23,230,63,127,255,122,48,
6,0,0,23,231,255,255,255,235,65,
102,0,0
300 VDU 23,232,255,255,255,174,6,
100,0,0
310 VDU 23,233,0,0,0,0,0,0,0,0,23,234,
0,0,0,0,0,0,0,0
320 VDU 23,235,0,0,0,0,0,0,0,0,23,236,
0,0,3,7,127,127,7,0
330 VDU 23,237,0,0,128,252,255,
255,255,0,23,238,0,0,0,0,255,0,128,0
340 VDU 23,239,255,255,255,117,
96,38,0,0,23,240,255,255,255,215,
130,102,0,0
350 VDU 23,241,252,254,255,94,12,
96,0,0
380 RETURN
When you run this program you will notice
that the tank leaves a trail behind it. Type
this line in to get rid of it:
110 VDU 31,X,Y:X%=0.CALL &000
(For disk drive, replace the . . . &000 . . .
with ... MOO.)
This line produces a 3x3 frame of space
which rubs out what is on the screen at the
X,Y position.
After seeing the tank you may want to
create other graphics. This is quite easy, as
long as you stay within the 3x3 frame.
In the meantime, you have used only 18
of the 32 available UDGs. You can make
the tank fire a shell by defining two of the
other UDGs as shells, one for firing left
and the other for firing right. You need a
few lines to control the shell. So add these
lines to your existing program:
100 IF A$=" ❑ " THEN GOTO 150
150 IF Z=2 THEN GOTO 210
160 FOR T=X-1 TO 0 STEP —1
170 VDU 31,T,Y+1,242,8
180 AS=INKEY$(5):VOU32
190 NEXT T
200 GOTO 50
210 FOR T= X+3 TO 39
220 VDU 31,T,Y+1,243,8
230 AS=INKEYS(5):VDU 32
240 NEXT T
250 GOTO 50
360 VDU 23,242,0,4,9,2,176,2,9,4
370 VDU 23,243,0,32,144,64,13,64,144,32
As Line 100 indicates, the space bar is your
firing mechanism.
load up the routine from the tape you
SAVEd earlier. Next, using a slight variation
of the normal LOAD command, type
*LOAD"" and the computer will load the
program.
Now the computer is ready for the BASIC
program needed to define the frog. So
enter these lines:
30 VDU 23,224,0,0,0,0,0,0,0,0,23,225,0,
0,0,0,0,0,0,0,23,226,0,0,0,0,0,0,0,0
40 VDU 23,227,0,0,0,0,0,0,1,1,23,228,0,0,
0,0, 0,128,192,176
50 VDU 23,229,0,0,0,0,0,0,0,0,23,230,4,
15,31, 63,127,254,248,127
60 VDU 23,231,96,240,224,192,64,32,156,
192,23,232,0,0,0,0,0,0,0,0
70 VDU 23,233,0,0,0,0,0,0,0,0,23,234,0,0,
0, 0,0,1,3,7
80 VDU 23,235,8,28,27,70,255,254,252,
249,23,236,0,0,0,0,0,0,0,0
90 VDU 23,237,7,7,15,30,62,54,70,70,23,
238,250,196,0,0,0,0,0,0
100 VDU 23,239,0,0,1,1,3,6,2,0,23,240,
140,144,16,32,32,48,32,0
110 VDU 23,241,0,0,0,0,0,0,0,0
CONTROLLING THE FROG
These extra lines will make the frog jump
when the space bar is pushed:
10 MODE 1
20 VDU 23; 8202; 0; 0; 0;
120 X=0:Y=20:DY=0
130 VDU 31,X,Y
140 X%=1:CALL &D00
150 IF GETS=" "THEN GOSUB 180
160 IF X> 35 THEN VDU 31,X,Y:X%=0:CALL
&D00:GOTO 120
170 GOT0150
180 RESTORE: FOR T=1 TO 4
190 VDU 31,X,Y—DY
200 X%=0:CALL &000
210 READ F,DY
220 X=X+3
230 VDU 31,X,Y—DY
240 X%=F:CALL &000
250 A$=INKEY$(5)
260 NEXT T
270 RETURN
280 DATA 2,3,2,5,2,3,1,0
(For disk drive,
change the ... &D00
CREATING THE FROG
in Lines 140, 160, 200
Creating the frog is a similar job to and 240 to ... &A00.)
creating the tank. First you type NEW. This
RUN the
gets rid of the tank and its controlling pro- program. The DATA
gram, but leaves the machine code routine statements repreintact. (This routine will go only when you sent the height of
turn off the computer or press I BREAK I.)
the frog above
If you have just turned on the computer, 'ground' level.
To set up the graphics illustrated in figs 2
and 3 you will need to do three things:
First, you must set up in the computer's
memory a frame which defines the size of
the graphic you want. This frame is made
up of user defined graphics characters
which, on the Dragon, are invisible at first.
Second, you must enter the DATA which
defines the shape of your tank or frog in
the computer's memory (though not yet on
the screen).
Third, you must enter another program
which both prints the tank or frog and
makes it move.
DRAGON UDG CHARACTERS
A user defined graphics character, or UDG
for short, is a 'box' in which part of a
picture can be located. Within this box
there is an 8 x 8 grid of 64 dots, each of
which, in PM ODE 4,1, can be either black or
white. (PMODE 4,1 is a much more flexible
mode than the others, in which you have to
define not just one pixel, or 'dot; at a time,
but two pixels or four.)
Putting several UDGs together allows
you to build up much more detailed, larger
shapes called frames. Unlike some other
computers the Dragon has no inbuilt UDG
characters, but parts of its memory will
behave as UDGs if you write a program
telling them to.
In theory, you have hundreds of these
frames at your disposal. But using them all
would involve hours and hours of programming and, in practice, you will
usually use about five of them.
SETTING UP THE GRID
BUILDING THE TANK
To produce the frog in fig. 3 or the tank in
fig. 2 you first need to define a frame to put
the character in. Both need a 3 x 3 frame
of UDG characters— like that in fig. 1, but
with nothing in it!
This gives you an imaginary grid, 24
dots by 24 dots, which you can move
around the screen.
In Dragon BASIC, you would have to
PSET every dot in the frame — all 576 of
them. So the machine code routine is
faster.
First type in the following routine:
To build the tank you need to use
two frames — one for the left-pointing
tank and one for the rightpointing version.
Type NEW to get rid of the
old BASIC program (but not
the machine code) and then
enter the following lines:
10 CLEAR 200,32000
20 FOR I=32000 TO 32110
30 READ N
40 POKE I,N
50 NEXT
60 CLS
90 PRINT "PRESS ANY KEY TO SAVE MACHINE
CODE ROUTINE"
100 B$=1NKEY$
110 IF B$= "" THEN 100
120 CSAVEM"FRAMEPRN",32000,32110,
32000
130 DATA 190,127,188,134,3,183,125,111,183,
125,112,134,8,183,125,113
140 DATA 182,125,250,39,50,206,126,44,
74,198,72,61,51,203,166,192
150 DATA 167,132,48,136,32,122,125,
113,38,244,134,8,183,125,113,48
160 DATA 137,255,1,122,125,111,
38,230,134,3,183,125,111,48,
137,0
170 DATA 253,122,125,112,38,216,57,
95,231,132,48,136,32,122,125,113
180 DATA 38,246,134,8,183,125,113,48,137,
255,1,122,125,111,38,232
190 DATA 134,3,183,125,111,48,137,0,253,
122,125,112,38,218,57
Now you can SAVE the routine for immediate or future use. The computer will
prompt you to do this, so have your tape
recorder handy.
As well as producing faster graphics
than the equivalent BASIC program could,
this machine code routine is shorter and so
takes up less memory space.
Until you understand 6809 machine
code you cannot know what each number
in the DATA means. The overall 'picture',
however, is that —
Line 10 sets aside some memory for the
routine, at the same time protecting it from
corruption by any BASIC that you enter
later.
Lines 90 to 120 SAVE the machine code
from memory onto tape.
10 CLEAR 200,32000
20 FOR 1=32300 TO 32443
30 READ N
40 POKE I,N
50 NEXT
60 DATA 0,0,0,0,0,0,0,
0,0,0,0,0,0,0,0,0,0
0,0,0,0,0,0,0
PRINTING AND MOVINGJHE TANK
This BASIC program both PRINTs the tank
and allows you to move it around the screen.
Before entering it, do NOT type NEW this
would destroy the DATA you have just typed
in so carefully. On the Tandy, use 251 instead
of 239 in Line 380; 253 instead of 247 in 3 90;
247 instead of 223 in 400 and 410.
—
70 DATA 0,0,3,7,127,127,7,0,0,0,128,252,
255,255,255,0
80 DATA 0,0,0,0,255,0,128,0,255,255,
255,117,96,38,0,0
90 DATA 255,255,255,215,130,102,0,0,252,
254,255,94,12,96,0,0
100 DATA 0,0,0,0,0,0,0,0,0,0,0,0,0,0,0,0,0,
0,0,0,0,0,0,0
110 DATA 0,0,0,0,255,0,1,0,0,0,1,63,255,
255,255,0
120 DATA 0,0,192,224,254,254,224,0,63,
127,255,122,48,6,0,0
130 DATA 255,255,255,235,65,102,0,0,
255,255,255,174,6,100,0,0
This defines the tank in the computer's
memory, but still does not print it on the
screen. So the final stage is:
5 PCLEAR 5
170 PMODE 4,1
180 PCLS
290 PCLS
300 SCREEN 1,1
310 T=1
320 TP=3500
330 POKE 32700, INT(TP/256)
340 POKE 32701, TP-256*INT(TP/256)
350 POKE 32250, T
360 EXEC 32000
370 LP=TP
380 IF PEEK (338)=239 THEN
TP=TP-32:GOTO 440
390 IF PEEK (342)=247 THEN TP=TP-I-32:
GOT0440
400 IF PEEK (340)=223 THEN
TP=TP-1:T=2:60T0 440
410 IF PEEK (338)=223 THEN TP=TP+1:
T=1: GOTO 440
430 GOTO 380
440 IF TP< 1536 OR TP> 6941 THEN TP=LP
470 GOTO 330
Now you can RUN the program and move
the tank around the screen using P up, Zleft, L-down and X-right.
You will notice that the tank leaves a trail
behind it. To get rid of it, type in these lines
-
450 POKE 32250,0
460 EXEC 32000
This uses a special feature of the machine
code routine that prints a frame of blanks.
FIRING A SHELL
To make things more interesting you can
add a bit more BASIC program to move a shell
fired from the tank. Enter these lines and RUN
the program—the space bar will then fire the
shell. On the Tandy you need to type in 247
instead of 223 in Line 420, or the program
will not work:
160 DIM A(2), B(2), C(2)
190 FOR 1=1536 TO 1760 STEP 32
200 READ N
210 POKE I, N
220 NEXT
230 GET (0,0)—(7,7), A
240 FOR I=1536 T01760 STEP 32
250 READ N
260 POKE I, N:NEXT
280 GET (0,0)—(7,7), B
420 IF PEEK (345)=223 GOSUB 500
480 DATA 0,32,144,64,13,64,144,32
490 DATA 0,4,9,2,176,2,9,4
500 IF T=2 THEN 560
510 YP=INT ((TP-1536)/32)-1-8
520 XP=8*(TP-1533—(YP-8)*32)
530 IF XP> 255 THEN 620
540 PUT (XP,YP)—(XP+7,YP+7), A
550 GOTO 600
560 YP=INT ((TP-1536)/32)+8
570 XP=8*(TP-1537—(YP-8)*32)
580IF XP<0 THEN 620
590 PUT (XP,YP)—(XP+7,YP+7), B
600 FOR I=1T0100:NEXT
610 PUT (XP,YP)—(XP1-7,YP+7), C
620 RETURN
CREATING THE FROG
Fig. 3 shows the frames that you can define
now and which, when controlled properly,
will make the frog jump across the screen.
Unless you have just turned on the computer, the machine code routine should still
be in memory. If it isn't allocate some
memory for it by typing CLEAR200,32000.
Then type CLOADM and turn on your tape
recorder.
To define the frog you need these lines.
First type NEW to get rid of any "rubbish" in
the machine, and then enter this DATA:
10 CLEAR 200,32000
20 FOR 1=32300 TO 32443
30 READ N
10 POKE I, N:NEXT
60 DATA 0,0,0,0,0,0,0,0,0,0,0,0,0,0,0,0,
0,0,0,0,0,0,0,0
70 DATA 0,0,0,0,0,0,1,1,0,0,0,0,0,128,
192,176
30 DATA 0,0,0,0,0,0,0,0,4,15,31,63,127,
254,248,127
30 DATA 96,240,224,192,64,32,156,192,
0,0,0,0,0,0,0,0
100 DATA 0,0,0,0,0,0,0,0,0,0,0,0,0,1,3,
7,8,28,27,70,255,254,252,249
110 DATA 0,0,0,0,0,0,0,0,7,7,15,30,62,54,
70,70
120 DATA 250,196,0,0,0,0,0,0,0,0,1,1,3,
6,2,0
130 DATA 140,144,16,32,32,48,32,0,0,0,0,
0,0,0,0,0
CONTROLLING THE FROG
To make the frog jump, type NEW, then enter
the following. On the Tandy use 247 instead
of 223 in Line 100:
10 PCLEAR 5
20 PMODE 4,1
30 PCLS
40 SCREEN 1,1
50 FP=4487
60 POKE 32700,17
70 POKE 32701,135
80 POKE 32250,1
90 EXEC 32000
100 IF PEEK(345) < >223 THEN 100
110 RESTORE
120 FOR I=1 TO 5
130 READ F,FD
140 POKE 32700,INT (FP/256)
150 POKE 32701,FP-256*INT (FP/256)
160 POKE 32250,F
170 EXEC 32000
180 FOR J=0 TO 70:NEXT
190 POKE 32250,0
200 EXEC 32000
210 FP=FP-I-FD
220 NEXT
230 GOTO 80
240 DATA 1,-287,2,-253,2,258,2,291,1,0
The DATA statement at the end of the program contains the numbers that make the
frog jump. As you will see, the frog jumps in
an arc across the screen, giving the effect of
movement when you tap the space bar.
The best way to create graphics similar to
those in figs 1 and 2 is to use one of the
Commodore 64's special graphics features:
sprites, a 'king-sized' type of UDG.
CREATING THE TANK
The sprite program here covers three activities: an initializing routine, a control sequence to regulate the sprite's movement on
the screen, and data which is used to define
the shape of the tank sprite:
10 FOR M=252 TO 253:FOR I =64 . M TO
64'M+63: POKE 1,0: NEXT
20 FOR I=64*M+21 TO 64*M+56:READ
A:POKE I,A: NEXT:NEXT
60 SC=53248:X3=24:X=24:Y3=157:
Y=157
70 POKE 2043,252:POKE 2042,254:POKE
SC-F23,0:POKE SC+29,0:POKE
SC+42,12:POKE SC-F27,0
90 J=0:R=0:POKE 650,128:PRINT"0":
POKE SC-I-21,8
100 GET A$:IF A$=" "THEN 180
110 IF AS="Z"AND X3>24 THEN
X3=X3-12
120 IF A$="X"AND X3 <310 THEN
X3=X3-1-12
130 IF A$="P" AND Y3>50 THEN
Y3=Y3-12
140 IF A$="L"AND Y3 <220 THEN
Y3=Y31-12
180IF X<X3 THEN X=X+3:POKE 2043,253
190 IF X> X3 THEN X=X-3:POKE 2043,252
200 IF Y<Y3 THEN Y--=Y+3
210 IF Y>Y3 THEN Y=Y-3
220 XA=INT(X/256):XB=X—XA*256
230 POKE SC+6,XB:POKE SC+7,Y
240 POKE SC+16,4*(1 AND JA)+8*
(1 AND XA)
250 GOT0100
1000 DATA 0,1,192,0,63,224,255,255,254,
0,255,254,1,255,224,0,0,0
1010 DATA 63,255,255,127,255,255,255,
255,255,122,235,174,48,65,6
1020 DATA 6,102,100
1030 DATA 3,128,0,7,252,0,127,255,255,
127,255,0,7,255,128,0,0,0
1040 DATA 255,255,252,255,255,254,
255,255,255,117,215,94,96,130,12
1050 DATA 38,102,96
If you now RUN the program, you can see a
tank sprite displayed on the screen. You
can use the Z and X keys to move it left or
right, and the P and L keys to move it up
and down. Press LRUNJSTOP to terminate the
program. Notice how the tank sprite
changes shape when the direction of movement is altered.
ADDING SOME ACTION
So far you have used only one of the available sprites, and another sprite can be
created to add some firepower to the tank.
This shell fires across the screen when you
tap the space bar, and is obtained by
adding the following program lines:
30 FOR M=254 TO 255:FOR I=64*M TO
64*M+62:POKE I,0: NEXT
40 M2=0:IF M=255 THEN M2=2
50 FOR 1=64*M+18 TO 64*M+36
STEP3:READA: POKE I + M2,A: NEXT: NEXT
80 POKE SC+23,0: POKE SC+29,0: POKE
SC-I-41,1
150 IF A$< > "0"THEN 180
160 RT=(PEEK(2043)=253):X2=-360*RT:
Y2=Y:J=X-24*RT-11:POKE
three of the 24 rows, and the only effect of
this is to shorten the legs a little.
Either switch off and then back on or
simply type NEW RETURN and enter this:
10 FOR M=252 TO 253:FOR I=64*M TO
64*M+29:POKE I,0:NEXT
20 FOR I=64*M+30+30*(M=253) TO
64*M+62:READ A:POKE I,A:NEXT:NEXT
30 PRINT"Er
40 SC=53248:X=24:Y=155:POKE 2043,
252: POKE SC+7,Y:POKE SC+6,X:POKE
SC+16,0
50 POKE SC-I-23,0: POKE SC+29,O:POKE
SC+27,O:POKE SC+42,5:POKE SC+21,8
60 SC=53248:X=24:Y=155:POKE
2043,252:POKE SC+7,Y:POKE
SC+6,X:POKE SC1-16,0:YR=0
70 GET A$
80 IF Y> 155 THEN POKE 2043,252
90 IF PEEK (2043)=253 THEN 120
1001FAS<>" ❑ "THEN 70
110 POKE 2043,253:YR=7.5
120 Y=Y—YR:YR=YR—.7
130 X=X+4:IF X=296 THEN POKE
2043,252:FOR T=1 TO 200: NEXT:
GOTO 60
140 XA=INT(X/256):XB=X—XA*256
150 POKE SC+6,XB:POKE SC+7,Y:POKE
SC+16,(1 AND XA)*8:GOT070
1000 DATA 0,128,0, 1,192,0, 1,176,0
1010 DATA 4,96,0, 15,240,0, 31,224,0,
63,192,0
1020 DATA 127,64,0, 254,32,0, 248,156,0,
127,192,0
1030 DATA 0,0,28, 0,0,27, 0,0,70, 0,0,255,
0,1,254, 0,3,252, 0,7,249
1040 DATA 0,7,250,0,7,196,0,15,0,0,30,0,
2042,254—RT
0,62,0,0,54,0,0,70,0
170 POKE SC+21,12: GOSUB 260
1050 DATA 0,14,0,0, 0,144,0, 1,16,0, 1,16,0,
260 FOR T=J TO X2-4 STEP(R72 +1)* 20
1,32,0, 3,32,0, 6,48,0, 2,32,0
270 JA=INT(T/256):JB=T—JA*256
280 POKE SC+16,4*(1 AND JA)+8*(1 AND
XA)
290 POKE SC+4,JB: POKE SC+5,Y
300 FOR P=1 TO 30:NEXT: NEXT:RETURN
1500 DATA 4,9,2,176,2,9,4
1510 DATA 32,144,64,13,64,144,32
To SAVE the program for future use, first
type POKE 53269,0 (which clears the screen
of sprites) and then use a normal BASIC program SAVE.
If you try to SAVE without first clearing
the sprites, they will corrupt your program.
CREATING A FROG SPRITE
Now let's try the frog. The graphics of the
frog shown in fig. 2 have to be changed
slightly so that each can be accommodated
in a single sprite. This is done by removing
What's a sprite?
A sprite is a kind of high resolution user
defined graphic (UDG), also referred
to as a movable object block (MOB). It
is used as a kind of mobile component
of high quality Commodore 64
graphics, in preference to UDGs.
Unlike a UDG, a sprite offers Smooth,
easily programmable pixel-by-pixel
movement in any direction, just as if it
were a single character even though its
size is 24 x 21 pixels (compared to 8 x
8 for a standard character).
Normally up to eight sprites can be
displayed together anywhere on the
screen but the number can be
increased by special programming. A
group of sprites can be arranged side
by side, or overlaid for 3D effects.
Sprites can be easily doubled in size,
set for collision detection, adopt hi-res
or multicolour forms — in short, they
are extremely versatile.
Programming for sprites actually
proves simpler than that for UDGs if
sophisticated animation sequences are
required. For example, you don't have
to follow the trail of a sprite with a
blanking out routine to 'erase' what's
been printed in a previous position.
And sprites may be used with any of
the other graphics modes. Each
one's characteristics can
be changed at will.
All that a FOR ... NEXT loop does is to
make your computer count up to a
certain number, then stop. But you
can use it in everything from games to
business programming
The FOR . . . NEXT loop takes the hard work
out of many repetitive operations. It is used
when you want the computer to count for
you, usually executing some other
operations as it goes, then stop when it
reaches a predetermined number.
You can create your own "instant paintings" using FOR . .. NEXT loops in quite tiny
programs. You'll also find them useful in
games programming—indeed, in programs
of all kinds.
WHAT IS A FOR ... NEXT LOOP
A FOR . . . NEXT loop in BASIC is a device
which makes the computer repeat the same
operation a number of times.
Suppose, for example, you wanted to
know the square roots of all the numbers
from 1 to 100. You could tell the computer:
PRINT SQR(1)
PRINT SQR(2)
PRINT SQR(3)
. . . and so on. And each time you asked a
question, the computer would display the
answer. Quite apart from imposing unnecessary wear and tear on your typing
finger(s), this is not a particularly efficient
use of the computer. So:
aa
10 FOR n=1 TO 100
20 PRINT n, SQR n
30 NEXT n
40 PRINT "and that is all"
F'
10 FOR N=1 TO 100
20 PRINT N;" ❑ ";SOR(N)
30 NEXT N
40 PRINT "AND THAT IS ALL"
r
10:1 .14i
10 FOR N=1 TO 100
20 PRINT N, SQR (N)
30 NEXT N
40 PRINT "AND THAT IS ALL"
What this tells the computer to do is to
print 1 and its square root, 2 and its square
root, 3 and its square root . . . and so on
until it reaches 100, when it stops.
How does it do this? When the computer
encounters FOR . . . it knows that the following lines of the program are going to be
repeated. So it executes (carries out) all the
following lines until it reaches . . . NEXT.
Then it loops back to the line with FOR .. .
in it and repeats the process line by line.
While the computer is doing this, it is
also counting. The first time it reaches
Line 20 it calculates the square root of 1,
the second time around it calculates the
square root of 2, and so on.
Once it has dealt with the highest
number in the FOR . . . statement, the computer automatically quits the loop and goes
on to the next line of the program—in this
case, Line 40.
FRACTIONS, TOO
In carrying out a FOR . . . NEXT instruction,
the computer can count in units other than
1. Try this, for example:
DELAYING ACTION
FOR . . . NEXT loops have dozens of uses in
programming. And the easiest of them is
simply to waste time.
If you refer back to the 'Know your
tables?' program on page 7 you will find a
good example.
In this case, all that happens between
each FOR . . . and its NEXT is that the computer 'counts up' one number. Computers
count very rapidly, so this takes only a tiny
fraction of a second (the exact time varies
from computer to computer, but is in the
order of hundredths or thousandths). But by
the time it has counted to 1000 you have a
noticeable pause. And if you should program
it:
10 FOR N=1 to 1000000
20 NEXT N
. . . you would probably have time for a
coffee before it executed the next line in
the program.
10 FOR n=1 TO 30 STEP 2.7
20 PRINT n, SGR n
30 NEXT n
Fl
10 FOR N=1 TO 30 STEP 2.7
20 PRINT N;" ❑ "; SQR(N)
30 NEXT N
How can I keep track of the
variables in my programs, and
not get lost among all those
Xs and Ys?
Cr 1 Imo' al
Keeping track of your variables is
much easier if you give them names
that actually mean something in
English. In a short program, your
variables are easy to trace. But in
a longer program if, for example,
you are setting out material on the
screen, it is easier to remember
FOR row...and FOR column...than, say,
FOR x... and FOR y. Some computers
recognise only one- or two-letter
variables, discarding any other
letters. In this case, try using
suitable initials — T for time,
SC for score, HS for high
score, H for hits and so on.
This makes them very
easy to pick up.
10 FOR N=1 TO 30 STEP 2.7
20 PRINT N, SRN)
30 NEXT N
The computer, you'll notice, is not at all
deterred by the fact that 30 will not divide
evenly in the STEPS you have asked for. It
just goes as near as it can, then stops.
Nor is it bothered by the number of
lines between the FOR . . . part of the loop
and the NEXT part. You can write for FOR
. . . into Line 10 and the NEXT into Line
90—or even 9000 if you like—and your
computer will faithfully remember it.
Remember, though, that it will execute
all the lines within the loop every time it
passes through.
PEEL APPEAL
Games programmers often make such
pauses less boring by inserting a few notes
of a tune into them. Try this, for example:
10 FOR n=29 TO 10 STEP —1
20 BEEP .015, n
30 NEXT n
10 FOR N=160 TO 100 STEP —4
20 SOUND 1,-15, N, 1
30 NEXT N
14 IA
10 FOR N=12 TO 1 STEP-1
20 PLAY "140;04;" + STR$ (N)
30 NEXT N
This is the noise that programmers sometimes use to say 'You've failed' or 'The
alien has landed'. It illustrates one point to
remember: when you are counting downwards from a given starting point, your STEPS
must be minus 1 (or whatever)—not just 1.
(The Commodore 64 does not have a
simple sound command. You would have
to write a separate sound generating
routine between Lines 10 and 30, branched
to by a GOSUB in Line 20).
PAINTING BY
NUMBERS
Just for fun—plus valuable practice in programming—you can use FOR ... NEXT loops
to create a huge range of graphics effects.
Here is one example:
a
Use the right loop
There are many occasions for using a
FOR ... NEXT loop — and just as many
occasions when you shouldn't. The
rule is:
When you want a program
sequence performed a fixed number
of times, without breaking into it at
any stage, use a FOR ... NEXT loop.
When you want a program
sequence executed only until some
condition is fulfilled, and then want
to break out of the loop, use a
different statement instead. Most
often this will be GOTO, taking you
back to an earlier line to complete a
loop. But on some computers you can
use REPEAT... UNTIL instead.
10 FOR n = 0 TO 21
20 LET m= RND*31
30 INK RND*7 +1
40 PRINT AT n,m;"
50 NEXT n
60 GOTO 10
■"
8 MODE 2
9 M23;8202;0;0;0;
10 FOR row=0 TO 30
20 LET column=RND(19)
30 COLOUR 128+RND(7)
40 PRINT TAB(column,row)" ❑ ";
50 NEXT row
60 GOTO 10
IA Ili
7 CLUJ
10 FOR N= 0 TO 63
20 LET M=RNI)(32)-1
30 LET C=RND(9)-1
40 SET (N,M,C)
50 NEXT N
60 GOTO 10
Here, Line 10 sets the depth of the pattern
you are going to print on the screen, and
tells the computer to print it out one line at
a time.
Line 20 sets the width of the overall
pattern, and—with Line 40—tells the
computer to print little squares randomly
across that width.
Line 30 randomizes the colours in the
little squares.
10 PRINT "D"
15 FOR N=0 TO 24
20 M =INT(RND(1) . 16)
25 C=INT(RND(1)*40)
30 POKE 1024+(40*N)+C,160
40 POKE 55296+(40*N)+C,M
50 NEXT
60 GOTO 15
The Commodore program works in a
slightly different way from those on the
other machines. Line 15 counts off the
lines of the screen, from top to bottom.
Line 25 selects squares randomly across
the width of each screen line in turn, while
Line 20 chooses random colours to print in
each square.
VARIATIONS ON A THEME
Trying variations on this theme will help
make you familiar with both the FOR .. .
NEXT Statement and the RND function.
Here are two for each machine. Don't
forget the NEW between them.
a
10 FOR n = 0 TO 21
20 FOR m=0 T031
30 INK RNO*7 +1
40 PRINT AT n,m;" "
45 NEXT m
50 NEXT n
60 GOTO 10
■
10 LET n = RND*21
20 FOR m = 0 TO 31
30 INK RND*7 +1
40 PRINT AT n,m;"R"
45 NEXT m
60 GOTO 10
II
8 MODE 2
9 VDU 23;8202;0;0;0;
10 FOR row=0 TO 30
20 FOR column=0 TO 19
30 COLOUR 128+RND(7)
40 PRINT TAB(column,row)" ❑ ";
45 NEXT column
50 NEXT row
60 GOTO 10
8 MODE 2
9 VDU 23;8202;0;0;0;
10 LET row=RND(31) —1
20 FOR column=0 TO 19
30 COLOUR 128+RND(7)
40 PRINT TAB(column,row)" ❑ ";
50 NEXT column
60 GOTO 10
lEtar
8 CLS0
10 FOR N=1 T060
20 FOR M=0 TO 31
30 LET C=RND(9) —1
40 SET (N,M,C)
45 NEXT M
50 NEXT N
60 GOTO 10
8 CLS0
10 LET N=RND(60)
20 FOR M=0 TO 31
30 LET C=RND(9) —1
40 SET (N,M,C)
45 NEXT M
60 GOTO 10
Cr
10 PRINT "a"
20 FOR M=0 TO 999
30 LET C=INT(RND(1)*16)
40 POKE 1024+M,160
50 POKE 55296+M,C
60 NEXT M
70 GOTO 20
10 PRINT "Q"
20 LET N=INT(RND(1)*25)*40
30 FOR M=N TO N+39
40 LET C=INT(RND(1)*16)
50 POKE 1024+M,160
60 POKE 55296+M,C
70 NEXT M
80 GOTO 20
Do keywords such as PRINT
always have to be entered in
capital letters?
Yes — except on Commodore, where
you must use capitals if you are in
upper case mode, but small letters
if you are in text mode.
Before you go any further, here is a small
experiment you should try—on the Spectrum, Acorn, Dragon and Tandy only. Delete
Line 45 from the first of the two programs,
and RUN it again with this line substituted:
55 NEXT m
55 NEXT column
14 !HI
55 NEXT M
You have just discovered the final
important fact about FOR . . . NEXT loops:
when you have two such loops in the same
program, one must be 'nested' completely
inside the other or be completely separate.
If they overlap, your program will not
work.
On the Commodore the problem does
not arise on this occasion. But the principle—that one loop must be completely
inside the other—is the same.
SUNSET
PATTERN
This program uses a FOR . . . NEXT loop to
create a 'sunset' pattern. The first part of
the program fixes a point in mid-screen,
and draws from there to random points
across the top of the screen. The second
part draws perspective lines at the bottom
half of the screen, starting from a series of
fixed points.
5 BORDER O:PAPER O:INK 6:CLS
10 FOR n=1 TO 80
20 PLOT 127,75
30 DRAW INT (RND*250) —125. INT(RND*97)
40 NEXT n
45 INK 5
50 FOR n=75 TO 0 STEP —15
60 PLOT 127, 75
70 DRAW —127,—n: PLOT 127,75:
DRAW 127.—n
80 NEXT n
100 FOR n=-127 TO 127 STEP 20
110 PLOT 127,75
120 DRAW n,-75
130 NEXT n
II
10 MODE1
15 GCOLO, 2
20 FOR S=1 TO 80
30 LET X=RND(1280)
40 LET Y-512+RND(512)
50 MOVE 640,512
60 DRAW X,Y
70 NEXT S
75 GCOLO, 1
80 FOR L=0 TO 1280 STEP 40
90 MOVE L,512
100 DRAW(L-512)*4,0
110 NEXT L
fl
20 PMODE 3.1
30 PCLS 3
40 COLOR 2
50 SCREEN 1,0
60 FOR N=1 TO 80
70 LINE(127,95)—(256—RND(256),
96—RND(96)),PSET
80 NEXT N
90 COLOR 4
100 FOR N=95 TO 191 STEP 12
110 LINE(127,95)—(0,N),PSET
120 LINE(127,95)—(255.N),PSET
130 NEXT N
140 FOR N=0 TO 255 STEP 10
150 LINE (127,95)—(N,191), PSET
160 NEXT N
170 GOTO 170
!INSTANT
EMER011DERY
Finally, here is a really spectacular
program which works on four of our
machines:
10 FOR n=0 TO 255 STEP 2
15 INK RND*8
20 PLOT 0,0: DRAW n,175
30 PLOT 255,0: DRAW —n,175
40 PLOT 0,175: DRAW n, —175
50 PLOT 255,175: DRAW —n,-175
60 NEXT n
70 GOTO 10
II
8 MODE 2
10 FOR N=0 TO 1279 STEP 10
15 GCOL 0,RND(7)
20 MOVE 0,0: DRAW N,1023
30 MOVE 1279,0: DRAW 1279—N,1023
40 MOVE 0,1023: DRAW N,0
50 MOVE 1279,1023: DRAW 1279—N,0
60 NEXT N
70 GOTO 10
3 PMODE 3,1
6 PCLS
9 SCREEN1,0
10 FOR L = 0 TO 255 STEP 2
1 5 COLOR RND(4)
20 LINE (0,0)—(0 91),PSET
30 LINE (255,0)—(255-0 91),PSET
40 LINE(0,191)—(L,0),PSET
50 LINE(255,191)—(255—L,0),PSET
60 NEXT L
70 GOTO 10
You can experiment, too — by deleting
some of the 'drawing' lines, by varying the
colours, by lengthening the STEPs in Line
Each of the four segments of this pattern 10 and by excluding the GOTO line at the
begins with a dot in one corner of the end. In minutes you can create hundreds of
screen. What the FOR . . . NEXT loop is doing different patterns — 'instant embroidery,'
is to count across the opposite side of the in fact.
screen while a pattern of lines is drawn
In doing this, you are not just creating
between the pairs of points thus created.
pretty pictures on the screen. You are also
Exactly how the graphics work is in a helping to familiarize yourself with one of
later chapter. But try deleting Lines 30 and the most useful 'tools' available to the
40 and you will get the general idea. programmer.
Nothing is more infuriating than a
program which won't SAVE or a game
that won't LOAD. Here's how to get
the frustration down to an irreducible
minimum
Few things bring a newcomer down to the
harsh reality of computers' exacting
demands more quickly than early problems
of SAVEing and LOADing programs with a
cassette recorder.
Almost everyone has tape problems.
The causes are not always easy to isolate —
even when you do know your way round a
computer. Nor is it possible to completely
eliminate SAVE and LOAD errors by adopting
apparently fail-safe recording and playback procedures. But you can establish
routines which will minimize the risks.
CORRECT SET UP
-
Some computers use a purpose-built tape
recorder which makes a single direct connection to the host machine and there
should be no problem linking this up. But
most computers can be linked to any cassette-type tape recorder — often using
more than one type of lead combination.
Typically the lead consists of a DIN plug
connected to three jack plugs, but can be a
DIN plug to a DIN plug with or without a
jack plug.
If you buy a lead—or make one up from
existing audio leads you may have — do
ensure it is suitable: LOADing difficulties
will be evident right away if it is not.
CONTROL SETTINGS
An early — and important — step which
prevents a hit-or-miss approach to SAVE
and LOAD routines is to establish exact settings of the tone, volume and feature controls on the recorder you are using. Some
computer instructions provide precise
directions on the best way of doing this —
advice which you should follow carefully.
Others leave it all up to you. If you are
using a special data cassette recorder,
follow the specific setting-up instructions
which should be provided.
With an ordinary audio recorder, start
by switching out all the special features
such as noise reduction systems and filters.
Set the tone control(s) to give maximum
treble (`high') and leave the recorder in this
state whenever it is used with the computer. Switch out special filters.
JIB
Choose a mid-point volume setting and
try LOADing a prerecorded program, such
as on the demonstration tape which came
with your machine. If the program fails to
LOAD, try increasing the volume by a little
and running it again. If the program still
fails to LOAD, continue increasing the
volume, step-by-step, running the program
tape again each time.
If you reach the maximum setting with
no success, reset the volume control to
slightly less than the original mid-point
position and then progressively decrease
the volume setting, running the tape again
each time.
If for some reason the program fails to
LOAD at anv volume setting, check the con-
■
■
■
■
■
GETTING THE RIGHT SET-UP
CONTROL SETTINGS
THE SAVE COMMAND
VERIFYING YOUR SAVES
THE LOAD COMMAND
simply switch the machine off and then
back on) and enter this dummy program:
10 REM TEST
20 REM
30 REM
40 REM
and then follow the SAVE command routine
used by your computer. When you LOAD
and LIST, you should get the program back.
THE SAVE COMMAND
nections again. Try another lead or pro
gram tape, or borrow a tape recordet
known to work with your make of corn
puter. If nothing works ask your dealer's
advice — it could very easily be a fault with
your computer.
When you have found a successful
volume setting for LOADing, note the con
trol setting, establish upper and lower
limits, then mark the mid-point for future
use. You can usually leave the volume con
trol at the same setting for SAVEing opera
tions — many recorders have automatic
recording level control in any case.
To test that the volume levels are right
for SAVEing, clear the computer memory
(type NEW, then press ENTER or RETURN I of
The exact form of SAVE command used
with your computer is given in your
manual. But several preliminary steps are
needed.
Before SAVEing any program, load your
recorder with a suitable cassette and wind
it just past the point where the leader joins
the tape.
Next, decide on a suitable file name for
your program. All data is stored in the
form of 'files' of one type or another.
regardless of the actual storage methods
used. But, for recordings made on tape.
particular types of file names are used with
the SAVE command.
The file or program name can usually be
any combination of characters or symbols
within the line length specified for your
machine. On most machines the file name
is restricted to ten characters or less; only a
few permit anything longer.
You can call your program anything you
like within the allowable line length and
short abbreviations are just as good as
long-winded descriptions. But everything
that forms part of the file or program name
must be enclosed wholly by quote marks
before it can be recognised as such by the
computer:
SAVE " P ROG NAM E01"
SAVE "ProgName01"
Both these are valid SAVE commands—but
note the use of both capitals and lower case
letters in the second example. If you mix
capitals and lower case in this way on a
program name you must repeat the name
exactly when you ask the computer to LOAD
the program.
• Use a simple, reliable mono port
able recorder and, if you can, reserve
this for exclusive use with the corn
puter. Always use mains power tc
ensure constant motor speeds
• Avoid using sophisticated stereo
recorders unless its facilities can be
switched out and mono playback is
possible
• Use good quality audio or data tap(
— if you find a brand which is reliable
stick to it. A popular or much-worked
on program will be LOADed many time
and poor quality tapes will not put ut
with this treatment
• Watch the screen for specific
instructions — you must leave the
recorder in 'play' mode until LOADirq
is complete
• Try alternative volume, tone am
feature control settings on you
recorder if LOADing proves unsuc
cessful
• Move the recorder away from the
TV/monitor if a program won't LOA[
but has LOADed successfully before
Try another program recording to sec
if it works — if it does, the first tap(
may have been damaged in some way
• If volume settings need frequen
adjusting from program to program
mark the necessary volume setting:
on the label of the tape cassette
• Make a habit of rewinding tape:
after they have been used. This ma:
prevent you later trying to LOAD fron
blank parts of the tape. Start progran
searches at the beginning of a tap(
rather than put too much reliance or
the tape counter
• Store your program tapes in a dry
dust-free place, away from electrica
appliances and heat
• Make sure your new program LOA(
doesn't conflict with something
already in memory
Although my friends with
expensive cassette recorders
make a great thing about
cleaning their machines, is it
really necessary just for data
recording?
Perhaps more so. Regular maintenance
of the tape recorder—and its leads—
takes only a few minutes yet can save
the frustration of poor SAVES and
LOADS.
Use a good quality cassette recorder
cleaning kit to remove oxide deposits
from the drive mechanism and head(s)
of your recorder. Be especially careful
not to scratch the delicate head. Avoid
re-using 'bud' type wipes, though these
may be used with caution when new to
remove stubborn build ups which
cannot be handled by a play or two of
the cleaning tape. If you use cleaning
solution make sure it has an
alcohol — not solvent — base.
to 'record'. Enter your selected program
name after your computer's tape SAVE
command and then hit I ENTER' or I RETURN
The computer should then take control of
the recorder motor until the SAVE routine is
completed.
If control is left to you, enter the SAVE
command, put the recorder into 'record'
mode and then press I ENTER I or 'RETURN I. Wait
until the 'ready' prompt shows on the screen
display.
If you are storing a particularly
important program, repeat the SAVE routine for at least one backup copy – but first
make sure there is room on the tape to do
this. Better still, record the backup copy on
a quite separate tape.
The time taken for the program to load
depends on two factors: its size, in terms of
memory usage, and the speed of data flow
between the computer and recorder, which
is fixed on some machines and selectable
on others.
The most reliable recordings are made
at the slowest rates and many computers
will use their own minimum settings unless
instructed otherwise. Fast settings use less
tape and obviously SAVE and LOAD programs more quickly. With the very fastest
rates it is important to use top-quality
tapes and a proven recorder.
Other variations of the SAVE command
to deal with special applications are
explained in a later article.
Make a habit of labelling the cassette as
soon as you have made a new program
recording. Small, self-adhesive labels are
particularly convenient for this. Remove
the tab from the back of the cassette to prevent accidental erasing or overwriting of
an important program.
VERIFYING YOUR SAVES
One way of checking whether or not a program has been SAVEd properly is to LOAD
and RUN it. But this could mean the loss of
the program if the SAVE has not been successful. In the computer's memory you will
If you want visual spacing, consider
using punctuation marks (other than full
quotes) instead:
SAVE " P ROG . NAM E"
SAVE " P ROG/ NA M E"
SAVE " P ROG NAM E) "
If your computer is linked to a remote control facility on the recorder, set the controls
replace the program you want to SAVE with
the program on the tape. If the SAVE has
been successful, it will be the same thing.
But if the transfer has distorted the program in any way you will have lost the
original.
Many computers avoid this problem by
providing some form of VERIFY command.
Its use typically involves rewinding the
tape back to the start of the program, and
running the command using a file name
which exactly matches that used in the
SAVE command, for example:
VERIFY "PROGNAME01"
2. Here are two recorder leads you
could copy for use on your
computer. Check your manual for
the right pin configuration at the
computer end (lower left)
LOADing instructions for games you have
bought. Many of these will also use small
`loader' programs which initiate LOADing of
the much larger programs which follow. To
get these programs going, simply follow
the command and file name requirements
listed on the cassette.
The computer will then read through till
SAVEd program and check it against the on
it has in its memory. If the program ha
corrupted during recording an error me
sage will be displayed on the screen. Thi
gives you the opportunity to try the SAV
again until you are successful.
THE LOAD COMMAND
If you start by using prerecorded progran
tapes, your first problems are likely to bi
with the LOAD command. As with the SAV
command, there can be several types o
LOAD command even for a single type o
computer. But for the moment look at thy
simplest form:
LOAD "PROGNAME01"
This exactly duplicates the form of fill
address used by the SAVE and VERIFY con
mands – the program will not load if then
is any error in the program file name
Keying in the LOAD instruction and
pressing the 'play' key on the recorder
enables the computer to read the tape
signals. It searches first for a program
name, and will display all the program
names until it reaches the one which
matches the file name you have entered
after the LOAD command. When this name
is found, the data which follows is automatically LOADed into the memory.
If the recorder is remotely controlled by
the computer, the cassette drive automatically stops after loading, but it is up to you
to press the 'stop' key. If your recorder is
not controlled by the computer, press
`stop' when prompted to do so.
The program you LOAD will replace
whatever is already in your computer's
available RAM memory – so if you have an
important program in there, make sure
you have SAVEd it beforehand.
Wind the four-line test program back to
its start and try to LOAD it using the chosen
file name. If you have problems, refer to
the troubleshooting guide here.
Other forms of LOAD command are
needed for accessing machine code data,
for program relocation, and for merging
one program with another. Your first
encounter with these may be as part of the
Can I use old music cassettes
for recording program data?
Although it is best to use good quality
data tapes, perfectly acceptable results
are possible using top-quality audio
cassettes. If by 'old music cassettes'
you mean tapes which have lain
around on a parcel shelf of a car or in
some equally unsatisfactory storage
location, you are asking for trouble.
Tapes which have shed minute
fragments of their coating or bind
slightly may make no appreciable
difference if you are playing music—
but can wreak havoc on data SAVEing
or LOADing. Only one item of
information has to go astray for a SAVE
or LOAD error.
A further problem of using tapes
previously used to record data or music
is the continued presence of part of th
original signal after the new data
recording has been made. This
can easily spoil it.
2
Want to bring your games
programming to life? Then start with
these simple graphics characters—
you can produce them from the ROM
graphics on your computer
Playing commercial computer games is
fine up to a point, but the time comes when
most people feel the need to let loose their
imaginations and create their own games.
Games programming is not easy; you
have to start with simple things and build
up. But this helps you to learn to think logically and increases your programming
skill. You'll also have more fun.
In games programming the first thing
you need to learn, apart from BASIC skills,
is the technique of animation.
To create the illusion of movement, the
computer programmer uses much the
same techniques as the cartoonist who animates a movie. He creates two (or more)
pictures and alternates them rapidly —
ideally, about 24 times a second.
But there is an important difference. In
movie animation, the cartoonist can rely
on the film projector to get rid of each picture when it is no longer wanted. In computer animation this is not so. Unless you
do something about it, any segment of a
picture which you 'project' onto a given
area of the screen will stay there.
One way of getting rid of the unwanted
segment is simply to print something over
it. The computer cannot put two images on
the same screen location at the same time.
So if, for example, Line 10 tells the computer to print an A at a particular location,
any later line which prints (say) B at the
same location will dispose of the A as well.
The programs below include several
examples of this kind of substitution.
But what if you have nothing that you
want to print over the unwanted character?
Then you must remember to include in a
later line an instruction to print a space,
"Er, at the relevant screen location.
Forget this detail, and your screen can
easily be cluttered with unwanted bits of
arms, legs and bodies.
There are big differences between one
computer and another in the way you get
graphics characters on the screen. The
standard, or ROM, graphics characters
vary. So does the way you PRINT them on
I the screen. And so does the way you make
them move.
FOR... NEXT loop it makes the computer
pause and count, and animation is clearer.
Any number can be used in the FOR... NEXT
loop lines (Lines 15 and 25), not only 15.
Other numbers will simply give you a
longer or shorter delay.
Try adding these extra lines:
ittC1H1
A simple animation you can try on th
Dragon and Tandy is the small 'creepy crawl'
(below). To create him, program th
machine as follows:
)))
)))
)))
)))
000 < 000 < 000 < 000
))
)))
)))
)
15 FOR L=1 TO 15
17 NEXT L
25 FOR L=1 TO 15
27 NEXT L
10 PRINT 238, "000"
20 PRINT 206, ")))"
30 PRINT 241, "<"
40 PRINT 270, "H)"
Now you have a little insect which flails
about uselessly but, nonetheless, gives
believable animation. Movement comes a
little later (see Movement).
RUNning this program is rather an elab(
rate way to produce a simple image, but i
does illustrate some interesting points:
First, it gives you some feel for the rel .;
tive positions of the screen locations. Th
middle of the insect is about in the middl
of the screen, at location 239.
Second, it shows what happens whet
the machine is told to PRINT more than on
character at one screen location—it simpl
carries on and prints the characters at th
adjoining (higher numbered) location;
That is why the 'feelers' in line 30 are a
241. Locations 238-240 are alread
occupied by the insect's body.
A more convenient way of setting up th
insect is to amalgamate the program abov
into a single line. Incidentally, if you hav
not discovered it yet, on the Dragon then
is a shorthand for PRINT — just use th,
)
000 <
238, "000<":PRINT © 206,
")))":PRINT 270, ")))"
10 PRINT
If you add two more lines you get some
animation:
20 PRINT
238, "000<":PRINT 206,
(((:PRINT 270, "(11"
30 00T0 10
-
RUNning the program produces a blur an
does not look like animation at all. Thl
reason for this is that the pictures are being
swapped too quickly. If you insert
)))
)))
000 < 000-"d
)
)
)
LOW-RESOLUTION GRAPHICS
You can use the computer's low-resolution
graphics to create more interesting animations. The User's manual shows the graphics characters which you can use. Each
graphics character has a code (a value from
128 to 143). To display them on the screen
you use CHR$ then the code of the graphics
character in brackets.
For example, to display the character
represented by code 138 towards the
middle of the screen you would type:
10 PRINT @ 239, CHR$ (138)
charte"?.Wnpogramislte
the machine will show PRINT instead of ?.
The simplified program looks like this:
)))
000
The following program uses the low-resolution graphics to animate this spinning
satellite (fig. 1 shows two views ofit which are
alternated in the program).
1 0 CLEAR 500:CLS
20 PRINT@ 174,CHR$(143)+CHRS(141):
PRINT@ 178,CHR$(143)
■
■
■
THE PRINCIPLES OF
ANIMATION
MOVING GRAPHICS FROM
THE 'TYPEWRITER' KEYS
HOW TO USE ROM GRAPHICS
MOVEMENT
Here, at last, is a program which not only
animates the insect, but also moves it
across the screen:
10 CLS
20 FOR N=0 TO 28
30 PRINT@ 192+N,")))":PRINT@ 224+N,
"000<":13RINTO
256+N,")))"
40 FOR X=1 T010
50 NEXT X
60 PRINT@ 192+N," ❑❑❑ ": PRINT@
224+N,"00 DID": PRINT@
256±N," ❑❑❑ "
70 PRINT@ 192+N,"(11":PRINTO
224+N,"000<":PRINT@ 256+N,"((("
80 FOR X=1 T010
90 NEXT X
100 PRINT@ 192+N," ❑❑❑ ":PRINTO
224+N,"01:11=11=1" : PRINT@
256+N," ❑❑❑ "
110 NEXT N
120 6010 20
30 PRINT@ 206,CHRS(140)+CHRS(132)+
CHR$(141)
40 PRINT@ 236,CHR$(137)+CHR$(129)+
CHRS(129)+CHRS(129)+CHRS(129)+
CHR$(129)+CHR$(141)
50 PRINT@ 268,CHR$(135)+CHR$(132)+
CHRS(132)+CHRS(132)+CHRS(132)+
CHRS(133)+CHRS(135)
60 PRINT@ 300,CHRS(143):PRINT@
303,CHR$(133):PRINT@ 305,CHR$
(143)+CHRS(143)
70 FOR X=1 T010
80 NEXT X
90 PRINT@ 173,CHR$(141):PRINTO 177,
CHR$(141)
100 PRINT@ 205,CHR$(139)+CHR$(140)+
CHRS(140)+CHRS(137)
110 PRINT@ 236,CHR$(138)+CHR$(130)+
CHRS(130)+CHRS(130)+CHR$11301+
CHRS(130)+CHRS(143)
120 PRINT@ 268,CHRS(139)+CHRS(136)+
CHRS(136)+CHRS(136)+CHRS(136 ► ±
CHRS(137)+CHRS(143)
130 PRINT@ 300,CHRS(137):PRINTO
303,CHRS(143):
PRINT@ 305,CHR$(139)
+CHR$(141)
140 FOR X=1 T010
150 NEXT X
160 GOTO 10
Do not worry about Line 10 in the program. CLEAR 500 simply makes enough
memory space available for the strings
created by using CHR$ codes and CLS gives
you a clear screen for your animation.
Look up the graphics characters represented by the codes after CHR$ in the program. And by referring to fig. 1, try to see
how the spaceship is constructed. The program instruction `--FCHR$0' means 'PRINT
CHR$() on the next screen location?
There are three FOR... NEXT loops in the program. The two loops using X both do
exactly the same thing as in your first
attempt at using them — they slow the
printing down by causing the computer to
count to 10 each time.
The FOR... NEXT loop using N has a different function. The loop actually makes
the insect move across the screen one location at a time. (For how a FOR...NEXT loop
works, see BASIC programming 2.)
You may be puzzled that Line 20 reads
FOR N = 0 TO 28 when there are 32 spaces
(the top line numbered from 0 to 31) available in each line of the screen. The reason
for this is that the insect is four spaces long
— if you had any more than 28 the insect's
antennae would appear at the opposite side
of the screen, one line down. This is
because of the way the screen locations are
numbered. Screen location 32, for
example, is the first location on the second
row from the top of the screen.
Lines 60 and 100 appear to be PRINTing
nothing at all. Try deleting them and see
what happens, though. These are 'unPRINTing' lines as described earlier.
You can make up bugs and monsters on
Acorn machines simply by using the ordinary keyboard characters such as brackets,
dashes and letters.
Below is a small 'creepy crawlie' made
up this way which is very easy to animate.
To begin with, try creating him in a
static position.
)))
000 <
)))
)
))
000 <
)))
)
)
)
000
)
))
<
) ) )
000 <
) ) )
5 CLS
10 PRINT TAB(15,10);"000"
20 PRINT TAB(15,9);")))"
30 PRINT TAB(15,11);")))"
40 PRINT TAB(18,10);"<"
(Note that when you type in this program
you must not leave a space after TAB.)
Now RUN the program.
This is a very simple picture, and not
terribly lifelike, but it does illustrate one or
two interesting points.
First, it gives you an idea of the relative
positions of the screen locations. The
middle of your insect is on Line 10 from
the top and about halfway across the
screen.
Second, it shows the effect of telling the
computer to print more than one character
on a single location. It simply carries on
and prints the extra characters on the
adjoining locations. That is why the
`feelers' in Line 40 are at 18,10. Locations
15,10;16,10; and 17,10; are already
occupied by the insect's body.
To animate the insect you must overprint it with another slightly different one
and then swap quickly between the two.
Add these lines to draw the second
insect:
50 PRINT TAB(15,10);"000"
60 PRINT TAB(15,9);"(11"
70 PRINT TAB(15,11);"(11"
80 PRINT TAB(18,10);"<"
Add one more line and you have animation:
90 GOTO 10
When you run this new program you may
find the flashing cursor spoils the picture.
You can get rid of it by adding:
7 VDU 23;8202;0;0;0;
You may also want to change the speed at
which the legs move. You can slow them
down by using INKEY which tells the computer to wait for a while. The delay is measured in hundredths of a second, so
A=INKEY(100) means a delay of one
second.
Try adding these lines:
45 LET A=INKEY(50)
85 LET A=INKEY(50)
You can adjust the speed of the insect's legs
by varying the INKEY number until you get
realistic movement.
USING TELETEXT GRAPHICS
If you have a BBC computer you can make
better-looking characters using the computer's graphics set. (Making graphics characters on the Electron requires a different
procedure, and is covered in a later article.)
In MODE 7 the BBC computer can produce a whole range of block graphics which
you can build up into interesting shapes.
First draw out a shape on graph paper
and divide it into rectangles 2 squares
across by 3 squares down. Each of these is
a graphics character. Each character has a
number which is given in the back of the
manual.
If you look up the numbers and write
them out as shown in Fig 2, it is easy to
write a program to draw the picture on the
screen. Here is one example:
10 MODE 7
20 LET Y=10: LET X=15
40 VDU 31,X,Y,146,160,160,191,160,160
50 VDU 31,X,Y+1,146,184,163,255,240,160
60 VDU 31,X,Y+2,146,160,168,189,236,160
70 VDU 31,X,Y+3,146,160,224,165,234,176
80 VDU 31,X,Y+4,146,168,177,160,160,160
90 VDU 31,X,Y,146,160,160,252,160,160
100 VDU 31,X,Y+1,146,232,236,189,174,160
110 VDU 31,X,Y+2,146,162,238,177,160,160
120 VDU 31,X,Y+3,146,240,250,162,180,160
130 VDU 31,X,Y+4,146,161,160,160,245,160
140 GOTO 40
-41111M■
The VDU command controls the screen,
so that VDU 31,X,Y means PRINT TAB(X,Y).
The next number produces coloured graphics, 145 to 151 making all the different
colours. In this case, 146 draws the man in
green. The other numbers (160 and over)
are the ones that control the shape.
MOVEMENT
Making the man move across the screen is
also quite easy. All you do is start him in
position X=0 at the left of the screen and
move him one position at a time to the
other side.
The computer does this by using a
FOR... NEXT loop. So you will need to type in
two new lines:
30 FOR X=0 TO 35
140 NEXT X
The first line puts the computer into Mode
7, the Teletext mode. Line 20 sets the man's
position on the screen.
Lines 40 to 80 define the man in the first
position, while Lines 90 to 130 define him
in the second position. Again you may need
to use INKEY after Lines 80 and 130.
This prints the man at each position from
column 0 to column 35.
You may wonder why X only goes up to
35 when there are 40 columns on the
screen (from X=0 TO 39). The reason is
that the man is five columns wide. If he
went past the end of the screen, bits of him
would start appearing on the left-hand
side. Try changing Line 30 and see what
happens.
Now add two more lines to introduce a
slight delay:
85 LET A=INKEY(3)
135 LET A=INKEY(3)
Finally, add one more line to turn off the
flashing cursor:
15 VDU 23;8202;0;0;0;
Here, then, is the complete program:
10 MODE7
15 VDU 23;8202;0;0;0;
20 LETY=10
30 FOR X=1 TO 35
40 VDU 31,X,Y,146,160,160,191,160,160
50 VDU 31,X,Y+1,146,184,163,255,240,160
60 VDU 31,X,Y+2,146,160,168,189,236,160
70 VDU 31,X,Y+3,146,160,224,165,234,176
80 VDU 31,X,Y+4,146,168,177,160,160,160
85 LET A=INKEY(3)
90 VDU 31,X,Y,146,160,160,252,160,160
100 VDU 31,X,Y+1,146,232,236,189,174,160
110 VDU 31,X,Y+2,146,162,238,177,160,160
120 VDU 31,X,Y+3,146,240,250,162,180,160
130 VDU 31,X,Y+4,146,161,160,160,245,160
135 LET A=INKEY(3)
140 NEXT X
Notice that in this case there is no need for
any 'un PRINTing' spaces. The control code
146 acts as a blank space which automatically erases the previous image as the man
is moved along.
You would need them, though, if you
wanted to make the 'creepy crawlie' move,
so spaces are inserted in front of each
image as shown in the program below:
-
10 CLS
20 VDU 23;8202;0;0;0;
30 FOR X=1 TO 35
40 PRINT TAB(X,10);"I=1000<"
50 PRINT TAB(X,9);" ❑ )))"
60 PRINT TAB(X,11);"12)))"
70 A=INKEY(10)
80 PRINT TAB(X,10);"0000<"
90 PRINT TAB(X,9);" ❑ ((("
100 PRINT TAB(X,11);" ❑ 111"
110 A=INKEY(10)
120 NEXT X
11111.111MaIM
The Commodore version of the 'creepy
crawlie' uses exactly the same typewriter
symbols as do other machines, but the
method of creating him on the screen is different. Try keying in this program:
)
)
)
000 <
) ) )
) ) )
000 <
) ) i
) ) )
000 <
) ) )
) ) )
000<
) ) )
10 PRINT "Er
20 PRINT ")))"
30 PRINT "000<"
40 PRINT ")))"
50 PRINT -"
60 PRINT "111"
70 PRINT "000<"
80 PRINT "(11"
90 GOT010
When you RUN the program you will see a
rapidly alternating picture. It is created by
the separate sets of symbols in the PRINT
statements overlaying each other. At the
same time, the GOTO statement in the last
line creates a continuous loop: it tells the
computer to go back to the start.
Without Lines 10 and 50 the program
could not RUN properly. Both use the
special characters available in the 'quote
mode' of CBM machines, which allow you
to incorporate cursor movements and
other controls within an otherwise
standard PRINT statement.
How do they work? The HOME, symbol
(reverse S) in Line 50 returns the cursor to
the HOME position at the top left of the
screen. This means that subsequent screen
activity starts at this position, so the new
characters from Line 60 onwards overwrite the existing ones.
The CLEAR/HOME symbol (reverse heart)
in Line 10 does something more. Having
returned the cursor to the top left position,
it also clears the screen ready for the next
image to appear.
SLOWING IT DOWN
Until now, the 'movement' of the insect is
rather fast and could do with being slowed
down. This is most easily done by using a
FOR... NEXT loop. So next enter this line:
45 FOR T=1 TO 100: NEXT
When you press the [ RETURN] key and RUN
the program, the movement is much more
deliberate. The FOR... NEXT loop is acting as
a counter—in this case counting up to 100
before the program goes on to Line 50.
You can vary the length of the pause
simply by changing '100' to any other
number you choose: the bigger the
number, the longer the delay.
Try also changing the position of the
FOR...NEXT delay loop to Line 15.
Depending on the delay you select, there
should be a noticeable pause — a blank
screen—when one image is cleared but not
immediately replaced by another. This
shows why it is better to use HOME rather
than ,CLEAR/HOMEI, within a program of this
kind.
As it stands, the image is still rather
jerky, because the delay loop is acting only
on the first image. You can get a much
more purposeful movement by introducing
another FOR... NEXT loop into the program
to act on the second image. So enter this:
85 FOR 1=1 TO 50: NEXT
This delay loop is shorter, to create a
slightly irregular 'leg' movement, but you
can of course change it if you wish.
MOVING THE CHARACTER
The next step is to alter the program so
that the 'body' of the insect appears to
cross the screen. Commodore BASIC has no
PRINT AT statement, so other methods have
to be used to position characters.
In simple applications, you can use the
TAB function. TAB is always followed by
either a number enclosed within brackets,
such as TAB( 15) which places the cursor
at column 15 on the screen — or by a variable enclosed within brackets. And TAB
always forms part of the PRINT statement to
which it applies.
In this case, use a variable to make the
TAB position move across the screen. So use
another FOR... NEXT loop:
—
10 FOR P=0 TO 35
20 PRINT • 0" TAB(P) ")))"
30 PRINT TAB(P) "000<"
40 PRINT TAB(P) ")))"
45 FOR I=1 TO 100:NEXT
60 PRINT •'1§I" TAW') "111"
70 PRINT TAB(P) "000<"
80 PRINT TAB(P) "1(1"
85 FOR I=1 TO 50:NEXT
90 NEXT P
What you have done is to scrap the original
GOTO statement in Line 90. It is now
replaced by a FOR... NEXT loop which
increases, by 1, the value of the variable P
each time the program repeats itself. Since
P is part of the TAB statement, this moves
the insect across the screen by one step for
every cycle of the program.
When you RUN the program, you can see
the insect move across the screen and stop
at the right. To re-start the action, you
need:
100 GOTO 10
USING ROM GRAPHICS
The Commodore has a wide range of onboard graphics characters which can be
used for creating rather more elaborate
shapes and images.
To access the full range you have to be
familiar with the computer's "upper case
and graphics" mode, obtained by simultaneously pressing the C= I and I SHIFT I
keys.
Now try keying in a few of the graphics.
The left-hand symbol can be printed on the
screen by simultaneously pressing I C= I and
the chosen key letter. The right-hand
symbol is obtained in the same way but by
using the I SHIFTI and letter keys.
Other graphic symbols can be obtained
by using RVS (reverse), enabled by simultaneously pressing ICTRLI and 9, and
switched off by simultaneously pressing
I CTRL and 0.
The helicopter graphic (fig 3) uses unreversed symbols, and gives some idea of
ROM graphics. Here is the program:
Shown below is a small 'creepy crawly' which
is easy to animate on the Spectrum or ZX81.
To begin with, try creating him in a static
position, thus:
)))
))1
1))
))1
000 < 000 < 000 < 000 <
)))
)))
)))
)))
10 PRINT AT 10,15; "000"
20PRINT AT 9,15; ")))"
30 PRINT AT 11,15; ")))"
40 PRINT AT 10,18; "<"
5 PRINT "
0"
10 PRINT -21"
15 PRINT ❑ \
20 PRINTED"
\
25 PRINT 0 "
\
30 PRINT 0 "
\.----,
35 PRINT 0 " --r-:,:-.; ,.x.,.:c,(14 I
-r-`\T'
40 PRINT 0 " — —
45 PRINT ❑ "
\
50 PRINT [=I \
55 PRINT 0 "
60 FOR D=1 TO 50:NEXT
65 PRINT - 2"
70 PRINT Cl"
/
75 PRINT ❑ " .
/
____/_
80 PRINT ❑ "
-i-a./-4-,
85 PRINT 0"
I*I I
90 PRINT 0" --rxxX.,<X.,„m___r,
95 PRINT 1=1"—
..
..
..
..
.,
„
..
..
..
..
..
..
--/
100 PRINT "
105 PRINT "
110 PRINT " / "
115 FOR D=1 TO 50:NEXT
120 GOTO 10
Now RUN the program. This is a rather elaborate way of producing a simple image,
but it does illustrate one or two interesting
points.
First, it gives you an idea of the relative
positions of the screen locations. The
middle of your insect is on Line 10 from
the top, and about halfway across the
screen.
Second, it shows the effect of telling the
computer to print more than one character
on a single location: it simply carries on
and prints the extra characters on the
adjoining locations. That is why the
`feelers' in Line 40 are at 10,18. Locations
10,15; 10,16; and 10,17; are already
occupied by the insect's body.
A more convenient way of setting up the
nsect is to amalgamate the above instruc
ions into a single line, thus:
10 PRINT AT 10,15; "000<"; AT 9,15 ;" ► /1";
AT 11,15; ")))"
kdd two more lines, and you have anima
ion:
?0 PRINT AT 10,15; "000<"; AT 9,15;
"Ur;
AT 11,15; "M"
30 GOTO 10
When you RUN this program, you may find
hat it produces a blur — the pictures are
xing swapped too rapidly.
The best way to slow them down is to
use a FOR... NEXT loop, which makes the
computer count up to 10 (or whatever else
you like) before PRINTing the next picture.
So try adding these extra lines to your
program. On the ZX81 use 2 instead of 10.
15 FOR L=1 TO 10
17 NEXT L
25 FOR M=1 TO 10
27 NEXT M
Of course you can vary the length of the
pause simply by changing the 1 TO 10 to 1
TO 5, 1 TO 20 or whatever else you need.
So far you have created a rather useless
little insect, whose legs flail about madly
but who doesn't move. That comes a little
later (see Movement).
) ) )
000 <
) ) )
)
)
:i
) )
)
000 <
)
)
)
0 00 <
)
) )
) )
)
000 <
) ) )
USING ROM GRAPHICS
Somewhat more interesting animation can
be produced by using the standard Sinclair
graphics characters. One example is in
fig. 4.
The full program is given below, but if
you are not used to the graphics symbols it
will pay you to first create a static figure
one line at a time, thus:
1 PRINT AT 5,15; "0"
2 PRINT AT 6,15; "0 INN"
... and so on.
Getting these graphics characters is easy. To
get those in Line 2 above, for example, press
CAPS SHIFT' (ISHIFTI on the ZX81) and 9
simultaneously. This puts you in graphics
mode, indicated by a flashing G on the screen.
Then, on the Spectrum, press CAPS SHIFT and
6 together to get an inverse – black for white –
version of the symbol on the 6 key; then
CAPSSHIFTI and 8; then 6 by itself. On the
ZX81, press I SHIFT and T; SHIFT I and I SPACE ;
SHIFT I and Y. Finally push 9 again to get out of
graphics mode before inserting the quotes at
the end.
Here is the full program for the figure:
10 PRINT AT 5, 14; "0011"; AT 6, 14;
" MIN" ; AT 7., 14;
II";
AT 8, 14; "JE11!1"
20 PRINT AT 5, 14; " ❑ 0 ";AT 6, 14;
"le N"; AT 7, 14; "N 11";
AT 8, 14;
Dar
30 GOTO 10
n
" I
Again you may find that inserting a FOR ...
NEXT loop after Line 10, and again after
Line 20, is necessary to slow the action.
MOVEMENT
Here, at last, is a program which not only
animates the insect in the earlier program,
but also makes him move across the
screen:
10 FOR N=0 TO 27
20 PRINT AT 10,N;°000<"; AT 9,N;
"Ur; AT 11,N;"((("
30 PRINT AT 10, N; "1:1101=1"; AT 9, N;
"ODD"; AT 11, N; "DOD"
40 PRINT AT 10, N; "000<"; AT 9, N; ")))";
AT 11,N;")))"
50 PRINT AT 10, N; "DODO"; AT 9, N;
"ODD"; AT 11,N;" ❑❑❑ "
60 NEXT N
70 GOTO 10
This program also uses a FOR... NEXT loop,
but for a completely different purpose. In
the example above, the computer was
counting up fractions of a second before
printing an image. Now, it is moving an
image across the screen — one screen location (or 'box', if you like) at a time.
Why, then, does Line 10 read "0 TO 27",
when there are in fact 32 screen locations
across a Sinclair screen? To find out, try
replacing Line 10 in the program with:
10 FOR N=0 TO 32
Another puzzle may be the need for
Lines 30 and 50. But try deleting them;
you will soon see why they are needed.
cr
c 11-11A1U1
NEXT STEPS
Now that you have started to learn
animation and movement, you can begin
to invent figures — or rockets or space
ships — of your own, using the graphics
set illustrated in your manual, the
standard typewriter characters, or both.
If you decide to try any of the figures
illustrated for other makes of computer,
however, you cannot use the programs
as listed. Instead, you have to draw out
the figures on graph paper and evolve
your own programs from there.
CUMULATIVE INDEX
An interim index will be published each week. There will be a complete index in the last issue of INPUT.
A
Animation
26-32
Dragon, Tandy
Spectrum
14
10
Low-resolution graphics
see graphics
B
G
M
Basic programming
2-7
think of a number
the FOR ...NEXT loop 16-21
BREAK, Dragon, Tandy
4
Games, guessing
Acorn
4-5
Commodore 64, Vic 20
4-5
Dragon, Tandy
3-4
Spectrum, ZX81
3-4
Games programming
animation
26-32
Games routines
8-15
GOSUB, Commodore
18
GOTO
4, 18-21, 28
Acorn
Commodore
4, 18-21, 30
4, 18-21, 26
Dragon, Tandy
Spectrum, ZX81
4, 18-21, 31
Graphics
low-resolution
26-32
also see animation;
movement; ROM graphics;
teletext; UDG.
Grid, of UDG
see UDG
Gunshell, firing a
12
Acorn
15
Commodore 64
14
Dragon, Tandy
Spectrum
10
Machine Code programming
speeding up games routines 8-15
MODE, Acorn
28
Movement
Acorn
28-29
Commodore 64, Vic 20
30-31
26-27
Dragon, Tandy
Spectrum, ZX81
31-32
C
25
Cassette, choice of
Cassette recorders,
choice of
CHR$, Dragon, Tandy
CLEAR
Dragon, Tandy
Spectrum
CLOAD, Dragon, Tandy
CLS, explanation of
CODE, Spectrum
Cursor, definition of
14, 27
10
14
27
8
3
DATA statements
Acorn
Commodore 64, Vic 20
Dragon, Tandy
Spectrum
Delaying action
DIN, plug
11
14
13
8-9
17
22
D
24
26-27
E
H
ESCAPE, Acorn
4
F
FOR ... NEXT loop
definition of
delaying action
fractions program
graphics
in games
Acorn
Commodore 64
Dragon, Tandy
Spectrum
music
painting by numbers
patterns
nested loops
used in programs
using variations
Frog, controlling and
creating a
Acorn
Commodore 64
16-21
16
17
17
18-21
12
14
13
8-9
18
18
20-21
19
16-21
19
12
15
Helicopter, building a
Commodore 64
IF ... THEN
IF ... THEN ... ELSE
Acorn. Dragon, Tandy
INKEY
Acorn
INPUT statement
INT
Keywords, spelling of
31
3
3
28-29
3, 4-5
2-3
S
Nested loop, definition
and use of
NEW
Acorn
Commodore 64, Vic 20
Dragon, Tandy
Spectrum, ZX81
Numbers, painting by
19
11, 23
15, 23
13, 23
10, 23
18
P
12
PMODE, Dragon, Tandy
POKE
15
Commodore 64
13
Dragon, Tandy
PRINT AT
26-27
Dragon, Tandy
8-9, 31-32
Spectrum, ZX81
11, 28
PRINT TAB, Acorn
30
Commodore 64, Vic 20
Program
BASIC
8
BREAKing into
4, 7, 11
7
line numbers
4
punctuation of
17
slowing down
13
PSET, Dragon, Tandy
Punctuation, in programming 4
19
7
Line numbers, in programs
LIST function
4
LOAD
command
22-25
success at
23
LOOP, FOR ... NEXT
see FOR ...NEXT loop
2, 3, 4-5
Acorn
2, 3, 4, 5, 6, 7
Commodore 64
2, 3, 4, 6, 7
Dragon, Tandy
2, 3, 4, 6, 7
Spectrum, ZX81
ROM graphics
28, 29
Acorn
31
Commodore 64, Vic 20
26, 27
Dragon, Tandy
31, 32
Spectrum, ZX81
Running man, building a,
28-29
Acorn
31
RVS, Commodore
RAM
Random numbers
ranges of
also see games, guessing;
RND function;
RANDOMIZE; tables,
multiplication
RANDOMIZE
RND function
Satellite, building a
26-27
Dragon
SAVE
22-25
command
22
setting controls
24-25
verifying
10-15
Shell, firing a
Sprite definition and use of,
Commodore 64
14, 15
17, 21
STEP
4
STOP, Spectrum, ZX81
String variables
see variables
6
Symbols, arithmetic
Tables, multiplication
Tank, controlling and
creating a
Acorn
Commodore 64
Dragon, Tandy
Spectrum
Teletext graphics, BBC
5-7
11-12
14-15
13-14
10
28
8
UDG, definition of
UDG grids
Acorn
Dragon, Tandy
Spectrum
25
2-7 V
7
Variables,
names for
string
use of
VDU command, use of
Acorn
2
2-7
VERIFY command
11
13
8-9
17
4-5
3
28-29
24
The publishers accept no responsibility for unsolicited material sent for publication in INPUT. All tapes and written material should be
accompanied by a stamped, self-addressed envelope.
,UGet your games programs off the ground
with KEYBOARD CONTROL techniques—
how to make 'em move, how to make 'emfly
and how to make 'em shoot.
Fill the screen with graphic images with
easy, short programs to create UDGsfor
games characters of your own design.
UMake your computer earn its keep with you
own versatile DATA FILING system. You
can store and recall information on hobbies,
collections, names and addresses — and lots
more...
❑Learn how to use GOTO and GOSUB, the
doors and gates that give your BASIC
programs a logical structure.
,jPut your computer's decision-making
ability to work for you, with IF . . . THEN
routines to add to your BASIC programming
skills.


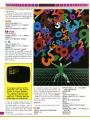
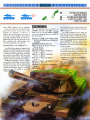

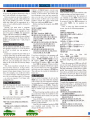

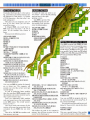


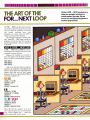
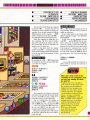

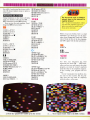


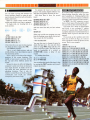


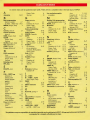


![v .] jCg _ 1l(_ `o,C..NN EinCOR `1_11E1](http://vs1.manualzilla.com/store/data/005961751_1-73960e1521729271050e00b8575619b8-150x150.png)