1
IND-MISPAFCMB4235
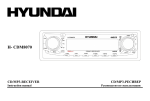
Bluetooth/CD/MP3/USB PLAYER WITH FM/AM TUNER
OPERATING INSTRUCTION
Safety Information
Thank you for purchasing this product. Please
read through these operating instructions so you
will know how to operate your model properly.
After you have finished reading the instructions,
keep this manual in a safe place for future
reference.
PRECAUTIONS
U se only in a 12-volt DC negative-ground
electrical system.
Disconnect the vehicle's negative battery
terminal while mounting and connecting the
unit.
When replacing the fuse, be sure to use one
with an identical amperage rating.
Using a fuse with a higher amperage rating
may cause serious damage to the unit.
DO NOT attempt to disassemble the unit. Laser
beams from the optical pickup are dangerous
to the eyes.
Make sure those pins or other objects do
not get inside the unit, they may cause
malfunctions, or create safety hazards such as
electrical shock or laser beam exposure.
If you have parked the car for a long time in
hot or cold weather, wait until the temperature
in the car become normal before operating the
unit.
Keep the volume at a level at which you can
hear outside warning sounds (horns sirens,
etc.).
Stop the car before performing any complicated
operation.
2
Contents
CD NOTES
Safety Information.......................................... 2
Playing a defective or dusty CD can cause
dropouts in sound.
Handle the disc by holding its inner and
outer edges. Do not touch the surface of the
unlabeled side of the disc.
Do not touch the unlabeled side.
Do not attach any seal, label or data protection
sheet to either side of a disc.
Do not expose a CD to direct sunlight or
excessive heat.
Wipe a dirty CD from the center outward with a
cleaning cloth.
Never use solvents such as benzine or alcohol.
This unit can not play 3-inch ( 8cm ) CDs.
Never insert a 3-inch CD contained in the
adapter or an irregularly shaped CD. The
unit may not be able to eject it, resulting in a
malfunction.
In addition to ordinary CDs, this unit can play
back a CD-R/CD-RW/MP3/UDF/CD-TEXT.
Panel Controls................................................ 3
CAUTION
Please power off this unit at once and send it
back to the after-sales service center or the dealer
/distributor you purchased from if one of the
following symptoms is found:
(1) Water or other obstacle enters the unit;
(2) Smoking;
(3) Peculiar smell.
Remote Controls............................................ 4
General Operation.......................................... 5
CD Player Operation...................................... 6
Tuner Operation............................................. 7
Playing MP3/WMA Files.............................. 7-8
USB MP3 Playback........................................ 8
Bluetooth Operation.................................. 9-10
System Menu............................................... 11
Electrical Connections.................................. 12
Installation Guide.......................................... 13
Troubleshooting............................................ 14
Specifications............................................... 15
To provide a clear demonstration and an
alternative for easy understanding of the
operation of this unit, graphic illustration
was used. However, this illustration is not
necessary printed as the actual image found
on the unit.
Panel Controls
1. - Power on
- Mute
- Power off(long press)
2. - Radio
- Disc (when disc is in)
- USB (when USB connected)
- AUX in
- BT Music (when bluetooth connected)
3. - Band select
4. - R
adio mode, scan preset stations, long
press to search and store strongest stations
in the memory automatically.
- MP3 search
5. - Answer phone
- Dial number
6. - Terminate call
7. - Aux-in jack
8. - USB connector
9. - Display switch
10. - SEEK mode
11. - Disc playback
Button 1: - Play/pause
- Start play from the beginning of the first
track.(long press)
Button 2: - Intro play (10 sec.)
Button 3: - Track repeat play
Button 4: - Track random play
Button 5: - MP3 folder down
- MP3 track -10 down (long press)
Button 6: - MP3 folder up
- MP3 track +10 up (long press)
- 1-6 Preset:
- Press to tune in a preset station.
- Long press to store station.
12. - Disc eject
13. - Disc slot
14. - Rotate to adjust volume
- Push to select VOL/BAS/TRE/BAL/FAD,
rotate the knob to adjust level.
- Press more than 2 seconds to enter menu
mode.
33
Remote Controls
Operating range
Point the remote control unit to the remote
sensor when you operate with it.
The remote control can operate within a
distance of 3~5m.
1. - Power on/off
2. - Mute
3. - Volume
4. - Press to select VOLUME/BASS/
TREBLE/BALANCE/FADER, use volume
button to adjust level.
- Press for more than 2 seconds to menu function.
4
5. - Loudness
6. - FM stereo/mono
7. - CD playback
Button 1: Press briefly for Play/Pause function.
Press for more than 2 seconds if you
want to start playback from the beginning
of the first track of your disc.
Button 2: Intro play (10 sec.)
Button 3: Track repeat play
Button 4: Track random play
Button 5: - Previous folder
- MP3 track -10 down (long press)
Button 6: - Next folder
- MP3 track +10 up (long press)
- 1-6 Button: Radio preset
Press to listen to a preset station.
Hold more than 2 seconds to store station.
8. - Radio
- Disc play (when disc inserted)
- USB (when USB inserted)
- AUX-in
9. - Radio tune
-To fast search within a track/skip to next or
previous track
10.- AMS
Radio auto preset/Radio preset scan
- MP3 track/file/character search
- Call off / cancel
11.- Band switch:
FM1->FM2->FM3->AM1->AM2
- Dial/Receive call
12.- Radio local/distant
13.- Display switch
Replacing the lithium battery of
remote control unit.
When the operation range of the card remote
control becomes short or no properly, replace
the lithium battery with a new one. Make sure
the battery polarity replacement is correct.
1.Pull out the battery holder while pressing
the stopper.
2. Insert the button-type lithium battery with
the(+) mark facing upward. Insert the
battery holder into the remote control.
(CR 2025)
1
2
WARNING:
Store the battery where children cannot
reach. If a child accidentally swallows the
battery, consult a doctor immediately.
Do not recharge, short, disassemble or
heat the battery or dispose it in a fire.
Otherwise, the battery may start to give off
heat, crack or catch fire.
Do not leave the battery with other metallic
materials. Otherwise, the battery may start
to give off heat, crack or catch fire.
When throwing away or saving the battery,
wrap it in tape and insulate.
Otherwise, the battery may start to give off
heat, crack or catch fire.
General Operation
Power On/Off Button
Audio Controls
Display Selector (DISP)
Press the /
button to turn the unit on
when the vehicle ignition switch is on. Press
and hold the button to turn the unit off.
To adjust the bass, treble, balance and fader,
press the knob repeatedly until the appropriate
audio control appears on the display panel.
Within five seconds, rotate the knob to adjust
the audio settings for the selected function.
Press DISP (once for Radio mode or twice for
other modes), display shows the clock time for
5 seconds.
Press DISP, time displays. Press again for
more than 2 seconds, time display blinks.
Rotate the knob to set clock, press DISP again
to exit the clock setting.
Mode Button (SRC)
Press the SRC button to change between
Radio, DISC (when disc is in), USB (when
USB is connected) , AUX play or BT (Music
(when bluetooth connected).
Adjust Volume level
Rotate the knob to adjust volume level. Rotate
it clockwise to increase and anticlockwise to
decrease the volume.
Auxiliary Input
To access an auxiliary device:
1.C onnect the portable audio player to the
AUX interface on the front panel of the unit.
2.P ress the SRC button to select Aux-In
mode.
Press SRC again to cancel Aux-In mode and
go to the next mode.
Audio Mute
Press the /
button to mute the volume
from the system. “MUTE” will appear on the
display panel and the volume will be muted.
Press the /
button again, or rotate or
press the knob to return the volume level to
the setting in use before the Mute function was
activated.
55
CD Player Operation
Inserting a Disc
Seek Up/Next Track
Track Repeat Play Select
With the label surface facing up, fully insert
a compact disc into the disc slot until the
mechanism engages and pulls the disc in. Play
will automatically begin from the first track on
the disc.
NOTE: The unit is designed for play of
standard 5” (12 cm.) compact discs only. Do
not attempt to use 3” (8 cm.) CD singles in
this unit, either with or without an adaptor,
as damage to the player and/or the disc may
occur.
Press the next track >>| button during disc play
to select the beginning of the next track.
During disc play, press the RPT button (9)
to select “RPT ON” and repeatedly play the
selected track. Press RPT again to select “RPT
FOLD” and repeatedly play all tracks in the
current folder. Repeat play will continue until
RPT is pressed to select “RPT OFF”.
Disc Eject Button
Press the eject button to stop disc play and
eject the disc. The unit will revert to radio
operation. Discs may be ejected with the
vehicle ignition switch on. If an ejected disc
is not removed from the disc slot within 10
seconds of being ejected, the disc will be reinserted automatically.
NOTE: To prevent a disc from accidentally
being damaged, always remove the disc from
the unit when disc play is finished.
CD Play/Pause Selector
Press the 1 >/|| button to freeze disc playback.
Press 1 >/|| again to resume disc playback.
6
Seek Down/Previous Track
Press the previous track |<< button during
disc play to select the beginning of the current
track.
Cue/Review Functions
High-speed audible search to any section of
the disc can be made by the Cue and Review
functions. Press and hold the next track >>|
button to advance rapidly in the forward
direction or the previous track |<< button to
advance rapidly in the backward direction.
Scan Play Selector
During disc play, press the 2/SCAN button
to select “SCAN ON” and play the first 10
seconds of each track. When a desired track
is reached, press the 2/SCAN button to select
“SCAN OFF” and play the current track.
Random Play Select
During disc play, press the 4/RDM button
to select “RDM ON” and play all tracks on
the disc in random, shuffled order. Press
RDM again to select “RDM OFF” and cancel
Random Play mode.
Tuner Operation
Playing MP3/WMA Files
FM/AM Band
Display Information
Searching Folders/Files
During radio play, press the FM/AM button to
choose between three FM and two AM bands.
The indication “AM” or “FM” appears on the
display panel according to your selection.
During playback, ID3 tag information display
scrolling on the screen: FOLDER, FILE,
ALBUM, TITLE, ARTIST and Track Number/
Elapsed Time.
Up Tuning
Folder Up/Down
Press the seek up >>| button to tune stations
upward step-by-step. The current frequency
will be shown in digital format on the display
panel.
Press and hold the seek >>| button to the next
available station.
Press the 5/Folder- button to go to the previous
folder. Press the 6/Folder+ button to go to the
next folder.
1.Press the AMS button twice and press the
knob to access the “FILE SCH” option.
2.R otate the knob to select the desired
directory/song.
3.Press the knob to view the files inside the
selected directory.
4.Rotate the knob to select the song/file. Press
the knob to play the selected song/file.
Down Tuning
Press the seek down |<< button to tune
stations downward step-by-step.
Press and hold the seek down |<< button to
the previous available station.
Auto Memory Store
Press the AMS button to scan preset stations
1-6. Hold it to automatically select six strong
stations and store them in the current band.
The new stations replace stations already
stored in that band.
Direct Song/File Access
1.Press the AMS button once and press the
knob to enable direct track searching.
2.Rotate the knob to select a digit at the units
position.
3.Press the knob to confirm entry and the tens
digit will flash.
4.Rotate the knob to select the tens digit.
5.Repeat above steps to enter the hundreds
and thousands digit, if necessary.
NOTE: The unit will only allow the selection
of digits that correspond with the number of
files on the media you are searching.
6.O nce the track number appears on the
screen, press the knob to play the selected
song/file.
77
Playing MP3/WMA Files
MP3 Overview
MP3 is short for MPEG Audio Layer 3 and
refers to an audio compression technology
standard.
This product allows playback of MP3 files
on CD-R or CD-RW discs.
The unit can read MP3 files written in the
format compliant with ISO 9660. However
it does not support the MP3 data written by
the method of packet write.
The unit can not read an MP3 file that has
a file extension other than ".mp3".
If you play a non-MP3 file that has the
".mp3" extension, you may hear some
noise.
In this manual, we refer to what are called
"MP3 file" and "folder" in PC terminology
as "Track" and "Album", respectively.
Maximum number of directory level is 8,
including the root directory. Maximum
number of files and folders per disc is 256.
The unit may not play tracks in the order of
track numbers.
The unit plays only the audio tracks if a
disc contains both audio tracks and MP3
files.
When playing a disc of 8kbps or VBR*, the
elapsed playing time in the display window
will not be correct and also the scan play
may not function properly.
*VBR: Variable Bit Rate.
8
USB MP3 Playback
Note on creating your own CD-Rs
or CD-RWs containing MP3 files
To enjoy high quality sound, we recommend
converting to MP3 files with a sampling
frequency of 44.1 kHz and a fixed bit rate of
128 kbps.
DO NOT store more than 256 MP3 files per
disc.
For ISO 9660-compliant format, the maximum
allowable depth of nested folders is 8,
including the root directory(folder).
When CD-R disc is used, playback is possible
only for discs which have been finalized.
Make sure that when MP3 CD-R is burned
that it is formatted as a data disc and NOT as
an audio disc.
You should not write non-MP3 files or
unneeded folders along with MP3 files on the
CD-R otherwise it takes a long time until the
unit starts
to play MP3 files.
With some CD-R media, data may not
be properly written depending on their
manufacturing quality. In this case, data may
not be reproduced correctly. High quality
CD-R disc is recommended.
Up to 16 characters are displayed for the
name of an Album or a Track. ID3 TAG
version 1.x is required.
Note that the unit may not play tracks in the
order that you wrote them to the disc.
1.Loading USB equipment
Insert the USB into the connector and
the unit play the music in the USB storer
automatically and the LCD will show USBDRIV.
2.Take out USB equipment
Push the SRC button and switch to non
USB-DRIV mode, then take off the USB
storer, push up the cap.
USB Notes
USB functions (flash memory type) MP3
music play (1) USB flash memory 2 in 1 support (2) Fat 12 / fat 16 / fat 32 is possible (3)File name : 32 byte / dir name : 32 byte /
tag name : 32 byte (4) Tag (ID3 tag ver 2.0) - title / artist / album : 32 byte support
(5) USB 1.1 support USB 2.0 support (It can not support USB
2.0 speed. Just, get be same speed with
USB1.1)
(6)N o t a l l k i n d s o f U S B d e v i c e s a r e
compatible with the unit.
Bluetooth Operation
Note:
For your safety, avoid talking on the phone as
much as possible while driving.
Bluetooth is a wireless transmission way
for short distance. The built-in Bluetooth
can connect with the mobile phones having
Bluetooth function.
After connecting, you can control your mobile
phone through the unit.
Pairing
Use this function to establish a connection
between the unit and your mobile phone.
1.Turn on the unit.
2.Turn on Bluetooth function of your mobile
phone, keep phone within 3 meters to
the unit and start to search for Bluetooth
devices.
3.After the name of the Bluetooth module
“xxxx” appears on the pairing list of your
mobile phone, select it. At this time, a
pairing code is required. Enter the pairing
code “1234”, and the Bluetooth pairing
will process automatically. Some mobile
phones may instruct you to select connect
or disconnect, please select connecting.
Exit Pair
Receive
After pair successfully, if you want to
disconnect, press and hold
button to
disconnect Bluetooth connection.
1.After pair successfully, if there is a call
incoming, the unit switch to BT mode
automatically.
2.Press button to receive.
button to hang up.
3.Press
Make a call
1.Press SRC button to select BT MUSIC
mode.
2.Press button.
3.Rotate the knob to select from the following
list:
DIAL NUML dial number directly
DIALLED: dialed number
MISSED: missed call
RECEIVED: received call
ME PBK: Phone directory
SIM PBK: SIM directory
4. Press the knob to confirm the selection.
To dial a number directly, select DIAL NUM.
1.Rotate and press the knob to select phone
number.
- Press |<< button to delete a digit inputted.
button to reset entered number.
- Press
to dial out.
2. Press
Call Transfer
During talking, press
button to transfer
audio from the unit to your mobile phone.
Note:
Some mobile phones will transfer audio from
the unit to themselves once the incoming call
is answered.
BT Audio
To listen to audio from a bluetooth device and
control playback with the unit.
1.Press SRC button repeatedly to select BT
MUSIC mode.
2. To play or pause, press 1 >|| TOP.
To use a number in call log or directory, select
the option other than DIAL NUM.
99
Bluetooth Operation
Music Mode
A2DP
A2DP is short for Advanced Audio Distribution
Profile. The mobile phones supporting this
function can transmit stereo audio, whereas
the ones not supporting this function can
transmit mono audio only.
General Notes for Bluetooth
1.For some types of mobile phones, during
our test, after the mobile phones appear
connection successful, the unit still appear
waiting for pairing. At this time you must
find the unit’s Bluetooth module name “xxxx”
on the pairing list on your mobile phone
and select connecting in the submenu, then
the unit will appear CONNECT. Otherwise,
there is no voice coming out when
communicating, though the mobile phone
has already displayed CONNECT. Some
mobile phones, when it play back A2DP,
you must find the unit name in the phone’s
menu and reconnect (check your mobile
phone whether has the A2DP & AVRCP
functions).
2.When pairing, some types of mobile phone
hint that how to operate, for example, when
you make a phone call by the unit, if the
mobile phone voice dosn’t be transferred to
the unit, no voice comes out.
10
3.Depending on the mobile phone, if private
mode is selected, when you make a phone
call by the unit, or receive, the voice would
be transferred to the mobile phone. But
sometime the Bluetooth maybe disconnect
till the communication ends, then connects
your mobile phone to the unit automtically.
Some mobile phones maybe need pair
again.
4.For mobile phone, the Bluetooth device
name must be primary symbols or numbers.
Otherwise, some unpredictable issues
may occur during the Bluetooth devices
connecting and making phone call.
5.After CONNECT, if no sound produced,
please check whether the Bluetooth stereo
audio on the phone switched ON.
System Menu
Press and hold the knob more than 2 seconds
to enter menu mode , then each press changes
the mode as follows:
DSP mode:
Rotate the knob to choose DSP sound effect:
POP->ROCK->CLASSIC->JAZZ->DSP OFF
LOUD mode
When listening to music at low volumes, this
feature will boost the bass and treble ranges to
compensate for the characteristics of human
hearing.
BEEP ON/OFF
Rotate the knob to choose button beep sound
on or off.
DIM 1/2/3
To select Dimmer, connect the Light wire
to your car. Rotate the knob to select the
brightness of LCD.
STEREO/MONO mode
12/24 HOUR mode
Rotate the knob to choose FM stereo or
mono.
Rotate the knob to select 12 or 24 HOUR time
format.
LOCAL/DX
AUTO ON/OFF mode (BT mode)
Rotate the knob to choose radio local or
distant.
LOCAL: Only stations with strong signal can
be broadcast.
DX: Stations with strong and weak signals
can be broadcast.
Rotate the VOL/MENU knob to choose AUTO
CONNECT on or off.
* The factory default setting is “ON“.
ROLL ON/OFF
Rotate the knob to choose ROLL ON or OFF.
When ROLL is ON, the LCD will display ID3
TAG information cyclely.
When ROLL is OFF, the LCD will display
one of the ID3 TAG information, but user
can adjust it to other ID3 TAG information by
press [ BAND ] button.
VOL LAST/ADJ mode
Rotate the knob to choose VOL LAST mode,
the turn on volume level is the volume level of
latest power off.
Rotate the knob to choose VOL ADJUST
mode, press to enter A-VOL mode, then rotate
the knob to set the turn on volume level.
1111
Electrical Connections
Wiring Diagram
6
A
4
10
3
9
2
5
B
4
3
8
C
1
7
2
6
1
5
%
$
&
10
12
Light/orange
2+3
Antenna/black
Installation Guide
Installation Opening
Reset
This unit can be installed in any dashboard
having an opening as shown below. The
dashboard should be 4.75mm - 5.56mm thick
in order to be able to support the unit.
Press the RESET button with a pointed object
to reset the unit to the original status.
Note: Press the RESET button will erase the
clock setting and stored stations.
105mm
Installation Procedures
183mm
If the opening is too small, carefully cut or file
as necessary until the unit easily slides into
the opening. Do not force the unit into the
opening or cause it to bend or bow. Check for
sufficient space behind the dashboard for the
unit chassis.
1.If relevant, remove any other audio system
from the car.
2.Fastening the bolt and rubber cushion.
3.Perform the required electrical connections.
4.T hen check that everything works before
installing the main unit.
5.Remove the two screws on the top of the unit,
otherwise, the unit will not work.
*If you are not sure how to install this unit
correctly, contact a qualified technician.
5HVHW
1313
Troubleshooting
The following checklist can help you solve some problems which you may encounter when using the unit. Before consulting it, check the connections
and follow the instructions in the user manual. Do not use the unit in abnormal condition, for example without sound, or with smoke or foul smell can
cause fire or electric shock, immediately stop using it and call the store where you purchased it.
Problem
General
The unit will not switch on.
No sound
The unit or screen does not work normally.
DISC mode
The appliance will not play discs.
Sound skips due to vibration.
TUNER mode
Unable to receive stations.
Poor quality reception of radio station.
Preset stations are lost.
Possible cause
Solution
Car ignition is not on.
Turn your car key in the ignition.
Cable is not properly connected.
Check cable connection.
Fuse is burnt.
Replace fuse with a new fuse of the same capacity.
Volume is set at minimum or the mute
Check the volume or switch the mute function off.
function is on.
The unit system is unstable.
Press the RESET button.
The disc is inserted incorrectly.
The disc is dirty or damaged.
Mounting angle is over 30˚.
Mounting is unstable.
Disc must be inserted with the label side facing up. Clean
the disc and check for damage. Try another disc.
Adjust mounting angle to less than 30˚.
Mount the unit securely with the supplied parts.
The antenna is not connected properly.
Connect the antenna properly.
The antenna is not fully extended or it is Fully extend the antenna and if broken, replace it with a
broken.
new one.
Connect the permanent live on the unit to the permanent
The battery cable is not properly connected.
live on the vehicle.
USB mode
Unable to insert USB device.
The USB device cannot be read.
14
The USB device has been inserted the
Insert it the other way around.
wrong way round.
Check that the file system is in FAT or FAT32 format. Due
NTFS format is not supported.
to different formats, some models of storage devices or
MP3 players may not be read.
Specification
General
Power supply:
Maximum power output:
Continuous power output:
Suitable speaker impedance:
Pre-Amp output voltage:
Fuse:
Dimensions(WxHxD):
Weight:
Disc Player
12V DC (11V-16V)
Test voltage 14.4V, negative ground
45Wx4 channels
25Wx4 channels (4 ,10% T.H.D.)
4-8 ohm
2 .0V (CD play mode: 1KHz, 0 dB, 10 K load)
15A
181x104x168mm
1.96kg
FM Stereo Radio
Frequency range:
Usable sensitivity:
Quieting sensitivity(S/N=50dB):
Frequency response:
Stereo separation:
Image response ratio:
IF response ratio:
Signal/noise ratio:
87.5-108.0MHz
8dBμ
12dBμ
30Hz-15kHz
30dB (1kHz)
50dB
70dB
55dB
isc digital audio system
D
20Hz-20kHz
>80dB
Less than 0.20% (1kHz)
Below measurable limits
>55dB
Components
Mounting bolt (50mm)
Mounting collar
Wire connector
Operating instructions
Remote control unit
Rubber cushion
1
1
1
1
1
1
Note: Specifications and the design are subject to change without notice
due to improvements in technology.
MW(AM) Radio
Frequency range:
Usable sensitivity(S/N=20dB):
System:
Frequency response:
Signal/noise ratio:
Total harmonic distortion:
Wow and flutter:
Channel separation:
22-1620KHz
5
30dBμ
1515
PN:12707500xxxx