1
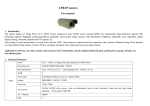
Highway LPR IP camera
User manual
1.Introduction
The camera adopts 2.1 Mega Pixel 1/2.8” SONY Exmor CMOS progressive scan sensor, featured WDR, low illumination, high definition. Special LPR
technology applied: Highlight compression(HLC) adjustable, multi-section shutter speeds, LED illuminators brightness adjustable, AGC adjustable, WDR
ON/FF, 3D-DNR, digital display setting, automatic snapshot and FTP upload, input linkage and output linkage, etc.
Easy setting: no need professionals, no need client software. BNC video output on control board for connection with a monitor. Manual setting all the function
on control board inside camera. Connect NVR or computer, playback video,pause and see license plates clearly.
Applicable in: highway, or freeway, city road, country road, entrance/exit of community, school, hospital, industrial park, parking lot or garage, toll
gate, etc. Surveillance place
2. Technical Parameter
Video
Model No.
CSK-7220CN
sensor
1/2.8" SONY 2.1 Mega pixel Exmor progressive CMOS sensor
Resolution max.
Full HD/1080P(1920x1080) + Full D1
Min. illumination
color:0.05Lux at F1.2
WDR
Y
video codec
H.264 Main Profile @ Level 4.1 / Motion JPEG
streams
FHD/1080P + Full D1 + CVBS
Frame rate
1-25fps/s(1920*1080、1280*960、1280*720)
video stream
H.264& M-JPEG video stream:video out multichannel video at max. Resolution.
H.264 support VBR/CBR
/ LED lights ON:0.001Lux at F1.2
Frame rate and video steam adjustable,
network
Storage
IE Web
interface
Audio
16:9 display
support
3D DNR
Y
ROI
Y
lens
f= 6mm/8mm/12/16 /25mm 3MP fixed lens optional
Network port
1 RJ45,10/100M self adaptive Ethernet port, 1 BNC,1 power supply port
network protocol
IPv4, TCP/IP, UDP, HTTP, DHCP, RTP/RTCP/RTSP, FTP, UPnP, DDNS, NTP, IGMP, ICMP ,etc
access agreement
WEB, SDK API, ONVIF
video
PC or NVR
snapshot images
TF card (max.32G) and/or FTP upload
Access from Web Browser
Camera live view, video recording, change video quality, motion detection, image snapshot, Privacy Mask, Text Overlay,
etc.
Two-way audio
1 channel linear input, 1kΩ; 1 channel linear output
Built-in watchdog
In unusual circumstances auto reset the system to ensure the normal operation.
remote reset
network remote reset
OS
Microsoft Windows XP/Windows 7
IE:Microsoft Internet Explorer 6.x or above
Video out
1.0Vp-p,75Ω
Power supply
AC220V
Operating temperature
-10℃—50℃
N.W:
3.5KG
Size:
L 390mm× W 140mm× H 143mm
safety
General
3. Installation and quick setting
3.1.Connect computer and LPR camera with 75Ωcoaxial cable at BNC port.
3.2. Connect power supply, if the upper casing is open,the indicator light is on
3.3. When the image appears in the monitor, adjust the focus and Iris to get clear image. Surveillance area: max. 5-8 meters wide.
3.4. LCD display: current traffic mode and its parameters.
3.4.1. Current electronic shutter speed: AUTO, 30KM/H, 60KM/H, 90KM/H, 120KM/H, 150KM/H, 180KM/H
3.4.2 HLC (highlight compression) value, WDR ON/OFF, AGC, 3D DNR,auxiliary light luminance value, input linkage and re-set
3.4.2. HLC intensity:E1—E6;
3.4.3. AGC:AUTO, C1—C5
3.4. 4.main LED fill-in light:00-32;
3.4.5 WDR:OFF, AUTO, 32, 64, 96;
3.4.6. 3D-DNR:OFF
3.4.7. Secondary fill-in light:00-32;
3.4.8
input linkage:OFF, ON
3.4.9. Reset:Y, N
Setting those parameter by a rocker switch: UP/DOWN, mode selection;
LEFT/RIGHT: parameter setting.
3.5. HLC/ highlight compression intensity is adjustable auto shift from daytime setting mode to night setting mode. When the intensity comes to E6 at night, it is
the upmost highlight inhibition, the image view is much darker. Be sure to set to a suitable intensity for best view license plates. Factory default: E1 in daytime,
E5 at night.
3.6. Set shutter speeds according to vehicle’s speed. If there’s a blur of image, choose a higher speed mode. If the vehicle is not moving at all, choose the shutter speed mode:
60KM/H.
3.7.When main auxiliary lights is too strong or too weak, set LED brightness value from 00 to 32 by Rocker Switch. The bigger value, the brighter LED illuminator. But it has to be
not too whitish license plates. Factory default: 00 in daytime. Adjustable. 20 at night. Adjustable.
If secondary LED fill-in light is necessary in a wide surveillance area, set it in the same way.
3.8. AGC setting. Enhance clearer image of license plates. Digital display: C1--C5,when it comes to C5, it is clearest image, but darker image. Factory default: C4.
3.9. WDR:It is recommended to set OFF in daytime. Otherwise, it’ll be too much whitish image.
3.10. linkage input: “ON”: the camera will be automatically at HLC mode at night when it has switch signal input (constant ON signal). The camera will not be HLC mode when
there is no switch signal in 10 seconds.Thus, the live view image won’t be that dark. Linkage input “OFF”, Highlight compression mode shall be controlled by photo-resistor. Switch
signal is always linkage with alarm linkage output.
3.11. Day/night setting shift:
Set the daytime parameter of the camera when the switch in on DAY position. Set the nighttime parameter of the camera when the switch in on
NIGHT position.
3.12.Connect PC or NVR via internet for live view or recording when finish setting.
3.13.Default IP:192.168.1.4,
user name: :system,
3.14.NVR access protocol:ONVIF,
password: system
IE port: 6002.
port:8080
3.15 TF card storage, FTP upload and image capture setting
3.15.1. Log in camera’s system by IE browser. IP:192.168.1.4, user name: system,
password: system
IE port: 6002.
3.15.2 Log in system, for video recording, FTP set, “ Configuration - Record - Ftp Set - Submit - Save” .Step 1-6.
Use an internal network IP address (same network with camera) as FTP server. If untick “Record the 2nd Stream”, video recording main stream.
3.15.3. Log in system, for snapshot image, capture setting, “ Configuration - Record - Capture Set - Submit - Save”
Use an internal network IP address (same network with camera) as FTP server.
Tick “Enable Second Stream”, snapshot image from second stream.
Step 1-7.
5 types of capture handle: Store the snapshot images to TF card, or To the FTP server, or through alarm channel upload, or TF card and FTP upload, or TF card and upload through
alarm channel.
To store images to TF card and FTP upload to a designated directory. Select it in down menu.
3.15.4 Log in system. AlarmIn setting, “Configuration - Alarm - Alarm Set -Submit -Save”. Step 1-8. For snapshot or Record or Alarm to the CMS.
3.15.5 Log in system, format TF card.
“Configuration -System - Disk Set - Format ”. Step 1-4.
3.15.6 Log in system. “Configuration - System - Advanced set - Restore “, restore camera if it is the 1st time setting. Step 1-3.
3.15.7 Then, the camera will capture image and store images when it is connected with inductive loops, etc. It says “Signal Alarm...” when live view.
3.15.8 Snapshot images by Video Motion Detection. It is for test purpose.
Please be noted that snapshot by Motion Detection is much less accurate than by inductive loops, radar,etc. external trigger because of poor illumination at night.
Log in System. “ Live View - VMD - Alarming Schedule - Linkage Action - ClearZone- Re-size VMD area - Setup - Save “ . Step 1-6.
( Alarming Schedule: Copy to “ Everyday” and Copy. )
Threshold: less value, more sensitive.
After finish VMD setting, it shows
“Motion Alarm...” when the car is passing through the virtual square area.
When live viewing, it says “ Motion Alarm...” when the car is passing through.
3.15.9
If you prefer MJPEG as second video stream, setting from “ Live view - Stream - Stream Type - Second video stream setting- Setup - Save” . Step 1-6
Remarks: When sub video stream is MJPEG, can’t set higher frame rate of real time view. The camera can’t proceed high stream. It will restore from time to
time because of high stream.
3.15.10 There are various video stream type (main stream and sub stream) to meet customer’s requirement.
“Live View - Stream - Stream Type - Setup - Save “.
3.15.11 To apply NTSC TV system, setting from “ Live view - Device - Format Type - Setup - Save” . Step 1-5
3.15.12 Manual recording, “Live View”, Press recording icon to start and stop. Find recording at D:/Record/Video on your computer. It is for test purpose.
3.15.13 Manual snapshot images, “ Live view” Press image icon to start capture . Find images at D:/Record/Image on your computer . It is for test purpose.
4.problem and solution
If there is any problem in the camera, please try to solve it as below..
problem
solution
1. If too wide surveillance area.
2. Well focus
License plate image is not
3. LED illuminator has enough luminance.
clear enough or obscure
4. Suitable HLC intensity.
5. Set suitable shutter speed for fast vehicle speed.
1. Set suitable shutter speed
Tailing image
2. NVR proceed too slowly. Replace an advanced NVR. etc.
1 HLC intensity, AGC value, LED brightness value is on best match.
Image whitish.
2. WDR function ON in the daytime.
1. Network is connected.
No network
2. Network protocol is correct.
5. Warranty: one year from factory shipment.