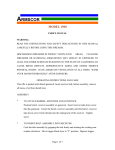
1
JRS
USER’S MANUAL
Updated 8/99
Table of Contents
Starting JRS for the First Time . . . . . . . . . . . . . . . . . . . . . . . . . . . . . . . . . . . . . . . . . . . . . . 2
Login Window . . . . . . . . . . . . . . . . . . . . . . . . . . . . . . . . . . . . . . . . . . . . . . . . . . . . . . . . . . . . . . . . 2
Station ID Window . . . . . . . . . . . . . . . . . . . . . . . . . . . . . . . . . . . . . . . . . . . . . . . . . . . . . . . . . . . . 2
“Janus Sampling” Window . . . . . . . . . . . . . . . . . . . . . . . . . . . . . . . . . . . . . . . . . . . . . . . . . . . . . . 3
Menu Bar . . . . . . . . . . . . . . . . . . . . . . . . . . . . . . . . . . . . . . . . . . . . . . . . . . . . . . . . . . . . . . . 4
Under Sample . . . . . . . . . . . . . . . . . . . . . . . . . . . . . . . . . . . . . . . . . . . . . . . . . . . . . . . . . . . . . . . .
Under Edit . . . . . . . . . . . . . . . . . . . . . . . . . . . . . . . . . . . . . . . . . . . . . . . . . . . . . . . . . . . . . . . . . . .
Under Local . . . . . . . . . . . . . . . . . . . . . . . . . . . . . . . . . . . . . . . . . . . . . . . . . . . . . . . . . . . . . . . . . .
Under Template . . . . . . . . . . . . . . . . . . . . . . . . . . . . . . . . . . . . . . . . . . . . . . . . . . . . . . . . . . . . . . .
Under Reports . . . . . . . . . . . . . . . . . . . . . . . . . . . . . . . . . . . . . . . . . . . . . . . . . . . . . . . . . . . . . . . .
Under Options . . . . . . . . . . . . . . . . . . . . . . . . . . . . . . . . . . . . . . . . . . . . . . . . . . . . . . . . . . . . . . . .
Under Help . . . . . . . . . . . . . . . . . . . . . . . . . . . . . . . . . . . . . . . . . . . . . . . . . . . . . . . . . . . . . . . . . .
4
5
5
5
6
6
7
Toolbar Buttons . . . . . . . . . . . . . . . . . . . . . . . . . . . . . . . . . . . . . . . . . . . . . . . . . . . . . . . . . . 8
Entering Samples . . . . . . . . . . . . . . . . . . . . . . . . . . . . . . . . . . . . . . . . . . . . . . . . . . . . . . . . 9
Spreadsheet Columns . . . . . . . . . . . . . . . . . . . . . . . . . . . . . . . . . . . . . . . . . . . . . . . . . . . . . . . . . .
Required Columns . . . . . . . . . . . . . . . . . . . . . . . . . . . . . . . . . . . . . . . . . . . . . . . . . . . . . . . . . . . . .
Columns With Lists . . . . . . . . . . . . . . . . . . . . . . . . . . . . . . . . . . . . . . . . . . . . . . . . . . . . . . . . . . . .
Entering Data . . . . . . . . . . . . . . . . . . . . . . . . . . . . . . . . . . . . . . . . . . . . . . . . . . . . . . . . . . . . . . . . .
Accepting Data . . . . . . . . . . . . . . . . . . . . . . . . . . . . . . . . . . . . . . . . . . . . . . . . . . . . . . . . . . . . . . .
9
9
9
10
10
Time Savers . . . . . . . . . . . . . . . . . . . . . . . . . . . . . . . . . . . . . . . . . . . . . . . . . . . . . . . . . . . . . 11
Disabling Columns . . . . . . . . . . . . . . . . . . . . . . . . . . . . . . . . . . . . . . . . . . . . . . . . . . . . . . . . . . . .
Setting Preferences . . . . . . . . . . . . . . . . . . . . . . . . . . . . . . . . . . . . . . . . . . . . . . . . . . . . . . . . . . . .
Inheritance . . . . . . . . . . . . . . . . . . . . . . . . . . . . . . . . . . . . . . . . . . . . . . . . . . . . . . . . . . . . . . . . . . .
Duplicating Values from Previous Samples . . . . . . . . . . . . . . . . . . . . . . . . . . . . . . . . . . . . . . . . .
Using Patterns . . . . . . . . . . . . . . . . . . . . . . . . . . . . . . . . . . . . . . . . . . . . . . . . . . . . . . . . . . . . . . . .
Editing Multiple Samples at Once . . . . . . . . . . . . . . . . . . . . . . . . . . . . . . . . . . . . . . . . . . . . . . . . .
11
12
12
13
13
14
Templates . . . . . . . . . . . . . . . . . . . . . . . . . . . . . . . . . . . . . . . . . . . . . . . . . . . . . . . . . . . . . . 16
Creating Templates . . . . . . . . . . . . . . . . . . . . . . . . . . . . . . . . . . . . . . . . . . . . . . . . . . . . . . . . . . . .
Saving Templates . . . . . . . . . . . . . . . . . . . . . . . . . . . . . . . . . . . . . . . . . . . . . . . . . . . . . . . . . . . . .
Editing Templates . . . . . . . . . . . . . . . . . . . . . . . . . . . . . . . . . . . . . . . . . . . . . . . . . . . . . . . . . . . . .
Using Templates . . . . . . . . . . . . . . . . . . . . . . . . . . . . . . . . . . . . . . . . . . . . . . . . . . . . . . . . . . . . . .
Saving Samples as a Template . . . . . . . . . . . . . . . . . . . . . . . . . . . . . . . . . . . . . . . . . . . . . . . . . . .
Importing Templates from Excel . . . . . . . . . . . . . . . . . . . . . . . . . . . . . . . . . . . . . . . . . . . . . . . . . .
Backing-up or Restoring Templates . . . . . . . . . . . . . . . . . . . . . . . . . . . . . . . . . . . . . . . . . . . . . . .
16
16
17
17
18
18
20
Exporting Sample Data . . . . . . . . . . . . . . . . . . . . . . . . . . . . . . . . . . . . . . . . . . . . . . . . . . . . 21
Saving Locally . . . . . . . . . . . . . . . . . . . . . . . . . . . . . . . . . . . . . . . . . . . . . . . . . . . . . . . . . . 22
Creating a File . . . . . . . . . . . . . . . . . . . . . . . . . . . . . . . . . . . . . . . . . . . . . . . . . . . . . . . . . . . . . . . .
Entering Samples . . . . . . . . . . . . . . . . . . . . . . . . . . . . . . . . . . . . . . . . . . . . . . . . . . . . . . . . . . . . . .
Uploading Samples . . . . . . . . . . . . . . . . . . . . . . . . . . . . . . . . . . . . . . . . . . . . . . . . . . . . . . . . . . . .
Batch Upload . . . . . . . . . . . . . . . . . . . . . . . . . . . . . . . . . . . . . . . . . . . . . . . . . . . . . . . . . . . . . . . . .
22
22
23
23
Warnings . . . . . . . . . . . . . . . . . . . . . . . . . . . . . . . . . . . . . . . . . . . . . . . . . . . . . . . . . . . . . . . 24
Appendix A. Installing JRS . . . . . . . . . . . . . . . . . . . . . . . . . . . . . . . . . . . . . . . . . . . . . . . . . 25
What You Need . . . . . . . . . . . . . . . . . . . . . . . . . . . . . . . . . . . . . . . . . . . . . . . . . . . . . . . . . . . . . . . 25
Installing JRS . . . . . . . . . . . . . . . . . . . . . . . . . . . . . . . . . . . . . . . . . . . . . . . . . . . . . . . . . . . . . . . . . 25
Appendix B. Upgrading or Reinstalling JRS . . . . . . . . . . . . . . . . . . . . . . . . . . . . . . . . . . . 26
Upgrading JRS . . . . . . . . . . . . . . . . . . . . . . . . . . . . . . . . . . . . . . . . . . . . . . . . . . . . . . . . . . . . . . . . 26
Recovering Lost Station ID Information . . . . . . . . . . . . . . . . . . . . . . . . . . . . . . . . . . . . . . . . . . . . 26
Table of Figures
Figure 1. Login Window of the JRS Program . . . . . . . . . . . . . . . . . . . . . . . . . . . . . . . . . . .
Figure 2. “Station ID” Window of the JRS Program . . . . . . . . . . . . . . . . . . . . . . . . . . . . .
Figure 3. “Janus Sampling” window. The Sample Entry Window . . . . . . . . . . . . . . . . . . .
Figure 4. The Menu bar. . . . . . . . . . . . . . . . . . . . . . . . . . . . . . . . . . . . . . . . . . . . . . . . . . . .
Figure 5. “Samples” Window of the JRS Program. . . . . . . . . . . . . . . . . . . . . . . . . . . . . . .
Figure 6. “Customize” Window of the JRS Program . . . . . . . . . . . . . . . . . . . . . . . . . . . . .
Figure 7. Toolbar buttons of the JRS Program. . . . . . . . . . . . . . . . . . . . . . . . . . . . . . . . . .
Figure 8. Columns of the “Janus Sampling” Spreadsheet. . . . . . . . . . . . . . . . . . . . . . . . . .
Figure 9. Disabled and enabled columns. . . . . . . . . . . . . . . . . . . . . . . . . . . . . . . . . . . . . . .
Figure 10. Disable/enable columns from this window. . . . . . . . . . . . . . . . . . . . . . . . . . . . .
Figure 11. Location and Half columns now have default values set for all. . . . . . . . . . . . .
Figure 12. Duplicating a Value. . . . . . . . . . . . . . . . . . . . . . . . . . . . . . . . . . . . . . . . . . . . . .
Figure 13. Example of a Pattern . . . . . . . . . . . . . . . . . . . . . . . . . . . . . . . . . . . . . . . . . . . . .
Figure 14. Editing multiple samples or columns at once. . . . . . . . . . . . . . . . . . . . . . . . . . .
Figure 15. Edit Samples at this Window. . . . . . . . . . . . . . . . . . . . . . . . . . . . . . . . . . . . . . .
Figure 16. Editing Changes Appear on the Spreadsheet.
Figure 17. Creating a Template. . . . . . . . . . . . . . . . . . . . . . . . . . . . . . . . . . . . . . . . . . . . . .
Figure 18. Enter Template Title and Filename Here. . . . . . . . . . . . . . . . . . . . . . . . . . . . . .
Figure 19. Open the “Samples” File in Excel. . . . . . . . . . . . . . . . . . . . . . . . . . . . . . . . . . .
Figure 20. Import your file from Excel here. . . . . . . . . . . . . . . . . . . . . . . . . . . . . . . . . . . .
Figure 21. Save the data as a .cvs file name. . . . . . . . . . . . . . . . . . . . . . . . . . . . . . . . . . .
Figure 22. Enter a Local Filename here. . . . . . . . . . . . . . . . . . . . . . . . . . . . . . . . . . . . . . . .
Figure 23. Spreadsheet showing two samples not uploaded to database. . . . . . . . . . . . . . .
2
2
3
4
4
6
8
9
11
11
12
13
14
14
15
15
16
17
19
20
21
22
24
JRS User’s Manual
1
Introduction
JRS is a program designed to aid in the recording of sample data. The entered data is subsequently saved to the central database. The main working window is a spreadsheet similar in
appearance and function to Excel.
Document Layout
This document is broken up into several sections. The first two describe the spreadsheet and
all the menu and toolbar functions. The third section describes how data is entered and saved.
The remaining sections describe, in depth, all of the various special features of the program
(e.g. Templates, Patterns, Inheritance, etc.). Two appendices describe how to install and
upgrade JRS.
Ocean Drilling Program
JRS User’s Manual
2
Starting JRS for the First Time
Double click on the JRS icon to start the program.
Login Window
Starting JRS opens the Login window (See Figure 1). Enter your User Name, Password, and
Host String here. JRS automatically remembers the last User Name and Host String entered,
and the next time the program is started, they will automatically be displayed.
Figure 1.Login Window of the JRS Program
Station ID Window
The information at this window allows the JRS program to assign each sample a unique ID
(See Figure 2). This window only appears the very first time the program is started.
These settings are saved in the “staid.jrs” file in the same folder as the program.
Figure 2.“Station ID” Window of the JRS Program
1. Enter a Location (Repository). If you are connected to the database, the program
defaults to the correct location. If not, enter a location (e.g. GCR, WCR, SHIP).
2. Enter a Station Number. This number should be displayed on the computer.
Ocean Drilling Program
JRS User’s Manual
3
3. Enter the Next Sample number (up to 7 digits). Enter the number “1” the first time.
The number will be incremented automatically for samples entered in a stand-alone
mode.
Note: JRS remembers these settings so you don’t have to
enter them again. This window should not appear the next
time you login.
“Janus Sampling” Window
Figure 3 displays the sample entry window. Notice that it is a spreadsheet format, similar to
Excel. The next two sections explain the menu and toolbar functions.
Figure 3.“The sample entry window
• There is a menu bar at the top of the window. Each menu item has several available
options. View these by clicking on the menu item.
• The toolbar buttons are beneath the men bar. These buttons perform the most frequently used functions.
• There is an entry prompt similar to Excel beneath the toolbar buttons. Typed entries
appear in this prompt.
• Clicking on the List button displays a list of possible entries for a highlighted cell.
• Each row contains one sample. An asterisk (*) by the record number indicates that the
sample has not been saved to the database.
• The Exit button completely closes the JRS program.
Ocean Drilling Program
JRS User’s Manual
4
Menu Bar
Figure 4. The Menu bar.
Under Sample
• New – opens an empty spreadsheet.
• Open – opens the “Samples” Window (See Figure 5), which is used to select a specific set of samples. Fill in the pertinent blanks and click OK. A spreadsheet of samples opens, corresponding to the information entered. Performs the same function as
the Open button or the F3 key.
Figure 5.“Samples” Window of the JRS Program.
• Accept Sample – saves the present sample to the central database. Performs the same
function as the Accept button or the F4 key.
• Login – opens the login window. Allows user to login with an alternate password.
• Logout – allows the user to logout without closing the entire program.
Ocean Drilling Program
JRS User’s Manual
5
• Exit – exits the JRS program completely.
Under Edit
• Delete – deletes the highlighted sample from the database. Same function as the
Delete button or the F5 key.
Note: This can only be done if the sample has no data or
analyses (e.g. smear slide data) connected to it.
• Field Duplicate – this copies the data of the previous cell in the column to the next
highlighted cell. Same function as the Duplicate button or the F7 key (See "Time
Savers" p. 11).
• Field Pattern – this duplicates an established pattern in a column. Same function as
the Pattern button or the F8 key (See "Time Savers" p. 11).
• Edit Selected – allows the user to edit one or more samples and one or more data
entries at a time. Same function as the Selected button or the F6 key (See "Time Savers" p. 11).
Under Local
• Create File – use this function to save your samples and data to a file (on a diskette or
the hard drive) rather than the database (See "Saving Locally" p. 22).
• Save – saves your samples and data to the file you created. You can also use the
Accept button, only in this case it saves to the file you created rather than the database
(See "Saving Locally" p. 22).
• Open – displays all files that are saved locally (instead of those in the database).
• Upload – lets you to upload local files to the database (See "Saving Locally" p. 22).
• Batch Upload – allows you to upload multiple local files to the database at one time
(See "Saving Locally" p. 22).
Under Template
• Create- opens an empty spreadsheet with a “Creating Template” message on it. Create a new template from here (See "Templates" p. 16).
• Save – allows you to save a <new> template, or save over an existing one (See "Templates" p. 16).
• Load – opens a list of available templates (See "Templates" p. 16).
• Import – allows the user to import a template as a Comma Delimited file from
Ocean Drilling Program
JRS User’s Manual
6
another program, such as Excel (See "Templates" p. 16).
• Backup – displays a message about backing up templates to another directory (See
"Templates" p. 16).
• Restore - displays a message about restoring templates back to the JRS directory (See
"Templates" p. 16).
Under Reports
• Tracking Sheet – prints an 8.5 X 11 sheet of paper containing all information from
the spreadsheet. Each sample has two lines: The first line contains all column information; the second line prints the barcode for each sample.
• Labels – prints a label for each highlighted sample on the spreadsheet. Highlight one
sample by clicking on its Record No. Highlight more than one by left clicking on the
first Record No, then right clicking on the last Record No. The first, last, and all
samples in between should now be highlighted.
Under Options
• Residues – this option is not developed.
• Customize – opens the “Customize” Window (See Figure 6). You can perform two
functions at this window:
Check Auto Print Labels to automatically print labels of each sample entered.
Check any box under Column Enable/Disable to enable the column. Click
again to remove the X. This disables the column (See "Time Savers" p. 11).
Ocean Drilling Program
JRS User’s Manual
7
Figure 6.“Customize” Window of the JRS Program
• Save Preferences – saves any preferences you select (See "Time Savers" p. 11).
• Edit Station ID – opens the “Station ID” window. From here you can edit the location, station number, or next sample number.
Under Help
• Contents – this function not developed yet.
• Search – this function not developed yet.
• Index – this function not developed yet.
• About JRS – displays copyright information about the JRS program.
Ocean Drilling Program
JRS User’s Manual
8
Toolbar Buttons
The toolbar buttons are provided for those functions most frequently perfomed.
Figure 7.Toolbar buttons of the JRS Program.
• Open or F3 Key - Use this function to open other sample records (e.g. from a specific
leg, person, etc) or those from other stations (See Figure 5. "“Samples” Window of
the JRS Program." p. 4).
Fill in pertinent blanks and click OK. A spreadsheet with samples corresponding to the information you entered, or a “No Records Match” prompt, appears.
Add a new record to the spreadsheet if you want. Any record numbers with a
(*) by them have not been saved to the database. Be sure to Accept (save) them
to the database before exiting (See "Entering Samples" p. 9).
Edit any pre-existing records, then Accept, or save, them to the database.
• Accept or F4 Key - This function saves the sample data to the central database. The
program runs through a series of data checks before it will save (See "Entering Samples" p. 9).
• Delete or F5 Key - This function deletes samples from the database. Highlight the
sample you want to delete by clicking on its Record Number (far left column), then
the Delete button.
• Selected or F6 Key - This function allows you to edit one or more samples and one or
more data entries at a time (See "Time Savers" p. 11).
• Duplicate or F7 Key - This function copies the data of the previous cell in the column
to the highlighted cell (See "Time Savers" p. 11)
• Pattern or F8 Key - This function duplicates an established pattern in a column (See
"Time Savers" p. 11)
• Tracking or F9 Key - Use this function to print out an 8.5 X 11 paper with all the
spreadsheet information, plus a barcode for each sample entered.
• Labels or F10 Key - Use this function to print the labels of highlighted samples.
Highlight one sample by clicking on its Record No. Highlight more than one sample
by left clicking on the first sample’s Record No., then right clicking on last sample’s
Record No. The first, last, and all samples in between are now highlighted.
• Exit - Click on this button to completely exit the JRS Program.
Ocean Drilling Program
JRS User’s Manual
9
Entering Samples
Select New to open an empty spreadsheet, or Open to display a spreadsheet with specific sample records. You can add new samples and their data to either type of spreadsheet.
Spreadsheet Columns
Figure 8. Columns of the “Janus Sampling” Spreadsheet.
• Rec No. – the Record Number column displays the unique ID assigned to each sample. Click on the Rec No button. It will cycle through the Sample ID, section length,
and core type of each sample.
• Loc – the Location Column displays the same location you entered into the Station ID
window (e.g. GCR, SHIP).
• Obs – Observer is the person entering the sample data.
• Req Num – Enter a Request Number if there’s a request for that specific sample.
• Req Part – If you enter a request number you must also enter a Part (e.g. A).
• Req code – Enter a request code if you don’t know the Request number. Enter a code
or a number, but don’t enter both. (Codes are used most often on the ship).
• Leg, Site, Hole, Core, Section, Half, Top, Bottom, Volume – Enter a value for each.
• Piece and Subpiece – For hard rock, enter a number if the sample was taken from a
core piece or subpiece.
• Lab ID and Aux ID – enter a Lab ID and/or an Auxiliary ID if there’s no request for
the sample.
Required Columns
Several columns require data entry or the program will not Accept the sample. They are: location, observer, leg, site, hole, core, section, half, top, bottom and volume.
Columns With Lists
Several of the columns have a list of possible choices associate with them. Highlight a cell and
click the List button to access these lists. The following columns have lists: location, request
code, leg, site, hole, core, section, half, lab ID.
Ocean Drilling Program
JRS User’s Manual
10
Entering Data
Data can be entered in several different ways:
• Move around the spreadsheet with the arrow keys. The current cell should be highlighted.
OR
• Click on any cell in the spreadsheet. This also highlights the cell.
• Enter data by typing. Notice that the values appear in the highlighted cell and the
entry prompt. Click the √ mark, or the Enter key to enter the data into the cell. Click
X or Delete to erase the entry.
• You can also enter data by using the List button, which displays an appropriate list of
selections for the highlighted cell. Click on the List button, then the selection you
want entered.
Note: The cursor will not move to the next cell until data is
either entered or deleted.
Accepting Data
Each sample must be saved to the database before you can enter another sample. Click Accept
or F4 to save a sample and its data to the central database. Before the program saves the sample, it runs through a series of integrity checks:
1. Required Fields – first, the program makes sure a value is entered in each required
field. If not, a warning appears describing the problem. It then highlights the problem
cell so that you can fix the error.
2. Corelog Check – next the program checks that the hole, core, and section entered exist
in the database. If not, a warning appears, then the problem cell is highlighted. Make
any corrections, then click Accept again.
3. Sample Request Match – next the program checks that the sample request is valid. If
not, a warning appears, then it highlights the problem cell. Also, if you enter a request
number that has no code, the program assigns the request a code consisting of the
request # plus the request part (e.g. 15009A).
4. Database Checks – finally, if everything is ok, the program saves the sample to the
database. The database then runs a series of checks. If it detects a problem, an error window appears describing the problem.
Ocean Drilling Program
JRS User’s Manual
11
Time Savers
The JRS Program has several features that can save you time when entering multiple samples.
Disabling Columns
Disable a column on the spreadsheet if you know it is not going to be used. Once disabled, the
cursor will move past it as if the column were not there.
There are two ways to disable a column:
• Click on the column’s top button (e.g. Piece, Lab ID, etc.,). The column turns gray
when disabled (See Figure 9). Click the button again to enable the column.
Figure 9. Disabled and enabled columns.
• OR, Choose Customize from the Options menu. A “Customize” window is opened
(See Figure 10). The lower box is labeled “Column Enable/Disable”. Check the boxes
by the columns you want to enable; remove the check to disable a column.
Figure 10. Disable/enable columns from this window.
Ocean Drilling Program
JRS User’s Manual
12
Setting Preferences
The spreadsheet has several columns whose values you may never change, or will rarely
change (e.g. location, half). For these columns, you can set preferences, which are remembered each time a new spreadsheet is opened.
1. Select New from the Sample menu. An empty spreadsheet is opened.
2. Enter the default values for the first sample.
3. Disable those columns that you want to carry the default values for each sample. The
program will not remember the values unless the columns are disabled!
4. Select Save Preferences from the Options menu.
5. Open a new spreadsheet and notice that your default values are automatically entered
(See Figure 11).
Figure 11. Location and Half columns now have default values set for all new spreadsheets.
Inheritance
This function tells the program to automatically copy the value from the previous cell in the
column to the next cell in the column. This occurs for every sample. Use inheritance if you
know the value for a column will stay the same for several samples.
Normal Inheritance
1. Enter the value to be copied in the column’s first cell.
2. Press Enter.
3. Disable the column (See "Disabling Columns" p. 11).
4. Each time you Accept a sample, the value in the disabled column is passed onto the next
record.
Ocean Drilling Program
JRS User’s Manual
13
Special Cases
1. Request Information – normally, a check is made on each sample that has request
information. With inheritance, if you enter the request information, then disable these
columns, the program only checks the information once. Each subsequent save skips
this step.
2. Leg, site, hole, core, and section information – with inheritance, once these columns
are disabled, the program only does the “corelog” check on the first sample. Subsequent
saves skip this step.
3. Bottom interval – the bottom interval cannot stay the same for each sample. Inheritance
auto-calculates the bottom interval based on the top interval value.
Duplicating Values from Previous Samples
Often, one or two samples in a row will have the same value for a specific column. The inheritance function is often not convenient, though, if the value changes after only a few samples.
The best function in this case is to Duplicate.
Figure 12.Duplicating a Value.
Notice in Figure 12 that all values in leg, site, hole, core, and half are the same. In these columns it makes sense to either use inheritance or give these columns a default value (notice the
columns are disabled). Section, on the other hand, changes every couple of samples. The best
function for this situation is to Duplicate.
To duplicate the value of the previous cell in the column into the next sample, click the
Duplicate button or the F7 key. In Figure 12, using Duplicate will copy the value “5” from
the previous sample into the highlighted cell.
Using Patterns
Samples are often taken in a pattern (e.g. take a sample every 10, 50, 75, and 120 cm from the
top of each core). Notice the “Top” interval pattern in Figure 13.
Ocean Drilling Program
JRS User’s Manual
14
Figure 13.Example of a Pattern
It is possible to duplicate this pattern throughout the column.
1. After a pattern is established, start it again by entering the first value of the pattern (e.g.
the highlighted number “10”).
2. Accept this sample, and start a new one.
3. When you reach the column with the pattern, click Pattern, or F8.
4. The next value in the pattern is added to the column.
5. Repeat this for each sample of the pattern.
Note: If you click Pattern without entering the first pattern
value (step 1), the program searches the previous values for
a pattern. It then defaults to the first value in the pattern.
Thus, it is possible to copy a pattern without using steps 1-3,
but there is no guarantee that the program will establish the
correct pattern with this method.
Editing Multiple Samples at Once
It is possible to make the same error in multiple samples while entering data. For example,
you may physically switch to section #4 but accidentally continue to enter the number 3. You
don’t have to go through each sample and fix the error. Instead, use the Selected function.
1. Highlight the group of samples that need editing. Do this by left clicking on the first
record number, then right clicking on the last record number of the group. This highlights the first and last record and all in between (See Figure 14).
Figure 14. Editing multiple samples or columns at once.
Ocean Drilling Program
JRS User’s Manual
15
2. Click Selected or F6. This opens a window with multiple entry blanks (See Figure 15).
Figure 15. Edit Samples at this Window.
3. Make all editing changes on this window then click OK.
4. The changes now appear in all highlighted samples (Notice in Figure 16 that the section
number is changed from 3 to 4).
Figure 16. Editing Changes Appear on the Spreadsheet.
Ocean Drilling Program
JRS User’s Manual
16
Templates
A template is a collection of data saved locally in the program. This function is used to minimize data entry when multiple, but similar, data sets are entered. It is most helpful for preentering sample information when lots of samples will be taken in a short time. Set the template up ahead of time, and you won’t have to deal with disabling columns, or selecting preferences during the data entry.
Creating Templates
1. Select Create from the Template menu.
2. This opens an empty spreadsheet with a “Creating Template” message on the top right.
3. Enter data as if you’re entering real sample data. Enable/disable columns, set up inheritance, etc (See Figure 17).
Figure 17. Creating a Template.
4. The differences between a template and a normal spreadsheet
• Samples are not saved to the database. They are saved to local files.
• JRS does not do the integrity checks.
• JRS does not print labels or tracking sheets for templates.
• All changes are kept in memory until saved.
Saving Templates
1. Select Save from the Template menu.
Ocean Drilling Program
JRS User’s Manual
17
2. This opens a window with all existing templates. You have two choices:
• Override an existing template by highlighting it and double clicking on OK
OR
• Choose <New> to assign the template a new name. This opens a window for entering
a new template title and filename (See Figure 18).
Figure 18.Enter Template Title and Filename Here.
Editing Templates
Instead of making a whole new template, it may be more convenient to edit an existing one.
1. Select Create from the Template menu. This opens an empty spreadsheet in template
mode.
2. Select Load from the Template menu. This displays a list of available templates.
3. Select the template you want to edit.
4. Edit the template.
5. Now, either save the template to the same name, or give it a <New> name to save it as a
new template (See "Saving Templates" p. 16).
Using Templates
Templates can be used for two purposes. You can either edit an existing template to create a
new one, or use a template to enter sample data into the database.
1. Use existing templates to build other templates. Do this by following steps 1-5 of
“Editing Templates”.
2. Use templates to enter sample data to the database.
• Select Load from the Template menu. This displays a list of existing templates.
• Select a template.
• The spreadsheet appears with the cursor in the first available column.
Note: the spreadsheet is no longer in “Template” mode. It is
Ocean Drilling Program
JRS User’s Manual
18
now ready to accept samples for saving to the database.
• Enter all data for one sample and click Accept. The sample is put through all the JRS
integrity checks. It is now saved to the database.
• Continue doing this for all samples.
• Remember, if you want to change anything in a gray column, enable the column first.
Saving Samples as a Template
You can save a set of samples as a template if you will be entering a similar set of samples in
the future.
1. Enter and Accept (save) all samples to the database.
2. Select Save from the Template menu.
3. This displays a warning, telling you that you are not in the mode for creating templates.
It then gives you the option to save the spreadsheet as a template. Click OK.
4. A window with all existing templates appears. Double click on <New>.
5. Enter the template name and filename for your new template. Click OK.
6. The samples are now saved to the database and as a template.
Importing Templates from Excel
It is possible to make a template in Excel, then import it into the JRS program.
1. Open Excel
2. Select Open from the File menu. This displays the “Open” window (See Figure 19).
Ocean Drilling Program
JRS User’s Manual
19
Figure 19. Open the “Samples” File in Excel.
3. Select “Samples” from the C:\ODP\JRS directory. Under Files of Type: Select
“Microsoft Excel Files”. This opens a spreadsheet with the JRS columns.
4. Make your template.
Note: Do NOT delete any of the columns. You must have all
the columns that are in the program spreadsheet. Do NOT
add any columns after the “comments” column. JRS will
not import the template if either of these changes are made.
5. Create a new folder to save templates in (e.g. “xltemplt”, in Figure 20), then save them
as a Comma Delimited File (“.csv”) .
Note: DO NOT save the files to the Template folder in the
JRS program.
6. Close the Excel file. JRS will not import the file if it is also open in Excel.
7. Select Import from the Template menu. An “Import from” window is displayed (See
Figure 20).
Ocean Drilling Program
JRS User’s Manual
20
Figure 20. Import your file from Excel here.
8. Select the folder, then the file you saved the data to. Click OK.
9. The template appears as a spreadsheet in JRS. Select Save from the Template menu.
This saves it to the “Template” folder. You can now use it for any of the functions
described in the Templates section.
Backing-up or Restoring Templates
You can backup a template from JRS to another folder or a diskette. Selecting Backup from
the Template menu opens this description. You cannot backup a template while in JRS. You
must use either the file manager or NT Explorer.
1. Go to C:\ODP\JRS\Template
2. Select the template you want to backup.
3. Copy the template to your folder of choice, or to a diskette.
Restoring a template is basically the reverse of backing up a template. Selecting Restore from
the Template menu opens a window telling you that you can restore a backup to the Template
Folder. You cannot do this in JRS. You must use either file manager or NT Explorer.
1. Open up the directory with the backup template in it.
2. Copy the backup to the Template folder under C:\ODP\JRS
Ocean Drilling Program
JRS User’s Manual
21
Exporting Sample Data
On ship or on shore, it is possible that you will want to view a specific set of samples in Excel.
This also gives you the opportunity to save data on your own spreadsheet. Do this by exporting the data to Excel.
1. Open Netscape. Either type in the address www-odp.tamu.edu/database, or go to the
ODP home page and click on Database.
2. Select Predefined Queries.
3. Under Curation select Sample Report. This opens a “Sample Data Query” form.
4. Fill in the pertinent information to select a set of samples (you can specialize or generalize your search as much as you want).
5. For Output Type, make sure you select Comma Delimited. This allows the data to be
in a format similar to JRS.
6. From the File menu select Save as. Enter a file name with the “ .csv” extension to save
it as a comma delimited file (e.g., in Figure 21 the filename is mydata.csv).
Figure 21.Save the data as a .cvs file name.
7. Open Excel.
8. Under the File menu select Open. This displays the “Open” window.
9. • Under Look in: choose the folder you saved the data to.
10.• Under Files of type: choose “Text Files”.
11.Highlight your file and click Open.
12.A spreadsheet should appear. The top and bottom of the page is filled with HTML data.
Either delete this or ignore it. Your data appears between the HTML language.
Ocean Drilling Program
JRS User’s Manual
22
Saving Locally
It can be convenient, or necessary, to save samples to a local file rather than the database,
especially if there is a connection problem. In these cases, save your sample data to a local
file, then upload it to the database later.
Creating a File
1. Select Create File from the Local menu.
2. This opens an entry window. Enter a Local File Title and a Local Filename (See Figure
23).
Figure 22.Enter a Local Filename here.
Note: These files are saved to the “Local” folder of the JRS
program. It is very important that you DO NOT save any
other type of file to this folder
3. A normal JRS spreadsheet appears with a red message in the top right. The message is
the spreadsheet filename.
Entering Samples
1. Enter samples and their data, just as you would in the normal mode.
2. Click Accept, or select Save from the Local menu after each sample.
3. The data is saved to the local file. The program runs a series of basic checks, but none of
the integrity checks. Those happen when the samples are uploaded to the database.
4. You can also open a file that is already saved to the local file.
• Select Open from the Local menu. A window appears, displaying all saved files.
• Highlight the file you want and click OK.
Ocean Drilling Program
JRS User’s Manual
23
Uploading Samples
Use this function to upload samples from a local file to the database.
1. Open the spreadsheet of data you want to upload.
2. Select Upload from the Local menu.
3. You will see a blue cursor pass though each sample. This is the database doing an integrity check on the sample data.
4. If there is a problem with a sample, the integrity check stops and a warning appears.
Make any appropriate changes.
Note: At this point, any samples that were accepted before
the problem are already saved to the database. You can see
this because there is no longer an asterisk (*) by the Record
No’s.
5. After fixing any problem samples, run the upload process again. Once all the samples
are accepted, the file is sent to the “uploaded” folder in the JRS directory.
6. It is possible that you might run into problems with your uploaded data. If for any reason
samples are missing, or it had a problem with the process, the files can always be found
again under “uploaded” in the JRS directory. You can then upload them to the database
again if needed.
Batch Upload
You can enter multiple files, and then save them to the database at the same time with the
“Batch Upload” function.
Note: once you start this process, you CANNOT stop it!!!
1. Select Batch Upload from the Local menu.
2. A warning appears telling you that the upload may take some time, and asks if you want
to continue. Click OK or Cancel.
3. This process goes through every file in the local directory and uploads each one, running
an integrity check at the same time.
4. All acceptable samples are uploaded to the database. Any samples with problems
remain in the local file.
5. All files that are completely uploaded (i.e. all samples in the file passed the integrity
check) appear in the JRS\Uploaded folder.
6. After the process is complete, select Open from the Local menu. Any files that had
problem samples will still be there.
Ocean Drilling Program
JRS User’s Manual
24
Note: Acceptable samples that were uploaded do NOT have
an asterisk (*) by the Record No. Problem samples will still
have an asterisk by the Record No (in Figure 24, samples 4
and 5 have not been accepted yet).
Figure 23. Spreadsheet showing two samples not uploaded to database.
7. At this time, run Upload from the Local menu. Now you can visually see the problems
because the program displays a warning window for each.
8. Correct any problems, run the upload again, and all samples are now saved to the database.
Warnings
Two warnings of importance:
1. Do not save anything other than a local file to the “Local” Folder. The program will
not be able to read a foreign file. If you do this, anytime you try to bring up a local file,
you will get an error window.
2. Do not save anything to the “Template” folder in the JRS directory. The only files
that are saved here are templates made in the JRS program. You should NEVER save a
template from Excel into this folder. If you do, you will have the same error problem as
the local folder.
Ocean Drilling Program
JRS User’s Manual
25
Appendix A. Installing JRS
What You Need
1. A 486 or higher IBM compatible computer with a minimum 8MB of RAM (16MB recommended).
2. A hard disk drive with at least 1 MB of free disk space.
3. VGA or higher resolution monitor.
4. Windows 3.1, Windows for Workgroups, or Windows 95, or Windows NT.
5. A printer supported by Windows to print tracking sheets, and a bar code printer to print
bar code labels for samples.
6. A Neuron Data’s Deployment Kit.
7. Oracle’s SQL-Net with support files version 7.2.
8. Bartender for Windows to print barcodes to either a label printer or a laser printer.
This software should be installed in C:\BTW.
Installing JRS
1. Create a directory where you want to install JRS (e.g. C:\ODP\JRS).
2. Copy the JRS program files to the directory you created. The program is provided as a
diskette.
3. Create an icon on your desktop for JRS.
• The command line should include the directory you created and the programs executable (e.g. C:\ODP\JRS\JRS.exe).
• The working directory is the one you created (e.g. \samples\JRS)
4. If you were provided with a JRS diskette, remove it and store in a safe place.
Ocean Drilling Program
JRS User’s Manual
26
Appendix B. Upgrading or Reinstalling JRS
Upgrading JRS
1. Copy the new JRS program files to the directory of the old JRS version (this ensures that
the same setups and templates will be used in the new version).
OR
2. Create a new folder. Copy all contents of the old version to the new folder. Then copy
the new version into the new folder (again, this ensures that the same setups and templates will be used in the new version).
Recovering Lost Station ID Information
Each sampling station has a unique ID and “next sampling number”. This information is saved
in the file “staid.jrs” in the JRS program folder. If the file is damaged or corrupted during
installation or updates, it must be restored. In this case, it is best to ask an MCS for help.
Because each station has a unique ID, it is always important to copy the old JRS program into
the new JRS folder. If both versions are used, and any samples are entered in stand alone
mode, JRS assigns the same sample ID to multiple samples.
1. Run JRS
2. If “staid.jrs” has been deleted, the program prompts you for the Station ID # (same as
when you run the program for the first time).
3. Enter the location, station number, and next sample number. Be sure you use the same
station # that was entered before.
4. JRS checks for database samples that match the location and station # you specified.
5. If it finds matches, and the “next sample number” you entered has already been used,
the program gives you a warning.
6. Click OK.
7. The program tells you that it’s going to get the next unused sample number from the
database.
8. The station ID screen will open. At this point you have two choices:
• Accept the updated sample number by clicking OK. This saves the information.
OR
• Change the station number and reset the next sample number.
9. You are done re-installing JRS. You should not have to go through these steps again.
Ocean Drilling Program