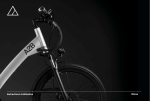
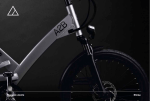
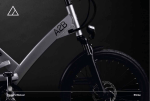
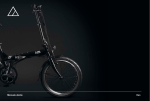
1
Operating instructions
Ørsted
1
Contents
1.0 2.0 3.0 4.0 Introduction
Important information
Your A2B
Familiarising yourself with the functions of your A2B
before your first journey
4
5
6
12
5.0 Display and motor operating instructions 16
5.1.1 Important instructions – please take note! 16
5.1.2 Intended use of the neodrives
components 16
5.1.3 Acceptable operating conditions / places of use 17
5.1.4 Standard scope of supply 17
5.1.5 Technical details18
5.2. Controller 20
5.3. smart Man-Machine Interface (sMMI) 20
5.3.1 Fitting and removing the sMMI 22
5.3.2 Functions of the sMMI 23
5.3.2.1 Switching on and off 23
5.3.2.2 Start menu 24
5.3.2.3 Dynamo function and "lights" switch-on routine (optional) 25
5.3.2.3 Selecting the assistance level 25
5.3.2.5 Activating recuperation 26
5.3.2.6 Braking assistant 27
5.3.2.7 Pushing aid 28
5.3.2.8 Date and time 30
5.3.2.9 Travel modes 30
5.3.2.10 Display of travelling information 31
5.3.2.11 Display of information and warnings 32
5.3.2.12 Easy Display mode 33
5.3.2.13 Other settings 33
5.3.2.14 USB port 34
5.3.2.15 Programming options for the specialist dealer 34
5.3.2.16 Firmware updates and their transmission 35
5.3.2.17 Information on the sMMI plugs 36
5.4. Thermal management 36
5.5. Motor 38
5.5.1 Removing the drive wheel 38
5.5.2 Attaching the drive wheel 40
5.6. Cleaning the motor and sMMI 41
5.6.1 Motor 41
5.6.2 sMMI 42
5.7. Transport 42
5.8. Warnings 42
5.9. Error indications and possible solutions 42
6.0 Battery operating instructions
44
6.1.1 Important instructions - please take note.44
5.1.2 Intended use of the neodrives components 44
6.1.3 Acceptable operating conditions45
6.1.4 Standard scope of supply45
6.1.5 Technical details45
6.1.6 The main elements at a glance46
6.2. Safety instructions and warnings47
6.2.1 for use of the battery47
6.2.2 for storage of the battery48
6.2.3 for the charging process48
6.2.4 for transportation and shipping49
6.2.5 for the charger49
6.3. Startup51
6.3.1 Information on the operating modes 51
6.3.2 Insertion of the battery 51
6.3.3 Switching the battery on 52
6.3.4 Display of the state of charge 52
6.5. Charging the battery 54
6.5.1 Connecting the charger 54
6.5.2 The charging process 54
6.5.3 LED indications during the charging process 55
6.6. Keys 56
6.7. Cleaning the battery 56
6.8. Disposal 56
6.9. Liability 56
7.0 Important safety precautions before your first journey 57
8.0 Maintenance
60
9.0 Vehicle cleaning66
10.0 Technical details
67
11.0 Warranty and safety information
68
12.0Disposal
70
13.0 Servicing schedule
70
14.0 Product registration
78
6.4. Removal of the battery 53
6.4.1 Switching the battery off 53
6.4.2 Removing the battery 53
3
User manual
1.0 Introduction
Congratulations on your purchase of the new A2B Ørsted*, the
e-bike that will significantly change your mobility. A2B has set itself
the goal of redefining your daily mobility together with you and
getting you from A to B in style. Driving an A2B is more fun than
driving a car, avoids the frustrating process of looking for parking
spaces, saves on fuel costs and, at the same time, protects the
environment. You can redefine your paths with the A2B. Whether
you ride your A2B to work, for shopping or just for fun, you will
rediscover your world. In order to take the idea of travelling familiar
paths differently, doing everyday activities in differently from before
and changing our behaviour into account, we named our A2B
models after various individuals. These individuals have strongly
influenced and changed our everyday life thanks to their ideas,
inventions and developments. In the case of the A2B Ørsted,
the name chosen for the bike is an hommage to Hanna Christian
Ørsted, a Danish physicist and chemist whose research and
discoveries in the field of electrical engineering first made the use
of electricity possible.
in and permitted by these operating instructions, the component
manufacturer's instructions or further documents provided upon
purchase of the Pedelec. The manufacturer does not assume any
liability for damage caused negligently due to misuse, improper
use or improper or omitted maintenance or repairs. The driver is
responsible for examining the Pedelec as required, having any
necessary works carried out and using it appropriately.
1.1. Intended use of your A2B
www.wearea2b.com
Your A2B, equipped with the neodrives drive system, is a Pedelec
(Pedal Electric Cycle) for usual transport of one person on public
roads. Any adjustments and repairs to the A2B and its components
shall only be regarded as intended use insofar as they are stated
* The A2B Ørsted electric bicycle is hereinafter referred to in short as
”A2B”.
These operating instructions describe the use of your A2B and its
components and correspond to the latest version of this technology
at the time of printing. The manufacturer reserves the right to make
changes resulting from the further development of mechanics, the
software or from the statutory requirements.
Hero Eco Ltd
Berlin office
Reichenberger Str. 124
Berlin - 10999
2.0 Important information
This user manual contains important information on safety, performance and maintenance.
Please read it carefully before your first journey.
In case of delivery by your A2B specialist dealer, your A2B should be fully assembled and charged. If not, please contact us
immediately as your guarantee will become void otherwise.
Please ensure that all users of your A2B read and understand the following important information.
• Make sure that you know and observe the rules of behaviour
• According to the Straßenverkehrszulassungsordnung (StVZO)
for safe and responsible cycling. When riding the A2B, there is
[Road traffic approval regulations], a bicycle must be equipped
always a risk of severe / fatal injuries or material damage resulting
with two operative brakes which are independent of each other,
from an accident. By deciding to ride the A2B you assume full
a clearly audible bell, headlamp, rear lamp, pedal reflectors, side
responsibility for this risk.
reflectors for wheels or integrated reflective strips on the tyre and
• Your current insurance policies might not include accident
front and rear reflectors.
insurance coverage for using the A2B. Please consult with your
• Your A2B is suitable for riding on paved streets and paths.
insurer or insurance agent concerning this matter.
Therefore, do not ride away from paths or off-road. Do not use
• This user manual provides no guarantee as to the safe use of the
the A2B for crossing water, for off-road jumps or for sports
A2B under all conditions.
events.
• We recommend that you always wear an approved bicycle helmet
when using the A2B and, additionally, that you wear light or
reflective clothes at night.
Important symbols
Indicates a potentially dangerous situation which may lead to a severe injury, material or equipment damage or unwanted system
failure if this situation is not prevented.
Indicates useful or other important, relevant information.
If you have any questions or do not understand any instructions in this user manual, please ask your A2B specialist dealer or contact our
customer service at [email protected]
5
User manual
3.0 Your A2B
3.1 Components
1
21
22
17
18
2
19
20
23
3
16
15
4
24
14
13
7
9
8
5
12
11
10
6
1. Saddle (seat)
2. Saddle post
3. Quick release
4. Front splash guard
5. Front tyre
6. Front wheel rim
7. Front disk brake and rotor
8. Pedals, pedal crank and chainring
9. Chain
10. Motor
11. Stand
12. Rear wheel rim
13. Rear tyre
14. Derailleur and freewheel
15. Reflector
16. Rear splash guard
17. Battery
18. LED rear light
19. Z reflector on battery
20. Battery plug
21. Frame
22. sMMI
23. Headlamp
24. Quick release front wheel
3.1 Components
A. Right-hand brake lever
(for rear wheel brake)
B. Left-hand brake lever
(for front wheel brake)
C. Shift lever
D. Right pedal
E. Left pedal
7
User manual
3.2 Replacement of components, fitting of accessories
Before mounting any components or accessories (including
different tyres), you should ask your certified A2B specialist dealer
if they are appropriate for your A2B.
Please read and observe the instructions for the respective
components or accessories you have bought for your A2B. Please
observe the manufacturer's instructions for the components or
accessories if they are different from these instructions.
Like all mechanical components, your A2B is subject to wear

and tear. The user must particularly watch out for wear and tear
under higher workloads. If a component's life cycle is exceeded,
this component may suddenly become inoperative leading to severe
or even fatal injuries. Please therefore watch out for signs of wear
and tear such as cracks, scratches and changes of colour in areas
which are subject to high strain, e.g. on the frame, fork, wheels and
handlebars, indicating that the life cycle has been completed or
even exceeded. Have worn components replaced immediately by
your specialist dealer.
If you do not check components or accessories for fitness

and install, use and maintain them properly, this can lead to severe
or even fatal injuries.
The use of non-original components or spare parts may

endanger your A2B's safety and void the warranty.
The replacement of components or fitting of accessories will

be made at your own risk, since the fitness, reliability or safety of
these parts for use with your A2B may not have been checked by
Hero Eco.
3.3 Adjusting the brake levers
Are you able to easily operate the brake levers? If not, take your
A2B to an A2B specialist dealer to have the angle of the brake
levers adjusted.
Alternatively, you can adjust the brake levers' angle yourself as
indicated below:
1. Loosen the screw below the brake lever using an appropriate
Allen key.
2. Adjust the angle as required.
3. Tighten the screw and make sure the brake lever is held securely
in place.
For adjustment of the brakes, you should take your A2B to an

A2B specialist dealer.
3.4 Adjusting the seat height
The seat height may need to be adjusted. Please ask your A2B
specialist dealer to adjust the seat height before your first journey.
You can also adjust the seat height yourself as indicated below:
Determining the correct seat height for the rider
There are several ways of determining the correct seat height; the
method which can be carried out without any other equipment is
performed as follows: Sit on the saddle and stretch one leg. Put
the heel of your foot on the pedal which is at the lowest point of the
crank turn. Your knee should now be almost straight.
Of course, you do not then ride with your legs stretched. When you
put your foot on the pedal while in the correct riding position (ball
of the foot and base of the toe joint above the pedal axle), the knee
will still remain slightly bent at the lowest point of the crank turn if
the saddle height has been adjusted correctly.
A short test ride will tell you if the saddle is too high. If your pelvis
tilts to the right and left in time with the pedalling rhythm then the
saddle is too high. If the saddle is too low, you will usually only find
out after many kilometres with pain in your knees.
If you are sitting right on the saddle while in this position then the
saddle height is correct.
9
User manual
Inside Leg Height
Frame Height
1 inch / 2,5 cm
Clearance
Frame Height
Inside Leg Height
Frame Height
Height adjustment
1. The seat height can be adjusted by loosening the quick release
for the saddle post.
2. Position the saddle at the desired height. Do NOT position the
saddle higher than the minimum insertion mark located on the
saddle post UNDER ANY CIRCUMSTANCES.
3. Push the quick release lever towards the frame, until it is closed
again. In order to avoid the risk of injury, the lever must not stick
out. The lever is safely fastened if it takes effort to push it into
the closed position. The amount of effort is appropriate if the
lever leaves a mark on the palm of your hand when pressing.
A properly closed quick-release cannot be moved any more
unless it is reopened as specified above. If you can move
the mechanism slightly, open the quick release lever, turn the
adjusting nut by another 180° and try again.
4. After height adjustment, check that the saddle cannot be moved
in any direction.
An improperly attached saddle may lead to severe or even

fatal injuries. Ensure that the saddle clamp screw (saddle post saddle) has been tightened using 27 Nm.
• This user manual provides no guarantee as to the safe use of the
A2B under all conditions.
3.5 Adjusting the handlebars
2. Position the stem at the
desired angle.
3. Tighten the C screws to 1718.5 Nm and ensure that the
stem is alignedin relation to the
front wheel.
1. Loosen the A screws using an
appropriate Allen key.
2. Align the handlebars centrally
in relation to the stem.
3. Turn the handlebars to achieve
the desired angular position.
4. Tighten the A screws evenly
using 5 Nm.
3.6 Adjusting the variable stem
Alignment of the handlebar
stem
A
C
B
1. Loosen the B screws using an
appropriate Allen key.
2. Align the stem in relation to the
front wheel.
3. Tighten the screws evenly
using 15 Nm.
C
B
Caution: This is an

A-headset stem, the upper screw
D is a pretensioning screw and
is not intended for adjusting
the stem! Trying to tighten screw D may result in damage to the
headset.
Improperly attached handlebars and stem may lead to severe

or even fatal injuries.
Make sure the steering is free of play and can be operated easily.
Please contact your A2B specialist dealer if you need more help in
adjusting the handlebars, headset and stem.
Adjusting the angle of the stem
1. Loosen the C screws using an appropriate Allen key.
11
User manual
4.0 Familiarising yourself with the functions of your A2B before your
first journey
If you still have any questions after having read this section, please ask your A2B specialist dealer to explain any unclear
functions or features to you before your first journey.
4.1 A2B at a glance
As soon as you start to pedal when the drive system is enabled, you
will notice that the motor will start and assist you based on the level
of assistance selected - making riding a bike an effortless pleasure.
4.2 Starting and stopping
1. Put your helmet on and look for a calm place without any
obstacles, cars or other hazards, if possible.
2. Ensure that the battery has been charged and connected
correctly
3. Activate the drive system by pressing the controller's middle
button next to the left handlebar grip.
4. Fold the stand up into the riding position.
Do NOT sit on the A2B if it is still
supported by the stand. By doing so, you
damage the stand and possibly the frame.
5. Sit on the A2B and find a comfortable
sitting position.
6. Start to pedal and start the motor
assistance in this way.
7. Test the brakes at low speed. The left brake lever activates the
front wheel brake, the right brake lever activates the rear wheel
brake. If you pull the brake levers too hard, a wheel may become
locked which could cause you to lose control of the bicycle and
fall. Remember that both brake levers include a motor switch-off
device; as soon as you operate one of the two brake levers, the
motor's power supply will be switched off, so do not brake if the
engine should remain running.

Remember that both brake levers include a motor switch-off
device. As soon as you operate one of the two brake levers, the
motor's power supply will be switched off, so do not keep a brake
lever pulled if the motor should remain running.
8. Test the handling and reactions of your A2B. Familiarise yourself
with how the suspension responds to the brakes being operated
by the rider and the shifting of the rider's weight.
4.3 Gear box
Your A2B is equipped with a
derailleur activated by the two
pressure levers at the righthand side of the handlebar.
To facilitate pedalling (e.g. at
gradients), you operate the
large lever located in front of
the handlebar and marked with
A in the illustration. In this way,
you shift down and have to
pedal faster to maintain your
speed. If you want to go faster
(on the flat or downhill), you
shift up one gear using the
smaller lever which is marked
as B in the opposite figure and
located behind the handlebar
from the driver's point of view.
You can pedal slower, but you
have to use more effort.
in a forward direction when
shifting into another gear.
The derailleur operates
independently from the motor.
Using the derailleur, select a
gear which allows you to pedal
comfortably and, at the same
time, helps the motor.
4.4 Lights
B
Turn the on/off switch located on the headlamp to the applicable
position to switch the lights on or off.
A
Do not ever move the pedals backwards when shifting into

another gear. The chain could come off and you may lose control
of the bicycle which could lead to accidents resulting in severe or
even fatal injuries and/or material damage. Always pedal evenly and
13
User manual
4.5 Luggage rack
Your bicycle model is not equipped with a luggage rack as
standard, however your A2B's battery has a slot for a Rack-Time
luggage rack adaptor. This adaptor can be ordered through
your A2B specialist dealer using the order no. 625450098300
and installed on the bicycle. This adaptor enables you to install
various luggage transport options from Rack-Time. You can from
choose either luggage baskets or a range of saddle bag solutions.
Alternatively, you can just use the base plate and a standard
Racktime luggage rack. Please ask your A2B specialist dealer for
information about the various options and the best solution for your
needs. No matter which solution you choose, please be aware of
the following when transporting your luggage:
1. Your A2B's battery is equipped with an integrated LED rear
light. When riding at dusk or in the dark, please ensure that your
luggage is fixed in such a way that the rear light is not covered,
either completely or in part, since this results in a high risk of not
being noticed by other road users.
2. Make sure the luggage is safely attached to the luggage rack
and cannot fall off while riding. Ensure that loose tightening
straps or other objects cannot get into the spokes while riding.
3. Observe the maximum permitted load of 25 kg in addition to
the bicycle's standard fittings on the rear of the bike. Do not
overload the luggage rack.
4. This vehicle is not designed or approved for transporting a
second passenger, transporting a child in a fitted child seat or
for pulling a trailer.
5. The total permitted weight for your A2B must not be exceeded.
The maximum total permitted weight is indicated in the
specifications.
6. Distribute the weight of your luggage or the objects to be
transported evenly on both sides of the luggage rack.
7. Please remember that luggage or other loads present on the
luggage rack alter the handling of your A2B. This applies in
particular to steering and braking responses.
Failure to observe these directions may lead to severe or

even fatal injuries and/or material damage.
At the end of your first journey
If you have any questions or feel that your A2B has not yet
been adjusted and adapted to you as well as possible then we
recommend that you contact your A2B specialist dealer before
using your A2B again.
Your range
Factors affecting the range:
• Support level
• Battery charge level
• Use of the correct gears for your speed
• Tyre pressure
• Front wheel bearing and both brakes (tight bearings or rubbing
brake blocks will reduce the range)
• Driver's weight (more energy is required to accelerate a heavy
person)
• Your speed and the wind conditions (quick pedalling into a strong
headwind reduces the range)
• Terrain (riding on soft areas or uphill requires more efforts)
• Frequent starting and stopping (full power from a standstill uses
the most battery power)
• Check the tyre pressure regularly and inflate the tyres to a
pressure of 3.5 bar (front and rear tyres).
• Have your A2B serviced regularly to ensure that the wheel
bearings are rotating freely and the brake blocks do not rub on
the brake disks.
• Keep the total weight as low as possible.
• Ride at low speeds.
• Use the energy saving mode as often as possible and assist the
motor by pedalling on your own.
• Lubricate the chain and derailleur using a special chain spray for
bicycles.
Maximising your range
• Completely charge the battery before every journey.
15
User manual
5.0 Operating instructions for the smart Man Machine Interface
(sMMI) motor and control interface
5.1.1 Important instructions – please take note!
Please pay attention to all documents enclosed with your A2B and
all notes, both those included in this user manual and those on
stickers attached to the bicycle.
the right to make changes resulting from further development of the
mechanics or software or from statutory requirements.
According to the manufacturer of the neodrives components,
misuse of the neodrives components installed on your A2B
includes, but is not limited to, the following:
5.1.2 Intended use of the neodrives components
Your A2B, equipped with the neodrives drive system, is a Pedelec
(Pedal Electric Cycle) for usual transportation of one person on
public roads. Any adjustments and repairs to the A2B and its
components shall only be regarded as intended use insofar as
they are stated in and permitted by these operating instructions,
the component manufacturers' instructions or further documents
provided upon purchase of the Pedelec. The manufacturer does not
assume any liability for damage caused negligently due to misuse,
improper use or improper or omitted maintenance or repairs. The
driver is responsible for examining the Pedelec as required, having
any necessary works carried out and using it appropriately.
The following sections of these operating instructions only describe
the use of the neodrives components installed on your A2B and
correspond to the latest version of this technology at the time of
printing. The manufacturer of the neodrives components reserves
• Use of the drive system contrary to the instructions and
recommendations in these operating instructions
• Exceeding the technical performance limits defined in the present
operating instructions
• Technical modifications to the neodrives components
• Modification of the neodrives components' software
• Unauthorised installation or use of the neodrives components on
bicycles other than the A2B Pedelec supplied to you.
5.1.3 Acceptable operating conditions / places of use
neodrives components may be operated at temperatures between
-10°C and 45°C.
Observe the safety instructions and hazard warnings included in
the individual sections of the present operating instructions. The
restrictions on the acceptable operating conditions (e.g. maximum
climbing power, permissible maximum obstacle height, maximum
user weight, etc.) contained herein must be observed when using
the Pedelec! Observe the safety instructions and hazard warnings
included in the individual sections of these operating instructions.
5.1.4 Standard scope of supply (neodrives components)
• Drive motor
• Smart Man Machine Interface (sMMI) = Control unit incl. dock
17
User manual
5.1.5 Technical details
Drive
Range*
Speed
Rated output (peak)
Operating voltage
Rated torque
Peak torque
Efficiency
Power electronics controls
Cartridge receiver
Brake disk
Intake torque
Weight Up to 120 km
25 km/h
250 watts (650 watts)
36 volts
12 Nm
40 Nm
80% (incl. electronics)
Integrated into the wheel hub
Commercially available plug-in
cartridge cartridge receiver
with 9-fold transmission
Diameter from 160 mm
Variable torque support can be
adjusted to dropout
4.36 Kg (just the drive, incl.
plugs and cable, without brake
disk, freewheel unit, cartridge)
Smart MMI
Display control *
Monochrome
Diagonal display measurement, 2.4 inches, 240 X 320 pixels
resolution
sMMI dimensions without dock 53 mm x 85 mm x 14 mm (W
X L X H)
Connectivity
Micro-B 1.1 USB, 5-volt
power supply, 500 mA PC
connection with diagnostic and
parameterisation software
Mechanical/electrical contacts Twist-to-lock, corrosion-proof
contacts, spring loaded
Lighting
LED Backlight, 70 – 350 cd/
m²
Display surface
Scratchproof, quenched and
tempered acrylic glass plate
sMMI weight (detached)
55 g
Smart MMI Dock
Controller
23 mm inside diameter, 3
buttons (up, down, menu),
hard-wired
Mounting plate
Stem and handlebar mounting,
angle can be adjusted in 10°
steps, height can be adjusted
using spacers
Weight (incl. cable and remote 60 g
control)
Whole system
Operating temperature
Protection class
(*) The range varies depending on the battery used, the terrain and
the prevailing travelling conditions.
The specified range can be achieved under optimum travelling
conditions (e.g. even terrain, recently charged batteries, ambient
temperature of 20°C, smooth journey, etc.), with a driving power of
100 watts and a pedalling power of 100 watts.
Subject to technical and design modifications based on continuous
further development.
These operating instructions can also be downloaded from our
website www.weareA2B.com.
-10°C to 45°C (recuperation
and braking assistant will be
automatically deactivated
below 0°C)
IP65
19
User manual
5.2. Controller
5.3. smart Man-Machine Interface (sMMI)
The controller fitted to the handlebar of your
A2B is used to access menus
and activate functions in the sMMI. The
following functions are stored:
Button 1 = UP (one step upwards)
Button 2 = confirm menu button or
selection
Button 3 = DOWN (one step downwards)
The sMMI is attached to your Pedelec's
handlebar or stem. You can access various
functions and activate or deactivate
parameters using the controller's buttons
(see section 2). For some functions you can
also permanently store various parameters
in the sMMI's software (see section
3.2.15). Please contact your specialist
dealer regarding this matter, they will be
happy to inform and advise you. For further
information, an overview of the sMMI's
menu structure follows.
Display start symbol
Transmission of the software updates to the motor
Start menu
Activation assistance level
Activation recuperation
Activation pushing aid
Display speed
Display remaining range
Display remaining energy
Display travelling information
Various warning indicators
Back
Switching off
Menu
Back
Tour Reset
o.k.
Travel mode
Boost
Tour
Eco
Braking
assistant
On
Off
Pushing aid
On
Off
Settings
Back
Speed selection
Easy Display
On / off
Date
Year / Month / Day
Time
Hour / Minute
Language
DE / GB / FR / NL
Units
Kilometres / Miles
Information
Software status sMMI, motor, battery
21
User manual
5.3.1 Fitting and removing the sMMI
Fitting
Place the sMMI [4] in the correct position (the "neodrives" logo
faces the rider) and turned to the left at an angle of about 30
degrees in relation to the dock [5] (see illustration).
Turn the sMMI [4] clockwise on the dock [5] by 30 degrees
applying slight pressure so that both components are aligned
to each other. While doing so, the electrical connections to the
controller, motor and battery pack are automatically established.
Removing
Turn the sMMI [4] anticlockwise on its dock [5] by about 30
degrees. While doing so, the electrical connections are disengaged
and the sMMI [4] can be removed. The sMMI must be switched off
before it is removed (see section 3.2).
To protect your Pedelec from unwanted use by third parties

or against theft, the sMMI should always be removed from the
handlebar when not in use. Removing the sMMI, however, does not
constitute a replacement for securing your Pedelec against theft
by means of appropriate measures (use of a bicycle lock, anti-theft
chain or similar).
5.3.2 Functions of the sMMI
5.3.2.1 Switching on and off
Switching on
To switch the sMMI on, press the menu button [2] on the controller.
After a couple of seconds, a welcome screen will appear followed
by the start menu shown opposite. If functions are already activated
or the battery is not fully charged, the display of your sMMI may
differ in parts from the illustration.
Switching off
To switch off your Pedelec, you need to press button [2] on the
controller for about 2 seconds while the start menu is displayed.
By doing so, you access the submenu shown opposite. In this
display, you can jump up or down using buttons [1] and [3] on the
controller. Any selected field is displayed within a U-shaped border.
Select the "Switch off" field and briefly press button [2]. Your
Pedelec will now be switched off.
Automatic switch-off
If your Pedelec is not used for 10 minutes, the system will
automatically be switched off. Pressing the menu button again will
switch the system back on.
Do not switch off your Pedelec by removing the sMMI, this

may damage the electronics.
23
User manual
5.3.2.2 Start menu
As described in section 3.2.1, the start menu shown in the opposite
illustration will appear upon startup.
Explanation:
6. Approximate value of the distance in km which can be travelled
at the preselected level of assistance (remaining range)
7. Display of the current speed
8. Selection of the assistance level (see section 3.2.4)
9. Set assistance level (see section 3.2.4)
10.Selection of recuperation (see section 3.2.5)
11.Various alternating information and warning indications, see
section 3.2.11 (shown here: remaining battery capacity)
12.Display of various travelling information (see section 3.2.10)
The letter "M" for setting the menu functions is only shown in
the left lower third of the display while at a standstill. For safety
reasons, various functions cannot be selected while riding.
All parameters that you change will be permanently saved

and will be available each time the sMMI is switched on. For this
reason, the display of your Pedelec may differ from the illustration.
5.3.2.3 Dynamo function and "light"
switch-on routine (optional)
The neodrives motor features a dynamo
function and supplies the headlamp on your
Pedelec with power even if the battery is
flat, not attached or defective. Thanks to
this function, a standard bicycle dynamo on
the front wheel is not required. In the normal
Pedelec mode, the bicycle headlamp is
supplied with 36 volts from the battery
pack. When switching on the bicycle lights,
a certain sequence must be followed for
electronic query routines:
1. Switch on the Pedelec, before switching
on the lights. Switch on the lights only
when the Pedelec shows readiness
to travel on the display for about 3
seconds.
2. After the end of the journey, the lights
always need to be switched off so that
the correct switch-on routine can be run
when they are switched on again.
If, contrary to the above routine, the
Pedelec is switched on when the lights are
switched on then a warning symbol will be
shown on the display. In this case, switch
off the Pedelec and the lights and proceed
as described above.
5.3.2.4 Selecting the assistance level
Your desired assistance level (5 possible
levels) can be permanently stored in the
sMMI by your specialist dealer as part of
a travel profile. This level will be available
instantly after switch-on of the sMMI and
will be shown on the sMMI's display as
bar element [9]. You can also change
the assistance level manually at any time
using the buttons [1] UP and [3] DOWN
on the controller, thereby increasing or
reducing the number of the individual white
bar elements in the field [8] according to
the assistance level you require. When
switching off the Pedelec, any changes
made using the controller buttons are not
stored.
According to the selected assistance level,
field [6] indicates the distance that can be
travelled using motorised assistance. The
higher the selected assistance level, the
more energy is consumed by the motor. The
range which can be achieved is reduced
accordingly.
When restarting the Pedelec, therefore,
only the assistance level stored in the travel
profile will be available.
25
User manual
When the Pedelec is stopped, please be
aware of the following:
• If the pushing aid (see section 3.2.7) is
activated, you need to turn the Pedelec's
pedals 2 to 3 times the Pedelec has been
stopped before the motorised assistance
will be available again - you can increase
or reduce the assistance level using the
buttons on the controller.
• If the pushing aid is deactivated, the
motorised assistance is instantly available
when moving the pedals. Similarly, the
assistance level can also be increased or
reduced when the Pedelec is standing
still.
The field [12] of the start menu has

multiple functions. By briefly pressing
the controller button [2], various travel
information can be displayed (see section
3.2.10).
5.3.2.5 Activating recuperation
By activating recuperation, you can recover
energy when travelling and feed it into the
battery. This is possible and advisable from
a speed of 15 km/h. The recuperation is
activated and adjusted using the controller
buttons [1] and [3].
• One white bar element [10] means: 50%
energy recovery in the battery (factory
setting, configurable)
• Two white bar elements mean: 100%
energy recovery in the battery (factory
setting, configurable)
Depending on the battery used and the
speed, a maximum of 6A to 8A is recovered
in case of 100% energy recovery. If you
want to deactivate recuperation, this is also
done using the controller button [1].
During energy recovery, "0 A" is shown
in field [12] and the charging process [a]
symbol is shown in field [11]. If the energy
cannot be recovered because the battery
is already charged to above 90% then the
[b] symbol is displayed instead. In this case,
the sMMI's software waits for the battery
to be partially drained then automatically
switches on recuperation and changes to
the [a] symbol.
Automatic recuperation (optional)
Depending on how the Pedelec has
been configured by the manufacturer,
recuperation can also be activated
automatically by operating the rear wheel
brake. By doing so, energy is automatically
fed into the battery whenever you brake.
To ensure controlled and safe braking,
recuperation during braking is made with
40% energy recovery.
appears, select the "Braking assistant" item.
When selecting the "On" item, a new menu
item is opened in which you can preselect
the speed from which the motor-assisted
braking process is to be carried out using
the controller buttons [1] and [3]. A speed
between 10 and 28 km/h can be set. If you
have adjusted the required speed, you can
return to the start menu by pressing the
controller button [1] several times.
Recuperation may only be activated

at temperatures above 0° C. If temperature
drops below 0°C, recuperation is
automatically deactivated.
If you wish to deactivate the braking
assistant, repeat the procedure and select
the "Off" item instead of "On". Please note
that neither automatic deceleration nor
energy recovery and feeding into the battery
are carried out if the braking assistant is
deactivated - unless you select manual
recuperation (see section 3.2.5)
5.3.2.6 Braking assistant
At speeds of less than 15 km/h the

motor is not yet at its optimum operating
point, which is why recuperation cannot be
activated.
Activating recuperation is not

possible when the battery is fully charged,
as the battery could be damaged as a result
of overcharging. Recuperation can only be
activated at a battery charge level of ≤ 90%.
The braking assistant can be activated
before the journey if required. It assists you
with braking and ensures the recovered
energy is fed into the battery (provided that
the battery is not charged above the limit
of 90% and the temperature is not below
0°C).
To activate the braking assistant, press
the controller button [2] while in the start
menu (see section 3.2.2) to access the next
submenu. Select "Menu" in the submenu
and, in the selection window which then
27
User manual
Important notes
If the battery is fully charged, the braking
assistant can be activated but not actively
used. This is only possible if the battery
charge level is <90%. For this reason, the
fully charged battery (a) symbol is shown
in field [11] of the display instead of the
activated braking assistant (b) symbol. The
sMMI's software now waits for the battery
to be partially drained, then automatically
switches on the braking assistant and
switches to symbol [b].
Important information about the
operation of the braking assistant
If, for example, you have preset a speed of 20 km/h then the system
will maintain this maximum speed irrespective of the slope angle,
provided that the slope is steep enough to achieve the preset
maximum speed. This is carried out by the drive until maximum
motor torque is reached. If this is exceeded, the braking effect
gradually decreases and you will have to brake additionally on
your own so as not to accelerate. While the motor is regulating the
travelling speed as described above, power is fed back into the
battery which is thus charged.
As soon as you start to pedal, the braking assistant is automatically
deactivated. It will be reactivated as soon as you stop pedalling
and there is no force acting on the chain or the force sensor in
the wheel hub via the pedals. The assistant will, however, only
become effective if the speed is not more than 28 km/h after you
have stopped pedalling. The assistant can be brought back into the
speed range where it is automatically activated by means of manual
braking.
5.3.2.7 Pushing aid
If you require motorised assistance when pushing, e.g. on steep
mountain slopes, you can activate the pushing aid. For this purpose,
press the controller button [2] while in the start menu (see section
3.2.2) to access the next submenu. Select "Menu" in the submenu
and, in the selection window which then appears, select the
"Pushing aid" item. You can activate or deactivate the pushing aid
in the next window which is opened. Once you have selected the
required function, you can return to the start menu by pressing the
controller button [1] for several times. The activation of the pushing
aid is shown there with the symbol [13].
Use of the pushing aid
• The pushing aid is used by pressing the controller button [1]. As
a result, the motor is switched on and moves your Pedelec at a
maximum speed of 6 km/h as long as you press and hold button
[1]. This is shown in field [13] as a white bar element.
• If the buttons [1] or [3] are released, the motor is switched off. It
can only be switched on when the Pedelec/Handbike is stopped.
• If the pedals are moved during pushing, the sMMI automatically
changes to the preset assistance level mode (see section 3.2.4) so
that the selection activated there is available for you.
• If the pedals are no longer moved, the sMMI switches back to the
pushing aid.
• If the sMMI is switched off, the activation of the pushing aid will
remain in the programme and will be immediately operational the
next time the sMMI is switched on. However, you first have to pedal
2 to 3 times before the motor moves the Pedelec when the button
[1] or [3] is pressed.
• The pushing aid's maximum speed can be adjusted by your
specialist dealer according to your requirements.
29
User manual
5.3.2.8 Date and time
The date and time can also be set individually. The set time is
shown in field [12] of the start menu, while the date is only used
for internal calculations in the sMMI. As for the functions already
described in the previous sections, you can access the various
submenus from the start menu as indicated above to set the date
and time (see overview provided in section 3). You can modify the
required parameters here.
5.3.2.9 Travel modes
Three travel modes - BOOST, TOUR and ECO - are stored in the
sMMI.
In Eco mode, the torque, and thus the maximum available motor
power, is automatically reduced by about 40%, thereby reducing
power consumption. At the same time, the agility is also modified so
that the drive responds better. The ECO travel mode is especially
suitable for journeys in which the battery charge needs to yield the
longest distance possible.
In the Tour mode, 75% of the maximum motor torque is available.
Performance and range are both at a high level. Moreover, the heat
generation in the motor (see section 4, Thermal Management) is
moderate in this mode so that long, steep inclines can be managed
very well in the Tour mode.
In the Boost mode you obtain the full drive performance. It is
suitable for quick rides in the city, incl. powerful starting at traffic
lights. The full "Boost performance" may not be sustainably
available. Under rough conditions, such as steep uphill rides, the
drive performance may be reduced due to heat generation (see
section 4, Thermal management). In Boost mode, the range will
also be smaller than in the other modes.
To activate the required mode, press the controller button [2] while
in the start menu (see section 3.2.2) to access the next submenu.
Select "Menu" in the submenu and, in the selection window which
then appears, select the "Travel mode" item. Another window will
then be opened in which you can activate the required mode. After
having completed the activation, you return to the start menu by
pressing the button [2] for several times. The ECO and SPORT
travel modes can only be selected when the bike has stopped, not
while travelling.
The parameters stored in the BOOST, TOUR and ECO

modes can be adapted for your requirements. Please contact your
specialist dealer concerning this matter.
Current time (requires presetting, see section 3.2.8).
Display of the distance travelled (requires "Journey Reset"). For this
purpose, navigate to the "Journey Reset" function (Start Menu Menu - Journey Reset; see chart in section 3) using the controller
buttons (see section 2). After each activation of "Journey Reset",
the display is reset to "Zero".
The distance you have travelled since the first startup of your
Pedelec.
Your average speed per journey. The average speed is calculated
from each "Journey Reset" on and is displayed after a travelling time
of 10 minutes.
5.3.2.10 Display of travelling information
(bike computer functions)
Before, during and after a journey, various
values and information are shown in field
[12]
and saved regularly. They can be adjusted
as normal by briefly pressing the menu
button [2] on the controller to show the
subsequent function.
Explanation:
The time in which you have ridden one or more journey; any time for
which the Pedelec is stopped is not included. The travelling time is
calculated from each "Journey Reset" on.
The current power consumption in Ampères.
Your rider performance in watts.
The travel mode that you have activated (BOOST, TOUR or ECO).
31
User manual
5.3.2.11 Display of information and
warnings
The battery's remaining capacity is shown
in field [11] as standard. Depending on
the travelling situation, information and
warnings can also be indicated in the field
as shown below.
Display of the battery's
capacity (standard
representation)
The battery's remaining
capacity is shown step by step
with a decreasing white bar.
The battery's charging
process
1. The battery charger is
plugged in and the battery
is being charged (only for battery
models which are charged via a second
charging socket which is why the power
connection from the battery to the sMMI
does not have to be disconnected).
2. The battery is charged using energy from
the motor (recuperation, see also section
3.2.5).
Warning
The battery is flat. No power
can be taken from the battery,
motorised assistance of the
Pedelec is no longer available. Please
charge the battery as soon as possible
using the charger supplied.
Braking assistant active
While travelling downhill, your
Pedelec is automatically braked
within the preset limits (see section 3.2.6)
Service reminder
The service interval of your
Pedelec has expired. Please
arrange a service appointment
with your specialist dealer. The
display can be reset by your dealer using
diagnostic software.
Warning - Temperature problem
In case of extremely long and
steep inclines (especially in
BOOST mode), the drive
generates heat leading to an
automatic reduction in performance inside
the motor from a temperature of +80°C.
This is shown on the display by the
temperature warning signal. Thanks to the
intelligent multipoint thermal management
monitoring (see also section 4), the motor
will never overheat. The performance is
reduced to such an extent that there is no
chance of any damage. Very rarely (e.g.
heating by external heat sources) the
system may be switched off entirely until
temperatures return to within the range of
acceptable operating values.
Warning - General fault
A fault has occurred in the system,
motorised assistance is no longer
available. Please contact your
specialist dealer.
Warning - System fault
Various letters (e.g. the letter "B"
in the opposite illustration) are
shown inside the warning symbol
instead of the exclamation mark.
They have the following meaning:
B = battery fault
C = communication fault in the system
M = motor fault
R = controller fault
If a fault occurs, motorised assistance will
no longer be available. Please contact your
specialist dealer.
5.3.2.12 Easy Display mode
By activating Easy Display, the following
graphical symbols introduced in section
3.2.2 are enlarged and shown on the
display:
• display of the current speed
• display of the number of kilometres
travelled daily (requires prior RESET,
see section 3.2.10)
• display of the battery's remaining
capacity, incl. display of the expected
remaining range
The respective displays can be selected by
briefly pressing button [2] of the controller.
If buttons [1] or [3] are pressed briefly, the
indication of the assistance level which can
be increased or decreased using the two
buttons will appear for about 3 seconds.
Deactivation of Easy Display
To deactivate this mode, you have to
press the controller button [2] for about 2
seconds. You then access the display "on/
off" via Menu - Settings -Easy Display.
5.3.2.13 Other settings
Your sMMI has a German user interface as
standard. If required, an English interface
can also be activated. The sMMI, motor and
battery pack software status can also be
requested via the "Information" menu item.
The language activation or status requests
are carried out similarly to the procedures
already presented in the previous sections
via various menus and submenus.
Activation of Easy Display
You can access the display "on/off" from
the start menu via Menu - Settings -Easy
Display. If Easy Display is activated, you
automatically access this mode every time
the sMMI is switched on.
33
User manual
5.3.2.14 USB port
The sMMI has a USB port [14] which is
primarily used by your specialist dealer
for maintenance and diagnosis. Make
sure the rubber cover fixed above is
always fully inserted and seals the port.
If the sMMI is not fully sealed, moisture
can get inside and steam up the display from inside.
5.3.2.15 Programming options through the specialist dealer
Your neodrives drive system has been optimally adjusted for your
A2B at the factory, so there is usually no need for any changes.
If individual changes are required owing to your preferences, the
following parameters can be programmed:
Speed of the forward pushing aid:
Set to 6 km/h in the factory settings (maximum legally permissible
value). This value may only be reduced.
Standard assistance level:
The assistance level which is always available after switching-on
the Pedelec. Adjustable from 0 - 5, value 3 is preprogrammed in
the factory settings.
sMMI standard settings:
Language settings, time format (12/24 h)
sMMI lock:
The sMMI can optionally be permanently connected to the motor.
As a result, the sMMI is only operable with this motor/system and
cannot be used with another motor.
Service interval:
Depending on the appropriate maintenance interval specified,
this interval can be set or reset by date or kilometres travelled
(depending on which is first).
Wheel circumference:
To correctly display the speed and comply with statutory provisions
regarding speed restriction, the bicycle dealer may change the
wheel circumference. This is only necessary if the drive wheel is
subsequently fitted with a tyre increasing or reducing the original
wheel circumference or if the motor has been readjusted to a larger
or smaller rim.
This parameter may only be changed if the statutory requirements
are complied with (max. 25 km/h for Pedelecs); in case of misuse
the warranty and product liability will become void. Furthermore,
illegal tampering may lead to criminal consequences if detected
during police checks
All changes to the travel parameters are logged in the sMMI's

data storage.
5.3.2.16 Firmware updates and their transmission to the motor
and battery
As part of product maintenance and to extend the range of
functions, firmware updates are occasionally available for download
by specialist dealers. Your specialist dealer will be happy to inform
and advise you in this matter. If an update was loaded to your sMMI
by your specialist dealer, the new firmware will be installed the next
time you start your Pedelec.
Proceed as follows:
• Put the sMMI on its dock [5] as described in section 3.1.
• The connection to the motor and the battery is automatically
established and a warning "Firmware update is running" appears
instead of the start menu. A live bar graph also shows the
progress of data transmission.
• Once the data is fully transmitted, the screen display
automatically changes to the start menu (see section 3.2.2).
• Check the settings, if any, which you have stored in the sMMI.
They may have been changed by the update.
Do not interrupt the update process, for example by removing

the sMMI from its dock. This
may cause damage.
35
User manual
5.3.2.17 Information on the sMMI plugs
5.4. Thermal management
If you need to remove the sMMI plugs
leading to the battery, please observe the
following information when reconnecting
them. The sMMI plug and the socket on
the cable leading to the battery must be
correctly aligned with each other when
connected. Both parts are quite hard to
connect. This, however, prevents moisture
ingress during operation. Do not bend
the attached cables by any means when
connecting the plug and the socket!
There is a risk of breaking the cable.
A combination of three temperature
sensors, an intelligent software control
and patented air circulation ensure optimal
cooling of the motor. This means better and
longer performance on gradients or with
heavy (trailer) loads.
Advantage:
protection against premature overheating
in case of long gradients or heavy loads longer assistance on hills, higher efficiency
and thus lower battery consumption since
the motor is optimally cooled.
About the theory
Like all drives, gearless wheel hub motors
are also optimised with regards to an
operating point consisting of speed, load
and power. Our wheel hub motors are
designed for operation in the speed range
between 15 km/h and 25 km/h and with
a nominal drive power of 250 watts. They
achieve their highest efficiency and range in
this speed and power range which means
that the energy supplied is optimally
converted into drive energy.
Whenever a motor is operated beyond
its optimum operating point, its efficiency
decreases. This results in the energy no
longer being optimally converted, but
rather a proportion of the energy supplied
being converted into heat. Because of
this, the range decreases and the heat
must be discharged. In neodrives motors
this heat is discharged through a large
contact surface inside the motor (stator
carrier) to the dropout or chainstays of
the bicycle frame. Cooling ribs inside and
outside the drive casing additionally ensure
the greatest possible heat exchange with
the surroundings. Heat which cannot be
discharged results in the drive motor being
heated up.
assistance. This is indicated in the sMMI by
the thermometer symbol shown opposite
(see section 3.2.11). As the temperature
increases, the power is continually reduced.
This means: the greater the
temperature increase in the motor,
the less drive power can be
obtained and the less assistance
is available. When the motor cools down,
the energy supplied is increased again and
the drive power increases.
The neodrives wheel hub motors monitor
both the energy supplied and the
temperatures in the motor. Any damage
through overheating owing to overload can
thus be avoided. This, however, results in
the motor performance available to the rider
being reduced to avoid overheating.
In practice
The above aspects, in practice, lead to
dependence on the outside temperature,
the total weight, incline, terrain, cadence, air
pressure and speed. These factors may lead
to a temperature which causes the power
or assistance to be reduced. This, however,
does not mean that a fault or failure has
occurred in the drive, you can proceed with
less assistance. In extreme cases, a shortterm complete shutoff may occur.
If a temperature of 80°C is exceeded in
the motor electronics, the motor control
reduces the supplied power and thus the
This control of drive power according to
the motor temperature is infinitely variable
so that there is always asistance available,
but the motor cannot be damaged by
overheating.
37
User manual
Extreme example:
an incline of 10-12% at an altitude of
500 metres, a total weight of 120 kg,
loose terrain, a maximum assistance level,
a travelling speed of < 10 km/h and a
cadence of 60 rpm mean operation in an
unfavourable range at low efficiency and
travelling range and, at the same time, high
heat generation. This will lead to a reduction
of the drive power.
Tip:
By selecting a lower gear with higher
cadence, the "Tour" or "Eco" travel mode
and/or a reduced level of assistance and/or
taking a short break (during which the drive
can cool down again), you can continue to
cycle at optimal performance.
The motor must never be externally

"forcibly cooled" using water! This may
cause damage and does not provide very
much cooling since the inside of the motor
in particular becomes hot.
5.5 Motor
The drive wheel of your Pedelec can be
removed from the bicycle frame at any time,
such as for cleaning or in case of a puncture.
Proceed extremely carefully when removing
the drive wheel and when remounting it
afterwards and, in particular, observe the
manufacturer's information and instructions
for the various components fitted to the
wheel, especially the brake disk. (Note: For
better clarity, the following charts only show
the drive motor integrated in the wheel, but
not the complete drive wheel).
5.5.1 Removing the drive wheel
Record or make a mental note of the
cable installation and the fixing points for
the cable fixers before removing the drive
wheel. First loosen and remove all cable
fixers attaching the cable [16] coming from
the motor and cables and supply lines for
other components to the bicycle frame.
Then disconnect the plug [15] on the motor
cable [16] from the socket [17] on the
battery cable. Loosen the two nuts [18] or
the quick release used for fixing the wheel
to the frame so that the entire wheel can be
removed from your Pedelec's frame.
Mark or make a mental note of the

position of the torque support [20]. It must
be reattached in exactly the same position
removal when fitting the wheel later.
Never hold or transport the removed

wheel by the cable [16] coming from the
motor! There is a risk of breaking the cable.
39
User manual
5.5.2 Attaching the drive wheel
Make sure that all components fixed to the
wheel have been mounted according to
their respective manufacturer's instructions
and specifications. This applies in particular
to the brakes and the gear box. Do not
forget to remount the torque support [20] in
the same position as before removal.
Then, push the wheel into the slot on the
frame and tighten it using the hub axle nut
[18] in the following sequence:
• first tighten on the gear box side (figure
A)
• then tighten on the brake side (figure B)
The tightening torque of the two nuts is
between 30 and 40 Nm in each case.
Make sure that the tooth lock washer [19]
is under the hub axle nut, otherwise there is
the risk that the hub axle nut [18] can come
loose.
If your wheels are equipped with quick
releases, please observe the manufacturer's
specifications on mounting and the
tightening torque.
If the wheel is correctly fixed to the frame,
the motor can be connected to the cable
end leading to the battery. While doing
so, ensure that the plug [15] is correctly
aligned with the socket [17]. The rounded
surfaces ([A] and [B]) must be aligned with
each other!
A
Fasten all cables and supply lines to the
bicycle frame using cable fixers and carry
out a final functional test.
Make sure the cable is installed correctly
since the cable could get caught in the
brake disk, drive or spokes if the cable
is incorrectly installed, leading to wheel
locking and, subsequently, the rider falling
off.
Observe the manufacturers'

instructions and specifications for the
various components fitted to the wheel at all
times during mounting work. This applies in
particular to the brake, the gear box and the
quick release.
B
Never install the motor without the

torque support [20]. This would lead to
a write-off (twisting off the cable). In this
case, all warranty or guarantee claims
shall become void.
•
Carry 5 cable fixers with you

alongside your repair tool in order to be
able to refasten any loose cablessecurely
during a journey.
Mounting or removing the drive

wheel is best carried out with the
Pedelec turned upside down (resting on
the handlebars and saddle). Remove the
sMMI fixed to the handlebars first to avoid
damage.
•
•
5.6. Cleaning the motor and sMMI
Never use cleaning benzine, thinners,
acetone or similar agents when cleaning
the motor and sMMI. Never use abrasive
or aggressive cleaning agents. Instead,
only use commercially available household
cleaning agents and disinfectants (isopropyl
alcohol).
•
cleaning. Riding in the rain and on wet
ground, however, are possible without
any problems.
Water infiltration may destroy the motor.
Therefore, always make sure when
cleaning that neither liquids nor moisture
get into the motor.
Do not clean the motor when warm, e.g.
immediately after a journey. Wait for the
motor to cool down. Otherwise this may
lead to damage.
If the motor has been removed, e.g.
for cleaning, it must never be held or
transported by the cables, otherwise
there is a risk of breaking the cables.
If the motor has been removed from the
Pedelec's frame (see section 4.1), the
plug from the motor and the socket of the
cable leading to the battery back must be
checked for contamination and cleaned
before reconnection.
5.6.1 Motor
• Your Pedelec's motor should be cleaned
regularly to remove dirt, ideally using a
dry brush or a damp (not wet) cloth. Do
not use running water, such as a water
hose or even a high-pressure cleaner for
41
User manual
5.6.2 sMMI
• The contacts of the sMMI dock are spring loaded and should be
cleaned from time to time using a contact spray to ensure they
operate flawlessly and for a long time.
• The sMMI casing must only be cleaned using a damp (not wet)
cloth.
5.7. Transport
The following information must be observed when transporting the
Pedelec by car:
• Protect all components of your Pedelec from moisture and dirt by
taking appropriate measures.
• Remove the battery and sMMI from the bicycle before attaching
the Pedelec to your car's bicycle rack. The weight that you have
to lift, particularly for a roof bicycle rack, is thus reduced.
• Always transport the battery and the sMMI inside your car.
• When transporting the Pedelec inside your car (e.g. in an estate
car), the sMMI and battery should also be removed to avoid
damage during loading and the journey.
• In case of carrier systems featuring down tube clamping, make
sure that the battery mounting rail is not crushed/damaged when
tightening the clamping device.
• Ensure that the cable ends cannot cause damage to the Pedelec
or your car during transport.
• Check all the Pedelec's contacts for possible foreign matter or
moisture after transportation. To ensure safe operation, all plug
connections in particular must be free from dirt and foreign matter
as well as completely dry.
• Never put your Pedelec on its gear box side during transport, for
instance in a car boot. It could be damaged in this way.
5.8. Warnings
• When not in use, do not expose your Pedelec to strong sunlight
for long periods. This can cause the motor to heat up and, in
extreme cases, not be able to operate at full power. Plastic parts
also age faster under intense sunlight.
• If high temperatures (caused for example by uninterrupted
operation or while stopped owing to sustained exposure to
sunlight) cause the system to stop, let the motor cool down for
about 10 minutes before continuing your ride.
• The maximum speed (non-motorised operation) of the system
is 75 km/h. When exceeding this speed, you endanger the
electronic components which could be damaged in the worst
case. The maximum speed is logged by the system.
5.9. Error indications and possible solutions
The system cannot be switched on
(no indication on the sMMI display)
• Has the battery been correctly inserted into its holder?
• Have all plugs been correctly connected?
• Are there any deposits (such as metal filings) on the magnetic
battery plug? Please check this very carefully!
• Is the battery "awake"? After 48 hours without being used, the
battery goes into a "deep sleep" and must be reactivated by
pressing the battery button once.
• Has the sMMI lock been activated by the specialist dealer? If so,
the sMMI only operates with the designated motor (see section
3.2.14 - Anti-theft measures).
• Do the sMMI contacts on the dock spring back properly? Press
the 8 pins into the dock one after the other using your finger.
Check if the pins spring back. If the pins are stuck, use contact
spray.
Recuperation/the downhill assistant
does not work
• Is the battery charge level >90%? Recuperation only works with
a battery charge level of ≤ 90%.
• Is the current travelling speed less than 15 km/h? Recuperation
is not possible below 15 km/h.
• Is the current travelling speed more than 28 km/h? Recuperation
is not possible above 28 km/h.
The battery cannot be charged
• Are there any deposits (such as metal filings) on the magnetic
charger plug? Carefully check the charger plug and the battery
socket for deposits.
• Is the ambient temperature <0°C? The battery cannot be
charged below 0°C. Always charge the battery at room
temperature. Observe the information on the charging process
provided in the charger's operating instructions, in particular the
error codes.
No motor assistance (sMMI operative, motor assistance not available)
• First check that the motor cable and motor plug are correctly
aligned with each other (see section 4.1).
• Is an error message appearing on the display? If so, follow the
appropriate recommendations (see section 3.2.11). Was the
switch-on routine for the lights observed? (see section 3.2.3).
• Is the system permanently in recuperation mode? If so, check the
brake lever switch located on the rear wheel brake lever (only for
sMMIs with brake cable) for proper fit.
• Has the sMMI been correctly attached to the dock (see section
3.1)?
The assistance levels cannot be changed
while stopped
• You have activated the pushing aid in the menu. As soon as you
start to pedal, you can select the assistance levels. Alternatively,
you can deactivate the pushing again aid via the menu (see
section 3.2.7).
The motor is not operating at full power output
• The motor might be in a high temperature range.. From an
electronics temperature of 80°C, power is gradually reduced. Let
the Pedelec cool down for about 10 minutes (in the shade) and
then continue your ride.
The symbol for the service reminder (section 3.2.11) is showing on the
display.
• You can continue to ride your Pedelec without any restrictions,
but please arrange a service appointment with your specialist
dealer. They can then reset the display.
43
User manual
6.0 A2B neodrives battery operating instructions
6.1.1 Important instructions – please take note!
Aside from this user manual, further documents are supplied with
your Pedelec.
Please observe the specifications and instructions contained in
these documents.
6.1.2 Intended use of the A2B neodrives battery
The A2B neodrives battery is only intended to supply power to the
neodrives drive system. No other components may be connected
to it. Any further use is subject to the written consent of the
manufacturer.
• Use of the battery contrary to the instructions and
recommendations in these operating instructions.
• Exceeding the technical performance limits defined in the
present operating instructions.
• Technical modifications to the battery.
• Modifications to the battery's software.
• Unauthorised attachments or use of the battery.
• The manufacturer does not accept any liability for damage
caused by misuse of the battery.
The manufacturer does not accept any liability for damage
caused by misuse of the battery.

Before starting your journey, read all safety instructions
These operating instructions only describe the use of the neodrives and hazard warnings contained in the individual sections of these
battery and corresponds to the latest version of this technology at operating instructions and all other enclosed documents.
the time of printing. The manufacturer reserves the right to make
changes resulting from the further development of the mechanics or
software or from the statutory requirements.
According to the manufacturer, misuse of the battery includes the
following:
6.1.3 Acceptable operating conditions / places of use
6.1.5 Technical details
The battery may be used at ambient temperatures between -10°C
and +45°C
Name: Battery type: Rated capacity: Rated voltage: End-of-charge voltage Total energy: Maximum discharge current: Ambient charging
temperature:
Ambient operating
temperature:
Number of cells: Protection class Weight: Also observe the information on acceptable operating conditions
contained in the Pedelec manufacturer's operating instructions. This
manufacturer's restrictions on the acceptable operating conditions
must also be followed!
Observe the safety instructions and hazard warnings included in the
individual sections of the present operating instructions.
6.1.4 Standard scope of supply (neodrives components)
• Battery, incl. 1 pair of keys
• Battery rail for attaching the battery (already mounted on the
Pedelec)
• the present operating instructions
BM18650Z3 Lithium ion 11.25 Ah 37 V 42.5 V 416 Wh 30 A US18650NC1
Lithium ion
14.5 Ah
36V
42.5 V
522 Wh
30 A
0°C to 40°C
0°C to 40°C
-10°C to 45°C 50 IP54 about 3.25 kg -10°C to 45°C
50
IP54
about 3.25 kg
Subject to technical and design modifications based on continuous
further development.
Please keep these operating instructions for future reference.
These operating instructions can also be downloaded from our
website at www.weareA2B.com.
45
1
User manual
5 4
6
6.1.6 The main elements at a glance
Battery
1. Battery (casing)
2. Keys
3. Charger socket / motor connection
4. On/off button
5. LED energy display
6. LED rear light
2
On the Pedelec
7. Battery rail
Battery charger
8. Charging cable plug
8
3
7
6.2. Safety instructions and warnings
Read and take not of the following

safety instructions and warnings before
installing the battery and starting the
charging process. Non-compliance with
the safety information and instructions
may result in damage to the product or
electric shocks, fire and/or severe injuries.
The lithium-ion battery contains chemical
substances which may cause dangerous
reactions if the present safety instructions
are not complied with. The manufacturer
does not accept any liability for damage
resulting from the non-compliance with
these instructions.
•
•
•
•
6.2.1 Safety instructions and warnings
for use of the battery
• The battery should be fully charged
before using it for the first time.
• The battery may only be used at
temperatures between -10°C and +45°C
• The battery must not be exposed to heat
(e.g. radiators) or fire. External heat may
cause the battery to explode.
• In the (unlikely) event of the battery
overheating or catching fire, the battery
must under no circumstance come into
•
•
•
contact with water or other liquids. The
cell manufacturers recommend sand as
only appropriate extinguishing agent.
Your Pedelec consumes energy each time it
is used. We therefore recommend charging
the battery after each use if possible.
The battery may only be used for
supplying power to the neodrives
components. Any further use is subject to
the written consent of the manufacturer.
The battery must not be opened or
disassembled. Improper opening or
wilful destruction of the battery involves
the danger of severe injuries. Moreover,
opening the battery will result in the
warranty claim being voided.
Never connect the battery contacts in
the socket to metallic objects and ensure
that the contacts never come into contact
with metallic objects (for example with
metal filings).
If the socket is dirty, clean it using a clean
and dry cloth.
Never immerse the battery in water.
The battery's life cycle depends, among
other things, on where it is stored.
Therefore, do not leave the battery
(irrespective of whether the battery is
inserted or has been removed from the
Pedelec) in hot places for long periods
of time. In particular, the boots of cars
parked in the sun should only be used for
transportation, not as a general storage
location.
• The battery must not be exposed to
mechanical impacts. If, for instance, the
Pedelec tilts and the battery directly hits
the ground, the battery must be checked
by the manufacturer. Please contact your
specialist dealer concerning this matter. A
damaged battery must not be used again.
• If the battery is damaged or defective, it
must be taken out of use and checked.
Please contact your specialist dealer and
discuss further action with respect to
return and repair. The defective/damaged
battery must by no means be used again
or opened.
• Always make sure to keep the battery
clean and dry.
6.2.2 Safety instructions and warnings
for storage of the battery
• Protect the battery immedialy after
disconnecting it from the charger or
motor. Moisture or foreign matter (such
as metal fragments, small nails, filings or
other conductive metals) must not get
into the battery.
47
User manual
• Do not expose the battery to any kind of
moisture (water, rainwater, snow, etc.)
during storage!
• Charge the battery before storage and
check the state of charge every 3 months.
• Store the battery in a cool and dry
place where it is safe from damage and
unauthorised access.
• To obtain an optimum battery life
cycle, the battery should be stored at a
temperature from 18°C to 23°C and a
humidity of 0 to 80 percent. The state of
charge should be 70 percent.
• Check the battery's state of charge every
3 months during storage and charge it to
70 percent if required.
6.2.3 Safety instructions and warnings
for the charging process
• Only charge the battery in a ventilated,
dry and dust-free environment.
• Never charge the battery in the presence
of or close to flammable liquids or gases.
• Do not expose the battery to any kind of
moisture (water, rainwater, snow, etc.)
during charging.
• Do not charge it in areas in which the
battery could come into contact with
moisture.
• The battery should only be charged at
temperatures between 0°C and 40°C. If
you try to carry out a charging process
beyond this temperature range,
• the battery's automatic system will
automatically switch off the charging
process.
• The battery achieves its maximum life
cycle if charged at temperatures between
10°C and 30°C.
• Only use the intended chargers to charge
the battery. Your specialist dealer will give
you the relevant information.
• Using an inappropriate charger may lead
to malfunctions and result in a shorter
life cycle of the battery. There is also a
danger of fire and explosion.
• After the end of the charging process,
the charger must first be disconnected
from the mains socket and then from the
battery.
• Ensure adequate air circulation as soon
as the battery is charged.
• Only charge the battery under supervision.
• Damaged batteries must not be
recharged or used again.
• Damaged battery chargers (damage
to the plug, casing, cable) must not be
used.
6.2.4 Safety instructions and warnings for transportation and
shipping of the battery
Lithium-ion cells are used in the A2B neodrives battery. Therefore,
relevant statutory provisions are applicable to the transportation
and shipping of the battery which must be strictly complied with.
For instance, a defective battery pack must never be transported in
aircraft.
If your battery is defective, please take it to your specialist dealer in
person since the shipping of lithium-ion batteries by post or through
other carriers is stricly regulated. In this case, we also recommend
that you contact your specialist dealer.
Since the transport regulations may change annually, we strongly
recommend that you contact your travel operator, airline or shipping
company before going on a trip to obtain information on the current
applicable regulations. A defective battery must not be brought
onto an aircraft or put into luggage. If your battery is attached to the
Pedelec when transporting it, less strict transport regulations apply
in accordance with UN3171.

Keep the paperboard packaging of the battery pack without
fail in case you need it for transport.

Discuss transportation with your specialist dealer before
dispatching the battery.
6.2.5 Safety instructions and warnings for the charger
Read and observe all instructions and warnings enclosed

with the charger and the following safety instructions and warnings
before starting the charging process.
• Only use the intended chargers to charge the battery. Your
specialist dealer will give you the relevant information.
• Using an inappropriate charger may lead to malfunctions and
result in a shorter life cycle of the battery. There is also a danger
of fire and explosion.
• The charging process is automatically ended as soon as the
battery pack is charged. Overcharging is therefore not possible.
• After the end of the charging process, we recommend
disconnecting the charger from the mains socket first and then
from the battery pack.
• Never use a charger other than the one recommended by your
specialist dealer.
• Do not expose the charger to any kind of moisture (water,
rainwater, snow) during charging.
• Do not carry out the charging process in areas in which the
charger could come into contact with moisture.
• Be careful if condensation occurs. If the charger is brought from
a cold area into a warm one, condensation may form. In this case,
wait until the condensation has evaporated before using the
charger. This may take several hours.
• Never carry the charger by the power cable or the charger cable.
• Never pull the power cable to disconnect the charger from the
mains socket.
49
User manual
• Do not subject the cable and plug to pressure. Excessive
stretching or bending of the cables, pinching of a cable between
a wall and a window frame or placing of heavy objects on a cable
or plug may lead to an electric shock or fire.
• Lay the power cable and the attached charging cable in such
a way that nobody can step on it or stumble over it and that
both cables are not subject to any other damaging effects or
influences.
• Do not operate the charger if the power cable, the charging cable
or the plugs fixed to the cables are damaged. All damaged parts
must be replaced immediately by the authorised specialist dealer.
Do not use or disassemble the charger if it has received a hard
blow, was dropped or was damaged in any other way. Take the
damaged charger to an authorised specialist dealer to have it
repaired.
• The charger must not be used by children.
• Do not disassemble or modify the charger.
• Do not cover the charger during the charging process and do not
place any objects on it.
• Never short-circuit the poles of the charging plug using metallic
objects.
• Ensure that the power plug has been firmly inserted into the
socket.
• Do not touch the plugs with wet hands.
• Do not use the charger plug and/or the mains plug if they are wet
or dirty. Clean the plugs using a dry cloth before inserting them.
6.3. Startup
6.3.1 Information on the operating modes
The battery essentially has two operating modes. It is
either in "Active mode" or in "Deep Sleep mode".
When being in "Active mode", the battery consumes at least 5 mA
per hour (own consumption of electronics).
To keep the own consumption as low as possible, the battery
automatically switches into the so-called "Deep Sleep mode" after
48 hours.
6.3.2 Insertion of the battery
• Put the battery's front end into the two rails located on the
connector box.
• Place the battery on the luggage rack and slightly push it
downwards until the lock snaps into place with a click. While
doing so, the electrical connection to the wheel is automatically
established.
• Press the lock until it snaps into place in its casing. The battery
can now no longer be removed from the luggage rack.
51
User manual
6.3.3 Switching the battery on
• Briefly press the button.
• The battery is switched on, all LEDs (a to e) flash three times.
If the battery has been used within 48 hours, it does not need to be • Briefly press the button again.
switched on. The Pedelec is operable and can be switched on via • The LEDs will now indicate the battery' s capacity as shown in
the sMMI and started.
the following table.
• If the battery has been used within the past 48 hours:
If the battery is being started for the first time or if it has not been
• Briefly press the button.
used for more than 48 hours ("Deep Sleep mode"), it must be
• The LEDs will now indicate the battery' s capacity as shown in
switched on.
the following table.
• Briefly press the button.
• All LEDs [5] flash three times to indicate that the battery has
While in operation or in case of storage
been switched on.
• 100-81% ROC: LED1-LED5 continuously illuminated
• Your Pedelec is now operable and can be switched on via the
• 80-61% ROC: LED1-LED4 continuously illuminated
sMMI and started.
• 60-41% ROC: LED1-LED3 continuously illuminated
• 40-21% ROC: LED1-LED2 continuously illuminated

ROC: LED1 continuously illuminated
If the motor cable has not yet been connected to the battery, • 20-11% • 10-0% ROC: LED1 flashing
the battery will still be put into "Active mode" when switched on.

If the battery cannot be switched on, the cell voltage might
be too low. In this case, connect the charger and then press the
on/off button. The battery will then be charged for a minute.
6.3.4 Display of the state of charge
You can check the battery's state of charge at any time using the
LED display.
If the battery has not been used for more than 48 hours:
During charging
• 100% • 99-81% • 80-61% • 60-41% • 40-21% • 20-11% • 10-0% ROC: LED1-LED5 continuously illuminated
ROC: LED1-LED4 continuously illuminated
ROC: LED1-LED3 continuously illuminated
ROC: LED1-LED3 continuously illuminated
ROC: LED1-LED2 continuously illuminated
ROC: LED1 continuously illuminated
ROC: LED1 flashing
6.4. Removal of the battery
6.4.2 Removing the battery
6.4.1 Switching off the battery
• Open the cover flap on the luggage rack
battery. Put the key into the lock on the
luggage rack battery
• Push the key slightly into the lock and,
while doing so, turn it into any direction.
• If the lock was turned by about 45
degrees, it comes out about 8 mm and
automatically releases the lock.
• Keep on turning the key into any direction
and, while doing so, pull it slightly
outward. When the starting position is
reached, the key can be pulled out of the
lock.
• Pull the lock [A] on borrom of the battery
and lift it upwards using the carrying
handle.
• Store the battery in a clean place.
The battery is switched off using the sMMI
controller (see neodrives sMMI and motor
operating instructions). While doing so, the
battery is first put into "Active mode" for 48
hours. This means that the sMMI can be
reactivated at any time during this period
without having to switch on the battery
first. The power required in this context is
minimal.
53
User manual
6.5. Charging the battery
6.5.2 Charging process
Completely charge the battery before using it for the first time. The
battery's state of charge is usually 30% upon delivery. The battery
may be charged from any state of charge without affecting the life
cycle. The battery achieves its maximum life cycle if charged at an
ambient temperature between 10°C and 30°C
When charging the battery, follow the charger's operating
instructions.
6.5.1 Connecting the charger
The battery [1] does not have to be removed from the Pedelec
to charge it, but may remain there. Only the motor cable plug [9]
needs to be detached (see section 4.2). Proceed as follows.
• Insert the charger plug into the socket on the battery.
• The two parts are automatically correctly aligned and locked by a
magnetic lock.
• Charge the battery in accordance with the specifications in the
charger's operating instructions. Also observe the instructions for
the charging process contained in section 2.3.
Before inserting the plug into the socket, make sure that both

parts are clean and do not contain any metallic particles. If they
contain metallic particles, these particles must be removed using a
clean dry cloth.
Also observe the safety instructions and warnings included in
sections 2.3 and 2.5
6.5.3 LED indications during charging process
The following table shows the battery's LED indications during the
charging process.
While in operation or in case of storage
• 100-81% ROC: LED1-LED5 continuously illuminated
• 80-61% ROC: LED1-LED4 continuously illuminated
• 60-41% ROC: LED1-LED3 continuously illuminated
• 40-21% ROC: LED1-LED2 continuously illuminated
• 20-11% ROC: LED1 continuously illuminated
• 10-0% ROC: LED1 flashing
During charging
• 100% • 99-81% • 80-61% • 60-41% • 40-21% • 20-11% • 10-0% ROC: LED1-LED5 continuously illuminated
ROC: LED1-LED4 continuously illuminated
ROC: LED1-LED3 continuously illuminated
ROC: LED1-LED3 continuously illuminated
ROC: LED1-LED2 continuously illuminated
ROC: LED1 continuously illuminated
ROC: LED1 flashing
If a fault occurs during the charging process, all LEDs will

illuminate. Check if all criteria (such as ambient temperature,
properly fixed charging plug, etc.) relating to the charging process
have been fulfilled in accordance with the present operating
instructions and those enclosed with the charger.
Do not leave the charger connected to the mains after the

charging process
is finished. After the end of the charging process, the charger must
first be disconnected from the mains socket and then from the
battery pack.
Always check the battery pack's state of charge before

starting a journey. It should be fully charged before starting the
journey so that motorised assistance is available at any time.
The batteries may only be charged in a dry room at a

temperature between 0°C and a maximum of 40°C.
Observe the information in the operating instructions

enclosed
with the charger.
Follow the safety instructions and warnings relating to

the battery provided in sections 2.1 to 2.5 of these operating
instructions
55
User manual
6.6. Keys
6.8. Disposal
The battery's scope of supply includes two keys for
locking the battery in the battery rail. Your specialist
dealer should record the identification engraved in the
keys
in the documents delivered with the Pedelec so that
the keys can be reordered if required.
Please check, therefore, that the key identification has been
recorded in the documents.
If not, please record it yourself.
Any keys may only be reordered via the Burg specialist dealer (as of
October 2013).
Electrical and electronic appliances must be disposed of separately
from household waste at governement disposal centres provided
for this purpose. The proper disposal and separate collection of
old appliances is intended to prevent potential damage to the
environment and health. It constitutes a prerequisite for reusing
and recycling used electrical and electronic appliances. Detailed
information on the disposal of your old appliances is available from
your community, your waste disposal service, the specialist dealer
who you bought this product from or your sales representative. This
only applies to devices which are installed and sold in European
Union member states and subject to the European directive
2002/96/EC. In countries outside the European Union, different
regulations on the disposal of electrical and electronic appliances
may apply.
6.7. Cleaning the battery
Never use cleaning benzine, thinners, acetone or similar agents
for any cleaning work. Only use commercially available household
cleaning agents
and disinfectants (isopropyl alcohol).
• The charging cable plug on the charger and the motor cable plug
may only be cleaned using a dry cloth.
• Never spray off the battery using a steam-jet air ejector or similar
devices.
6.9. Liability
The manufacturer shall not accept any liability if
• the battery was / is operated improperly.
• the battery was / is started contrary to the present operating
instructions.
• the battery was / is operated with inadequate battery charge.
• repairs or other works were / are performed by unauthorised
persons.
• the battery was / is used contrary to the intended use.
7.0 Important safety precautions before your first journey
Make sure that you and your A2B are prepared for a safe and
pleasant ride.
ALWAYS wear an approved bicycle helmet. If you lend your A2B
to some else, you should always lend them an approved helmet as
well.
NEVER transport another person on your A2B. Overloading your
A2B by transporting another person may cause severe or even fatal
injuries.
FOLLOW all traffic rules. Always ride on the correct side of the
road, in the direction of the traffic and not in the opposite direction.
Beware of vehicle doors. Remember that the doors of vehicles in
front of you might be opened.
Be very careful in wet weather. When the road is wet, the braking
distance of your A2B might be twice or three times as long. Ride
slower, prepare for stopping in plenty of time and brake earlier. Wet
roads are slippery – be careful in curves and when turning.
Remain attentive when cycling. Watch out for moving and
stopped vehicles.
Special note for parents or guardians
As parents or guardians, you are responsible for the child's
activities and safety when using the A2B. You must ensure that:
• your A2B is correctly adjusted for the child.
• your A2B is in good and safe operating condition.
• you and your child have learnt and understood how to safely use
the A2B.
• you and your child have learnt, understand and comply with the
local applicable regulations relating to motor vehicles, bicycles
and traffic.
• you and your child observe the generally accepted rules of
behaviour for safe and responsible cycling.
• you and your child have read this manual and you have discussed
the warnings, functions of the A2B and operating procedures
with your child before letting the child use the A2B.
Make sure that you are seen by others. In dim lighting and in the
dark, you should wear light clothes, ideally with reflective stripes.
57
User manual
Check your A2B before every journey
Walk around your A2B before every ride and check the brakes,
tyres and fit of all major fastening elements. Have your A2B
serviced in accordance with the servicing schedule and checked at
least ONCE a year by a certified A2B dealer. Your safety depends
on your A2B's roadworthiness.
Reflectors. Your A2B is equipped
with rear and side reflectors to
make sure you are noticed at
night. Make sure before every ride
that the rear and side reflectors
are fixed, properly positioned and
clean.
Lights. Your A2B has a headlamp
and rear lamp to make sure you
are noticed at night. Ensure that
the lights are operative and clean
before every journey.
Brakes. Check the brakes before
every journey. The left brake lever
activates the front wheel brake, the
right brake lever activates the rear
wheel brake.
Brake pads. When checking the
brakes, the entire brake system
must be checked without fail. Brake
pads are subject to normal wear
and tear and will wear out over
time. Never wait until the brake
pads are completely worn out. Ask
your A2B specialist dealer to check
the brake pads and replace them if
necessary.
Pedals. Ensure that the pedals are properly fixed and have a firm fit
before every journey.
Saddle. Ensure that the saddle is correctly adjusted and has a firm
fit (see 3.4) before every journey.
Tyre pressure. Your A2B is
fitted with very durable bicycle
inner tubes to prevent punctures.
Bicycle tyres, however, usually lose
pressure over time. Poorly inflated
tyres might fail prematurely and
mean that you have to use more
power (pedalling power and motor
power) to move your A2B forward.
Low tyre pressure reduces the
possible range for each battery
charge. The recommended tyre
pressure for the front and rear
wheel tyres is 3.5 bar.
are tightened using the specified
torque.
C
B
Battery. Check the display before
the ride to ensure that the battery
has been sufficiently charged for
the planned distance.

If any aspects regarding
the use and servicing of your A2B
are unclear, please contact your
A2B specialist dealer.
Quick release. Ensure that

the quick release on the front
wheel is correctly adjusted and has a firm fit. In case of inadequate
adjustment and securing of the quick release, the front wheel may
come loose during the ride leading to severe or even fatal injuries
and/or material damage.
Stem and handlebars. Make absolutely sure that the

screws of the handlebar clamp (see 3.5) and the stem (see 3.6)
59
User manual
8.0 Maintenance
Have your A2B checked and serviced regularly by an A2B
specialist dealer in accordance with the servicing schedule (see
section 13 of these operating instructions) and at least once a year.
8.1 Wheels
The front and rear wheels should be
aligned centrally in the fork and the
frame. Regularly check the wheels
for correct spoke tension and rim
alignment. Do NOT use your A2B if
the spokes are damaged or missing.
The wheels should run smoothly
and without any horizontal or vertical
wobble.
8.2 Hub bearings
Regularly check the fit of the hub
bearings by lifting the wheel from
the ground and turning it while trying
to move the rim sideways between
the fork or the frame. There should
not be any movement to the side. If
you notice that a wheel is moving to
the side, the hub bearings must be
adjusted or replaced.
8.3 Rims
The rims must be smooth and
should not have any cracks, bulges
or flat areas. Take your A2B to your
A2B specialist dealer, as required,
to have the wheels repaired and/or
adjusted.
8.4 Drive chain
Your A2B is equipped with a
high-quality chain. This chain
must be cleaned regularly and
lubricated using a synthetic lubricant
recommended for bicycles.
8.5 Brakes
Check the hydraulic brake lines for signs of wear and fraying.
Pull the brake lever tight and check whether the brakes are
operating properly.
Make sure that the rotors are free from any residues and oil.
Never wait until the brake pads are completely worn out. Replace
the brake pads as required.
If the brake pads look worn out or the brakes do not respond as
usual, you should ask your A2B specialist dealer to check and
replace the brake pads. The brakes are less effective if the road is
wet.
If you have to travel in wet weather, always remember that your A2B
has a longer braking distance. Ride slower, keep a larger distance
between yourself and other road users and start braking earlier than
usual. Any non-compliance with these safety measures may lead to
accidents resulting in severe or even fatal injuries and/or material
damage. If you have any questions on the use of the brakes, please
contact your A2B specialist dealer.

Brake disks and pads must be free from oil and grease.
8.6 Tyres
Check the tyres for damage, cracks and unusual or heavy wear and
tear. The tyre should sit properly in the rim. Regularly check the fit
of the bead in the rim. Check that the tyre tread is free from any
foreign bodies and the valve stands out straight from the rim.
Damaged or worn out tyres should be replaced immediately.
Take your A2B to an A2B specialist dealer or a qualified bicycle
mechanic to have the tyres repaired and/or replaced as necessary.
In the unlikely event that you get a puncture, you should be familiar
with the proper method for removing and remounting the front and
rear wheels.
61
User manual
8.7 Removing and remounting the wheels
Removing the front wheel
1. Loosen the quick release on the front wheel hub by turning the
lever away from the hub until it is fully opened.
2. Turn the adjusting nut on the hub opposite from the quick
release ANTI CLOCKWISE until the nut and the quick release
unit stick out from the safety edges on the fork end.
3. The front wheel can now be easily removed from the hub.
Your A2B is equipped with a front wheel with quick release

for easy removal and mounting of the front wheel. Please observe
the instructions on the quick release system to ensure proper
handling. If you do not observe the correct procedure for fastening
the front quick release then the front wheel may come loose
during the ride. This can lead to severe or even fatal injuries and/
or material damage. If you have any questions on assembling and
adjusting your A2B, please contact your A2B specialist dealer.
Remounting the front wheel
1. Position the front wheel in the
fork in such a way that the quick
release lever is on the left-hand
side of the fork.
2. Adjust the lever to the open
position (OPEN, i.e. the lever
is bent away from the hub) and
push the front wheel axle into the
dropouts of the fork.
3. Turn the adjusting nut on the righthand side of the hub in clockwise
direction so that you can feel
resistance when closing the lever
(when the lever is parallel to the
midline of the hub).
4. Hold the fork tightly in your left
hand and push the lever towards
the fork until it is closed again. In
order to avoid the risk of injury,
the lever must not stick out. The
lever is safely fastened if it takes
effort to push it into the closed
position. The amount of effort is
appropriate if the lever leaves a
mark on the palm of your hand
when pressing. When the lever is closed, the OPEN label is no
longer visible. A properly closed quick-release cannot be moved
any more unless it is reopened as specified above. If you can
move the mechanism slightly, open the quick release lever, turn
the adjusting nut by another 180° and try again.
5. Make sure that the brake disk is sitting correctly between the
brake calipers and is correctly adjusted.
If such installation and adjustment of the brakes is not

completely clear, ask your A2B specialist dealer to adjust the your
A2B's brakes for you. Incorrectly adjusted brakes have reduced
efficiency which can lead to accidents resulting in severe or even
fatal injuries and/or material damage. Do NOT use your A2B if you
are not sure whether the brakes are working properly.
63
User manual
Removing the rear wheel
1. Ensure that the battery is no longer connected to the system.
To that end, remove the battery from the vehicle.
2. Remove the cable holders (on the back of the dropout and
on the bottom side of the left chain stay) using an appropriate
Allen key.
3. Disconnect the plug connectors for the power and control cables
leading to the motor.
1
2
5
6
4. Loosen and remove the hub axle nuts using a 19-mm wrench.
5. Loosen and remove the torque support retaining screw on the lefthand side of the dropout.
6. Remove the torque support from the A2B by pushing it from the
axle.
7. Now pull the rear wheel from the frame while at the same time
removing the chain from the freewheel.
3
7
4
Remounting the rear wheel
Carry out the steps for removal (7-1) in reverse order.
B
A. Remount the torque support. Otherwise, the frame may be
damaged.
B. Ensure that the rear wheel is centred in the frame before safely
tightening the hub axle nuts using 60 Nm.
C. Make sure that the brake disk is sitting correctly between the
brake calipers and the wheel is turning freely without the brake
blocks rubbing on it.
If such installation and adjustment of the brakes is not

completely clear, ask your A2B specialist dealer to adjust the
your A2B's brakes for you. Incorrectly adjusted brakes may have
reduced efficiency which can lead to accidents resulting in severe
or even fatal injuries and/or material damage. Do NOT use your
A2B if you are not sure whether the brakes are working properly.
E
D. Check the correct fit of the chain on the front and rear
chainrings.
E. Reattach the cable holders to the dropout and the frame.
65
User manual
9.0 Vehicle cleaning

Rubber‑ and plastic parts must
not be damaged with aggressive or
penetrating cleaning agents‑ and
solvents.

Always carry out a brake test
after cleaning and before starting a
journey!

Do not use any steam cleaners‑
or high pressure blast cleaners! The
high water pressure may damage
seals, the battery and the entire
electrical system.
- Only use a soft sponge and clear
water for cleaning.
- Only repolish it using a soft cloth or
leather!
- Do not wipe away dust and dirt using
a dry cloth (scratches to the paint and
on the coverings).

Do not use paint polishing
agents for plastic parts.
- Thoroughly clean the A2B after
long journeys and preserve it using a
commercially available anticorrosive
agent.

For the purposes of environmental protection, we ask you use
care products economically and only use products which are
marked as environmentally friendly.
Road salt can cause major damage if the vehicle is used during the
winter.
Do not use warm water - increased salt-induced corrosion.

Immediately clean the vehicle after the journey using cold water;
thoroughly dry the vehicle; treat parts subject to corrosion using
wax-based anticorrosive agents.
10.0 Tecnical details
General technical details
• 17” Overall dimensions – 1,720 mm x 650 mm x 1,000 mm
• 20” Overall dimensions – 1,745 mm x 650 mm x 1,070 mm
• Unladen weight without battery: 22.4 kg
• Unladen weight with battery: 25.9 kg
• Permissible maximum load: 160 kg
• Permissible maximum luggage rack load: 25 kg
• Maximum speed with motorised assistance, even terrain:
25km/h (15.5 mph), NOTE: limited
• Maximum range, even terrain, without tailwind
or headwind, without stopping/starting, lowest assistance level:
Up to 120 km (74.5 miles)
67
User manual
11.0 Warranty and safety information
Hero Eco Warranty
1. Definitions
1.1 The following definitions stipulated in this clause shall apply to the
warranty:
Goods means: In connection with the A2B: the frame, the motor system
(motor and motor control), the lithium-ion battery and all other components
of the A2B, excluding the tyres, inner tubes and brake bads.
A2B means: Light electric vehicle, manufactured and distributed by Hero
Eco.
2. Guarantee
Periods means:
5 years from the date of delivery of your A2B for the
frame, two years from the date of delivery of your
A2B for the motor system (motor and motor control);
one year from the date of delivery of your A2B for the
lithium-ion battery, two years from the date of delivery
of youe A2B for all other A2B components, excluding
the tyres, inner tubes, brake pads and handles.
Hero Eco means: Hero Eco Ltd.
You and your mean: The original purchaser of the A2B buying it from an
authorised A2B specialist dealer.
2.1 Hero Eco guarantees that, upon delivery of the A2B to you and for the
specified period, the goods:
2.1.1 correspond to the relevant description with respect to all major
aspects and based on any conditions or information contained in
brochures, promotion or other documents;
2.1.2 are of a satisfactory quality;
2.1.3 are appropriate for the purposes specified by Hero Eco or all
reasonable purposes that you use the goods for;
2.1.4 do not have any major defects relating to construction, material
and workmanship;
2.1.5 comply with all applicable statutory and regulatory requirements
with regard to the sale of the goods in Europe.
2.2 Hero Eco provides this warranty in addition to your statutory claims
relating to goods which are defective or do not fulfill the warranty
conditions in any other way. Your local consumer advice centre or
consumer protection authority will inform you of your statutory claims.
2.3 This warranty shall not apply in case of failure of the goods:
2.3.1 owing to normal use and wear;
2.3.2 owing to wilful destruction, accident or negligence by you or any
third party;
2.3.3 if your A2B has been assembled by any person other than Hero
Eco or an authorised A2B specialist dealer
2.3.4 if you use the goods in a way not recommended by Hero
Eco, such as using the A2B for commercial purposes or in
competitions or for the purposes of training for such activities
or events;
2.3.5 because of your non-compliance with our instructions, such as
the user manual;
2.3.6 in case of any modifications, changes or repairs carried out by
you without Hero Eco's prior written consent.
2.4 The warranty shall also apply to any goods repaired by Hero Eco or
provided as replacement by Hero Eco in the unlikely event that the
original goods are defective or do not fulfil this warranty in any other
way.
3. Defective goods and returns
3.1 Either contact an authorised A2B specialist dealer or contact Hero Eco
directly via [email protected]
3.2 Hero Eco will ask you to take the A2B to an authorised A2B specialist
dealer together with proof of purchase. After Hero Eco has checked
that the goods are defective, Hero Eco will, at its own discretion:
3.2.1 refund the costs of the defective goods in whole or in part or
3.2.2 replace the defective goods or
3.2.3 repair the defective goods.
4. Limitation of liability
4.1 If you or Hero Eco does not comply with this waranty, subject to clause
4.2, neither party shall be liable for any losses which may result for the
other party, except for losses which are a foreseeable consequence of
the non-compliance with this warranty.
4.2 Neither you nor Hero Eco shall be liable for losses due to noncompliance with this warranty by Hero Eco, especially including, but
not limited to:
4.2.1 loss of income or earnings;
4.2.2 loss of business;
4.2.3 loss of expected savings;
4.2.4 data loss or
4.2.5 any lost time.
4.3 Clause 4.2, however, shall not prevent claims with regard to
foreseeable loss of or damage to objects in your possession.
4.4 This clause shall not, in any form, cover or limit the liability of Hero Eco
for:
4.4.1 death or personal injuries due to the Hero Eco's negligence or
4.4.2 fraud or fraudulent misrepresentation or
4.4.3 any other matter in which it would be illegal or unlawful for Hero
Eco to exclude or attempt to exclude its liability.
69
User manual
12.0 Disposal
Hero Eco supports the professional disposal and recycling of our products. In case of need, please take your vehicle or vehicle
components to a local disposal facility. Our specialist dealer or customer service may assist you with disposal. Please call your
specialist dealer or our customer service for this purpose. If requested, Hero Eco will carry out the disposal for you.
13.0 Servicing schedule
To ensure the proper functioning and related safety of your A2B, you should have a service check carried out once a year, or at least in the
periods indicated in the table. Please contact an A2B specialist dealer for this purpose and have the vehicle routinely checked. This still
applies, even if you do not notice any problems or signs of wear and tear when using your A2B.
Inspection by your specialist workshop is documented in the following servicing schedule. Please keep it in a safe place.
Checklist
The following pages contain the maintenance tables which are
checked by your A2B specialist dealer at the following times:
1. Maintenance upon assembly
2. First inspection after 200, no later than after 300 km
3. Further maintenance: every 2,000 km
6
5
4
3
2
1
No.
Clean crank & pedal / lubricate pedal axle
Check sprocket for wear, replace, if necessary
Check crank and pedal fastening for firm fit
Check play of bottom bracket bearing, replace, if necessary
Demount bottom bracket bearing, clean & lubricate casing & thread
Clean all parts.
Check all screws for firm fit
Check components for wear, replace, if necessary
Clean & lubricate chain
Clean parts
Check tyres for damage and tread
Adjust tyre air pressure
Check front and rear wheel rim for lateral and radial run-out,
adjust, if necessary
• Check spoke tension, adjust, if necessary
• Check functioning & bearing play of front wheel hub.
• Demount, clean and lubricate hub
•
•
•
•
Component assembly: Wheels-rims-tyres
•
•
•
•
Component assembly: Chain-cassette-sprocket
•
•
•
•
•
Component assembly: Crank - inside bearing-pedal
• Clean TMM4 sensor using air, without demounting it
• Check firm fit & state of the sensor plate
• Check axle screws for firm fit
Rear wheel slot
• Completely clean suspension fork, espec. sliding surfaces of the
standpipes
• Check standpipes for damage, replace, if necessary
Front fork
• Check components for cracks and replace, if necessary
• Check screws on handlebars/stem/saddle
• Clean & lubricate saddle post pipe
Component assembly: Frame-handlebars-stem-saddle post-saddle
Step
X
X
X
X
X
X
inspection
Maintenance upon assembly
71
Clean brake bosses.
Check brake pads, replace, if necessary
Check brake pressure, refill brake oil, if necessary
Check brake system for tightness.
Check brake system screws for firm fit
Check brake function and efficiency
• Check lines for proper fastening, breakings, chafing, bends,
replace, if necessary
• Check plug contacts for corrosion and scaling, clean or replace,
if necessary
• Check cable joints for correct connection
• Check display for functioning & error codes
• Run current software update
• Check battery state and charge
• Check alignment & state of the battery slide rails, adjust/replace,
if necessary
• Check locking cylinder on battery slot for functioning, clean and
lubricate
• Check brake switch/motor stop switch for functioning
Component assembly: electrical drive system & lock
• Tighten all screws
• Check lighting system for functioning & setting, adjust, if necessary
Guard plates-luggage rack-side stand-lighting system
•
•
•
•
•
•
Component assembly: Brake system
• Clean and lubricate derailleur mechanism and derailleur.
• Check derailleur system cord and outer shells for state and function,
replace, if necessary
• Check derailleur mechanism adjustment, adjust, if necessary
• Check all screws on the derailleur mechanism/derailleur for firm fit
Component assembly: Derailleur system
Date
Signature / stamp of the A2B specialist workshop
11
10
9
8
Steering head
7
• Check bearing play of steering head and adjust or replace, if
necessary
Step
No.
X
X
X
X
X
X
X
X
X
X
X
X
inspection
User manual
6
5
4
3
2
1
No.
Clean crank & pedal / lubricate pedal axle
Check sprocket for wear, replace, if necessary
Check crank and pedal fastening for firm fit
Check play of bottom bracket bearing, replace, if necessary
Demount bottom bracket bearing, clean & lubricate casing & thread
Clean all parts.
Check all screws for firm fit
Check components for wear, replace, if necessary
Clean & lubricate chain
Clean parts
Check tyres for damage and tread
Adjust tyre air pressure
Check front and rear wheel rim for lateral and radial run-out, adjust,
if necessary
• Check spoke tension, adjust, if necessary
• Check functioning & bearing play of front wheel hub.
• Demount, clean and lubricate hub
•
•
•
•
Component assembly: Wheels-rims-tyres
•
•
•
•
Component assembly: Chain-cassette-sprocket
•
•
•
•
•
Component assembly: Crank - inside bearing-pedal
• Clean TMM4 sensor using air, without demounting it
• Check firm fit & state of the sensor plate
• Check axle screws for firm fit
Rear wheel slot
• Completely clean suspension fork, espec. sliding surfaces of the
standpipes
• Check standpipes for damage, replace, if necessary
Front fork
• Check components for cracks and replace, if necessary
• Check screws on handlebars/stem/saddle
• Clean & lubricate saddle post pipe
Component assembly: Frame-handlebars-stem-saddle post-saddle
Step
X
X
X
X
X
X
X
X
X
X
X
X
X
X
X
X
X
inspection
First inspection after 200 km (125 miles), no later than 300 km (185 miles)
73
Clean brake bosses.
Check brake pads, replace, if necessary
Check brake pressure, refill brake oil, if necessary
Check brake system for tightness.
Check brake system screws for firm fit
Check brake function and efficiency
• Check lines for proper fastening, breakings, chafing, bends, replace,
if necessary
• Check plug contacts for corrosion and scaling, clean or replace,
if necessary
• Check cable joints for correct connection
• Check display for functioning & error codes
• Run current software update
• Check battery state and charge
• Check alignment & state of the battery slide rails, adjust/replace,
if necessary
• Check locking cylinder on battery slot for functioning, clean and
lubricate
• Check brake switch/motor stop switch for functioning
Component assembly: electrical drive system & lock
• Tighten all screws
• Check lighting system for functioning & setting, adjust, if necessary
Guard plates-luggage rack-side stand-lighting system
•
•
•
•
•
•
Component assembly: Brake system
• Clean and lubricate derailleur mechanism and derailleur.
• Check derailleur system cord and outer shells for state and function,
replace, if necessary
• Check derailleur mechanism adjustment, adjust, if necessary
• Check all screws on the derailleur mechanism/derailleur for firm fit
Component assembly: Derailleur system
Date
Signature / stamp of the A2B specialist workshop
11
10
9
8
Steering head
7
• Check bearing play of steering head and adjust or replace,
if necessary
Step
No.
X
X
X
X
X
X
X
X
X
X
X
X
X
X
X
X
X
X
inspection
User manual
6
5
4
3
2
1
No.
Clean crank & pedal / lubricate pedal axle
Check sprocket for wear, replace, if necessary
Check crank and pedal fastening for firm fit
Check play of bottom bracket bearing, replace, if necessary
Demount bottom bracket bearing, clean & lubricate casing & thread
Clean all parts.
Check all screws for firm fit
Check components for wear, replace, if necessary
Clean & lubricate chain
Clean parts
Check tyres for damage and tread
Adjust tyre air pressure
Check front and rear wheel rim for lateral and radial run-out,
adjust, if necessary
• Check spoke tension, adjust, if necessary
• Check functioning & bearing play of front wheel hub.
• Demount, clean and lubricate hub
•
•
•
•
Component assembly: Wheels-rims-tyres
•
•
•
•
Component assembly: Chain-cassette-sprocket
•
•
•
•
•
Component assembly: Crank - inside bearing-pedal
• Clean TMM4 sensor using air, without demounting it
• Check firm fit & state of the sensor plate
• Check axle screws for firm fit
Rear wheel slot
• Completely clean suspension fork, espec. sliding surfaces of the
standpipes
• Check standpipes for damage, replace, if necessary
Front fork
• Check components for cracks and replace, if necessary
• Check screws on handlebars/stem/saddle
• Clean & lubricate saddle post pipe
Component assembly: Frame-handlebars-stem-saddle post-saddle
Step
X
X
X
X
X
X
X
X
X
X
X
X
X
X
X
X
X
X
X
X
X
X
X
X
inspection
Further maintenance: every 2,000 km (125 miles)
75
Clean brake bosses.
Check brake pads, replace, if necessary
Check brake pressure, refill brake oil, if necessary
Check brake system for tightness.
Check brake system screws for firm fit
Check brake function and efficiency
• Check lines for proper fastening, breakings, chafing, bends, replace,
if necessary
• Check plug contacts for corrosion and scaling, clean or replace,
if necessary
• Check cable joints for correct connection
• Check display for functioning & error codes
• Run current software update
• Check battery state and charge
• Check alignment & state of the battery slide rails, adjust/replace,
if necessary
• Check locking cylinder on battery slot for functioning, clean and
lubricate
• Check brake switch/motor stop switch for functioning
Component assembly: electrical drive system & lock
• Tighten all screws
• Check lighting system for functioning & setting, adjust, if necessary
Guard plates-luggage rack-side stand-lighting system
•
•
•
•
•
•
Component assembly: Brake system
• Clean and lubricate derailleur mechanism and derailleur.
• Check derailleur system cord and outer shells for state and function,
replace, if necessary
• Check derailleur mechanism adjustment, adjust, if necessary
• Check all screws on the derailleur mechanism/derailleur for firm fit
Component assembly: Derailleur system
Date
Signature / stamp of the A2B specialist workshop
11
10
9
8
Steering head
7
• Check bearing play of steering head and adjust or replace, if
necessary
Step
No.
X
X
X
X
X
X
X
X
X
X
X
X
X
X
X
X
X
X
X
X
X
inspection
User manual
Step
Signature / stamp of the A2B specialist workshop
Signature / stamp of the A2B specialist workshop
Signature / stamp of the A2B specialist workshop
Signature / stamp of the A2B specialist workshop
Signature / stamp of the A2B specialist workshop
Signature / stamp of the A2B specialist workshop
Signature / stamp of the A2B specialist workshop
Signature / stamp of the A2B specialist workshop
Signature / stamp of the A2B specialist workshop
No.
Date
Date
Date
Date Date
Date
Date
Date
Date after 20,000 km
(12,500 miles)
after 18,000 km
(11,250 miles)
after 16,000 km
(10,000 miles)
after 14,000 km
(8,750 miles)
after 12,000 km
(7,500 miles)
after 10,000 km
(6,200 miles)
after 8,000 km
(5,000 miles)
after 6,000 km
(3,750 miles)
after 4,000 km
(2,500 miles)
inspection
Further maintenance: every 2,000 km (1250 miles)
77
User manual
14.0 Owner registration
You should complete your owner registration card immediately and
return it or register online at www.wearea2b.com so that we can
send you important information in the future. Thank you very much.
Date of purchase: Selling specialist dealer: Your A2B and certain major components have unique serial
numbers. You should note these numbers in case you wish to
register any warranty claims at a later date or if your bicycle gets
lost or is stolen.
The vehicle serial number can be found on the bottom side of the
frame near the pedal crank:
Address: Town/postcode: Phone: Seller: Vehicle serial number:
Please keep this information in a safe place.
The motor serial number is engraved on the left-hand side of the
motor hub:
Motor serial number:
Please make a note of this further important information:

In
order to appropriately protect your A2B from theft, you should buy a high-quality cable lock or a similar device. Each time you leave
your A2B unattended, attach it to a firmly fixed object and lock it. Also lock the front and rear wheels and the motor to the frame.
A2B Global Head Office
Hero Eco Ltd
80 Coleman Street
London
EC2R 5BJ
Germany
Hero Eco Ltd
Reichenberger Strasse 124
10999 Berlin
USA
Hero Eco Inc.
207 9th St.
San Francisco, CA 94103
[email protected]
www.wearea2b.com
DE Edition 1.0
July 2014
© Hero Eco Ltd.
All rights reserved,
July 2014
EN15194
79
User manual
weareA2B.com
660001441500